
Elevate Your Pizza: The Art of Sourdough Pizza Dough

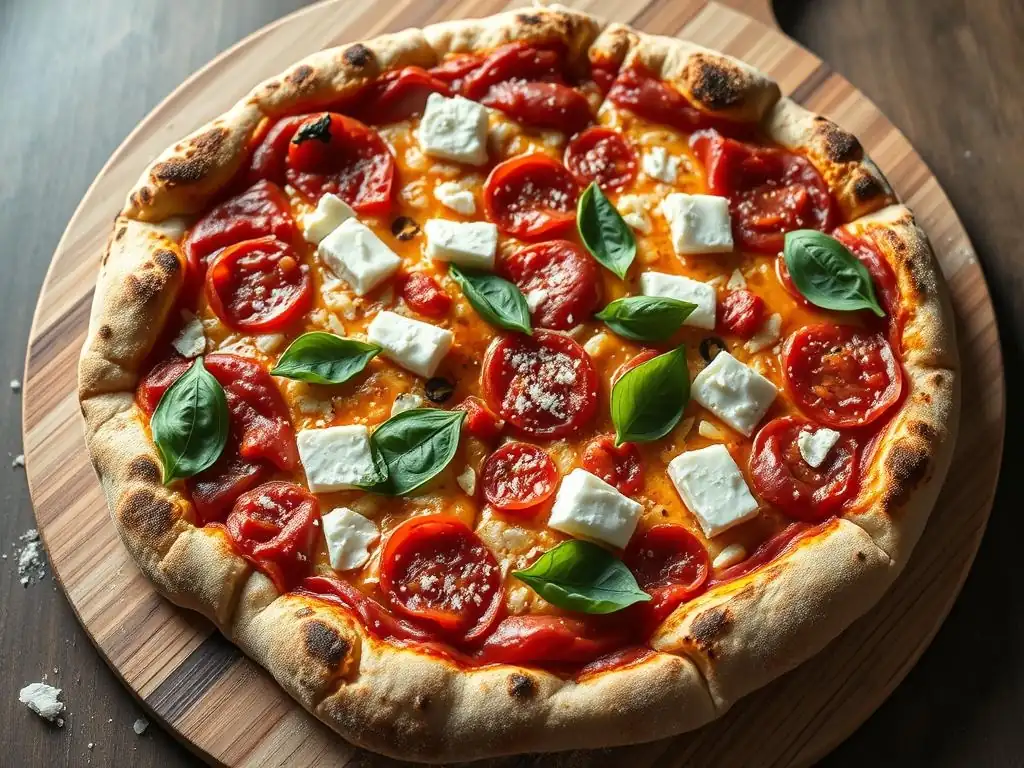
Welcome to BakeWithEase, your partner in the wonderful world of baking!
Ever dreamt of crafting a pizza with that perfect, tangy crust and irresistible chew? Dive in and discover the secrets behind our Sourdough Pizza Dough Recipe. More than just a recipe, it's a journey into the art of fermentation and flavor. Unlock the potential of sourdough and elevate your pizza nights from ordinary to extraordinary. Intrigued? Let's get baking!
- Introduction to Sourdough Pizza: A BakeWithEase Guide
- Mastering the Sourdough Pizza Dough Recipe: Step-by-Step
- Troubleshooting Common Sourdough Pizza Dough Problems
- Sourdough Pizza Dough Variations: Exploring Different Flavors
- Storing Sourdough Pizza Dough for Future Use
- Conclusion: Enjoying the Art of Sourdough Pizza Making
- Frequently Asked Questions
- Final Reflection: The Unexpected Joys of Sourdough Pizza
- Unleash Your Inner Pizzaiolo: Craft the Perfect Crust!
Introduction to Sourdough Pizza: A BakeWithEase Guide
Why Choose Sourdough for Your Pizza Dough?
Choosing sourdough for your pizza dough elevates a simple meal into a culinary experience marked by depth and complexity. Unlike commercial yeast, a sourdough starter, a living culture of wild yeast and bacteria, undergoes a slower fermentation process.
This extended time allows for the breakdown of starches and proteins in the flour, resulting in a crust that is not only easier to digest for some individuals but also develops a more intricate flavor profile. The natural acids produced by the lactic acid bacteria contribute a subtle tang that beautifully complements a wide range of pizza toppings, creating a unique taste that is hard to replicate with conventional methods.
Furthermore, the structure provided by the sourdough fermentation process contributes significantly to the texture of the final crust. When baked at high temperatures, a well-developed sourdough pizza dough yields a crust with a delightful contrast: a crispy, often slightly chewy exterior that gives way to a light, airy interior crumb, sometimes exhibiting beautiful large air pockets (known as cornicione).
This desirable texture is a hallmark of artisanal pizzas and is a primary reason why bakers are increasingly turning to a sourdough pizza dough recipe for their homemade creations. It transforms a basic pizza base into a star component of the dish.
Understanding the Unique Flavor Profile of Sourdough Pizza
The signature flavor of sourdough pizza dough comes from the metabolic activity of the diverse microbial community within the starter. Lactic acid bacteria, the same type found in yogurt and other fermented foods, produce lactic acid and acetic acid. The ratio of these acids, influenced by factors like temperature and hydration, dictates the level of tanginess. Warmer temperatures tend to favor lactic acid (milder tang), while cooler temperatures encourage acetic acid (sharper tang). This nuanced acidity provides a pleasant contrast to the richness of cheese and toppings, cutting through fattiness and brightening the overall taste.
Beyond the tang, sourdough fermentation unlocks complex aromatic compounds in the flour that are not present in quickly risen doughs. These compounds contribute nutty, earthy, and sometimes slightly sweet notes to the crust. The slower process also allows for the development of a more robust gluten structure, which, when baked, contributes to the satisfying chewiness and structure of the crust. This intricate interplay of acids and aromatics is what makes a sourdough pizza dough recipe so rewarding to master, offering a depth of flavor that is simply unattainable with standard yeast-based doughs.
Mastering the Sourdough Pizza Dough Recipe: Step-by-Step
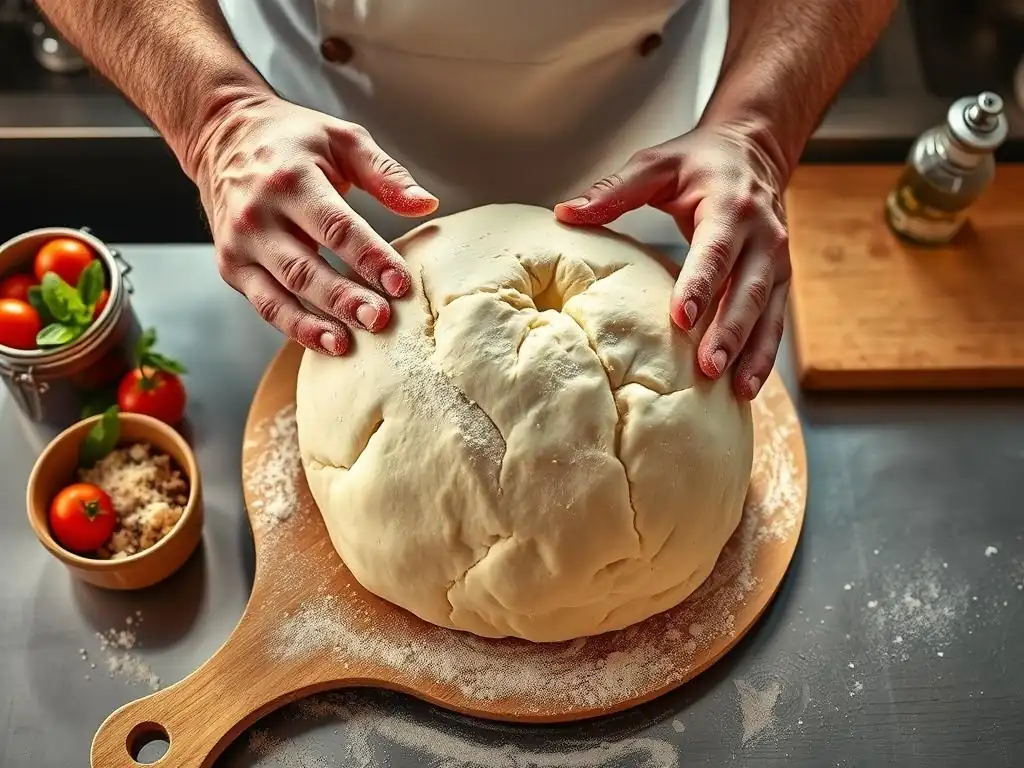
Ingredients for Authentic Sourdough Pizza Dough
Creating an authentic sourdough pizza dough recipe relies on a few key ingredients, each playing a vital role in the final outcome. The quality and type of these components significantly impact the dough's texture, flavor, and handling characteristics. Understanding their function is crucial for success. The basic components are typically flour, water, sourdough starter, and salt. While simple, the specific types and ratios are what elevate a good dough to a great one.
A typical sourdough pizza dough recipe often uses a relatively high hydration level, sometimes ranging from 65% to 75% or even higher, meaning the water weight is 65-75% of the flour weight. This higher hydration contributes to a more open crumb structure and a crispier crust when baked at high temperatures. Using filtered water is often recommended to avoid chlorine, which can potentially inhibit the activity of your delicate sourdough starter. The precise measurements will depend on the desired yield and the specific characteristics of your starter and flour.
High-Protein Flour: The Key to a Crispy Crust
High-protein flour, such as bread flour (typically 12-14% protein) or Italian "Tipo 00" flour (specifically milled for pizza, often around 10-12% protein but with specific gluten characteristics), is fundamental to a great sourdough pizza dough recipe. The higher protein content means more gluten can be developed during mixing and fermentation. Gluten is the protein network that provides elasticity and structure to the dough, allowing it to be stretched thin without tearing and trapping the gases produced by the starter.
This strong gluten network is what enables the crust to achieve that desired airy structure and crispy exterior when subjected to the intense heat of a pizza oven. While all-purpose flour can be used, it typically has a lower protein content (around 10-12%) and may result in a less chewy and airy crust. For the best results in your sourdough pizza dough, investing in quality high-protein flour designed for bread or pizza is highly recommended.
Sourdough Starter: The Heart of the Recipe
Your active, bubbly sourdough starter is the sole leavening agent in a sourdough pizza dough recipe, responsible for making the dough rise and developing its characteristic flavor. A healthy starter, fed regularly and active, is paramount. It contains a symbiotic culture of wild yeasts and lactic acid bacteria that consume the sugars in the flour, producing carbon dioxide gas (which makes the dough rise) and organic acids (which contribute flavor and help tenderize the gluten).
The amount of starter used in a sourdough pizza dough recipe can vary, typically ranging from 10% to 30% of the flour weight. Using more starter will generally speed up fermentation, while less starter will slow it down. The activity level of your starter directly impacts the dough's rise time and final texture, making its health and readiness a critical factor before you begin mixing your dough.
Water: Hydration for Perfect Dough
Water is not just a liquid to combine ingredients; it plays a crucial role in hydrating the flour and activating the gluten network in your sourdough pizza dough. The amount of water, expressed as a percentage of the flour weight (hydration), significantly affects the dough's consistency and the final crust texture. As mentioned, sourdough pizza dough recipes often feature relatively high hydration (65-75%+).
Higher hydration doughs are typically stickier and more challenging to handle initially but result in a more open crumb structure and a crispier crust. Lower hydration doughs are easier to work with but may produce a denser crust. Using room temperature or slightly warm water (around 75-80°F or 24-27°C) can help kickstart microbial activity in the starter when mixing the dough.
Salt: Enhancing Flavor and Controlling Fermentation
Salt is a seemingly small but incredibly important ingredient in any sourdough pizza dough recipe. It does far more than just add flavor; it plays a critical role in controlling the fermentation rate of the sourdough starter. Salt slows down yeast activity, preventing the dough from rising too quickly and allowing the complex flavors to develop properly over a longer period.
Furthermore, salt strengthens the gluten structure, contributing to better dough elasticity and handling. Without salt, the dough would be slack and difficult to shape, and the crust would lack depth of flavor. Most sourdough pizza dough recipes call for salt in the range of 1.8% to 2.5% of the flour weight. It's essential to add salt after the initial mixing of flour and water (autolyse) as it can interfere with water absorption and gluten development if added too early.
Preparing Your Sourdough Starter for Pizza Dough
Before you even think about mixing your sourdough pizza dough recipe, ensuring your starter is active and ready is paramount. A sluggish or inactive starter will result in a flat, dense crust with little flavor development. Think of your starter as the engine of your dough; it needs to be properly fueled and warmed up before use. This preparation step is often overlooked but is critical for successful sourdough baking.
Taking the time to feed your starter and observe its activity ensures it is at its peak performance when introduced to your main dough ingredients. This readiness is often indicated by visual cues and a simple test, giving you confidence that your leavening agent is ready to do its job effectively in your sourdough pizza dough.
Feeding Your Starter: A Quick Refresher
To get your sourdough starter ready for a sourdough pizza dough recipe, you'll want to give it a refreshing feed. This involves discarding a portion of the starter and feeding the remainder with fresh flour and water, typically in equal parts by weight (e.g., 1:1:1 ratio of starter:water:flour). For example, you might keep 20g of starter and feed it with 40g of water and 40g of flour. Use the same type of flour you regularly feed your starter with, ideally a mix of all-purpose and whole wheat or just bread flour.
After feeding, cover your starter loosely and let it sit at room temperature (around 70-75°F or 21-24°C). The time it takes to become active will depend on the temperature and the starter's vitality, but it typically takes between 4 to 8 hours to reach its peak. You're looking for it to roughly double or triple in size and become very bubbly and airy before using it in your sourdough pizza dough recipe.
Determining Starter Readiness: Float Test & Visual Cues
Several indicators signal that your sourdough starter is ready to be used in your sourdough pizza dough recipe. Visually, a ready starter will have significantly increased in volume, often doubling or tripling since being fed. Its surface will be domed and covered in many small bubbles, and the sides of the jar will show clear signs of activity and expansion. When you gently shake the jar, it should jiggle like a mousse or sponge.
A simple and popular test for readiness is the float test. Gently spoon a small amount (about half a teaspoon) of your peaked starter into a glass of room temperature water. If the starter floats on the surface, it's full of carbon dioxide gas and is active enough to leaven your sourdough pizza dough. If it sinks, it needs more time to ferment and build up gas, or it might need a few more consistent feedings to build strength.
Mixing the Sourdough Pizza Dough: A Detailed Walkthrough
Mixing the sourdough pizza dough is where the magic begins, bringing together the ingredients to start developing the gluten structure and initiate fermentation. This process can be done by hand or with a stand mixer. The goal is to combine everything thoroughly while building strength in the dough. Patience and attention to detail during this phase are key to a successful sourdough pizza dough recipe.
The steps involved, from the initial hydration to the final incorporation of salt, are designed to optimize gluten development and ensure even distribution of the starter throughout the dough. Following a systematic approach will make the subsequent steps, like bulk fermentation and shaping, much more manageable and contribute to a superior end product.
Autolyse: The Secret to Improved Dough Texture
Autolyse is a simple yet powerful technique used in many bread and sourdough recipes, including sourdough pizza dough. It involves mixing just the flour and water from the recipe and letting the mixture rest for a period, typically 20 minutes to an hour. During this rest, the flour fully hydrates, and enzymes naturally present in the flour begin to break down proteins, which helps in gluten development without any mechanical work (kneading).
This resting period allows the gluten network to start forming on its own, making the dough easier to knead later and improving its extensibility. It also helps with water absorption, leading to a smoother, less sticky dough. Incorporating an autolyse step into your sourdough pizza dough recipe can significantly improve the dough's texture and handling, leading to a lighter, airier crust.
Incorporating the Sourdough Starter
After the autolyse period, the next step is to incorporate your active sourdough starter into the dough. Add the starter to the flour and water mixture and mix until it is fully integrated. This can be done by hand, squeezing the dough through your fingers until the starter is evenly distributed, or using a stand mixer on a low speed. The dough will likely feel wet and shaggy at this stage.
Ensure there are no visible pockets of starter remaining in the dough. The goal is to distribute the starter's microbial community evenly so that fermentation can begin throughout the entire mass of dough. This step officially kicks off the leavening process for your sourdough pizza dough.
Kneading the Dough: Achieving Gluten Development
Kneading is essential for developing the strong gluten network needed for a chewy and airy sourdough pizza dough. The duration and method of kneading depend on whether you're working by hand or with a mixer. By hand, this might involve techniques like the stretch and fold method or traditional kneading on a surface for 10-15 minutes. With a stand mixer using a dough hook, 5-8 minutes on medium speed is often sufficient.
You are looking for the dough to become smooth, elastic, and pass the "windowpane test." To perform the windowpane test, gently stretch a small piece of dough between your fingers; if you can stretch it thin enough to see light through it without it tearing, the gluten is well-developed. Proper kneading ensures your sourdough pizza dough can hold its shape and trap gases during fermentation and baking.
Bulk Fermentation: Time and Temperature Considerations
Bulk fermentation, also known as the first rise, is the critical period where the sourdough starter works to leaven the dough and develop flavor. This phase typically takes place at room temperature and involves the dough increasing significantly in volume. The duration is highly dependent on the ambient temperature and the activity of your starter, often ranging from 4 to 8 hours at standard room temperature (around 70-75°F or 21-24°C).
During bulk fermentation, performing a series of "stretch and folds" every 30-60 minutes for the first couple of hours is beneficial. This technique helps strengthen the gluten, redistribute the yeast and bacteria, and equalize the dough's temperature. You are looking for the dough to increase in volume by about 50-75% and become visibly gassy and airy before moving on to the next stage of your sourdough pizza dough recipe.
Shaping and Proofing Your Sourdough Pizza Dough
Once bulk fermentation is complete, the sourdough pizza dough needs to be divided, shaped, and proofed before baking. This stage prepares the dough for its final stretch and ensures it has the right structure to bake into a perfect pizza crust. Proper handling here preserves the airy structure built during bulk fermentation.
This stage is crucial for developing the final shape and texture of your pizza crust. Rushing or mishandling the dough can deflate it and result in a dense crust. Taking care during dividing, pre-shaping, and especially cold fermentation will pay dividends in the final bake of your sourdough pizza dough.
Dividing the Dough: Creating Individual Pizza Portions
After bulk fermentation, gently turn the sourdough pizza dough out onto a lightly floured surface. Avoid degassing it roughly. Use a dough scraper or knife to divide the large mass into individual portions, typically weighing between 200g and 300g for a personal-sized pizza (roughly 10-12 inches in diameter). Aim for clean cuts rather than tearing the dough.
Weighing each portion ensures consistency in size and baking time for each pizza. Once divided, handle each portion gently to maintain the internal structure developed during bulk fermentation. This step prepares each piece of sourdough pizza dough for the pre-shaping stage.
Pre-Shaping: Building Tension in the Dough
Pre-shaping involves gently forming each divided portion of sourdough pizza dough into a round ball. The goal is to create surface tension on the dough ball, which helps it hold its shape and makes the final shaping easier. Gently tuck the edges of the dough underneath itself to create a smooth, taut surface on top. Avoid using too much flour, which can prevent the dough from sealing properly.
Place the pre-shaped dough balls seam-side down on a lightly floured surface or in individual containers. Allow them to rest for 15-20 minutes, covered, to relax the gluten. This short rest period is crucial as it prevents the dough from springing back excessively when you attempt the final shaping, making your sourdough pizza dough much more pliable.
Cold Fermentation (Proofing): Developing Complex Flavors
Cold fermentation, typically done in the refrigerator for 24 to 72 hours (or even longer), is a cornerstone technique for developing deep, complex flavors in your sourdough pizza dough. The cold temperature significantly slows down yeast activity but allows the lactic acid bacteria to continue their work, producing more organic acids that enhance the dough's tang and aroma.
This slow proofing also improves the dough's structure and extensibility, making it easier to stretch into a thin pizza base without tearing. While you can bake the dough after a shorter room-temperature proof, cold fermentation is highly recommended for achieving the best flavor and texture in your sourdough pizza dough. Store the dough balls in individual airtight containers or proofing boxes to prevent drying out.
Baking Your Sourdough Pizza: Achieving Pizza Perfection
Baking is the grand finale for your sourdough pizza dough, transforming it from a raw state into a crispy, airy crust. High temperatures are key to achieving the classic Neapolitan-style crust with a puffy, charred edge (cornicione). Proper preparation of your oven and baking surface is just as important as the dough itself.
This stage requires attention to detail, from preheating your oven to handling the delicate dough and knowing when the pizza is perfectly cooked. Mastering the baking process is essential to fully appreciate the effort put into crafting your sourdough pizza dough.
Oven Temperature: Reaching Optimal Heat
To achieve a truly great sourdough pizza crust, you need high heat – much higher than baking bread or cookies. Aim for the highest temperature your home oven can safely reach, ideally between 500°F and 550°F (260°C to 290°C). This intense heat causes the dough to rapidly expand, creating that desirable open crumb and crispy exterior.
Preheat your oven with your baking surface (stone or steel) inside for at least 45 minutes to an hour to ensure it is thoroughly heated. This stored heat is crucial for transferring energy quickly to the base of the sourdough pizza dough, resulting in a rapid rise and a crispy bottom crust.
Baking Surfaces: Pizza Stone vs. Baking Steel
Using a dedicated baking surface is highly recommended for baking sourdough pizza dough. A pizza stone, typically made of ceramic or cordierite, absorbs and retains heat, releasing it evenly into the pizza crust. A baking steel, made of steel, conducts heat even more efficiently than a stone and stores more energy, resulting in an even crispier bottom crust and often a faster bake time.
Both surfaces work by providing a very hot base for the dough, causing it to cook rapidly from the bottom up. Place your stone or steel on a rack positioned in the upper third of your oven, close to the heating element, for maximum heat exposure. A well-preheated baking surface is non-negotiable for achieving a great result with your sourdough pizza dough.
Stretching the Dough: Techniques for a Perfect Circle
Stretching cold-fermented sourdough pizza dough requires a gentle touch to avoid tearing the delicate gluten network. Remove a dough ball from the refrigerator about 30-60 minutes before you plan to bake, allowing it to relax slightly. Lightly flour your work surface and the dough ball. Start by gently pressing the center of the dough with your fingertips, leaving a small rim around the edge untouched (this will become the cornicione).
Then, lift the dough and gently stretch it, letting gravity assist. You can rotate the dough over your fists or drape it over the backs of your hands, allowing the weight of the dough to stretch it outwards. Avoid stretching the edges. Aim for an even thickness across the base, except for the slightly thicker rim. Practice makes perfect when stretching sourdough pizza dough!
Topping Your Pizza: Less is Often More
When topping your sourdough pizza dough, remember that less is often more, especially for home ovens. Overloading the pizza with sauce, cheese, and toppings can weigh down the delicate crust, prevent it from cooking evenly, and make it difficult to transfer to your hot baking surface. A thin layer of sauce, a moderate amount of cheese (high-quality mozzarella is classic), and a few key toppings work best.
Consider the moisture content of your toppings. Wet toppings can make the crust soggy. Drain excess liquid from fresh mozzarella, vegetables, and meats. Distribute toppings evenly to ensure balanced cooking and flavor in every bite of your sourdough pizza.
Baking Time: Visual Cues for a Done Pizza
Baking time for sourdough pizza dough at high temperatures is relatively short, typically 8 to 12 minutes, depending on your oven's temperature, the baking surface, and the thickness of your crust. You'll know your pizza is done when the crust is deeply golden brown with some charring on the edges (the cornicione). The cheese should be melted and bubbly, and any toppings should appear cooked.
Carefully lift one edge of the pizza with a spatula to check the bottom crust; it should also be golden brown and firm. If the top is cooking faster than the bottom, you might need to adjust your oven rack position for future bakes. Remove the pizza from the oven and let it rest for a minute or two before slicing and enjoying your perfect sourdough pizza dough creation.
Troubleshooting Common Sourdough Pizza Dough Problems
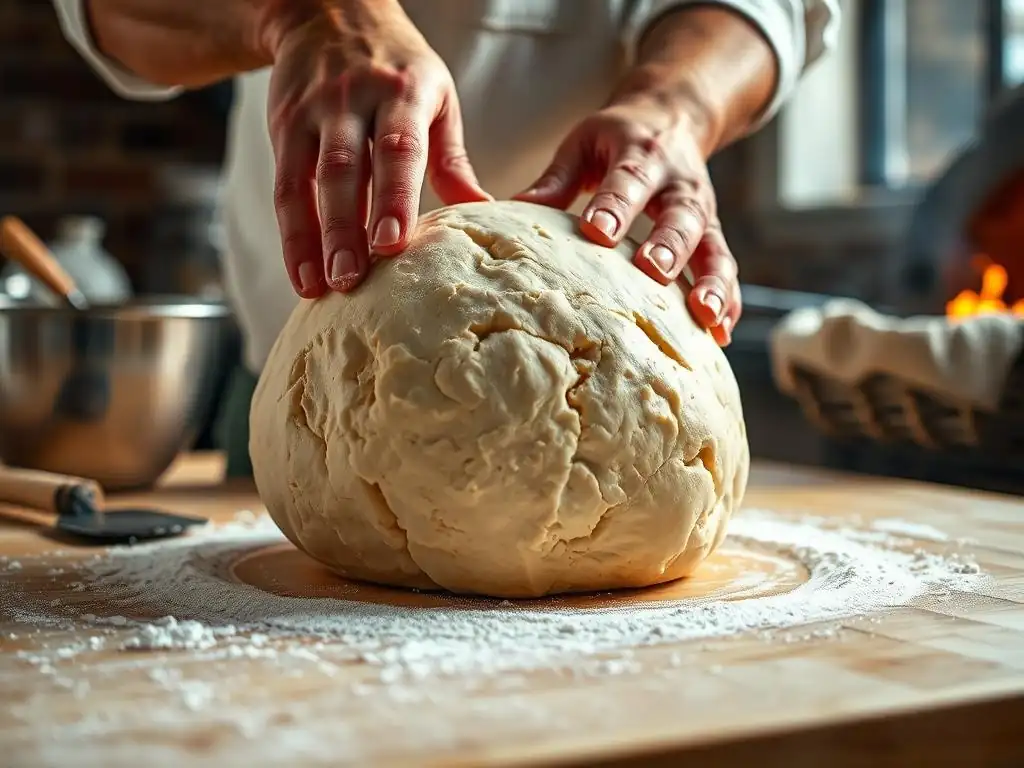
Working with sourdough can sometimes present challenges, and sourdough pizza dough is no exception. Understanding common issues and how to address them can save you frustration and help you learn from each bake. Most problems relate to starter activity, dough hydration, or handling techniques.
Don't be discouraged if your first few attempts aren't perfect. Sourdough baking is a skill that improves with practice and observation. Identifying the cause of a problem with your sourdough pizza dough allows you to make adjustments for future batches and refine your process.
Dough Too Sticky: Hydration Adjustments
If your sourdough pizza dough feels excessively sticky and difficult to handle even after kneading, the hydration level might be too high for your flour or your comfort level. Different flours absorb water differently; humidity can also play a role. While high hydration contributes to a good crust, it requires practice to handle.
- Add a small amount of flour (a tablespoon at a time) during kneading until the dough is manageable but still soft and pliable.
- For future batches of your sourdough pizza dough recipe, slightly reduce the amount of water (e.g., reduce hydration by 2-3%).
- Ensure you are using enough flour on your work surface and hands when handling sticky dough, but avoid incorporating too much into the dough itself.
Dough Not Rising: Starter Activity Issues
A sourdough pizza dough that doesn't rise sufficiently during bulk fermentation or proofing is almost always due to an inactive starter. If your starter wasn't active and bubbly when you used it, it won't produce enough gas to leaven the dough. Temperature is also a factor; cold temperatures significantly slow down fermentation.
- Ensure your starter is at its peak activity (passes the float test) before mixing your sourdough pizza dough recipe.
- Check the temperature of your bulk fermentation environment. If it's too cold (below 70°F or 21°C), try finding a warmer spot or using a proofing box or oven with the light on (not the element! ).
- Give the dough more time to rise if the temperature is cool. Fermentation is a process that follows biological timelines, not strict clocks.
Crust Too Tough: Over-Kneading or Over-Baking
A tough, dense sourdough pizza crust can result from over-kneading the dough, which develops the gluten too much, or over-baking it at too low a temperature or for too long. Over-developed gluten becomes too tight, resulting in a dense texture rather than an airy one. Baking at insufficient heat or for too long can dry out the crust and make it hard.
- Be mindful of kneading time; stop when the dough is smooth and passes the windowpane test, but isn't overly resistant.
- Ensure your oven is preheated to a high temperature (500°F+ or 260°C+) with your baking surface.
- Monitor the pizza closely during baking and remove it as soon as the crust is golden and charred in spots, and the toppings are done.
Pizza Sticking to the Baking Surface: Prevention Tips
Having your beautifully stretched sourdough pizza dough stick to your peel or baking surface is frustrating. This usually happens if there isn't enough flour or semolina on the peel, or if you've let the topped pizza sit on the peel for too long before transferring it to the oven.
- Liberally flour your pizza peel (or use a mix of flour and semolina) before placing the stretched dough onto it. Semolina acts like tiny ball bearings, helping the dough slide.
- Build your pizza quickly once it's on the peel. The moisture from the toppings will start to hydrate the flour/semolina underneath, making it sticky over time.
- Give the peel a little shake before attempting to slide the pizza to ensure it's not stuck. If it is, gently lift edges and add more flour/semolina underneath.
- Ensure your baking surface in the oven is fully preheated; a hot surface helps the dough release quickly.
Sourdough Pizza Dough Variations: Exploring Different Flavors
While a classic sourdough pizza dough recipe using white bread flour is fantastic, the world of flour offers exciting possibilities for adding new dimensions of flavor and texture to your pizza crust. Experimenting with different types of flour can yield delicious results and expand your sourdough baking repertoire.
These variations not only change the flavor profile but can also impact the handling characteristics and final texture of the sourdough pizza dough. Adjustments to hydration or fermentation times may be necessary when substituting flours.
Whole Wheat Sourdough Pizza Dough
Incorporating whole wheat flour into your sourdough pizza dough recipe adds a nutty, earthy flavor and increases the fiber content. Whole wheat flour absorbs more water than white flour due to the presence of the bran and germ, so you may need to slightly increase the hydration. A common approach is to substitute 10% to 30% of the white flour with whole wheat.
The bran and germ can interfere slightly with gluten development, potentially resulting in a slightly denser crust compared to 100% white flour. However, the trade-off is a richer flavor and added nutritional benefits. Whole wheat sourdough pizza dough pairs wonderfully with robust toppings like mushrooms, olives, and hearty meats.
Spelt Sourdough Pizza Dough
Spelt is an ancient grain that can add a unique, slightly sweet, and nutty flavor to your sourdough pizza dough. Spelt flour has a more delicate gluten structure than modern wheat, which means it can be easily over-mixed. It also absorbs water differently and can become sticky.
Using spelt for 25% to 50% of the flour in your sourdough pizza dough recipe is a good starting point. You might find you need slightly less water. The dough may feel less elastic but should still stretch reasonably well. Spelt sourdough pizza crust tends to be tender with a distinct, pleasant taste.
Adding Herbs and Spices to Your Sourdough Pizza
Beyond flour variations, you can infuse your sourdough pizza dough with flavor by incorporating dried herbs and spices directly into the mix. Italian herbs like oregano, basil, and rosemary are classic choices. Red pepper flakes can add a touch of heat. Garlic powder or onion powder can also enhance savory notes.
Mix the dried herbs or spices (e.g., 1-2 teaspoons per 500g of flour) into the dry flour before adding water. They will hydrate during the mixing and fermentation process, distributing their flavor throughout the dough. This simple addition can add an extra layer of complexity to your sourdough pizza dough, complementing your chosen toppings.
Storing Sourdough Pizza Dough for Future Use
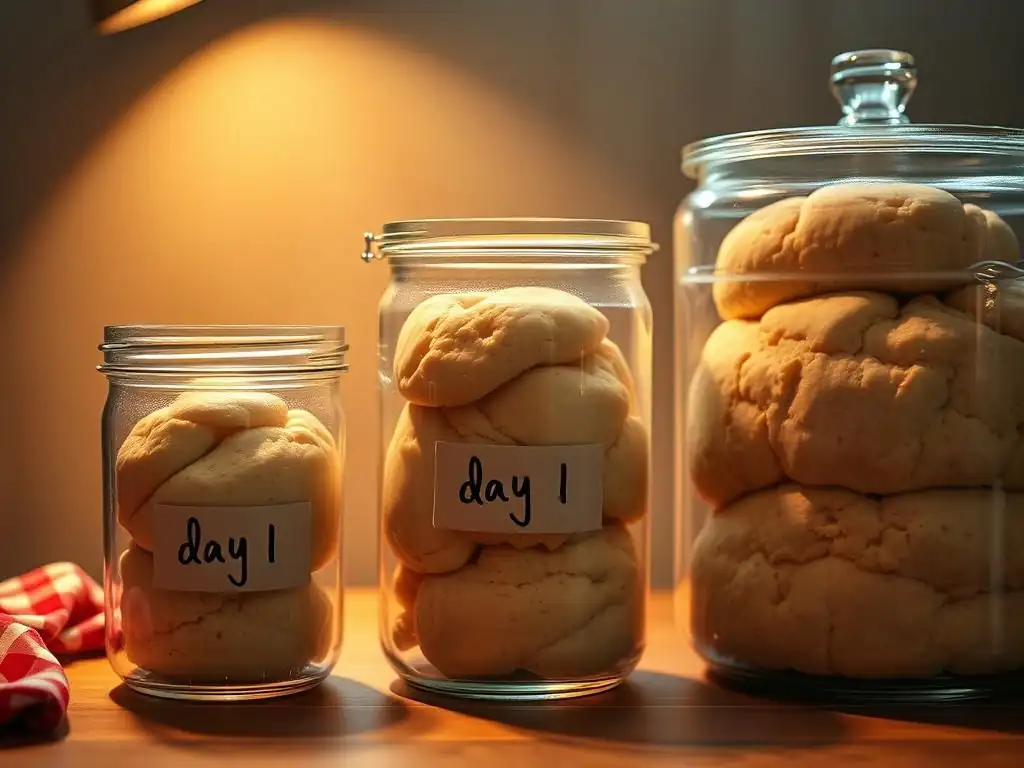
One of the great advantages of making sourdough pizza dough is its flexibility for storage. Cold fermentation in the refrigerator is already a form of storage that improves flavor. However, you can also store dough for longer periods, allowing you to have homemade pizza ready on demand.
Proper storage techniques ensure that your sourdough pizza dough remains viable and delicious, whether you plan to use it in a few days or a few weeks. Understanding how refrigeration and freezing affect the dough is key.
Refrigerating Sourdough Pizza Dough
As discussed with cold fermentation, refrigerating sourdough pizza dough is an excellent way to store it for up to 3-5 days while simultaneously developing flavor. After pre-shaping, place the dough balls in individual airtight containers or sealable bags, lightly oiled to prevent sticking. Ensure there's enough space for the dough to expand slightly.
Store the sealed containers in the refrigerator at a consistent temperature (around 38-40°F or 3-4°C). The dough will continue to ferment slowly, becoming more flavorful and easier to stretch over time. Remember to take the dough out of the fridge 30-60 minutes before baking to allow it to relax.
Freezing Sourdough Pizza Dough
For longer-term storage, sourdough pizza dough can be successfully frozen for up to 2-3 months. After bulk fermentation and dividing, lightly oil each dough ball and place them on a baking sheet lined with parchment paper. Freeze them individually until solid (about 1-2 hours).
Once frozen solid, transfer the dough balls to a freezer-safe bag or airtight container, removing as much air as possible to prevent freezer burn. To use frozen sourdough pizza dough, transfer it to the refrigerator 24 hours before you plan to bake. Then, take it out of the fridge 1-2 hours before shaping and baking, as you would with refrigerated dough.
Conclusion: Enjoying the Art of Sourdough Pizza Making
The Satisfaction of Homemade Sourdough Pizza
Making sourdough pizza dough from scratch is a rewarding process that culminates in a uniquely delicious result. There's immense satisfaction in transforming simple ingredients and a living starter into a bubbly, flavorful crust through patience and technique. The aroma of a baking sourdough pizza is truly incomparable, filling your home with the promise of a special meal.
Beyond the technical skill, the act of making sourdough pizza connects you to a rich tradition of baking and fermentation. Sharing a homemade sourdough pizza with friends and family, knowing you crafted the base with care, adds an extra layer of enjoyment to the experience. It’s more than just food; it's an expression of culinary art.
Continuing Your Sourdough Baking Journey with BakeWithEase
Mastering the sourdough pizza dough recipe is just one step in a vast and rewarding sourdough baking journey. At BakeWithEase, we are dedicated to providing you with the resources, tips, and confidence to explore all facets of sourdough. From rustic loaves and delicate pastries to enriched doughs, the possibilities are endless when you understand the fundamentals of working with your starter.
We encourage you to continue experimenting, learning from each bake, and refining your techniques. Whether you're aiming for a perfect sourdough loaf or your next incredible sourdough pizza, BakeWithEase is here to support your passion for baking every step of the way. Happy baking!
Frequently Asked Questions
What makes sourdough pizza dough different from regular pizza dough?
Sourdough pizza dough relies on a natural starter for leavening, which gives it a tangy flavor and chewier texture, unlike dough made with commercial yeast.
Is sourdough pizza dough more difficult to make than regular pizza dough?
It requires more time and attention due to the starter's activity and longer fermentation periods. However, the BakeWithEase recipe provides easy-to-follow steps making it accessible.
What kind of flour is best for sourdough pizza dough?
Bread flour is recommended for its high protein content, which develops gluten and contributes to the dough's elasticity and structure.
How long does sourdough pizza dough need to ferment?
The BakeWithEase recipe typically recommends a bulk fermentation of around 12-24 hours in the refrigerator, allowing for optimal flavor development and dough structure.
Can I freeze sourdough pizza dough?
Yes, freezing is possible. Divide the dough into portions and freeze them after the bulk fermentation, before shaping. Thaw completely before using for best results.
Final Reflection: The Unexpected Joys of Sourdough Pizza
The pursuit of the perfect sourdough pizza dough is more than just a recipe; it's a journey of discovery, patience, and ultimately, unparalleled flavor. This article has explored the intricacies of crafting this unique dough, from understanding the sourdough starter's vital role to mastering the kneading and proofing processes. But the true reward lies not just in the technical mastery, but in the transformative experience it offers.
The impact of sourdough, beyond its delicious application in pizza, is a testament to the enduring power of traditional techniques in our increasingly fast-paced world. It's a reminder to slow down, to appreciate the subtle nuances of fermentation, and to connect with a culinary heritage that spans centuries. The best things in life are worth waiting for,
a sentiment perfectly encapsulates the rewarding process of nurturing a sourdough starter and patiently crafting a pizza dough. This journey fosters a deeper appreciation for the ingredients and the process itself, enriching the entire culinary experience.
Now, consider your own kitchen. Imagine the aroma of freshly baked sourdough pizza filling your home, the satisfying crust giving way to a flavorful interior. Don't just read about this; experience it. Embrace the challenge, nurture your starter, and embark on your own sourdough pizza journey. The rewards – the taste, the satisfaction, the connection to a time-honored tradition – are well worth the effort. Let the art of sourdough elevate not just your pizza, but your culinary perspective.
Unleash Your Inner Pizzaiolo: Craft the Perfect Crust!
Thanks for joining us on this delicious journey into the world of sourdough pizza! You've now unlocked the secrets to crafting a truly exceptional crust. Ready to put your newfound knowledge into practice?
- Bake your dream pizza: Try our sourdough recipe today – the results will speak for themselves! Experiment with different toppings and share your creations with us!
- Join our baking community: Connect with fellow sourdough enthusiasts on our forum to share tips, recipes, and pictures of your amazing pizzas.
- Challenge yourself: Try substituting different flours in our recipe to discover your ideal texture and flavor profile.
What unique topping combination will you create with your perfectly crafted sourdough crust? Let us know in the comments below!