
Sweet Fried Doughs of Eastern Europe: Easy Recipes

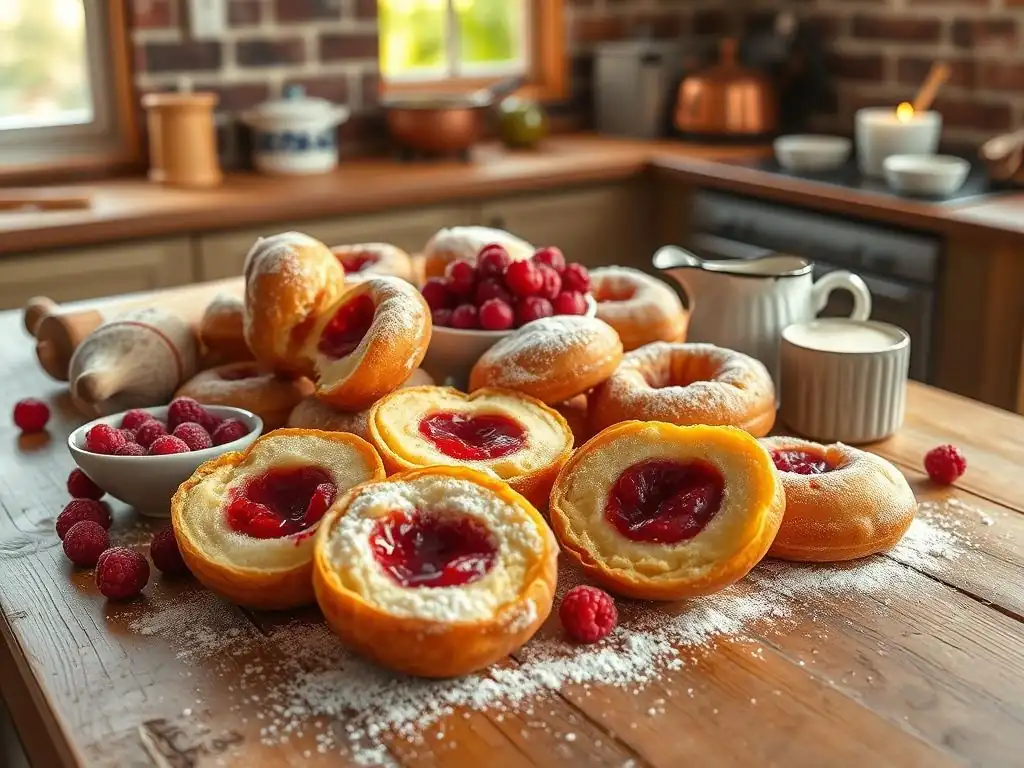
Welcome to BakeWithEase, your guide to unlocking delicious baking adventures! Ever dreamt of mastering the sweet, comforting flavors of Eastern Europe? Then you're in the right place. Discover the secrets to creating irresistible treats, starting with our easy Polish fried dough recipe. Curious about how to make these golden, fluffy delights yourself? Read on to explore a world of simple techniques and mouthwatering results...
- Sweet Fried Doughs of Eastern Europe: Easy Recipes - BakeWithEase
- Introduction to Eastern European Fried Dough Delights
- Easy Polish Fried Dough Recipe: Pączki Perfection
- Ukrainian Pampushky: A Sweet and Savory Treat
- Hungarian Fánk: Light and Airy Fried Doughnuts
- Lithuanian Spurgos: A Simple Fried Dough Classic
- Variations and Adaptations of Eastern European Fried Doughs
- Baking Tips and Tricks for Perfect Fried Doughs
- Conclusion: Enjoying the Sweetness of Eastern Europe at Home
-
Frequently Asked Questions
- What makes this Easy Polish fried dough recipe different from other fried dough recipes?
- How can I ensure my fried dough cooks evenly and doesn't burn?
- What are the key ingredients needed for the Easy Polish fried dough recipe?
- Can I customize the fillings for these fried doughs?
- How long does the dough need to rise for the Easy Polish fried dough recipe?
- Final Reflection: The Enduring Sweetness of Tradition and Simplicity
- Unleash Your Inner Baker: Make These Doughnuts Today!
Sweet Fried Doughs of Eastern Europe: Easy Recipes - BakeWithEase
Introduction to Eastern European Fried Dough Delights
Discover the Sweet Tradition of Fried Dough in Eastern Europe
Eastern Europe boasts a rich and diverse culinary landscape, and among its most cherished treats are sweet fried doughs. These delightful pastries, often enjoyed during holidays, festivals, or simply as a comforting snack, vary significantly from country to country, yet share a common theme of simple ingredients transformed into golden, airy goodness.
From the jam-filled Pączki of Poland to the light Fánk of Hungary, these recipes reflect centuries of tradition and local flavors. They are more than just desserts; they are edible pieces of cultural heritage, often linked to specific celebrations like Fat Thursday before Lent in Poland or Maslenitsa in Ukraine.
The preparation of these sweet fried doughs often involves surprisingly similar basic components: flour, eggs, sugar, yeast (or sometimes baking powder), and milk or sour cream. What sets them apart are the subtle differences in dough consistency, leavening methods, shapes, and, of course, the fillings and toppings used. While some are dense and rich, others are incredibly light and airy. Learning to make these at home offers a direct connection to these vibrant cultures and provides a delicious way to expand your baking repertoire beyond the familiar.
Why These Easy Fried Dough Recipes Are Perfect for Home Bakers
Venturing into the world of fried dough might seem intimidating, but the recipes featured here are specifically chosen for their accessibility and ease, making them perfect for home bakers of all skill levels. Unlike some complex pastries, many Eastern European fried doughs rely on straightforward techniques and readily available ingredients you likely already have in your pantry. Our goal is to demystify the process, breaking down each recipe into manageable steps so you can achieve delicious results without stress.
These easy fried dough recipes provide a fantastic opportunity to practice fundamental baking skills, such as working with yeast doughs, understanding fermentation, and mastering the art of frying. We'll guide you through each stage, offering tips to ensure your dough rises properly, your frying oil is at the right temperature, and your finished treats are perfectly golden and delicious. Whether you're craving a taste of your heritage or simply looking for a new sweet treat to try, these easy recipes offer a rewarding and enjoyable baking experience.
Easy Polish Fried Dough Recipe: Pączki Perfection
Understanding Pączki: Poland's Beloved Fried Doughnut
Pączki (pronounced pohnch-kee) are perhaps the most famous sweet fried dough from Eastern Europe, deeply ingrained in Polish culture, especially around the time of Lent. These are not just any doughnuts; traditional Pączki are rich, yeast-raised dough balls fried until golden brown and often filled with fruit preserves or cream. They are particularly associated with Tłusty Czwartek (Fat Thursday), the last Thursday before Lent begins, when Poles indulge in copious amounts of Pączki before the fasting period. It's estimated that millions of Pączki are consumed across Poland on this single day!
What distinguishes authentic Pączki is their rich dough, typically containing a significant amount of egg yolks and butter, sometimes even a splash of alcohol like rum or vodka, which is believed to help prevent the dough from absorbing too much oil during frying. When done correctly, they should have a slightly crispy exterior and a light, fluffy interior, often with a characteristic pale ring around the middle where the dough wasn't fully submerged in the hot oil. Mastering an easy Polish fried dough recipe for Pączki is a true achievement for any home baker.
Simple Pączki Recipe: Step-by-Step Guide
Ready to make your own delicious Pączki? This easy Polish fried dough recipe simplifies the traditional method, making it approachable for home kitchens. We'll guide you from gathering ingredients to the final delicious glaze.
Ingredients for Authentic Polish Pączki
Gathering the right ingredients is the first step to a successful easy Polish fried dough recipe. You'll need:
- Active dry yeast: About 7-10 grams (or one packet)
- Warm milk: Around 1/2 cup (about 120ml), ideally between 40-45°C (105-115°F)
- Granulated sugar: Approximately 1/4 cup (about 50g) + 1 teaspoon
- All-purpose flour: Around 2 1/2 to 3 cups (about 300-360g), plus extra for dusting
- Egg yolks: 3 large
- Unsalted butter: About 1/4 cup (55g), melted and cooled slightly
- Salt: 1/2 teaspoon
- Vanilla extract: 1 teaspoon
- Rum or vodka (optional): 1 tablespoon
- Filling: Fruit jam (like rose or plum) or pastry cream
- Glaze/Topping: Powdered sugar glaze or just powdered sugar
- Oil for frying: About 2-3 liters of neutral oil (like canola or sunflower)
These quantities typically yield about 12-15 medium-sized Pączki. Using warm milk is crucial for activating the yeast, while the egg yolks contribute to the rich texture characteristic of Pączki.
Preparing the Pączki Dough: A Baker's Guide
Making the dough is key to this easy Polish fried dough recipe. Start by activating the yeast: In a small bowl, combine the warm milk, 1 teaspoon of sugar, and the active dry yeast. Stir gently and let it sit for 5-10 minutes until frothy. This confirms your yeast is alive and ready to work. In a large mixing bowl (or the bowl of a stand mixer), whisk together the remaining sugar, flour, salt, egg yolks, melted butter, vanilla extract, and optional rum or vodka.
Pour the activated yeast mixture into the dry ingredients. If using a stand mixer, attach the dough hook and mix on low speed until a shaggy dough forms, then increase speed to medium and knead for about 5-7 minutes until the dough is smooth and elastic. If kneading by hand, mix with a spoon until it comes together, then turn onto a lightly floured surface and knead for 10-12 minutes.
The dough should be soft but not overly sticky. Place the dough in a lightly oiled bowl, cover with plastic wrap or a clean towel, and let it rise in a warm place for about 1 to 1.5 hours, or until it has doubled in size.
Frying Pączki: Achieving Golden Brown Perfection
Frying is a critical step in this easy Polish fried dough recipe. Once the dough has risen, gently punch it down and turn it onto a lightly floured surface. Roll the dough to about 1/2 inch (1.25 cm) thickness. Using a round cutter (about 2.5-3 inches or 6-7 cm in diameter), cut out circles.
You can place a small amount of filling (about 1 teaspoon) in the center of half the circles, then top with the remaining circles, pressing the edges firmly to seal. Alternatively, cut out all circles and fill after frying using a piping bag. Place the cut dough pieces on parchment-lined baking sheets, cover lightly, and let them rest for another 20-30 minutes until slightly puffy.
While the Pączki rest, heat your frying oil in a large, heavy-bottomed pot or deep fryer to approximately 175°C (350°F). It's helpful to use a thermometer to monitor the temperature, as oil that is too hot will burn the outside while leaving the inside raw, and oil that is too cool will result in greasy Pączki. Carefully slide a few Pączki into the hot oil using a slotted spoon or spatula, being careful not to overcrowd the pot.
Fry for about 2-3 minutes per side, until golden brown and cooked through. Use the slotted spoon to remove the fried Pączki and place them on paper towels to drain excess oil.
Filling and Glazing Your Homemade Pączki
Once the Pączki have cooled slightly but are still warm, they are ready for filling and glazing. If you sealed the filling inside before frying, you can skip the filling step here and move straight to glazing. If you fried unfilled circles, use a skewer or knife to make a small hole in the side of each Pączek (singular of Pączki), wiggling it slightly to create a pocket inside.
Using a piping bag fitted with a long tip, gently pipe your desired filling into each Pączek until you feel resistance or see a little filling appear at the hole. Rose jam is a classic choice for this easy Polish fried dough recipe.
For the glaze, you can simply dust the warm Pączki generously with powdered sugar using a sieve. For a powdered sugar glaze, whisk together about 1 cup (120g) of powdered sugar with 2-3 tablespoons of milk or lemon juice until smooth. Dip the tops of the warm Pączki into the glaze or drizzle it over them. Let the glaze set slightly before serving. Enjoy your homemade Pączki warm – they are truly a treat!
Tips for Making the Best Pączki at Home
Making Pączki using an easy Polish fried dough recipe is rewarding, and a few simple tips can elevate your results. Firstly, ensure your yeast is active; if it doesn't get frothy in the warm milk, start over with fresh yeast. Secondly, don't rush the rising times; proper fermentation develops flavor and creates a light texture. A warm, draft-free spot (like a slightly warmed oven that's turned off) is ideal for rising.
When frying, maintaining a consistent oil temperature is paramount. If the oil is too hot (above 180°C/350°F), the Pączki will brown too quickly on the outside before the inside cooks. If it's too cool (below 160°C/325°F), they will absorb excessive oil and become greasy. Fry in batches to avoid lowering the oil temperature too much. Lastly, fill and glaze the Pączki while they are still warm; this allows the filling to meld and the glaze to adhere beautifully.
Ukrainian Pampushky: A Sweet and Savory Treat
What are Pampushky? Exploring Ukrainian Fried Dough
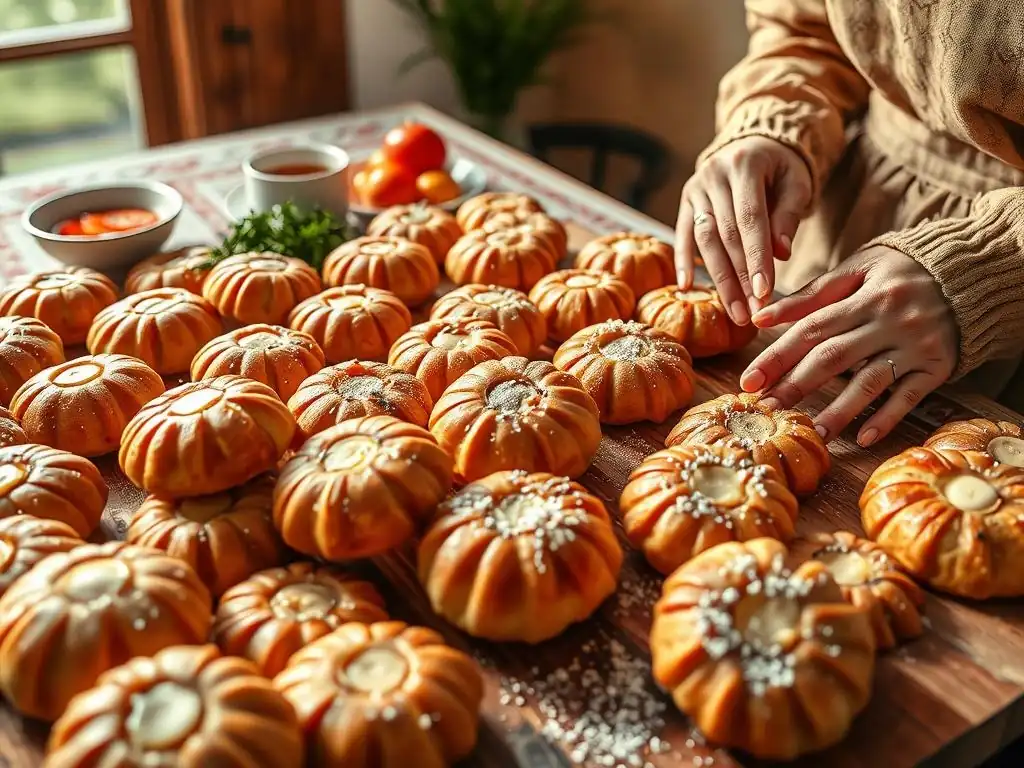
Pampushky (pronounced pahm-poosh-kih) are small, fluffy buns from Ukraine, traditionally served with borscht, often brushed with garlic butter. However, a sweet version of Pampushky is also incredibly popular, enjoyed as a dessert or snack. These sweet Pampushky are typically round, yeast-raised buns that are fried and then dusted with powdered sugar or drizzled with sweet sauces or jams. They share a similar dough base with their savory counterparts but omit the garlic and are instead sweetened.
Sweet Pampushky are a staple in Ukrainian home baking and are particularly enjoyed during festive periods. They are prized for their incredibly light and airy texture, which is achieved through careful dough preparation and proper frying. While the savory version might be more widely known internationally, exploring the sweet side of Pampushky reveals another delicious facet of Ukrainian culinary tradition. An easy Pampushky recipe for the sweet variety is a wonderful addition to any baker's collection.
Easy Pampushky Recipe with Sweet Toppings
This easy Pampushky recipe focuses on the sweet version, perfect for a delightful dessert or snack. The process is straightforward, resulting in wonderfully light fried buns.
Ingredients for Fluffy Ukrainian Pampushky
To make sweet Ukrainian Pampushky, you'll need simple ingredients similar to other fried doughs, focusing on creating a light dough:
- Active dry yeast: About 7-10 grams (one packet)
- Warm milk: Approximately 1 cup (240ml), about 40-45°C (105-115°F)
- Granulated sugar: About 1/4 cup (50g) + 1 teaspoon
- All-purpose flour: Around 3 to 3 1/2 cups (about 360-420g)
- Large egg: 1
- Butter or vegetable oil: 2 tablespoons, melted and cooled
- Salt: 1/2 teaspoon
- Oil for frying: About 2-3 liters of neutral oil
- Toppings: Powdered sugar, melted chocolate, jam, honey, etc.
The higher ratio of liquid (milk) compared to some other fried dough recipes contributes to the lighter consistency of Pampushky dough. Using warm milk and ensuring your yeast is active are crucial first steps.
How to Make Pampushky Dough: A Simple Method
Making the dough for this easy Pampushky recipe starts with activating the yeast. In a large bowl, combine the warm milk, 1 teaspoon of sugar, and the yeast. Let it sit for about 5-10 minutes until foamy. In a separate bowl, whisk together the egg, remaining sugar, melted butter or oil, and salt. Add this mixture to the yeast mixture. Gradually add the flour, mixing with a spoon or in a stand mixer with a dough hook.
Mix until a soft, slightly sticky dough forms. If using a stand mixer, knead on medium speed for about 5-7 minutes until smooth and elastic. If kneading by hand, turn onto a lightly floured surface and knead for 8-10 minutes. Place the dough in a lightly oiled bowl, cover, and let it rise in a warm place for about 1 to 1.5 hours, or until doubled in size. The dough should be noticeably soft and pliable.
Frying Pampushky to Golden Perfection
Once the dough has risen, gently punch it down. Turn the dough onto a lightly floured surface and roll it out to about 1/2 inch (1.25 cm) thickness. Using a round cutter (about 2-2.5 inches or 5-6 cm), cut out circles. Reroll scraps and cut more circles until all dough is used. Place the cut dough pieces on parchment-lined baking sheets, cover lightly, and let them rest for about 15-20 minutes until slightly puffy.
Heat your frying oil in a large pot or deep fryer to approximately 170-175°C (340-350°F). Fry the Pampushky in batches, being careful not to overcrowd the pot, for about 2-3 minutes per side, until they are golden brown and have puffed up beautifully. Use a slotted spoon to transfer the fried Pampushky to paper towels to drain excess oil. Their light texture means they cook relatively quickly.
Topping Ideas for Sweet Ukrainian Pampushky
Sweet Pampushky are typically enjoyed warm, immediately after frying. The simplest and most traditional topping is a generous dusting of powdered sugar. You can use a sieve to sprinkle it evenly over the warm buns.
Other delicious sweet toppings include:
- Drizzling with honey
- Brushing with melted butter and then coating in cinnamon sugar
- Dipping in melted chocolate
- Serving alongside fruit jam or preserves for dipping
- A simple lemon glaze made with powdered sugar and lemon juice
Serve these delightful, easy Pampushky warm for the best experience. Their light, fluffy interior is perfect for soaking up sweet flavors.
Hungarian Fánk: Light and Airy Fried Doughnuts
Exploring Fánk: Hungarian Fried Doughnut Tradition
Hungarian Fánk (pronounced fahnk) are a type of fried dough pastry, often translated simply as "doughnuts," but they are distinct from the dense, cakey varieties found elsewhere. Traditional Hungarian Fánk, sometimes called Szalagos Fánk (ribbon doughnut) due to a characteristic pale band that forms around the middle when properly fried, are incredibly light and airy, almost like fried clouds. They are typically made with a rich, egg-based yeast dough that is rolled thin before frying.
Fánk are a popular treat in Hungary, frequently enjoyed during carnival season (Farsang), similar to how Pączki are consumed in Poland before Lent. They are traditionally served dusted with powdered sugar and accompanied by apricot jam or other fruit preserves. Achieving the signature lightness of Fánk requires careful dough handling and frying technique, but an easy Fánk recipe makes this delightful pastry accessible to the home baker.
Easy Fánk Recipe: A Beginner's Guide
This easy Fánk recipe simplifies the process of creating these wonderfully light Hungarian fried doughnuts. It focuses on a manageable dough and clear frying instructions.
Essential Ingredients for Hungarian Fánk
To make Hungarian Fánk using this easy recipe, you'll need ingredients that contribute to a rich yet light dough:
- Active dry yeast: About 7-10 grams (one packet)
- Warm milk: Approximately 1/2 cup (120ml), about 40-45°C (105-115°F)
- Granulated sugar: About 1/4 cup (50g) + 1 teaspoon
- All-purpose flour: Around 2 1/2 to 3 cups (about 300-360g)
- Large egg yolks: 4
- Melted butter: 2 tablespoons, cooled
- Salt: 1/4 teaspoon
- Lemon zest: From half a lemon (optional, but traditional)
- Rum or brandy (optional): 1 tablespoon
- Oil for frying: About 2-3 liters of neutral oil
- Toppings: Powdered sugar, apricot jam
The higher number of egg yolks compared to some other doughs is key to the richness and tenderness of Fánk. The optional lemon zest adds a traditional subtle aroma.
Making the Fánk Dough: A Simple Process
Begin this easy Fánk recipe by activating the yeast. In a small bowl, combine the warm milk, 1 teaspoon of sugar, and the yeast. Let it sit for 5-10 minutes until foamy. In a large mixing bowl, whisk together the remaining sugar, flour, salt, egg yolks, melted butter, optional lemon zest, and optional rum or brandy.
Add the activated yeast mixture to the bowl. Mix with a spoon or in a stand mixer with a dough hook until a soft dough forms. Knead the dough for about 8-10 minutes until it is smooth, elastic, and slightly shiny. The dough should be soft. Place the dough in a lightly oiled bowl, cover, and let it rise in a warm place for about 1 to 1.5 hours, or until it has doubled in size.
Frying Fánk to Perfection: Tips and Tricks
Once the dough has risen, gently punch it down and turn it onto a lightly floured surface. Roll the dough out quite thinly, to about 1/4 inch (0.6 cm) thickness. Using a round cutter (about 3-4 inches or 7-10 cm), cut out circles. You can make a small slit or two in the center of each circle, or leave them whole. Place the cut dough pieces on parchment-lined baking sheets, cover lightly, and let them rest for about 15-20 minutes.
Heat your frying oil in a large pot or deep fryer to approximately 170-175°C (340-350°F). Carefully slide the Fánk into the hot oil using a slotted spoon or spatula. Fry only a few at a time to maintain oil temperature; overcrowding will lower the temperature and result in greasy Fánk. Fry for about 1.5-2 minutes per side, until they are golden brown and have puffed up significantly, ideally forming the characteristic pale ribbon around the middle. Use a slotted spoon to transfer the fried Fánk to paper towels to drain.
Serving Suggestions for Delicious Hungarian Fánk
Hungarian Fánk are best served warm, immediately after frying. The traditional way to serve them is dusted generously with powdered sugar.
They are almost always accompanied by apricot jam. You can place a dollop of jam on top of each Fánk or serve the jam on the side for dipping. Other fruit jams like plum or cherry also pair wonderfully.
- Serve warm, dusted with powdered sugar.
- Provide apricot jam on the side for dipping.
- Try other fruit jams or even a dollop of whipped cream.
Their delicate, airy texture makes them lighter than many other fried doughs, allowing you to enjoy more than one!
Lithuanian Spurgos: A Simple Fried Dough Classic
Understanding Spurgos: Lithuanian Fried Doughnuts
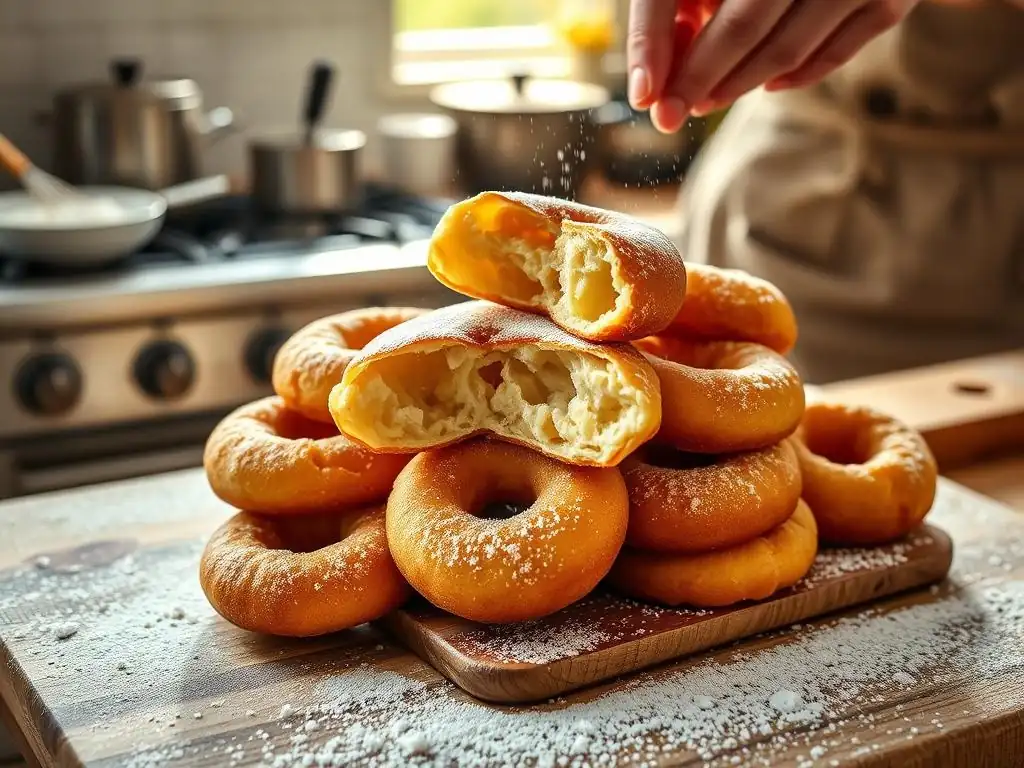
Spurgos (pronounced spur-gohs) are Lithuanian doughnuts, typically small, round, and often made from a simple dough that can sometimes include quark (a type of fresh cheese) or sour cream, in addition to standard ingredients like flour, eggs, and sugar. Unlike some larger, filled doughnuts, Spurgos are usually solid or sometimes filled with jam after frying. They are a popular homemade treat, enjoyed year-round but especially during celebrations.
The inclusion of quark or sour cream in some traditional Spurgos recipes contributes to a tender crumb. While yeast is used in some versions, many easy Spurgos recipes rely on baking powder, making them quicker to prepare. This simplicity and speed make them an excellent choice for an impromptu baking session. Learning an easy Spurgos recipe is a great way to explore Lithuanian home baking.
Easy Spurgos Recipe: A Quick and Delicious Treat
This easy Spurgos recipe focuses on a straightforward method, perfect for a quick batch of these delightful Lithuanian fried doughs.
Ingredients for Authentic Lithuanian Spurgos
This easy Spurgos recipe uses common baking ingredients, often including a dairy element for tenderness:
- All-purpose flour: Around 2 cups (about 240g)
- Granulated sugar: About 1/4 cup (50g)
- Baking powder: 2 teaspoons
- Salt: 1/4 teaspoon
- Large eggs: 2
- Sour cream or plain yogurt: 1/2 cup (about 120g)
- Vanilla extract: 1 teaspoon
- Oil for frying: About 1-2 liters of neutral oil
- Topping: Powdered sugar
Using baking powder makes this a quicker recipe than yeast-based fried doughs. The sour cream or yogurt adds moisture and creates a tender interior.
Preparing the Spurgos Dough: A Step-by-Step Guide
Preparing the dough for this easy Spurgos recipe is very simple. In a large mixing bowl, whisk together the flour, sugar, baking powder, and salt. In a separate medium bowl, whisk together the eggs, sour cream or yogurt, and vanilla extract until well combined.
Pour the wet ingredients into the dry ingredients. Mix with a spoon or spatula until just combined. Be careful not to overmix, as this can lead to tough Spurgos. The dough will be soft and sticky. Cover the bowl and let the dough rest for about 10-15 minutes. This short rest allows the flour to hydrate.
Frying Spurgos: Achieving the Perfect Texture
Once the dough has rested, lightly flour your hands. The dough will be too soft to roll and cut like traditional doughnuts. Instead, you can either:
- Drop spoonfuls of dough directly into the hot oil (for rustic, irregular shapes).
- Or, with floured hands, gently shape small balls (about 1-1.5 inches or 2.5-4 cm in diameter) from the dough.
Heat your frying oil in a pot or deep fryer to approximately 170-175°C (340-350°F). Carefully add the dough balls or spoonfuls to the hot oil, frying in batches. Fry for about 2-4 minutes, turning occasionally, until they are golden brown all over and cooked through. Since they are typically smaller, they cook relatively fast. Use a slotted spoon to remove the fried Spurgos and place them on paper towels to drain excess oil.
Dusting and Serving Your Homemade Spurgos
Spurgos are traditionally served warm, generously dusted with powdered sugar. Use a sieve to sprinkle the sugar over the warm fried dough.
They can be enjoyed plain or served with:
- Fruit jam (strawberry, raspberry, or plum are popular) for dipping or injecting after frying.
- A drizzle of honey or melted butter.
- Sometimes served with a side of sour cream, even the sweet ones!
Their simple preparation and delicious result make this easy Spurgos recipe a delightful treat any time.
Variations and Adaptations of Eastern European Fried Doughs
Exploring Regional Differences in Fried Dough Recipes
While we've highlighted some key examples, the tradition of sweet fried dough extends across many countries in Eastern Europe, each with its own unique variations. These differences can be subtle, like the specific leavening agent used (yeast vs. baking powder), the richness of the dough (more or fewer eggs/butter), the shape, or the preferred filling and topping. For instance, while Pączki are typically round and filled, others might be flat, twisted, or served plain with just a dusting of sugar.
The availability of local ingredients also plays a role. Some regions might incorporate local cheeses like quark, while others might favor specific types of fruit preserves made from indigenous fruits. Exploring these regional differences is a fascinating way to understand the culinary tapestry of Eastern Europe. An easy Polish fried dough recipe might differ from a similar recipe in Lithuania or Serbia, offering a slightly different texture or flavor profile based on centuries of local adaptation.
Serbian Krofne: A Balkan Delight
Serbian Krofne (pronounced krohf-neh) are yeast-raised doughnuts popular throughout the Balkans, sharing similarities with other Central and Eastern European varieties like Pączki or Krapfen. They are typically round, fluffy, and often filled with jam, chocolate cream, or vanilla cream after frying. They are a beloved treat, often found in bakeries but also frequently made at home for special occasions or simply as a comforting dessert.
Making Krofne involves preparing a soft, enriched yeast dough, similar to that used for Pączki. The key is allowing sufficient time for the dough to rise to achieve a light texture. Frying them correctly results in golden-brown doughnuts that are perfect for filling. An easy Krofne recipe follows a process very much like an easy Polish fried dough recipe, making it accessible if you've already tried making Pączki.
Ingredients for Serbian Krofne
A typical easy Krofne recipe requires:
- Active dry yeast: About 7-10 grams
- Warm milk: Approximately 1 cup (240ml)
- Granulated sugar: About 1/4 cup + 1 teaspoon
- All-purpose flour: Around 3 to 3 1/2 cups
- Large eggs: 2
- Butter: 1/4 cup (55g), melted and cooled
- Salt: 1/2 teaspoon
- Lemon zest (optional): From half a lemon
- Oil for frying
- Filling: Jam, chocolate cream, or vanilla cream
- Topping: Powdered sugar
These ingredients yield a soft, enriched dough that fries up beautifully.
Preparing Serbian Krofne Dough
To make Krofne dough, activate the yeast in warm milk with a teaspoon of sugar. In a large bowl, combine the rest of the sugar, flour, salt, eggs, melted butter, and optional lemon zest. Add the activated yeast mixture and mix until a soft dough forms. Knead for 8-10 minutes until smooth and elastic. Place the dough in a lightly oiled bowl, cover, and let it rise for 1 to 1.5 hours until doubled.
Frying and Filling Krofne
Punch down the risen dough and roll it out to about 1/2 inch thickness. Cut out circles using a cutter. Place on parchment paper, cover, and let rest for 20-30 minutes. Heat oil to 175°C (350°F). Fry Krofne in batches for 2-3 minutes per side until golden. Drain on paper towels. Once cooled slightly, fill with jam or cream using a piping bag and dust with powdered sugar.
Slovakian Šišky: A Simple and Delicious Treat
Slovakian Šišky (pronounced shish-kee) are another delightful fried dough pastry, often small and round, similar in appearance to some versions of Spurgos or smaller Krofne. They can be yeast-leavened or made with baking powder, with simpler recipes often using baking powder for speed. They are usually served plain with powdered sugar or jam, sometimes incorporating quark into the dough for tenderness.
The charm of Šišky lies in their simplicity and ease of preparation. An easy Šišky recipe is perfect for a quick dessert. They are often made from a soft, almost drop-dough consistency when using baking powder, making them very fast to fry.
Ingredients for Slovakian Šišky
An easy Šišky recipe might include:
- All-purpose flour: Around 1 1/2 cups (180g)
- Granulated sugar: 1/4 cup (50g)
- Baking powder: 1 1/2 teaspoons
- Salt: 1/4 teaspoon
- Large egg: 1
- Milk or sour cream: 1/2 cup (120ml/g)
- Vanilla extract: 1 teaspoon
- Oil for frying
- Topping: Powdered sugar, jam
This combination yields a quick dough that doesn't require extensive kneading or rising time.
Preparing Slovakian Šišky Dough
Mix the dry ingredients (flour, sugar, baking powder, salt) in a bowl. In another bowl, whisk together the wet ingredients (egg, milk or sour cream, vanilla). Add the wet to the dry and mix until just combined. The dough will be soft and sticky. Let it rest for 5-10 minutes.
Frying and Topping Šišky
Heat oil to 170-175°C (340-350°F). Drop spoonfuls of dough into the hot oil and fry for 2-3 minutes, turning, until golden brown. Drain on paper towels. Serve warm, dusted generously with powdered sugar, or with jam for dipping. Their small size and quick cooking time make them an almost instant treat.
Baking Tips and Tricks for Perfect Fried Doughs
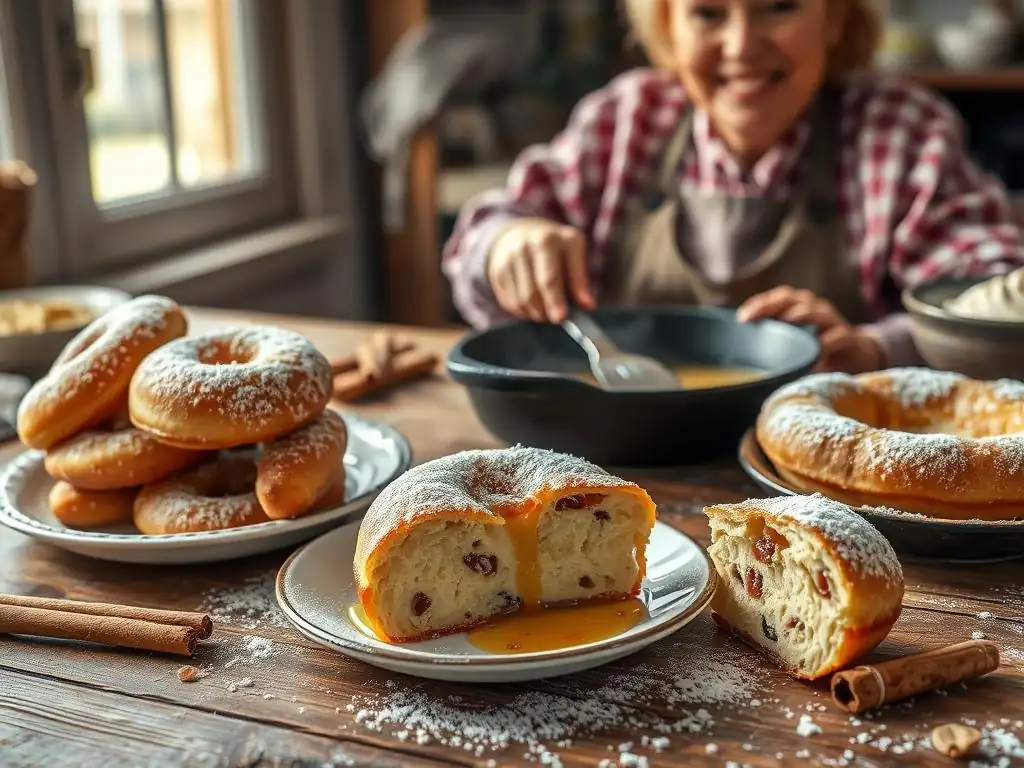
Achieving perfectly fried doughs, whether you're using an easy Polish fried dough recipe or trying Hungarian Fánk, involves a few key techniques. Paying attention to these details will help you get consistent, delicious results every time.
Choosing the Right Oil for Frying Dough
The type of oil you use for frying significantly impacts the taste and outcome of your fried doughs. It's best to use a neutral-flavored oil with a high smoke point.
- Recommended Oils: Canola oil, sunflower oil, vegetable oil, or peanut oil. These oils won't impart strong flavors to your pastries and can withstand the high temperatures needed for frying without smoking excessively.
- Oil Temperature: This is crucial. Aim for a temperature between 170°C and 180°C (340°F and 350°F). Too low, and your dough will absorb too much oil, becoming greasy. Too high, and the outside will burn before the inside cooks through. Use a thermometer to monitor and adjust the heat as needed.
- Amount of Oil: Use enough oil so that the dough pieces can float and fry without touching the bottom of the pot. This usually means the oil should be at least 2-3 inches deep, depending on the size of your pot and the dough.
Using clean, fresh oil is also important. Reused oil can impart off-flavors.
Achieving the Perfect Dough Consistency
The consistency of your dough is fundamental to the texture of the final fried pastry.
- Yeast Doughs (like Pączki, Krofne, Fánk): These should be soft, pliable, and elastic after kneading. They might be slightly sticky, but shouldn't be impossible to handle. If the dough is too stiff, the fried result will be dense. If it's too wet, it will be difficult to shape and might absorb too much oil. Pay attention to the flour amount in the recipe, but adjust slightly if needed based on humidity and the specific flour used. A good rise time is also essential for lightness.
- Baking Powder Doughs (like some Spurgos, Šišky): These are typically softer and stickier than yeast doughs, often more like a thick batter or very soft dough that's dropped or gently shaped with floured hands. Overmixing should be avoided to keep them tender.
Allowing the shaped dough pieces a final short rest (proofing) before frying is also important, especially for yeast doughs, as this helps them puff up nicely in the hot oil.
Avoiding Common Frying Mistakes
Even with an easy Polish fried dough recipe or a simple Spurgos dough, frying can be tricky. Here are common mistakes and how to avoid them:
- Overcrowding the Pot: Frying too many pieces at once drastically lowers the oil temperature, leading to greasy dough. Fry in batches, leaving space between pieces.
- Incorrect Oil Temperature: As mentioned, this is key. Monitor with a thermometer and adjust heat. If the oil gets too hot, turn off the heat briefly or move the pot off the burner until it cools slightly.
- Not Draining Properly: Always transfer fried dough to a wire rack set over paper towels or just directly onto a thick layer of paper towels immediately after removing them from the oil. This allows excess oil to drain off.
- Flipping Too Early/Often: Let the dough fry undisturbed on one side until golden brown before flipping. Constant flipping isn't necessary and can sometimes hinder even cooking.
- Using a Pot That's Too Shallow: A deep, heavy-bottomed pot is safer and helps maintain a consistent oil temperature.
Safety First! Be extremely cautious when frying with hot oil. Never leave the pot unattended, keep water away from the oil, and use a spider or slotted spoon for adding and removing dough.
Storing and Reheating Fried Dough
Fried doughs are generally best enjoyed warm, shortly after frying. However, if you have leftovers, proper storage and reheating can help maintain some of their quality.
- Storage: Store cooled fried dough in an airtight container at room temperature for 1-2 days. They will lose some of their crispiness over time. Filled doughnuts might need refrigeration depending on the filling (e.g., cream-filled).
- Reheating: Reheating in a microwave can make them soft or rubbery. The best way to reheat is often in a toaster oven or conventional oven at a low temperature (around 150°C/300°F) for a few minutes until warmed through. This can help crisp up the exterior slightly. Frying for a very short time (30-60 seconds per side) in hot oil is also an option but requires caution.
While they won't be quite the same as fresh, you can still enjoy leftover fried dough with a little care.
Conclusion: Enjoying the Sweetness of Eastern Europe at Home
Recreate Authentic Flavors with These Easy Recipes
Embarking on the journey of making sweet fried doughs from Eastern Europe is a rewarding experience. From mastering an easy Polish fried dough recipe for Pączki to creating light Hungarian Fánk or simple Lithuanian Spurgos, you're connecting with rich culinary traditions.
These recipes, simplified for the home kitchen, prove that you don't need to be an expert baker to achieve delicious, authentic results. The joy of baking these treats lies not only in the delightful flavors but also in the process itself – the magic of yeast transforming dough, the comforting aroma of frying, and the simple pleasure of dusting warm pastries with sugar.
We've provided step-by-step guides and helpful tips to make your baking experience smooth and enjoyable. Whether you choose to fill your Pączki with traditional rose jam, serve Pampushky with honey, or simply dust your Spurgos with powdered sugar, you're bringing a piece of Eastern European sweetness into your home. Don't be afraid to experiment with fillings and toppings to find your favorite combinations.
We love seeing what our community is baking! If you try out any of these easy fried dough recipes – perhaps you tackled the easy Polish fried dough recipe or whipped up a batch of quick Šišky – share your results! Baking is a wonderful way to connect with others, share culture, and spread joy.
Let us know which recipe was your favorite or if you made any fun adaptations. Happy baking, and enjoy the sweet, fried delights of Eastern Europe!
Frequently Asked Questions
What makes this Easy Polish fried dough recipe different from other fried dough recipes?
This recipe focuses on simplicity and readily available ingredients, making it perfect for beginners. It also aims for a specific sweetness and texture common in Polish pączki, often using yeast for a light, airy result.
How can I ensure my fried dough cooks evenly and doesn't burn?
Maintaining a consistent oil temperature is crucial. Aim for around 350°F (175°C). Fry in small batches to prevent overcrowding and ensure even browning on all sides.
What are the key ingredients needed for the Easy Polish fried dough recipe?
The core ingredients usually include flour, yeast, sugar, eggs, and milk. Some variations may also include butter or shortening for added richness. Oil for frying is essential.
Can I customize the fillings for these fried doughs?
Absolutely! While traditional fillings like rose petal jam or fruit preserves are popular, you can experiment with chocolate, custard, or even savory fillings if desired. Adjust the sugar content accordingly.
How long does the dough need to rise for the Easy Polish fried dough recipe?
The rising time depends on the yeast and room temperature, but typically it requires at least one hour for the dough to double in size. This allows for a light and airy texture after frying.
Final Reflection: The Enduring Sweetness of Tradition and Simplicity
The ease of making traditional Polish fried dough transcends mere culinary convenience; it's a direct line to cultural heritage and the joy of shared experiences. These simple recipes, passed down through generations, offer a comforting taste of home, a connection to the past that resonates deeply even in our fast-paced modern world. The accessibility of these recipes, their ability to bring people together around a shared culinary experience, makes them more than just a snack; they are a powerful symbol of community and connection.
The enduring appeal of these fried doughs lies not just in their deliciousness, but in their ability to evoke powerful memories and emotions. They represent a tangible link to family history, a taste of childhood, or a comforting reminder of simpler times. As someone who has personally experienced the joy of making and sharing these treats, I understand the profound impact they can have. Food is symbolic of love when words are inadequate.
- Alan D. Wolfelt. This quote perfectly encapsulates the emotional resonance these simple recipes hold.
So, I encourage you, dear reader, to try your hand at one of these recipes. Don't be intimidated by the seemingly simple instructions; within them lies a wealth of history and the potential for creating your own cherished memories. Gather your family and friends, share the experience of making these sweet delights, and savor the taste of tradition, the warmth of connection, and the enduring sweetness of simple pleasures. Let the aroma of fried dough fill your kitchen, and let the joy of sharing fill your heart.
Unleash Your Inner Baker: Make These Doughnuts Today!
Thanks for joining us on a delicious journey through the sweet fried doughs of Eastern Europe! We hope you discovered some new favorites and feel inspired to try your hand at these delightful treats. Ready to get baking?
- **Master your first pączki or potica: ** Choose one recipe from the article and get started! We've provided clear instructions, so even beginners can achieve amazing results.
- Share your baking adventure! Snap a picture of your creations and post it on social media using #BakeWithEaseEasternEurope. Let's see those delicious doughnuts!
- Explore the diverse world of fried doughs: Research other regional variations and try adapting the recipes you learned today. What unique twists can you create?
What surprising ingredient will you add to your next batch of fried dough to make it truly your own?