
From Dough to Delight: Baking Your Puff Pastry Masterpiece

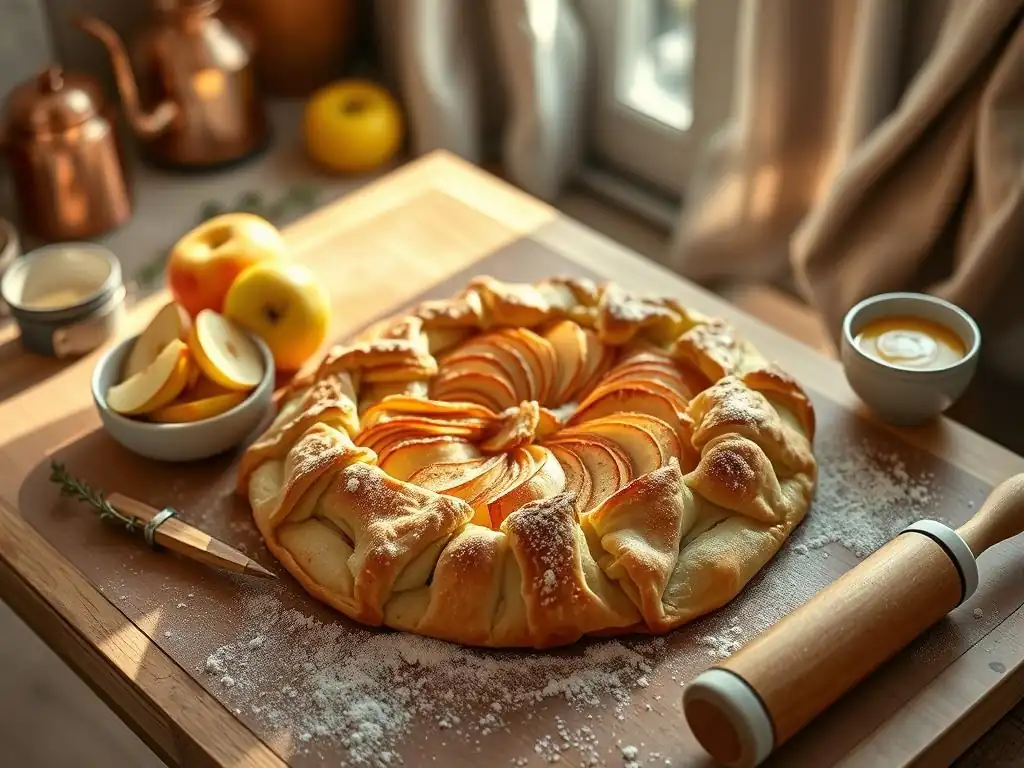
Welcome to BakeWithEase, your trusted guide to creating baking magic! Ever dreamed of effortlessly crafting flaky, golden-brown pastries? Our "Easy puff pastry recipe" is your gateway to achieving baking brilliance. Discover the secrets to perfect lamination and unlock a world of delicious possibilities within these pages. Intrigued? Let's embark on your puff pastry journey and transform simple ingredients into a culinary masterpiece!
- Croissant Conquest: Mastering the Art of Viennoiserie at Home
- Introduction to Croissant Creation: A Detailed Guide for Aspiring Bakers
-
The Authentic Croissant Recipe: A Step-by-Step Immersion
- Ingredient Inventory: Essential Components for Perfect Croissants
- Developing the Détrempe: The Foundation of Flaky Layers
- Crafting the Beurre Sec: The Key to Distinctive Lamination
- The Lamination Process: Unveiling the Secrets of Flaky Layers
- Shaping and Proofing: Preparing for the Oven's Embrace
- Baking to Golden Perfection: Achieving the Ideal Color and Texture
- Troubleshooting Common Croissant Challenges
- Beyond the Basics: Creative Croissant Variations and Applications
- Preserving Freshness: Storing Your Homemade Croissants
- Conclusion: Embarking on Your Croissant Journey!
-
Frequently Asked Questions
- What exactly is puff pastry, and why is it considered a bit challenging to make?
- What are some common mistakes people make when attempting an easy puff pastry recipe, and how can I avoid them?
- Can I substitute any ingredients in an easy puff pastry recipe to make it healthier or more accessible?
- How long does homemade puff pastry typically last in the refrigerator or freezer?
- What are some simple and easy puff pastry recipe ideas I can try once I've mastered the basic dough?
- Final Reflection: The Enduring Magic of Puff Pastry
- Unleash Your Inner Pastry Chef!
Croissant Conquest: Mastering the Art of Viennoiserie at Home
Introduction to Croissant Creation: A Detailed Guide for Aspiring Bakers
Embracing the Flaky Challenge: Crafting Authentic Croissants
Creating authentic croissants at home is a rewarding baking endeavor that stands as a benchmark for intermediate bakers. Unlike an easy puff pastry recipe, crafting classic croissants involves mastering a delicate balance of yeast activity, butter lamination, and precise temperature control. This journey from simple ingredients to a multilayered, flaky pastry is a testament to patience and technique, culminating in a product far superior to many commercially available options. It’s a process that builds fundamental skills applicable across the realm of viennoiserie.
The process requires dedication over several hours, often spread across two days, allowing for sufficient chilling and proofing times. Each step, from developing the initial dough (détrempe) to incorporating the butter block (beurre sec) through repeated folding (lamination), contributes to the final texture. Success hinges on maintaining cold temperatures to keep the butter solid and separate from the dough layers, ensuring that during baking, the melting butter creates steam, forcing the hundreds of dough layers apart into the signature flaky structure.
Why Croissants? Understanding the Allure of this Classic Pastry
The appeal of a freshly baked croissant lies in its exquisite sensory experience: the audible shatter of the crisp, golden crust, the yielding lightness of the airy interior honeycomb structure, and the rich, buttery aroma that fills the air. Originating from Austria (as the kipferl) but popularized and refined in France, the croissant has become a global symbol of refined baking. It represents comfort, indulgence, and the simple pleasure of a perfect pastry enjoyed with a morning coffee.
Beyond their deliciousness, making croissants appeals to bakers seeking to elevate their skills. Mastering the lamination technique provides a deep understanding of dough and butter interactions under temperature control, a skill set valuable for other pastries like pain au chocolat, danishes, or even a more complex puff pastry. The satisfaction derived from pulling a tray of perfectly puffed, deeply colored croissants from your own oven is immense, validating the effort put into the intricate process.
The Authentic Croissant Recipe: A Step-by-Step Immersion
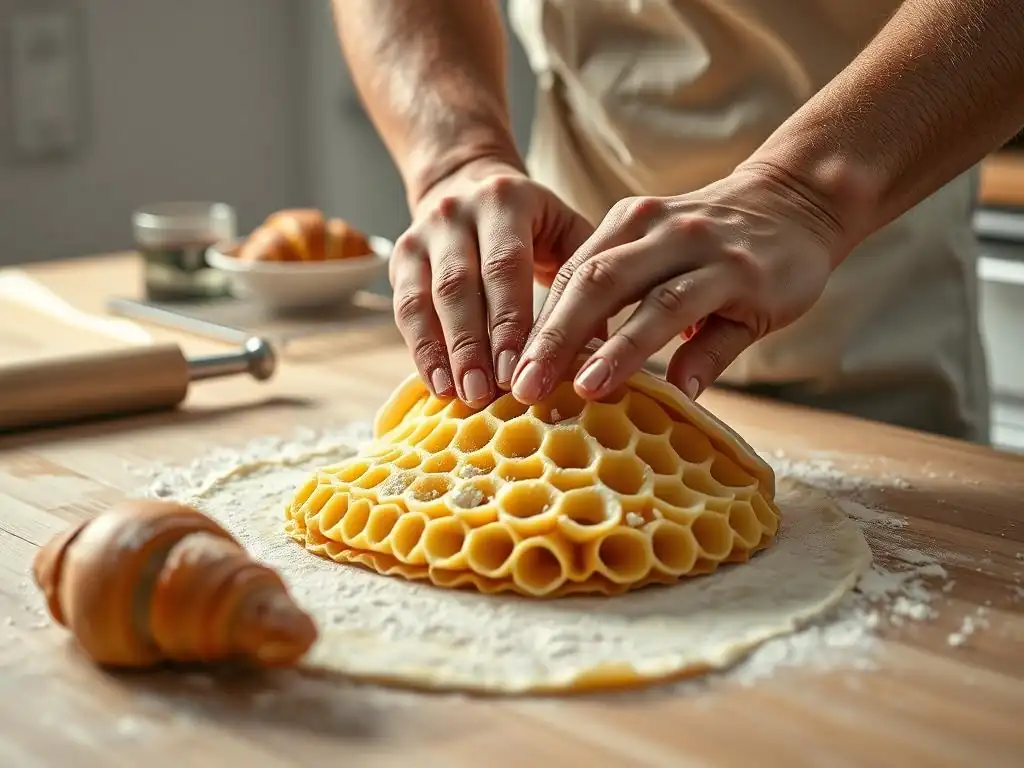
Ingredient Inventory: Essential Components for Perfect Croissants
The foundation of a great croissant begins with selecting the right ingredients. You will need a strong bread flour, typically with a protein content between 12-14%, which provides the necessary gluten structure to withstand the rigorous rolling and folding of lamination. High-quality, cold butter is non-negotiable; European-style butter with at least 82% fat content is preferred because its lower water content results in cleaner layers and less steam interference during lamination.
Additionally, you'll need fresh yeast (instant or active dry), cold milk or a mix of milk and water for the liquid, a small amount of sugar for yeast activation and flavor, and salt to balance the sweetness and strengthen the gluten. While specific quantities vary slightly by recipe, a standard batch yielding about 12-15 medium croissants might use approximately 500 grams of flour, 250-300 grams of butter for lamination, 10-15 grams of yeast, 250-300 ml of cold liquid, 50 grams of sugar, and 10 grams of salt.
Using cold ingredients from the start is crucial for maintaining dough temperature throughout the process.
Developing the Détrempe: The Foundation of Flaky Layers
Combining Détrempe Ingredients: Achieving Optimal Hydration
The détrempe is the initial dough base that encases the butter. It's a simple mixture of flour, sugar, salt, yeast, and cold liquid. The goal is to combine these ingredients until they just come together into a shaggy mass, ensuring all the flour is hydrated. Overmixing at this stage can lead to excessive gluten development too early, making the dough difficult to roll out thinly later during lamination.
Using cold liquid, typically milk or a blend of milk and water chilled to around 4°C (39°F), is paramount. This low temperature helps to keep the overall dough temperature down, which is critical for preventing the butter from melting into the dough during subsequent steps. The hydration level, usually around 55-65% of the flour weight, affects the dough's extensibility and handling properties.
Autolysing the Détrempe: Enhancing Gluten Development
Autolysis is a resting period for the détrempe after the initial mixing, and before the butter (or sometimes salt and yeast) is fully incorporated or before kneading begins. Typically, the shaggy dough is covered and allowed to rest for 20-60 minutes at room temperature or in the refrigerator. This seemingly simple step has a significant impact on the dough's structure.
During autolysis, the flour fully hydrates, and enzymes naturally present in the flour begin to break down proteins, allowing gluten bonds to start forming without mechanical kneading. This process results in a dough that is smoother, more extensible, and easier to roll out thinly without tearing during lamination. It also means less kneading is required overall, reducing the risk of overworking the dough.
Crafting the Beurre Sec: The Key to Distinctive Lamination
The beurre sec, or "dry butter," refers to the block of cold, pliable butter that will be enclosed within the détrempe. Its quality and preparation are fundamental to achieving clean, distinct layers in the final croissant. High-fat butter is essential because its lower water content creates less steam during baking, allowing the butter layers to remain more intact and separate the dough layers effectively.
For a batch using 500g flour, you'll typically prepare a butter block of 250-300g. This butter should be cold but not rock hard. It needs to be pliable enough to be rolled out with the dough without breaking into pieces, yet cold enough to maintain its structure as a separate layer. Preparing the butter block correctly sets the stage for successful lamination.
Shaping the Beurre Sec: Achieving Uniform Thickness
The beurre sec must be shaped into a uniform rectangle or square, typically measuring about 15x20 cm and roughly 1 cm thick for a standard batch, depending on the size of your rolled-out détrempe. This is usually achieved by pounding the cold butter block with a rolling pin to soften it slightly, then rolling it out between two sheets of parchment paper. You can draw guidelines on the parchment to help achieve precise dimensions.
Uniform thickness is crucial because it ensures the butter is evenly distributed within the dough during every turn of the lamination process. Any thick or thin spots in the butter block will result in uneven layers in the final croissant, leading to areas that are dense or where the butter leaks out during baking. Precision here pays off significantly in the final product's texture.
Tempering the Beurre Sec: Maintaining Ideal Consistency
Tempering the beurre sec involves bringing the butter to the correct temperature and consistency – cold, but pliable enough to bend without breaking, roughly similar to the consistency of the détrempe dough after its initial rest. This is often achieved by leaving the shaped butter block out of the refrigerator for 10-20 minutes before use, or gently pounding it.
The ideal consistency allows the butter and dough to roll out together smoothly and evenly during lamination. If the butter is too cold and hard, it will break into shards, creating gaps instead of continuous layers. If it's too warm and soft, it will melt into the dough during rolling, destroying the distinct layers needed for flakiness. Achieving this balance is key to successful lamination.
The Lamination Process: Unveiling the Secrets of Flaky Layers
Lamination is the heart of croissant making, the magical process where repeated rolling and folding transform a simple dough and butter block into a structure containing hundreds of alternating layers. Each fold multiplies the number of layers, setting the stage for the dramatic rise and flakiness that occurs in the oven.
The goal is to create a dough packet where thin layers of détrempe are separated by equally thin layers of beurre sec. A typical croissant dough undergoes enough turns to achieve somewhere between 27 and 81 layers of dough and butter, creating the intricate honeycomb structure seen inside a perfectly baked croissant. This process requires precision, patience, and careful temperature management.
Encasing the Beurre Sec: The Initial Lock-In
The lamination process begins with the "lock-in" or "encasing" step. The chilled détrempe is rolled out into a rectangle, usually about twice the length of the prepared butter block and slightly wider. The cold, tempered butter block is placed neatly on one half of the rolled-out dough rectangle.
The other half of the dough is then folded over the butter block, like closing a book. The edges of the dough are carefully sealed around the butter using your fingers or a rolling pin. This ensures the butter is completely enclosed within the dough packet, preventing it from leaking out during the subsequent rolling and folding steps. A successful lock-in is essential for maintaining the integrity of the layers.
Executing the Turns: Building Hundreds of Delicate Layers
After the initial lock-in, the dough packet is rolled out into a long rectangle, and then folded. This rolling and folding sequence is called a "turn." Each turn increases the number of dough and butter layers exponentially. For example, a simple letter fold (folding the dough into thirds) triples the layers with each turn.
Typically, croissant dough requires 3 or 4 turns to achieve the desired number of layers and flakiness. Between each turn, the dough must be thoroughly chilled. Rolling should be done evenly and gently to avoid tearing the dough or squeezing the butter out. Keeping track of the number of turns completed is important for consistency.
Three-Quarter Turn vs. Single Turn: Selecting the Right Technique
There are different folding techniques used for lamination, with the most common being the single turn and the three-quarter turn (sometimes called a double turn). A single turn involves rolling the dough into a rectangle and folding it into thirds, like a letter. This yields 3 layers per turn. Three single turns result in 3 x 3 x 3 = 27 layers.
A three-quarter turn involves rolling the dough into a longer rectangle, folding both ends towards the center until they almost meet, and then folding the dough in half along the center seam, like closing a book. This method creates 4 layers per turn. Fewer three-quarter turns are needed to achieve a high number of layers; for instance, just two three-quarter turns yield 4 x 4 = 16 layers, while one single turn followed by one three-quarter turn yields 3 x 4 = 12 layers (this is sometimes used for danishes).
The choice of technique can slightly affect the final texture and crumb structure. A common approach for croissants is three single turns.
Refrigeration Between Turns: Preventing Butter Softening
Adequate refrigeration between each turn is a non-negotiable step in croissant lamination. After each fold, the dough packet must be wrapped tightly and chilled in the refrigerator for a minimum of 30-60 minutes, although longer rests (up to 90 minutes) are often beneficial. This chilling period serves two vital purposes for creating flaky layers.
Firstly, it allows the butter layers to firm up again. If the butter is too soft from handling and rolling, it will melt into the dough during the next turn instead of remaining a distinct layer. Secondly, chilling allows the gluten in the dough to relax. After being stretched during rolling, the dough needs time to rest and become extensible again, making it easier to roll thinly for the next turn without shrinking back or tearing. Skipping or shortening chilling leads directly to poor lamination and dense, bready croissants.
Shaping and Proofing: Preparing for the Oven's Embrace
Once the lamination process is complete and the dough has had its final chill, it is ready to be shaped into the iconic crescent form. This stage requires gentle handling to preserve the delicate layers created through lamination. The dough should be rolled out evenly to a specific thickness before cutting.
The goal is to roll the dough relatively thin, typically to about 3-4mm thickness, ensuring a large surface area from which to cut the triangles. Proper shaping techniques are essential for achieving the classic look and ensuring even baking and flaking.
Cutting and Rolling: Achieving the Signature Croissant Shape
Roll the chilled, laminated dough into a large, even rectangle, often measuring around 40x30 cm (approximately 16x12 inches) and 3-4mm thick. Use a sharp knife or a pastry wheel to trim the edges square (the scraps can be baked as "croissant bites") and then cut the rectangle into long triangles. The base of each triangle should typically be 8-10 cm (3-4 inches) wide, with the length determining the size of the final croissant.
To shape, take a triangle, make a small slit (about 1-2 cm) in the center of the base, and gently stretch the base outwards slightly. Roll the triangle tightly from the base towards the point, using your fingertips to stretch the tip as you roll. Finish by curving the ends inwards to form the crescent shape. Roll firmly but gently to maintain the layers.
Proofing the Croissants: Allowing for Optimal Rise
Proofing is a critical step where the shaped croissants undergo their final rise before baking. Unlike puff pastry which relies solely on steam from butter for lift, croissants also contain yeast, which produces carbon dioxide gas during proofing, causing the dough to expand significantly. Proofing should occur in a warm, humid environment, ideally between 24-27°C (75-80°F), to encourage optimal yeast activity and dough relaxation.
The croissants should approximately double or nearly triple in size, becoming visibly puffy and jiggly when gently shaken. You should be able to see the definition of the layers on the surface. Proofing time can vary greatly depending on the temperature and humidity, often taking 2-3 hours. It is crucial not to overproof (where the butter starts to melt and leak) or underproof (resulting in a dense, heavy crumb). Proper proofing is essential for achieving the light, airy interior.
Baking to Golden Perfection: Achieving the Ideal Color and Texture
Baking is the culmination of the croissant-making process, where heat transforms the proofed dough into a flaky, golden masterpiece. The intense heat of the oven causes the butter layers to melt and produce steam, which forces the delicate dough layers apart, creating the characteristic flaky structure. Simultaneously, the yeast receives a final burst of activity (oven spring), contributing to the volume.
A perfectly baked croissant is characterized by a deep, rich golden-brown exterior that is crisp and shatters when broken, and an interior that is light, airy, and displays a beautiful honeycomb pattern of open cells. Achieving this balance requires precise temperature control and careful monitoring during the bake.
Preheating the Oven: Precise Temperature Control
Thoroughly preheating your oven is vital for successful croissant baking. The oven should be preheated to a high temperature, typically between 200-220°C (400-425°F), for at least 20-30 minutes before placing the croissants inside. This ensures the oven cavity and any baking surfaces (like a baking stone or steel, if used) are uniformly hot.
Starting with a high initial temperature is important for maximizing oven spring. The sudden heat causes the butter to melt rapidly and generate steam, which quickly lifts and separates the layers before the dough structure sets. This initial high heat is what gives the croissants their impressive volume and helps create a very crisp crust.
Egg Washing: Enhancing Color and Shine
Just before baking, the proofed croissants are typically brushed with an egg wash. A standard egg wash is made by whisking a whole egg with a tablespoon or two of milk or water. Apply the wash gently with a pastry brush, covering the entire surface of the croissant without letting it pool in the crevices between layers, as this can inhibit flaking.
The egg wash serves multiple purposes: it gives the baked croissant a beautiful, deep golden-brown color and a lovely glossy shine. It also helps the crust develop a crisp texture. Some bakers opt for a double egg wash, applying a thin coat before proofing and a second coat just before baking, for an even richer color.
Baking Time and Temperature: Monitoring for Flakiness and Color
Croissants are typically baked for 15-25 minutes, depending on their size and your specific oven. The process often involves starting at the high preheated temperature (e.g., 200-220°C / 400-425°F) for the first 5-10 minutes to achieve maximum oven spring and crust development.
After this initial phase, the oven temperature is often reduced (e.g., to 180-190°C / 350-375°F) for the remainder of the baking time. This lower temperature allows the interior of the croissant to cook through without the exterior becoming too dark or burning. Croissants should be rotated halfway through the baking time for even browning. They are done when they are deeply golden brown all over, including the sides and underneath. An internal temperature of 90-95°C (195-205°F) confirms they are cooked through.
Achieving a Deep Golden Hue: Mastering the Baking Process
The color of a baked croissant is not just about aesthetics; it's a crucial indicator of doneness and flavor development. A pale croissant is almost certainly underbaked, resulting in a doughy, heavy interior where the layers haven't fully separated and set. A truly perfect croissant has a rich, deep golden-brown color across its entire surface.
Don't be afraid of color! This deep hue signifies that the sugars in the dough and butter have caramelized, contributing significantly to the complex flavor profile of a well-made croissant. It also ensures the crust is shatteringly crisp. If your croissants are pale after the recommended baking time, continue baking for a few more minutes, watching them closely, until they reach the desired deep golden shade.
Troubleshooting Common Croissant Challenges
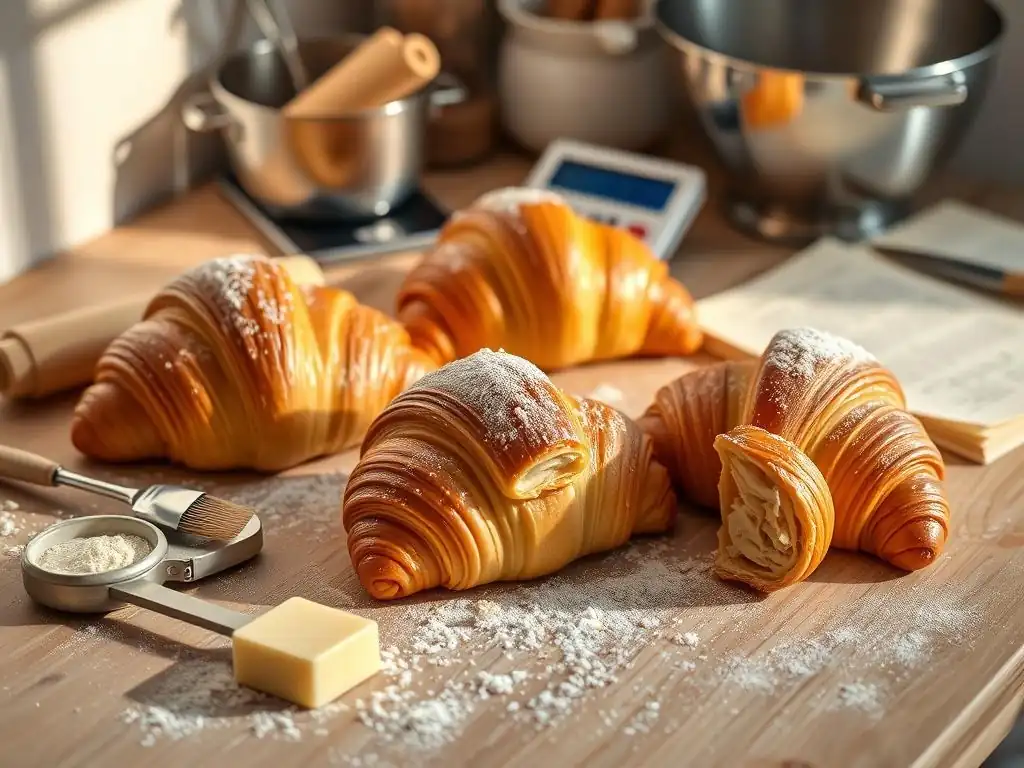
Dough Too Elastic: Addressing Gluten Overdevelopment
One common frustration is dough that snaps back excessively when you try to roll it out during lamination, making it difficult to achieve thin, even layers. This is usually a sign of gluten overdevelopment or insufficient relaxation. It can happen if the initial détrempe was over-kneaded, or if the dough hasn't rested long enough between turns.
To address this, ensure you mix the détrempe only until just combined initially. More importantly, extend the chilling time between turns. Instead of the minimum 30-60 minutes, try resting the dough for 60-90 minutes or even longer, up to 2 hours, especially if your kitchen is warm. This gives the gluten ample time to relax, making the dough more extensible and cooperative during rolling.
Butter Separation: Preventing and Rectifying
Butter leaking out during rolling or proofing is a disheartening problem that destroys the potential for flaky layers. This can occur for several reasons: the butter block was too cold and broke into pieces, the butter was too warm and melted into the dough, the initial lock-in wasn't sealed properly, the dough wasn't chilled enough between turns, or the dough was rolled too aggressively.
Prevention is key: ensure the butter and dough are at similar pliability before lamination. Seal the butter securely during the lock-in. Always chill the dough for the full recommended time between turns (at least 45-60 minutes). Roll gently and evenly, applying consistent pressure. If you notice butter starting to leak during rolling, stop immediately, wrap the dough, and return it to the refrigerator for a longer chill (e.g., 60 minutes) before attempting to roll again more gently.
Uneven Layers: Achieving Uniform Flakiness
If some parts of your baked croissant are beautifully flaky while others are dense or doughy, it points to uneven layering. This is typically a result of inconsistent rolling during the lamination process, an uneven butter block from the start, or variations in folding technique leading to some sections having more layers than others. Butter leakage in certain areas can also lead to localized density.
To improve uniformity, focus on rolling the dough to an even thickness across the entire rectangle at each stage of lamination. Ensure your initial butter block is uniformly thick and shaped. Practice precise folding techniques to keep the layers even. Gentle handling and consistent chilling between turns also help maintain the integrity and even distribution of the delicate layers throughout the dough packet.
Croissants Not Rising: Identifying the Cause and Solution
Croissants that remain small and dense after proofing and baking are usually suffering from insufficient rise. This can be due to inactive yeast (either dead, or the proofing temperature was too cold), insufficient proofing time, overworking the dough which creates tight gluten that restricts expansion, or simply underproofing. Unlike an easy puff pastry recipe which gets all its lift from steam, yeast is essential here.
First, ensure your yeast is active by blooming it in warm liquid if necessary. Crucially, proof the shaped croissants in a consistently warm and humid environment (e.g., 24-27°C / 75-80°F). An oven with the light on, or a dedicated proofing box, works well. Allow sufficient time for proofing – this can take 2-4 hours depending on conditions; they should be visibly puffy and jiggly. Handle the shaped dough gently to avoid deflating the air pockets created by the yeast. Ensure the dough temperature was maintained properly throughout lamination, as prolonged warmth can kill yeast.
Beyond the Basics: Creative Croissant Variations and Applications
Savory Croissant Creations: Ham and Cheese, Almond Pesto, and More
While the classic butter croissant is a masterpiece on its own, the versatile laminated dough serves as an excellent base for savory fillings. Incorporating savory elements transforms the pastry into a delightful snack or light meal. Popular additions include ham and Gruyère cheese, spinach and feta, or a vibrant almond pesto.
These fillings are typically added during the shaping stage. For ham and cheese, place a slice of ham and a sprinkle of grated cheese on the dough triangle before rolling. For spinach and feta, use a cooked and drained mixture. For pesto, a small dollop spread lightly. Alternatively, for larger fillings, you can shape the plain croissant and then make a slit along the side to insert the filling before the final proof and bake.
Sweet Croissant Delights: Chocolate, Almond, and Fruit Fillings
Sweet variations are equally beloved and offer different textures and flavors. The most famous is the pain au chocolat, made by rolling the dough around one or two batons of dark chocolate. Almond croissants are often made by filling plain croissants with frangipane (almond cream), sometimes baked twice for extra crispness.
Fruit fillings, such as cherry or apple, can be added before rolling the dough, ensuring the filling is not too wet. Alternatively, baked croissants can be split and filled with pastry cream, whipped cream, or fresh berries. These variations leverage the flaky base while adding richness, sweetness, or fruity tartness.
Elevating Your Croissants: Incorporating Flavors and Textures
Beyond simple fillings, you can further elevate your homemade croissants by incorporating flavors directly into the dough or adding interesting textures to the exterior. Citrus zests, such as orange or lemon, can be added to the détrempe for a subtle fragrant note. Spices like cardamom or cinnamon can also be included, particularly for sweeter variations.
For exterior texture and flavor, consider sprinkling the shaped croissants with sesame seeds, poppy seeds, or coarse sugar crystals before baking. A simple sugar glaze applied immediately after baking adds sweetness and shine. While more advanced, some bakers experiment with compound butters flavored with herbs or spices for the lamination process itself, adding another dimension to the final taste.
Preserving Freshness: Storing Your Homemade Croissants
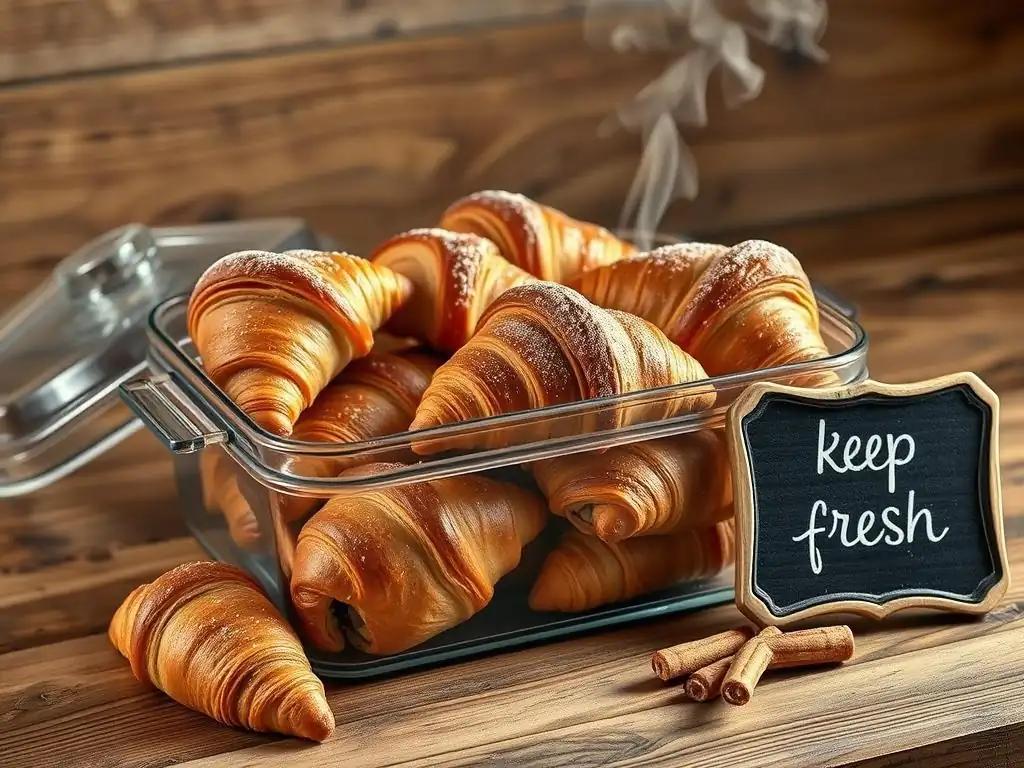
Storing Unbaked Croissants: Refrigeration and Freezing Strategies
One major advantage of making croissants at home is the ability to bake them fresh on demand. Shaped, unbaked croissants can be stored before their final proof. They can be refrigerated for a slow proofing period of 12-24 hours; this extended cold proof can sometimes enhance flavor development.
For longer storage, unbaked croissants freeze beautifully. Place the shaped, unproofed croissants on a baking sheet lined with parchment paper and freeze them until they are solid, typically 2-3 hours. Once frozen, transfer them to an airtight container or a freezer bag, removing as much air as possible. They can be stored in the freezer for up to 1-2 months. To bake from frozen, place the desired number of croissants on a baking sheet, cover loosely, and let them proof overnight in the refrigerator, then finish proofing at room temperature for 1-2 hours until puffy before baking as usual.
Storing Baked Croissants: Maintaining Crispness and Flavor
Baked croissants are undeniably best enjoyed fresh, ideally within a few hours of coming out of the oven when their crust is at its crispiest and the interior is softest. However, if you need to store them for a short period, proper technique can help maintain some of their quality.
For storage up to 1-2 days at room temperature, place the cooled croissants in a paper bag. The paper allows some air circulation, which helps prevent the crust from becoming completely soggy. Avoid airtight containers or plastic bags, as they trap moisture and quickly soften the delicate crust. To refresh day-old croissants, place them on a baking sheet and warm them in a preheated oven at around 170°C (325°F) for 5-8 minutes until the crust crisps up again.
Conclusion: Embarking on Your Croissant Journey!
Relishing the Rewards of Your Labor: Sharing Your Masterpieces
You've navigated the intricate steps, from preparing the détrempe and beurre sec to mastering the art of lamination, precise shaping, patient proofing, and careful baking. The result of this labor is a batch of warm, golden, flaky croissants – a truly impressive achievement in home baking. Taking that first bite into a croissant you made yourself, feeling the crisp exterior give way to the airy interior, is incredibly satisfying.
Sharing these homemade croissants with friends and family is part of the joy of baking. The appreciation for the effort and skill involved in creating such a classic pastry from scratch makes the experience even more rewarding. Each flaky layer is a testament to your patience and dedication to the craft.
Further Exploration: Advanced Viennoiserie Techniques
Mastering the croissant is a significant milestone and opens the door to a wider world of viennoiserie. The techniques you've learned – particularly dough handling, lamination, and proofing – are foundational for many other enriched, laminated pastries. You are now equipped to tackle recipes like pain au raisin (swirled with pastry cream and raisins), kouign amann (a caramelized, buttery pastry from Brittany), or even more complex Danish pastries.
Continue practicing and refining your skills. Experiment with different flours, butter types, and subtle variations in technique to see how they affect the final outcome. The journey into advanced viennoiserie is rich and full of delicious possibilities, building upon the knowledge gained from conquering the classic croissant.
Frequently Asked Questions
What exactly is puff pastry, and why is it considered a bit challenging to make?
Puff pastry is a light, flaky pastry made from layered dough and butter or other solid fat. It's challenging because it requires precise layering and temperature control to achieve the signature "puff".
What are some common mistakes people make when attempting an easy puff pastry recipe, and how can I avoid them?
Common mistakes include using warm butter, overworking the dough, and insufficient chilling. Avoid these by keeping ingredients cold, handling the dough gently, and adhering to chilling times.
Can I substitute any ingredients in an easy puff pastry recipe to make it healthier or more accessible?
While substitutions are possible, they can affect the final texture. Using a lower-fat butter substitute or whole wheat flour may alter the flakiness and rise of the pastry.
How long does homemade puff pastry typically last in the refrigerator or freezer?
Homemade puff pastry can be stored in the refrigerator for up to 2-3 days, tightly wrapped. For longer storage, freeze it for up to 2-3 months.
What are some simple and easy puff pastry recipe ideas I can try once I've mastered the basic dough?
Once mastered, you can create endless possibilities! Try making fruit tarts, savory turnovers, or mini quiches for a delicious treat.
Final Reflection: The Enduring Magic of Puff Pastry
The seemingly simple act of creating puff pastry holds a power far beyond its flaky, buttery layers. It's a testament to the transformative potential of patience and precision, a skill that connects us to culinary traditions spanning centuries, and a delicious journey accessible to everyone willing to try. In a world increasingly focused on instant gratification, mastering puff pastry offers a rewarding counterpoint – a reminder that the most exquisite results often require time and dedication.
The enduring appeal of puff pastry lies not just in its exquisite taste, but in its symbolic representation of transformation. From a humble block of dough, something truly magical emerges – a testament to human ingenuity and the ability to create something beautiful from simple ingredients. This process mirrors life's own journey, where dedication and perseverance can lead to unexpected and delightful outcomes. The best things in life are worth waiting for,
a sentiment perfectly encapsulated in the slow, deliberate creation of this culinary masterpiece.
Now, I invite you to consider your own "puff pastry moments" – those instances where patience and persistence yielded extraordinary results. Perhaps it's a project you completed, a skill you mastered, or a relationship you nurtured. Remember the satisfaction of that final product, that feeling of accomplishment. Embrace the challenge of creating your own puff pastry masterpiece, not just in the kitchen, but in all aspects of your life. Let the journey, with all its folds and layers, be as rewarding as the final, golden-brown delight.
Unleash Your Inner Pastry Chef!
Thanks for joining us on this delicious journey into the world of puff pastry! We hope you've gained the confidence to tackle this seemingly intimidating treat. Now it's time to put your new skills to the test.
- Bake your masterpiece! Try the recipe from the article – we’re confident you'll be amazed by the results. Don't be afraid to experiment with fillings and flavors!
- Share your creation! Post a picture of your puff pastry on social media and tag #BakeWithEase – we'd love to see your delicious work.
- Explore other BakeWithEase recipes: Discover even more exciting baking adventures on our website – from simple cookies to elaborate cakes, we've got something for everyone.
So, what unexpected flavor combination will you try in your next puff pastry adventure?