
DIY Pizza Stone Guide: Adjusting Oven Heat and Duration for Crispiest Crust

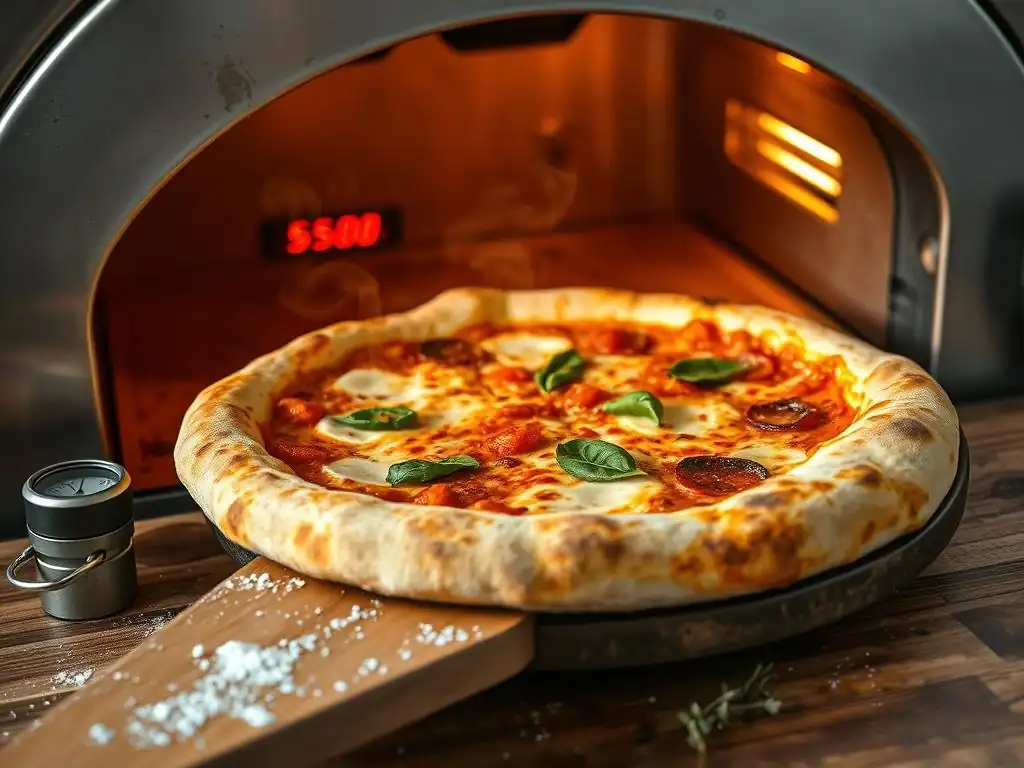
Welcome to BakeWithEase, your trusted companion in the delicious world of baking! Ever wondered how to achieve that perfectly crispy, restaurant-quality crust at home? This guide delves into crispy pizza stone baking tips, revealing the secrets to adjusting your oven's heat and duration for unparalleled results. Get ready to elevate your homemade pizza game – and discover why a simple stone can make all the difference. Dive in and prepare to be amazed!
- Understanding Your Pizza Stone for Optimal Crispy Crust
- Oven Temperature Control for Crispy Pizza on a Stone
- Mastering Baking Time for a Crispy Pizza Stone Crust
- DIY Pizza Stone Baking Techniques for Enhanced Crispiness
- Crispy Pizza Stone Baking Tips & Tricks
- Adjusting for Different Pizza Styles on a Pizza Stone
- Maintaining Your Pizza Stone for Long-Lasting Crispy Bakes
- Advanced Crispy Pizza Stone Baking Techniques
- Troubleshooting Common Pizza Stone Baking Problems
-
Frequently Asked Questions
- What is the best way to prepare my pizza stone before baking for a crispy crust?
- How does oven temperature affect the crispness of my pizza crust when using a pizza stone?
- How long should I bake my pizza on a pizza stone to achieve a crispy crust?
- What kind of dough works best for achieving a crispy crust on a pizza stone?
- Besides temperature and time, what other factors contribute to a crispy pizza crust when using a stone?
- Final Reflection: The Quest for the Perfect Crust
- Unleash Your Inner Pizzaiolo: Craft the Perfect Crust!
Understanding Your Pizza Stone for Optimal Crispy Crust
Types of Pizza Stones: Material Matters for Crispiness
Pizza stones come in various materials, each offering distinct properties that affect heat transfer and ultimately, the crispiness of your pizza crust. Cordierite is a popular choice for many home bakers. Known for its thermal shock resistance, it's less likely to crack when exposed to rapid temperature changes compared to traditional ceramic stones.
Cordierite also absorbs moisture from the dough, which is key to preventing a soggy bottom and encouraging a crispier texture. For instance, a cordierite stone, typically found in thicknesses ranging from 0.5 to 1 inch, can withstand temperatures up to 1000°F (538°C) or even higher, making it ideal for high-heat pizza baking.
Another common material is ceramic or stoneware. These stones are often more affordable but can be more prone to cracking if not handled carefully, especially during preheating or cooling. While they also absorb moisture, their thermal shock resistance is lower than cordierite. Lava stones are a newer option, lauded for their ability to retain heat exceptionally well and distribute it evenly.
Steel, while technically a baking steel and not a stone, is often discussed alongside stones due to its superior heat conductivity. Steel transfers heat much faster and more intensely than stone, which can result in an even quicker and crispier crust, often in just 5-8 minutes at high temperatures, compared to 8-15 minutes on a stone. Understanding these material differences is fundamental to achieving the best crispy pizza stone baking results.
Seasoning Your Pizza Stone: Preparing for the Perfect Bake
Unlike cast iron, most ceramic or cordierite pizza stones do not require traditional seasoning with oil in the same way. In fact, applying oil to a new, porous stone can lead to smoking and unpleasant odors in your oven. The "seasoning" process for a pizza stone primarily happens naturally over time as spills, drips, and residual flour bake onto the surface. This creates a non-stick layer and helps the stone develop character, often turning darker with use.
However, some manufacturers recommend a very light initial seasoning or simply advocate for several high-temperature bakes to break in the stone. For a new stone, a simple approach is to wipe it clean with a dry cloth, place it in a cool oven, and then preheat the oven to a high temperature, perhaps 450°F to 500°F (230°C to 260°C), for at least an hour.
This initial bake helps to cure the stone and remove any manufacturing residues. Subsequent bakes, where flour or cornmeal might fall onto the stone during pizza transfer, will further contribute to its natural non-stick surface, enhancing your crispy pizza stone baking tips repertoire.
The Importance of Preheating Your Pizza Stone
Properly preheating your pizza stone is arguably the most critical step in achieving a truly crispy crust. A cold or insufficiently preheated stone acts merely as a shelf. A hot stone, however, immediately transfers intense heat to the base of the pizza dough the moment it's placed on the surface. This sudden burst of heat causes rapid oven spring and quickly sets the crust, creating that desirable crispy texture on the bottom before the top of the pizza burns.
To effectively preheat your stone, place it in a cold oven before turning it on. This allows the stone to heat up gradually with the oven, preventing thermal shock that could cause it to crack. Once the oven reaches your desired high temperature (ideally 450°F-550°F / 230°C-290°C for most home ovens), you must continue to preheat the stone for an additional 30 to 60 minutes.
This extended time ensures that the heat penetrates deep into the stone, creating a reservoir of thermal energy ready to bake your pizza's base rapidly and evenly. Skipping this step is a common mistake that leads to a disappointing, less-than-crispy crust, undermining your crispy pizza stone baking efforts.
Oven Temperature Control for Crispy Pizza on a Stone
Finding the Sweet Spot: Ideal Oven Temperature for Pizza Stone Baking
Determining the ideal oven temperature is key to mastering crispy pizza stone baking. While professional pizza ovens reach temperatures exceeding 800°F (425°C), most home ovens max out between 500°F and 550°F (260°C and 290°C). For achieving a crispy crust on a pizza stone in a standard home oven, the sweet spot is typically the highest temperature your oven can safely reach and maintain, usually 500°F or 550°F. This high heat mimics the intense environment of a professional pizza oven, allowing the crust to cook rapidly and develop that desirable crisp exterior while the toppings cook through.
Baking at these high temperatures on a preheated stone ensures that heat is transferred quickly to the base of the dough, promoting rapid expansion and crisping. For instance, a pizza baked at 550°F (290°C) on a properly preheated stone might take only 6-10 minutes to cook, compared to 12-18 minutes at a lower temperature like 400°F (200°C). The rapid cooking time at high heat minimizes the chance of the crust drying out excessively while maximizing the crisping effect, making high heat one of the most effective crispy pizza stone baking tips.
High Heat vs. Low Heat: Which Works Best for a Crispy Crust?
When aiming for a crispy crust, high heat is almost always superior to low heat when using a pizza stone. Baking at a high temperature, such as 500°F (260°C) or above, leverages the thermal mass of the preheated stone to deliver an intense burst of heat to the dough's underside. This rapid heat transfer is what causes the crust to puff up quickly and develop a crisp, often bubbly, texture on the bottom and edges in a short amount of time.
Conversely, baking at a lower temperature, say 350°F (175°C) or 400°F (200°C), will result in a slower bake. While this might be suitable for certain baked goods, it's detrimental to achieving a truly crispy pizza crust. The longer exposure to moderate heat can dry out the dough before it has a chance to develop significant crispness, often resulting in a tougher or chewier texture rather than the desired light and airy crispiness. For optimal crispy pizza stone baking, push your oven temperature as high as it can go, ensuring your stone is thoroughly preheated.
Calibrating Your Oven Thermostat for Accurate Baking Temperatures
Relying solely on your oven's built-in thermostat can sometimes lead to inconsistent results, impacting your quest for the perfect crispy crust. Many oven thermostats can be off by as much as 25-50°F (15-30°C) or even more. If your oven is running cooler than it indicates, you won't be achieving the high temperatures necessary for rapid, crispy baking on your stone. Conversely, if it's running too hot, your pizza might burn before the crust fully crisps or the toppings cook through.
To ensure accuracy, it's highly recommended to use an independent oven thermometer placed near your pizza stone. Monitor its reading during the preheating phase. If the thermometer shows a significant difference from your oven's setting, you'll know to adjust accordingly for future bakes. For example, if your oven is set to 500°F (260°C) but the thermometer only reads 475°F (245°C) after an hour, you might need to set your oven slightly higher (if possible) or extend your baking time slightly to compensate. Knowing the true temperature inside your oven is a key step in consistent crispy pizza stone baking.
Mastering Baking Time for a Crispy Pizza Stone Crust
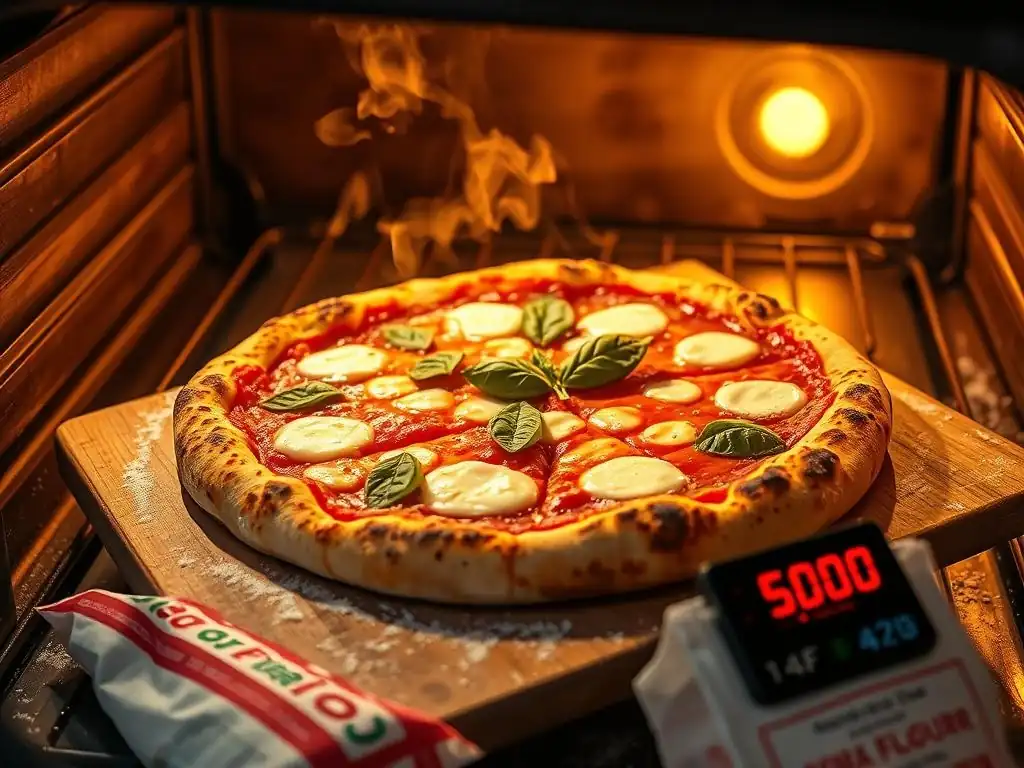
Determining the Perfect Baking Time: Visual Cues to Look For
Pinpointing the exact baking time for a crispy pizza on a stone isn't a one-size-fits-all answer, as it depends on your oven's true temperature, stone material, pizza thickness, and desired level of crispiness. However, visual cues are your best guide. For a typical Neapolitan-style or thin-crust pizza baked at high heat (500°F+ / 260°C+), baking time is often between 6 and 12 minutes. The crust should be significantly puffed up, with charred or dark brown spots (known as leoparding) appearing on the edges and bottom.
Look for the cheese to be fully melted and bubbly, and for any toppings to appear cooked. The edges of the crust should be a deep golden brown, and the bottom, visible by lifting an edge with a spatula, should have those desirable brown and black spots indicating crispness. Don't be afraid to lift the pizza slightly with a peel or spatula during baking to check the bottom color. If the top is cooking faster than the bottom, you might need to adjust stone placement or oven settings for future crispy pizza stone baking sessions.
Avoiding a Soggy Crust: Timing Tips for Pizza Stone Success
A soggy crust is a common frustration, but proper timing, coupled with other techniques, can prevent it. The primary culprit for a soggy bottom is often insufficient heat transfer to the base of the pizza dough. This usually stems from not preheating the pizza stone long enough or baking at too low a temperature. As mentioned, a preheated stone at high heat rapidly sets the base.
Beyond temperature and preheating, avoid overloading your pizza with wet toppings or excessive sauce. Too much moisture on top can steam the dough from above, while insufficient heat transfer from below fails to crisp it up effectively. Also, ensure your dough isn't too thick for the temperature you're using.
A very thick dough at a lower temperature will take too long to cook through, increasing the risk of a soggy center before the outside is done. Aim for a balance where the high heat and short baking time cook the crust and toppings simultaneously for optimal crispy pizza stone baking results.
Troubleshooting: Common Baking Time Issues and Solutions
Encountering issues with baking time is part of the learning curve with crispy pizza stone baking. One common problem is a top that's done or burned while the bottom crust is still pale and potentially soggy. This often indicates the stone wasn't hot enough or the oven heat isn't distributing properly. Solution: Increase preheating time for the stone (up to 90 minutes isn't unreasonable for some ovens/stones) and ensure you're baking at the highest possible temperature. You might also try moving the stone to a lower rack position to get closer to the heating element.
Another issue is a crust that's crispy on the edges but still soft or doughy in the center. This could be due to uneven heat, too much moisture in the center (from sauce/toppings), or placing the pizza on a stone that wasn't uniformly hot. Solution: Reduce the amount of sauce/toppings in the center.
Ensure the stone is fully preheated across its entire surface. If your oven has hot spots, try rotating the pizza halfway through baking. If using a very wet dough, consider a slightly longer bake time or a slightly lower hydration dough next time for better crispy pizza stone baking consistency.
DIY Pizza Stone Baking Techniques for Enhanced Crispiness
The Cold Start Method: Baking Directly on a Cold Pizza Stone
While preheating your stone is typically the gold standard for maximum crispiness, some bakers experiment with the "cold start" method, particularly useful for thicker crusts or when trying to prevent scorching. In this technique, the pizza is assembled and placed directly onto a cold pizza stone (or one that hasn't been preheated for the full duration), and then the stone and pizza are placed together into a preheated oven.
The theory is that as the stone gradually heats up with the oven, it provides a gentler, more even heat transfer to the dough over a longer period. This can be beneficial for preventing the very bottom from burning before the rest of the pizza cooks through, which can sometimes happen with extremely high heat and thin crusts. However, the trade-off is often a less intensely crispy bottom crust compared to the traditional hot stone method.
Baking time will also be significantly longer, potentially 15-25 minutes or more depending on the pizza and oven temperature. While not the go-to for extreme crispiness, it's a technique worth trying for certain styles or as a troubleshooting step in your crispy pizza stone baking journey.
Using a Pizza Peel for Easy Transfer and Even Baking
A pizza peel is an indispensable tool for crispy pizza stone baking. It allows you to easily transfer your assembled pizza from your countertop directly onto the hot stone in the oven. Attempting to slide a raw pizza onto a hot stone by hand or with a flimsy spatula is messy and dangerous. A peel, typically made of wood or metal, provides a stable surface for building your pizza and then a smooth slide onto the stone.
To use a peel effectively for crispy pizza stone baking, generously dust it with flour, cornmeal, or semolina. Semolina is often preferred as its rounder grains act like tiny ball bearings, allowing the pizza to slide off more easily. Ensure your pizza is assembled quickly on the peel to prevent the dough from sticking.
Once ready, open the oven, position the peel over the hot stone, and with a swift, confident forward and backward jiggling motion, slide the pizza onto the stone. This smooth transfer minimizes distortion and ensures the pizza lands flat for even baking and optimal crispy crust development.
Pizza Stone Placement: Optimizing Heat Distribution in Your Oven
Where you place your pizza stone in the oven significantly impacts heat distribution and, consequently, your pizza's crispiness. For most home ovens, the strongest heat source is the bottom element (especially during the initial ramp-up and if using the bake setting). Placing the pizza stone on the lowest or second-lowest rack position is often recommended for achieving a super crispy bottom crust. This positioning allows the stone to absorb maximum radiant heat from the bottom element, creating that intense heat transfer needed for rapid crisping.
However, consider your oven's specific heating patterns. Some ovens have a broiler element at the top, which can be used effectively at the very end of the bake to quickly finish the top and get some nice charring on the crust edges, but you need to be very careful not to burn it.
If your oven tends to burn the top before the bottom is done even on a lower rack, you might try the middle rack. Experimentation is key, but starting with the stone on a lower rack is a solid crispy pizza stone baking tip for maximizing bottom crispiness.
Crispy Pizza Stone Baking Tips & Tricks
Dough Consistency: How Hydration Affects Crispiness
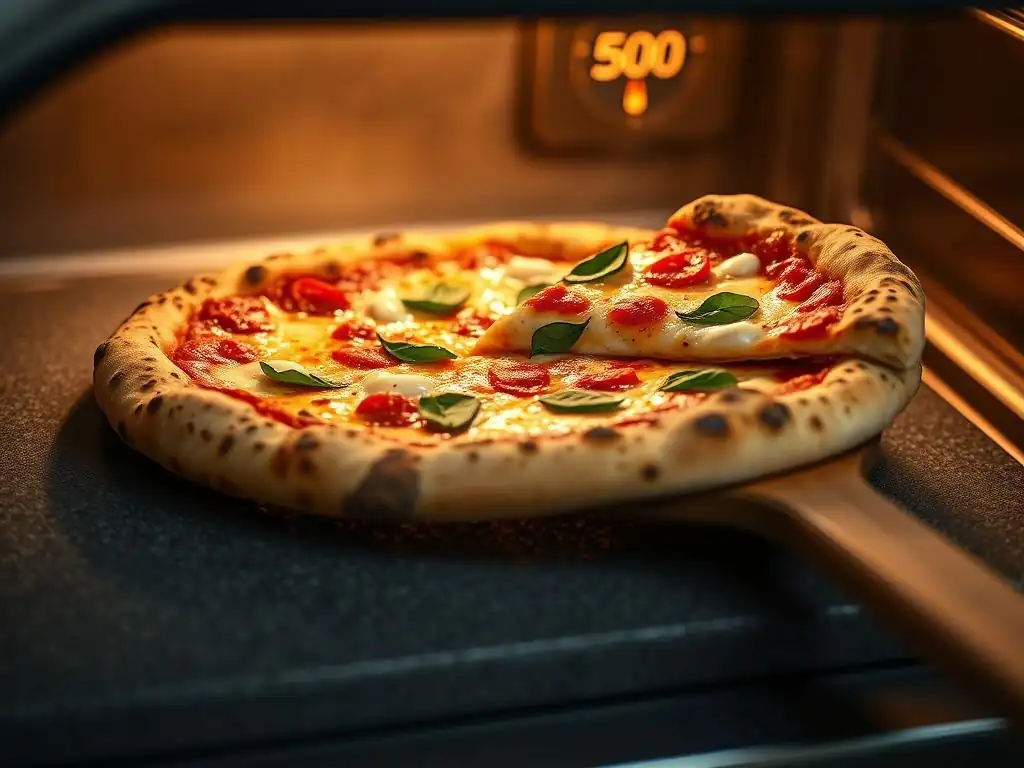
The hydration level of your pizza dough plays a significant role in the final texture and crispiness of the crust when baking on a stone. Hydration refers to the ratio of water to flour by weight. A standard pizza dough might have a hydration level of around 60-65%. This produces a dough that is relatively easy to handle and results in a crust with a good balance of chewiness and crispiness, especially at the edges.
Higher hydration doughs, with water content of 70% or more, are stickier and harder to work with but can yield a lighter, airier crust with larger bubbles and a more pronounced crisp exterior when baked at high temperatures on a hot stone. The extra water turns to steam rapidly in the hot oven, helping the dough to puff up dramatically and create that desirable open crumb structure that contributes to crispiness. For serious crispy pizza stone baking enthusiasts, experimenting with hydration levels and handling techniques for wetter doughs is a rewarding path.
Ingredient Placement: Preventing a Soggy Center
Even with a perfectly preheated stone and optimal oven temperature, a soggy center can ruin your crispy pizza stone baking efforts. This is often caused by excess moisture from toppings or sauce pooling in the middle of the pizza. To combat this, be mindful of how you apply your sauce and toppings. Apply a thin, even layer of sauce, avoiding excessive amounts, especially in the very center. Leaving a small border of plain crust around the edge also helps define the crust and prevents toppings from sliding off.
For toppings, ensure wet ingredients like fresh mozzarella (which releases a lot of water when melted) are used judiciously or drained slightly. Spreading toppings evenly across the pizza, rather than piling them high in the center, helps distribute moisture and allows heat to penetrate uniformly. Cooking wetter toppings like mushrooms or onions slightly beforehand can also reduce the amount of moisture they release onto the pizza during baking, contributing to a crispier outcome.
Experimenting with Different Flours for a Better Crust
The type of flour you use is fundamental to the structure and crispiness of your pizza crust. All-purpose flour is a common starting point, but for enhanced crispiness and better texture, consider using bread flour or Italian "Tipo 00" flour. Bread flour has a higher protein content (typically 12-14%) compared to all-purpose (10-12%), which helps develop more gluten. More gluten provides structure, allowing the dough to trap more air and achieve a better rise and a chewier yet crispy crust when baked on a stone.
Italian Tipo 00 flour is finely milled and often has a protein content specifically suited for high-temperature baking, producing a light, airy crust with characteristic charring (leoparding) when baked quickly on a hot stone. While sometimes lower in protein than bread flour, its quality and milling process are optimized for pizza. Experimenting with blends of these flours or adding a small percentage of whole wheat or rye flour can also introduce new flavors and textures to your crispy pizza stone baking repertoire.
Adjusting for Different Pizza Styles on a Pizza Stone
Thin Crust Pizza: Achieving Maximum Crispiness
Baking a thin crust pizza on a stone is one of the best ways to achieve maximum crispiness. The key is high heat and rapid cooking. Place your pizza stone on a lower rack in your oven and preheat it for at least 45-60 minutes at your oven's highest temperature, ideally 500-550°F (260-290°C). The thin dough requires intense, direct heat from the stone to crisp up quickly before the toppings overcook.
Roll or stretch your dough very thin, aiming for a thickness of perhaps 1/8 inch or less. Be careful not to overload a thin crust with too many toppings, as this can weigh it down and prevent it from crisping properly. Baking time will be very short, likely between 5 and 10 minutes.
Monitor the pizza closely; the edges should brown and puff quickly, and the bottom should develop significant charring. A perfectly executed thin crust bake on a stone results in a pizza that is delightfully crisp from edge to center, a prime example of effective crispy pizza stone baking.
Deep Dish Pizza: Ensuring a Cooked Through Crust
Baking a deep dish pizza on a stone presents a different challenge: ensuring the thick crust cooks all the way through and gets crispy on the bottom without burning the top or leaving the center doughy. For deep dish, you typically bake the pizza in a well-oiled pan (like a cast iron pan or a specific deep-dish pan), which is then placed on the preheated stone.
The stone still serves to provide consistent, high heat to the bottom of the pan, promoting a crispy base, but the overall baking approach is slower and at a slightly lower temperature than thin crust.
Preheat your oven and stone to around 400-425°F (200-220°C). The pan insulates the crust somewhat, allowing for a longer bake time needed for the thick dough and generous fillings. Baking time can range from 25 to 40 minutes or even longer, depending on the pan size and amount of cheese/sauce.
The stone helps ensure the bottom of the pan gets hot enough to crisp the base of the thick crust, preventing a soggy result. Monitor the top to prevent burning; you might need to loosely tent the pizza with foil halfway through if the top is browning too quickly. This method adapts crispy pizza stone baking principles to a heartier style.
Neapolitan Style Pizza: Mimicking Wood-Fired Oven Results
Achieving a true Neapolitan-style pizza at home requires mimicking the intense, short bake of a wood-fired oven, where temperatures can reach 800-1000°F (425-538°C). While home ovens can't reach those extremes, a pizza stone combined with the highest possible oven temperature (500-550°F / 260-290°C) is the best approximation. A key technique is using the oven's broiler element in conjunction with the stone.
Preheat your stone on the top rack (or second to top) for at least 60 minutes at the highest bake setting. Once the stone is scorching hot, switch the oven to the broiler setting for 5-10 minutes just before loading the pizza to superheat the stone's surface and the top of the oven cavity. Slide your Neapolitan pizza (made with high-hydration dough and minimal toppings) onto the stone. The intense heat from the stone and the broiler will cook the pizza incredibly fast, often in 5-8 minutes.
You'll see the crust puff dramatically and develop characteristic char spots. Watch it constantly as it can burn in seconds. This high-heat, short-time approach is the essence of crispy pizza stone baking for Neapolitan results.
Maintaining Your Pizza Stone for Long-Lasting Crispy Bakes
Cleaning Your Pizza Stone: Removing Residue Without Damage
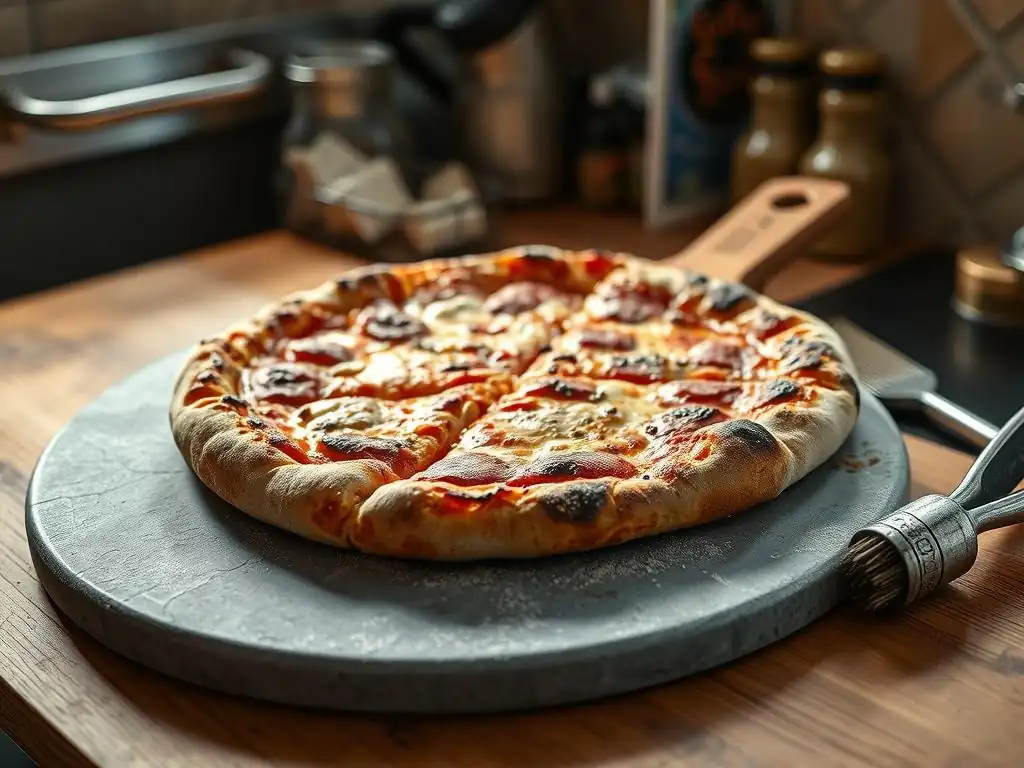
Proper cleaning is essential for maintaining your pizza stone and ensuring it continues to produce crispy crusts for years. The most important rule is never use soap or harsh detergents. Pizza stones are porous and will absorb soap, which can then leach into your food and leave an unpleasant taste. Also, avoid using metal scrapers or abrasive pads that can scratch or damage the stone's surface.
After baking, let the stone cool completely in the oven. Attempting to clean a hot stone with water can cause thermal shock and cracking. Once cool, the best way to clean it is by simply scraping off any baked-on residue with a plastic scraper or a stiff nylon brush.
For stubborn spots, you can use a bit of hot water and a brush, but ensure the stone is completely dry before its next use. Any lingering dark spots or discoloration are normal "seasoning" and contribute to its non-stick properties – they don't need to be scrubbed off. Gentle, dry scraping is a key crispy pizza stone baking maintenance tip.
Storing Your Pizza Stone: Protecting it from Cracks and Breaks
Pizza stones, especially those made of ceramic or stoneware, can be fragile and prone to cracking if not stored properly. Thermal shock is a major culprit, but physical impact can also cause damage. The best place to store your pizza stone is often inside your oven. Leaving it in the oven provides a stable, protected environment and also means it's ready to be preheated whenever you decide to bake.
If you prefer to store it outside the oven, ensure it's placed on a flat, stable surface where it won't be bumped or have heavy objects placed on top of it. Avoid storing it vertically unless securely propped, as it could tip over and break. If storing with other bakeware, place it on top to prevent pressure from heavier items. Proper storage protects your investment and ensures your stone remains intact for countless crispy pizza stone baking sessions.
Extending the Life of Your Pizza Stone: Best Practices
Following a few best practices can significantly extend the lifespan of your pizza stone. Always place the stone in a cold oven before turning it on, allowing it to heat up gradually with the oven. Similarly, let it cool down naturally inside the oven after baking; do not remove it and expose it to a cold surface or run cold water over it while it's hot. This gradual heating and cooling prevents thermal shock.
Avoid dropping the stone or exposing it to sudden temperature changes. Never use soap to clean it. Scrape off excess residue between uses. If your stone is double-sided, consider flipping it occasionally for more even wear. While some stones may develop hairline cracks over time, significant cracks often result from improper handling or thermal shock. Treating your stone with care ensures it remains a reliable tool for achieving perfectly crispy pizza stone baking results for years.
Advanced Crispy Pizza Stone Baking Techniques
Using a Baking Steel vs. a Pizza Stone: A Comparison
While pizza stones are excellent for achieving a crispy crust, baking steels offer an even more intense heat transfer, which some consider superior for mimicking professional ovens. Steel is significantly more thermally conductive and has a higher thermal mass than stone. This means it absorbs and retains more heat, and transfers that heat to the pizza dough much faster and more efficiently.
When comparing baking steel vs. pizza stone for crispy pizza stone baking, steel typically results in a faster bake time (often just 5-8 minutes at high heat) and can produce a more aggressively charred and crispy bottom crust. Stones, being less conductive, provide a slightly gentler heat transfer over a longer period (8-15 minutes), which some prefer for a less intense crisp or for thicker crusts. Steel is also virtually indestructible and immune to thermal shock. The choice depends on your desired results and budget; steels are generally more expensive but offer extreme crisping potential.
Adding Steam to Your Oven for a Crusty Exterior
Introducing steam into your oven during the initial phase of baking can significantly improve the crust's texture, promoting a crispier exterior and better oven spring. Steam keeps the surface of the dough moist for the first few minutes of baking, allowing it to expand more fully before the crust hardens. This results in a lighter, airier interior and a thinner, crispier outer shell.
A simple way to create steam is to place a cast iron pan or a metal tray on the rack below your pizza stone while preheating. Just before you slide the pizza onto the stone, carefully pour about 1/2 to 1 cup of hot water into the preheated pan below. Close the oven door quickly to trap the steam.
Be cautious when doing this, as hot steam can cause burns. The steam is most effective for the first 5-10 minutes of baking. This technique, combined with crispy pizza stone baking on a hot stone, can elevate your crust game considerably.
Experimenting with Different Toppings and Their Impact on Crispiness
The choice and application of toppings have a direct impact on how crispy your pizza crust turns out when using a stone. Overloading the pizza, especially with wet toppings, is a primary cause of soggy crusts. Toppings release moisture as they cook, and excessive moisture can steam the dough instead of allowing it to crisp.
Consider the moisture content of your toppings. Fresh mozzarella contains more water than aged mozzarella. Raw vegetables like mushrooms or onions will release more water than pre-sautéed ones. Using lighter toppings, spreading them evenly, and avoiding thick layers of sauce or cheese in the center helps heat penetrate the dough more effectively. For instance, a simple Margherita pizza with minimal sauce and cheese is much easier to get perfectly crispy on a stone than a heavily loaded pizza with multiple layers of wet ingredients. Being strategic with toppings is a key crispy pizza stone baking tip.
Troubleshooting Common Pizza Stone Baking Problems
Pizza Sticking to the Stone: Prevention and Solutions
Pizza sticking to the stone is a frustrating issue that disrupts the crisping process and makes serving difficult. The most common cause is insufficient use of a release agent on the pizza peel or stretching the dough too thin in spots. To prevent sticking, generously dust your pizza peel with flour, cornmeal, or semolina before placing the dough on it. Ensure the dough moves freely on the peel before you attempt to slide it onto the hot stone. If it feels sticky, lift edges and add more dust underneath.
If the pizza does stick while on the stone, do not try to force it off immediately. Let it bake for a few more minutes; as the crust cooks and sets, it often releases naturally.
If it's still stuck after baking, use a thin metal spatula or peel to gently loosen the edges and work your way under the pizza. For future bakes, increase the amount of dusting flour on the peel, ensure your stone is fully preheated to a high temperature, and perhaps consider using a slightly less hydrated dough if stickiness is a persistent issue with your crispy pizza stone baking.
Unevenly Cooked Pizza: Identifying and Fixing the Problem
Unevenly cooked pizza, where one side is burned and the other is pale, or the center is raw while the edges are done, often points to issues with heat distribution in your oven or on the stone. Ovens often have hot spots. Placing the stone directly in a hot spot can lead to uneven heating of the stone itself. Additionally, the oven's heating elements (bottom or top broiler) can cause uneven radiant heat.
To fix this, first, ensure your stone is placed in a location that receives relatively even heat – often the middle or slightly lower rack. Preheating the stone for a full 60 minutes or more helps distribute heat evenly throughout the stone's mass. During baking, if you notice one side cooking faster, rotate the pizza halfway through the baking time using your peel. If your oven has a significant hot spot, you might need to slightly adjust the stone's position or rotate the pizza more frequently. Consistent crispy pizza stone baking requires understanding your oven's quirks.
Pizza Stone Cracking: Understanding the Causes and Prevention
A cracked pizza stone is usually the result of thermal shock or physical damage. Thermal shock occurs when the stone experiences a rapid change in temperature, such as placing a cold stone into a hot oven, removing a hot stone and placing it on a cold counter, or adding cold water to a hot stone. These sudden temperature shifts cause the material to expand or contract too quickly, leading to stress and eventual cracking.
To prevent cracking, always place your stone in a cold oven before preheating and let it cool down naturally inside the oven after baking. Avoid washing a hot stone. Handle the stone carefully when moving it; dropping it or hitting it against a hard surface can also cause breaks. While some minor hairline cracks can form over time and don't necessarily render the stone unusable, following proper heating, cooling, and handling procedures is crucial for preventing major cracks and ensuring the longevity of your tool for crispy pizza stone baking.
Frequently Asked Questions
What is the best way to prepare my pizza stone before baking for a crispy crust?
Preheat your pizza stone in the oven at a high temperature (usually 500-550°F) for at least 30-60 minutes. This ensures the stone is thoroughly heated and ready to deliver a crispy pizza base. You can also lightly dust it with flour or cornmeal.
How does oven temperature affect the crispness of my pizza crust when using a pizza stone?
Higher oven temperatures are crucial for achieving a crispy crust on a pizza stone. The intense heat quickly cooks the dough, creating a crisp exterior while maintaining a soft interior.
How long should I bake my pizza on a pizza stone to achieve a crispy crust?
Baking time depends on your oven and desired crispness, but generally, aim for 8-12 minutes. Keep a close eye on the pizza and remove it when the crust is golden brown and crispy.
What kind of dough works best for achieving a crispy crust on a pizza stone?
A dough with a lower hydration level (less water) tends to yield a crispier crust. Also, allowing the dough to ferment properly will help develop flavor and texture.
Besides temperature and time, what other factors contribute to a crispy pizza crust when using a stone?
Using high-quality ingredients, avoiding overcrowding the pizza with toppings, and ensuring the dough is properly stretched contribute to a crispier and more evenly cooked crust on your pizza stone.
Final Reflection: The Quest for the Perfect Crust
The pursuit of the crispiest pizza crust is more than just a culinary quest; it's a testament to the enduring power of simple pleasures perfected. From humble beginnings in home kitchens to the bustling atmosphere of pizzerias, the desire for that satisfying crunch remains a universal constant. This guide has explored the crucial role of oven temperature and baking time when using a pizza stone, highlighting the delicate balance required to achieve that coveted crispness without burning the toppings.
The journey to mastering pizza stone baking has been a personal one, filled with experimentation and the occasional (deliciously charred) mishap. The satisfaction of finally achieving that perfect, blistered crust is a reward in itself, a tangible representation of patience and precision. The best things in life are worth waiting for,
and this certainly applies to the art of pizza making. The impact of this simple act extends beyond the individual; sharing a perfectly crafted pizza fosters connection and creates lasting memories.
Now, it's your turn. Don't be afraid to experiment with different temperatures and timings, to tweak the techniques outlined here to suit your own oven and preferences. Embrace the journey, learn from your mistakes (even the slightly burnt ones! ), and savor the delicious rewards of your efforts. The perfect pizza crust awaits – and the journey to finding it is just as rewarding as the destination.
Unleash Your Inner Pizzaiolo: Craft the Perfect Crust!
Thanks for joining us on this pizza-making adventure! You've now got the knowledge to conquer even the trickiest oven temperatures and baking times. Ready to transform your pizza game?
- Bake your dream pizza: Grab your pizza stone (and your favorite toppings! ), and put your newfound oven-temperature mastery to the test. This is your chance to create the crispiest, most flavorful pizza you've ever tasted!
- Share your pizza triumph: Snap a picture of your masterpiece and share it on social media using #BakeWithEasePizza – let's inspire others!
- Experiment with different flours and toppings: Now that you're a pizza stone pro, push your boundaries! Try different flour types or explore exciting new topping combinations.
What unexpected flavor combination will you try next to elevate your homemade pizza?