
Your Guide to Basic Buttercream Piping Tips and How to Use Them

Welcome to BakeWithEase!
Ready to transform your baked creations from simple to stunning? Dive into the world of easy buttercream piping techniques for beginners and unlock a whole new level of artistry. Even if you've never held a piping bag before, our step-by-step guide will equip you with the skills to create beautiful designs. Intrigued? Let's get started and discover the secrets behind perfect swirls, rosettes, and more!
- Introduction to Buttercream Decorating
- Exploring Fundamental Buttercream Piping Tips
- Preparing Buttercream for Optimal Piping
- Mastering Basic Buttercream Piping Techniques
- Simple Buttercream Decorating Projects
- Troubleshooting Common Buttercream Piping Issues
- Expanding Your Buttercream Piping Skills
- Conclusion: Enhancing Your Cakes with Buttercream Artistry
-
Frequently Asked Questions
- What are some essential tools needed for easy buttercream piping?
- How do I make sure my buttercream is the right consistency for piping?
- What are some simple piping techniques a beginner can start with?
- How do I avoid air bubbles in my piping bag?
- What's the best way to store decorated cakes with buttercream frosting?
- Final Reflection: Mastering the Art of Easy Buttercream Piping
- Unleash Your Inner Cake Artist: Master Buttercream Piping Today!
Introduction to Buttercream Decorating
The Appeal of Buttercream Decoration
Buttercream frosting is a beloved staple in the world of baking, and its appeal goes far beyond just taste. It's incredibly versatile, serving as both a delicious covering and a fantastic medium for artistic expression on cakes, cupcakes, and cookies. For many home bakers, mastering simple buttercream piping techniques is the first step towards creating visually stunning desserts that impress friends and family.
Unlike more complex mediums like fondant, buttercream is relatively forgiving and easy to work with, making it perfect for those just starting out. The smooth, creamy texture holds its shape well when piped, allowing beginners to achieve beautiful results with minimal effort.
The ability to transform a simple cake or cupcake into a decorated masterpiece using easy buttercream piping techniques is incredibly rewarding. With just a few basic tools and a bit of practice, you can add elegant borders, fun swirls, delicate flowers, or even personalized messages. This accessibility is what makes buttercream so popular for everything from birthday celebrations to everyday treats. It allows bakers to add a personal touch and elevate their creations from delicious baked goods to edible art, proving that beautiful decoration is achievable even for those new to piping.
Essential Tools for Buttercream Piping Success
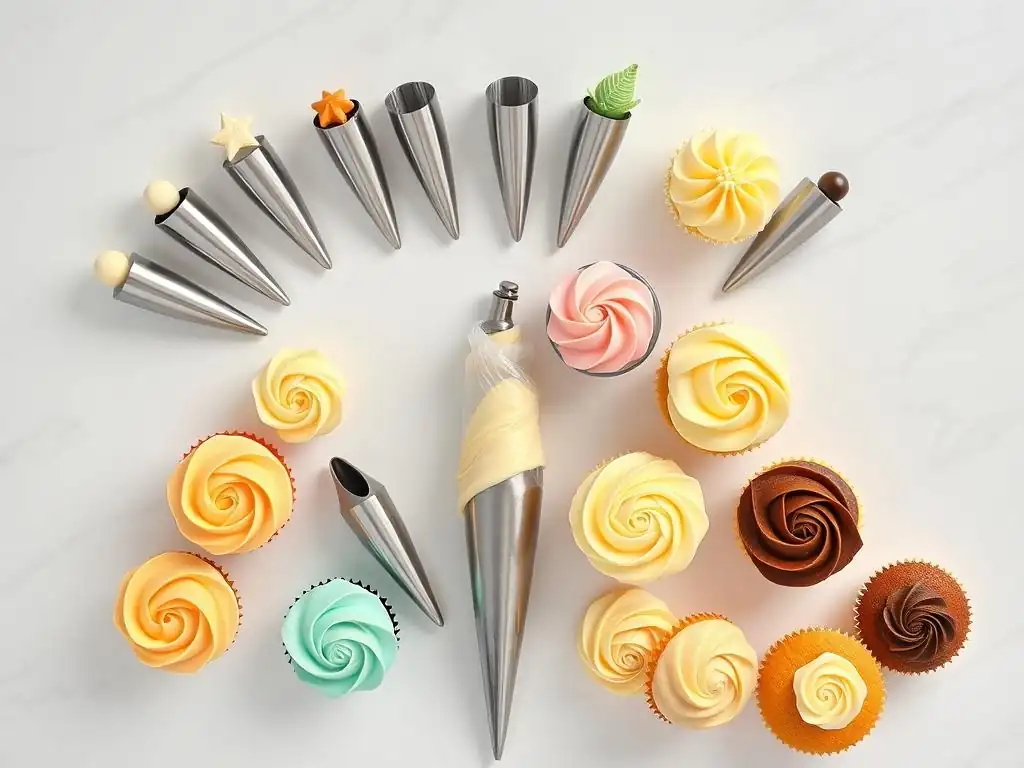
To embark on your buttercream piping journey, you'll need a few key tools that make the process smooth and enjoyable. The most fundamental is a piping bag, which can be reusable silicone or plastic, or disposable plastic. Disposable bags are convenient for easy cleanup, while reusable ones are more eco-friendly. You'll also need piping tips, small metal or plastic nozzles that fit into the bag and shape the frosting as it's squeezed out. Tips come in a vast array of shapes and sizes, each producing a different effect.
Another incredibly useful tool, especially when working with multiple colors or changing tips frequently, is a coupler. A coupler consists of two parts: a base that goes inside the bag before the tip is inserted, and a ring that screws onto the outside to hold the tip securely.
Using a coupler allows you to swap piping tips on the same bag of frosting without having to empty and refill it, making it much easier to execute designs that require different tips, like adding a border with a star tip and then writing a message with a round tip, all from the same color of buttercream. Having these basic tools is crucial for anyone wanting to learn easy buttercream piping techniques beginners can master.
Exploring Fundamental Buttercream Piping Tips
Round Tip: The Foundation of Buttercream Designs
The round piping tip is arguably the most essential tip for any beginner baker learning buttercream piping techniques. It's simple, versatile, and comes in many sizes, from very fine ones used for writing delicate messages to large ones perfect for piping smooth mounds of frosting. The round opening produces a smooth, cylindrical stream of buttercream, making it ideal for a wide variety of applications. Its simplicity makes it forgiving, which is why it's a great starting point for learning control and pressure when piping.
This tip is indispensable for basic tasks and intricate details alike. For example, a medium-sized round tip (like a Wilton #12) is perfect for piping dollops of frosting onto cupcakes, while a very small tip (like a Wilton #3) is used for writing text or drawing fine lines. The consistent output of the round tip helps beginners develop a feel for how much pressure to apply to the bag to achieve uniform results, a fundamental skill for all buttercream piping techniques.
Creating Lines, Dots, and Outlines with a Round Tip
Using a round tip to create lines and dots is one of the most basic yet important skills in buttercream piping. To pipe a line, hold the bag at a slight angle above the surface, apply steady pressure, and move along your desired path, releasing pressure at the end. For dots, hold the bag perpendicular to the surface, apply pressure until the dot is the desired size, then stop squeezing and pull the bag straight up. Practicing these simple motions helps build muscle memory and control.
Outlining shapes, whether on a cake or cookie, is also easily done with a round tip. A smaller tip is usually preferred for outlines to keep them neat. Piping an outline involves following the edge of a shape with a continuous line of buttercream. The key is consistent pressure and movement. These fundamental applications of the round tip are excellent for practicing the essential hand-eye coordination needed for more complex easy buttercream piping techniques beginners will explore later.
Star Tip: Achieving Textured Buttercream Effects
The star tip is another fundamental tip that creates beautiful textured effects. It comes in two main varieties: open star tips and closed star tips. Open star tips produce defined ridges and points, perfect for classic star shapes and shells. Closed star tips have points that curve inward slightly, creating more defined, sometimes ruffled, textures. Both types are incredibly popular for decorating cupcakes and creating attractive borders on cakes due to the visual interest they add.
Using a star tip allows you to easily add flair and texture to your buttercream designs. A common open star tip like the Wilton #1M or #21 is fantastic for piping swirls on cupcakes, creating a professional look with minimal effort. These tips are also used for piping star shapes, which are simply dots piped with a star tip, or shells, which are tapered strokes that resemble seashells. The versatility of the star tip makes it a must-have for anyone learning easy buttercream piping techniques beginners can quickly master.
Piping Borders, Stars, and Shells with a Star Tip
Piping borders with a star tip is a quick way to give a cake a finished, polished look. The shell border is a classic example, created by piping overlapping shell shapes around the edge of the cake. Start by piping a shell, then pipe the next shell so it slightly overlaps the tail of the previous one. This creates a continuous, decorative edge.
Piping individual stars is as simple as holding the bag perpendicular to the surface and applying a quick burst of pressure, then pulling straight up. For a cupcake covered in stars, you would repeat this motion across the entire surface. These techniques are straightforward and effective, making the star tip excellent for practicing easy buttercream piping techniques beginners can use to add professional-looking details to their bakes.
Leaf Tip: Crafting Realistic Buttercream Foliage
The leaf tip is specifically designed to create realistic-looking leaves out of buttercream. It has a V-shaped opening, often with a slight notch in the middle, that helps form the distinct shape and vein down the center of a leaf. Leaf tips come in various sizes, allowing you to pipe leaves appropriate for different flower sizes and scales of decoration. While perhaps not as frequently used as round or star tips, the leaf tip is essential for adding botanical elements to floral buttercream designs.
Learning to use a leaf tip adds a layer of realism and detail to your buttercream flowers and arrangements. It allows you to easily add greenery, transforming individual piped flowers into more complete and natural-looking bouquets or garlands on a cake. The technique is relatively simple, focusing on pressure control to make the base of the leaf wider and the tip narrower.
Piping Single Leaves, Garlands, and Floral Accents
Piping a single leaf involves holding the tip with the V-opening perpendicular to the surface (or slightly angled depending on the desired effect), applying firm pressure to create the base, and then slowly decreasing pressure as you pull the tip away, creating the pointed tip of the leaf. A slight wiggle of the tip while piping can add a more natural, ruffled edge.
To create garlands or floral accents, you would pipe multiple leaves together or around piped flowers. For a garland, you can pipe a series of overlapping leaves following a curved line. Adding a few simple leaves around a piped rose or tulip instantly makes the flower look more complete and vibrant. These techniques demonstrate how specialized tips can add specific, beautiful details using relatively easy buttercream piping techniques beginners can learn after mastering the basics.
Petal Tip: Sculpting Beautiful Buttercream Flowers
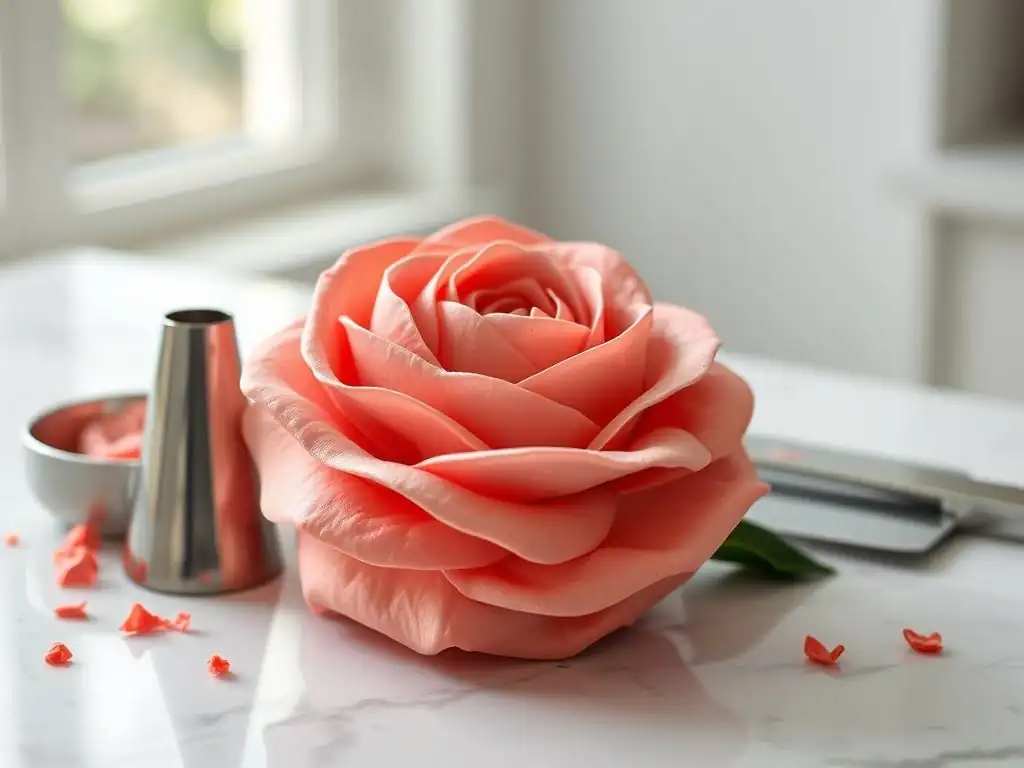
The petal tip is a key tool for creating a wide variety of buttercream flowers, from simple rosettes to intricate roses and ruffles. It has a teardrop or angled opening – one side is wide and the other is narrow. By controlling the orientation of the tip and the pressure applied, you can sculpt delicate petals that build upon each other to form realistic floral shapes. This tip truly allows you to turn buttercream into edible sculptures.
Mastering the petal tip requires a bit more practice than round or star tips, but the results are incredibly rewarding. It's the primary tool used for creating the iconic buttercream rose, a popular decoration for cakes and cupcakes. The ability to create dimensional flowers adds a sophisticated touch to your baked goods and is a fantastic skill to develop as you advance your buttercream piping techniques.
Piping Roses, Tulips, and Other Floral Designs
Piping a classic buttercream rose typically starts with a base or bud, often made with a small mound of frosting or even a small cone of cake or cookie. Then, holding the petal tip with the narrow end pointing upwards, you pipe petals around the base, overlapping them slightly and gradually increasing their size and shape as you work outwards. The movement is often a curved stroke, mimicking the natural curl of a rose petal.
Other flowers like tulips or ruffled blossoms can be created by varying the angle and movement of the petal tip. For instance, holding the tip with the wide end against the surface and moving it back and forth while applying pressure creates beautiful ruffles. While these techniques might seem daunting at first, breaking them down into steps makes them achievable, proving that even complex-looking floral designs can be approached using easy buttercream piping techniques beginners can gradually learn.
Basketweave Tip: Creating Intricate Buttercream Patterns
The basketweave tip is a flat tip with fine ridges on one side and a smooth edge on the other. It's designed specifically to create patterns that resemble woven baskets or ribbons. While it might look specialized, the basic technique involves piping overlapping horizontal and vertical stripes, making it accessible for beginners willing to practice their straight lines and spacing.
Using a basketweave tip adds a unique texture and design element to the sides of cakes. It creates a visually interesting pattern that can range from simple criss-cross lines to a more complex woven look. It's a great way to cover the sides of a cake with a decorative finish that's different from simple frosting or swirls, adding another dimension to your buttercream piping techniques repertoire.
Piping Horizontal and Vertical Weaves for a Classic Look
To create a basic basketweave pattern, start by piping a vertical stripe of buttercream using the smooth side of the tip against the cake. Then, pipe several short horizontal stripes over the vertical stripe, using the ridged side of the tip facing upwards. Pipe the next vertical stripe over the ends of these horizontal stripes. Continue alternating, piping horizontal stripes over the new vertical, and then the next vertical stripe over the ends of those horizontal stripes.
Consistency in pressure and spacing is key to achieving a neat basketweave pattern. It requires a steady hand and attention to detail, but the motion itself is repetitive and relatively easy to learn. Practicing on a flat surface or the back of a baking sheet before applying it to a cake is highly recommended. This technique, while looking intricate, is built upon simple, repeatable steps, fitting well within the scope of easy buttercream piping techniques beginners can practice and perfect.
Preparing Buttercream for Optimal Piping
Achieving the Ideal Buttercream Consistency
The consistency of your buttercream is paramount for successful piping. If it's too stiff, it will be difficult to squeeze through the tip and might tear your piping bag. If it's too soft, your piped shapes won't hold their definition and will slump. The ideal consistency is firm enough to hold a peak but smooth enough to flow easily and consistently through the piping tip. This is often described as medium consistency.
Achieving the right consistency usually involves adjusting the amount of liquid (like milk, cream, or water) added to the buttercream. If your buttercream is too stiff, add liquid one teaspoon at a time, mixing thoroughly until the desired consistency is reached.
If it's too soft, you can try chilling it in the refrigerator for 10-15 minutes to firm it up, or if it's very soft, you may need to beat in a little more sifted powdered sugar. Temperature also plays a big role; warm environments will soften buttercream quickly, so working in a cool kitchen helps maintain the correct consistency for easy buttercream piping techniques beginners are learning.
Coloring Buttercream for Vibrant Designs
Adding color to your buttercream allows you to create eye-catching and dynamic designs. Gel food coloring is highly recommended over liquid food coloring because it is much more concentrated, meaning you need less of it to achieve vibrant colors. Using too much liquid coloring can alter the consistency of your buttercream, making it too soft for piping. Gel colors also provide a wider range of shades and true-to-life colors.
To color buttercream, add a small amount of gel coloring with a toothpick or food-safe spatula and mix it in thoroughly. Start with a small amount, as a little gel color goes a long way, especially with vibrant shades like red or black which require more pigment. Continue adding small amounts and mixing until you achieve the desired hue.
Remember that colors can deepen slightly as they sit, so it's often best to aim for a shade slightly lighter than your final goal. Preparing vibrant, well-colored buttercream is an important step for executing beautiful and easy buttercream piping techniques beginners will be using.
Mastering Basic Buttercream Piping Techniques
Filling a Piping Bag Without Air Pockets
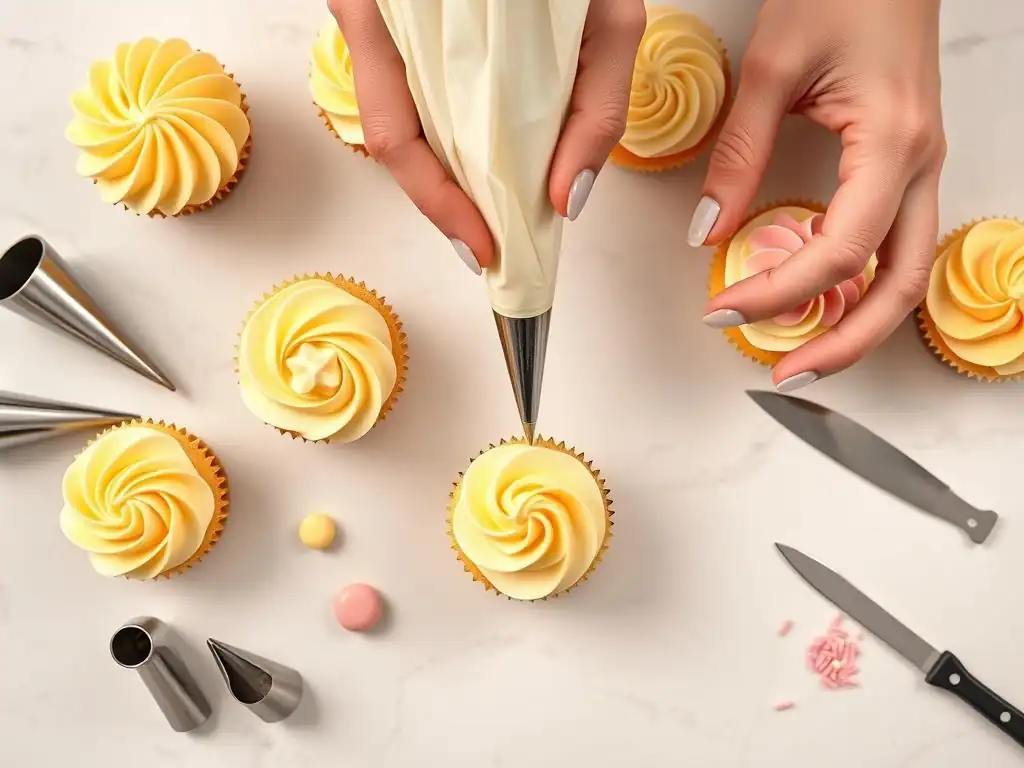
Properly filling a piping bag is a crucial first step to avoid frustrating air bubbles that can cause breaks in your piped lines. The easiest way to fill a bag is to place it tip-down into a tall glass or container, folding the top edge of the bag over the rim. This creates a wide opening that you can then fill with buttercream using a spatula. Fill the bag no more than two-thirds full; overfilling makes the bag difficult to handle and control.
Once the bag is filled, lift it out of the glass and unfold the top edge. Gently push the buttercream down towards the tip, encouraging any trapped air bubbles to rise to the top. Twist the top of the bag tightly closed just above the level of the buttercream. This twisted section is where you will apply pressure with your hand. Ensuring the bag is filled correctly and free of large air pockets makes executing easy buttercream piping techniques beginners are practicing much smoother and more consistent.
Holding and Controlling a Piping Bag for Precision
Holding the piping bag correctly is essential for control and precision. Hold the twisted top of the bag firmly with your dominant hand – this hand will apply the pressure to push the buttercream out. Your non-dominant hand should guide the bag and tip, providing stability and directing the flow of frosting. Think of your dominant hand as the "power" hand and your non-dominant hand as the "steering" hand.
Keep the bag angled comfortably – usually around 45 degrees for lines and borders, or perpendicular for dots and stars, depending on the technique and tip used. Maintain steady pressure from your dominant hand on the twisted part of the bag. Avoid squeezing the lower part of the bag near the tip, as this can cause uneven pressure and messy results. Consistent pressure is key to smooth, even piping, a fundamental aspect of mastering easy buttercream piping techniques beginners need to focus on.
Practicing Fundamental Piping Motions: Pressure and Consistency
Developing consistent pressure and smooth motion is the core of successful buttercream piping. Before decorating a cake or cupcake, practice on a piece of parchment paper or the back of a baking sheet. This allows you to get a feel for how much pressure is needed to achieve the desired thickness of line or size of dot with a specific tip.
Practice piping straight lines, wavy lines, dots, and simple shapes like stars or shells. Pay attention to how changing the pressure affects the flow and appearance of the buttercream. Try to maintain steady pressure as you pipe lines and release pressure cleanly when finishing a shape. Consistent practice, even for just 10-15 minutes at a time, significantly improves control and confidence, making all easy buttercream piping techniques beginners attempt more successful.
Simple Buttercream Decorating Projects
Decorating Cupcakes with Swirls and Rosettes
Cupcakes are perfect canvases for practicing easy buttercream piping techniques beginners can tackle right away. A simple swirl is a classic and effective decoration. Using a large open star tip (like a Wilton #1M), hold the bag perpendicular to the center of the cupcake. Start piping in the center, applying steady pressure, and move in a circular motion outwards towards the edge, then spiral inwards and upwards, releasing pressure when you reach the peak.
For rosettes, also often piped with a star tip, start at the center of the cupcake and pipe in a tight circular motion outwards, following the curve of the cupcake surface. Stop squeezing and pull the bag away when you reach the desired size. These techniques are quick, visually appealing, and provide excellent practice for pressure control and circular motions, making them ideal easy buttercream piping techniques beginners can use to create beautiful treats.
Adding Borders to Cakes for a Finished Look
Adding a border is a fantastic way to give a cake a clean, finished appearance and hide any imperfections where the frosting meets the cake board. Simple borders like shells, stars, or even just a row of dots can be piped around the top and bottom edges of the cake. Using a medium to large star tip or a medium round tip works well for most borders.
To pipe a shell border, use a star tip and pipe overlapping shell shapes along the edge. For a simple star border, pipe individual stars close together along the edge. Practice maintaining a consistent height and size for each element of the border for a neat look. Adding borders using these easy buttercream piping techniques beginners learn early on instantly elevates the presentation of any cake.
Even with just basic tips, you can create simple floral accents. Using a small round tip, you can pipe dots in a circle to represent small blossoms, adding a dot of a different color in the center. With a small star tip, you can pipe small star shapes that look like simple flowers. Once you're comfortable with a petal tip, even a basic rose or a few ruffles can add a beautiful floral touch.
Pairing these simple flowers with leaves piped using a leaf tip (or even just small green dots from a round tip) creates charming floral designs on cookies or as accents on a larger cake. These projects allow beginners to combine different basic piping skills, building confidence while creating lovely decorations using easy buttercream piping techniques.
Troubleshooting Common Buttercream Piping Issues
Preventing Air Bubbles and Buttercream Separation
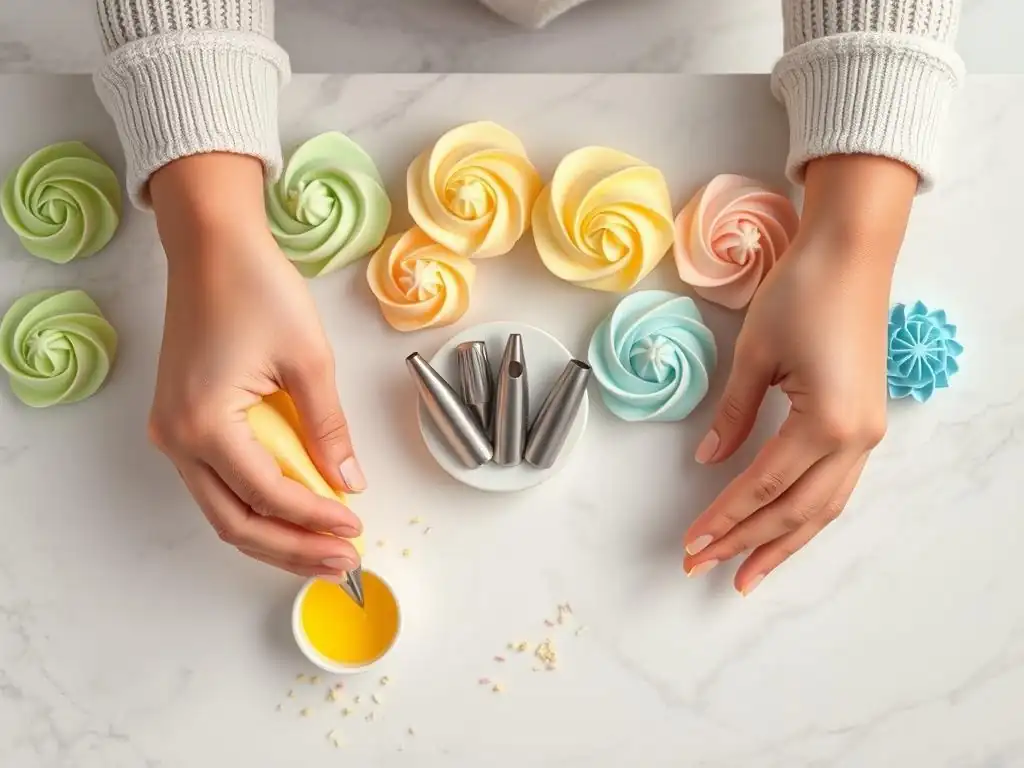
Air bubbles are a common nuisance in buttercream piping, causing frustrating gaps in your lines. They often occur from over-beating the buttercream or improperly filling the piping bag. To minimize bubbles, try giving your mixed buttercream a final slow stir with a spatula to push out air before filling the bag. When filling the bag, push the buttercream down gently towards the tip to encourage air to rise. If you encounter a bubble while piping, stop, untwist the bag slightly, squeeze the bubble out, retwist, and resume piping.
Buttercream separation (looking curdled or greasy) can happen if the ingredients aren't at the right temperature or if it's over-beaten. If your buttercream separates, try warming a small amount gently (microwave a spoonful for a few seconds or hold a portion of the bowl over warm water) and then re-beating it into the rest of the mixture. Sometimes, adding a teaspoon of warm milk and re-beating can also help bring it back together. Proper preparation and handling are key to avoiding these issues when practicing easy buttercream piping techniques beginners might encounter challenges with.
Achieving Smooth, Consistent Buttercream Lines
Achieving smooth, consistent lines requires practice with pressure and movement. If your lines are jagged, it could be due to inconsistent pressure, air bubbles, or buttercream that is too stiff. Ensure your buttercream has the right consistency and your bag is filled correctly. Practice piping lines on parchment paper, focusing on steady pressure and a smooth, continuous motion, keeping the tip slightly elevated above the surface.
If your lines are breaking or uneven, check your pressure control – are you squeezing too hard or too softly in places? Also, ensure you are moving the tip at a consistent speed. Sometimes, slightly warming the buttercream by holding the bag in your hands for a moment can help if it's just a little too firm. Patience and repetition are key to developing the muscle memory needed for smooth lines, a core skill for all easy buttercream piping techniques beginners aspire to master.
Storing Buttercream-Decorated Treats Properly
Proper storage is essential to keep your buttercream decorations looking their best. Cakes, cupcakes, and cookies decorated with buttercream should generally be stored in an airtight container at room temperature for a few days, provided the ingredients in the buttercream and cake are shelf-stable (like standard butter, sugar, and flour). If using fillings or ingredients that require refrigeration (like fresh fruit or cream cheese), the decorated items must be stored in the refrigerator.
When refrigerating buttercream-decorated items, place them in an airtight container after the buttercream has firmed up slightly at room temperature. This helps prevent condensation from forming on the buttercream, which can cause colors to bleed or the surface to become sticky. If stacking items, ensure the container is tall enough that the lid doesn't touch the decorations, or use parchment paper between layers if necessary.
Bringing refrigerated items back to room temperature for about 15-30 minutes before serving often improves the texture of both the cake and the buttercream. Proper storage helps preserve the beautiful results of your easy buttercream piping techniques beginners have worked hard on.
Expanding Your Buttercream Piping Skills
Exploring Advanced Piping Techniques and Tips
Once you feel comfortable with the basic buttercream piping techniques beginners learn using round, star, leaf, and petal tips, a world of more advanced possibilities opens up. This includes exploring a wider variety of specialized tips, such as ruffle tips for creating dramatic folds, grass tips for realistic texture, or even multi-opening tips that pipe several lines at once.
Advanced techniques involve combining different tips and motions to create more complex designs, like intricate floral arrangements, specific character designs, or detailed patterns like lacework or brush embroidery. While these require more practice and precision, the foundational skills you build with easy buttercream piping techniques beginners learn are directly transferable. Continuing to experiment with different tips and challenging yourself with new designs is how you continue to grow your skills and creativity in buttercream artistry.
Conclusion: Enhancing Your Cakes with Buttercream Artistry
Mastering basic buttercream piping techniques is a rewarding journey that transforms simple baked goods into stunning creations. Starting with fundamental tips like the round and star, practicing essential skills like pressure control and bag handling, and then exploring slightly more specialized tips opens up a world of decorating possibilities. From piping elegant borders to creating charming floral accents, the skills you develop allow you to add a personal and beautiful touch to all your baking projects.
Remember that practice is key – don't be discouraged if your first attempts aren't perfect. Every line piped and every swirl created builds your confidence and skill. With the accessible nature of buttercream and these easy buttercream piping techniques beginners can readily learn and apply, you have everything you need to start creating edible works of art. So grab your piping bag, prepare your buttercream, and enjoy the process of enhancing your cakes and treats with beautiful buttercream artistry.
Frequently Asked Questions
What are some essential tools needed for easy buttercream piping?
You'll need a piping bag, piping tips (like a star or round tip), a coupler (optional), and of course, buttercream. These tools are fundamental for achieving different designs.
How do I make sure my buttercream is the right consistency for piping?
Buttercream should be smooth, creamy, and hold its shape. Avoid buttercream that's too stiff or too soft, as it will be difficult to pipe effectively.
What are some simple piping techniques a beginner can start with?
Dotting, rosettes, and simple swirls are great starting points. Practice these basic techniques on parchment paper before decorating your cake.
How do I avoid air bubbles in my piping bag?
After filling your bag, gently squeeze to remove air. Twist the top of the bag to seal it tightly and prevent air from entering as you pipe.
What's the best way to store decorated cakes with buttercream frosting?
Store decorated cakes in the refrigerator. This helps the buttercream maintain its shape and freshness. Allow the cake to come to room temperature before serving for best flavor.
Final Reflection: Mastering the Art of Easy Buttercream Piping
The ability to create beautiful buttercream decorations is no longer confined to professional bakers; it's now within everyone's reach. With a little practice and the right techniques, even the most novice baker can transform a simple cake into a stunning masterpiece. This guide has aimed to demystify the process, providing accessible steps and clear explanations for beginners eager to explore the world of buttercream piping.
The impact of accessible baking techniques extends far beyond the kitchen. It fosters creativity, encourages self-expression, and provides a tangible way to connect with loved ones through the act of creating something beautiful and delicious. The joy of crafting a personalized cake, decorated with your own hand, is a powerful experience. Baking is at once child's play and adult joy. And love, of course.
– Alma Flor Ada. This quote perfectly encapsulates the emotional connection we can forge through baking, and buttercream piping adds an extra layer of artistry to that connection.
Now, it's your turn. Don't be intimidated by the seemingly intricate world of piping. Pick up a piping bag, choose your favorite tip, and experiment! Each swirl, each rose, each perfectly placed star is a step towards mastering a new skill and expressing your unique creativity. Embrace the process, celebrate your successes (even the small ones! ), and remember that the most important ingredient is your passion. Go forth and create something beautiful!
Unleash Your Inner Cake Artist: Master Buttercream Piping Today!
Thanks for taking the time to explore the world of buttercream piping with us! We hope you gained valuable skills and inspiration to create stunning cakes. Now it's time to put your newfound knowledge into practice.
- Start piping! Grab your piping bags, tips, and buttercream, and try recreating your favorite design from the article. Don't be afraid to experiment – even small tweaks can create unique masterpieces.
- Share your creations! Show us your buttercream piping masterpieces on social media using #BakeWithEaseButtercream. We love seeing what our readers create!
- Challenge a friend: Invite a friend or family member to join you in a buttercream piping challenge. It's a fun way to learn and share the joy of baking.
What incredible cake designs will you create with your newfound piping skills?