
Tempering Chocolate Made Simple: Shiny, SnapWorthy Results

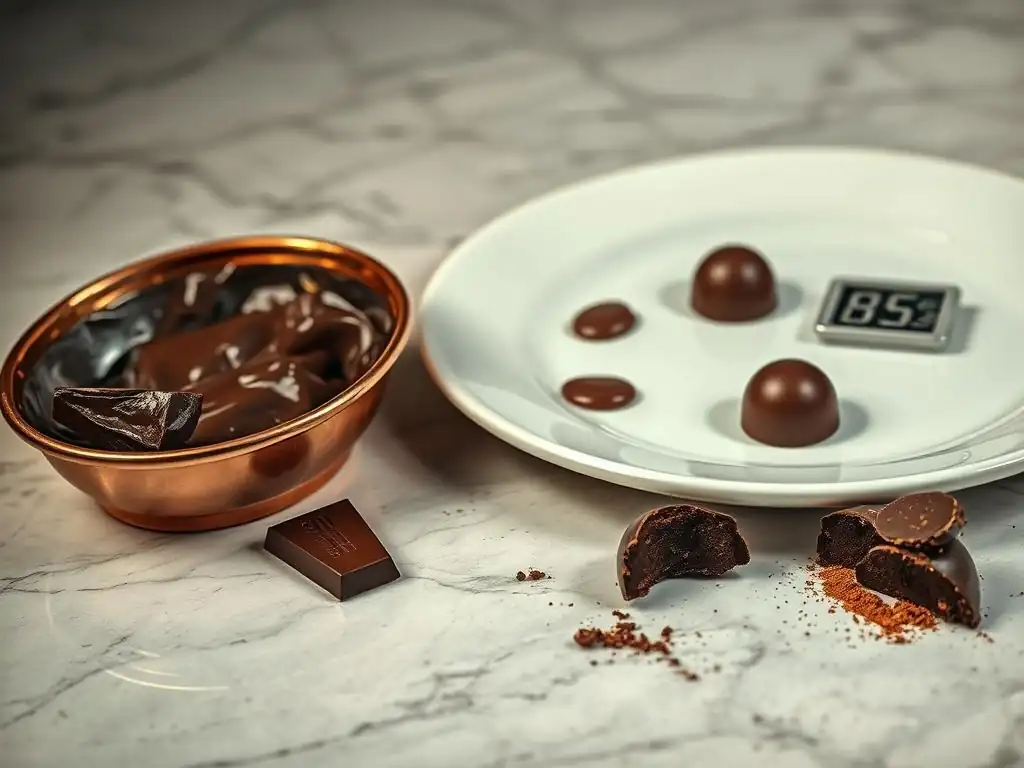
Welcome to BakeWithEase, your passport to pastry perfection! Ever dreamt of creating chocolate that's flawlessly shiny and boasts that satisfying snap? Discover the secrets to achieving professional-quality results with our easy chocolate tempering techniques. We're about to unlock the mystery, turning what seems complex into a surprisingly simple skill. Get ready to elevate your baking game – let's get started!
- Tempering Chocolate: Achieving a Glossy Finish and Crisp Snap
- A Guide to Chocolate Tempering Techniques
- Understanding Chocolate Tempering: Essential for Professional Results
- Simple Chocolate Tempering Methods for Home and Professional Use
- Achieving a Glossy Finish and Crisp Snap: Troubleshooting Tempering
- Essential Tools and Equipment for Chocolate Tempering
- Using Tempered Chocolate in Recipes
- Tips and Tricks for Successful Chocolate Tempering
- Storing Tempered Chocolate: Maintaining Quality and Appearance
-
Frequently Asked Questions
- What is chocolate tempering and why is it important?
- What are some easy chocolate tempering techniques mentioned on BakeWithEase?
- What are the key indicators of properly tempered chocolate?
- What can happen if chocolate is not tempered correctly?
- Where can I find step-by-step guides and easy-to-find ingredients for chocolate tempering on BakeWithEase?
- Final Reflection: The Enduring Allure of Perfectly Tempered Chocolate
- Unlock Your Inner Chocolatier: Master the Art of Tempering
Tempering Chocolate: Achieving a Glossy Finish and Crisp Snap
Chocolate tempering is a fundamental skill for anyone serious about working with chocolate, whether you're a home baker looking to make beautiful decorations or a professional confectioner crafting delicate truffles. Achieving that perfect shiny surface and satisfying snap isn't just about aesthetics; it's crucial for the stability and shelf life of your chocolate creations. While it might sound intimidating, mastering easy chocolate tempering techniques is well within reach with a little practice and understanding.
A Guide to Chocolate Tempering Techniques
Tempering involves carefully controlling the temperature of melted chocolate to encourage the formation of stable cocoa butter crystals. Cocoa butter is polymorphic, meaning it can crystallize in different forms. Only one of these forms, the Beta (Type V) crystal, provides the desired characteristics: a smooth texture, a high melting point (around 32-34°C or 90-93°F for dark chocolate), a beautiful shine, and a firm snap when broken. Untempered chocolate, or chocolate tempered improperly, results in a dull, streaky appearance and a soft, crumbly texture that melts too easily and is prone to fat bloom.
This guide will walk you through the essential knowledge and simple chocolate tempering methods to help you achieve professional-quality results right in your own kitchen. We'll cover the 'why' and 'how' of tempering, explore different techniques suitable for various batch sizes, discuss common problems and how to fix them, and provide tips for success.
Understanding Chocolate Tempering: Essential for Professional Results
Tempering chocolate is more than just melting and cooling; it's a precise process that dictates the final quality of your chocolate work. Without proper tempering, even the finest chocolate won't perform as expected in confectionery applications. Understanding the basic principles is the first step towards mastering these easy chocolate tempering techniques.
Why Temper Chocolate? Benefits for Confectionery and Baking
Tempering chocolate is essential for several key reasons, all contributing to the quality and stability of the final product. Firstly, it gives chocolate that desirable hard, brittle snap when broken. This is a hallmark of properly tempered chocolate and is particularly important for chocolate bars, decorations, and enrobed items like truffles. Think of a high-quality chocolate bar – it breaks cleanly with a distinct sound.
Secondly, tempering provides a beautiful, glossy surface finish. This shine is visually appealing and indicates that the chocolate has set correctly with stable crystals. Properly tempered chocolate also shrinks slightly as it cools, making it easier to release from molds.
Finally, and critically, tempering prevents fat bloom, the grayish, streaky appearance that occurs when unstable cocoa butter crystals melt and recrystallize on the surface. This bloom doesn't affect safety but ruins the texture and appearance, significantly reducing shelf life and appeal. For example, a box of truffles coated in untempered chocolate might look dull and develop bloom within days, whereas the same truffles coated in tempered chocolate will retain their shine and snap for weeks or months if stored correctly.
The Science Behind Tempering: Polymorphic Cocoa Butter Crystals
The science of tempering lies in controlling the crystallization of cocoa butter. Cocoa butter contains fatty acids that can arrange themselves into six different crystalline forms, labeled Type I through Type VI. Each type has a different melting point and stability. Type I and II crystals are very unstable and melt at low temperatures (below 20°C).
Type III and IV are slightly more stable but still melt below body temperature and are prone to bloom. The goal of tempering is to form only the stable Type V crystal, which melts around 32-34°C (90-93°F). This is just below body temperature, allowing the chocolate to melt smoothly in your mouth without feeling greasy.
Tempering involves heating the chocolate to melt all crystal types (typically 45-50°C for dark, 40-45°C for milk/white), then cooling it down to a specific working temperature range (around 27-29°C for dark, 26-28°C for milk/white) while agitating it. This cooling and movement encourage the formation of some stable Type V seed crystals.
Finally, the chocolate is gently reheated slightly (to 30-32°C for dark, 29-30°C for milk/white) to melt any remaining unstable crystals, leaving behind a mixture of melted chocolate and stable Type V seeds. These seeds then act as templates, guiding the rest of the cocoa butter to crystallize into the desired Type V form as the chocolate cools and sets.
Untempered vs. Tempered Chocolate: Appearance, Texture, and Stability
The difference between untempered and tempered chocolate is stark and immediately noticeable. Untempered chocolate, when cooled, will typically look dull or streaky. It might have white or grayish patches known as fat bloom, which occurs when unstable cocoa butter crystals migrate to the surface and recrystallize. Its texture is soft and crumbly, and it lacks the satisfying snap when broken. It melts very easily, often feeling greasy rather than smooth in the mouth, and is difficult to release cleanly from molds.
Tempered chocolate, on the other hand, is visually appealing with a smooth, shiny surface. It sets firmly and shrinks slightly upon cooling, making it easy to demold. When broken, it produces a distinct, sharp snap.
The texture is firm but melts cleanly and smoothly in the mouth at body temperature. Crucially, tempered chocolate is much more stable and resistant to bloom, maintaining its quality and appearance for a significantly longer time under proper storage conditions. For instance, chocolate molded into shapes using tempered chocolate will pop cleanly out of polycarbonate molds, while the same chocolate untempered would likely stick and break apart, leaving a messy residue.
Simple Chocolate Tempering Methods for Home and Professional Use
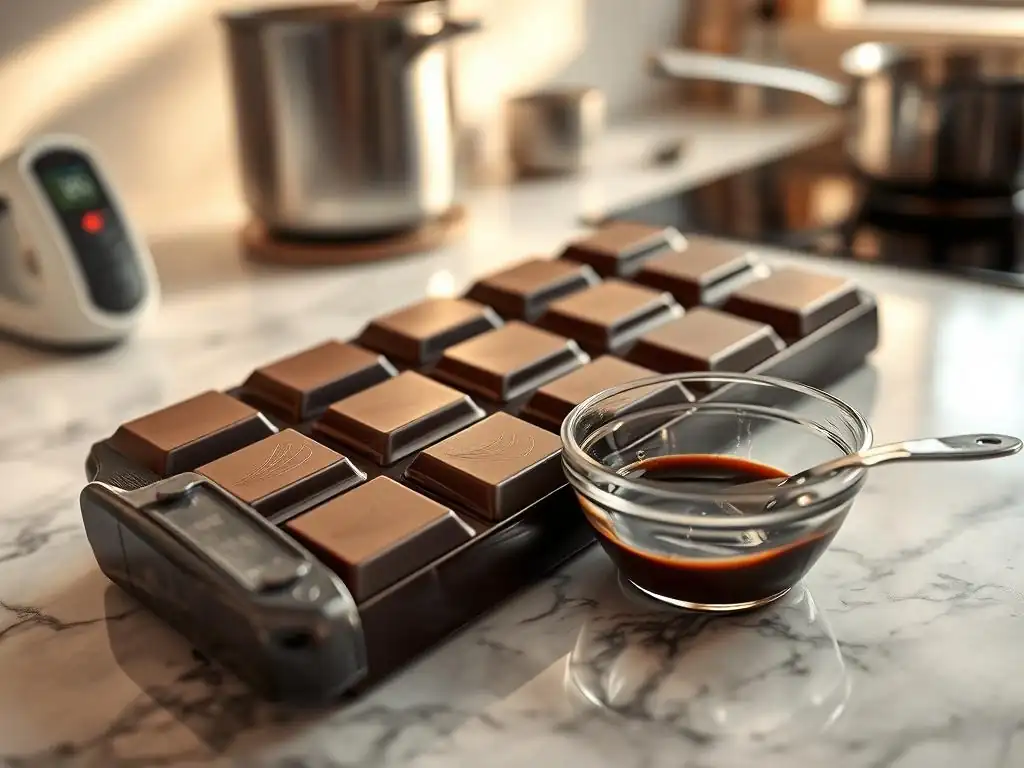
Fortunately, there are several easy chocolate tempering techniques suitable for home bakers. Each method has its pros and cons depending on the amount of chocolate you're working with and the tools you have available. The key is always accurate temperature control and sufficient agitation.
Method 1: Seeding - Adding Pre-Crystallized Chocolate
The seeding method is one of the most popular easy chocolate tempering techniques for home use because it's relatively straightforward and doesn't require specialized equipment like a marble slab. It works by adding pieces of already tempered, solid chocolate (the "seed") to melted chocolate. These seed pieces contain the stable Type V crystals needed to encourage the rest of the chocolate to crystallize correctly as it cools.
Step-by-Step Guide to Seeding Tempering
- Melt the majority of your chocolate: Finely chop about 75-80% of your chocolate. Place it in a dry, heatproof bowl set over a pan of gently simmering water (ensure the bottom of the bowl doesn't touch the water) or melt it carefully in a microwave on low power, stirring frequently. Heat until the chocolate is completely melted and reaches approximately 45-50°C (113-122°F) for dark chocolate, or 40-45°C (104-113°F) for milk or white chocolate. This ensures all types of cocoa butter crystals are melted.
- Remove from heat and add seed chocolate: Take the bowl off the heat (or out of the microwave). Add the remaining 20-25% of finely chopped, solid, tempered chocolate (your "seed").
- Stir and cool: Stir the mixture constantly with a spatula. The heat from the melted chocolate will start to melt the seed chocolate, while the cool seed chocolate will help cool down the melted chocolate. Continue stirring until all the seed chocolate has melted and the temperature drops to the working temperature: around 30-32°C (86-90°F) for dark chocolate, or 29-30°C (84-86°F) for milk or white chocolate. This temperature range allows the stable Type V crystals from the seed to propagate throughout the mixture, but is still high enough to melt any unstable crystals that may have formed during cooling.
- Test for temper: Once the chocolate is within the working temperature range and smooth, test its temper. Dip a knife tip or a piece of parchment paper into the chocolate. If it's properly tempered, it should set within 3-5 minutes at room temperature (around 20-22°C or 68-72°F) and have a shiny, streak-free finish.
- Maintain working temperature: Keep the chocolate at its working temperature while you use it. If it starts to cool and thicken too much, you can gently warm it slightly (e.g., over a warm water bath briefly or with a heat gun on a low setting) while stirring, ensuring it doesn't go above the maximum working temperature for your chocolate type.
Tips for Successful Seeding: Temperature Maintenance and Agitation
Success with the seeding method heavily relies on accurate temperature control and consistent agitation. Use a reliable thermometer – an instant-read digital thermometer is ideal. Ensure your "seed" chocolate is actually tempered; using untempered chocolate as seed will not work. Chocolate from a good quality, commercially produced bar is generally tempered. Avoid using chocolate chips, as they often contain stabilizers that affect how they melt and temper.
Constant stirring is crucial during the cooling phase after adding the seed. Stirring helps distribute the seed crystals evenly and promotes the formation of more stable crystals throughout the mass. If the chocolate cools too quickly or you don't stir enough, you might end up with insufficient stable crystals, leading to a weak temper. If the temperature drops below the working range and thickens too much, it might be over-crystallized; you'll need to gently reheat it just to the top of the working range (e.g., 32°C for dark) while stirring constantly to melt out excess crystals, then re-test.
Method 2: Tablier (Marble Slab) Tempering - Traditional Technique
Tablier tempering, also known as marble slab tempering or tablaing, is a classic, professional technique. It's very effective because the cold surface of a marble or granite slab quickly cools the chocolate while you work it, rapidly promoting crystal formation. This method is particularly well-suited for tempering larger quantities of chocolate.
Mastering Tablier Tempering: Achieving Stable Crystals
- Melt the chocolate: Melt your chocolate to the same initial temperature as in the seeding method (45-50°C for dark, 40-45°C for milk/white).
- Pour onto the slab: Pour about two-thirds of the melted chocolate onto a clean, dry marble or granite slab.
- Work the chocolate: Using a metal spatula and a bench scraper, spread the chocolate thinly across the slab, then scrape it back into a pile. Repeat this spreading and scraping motion continuously. This process rapidly cools the chocolate and encourages the formation of Type V crystals through friction and movement.
- Check the consistency: As you work the chocolate, it will start to thicken and become slightly paste-like. Check the temperature; you are aiming to cool it down to approximately 27-28°C (81-82°F) for dark chocolate, or 26-27°C (79-81°F) for milk or white chocolate. This is the point where sufficient stable crystals have formed.
- Return to the bowl: Scrape the cooled, thickened chocolate from the slab and add it back to the bowl with the remaining one-third of the warm, melted chocolate that you kept aside.
- Mix and reheat slightly: Stir the mixture thoroughly until it is smooth and reaches the final working temperature (30-32°C for dark, 29-30°C for milk/white). The warmer chocolate helps melt any unstable crystals formed on the slab, leaving only the desired Type V crystals and creating a smooth consistency.
- Test for temper: Test the temper as described in the seeding method. Maintain the working temperature while using the chocolate.
Tablier Tempering: Ideal for Larger Batches
Tablier tempering is often preferred by professional chocolatiers when working with significant quantities of chocolate, say 1 kg or more. The large surface area of the slab allows for rapid and uniform cooling of a substantial amount of chocolate, which can be more challenging to achieve with the seeding method in a standard bowl.
Working the chocolate physically on the slab provides excellent control over the rate of cooling and crystal formation. While it requires a bit more physical effort and space than seeding, mastering this technique gives you precise control over the tempering process, making it a valuable skill for anyone working with chocolate frequently or in larger volumes.
Method 3: Microwave Tempering - Rapid Tempering for Small Projects
For small amounts of chocolate needed for quick decorations or dipping, microwave tempering is perhaps the simplest and fastest of the easy chocolate tempering techniques. It's ideal for using just a few ounces of chocolate and minimizes cleanup. The key is to melt the chocolate very gently and avoid overheating any part of it.
Microwave Tempering: Avoiding Burning and Over-Crystallization
Microwave tempering relies on heating the chocolate just enough to melt the unstable crystals while leaving some stable crystals intact. This is often called "partial melting." It's crucial not to melt the chocolate completely. If you overheat it and melt all the crystals, you'll need to start over with a different method or add seed chocolate.
The primary risk with microwave tempering is burning the chocolate, which happens quickly if heated too high or for too long. Chocolate burns easily in a microwave because it heats from within and can create hot spots. Over-crystallization can occur if the chocolate cools too much after partial melting before use, becoming too thick.
Microwave Tempering: Best Practices
- Finely chop the chocolate: Chop your chocolate into very small, uniform pieces. This helps it melt evenly.
- Heat in short bursts: Place the chopped chocolate in a microwave-safe bowl. Heat on 50% power for 30-second intervals.
- Stir thoroughly between bursts: After each 30-second interval, remove the bowl and stir the chocolate very well, even if it doesn't look like it's melting. The residual heat will continue to melt the chocolate. Stirring distributes the heat and prevents burning.
- Stop when mostly melted: Continue heating and stirring in 30-second (or even 15-second for the last few bursts) intervals until the chocolate is mostly melted but still contains a few small solid pieces.
- Stir to finish melting: Remove the bowl from the microwave and stir continuously. The heat from the melted chocolate and the bowl will melt the remaining solid pieces. Keep stirring until the chocolate is completely smooth and reaches its working temperature (check with a thermometer if possible, or rely on consistency – it should be fluid but slightly thickened compared to fully melted). The presence of the solid pieces you didn't melt in the microwave acts as your "seed" crystals.
- Test for temper: Test the temper as usual. This method is best for immediate use of small quantities of chocolate.
Achieving a Glossy Finish and Crisp Snap: Troubleshooting Tempering
Even with the simplest chocolate tempering techniques, things can occasionally go wrong. Knowing how to identify and fix common problems is part of mastering the art. Don't be discouraged if your first attempt isn't perfect; practice makes perfect!
Common Tempering Problems and Solutions
Several issues can arise during or after tempering, leading to a poor result. The most frequent are chocolate seizing, bloom, and over-thickening. Recognizing the cause is key to finding the solution.
Chocolate Seizing: Causes and Remedies
Chocolate seizing is perhaps the most frustrating tempering problem. It occurs when melted chocolate suddenly turns from a smooth, liquid state into a thick, lumpy, unusable paste. The primary cause is the introduction of even a tiny amount of water or steam into the melted chocolate. Chocolate is hydrophobic (water-repelling), and water interferes with the smooth flow of fat and sugar particles, causing them to clump together. Using a bowl with residual moisture, getting steam from a water bath into the chocolate, or adding a water-based flavoring (like extract instead of oil-based) can all cause seizing.
Unfortunately, seized chocolate cannot be easily restored to a temperable state for confectionery coatings or molding. However, it's not entirely wasted. You can sometimes rescue seized chocolate for baking purposes (like brownies or cakes) by stirring in a tablespoon or two of hot vegetable oil or melted butter until it becomes a usable paste. Do not add water or milk, as this will only make it worse. For tempering purposes, however, seized chocolate is a loss and you'll need to start with a fresh batch. Always ensure all your equipment is completely dry when working with chocolate.
Bloom on Tempered Chocolate: Prevention and Identification
Bloom is the appearance of grayish streaks or patches on the surface of chocolate. There are two types: sugar bloom and fat bloom.
- Sugar bloom occurs when chocolate gets damp, causing sugar crystals to dissolve and then recrystallize on the surface as white, dusty spots. This happens if chocolate is stored in a humid environment or moved too quickly from a cold to a warm place (causing condensation). It feels gritty.
- Fat bloom is far more common and directly related to improper tempering or storage. It happens when unstable cocoa butter crystals melt (often due to warm storage temperatures, even slightly above room temperature like 25°C/77°F) and then recrystallize on the surface as larger, visible gray or white patches or streaks. It typically feels smooth.
Preventing bloom primarily involves proper tempering and storage. Ensure your chocolate is correctly tempered using one of the easy chocolate tempering techniques discussed. Store tempered chocolate in a cool, dry place (ideally 15-18°C or 59-64°F) away from direct sunlight and strong odors.
Avoid drastic temperature fluctuations. While bloom affects appearance and texture, bloomed chocolate is still safe to eat and can often be melted down and used in baking recipes where temper isn't required. You can even re-temper bloomed chocolate if it's fat bloom, but you must melt it completely first (to 45-50°C) to erase all crystal memory, then follow a full tempering method like seeding or tablier.
Correcting Over-Tempered Chocolate: Reheating and Re-Tempering
Over-tempered chocolate occurs when too many stable (Type V) crystals form during the cooling phase, causing the chocolate to become thick, sludgy, or even seize up prematurely before you can work with it. This usually happens if the chocolate cools too much during the tempering process or if you add too much seed chocolate in the seeding method. It will look dull and be difficult to dip or mold with.
If your chocolate becomes over-tempered, it's relatively easy to correct. You need to gently reheat it slightly to melt out the excess Type V crystals. Place the bowl back over a very gentle warm water bath or use a heat gun on a low setting, stirring constantly.
Heat the chocolate just enough to bring it back into the correct working temperature range (30-32°C for dark, 29-30°C for milk/white), stirring until it is smooth and fluid again. Be careful not to overheat it above the working range, or you will melt out the desirable Type V crystals too, requiring you to start the tempering process over from the beginning (melting to 45-50°C and then re-tempering). Test the temper again after adjusting the temperature.
Essential Tools and Equipment for Chocolate Tempering
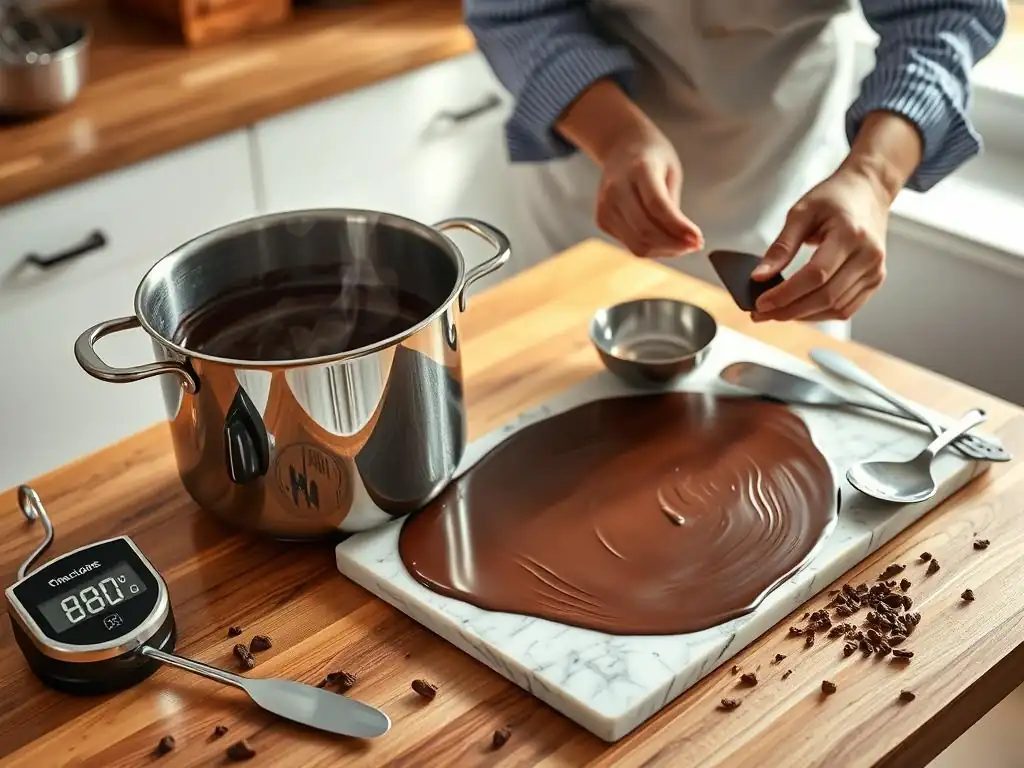
While some easy chocolate tempering techniques require minimal tools, having the right equipment can make the process smoother and more successful. Accuracy in measurement and temperature is paramount.
Thermometers: Accurate Temperature Measurement
An accurate thermometer is arguably the most essential tool for tempering chocolate. Since tempering relies on specific temperature ranges, guessing the temperature will almost certainly lead to failure. You need a thermometer that can measure temperatures between approximately 25°C and 50°C (77°F and 122°F) accurately.
An instant-read digital thermometer is highly recommended as it provides quick and precise readings. Infrared thermometers (pyrometers) are also excellent for surface temperature measurement but can be more expensive. Avoid old-fashioned mercury thermometers or meat thermometers that don't have the necessary precision or range for chocolate work. Dipping thermometers are also suitable, but ensure they are specifically designed for confectionery or chocolate. Regular monitoring of the chocolate's temperature throughout the process is critical for success with any easy chocolate tempering techniques.
Bowls and Spatulas: Material and Shape Considerations
For melting chocolate over a water bath, a heatproof bowl, typically made of glass or stainless steel, is necessary. Ensure the bowl is large enough to hold your chocolate comfortably and that its base does not touch the simmering water when set over the pan. This prevents overheating the bottom layer of chocolate.
A sturdy spatula is needed for stirring. Silicone spatulas are excellent because they are flexible, heat-resistant, and easy to clean, and chocolate doesn't stick to them excessively. Avoid wooden spatulas as they can retain moisture or odors. When using the seeding method, thorough and continuous stirring with a good spatula is key to distributing the seed crystals and cooling the chocolate evenly. For tablier tempering, a metal spatula and a bench scraper are essential for working the chocolate on the slab.
Optional Tools: Chocolate Melters and Tempering Machines
For those who work with chocolate frequently or in larger quantities, specialized equipment can simplify the process. A chocolate melter (or chocolate warmer) is a thermostatically controlled bath that keeps melted chocolate at a precise temperature. While it doesn't actively temper the chocolate, it's useful for keeping already-tempered chocolate at its working temperature for extended periods.
Dedicated chocolate tempering machines take the guesswork out of the process entirely. These machines automatically heat, cool, and agitate the chocolate according to pre-set programs for different chocolate types. They maintain the perfect working temperature, ensuring consistent, professional results with minimal effort. While a significant investment, they are invaluable in a high-volume professional setting. For home bakers exploring easy chocolate tempering techniques, a good thermometer and basic kitchen equipment are usually sufficient.
Using Tempered Chocolate in Recipes
Once you've successfully tempered your chocolate, a world of confectionery possibilities opens up! Tempered chocolate is essential for achieving the desired finish and stability in many classic chocolate recipes.
Chocolate Truffles Recipe with Tempered Chocolate Shell
Creating chocolate truffles with a crisp, tempered chocolate shell is a classic application.
- Ingredients: 200g high-quality chocolate (for ganache), 200ml heavy cream, 20g butter (optional), 300g chocolate (for tempering/shell).
- Instructions:
- Make the ganache: Finely chop the 200g chocolate and place it in a bowl. Heat the heavy cream (and butter, if using) just to a simmer. Pour the hot cream over the chocolate and let it sit for a minute, then stir gently until smooth and emulsified. Let the ganache cool and thicken at room temperature or in the refrigerator until firm enough to scoop or roll (usually several hours or overnight).
- Shape the truffles: Scoop or roll the chilled ganache into bite-sized balls. Place them on a parchment-lined tray.
- Temper the shell chocolate: Temper the 300g chocolate using your preferred easy chocolate tempering techniques (seeding, microwave, etc. ).
- Dip the truffles: Using a dipping fork or toothpick, dip each ganache ball into the tempered chocolate, ensuring it's fully coated. Lift it out, letting excess chocolate drip off.
- Set: Place the dipped truffles back on the parchment paper. The tempered chocolate shell should set quickly (within minutes) at room temperature, developing a shiny surface and a thin, crisp shell.
This technique results in truffles with a smooth, creamy interior and a satisfying snap from the tempered coating, providing excellent texture contrast and improved shelf life compared to simply dusting them with cocoa powder.
Chocolate Decorations (e.g., Curls, Shavings)
Tempered chocolate is crucial for creating beautiful and stable chocolate decorations like curls, shavings, fans, or molded shapes. Untempered chocolate is too soft and sticky; it won't hold its form or release cleanly from surfaces or molds.
To make chocolate curls, for example, spread a thin layer of tempered chocolate onto a clean, smooth surface like the back of a baking sheet or a marble slab. Let it set partially but not completely hard (it should be firm but still slightly pliable). Then, using a metal scraper or large knife held at an angle, push it along the surface to create curls.
The tempered chocolate's structure allows it to curl cleanly and hold its shape once set. Similarly, tempered chocolate poured into polycarbonate molds releases easily once set, yielding perfectly formed, shiny chocolates. Decorations made with tempered chocolate are stable at room temperature (within reason) and retain their shine.
Enrobing Candies and Pastries with Tempered Chocolate
Enrobing involves completely coating a confection (like nougat, caramel, or a small cake) in melted chocolate. This is a primary use for tempered chocolate in professional settings and can be achieved at home using simple chocolate tempering methods. Dipping items like caramels, pretzels, or small cakes in tempered chocolate provides a smooth, even coating that sets firm, shiny, and resistant to handling and melting at room temperature.
When enrobing, ensure your filling is cool and firm. Dip the item into the tempered chocolate, cover it completely, lift it out, let the excess drip off, and place it on parchment paper to set. The tempered chocolate will quickly form a hard, protective shell.
This not only improves the appearance and texture but also helps preserve the freshness of the filling by creating a barrier against moisture and air. For example, a homemade caramel dipped in tempered chocolate will have a crisp outer layer that contrasts beautifully with the chewy interior and will resist becoming sticky on the outside even in slightly warmer conditions, unlike one dipped in untempered chocolate.
Tips and Tricks for Successful Chocolate Tempering
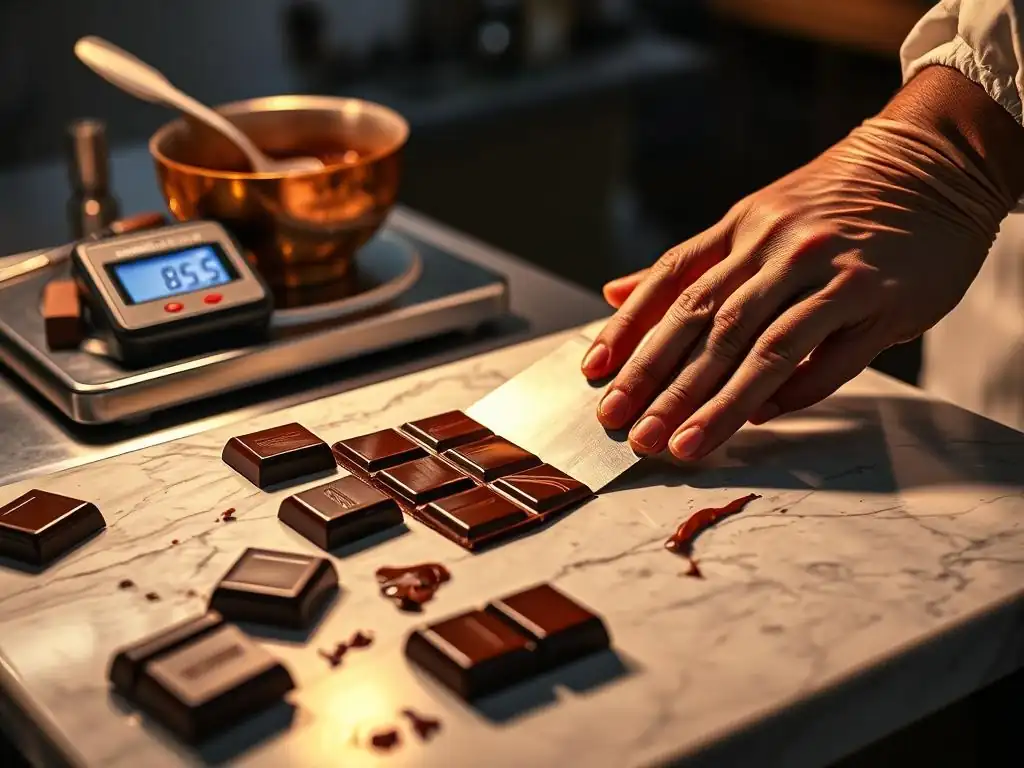
Beyond the specific steps of each method, a few general principles and tips can significantly improve your success rate when using easy chocolate tempering techniques. Patience, precision, and good ingredients are key.
Choosing the Right Chocolate: Cocoa Content and Origin
The type and quality of chocolate you use directly impact the tempering process and the final result. High-quality chocolate with a higher cocoa butter content is generally easier to temper and yields better results (shinier finish, crisper snap) than lower-quality chocolate or chocolate chips, which may contain less cocoa butter or added stabilizers that interfere with crystal formation. Couverture chocolate, specifically formulated with extra cocoa butter for tempering and coating, is ideal if you can find it.
Different types of chocolate (dark, milk, white) have different melting points and working temperatures due to varying proportions of cocoa solids, milk solids, and sugar relative to cocoa butter. Dark chocolate, with the highest percentage of cocoa solids and often cocoa butter, typically requires higher melting and working temperatures than milk or white chocolate.
Always check the recommended temperatures for the specific type of chocolate you are using, though the ranges provided earlier are good general guidelines. Using a good quality chocolate bar specifically designed for melting or tempering will give you the best chance of success with your easy chocolate tempering techniques.
Temperature Control: Precision is Key
We've mentioned it multiple times, but it bears repeating: precise temperature control is the single most critical factor in successful chocolate tempering. Each stage – melting, cooling, and reheating to working temperature – requires hitting specific temperature ranges. Being off by just a few degrees can mean the difference between perfectly tempered chocolate and a dull, bloomed mess.
Use a reliable thermometer and monitor the temperature diligently throughout the process. Avoid overheating the chocolate at any stage, especially when melting or bringing it back to working temperature. Overheating melts out the stable Type V crystals you've worked to create, forcing you to start over. Conversely, letting it get too cold can lead to over-crystallization. Keeping the chocolate within the correct working temperature range while you are using it is also vital; if it cools down too much, gently warm it back up while stirring, staying within the specified temperature range.
Practice and Observation: Developing Your Tempering Skills
Like any baking or confectionery skill, mastering easy chocolate tempering techniques takes practice. Don't expect perfection on your first attempt. Pay close attention to how the chocolate behaves at different temperatures – how it flows, thickens, and sets. Learn to recognize the signs of correctly tempered chocolate: it should be smooth and fluid at working temperature, and a test sample should set quickly with a shiny finish.
Observe how different methods work for you and the types of chocolate you commonly use. The microwave method is great for small tasks, seeding is versatile for moderate amounts, and tablier is effective for larger batches. With practice, you'll develop a feel for the process and become more confident in adjusting temperatures or techniques as needed. Think of it as learning to ride a bike – it might feel awkward at first, but with repetition, it becomes second nature, allowing you to create beautiful, professional-quality chocolate treats with ease.
Storing Tempered Chocolate: Maintaining Quality and Appearance
Proper storage is the final step in ensuring your tempered chocolate creations retain their beautiful shine, crisp snap, and smooth texture over time. Even perfectly tempered chocolate can develop bloom if stored incorrectly.
Proper Storage Techniques for Tempered Chocolate
The ideal storage conditions for tempered chocolate products are cool, dry, and consistent temperature. The recommended temperature range is typically between 15°C and 18°C (59°F and 64°F). Storing chocolate much warmer than this can cause unstable crystal formation and bloom. Storing it much colder, especially in a refrigerator, can cause sugar bloom due to condensation when the chocolate is brought back to room temperature.
Store tempered chocolate away from direct sunlight, which can cause both melting and fat bloom. Keep it away from strong odors (like spices or onions) as chocolate can absorb smells easily. Airtight containers are best to protect against moisture and odors. Avoid storing chocolate in areas with fluctuating temperatures, such as near an oven or on top of a refrigerator. A cool pantry or a dedicated wine cooler set to the correct temperature is often ideal.
Shelf Life of Tempered Chocolate Products
The shelf life of tempered chocolate products depends on several factors, including the type of chocolate, the ingredients in any fillings or inclusions, and storage conditions. However, properly tempered chocolate itself is quite stable. Plain tempered dark chocolate stored correctly can maintain its quality for over a year, while milk and white chocolate (due to milk solids) have a slightly shorter shelf life, typically 6-12 months.
Products made with tempered chocolate and stable fillings (like solid ganache or nuts) will last as long as the filling is good, often several weeks or months if stored properly. Products with fresh cream, fruit, or other perishable ingredients will have a much shorter shelf life and may require refrigeration, which, as mentioned, can risk sugar bloom on the chocolate shell. Always refer to the recipe or ingredient shelf life guidelines, but rest assured that using easy chocolate tempering techniques significantly extends the visual appeal and textural quality of your chocolate work compared to using untempered chocolate.
Frequently Asked Questions
What is chocolate tempering and why is it important?
Tempering chocolate is the process of stabilizing the cocoa butter in chocolate to create a smooth, glossy finish and a crisp snap. Without tempering, chocolate can be dull, streaky, and melt easily.
What are some easy chocolate tempering techniques mentioned on BakeWithEase?
BakeWithEase likely presents simplified methods, such as the seeding method or the microwave method, focusing on achieving stable crystals without complex equipment. These techniques emphasize precise temperature control for optimal results.
What are the key indicators of properly tempered chocolate?
Properly tempered chocolate has a smooth, glossy appearance, a hard, crisp snap when broken, and contracts slightly when cooling, making it easy to release from molds. It also has a stable structure that resists melting at room temperature.
What can happen if chocolate is not tempered correctly?
Untempered chocolate, or poorly tempered chocolate, can exhibit bloom (a white or grey coating), a grainy texture, and will melt easily in your hands. It also lacks the desired snap and visual appeal.
Where can I find step-by-step guides and easy-to-find ingredients for chocolate tempering on BakeWithEase?
BakeWithEase.com offers detailed recipes and tutorials for various baking projects, including chocolate tempering. You can find these guides within the Pastries or Desserts sections, often accompanied by video demonstrations and ingredient lists.
Final Reflection: The Enduring Allure of Perfectly Tempered Chocolate
The pursuit of flawlessly tempered chocolate—that signature snap, that alluring sheen—remains as relevant today as it was centuries ago. It's more than just a culinary technique; it's a testament to the power of precision and patience in achieving culinary excellence. The satisfying crack of a perfectly tempered chocolate truffle is a sensory experience that elevates the ordinary to the extraordinary.
The journey of mastering chocolate tempering, for me, has been a lesson in both technical skill and mindful attention. It's a process that demands respect for the delicate nature of cocoa butter, a reminder that even the simplest ingredients can yield extraordinary results with careful execution. The best things in life are simple, but not easy.
This quote perfectly encapsulates the essence of tempering chocolate; it's a deceptively simple process, yet achieving consistent, high-quality results requires dedication and practice.
Now, it's your turn. Don't be intimidated by the seemingly complex world of chocolate tempering. Armed with the knowledge and techniques shared in this article, you have the power to create stunning, professional-quality chocolate at home. Embrace the challenge, experiment with different methods, and savor the rewarding experience of transforming simple ingredients into something truly magnificent. The journey of mastering chocolate tempering is a journey of self-discovery, patience, and ultimately, delicious reward. So, grab your chocolate, and let the tempering begin!
Unlock Your Inner Chocolatier: Master the Art of Tempering
Thanks for diving into the world of perfectly tempered chocolate! You've just learned the secrets to achieving that enviable shine and satisfying snap. Ready to put your new skills to the test?
- Craft your dream chocolate creation: Now's the time to experiment! Try making those truffles you've always wanted or decorating a cake with flawlessly tempered ganache. Remember, practice makes perfect!
- Share your chocolaty triumphs: Post a picture of your masterpiece on social media and tag us – we'd love to see what you create! Use #BakeWithEaseTempering.
- Explore our other chocolate recipes: Discover even more delicious ways to use your newly acquired tempering skills. (This would link to relevant pages on bakewithease.com in a real-world scenario).
What decadent chocolate treat will you tackle first?