
Decorating with TwoTone Buttercream: An Easy Effect

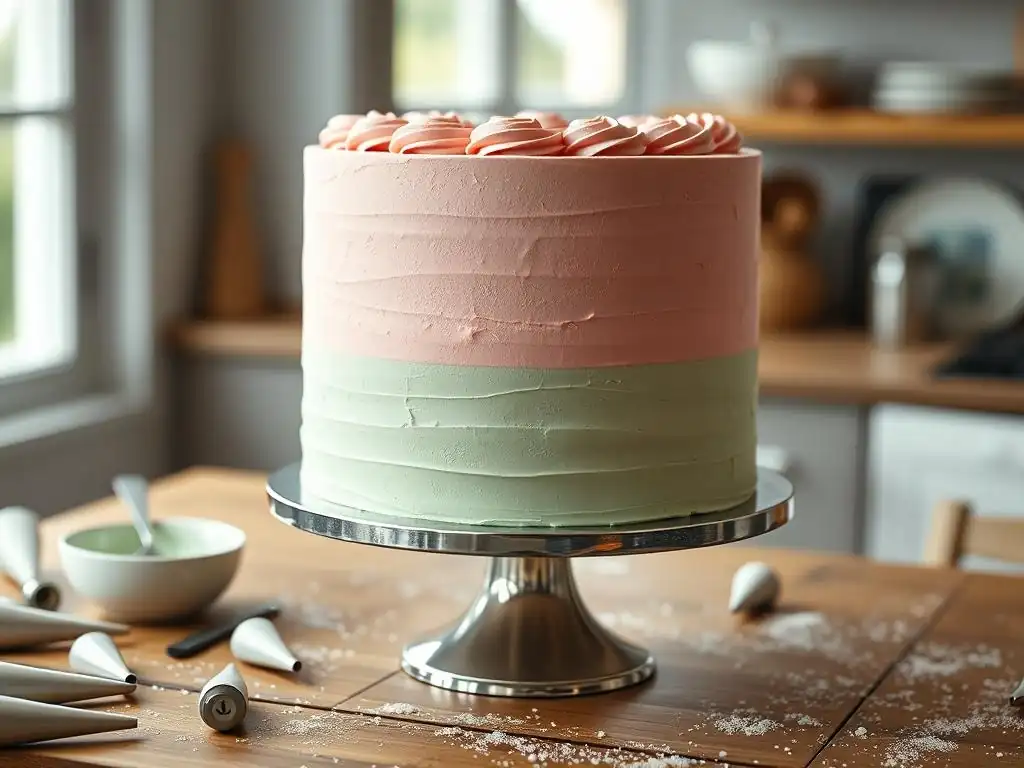
Welcome to BakeWithEase, your kitchen companion for all things baking! Ready to elevate your cakes from simple to stunning? Discover the secrets of creating a professional-looking finish with our Twotone Buttercream Frosting Tutorial. It's easier than you think! Intrigued? Let's get started and unlock the artistry within.
- Mastering Gradient Buttercream: Simple Techniques for Stunning Cakes
- Introduction to Gradient Buttercream Frosting
- Understanding Gradient Buttercream: What You Need
- Gradient Buttercream Tutorial: Step-by-Step Guide
- Gradient Buttercream Frosting Techniques: Beyond the Basics
- Tips and Tricks for Perfect Gradient Buttercream
- Gradient Buttercream Design Ideas and Inspiration
- Conclusion: Mastering the Art of Gradient Buttercream
- Frequently Asked Questions
- Final Reflection: The Enduring Appeal of Two-Tone Buttercream
- Unleash Your Inner Cake Artist: Master the Two-Tone Technique!
Mastering Gradient Buttercream: Simple Techniques for Stunning Cakes
Introduction to Gradient Buttercream Frosting
Elevate Your Cake Decorating with Simple Gradient Techniques
Adding a touch of elegance and visual flair to your cakes doesn't require advanced sculpting or intricate sugar work. One of the most accessible yet stunning techniques is decorating with gradient, or two-tone, buttercream. This method allows you to blend colors seamlessly on your cake, creating a smooth transition from one shade to another, or even from a color to white.
It's a fantastic way to add depth and sophistication to your baked creations, making them look professionally finished with relatively simple steps. Whether you're frosting a birthday cake, cupcakes for a baby shower, or just practicing your piping skills, mastering this easy effect can significantly enhance your decorating repertoire.
This approach is particularly popular for achieving trendy ombre effects, where colors fade into each other. Unlike single-color frosting, gradient buttercream offers a dynamic visual appeal that can complement various cake designs and themes. From subtle pastels for a delicate look to vibrant hues for a bold statement, the possibilities are vast. Learning how to load your piping bag correctly and apply the frosting with control is key to achieving a beautiful color blend, and this technique is surprisingly forgiving, making it perfect for intermediate bakers looking to level up their skills without complex procedures.
Why Choose Gradient Buttercream? Simplicity and Visual Appeal
Choosing gradient buttercream offers a superb balance between ease of execution and high visual impact. For bakers who want their cakes to stand out without spending hours on complex decorations, the two-tone effect provides a quick way to add 'wow' factor. The technique primarily involves preparing your buttercream, coloring it strategically, and loading it into a piping bag in a specific manner. Compared to sculpting fondant or creating intricate gum paste flowers, the process is straightforward and relies more on your buttercream consistency and piping confidence.
The visual appeal is undeniable. A cake frosted with a smooth color gradient immediately catches the eye, conveying a sense of artistry and skill. It adds dimension and interest that a plain frosted cake might lack. Furthermore, gradient frosting is incredibly versatile. It can be used for full cake coverage, piped borders, rosettes, swirls, or even small details like leaves or petals, each application yielding a unique gradient effect. This makes it a go-to technique for achieving beautiful results efficiently.
Understanding Gradient Buttercream: What You Need
Essential Tools for Gradient Buttercream Decoration
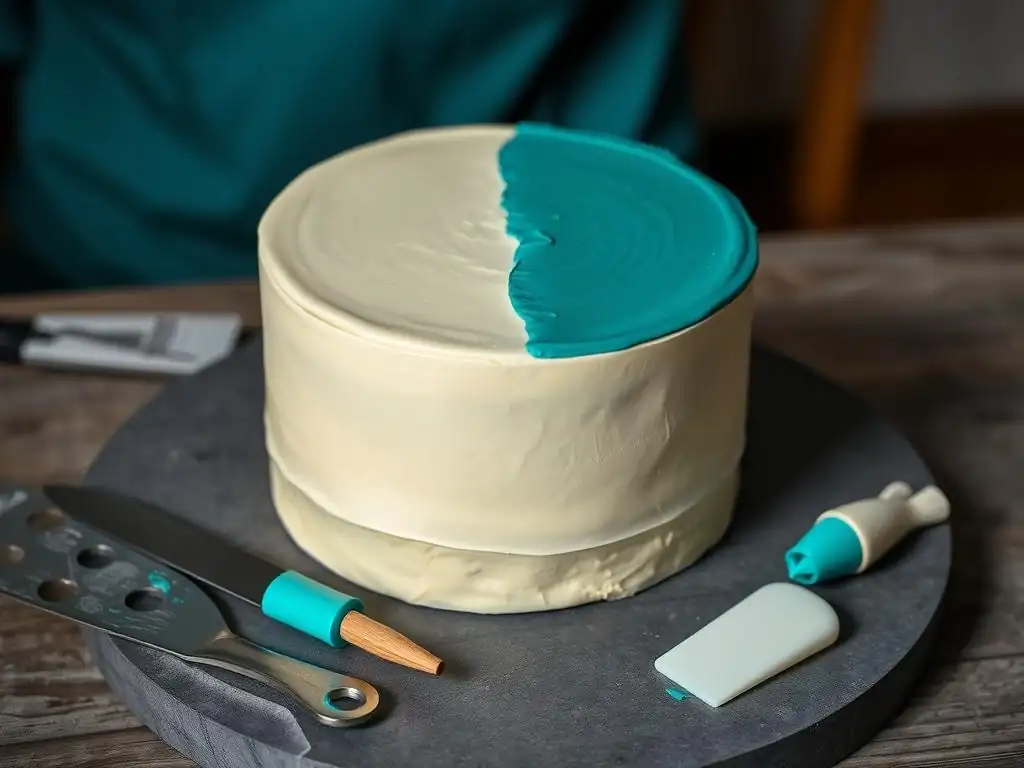
To successfully create beautiful two-tone buttercream effects, you'll need a few key tools. Primarily, you'll need piping bags – disposable or reusable are fine, but ensure they are sturdy enough for piping. You'll also need piping tips. While you can create some effects with just a cut bag, specific tips like a large round tip (like Wilton 1A or similar) for smooth coverage or a star tip (like Wilton 1M) for swirls and rosettes are invaluable. A spatula or bench scraper is essential for smoothing the frosting on the cake's sides if you're doing full coverage.
Additionally, multiple bowls for coloring your buttercream are necessary, typically one for each color plus one for plain or the lightest shade. Measuring spoons are helpful for adding gel coloring consistently. A cake turntable is highly recommended, especially for achieving smooth, even coverage and horizontal or vertical stripes, as it allows you to rotate the cake smoothly while applying pressure to the piping bag. Having these tools ready before you start will streamline the entire process of creating your stunning gradient buttercream design.
Choosing the Right Buttercream for Gradient Effects (Swiss Meringue, Italian Meringue)
The type of buttercream you use significantly impacts the final look and ease of creating a gradient. American buttercream, made from butter and powdered sugar, is common and easy to make, but it can be very sweet and sometimes crusts over quickly, which can make smoothing gradients tricky. Swiss Meringue Buttercream (SMBC) and Italian Meringue Buttercream (IMBC) are often preferred for gradient effects. These buttercreams are made with egg whites and sugar syrup/sugar, resulting in a much smoother, silkier texture that is less sweet and holds colors beautifully without bleeding.
SMBC and IMBC are more stable in warmer temperatures than American buttercream and provide a smooth, pliable texture that is ideal for piping and blending colors seamlessly. Their consistency allows for clean lines when piping stripes and smooth transitions when spreading. While they require a bit more effort to make than American buttercream (involving heating sugar and egg whites), their superior texture and stability for detailed work like a twotone buttercream frosting tutorial make them worthwhile choices for achieving professional-looking results.
Selecting Gel Food Coloring for Gradient Buttercream Designs
When coloring buttercream for gradient effects, gel food coloring is the superior choice over liquid food coloring. Gel colors are highly concentrated, meaning you need only a small amount to achieve vibrant hues. This is crucial because adding too much liquid can alter the consistency of your buttercream, making it too thin or unstable. Gel colors are also less likely to cause colors to bleed into each other over time, which is important for maintaining distinct color bands or smooth transitions in your gradient design.
Look for high-quality gel food colorings specifically designed for frosting and fondant. Brands like Americolor or Wilton's gel pastes are popular choices among decorators. When creating a gradient, you'll typically need at least two colors – often one color and white buttercream, or two complementary/analogous colors. For a classic ombre effect, you might use varying amounts of the same color gel in different batches of buttercream to create shades from light to dark. Starting with a tiny amount of color and gradually adding more allows you to control the intensity and achieve the perfect shades for your gradient.
Gradient Buttercream Tutorial: Step-by-Step Guide
Step 1: Preparing Your Buttercream
The foundation of a great gradient effect is perfectly prepared buttercream. Ensure your buttercream, regardless of type (American, Swiss meringue, etc. ), is smooth, lump-free, and at the right consistency for piping or spreading. It should be soft enough to pipe easily but firm enough to hold its shape. If it's too stiff, you can beat in a tiny amount of milk or cream (about 1 teaspoon at a time). If it's too soft, chill it in the refrigerator for 10-15 minutes, then re-whip it.
Before coloring, give your buttercream a good whip with a paddle attachment on a stand mixer or with a hand mixer for a few minutes on medium speed. This helps to remove any air bubbles and ensures a super smooth texture, which is vital for achieving a clean, professional-looking gradient. A smooth base buttercream will make the subsequent coloring and piping steps much easier and yield a better final result for your twotone buttercream frosting tutorial efforts.
Achieving the Perfect Consistency for Gradient Frosting
The ideal consistency for gradient frosting is somewhere between soft-serve ice cream and peanut butter. It should fall off your spatula slowly in thick ribbons, not plop off in chunks or run off quickly. For piping applications, a slightly firmer consistency is better to help the piped lines hold their shape. For smoothing techniques like horizontal or vertical stripes, a slightly softer, more spreadable consistency works well.
If your buttercream feels too firm after mixing or chilling, let it sit at room temperature for a few minutes and then re-whip it. The mechanical action of the mixer will warm it slightly and make it smooth again. Conversely, if it's too soft and doesn't hold a peak, chilling is the best solution. Aim for a consistency that allows you to pipe without straining your hand but is firm enough that your piped lines don't immediately lose definition. This balance is key to a successful twotone buttercream frosting tutorial outcome.
Step 2: Dividing and Coloring Your Buttercream
Once your buttercream is ready, divide it into the number of portions needed for your gradient. For a simple two-color gradient, you'll need two portions – one for each color. For an ombre effect with multiple shades, divide it into 3, 4, or even 5 portions. For a basic two-tone effect transitioning from a color to white, you'll need one portion for the color and one portion of uncolored buttercream.
Now, it's time to color each portion. Add your gel food coloring to each bowl, starting with a very small amount (e.g., the tip of a toothpick or a tiny drop) and mixing thoroughly until the color is uniform. Gradually add more coloring until you achieve the desired shades. Remember that colors can deepen slightly over time. For an ombre effect, add progressively more color to each subsequent bowl to create a range from lightest to darkest. If using white, leave one portion uncolored. Mix gently to avoid incorporating too much air.
Creating a Smooth Color Transition
The key to a smooth color transition lies in the shades you create and how you load the piping bag. When coloring, ensure the difference between adjacent shades isn't too stark. For a smooth ombre, aim for subtle differences between each bowl of buttercream. For a two-tone effect, ensure your two colors complement each other or create a pleasing contrast.
When loading the bag (which we'll cover next), the arrangement of the colors is what physically creates the transition as you pipe. The goal is for the colors to meet and blend slightly as they are squeezed through the tip. Achieving a truly smooth transition also depends on your piping speed and pressure – consistent pressure helps the colors blend evenly as they emerge. Practice piping on parchment paper first to see how your colors blend before applying them to the cake.
Step 3: Loading Your Piping Bag for Gradient Buttercream
This step is crucial for achieving the gradient effect. There are several ways to load the bag for a twotone buttercream frosting tutorial. A common method for a simple two-tone effect is to prepare your piping bag with the desired tip. Then, take your two colors of buttercream. Using spatulas or spoons, place strips of one color along one side of the inside of the bag, from the tip upwards. Then, place strips of the second color along the other side.
Alternatively, you can lay out a large piece of plastic wrap. Spread one color of buttercream in a stripe along the plastic wrap, then spread the second color next to it, touching the first stripe. You can repeat this with additional colors for a multi-color gradient. Then, carefully roll the plastic wrap into a log, twisting the ends.
Snip off one twisted end and insert this log into your piping bag, pushing the snipped end down towards the tip. This method helps keep the inside of your bag cleaner and makes loading multiple colors easier. Push the buttercream down towards the tip, twisting the top of the bag to apply pressure.
Achieving a Seamless Blend of Colors
Achieving a seamless blend depends on the loading method and your piping technique. When loading colors side-by-side directly into the bag, make sure they are in contact with each other along the length of the bag. As you pipe, the pressure will force the colors together through the tip, creating the blend. The plastic wrap method also ensures the colors are touching before they enter the bag, facilitating the blend.
Once loaded, pipe a little buttercream onto a plate or parchment paper first. The very first bit might be mostly one color or unevenly mixed. Keep piping until you see the gradient effect starting to emerge smoothly. This 'test pipe' helps you ensure the colors are positioned correctly and blending as intended before you start decorating your cake. Consistency in your buttercream's texture is also key here; if one color is significantly stiffer than the other, they won't push through the tip evenly.
Step 4: Practicing Gradient Buttercream Piping Techniques
Before piping directly onto your cake, practice on a sheet of parchment paper. This allows you to get a feel for the pressure needed and see how the colors are blending without risking your final decoration. Practice the specific technique you plan to use on the cake, whether it's piping dots, swirls, stars, or lines.
For swirls or rosettes (using a star tip like 1M), start in the center and spiral outwards, or start at the edge and spiral inwards. Notice how the colors transition as you pipe. For smooth coverage or stripes (using a round tip like 1A or a large open tip), practice applying consistent pressure and moving your hand smoothly. This practice phase is invaluable for mastering the twotone buttercream frosting tutorial and building confidence before working on the actual cake surface. Aim for consistent pressure and speed to ensure an even flow and blend of colors.
Basic Swirls and Other Easy Gradient Designs
One of the easiest and most popular ways to use gradient buttercream is for piping swirls or rosettes on top of cupcakes or a cake. Load your bag with two colors side-by-side (or using the plastic wrap method). Using a star tip (like 1M), hold the bag perpendicular to the surface. Start piping from the center, applying steady pressure, and swirl outwards in a circular motion. As you pipe, you'll see the colors blend beautifully from one to the other within each swirl.
Another simple design is piping vertical stripes around the side of a cake using a large round tip or a smooth piping tip. Hold the bag at the bottom edge of the cake and pipe a straight line upwards, applying consistent pressure. Lift the bag cleanly at the top. Repeat, piping lines side-by-side. The colors loaded side-by-side in the bag will create stripes that transition in color from one edge of the stripe to the other. These basic techniques are great starting points for any twotone buttercream frosting tutorial.
Gradient Buttercream Frosting Techniques: Beyond the Basics
Vertical Gradient Buttercream Stripes
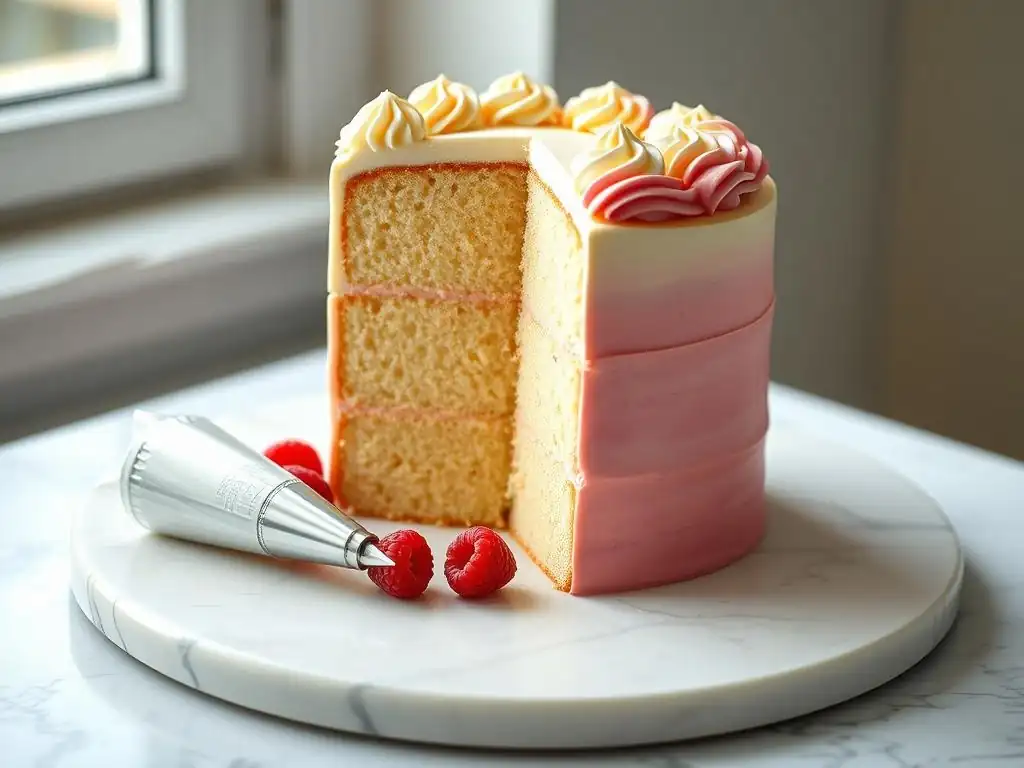
Vertical stripes are a classic and elegant way to apply gradient buttercream to the sides of a cake. After crumb coating and chilling your cake, load your piping bag with gradient colors (using the plastic wrap method is often easiest here, or load colors side-by-side). Use a large round tip or a tip specifically designed for smooth stripes. Starting at the bottom edge of the cake, hold the bag vertically and pipe a straight line upwards to the top edge, applying even pressure.
Pipe the next stripe immediately next to the first one, continuing around the cake. Once the cake sides are covered in piped vertical lines, use a clean bench scraper or a long, flat spatula. Hold the scraper perpendicular to the cake side, touching the surface. Rotate the cake slowly on a turntable while holding the scraper steady. This action will smooth the piped lines into a continuous layer of frosting, blending the colors vertically along the cake side to create a striking gradient effect.
Achieving Clean and Even Stripes
Achieving clean and even vertical stripes requires steady hands and consistent pressure. The key is to pipe lines that are uniform in thickness and spacing. When using the scraper, ensure it is perfectly perpendicular to the cake and held at a consistent angle and pressure as you rotate the turntable. If the scraper isn't flat against the cake or is angled, you'll create uneven stripes or remove too much frosting.
The temperature of your cake and buttercream also plays a role. A slightly chilled cake helps the piped lines adhere better before smoothing. The buttercream should be pliable enough to smooth easily but not so soft that it smudges or bulges. Practice on a dummy cake or the back of a sheet pan before attempting it on your final cake to perfect your technique for this twotone buttercream frosting tutorial.
Horizontal Gradient Buttercream Bands
Horizontal bands of gradient buttercream are another beautiful way to decorate the sides of a cake, creating an ombre effect that wraps around the cake. This technique is particularly effective when using several shades of a single color, transitioning from darkest at the bottom to lightest at the top, or vice versa. After crumb coating and chilling your cake, prepare your buttercream in several shades (e.g., 3-5 shades from dark to light).
Load separate piping bags with each shade, or load one large bag with sections of each shade arranged horizontally using the plastic wrap method. Using a round tip, start at the bottom of the cake and pipe a horizontal band of the darkest color around the entire circumference. Pipe the next lighter shade directly above the first band, touching it, and continue around the cake. Repeat with progressively lighter shades until you reach the top. Then, use a clean bench scraper held parallel to the cake side and rotate the cake to smooth the bands into a continuous gradient.
Creating a Smooth Color Transition
For horizontal bands, the smoothness of the transition relies heavily on the subtle differences between your shades of buttercream and the smoothing process. Ensure your shades are distinct but not drastically different – a gradual change from one hue to the next is essential for a seamless ombre. When piping the bands, try to keep them as level and consistent in thickness as possible.
The smoothing step is where the magic happens. Hold your bench scraper steady and flat against the cake, applying gentle, consistent pressure as you rotate the turntable. The scraper will shave off the excess buttercream and blend the edges of the bands together. You may need to scrape multiple times, cleaning your scraper between passes, to achieve a perfectly smooth and blended finish. The right buttercream consistency (smooth and pliable) is crucial here for easy spreading and blending.
Gradient Buttercream Rosettes and Flowers
Piping rosettes, stars, or even simple flowers with gradient buttercream adds a lovely dimension and color variation to individual elements. Load your piping bag with two colors side-by-side or using the plastic wrap method with a star tip (like 1M for rosettes or a smaller star tip for smaller decorations). As you pipe each rosette or star, the colors will blend from one side to the other within the shape, creating a unique look for each one.
For rosettes, start piping from the center and swirl outwards, or start at the edge and swirl inwards, maintaining consistent pressure. For stars, simply apply pressure, let the buttercream build up, and pull away cleanly. You can pipe these directly onto the top or sides of a cake, or onto cupcakes. This technique is relatively quick but yields beautiful results, showcasing the two-tone effect within each piped element. It's a simple yet effective application within any twotone buttercream frosting tutorial.
Adding Dimension and Elegance to Your Cake
Using gradient buttercream for piped elements like rosettes adds visual interest and sophistication. Each rosette becomes a little piece of art with its own unique color blend. Arranging these rosettes closely together can create a textured surface on the cake top or sides, where the gradient colors flow across the entire surface through the individual elements.
This technique allows you to use multiple colors effectively without needing to cover the entire cake in a gradient. You can pipe gradient rosettes on a plain frosted cake, creating focal points with bursts of color transition. It's a versatile method for adding elegance and a handcrafted feel, perfect for celebration cakes where you want a touch of something special.
Gradient Buttercream Ombre Effect
The ombre effect is perhaps the most popular application of gradient buttercream, involving a smooth transition from one color (often dark) to another (often light or white). This can be applied vertically or horizontally on a cake's sides. The core principle is using multiple shades of the same color buttercream, arranged from darkest to lightest.
To achieve this, divide your buttercream into several portions (e.g., 4-5). Leave one portion uncolored (white). Add a tiny amount of your chosen color to the next portion and mix.
Add slightly more color to the third portion, more to the fourth, and the most to the last portion. This creates a range of shades from white or very light to the deepest hue. Then, apply these shades to the cake, typically starting with the darkest at the bottom and progressing to the lightest at the top, either by piping bands and smoothing or by applying sections directly with a spatula and blending.
Blending Colors Seamlessly for a Stunning Finish
Seamless blending in an ombre effect is achieved by having subtle differences between your shades and careful smoothing. When using the band method (as described in horizontal stripes), the bench scraper smooths and blends the edges of the bands together. For a more freehand approach, you can apply swatches of each color to the cake side with a spatula, placing lighter shades above darker ones, and then use a clean spatula or bench scraper to gently blend the colors together with upward or horizontal strokes.
Ensure your tools are clean between strokes to avoid dragging dark color into light areas unnecessarily. The goal is a soft, diffused transition where it's hard to tell exactly where one shade ends and the next begins. This technique requires a bit of practice, but the result is a truly stunning cake with a professional finish, making it a highlight of any twotone buttercream frosting tutorial.
Tips and Tricks for Perfect Gradient Buttercream
Avoiding Common Gradient Buttercream Mistakes
Several common pitfalls can occur when working with gradient buttercream. One is using liquid food coloring, which can thin the buttercream and cause colors to bleed. Always opt for gel or powder colors. Another mistake is not preparing enough buttercream; it's better to have too much than run out mid-decoration. Estimate approximately 2-3 cups of buttercream for a standard 8-inch two-layer cake for full coverage and some piping.
Not getting the buttercream consistency right is another issue. Too stiff, and it's hard to pipe and smooth; too soft, and it won't hold its shape or blend cleanly. Ensure your buttercream is smooth and pliable. Lastly, rushing the process, especially the smoothing step, can lead to uneven gradients or messy lines. Take your time, practice on parchment, and work methodically for the best results from your twotone buttercream frosting tutorial.
Achieving Consistent Color Distribution
Consistent color distribution within your gradient relies on thorough mixing after adding the gel coloring. Ensure there are no streaks of unmixed color. When creating multiple shades for an ombre, measure your buttercream portions as accurately as possible and add coloring incrementally, mixing fully after each addition. A small kitchen scale can help ensure your portions are equal.
When loading the piping bag, distribute the colors evenly according to the method you're using (e.g., equal strips of each color side-by-side). This ensures that as you pipe, the ratio of colors coming out of the tip remains relatively consistent, leading to a more uniform gradient effect throughout your decoration.
Troubleshooting Gradient Buttercream Issues [e.g., Air Bubbles]
Air bubbles are a common frustration in buttercream, especially when piping. To minimize them, give your buttercream a good whip on low speed for a few minutes after it's fully mixed and colored. This helps force trapped air out. Before loading the piping bag, you can also press the buttercream firmly against the side of the bowl with a spatula to push out air.
If you encounter an air bubble while piping, stop piping, pinch the bag behind the bubble to move it, or gently squeeze the bubble out onto a separate surface before resuming. If your colors aren't blending well, check your buttercream consistency (ensure they are similar) and how you loaded the bag (are the colors making firm contact?). If the gradient is too subtle or too stark, adjust the color intensity in your different buttercream portions.
Storing and Handling Gradient Buttercream Frosted Cakes
Once your cake is beautifully decorated with gradient buttercream, proper storage is key. Cakes frosted with buttercream can typically sit at room temperature for a day or two if the ingredients are stable (i.e., no perishable fillings like fresh fruit or custard). However, for longer storage or if using meringue-based buttercreams, refrigeration is recommended.
To prevent the buttercream from getting damaged or absorbing odors in the fridge, chill the cake uncovered for about 15-20 minutes until the buttercream is firm to the touch. Then, loosely cover it with plastic wrap or place it in a cake carrier. When ready to serve, allow the cake to sit at room temperature for 30-60 minutes (depending on size) to soften the buttercream slightly for the best texture. Handle the cake carefully to avoid smudging your beautiful gradient design.
Gradient Buttercream Design Ideas and Inspiration
Gradient Buttercream Cakes for Different Occasions [e.g., Anniversaries, Baby Showers]
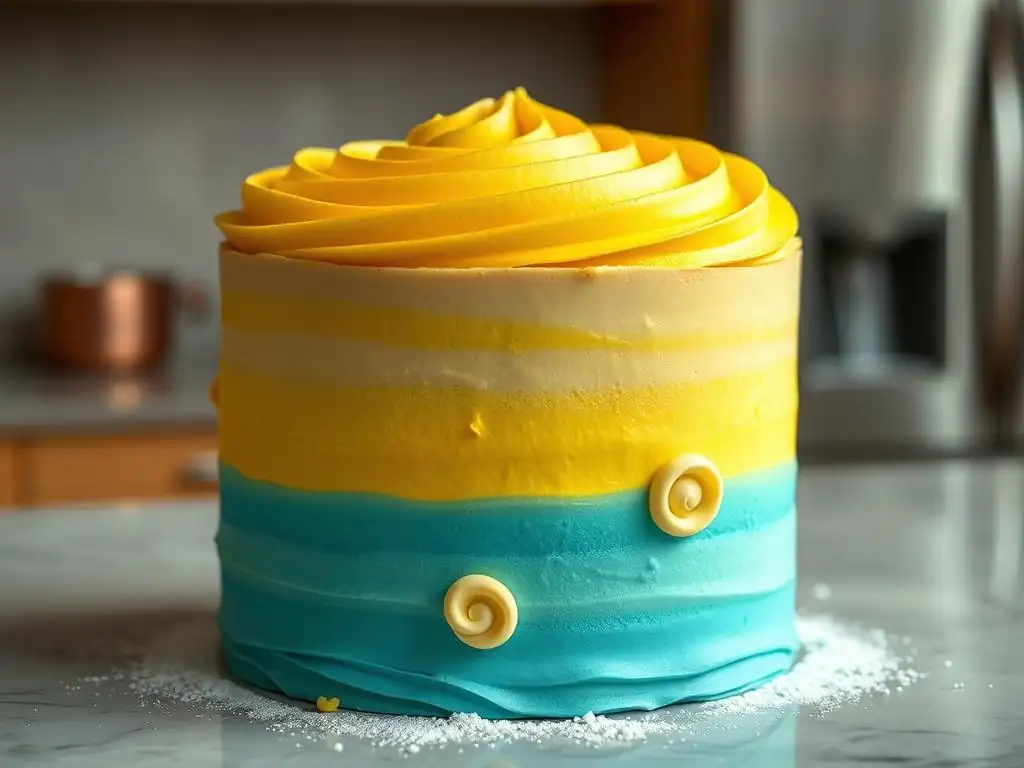
Gradient buttercream is incredibly versatile for various celebrations. For anniversaries, a subtle gradient from white to a deep red or burgundy can create a romantic and sophisticated look. For baby showers, soft pastels like pink and blue blending into white or yellow are popular choices, often combined with gradient rosettes or smooth ombre sides.
Birthday cakes for all ages can feature vibrant gradients using complementary colors like blue and green or warm tones like orange and yellow. The theme of the party can inspire the color palette – for a mermaid theme, think blues and greens blending into purple; for a sunset theme, use oranges, pinks, and yellows. The ease of this twotone buttercream frosting tutorial makes it adaptable to almost any color scheme.
Gradient Buttercream Color Palette Suggestions
Choosing the right color palette is crucial for a visually appealing gradient. Consider using analogous colors – colors next to each other on the color wheel, like blue, blue-green, and green. These blend beautifully and naturally. Monochromatic palettes, using different shades of a single color (e.g., light blue, medium blue, dark blue), are perfect for classic ombre effects.
Complementary colors (opposite each other on the color wheel, like blue and orange) can create striking, vibrant gradients, though they might require more careful blending to avoid muddying. Using one color blending into white or a very light neutral is always a safe and elegant choice. Don't be afraid to experiment with unexpected combinations, but test them on a small batch of buttercream first.
Gradient Buttercream: Examples of Cake Decoration
Think of a tall, elegant wedding cake with sides covered in vertical stripes of gradient buttercream, transitioning from ivory at the base to blush pink at the top, perhaps adorned with a few fresh flowers. Or imagine a fun birthday cake for a child, covered in bright blue and green gradient buttercream swirls using a star tip.
Consider cupcakes topped with generous gradient rosettes, each one a mini masterpiece of color transition. Another example is a smooth, modern cake with sharp edges, where the sides feature a seamless ombre from a deep teal at the bottom fading to a light turquoise at the top. These examples showcase how the basic twotone buttercream frosting tutorial techniques can be applied to create diverse and stunning cake designs.
Conclusion: Mastering the Art of Gradient Buttercream
Enjoy the Simplicity and Beauty of Gradient Buttercream Decoration
Mastering gradient or two-tone buttercream decoration opens up a world of possibilities for elevating your cake designs. The techniques, while requiring a little practice, are fundamentally simple compared to many other decorating methods. The key lies in preparing your buttercream correctly, carefully coloring your portions, and loading your piping bag strategically to allow the colors to blend as you pipe or smooth them onto the cake.
The visual impact of a well-executed gradient is significant, adding a professional and artistic touch to your baked goods with relatively little effort. It's a technique that is both forgiving for beginners and offers endless creative potential for more experienced decorators. Embrace the process, practice your piping, and enjoy the stunning results you can achieve with this beautiful frosting effect.
Further Baking Resources on SweetCreations.com
(Note: As per instructions, this section cannot contain actual links or external references. I will adapt to provide a placeholder-like statement that fits the context of a website.)
To continue your baking journey and explore more decorating techniques, including detailed guidance on different types of buttercream, crumb coating, and advanced piping skills, explore the other resources available on BakeWithEase.com. Our site offers a wealth of articles, tutorials, and tips designed to help bakers of all levels refine their craft and create delicious, beautiful treats. Look for our sections on Buttercream Frosting Techniques and Intermediate Baking for more helpful guides like this twotone buttercream frosting tutorial.
Frequently Asked Questions
What is Two-Tone Buttercream Frosting?
Two-tone buttercream frosting is a decorating technique where two different colors of buttercream are combined on a cake or cupcakes to create a visually appealing effect. This is achieved by using piping bags and tips to apply both colors simultaneously.
Is Two-Tone Buttercream Frosting difficult to make?
No, it's actually quite simple! The technique involves preparing two batches of buttercream, each a different color, and loading them into a single piping bag. The key is to practice your piping technique for a smooth, seamless blend.
What kind of buttercream works best for a Two-Tone effect?
American buttercream is a popular choice due to its stability, but Swiss meringue buttercream or Italian meringue buttercream can also be used. The most important thing is that both colors of buttercream have a similar consistency for even piping.
What piping tips are best for Two-Tone Buttercream?
Star tips and round tips are commonly used, but you can experiment with different tips to achieve various effects. The size of the tip will also affect the look, so consider your desired outcome.
Can I use gel food coloring for Two-Tone Buttercream?
Yes, gel food coloring is highly recommended for buttercream. It provides vibrant colors without altering the buttercream's consistency, unlike liquid food coloring which can make it too runny.
Final Reflection: The Enduring Appeal of Two-Tone Buttercream
The art of two-tone buttercream frosting transcends mere decoration; it's a testament to the power of simple elegance in baking. This seemingly straightforward technique, as explored throughout this tutorial, offers a surprisingly versatile and impactful way to elevate any cake, cupcake, or cookie. From subtle ombre effects to bold, contrasting swirls, the possibilities are as limitless as your imagination.
The enduring appeal of this technique lies not just in its visual impact, but in its accessibility. It's a skill that empowers even novice bakers to create stunning results, fostering a sense of accomplishment and creativity in the kitchen. This democratization of beautiful baking is, I believe, incredibly important. The best things in life are simple,
a sentiment that rings especially true when considering the beauty achieved with just two shades of buttercream.
Now, I invite you to consider your own baking journey. What will you create with this newfound knowledge? Will you experiment with different color combinations, perhaps mirroring the seasonal hues of nature or reflecting your personal style? Will you share this technique with friends and family, spreading the joy of beautiful, delicious creations? The possibilities are endless, and the only limit is your own creativity. Embrace the simplicity, embrace the artistry, and embrace the deliciousness of two-tone buttercream.
Unleash Your Inner Cake Artist: Master the Two-Tone Technique!
Thanks for taking the time to explore the world of two-tone buttercream with us! We hope you've gained some delicious inspiration and confidence in your baking skills. Ready to put your new knowledge into practice?
- Create your masterpiece! Try out the two-tone technique on your next cake – even a simple design will look stunning. Let your creativity flow!
- Share your creations! We'd love to see your beautiful two-tone cakes. Tag us on social media and show off your baking prowess.
- Experiment with flavor combinations: Don't be afraid to try new flavor pairings with your buttercream. What unexpected combinations will you discover?
Ready to transform your cakes from ordinary to extraordinary? What delicious flavor combination will you try first?