
Rescuing Seized Chocolate: A Baker's Emergency Guide

Welcome to BakeWithEase, your haven for all things baking! Ever found yourself in a sticky (or rather, grainy) situation with seized chocolate? Don't despair! This guide unravels the mystery behind chocolate seizing, providing you with practical troubleshooting tips and techniques to rescue your recipe and your sanity. Discover the secrets to smooth, decadent chocolate every time, and let's turn those baking mishaps into masterful creations. Ready to conquer the chocolate conundrum?
- Understanding Chocolate Seizing: Why It Happens and How to Prevent It
- The Baker's Emergency Guide: Rescuing Seized Chocolate
- Beyond the Rescue: Using Rescued Chocolate in Baking
- Chocolate Seizing Troubleshooting: Advanced Tips and Tricks
- Mastering Chocolate Tempering: Avoiding Seizing from the Start
-
Frequently Asked Questions
- What exactly does it mean when chocolate seizes?
- What's the most common cause of chocolate seizing during baking?
- Can you actually reverse seized chocolate, or is it always ruined?
- Will adding more liquid affect the taste or texture of my final baked product?
- Is there anything I can do to prevent chocolate from seizing in the first place?
- Final Reflection: Embracing the Sweetness of Chocolate Mastery
- Unleash Your Inner Chocolate Savior!
Understanding Chocolate Seizing: Why It Happens and How to Prevent It
What is Chocolate Seizing? Identifying the Problem
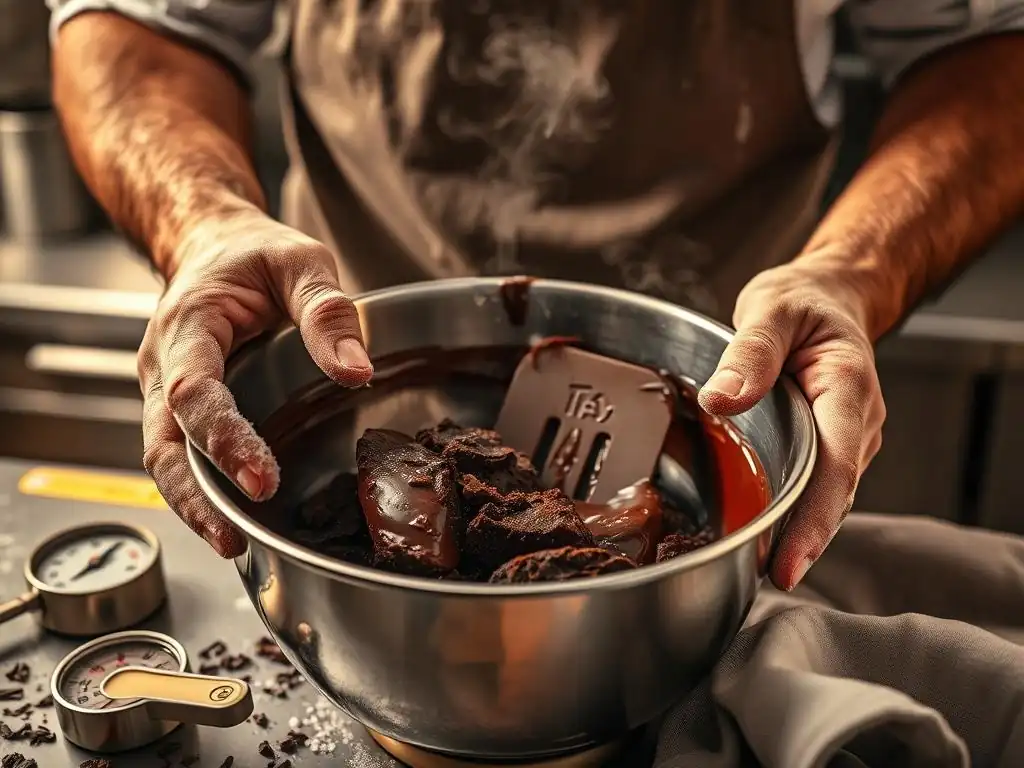
Chocolate seizing is a baker's nightmare – a smooth, glossy pool of melted chocolate can instantly transform into a grainy, lumpy, and unusable mass. This happens when chocolate comes into contact with even a tiny amount of moisture while it's melting. Instead of melting into a fluid state, the sugar crystals in the chocolate clump together.
Cocoa solids and fat separate, resulting in a thick, pasty texture that looks less like luscious melted chocolate and more like gritty mud. It's a common issue in baking, and knowing how to identify seized chocolate is the first step in any chocolate seizing troubleshooting guide.
Identifying seized chocolate is usually quite obvious. As you are melting or working with the chocolate, you'll notice a sudden change in texture. The chocolate will thicken dramatically, lose its smooth consistency, and often develop a dull or grainy appearance. A small amount of moisture, perhaps just a drop of water or steam, is typically the culprit. For example, melting chocolate over a simmering pot of water without a tight-fitting lid can introduce enough steam to cause seizing. Or, adding a liquid ingredient like flavoring extract too early in the melting process can trigger this unwelcome transformation.
Common Causes of Chocolate Seizing: Moisture and Temperature
The primary antagonist in the story of chocolate seizing is moisture. Chocolate is what's known as a hygroscopic substance, meaning it readily absorbs moisture from its surroundings. When chocolate is melted, the sugar particles are suspended in the cocoa butter. If water is introduced, it dissolves the sugar crystals, causing them to stick together and form clumps. These clumps then bind the cocoa solids, displacing the cocoa butter and leading to that characteristic thick, grainy texture. Even residual water in a bowl or on a spatula can be enough to ruin a batch of carefully melted chocolate.
Temperature also plays a subtle but important role. Melting chocolate too quickly or at too high a temperature can exacerbate the risk of seizing, particularly if any moisture is present. Overheating can also cause the cocoa solids to burn or the cocoa butter to separate, leading to a similarly undesirable texture, although technically different from true moisture-induced seizing.
Using a gentle heat source, like a double boiler or microwave on low power with short intervals, is crucial for successful melting and minimizing the risk of your chocolate seizing. A common recommendation is to melt chocolate over water that is simmering, not boiling, and to ensure the bottom of your melting bowl does not touch the water.
Preventing Chocolate Seizing: Key Techniques for Smooth Chocolate
Prevention is always better than cure, especially when it comes to working with sensitive ingredients like chocolate. The absolute golden rule for preventing chocolate seizing is to keep it away from water. This means using completely dry bowls, spatulas, and any other utensils that will come into contact with the chocolate. If you're using a double boiler, ensure the pot of water has a tight-fitting lid to prevent steam from escaping and condensing into the chocolate. Wipe down the outside of the melting bowl before removing it from the heat source.
Beyond moisture control, proper temperature management is vital. Melt chocolate slowly and gently. If using a microwave, heat in 20-30 second intervals, stirring thoroughly after each interval, until only a few small lumps remain, then stir until smooth from the residual heat. This prevents localized overheating.
For a double boiler, use low to medium heat and stir continuously. Adding a tiny amount of fat, like a teaspoon of vegetable oil or cocoa butter, before melting can sometimes help create a buffer against minor moisture contamination, though this isn't a foolproof method against significant water exposure. Following these preventive steps is a key part of any effective chocolate seizing troubleshooting guide.
The Baker's Emergency Guide: Rescuing Seized Chocolate
Assessing the Damage: Is Your Chocolate Salvageable?
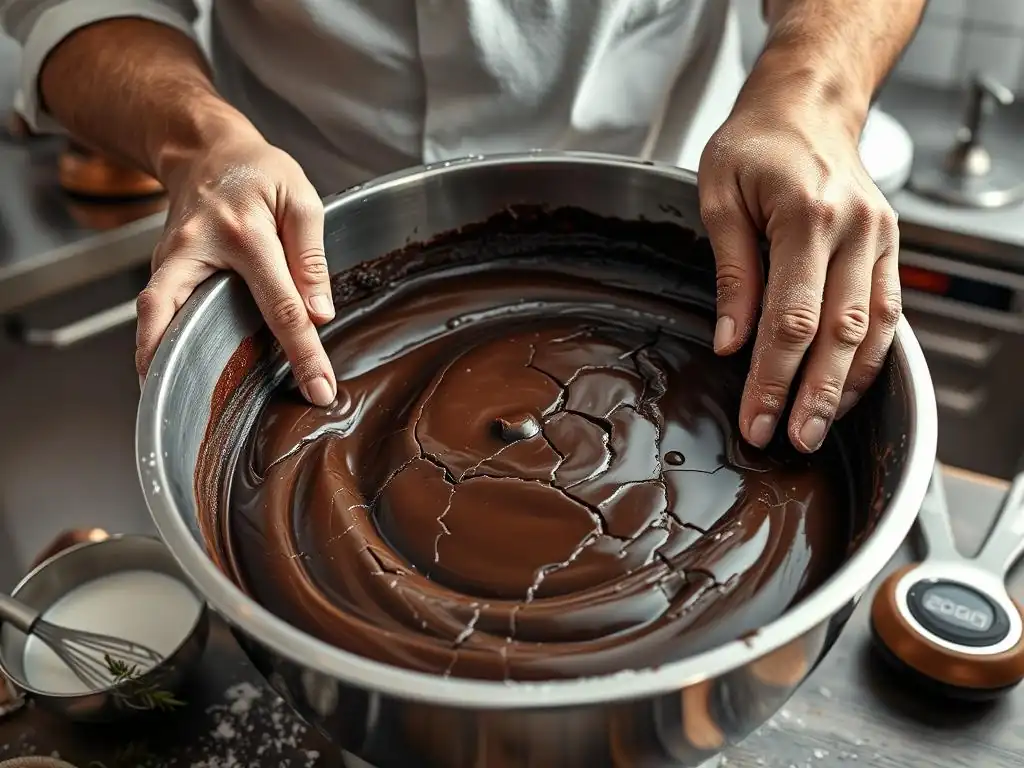
So, despite your best efforts, your chocolate has seized. Don't panic immediately! The first step in this chocolate seizing troubleshooting guide is to assess the severity of the situation. Look at the texture: is it just slightly thick and grainy, or has it turned into a solid, crumbly mass? If the chocolate has become extremely thick and crumbly, almost like dry crumbs, it might be beyond easy rescue for certain applications like dipping or coating, which require ultimate smoothness. However, even severely seized chocolate can often be repurposed.
Consider the volume of chocolate involved and the type of chocolate. Dark chocolate, with its higher cocoa solid content and lower sugar, can sometimes be more forgiving than milk or white chocolate, which have more sugar and milk solids that can react poorly to moisture. If you have a large quantity of expensive chocolate that has seized, attempting a rescue is definitely worthwhile.
If it's a small amount of basic chocolate, you might weigh whether the effort is worth it compared to starting over. A key indicator of potential salvageability is if there's still some fluidity or paste-like consistency rather than a completely solid crumb.
Rescue Method 1: Adding Fat to Revive Seized Chocolate
One of the most common and often effective methods for rescuing seized chocolate is by adding a small amount of fat. The idea here is to introduce enough liquid fat to coat the sugar crystals and cocoa solids that have clumped together, essentially loosening them up and restoring some fluidity. This method works best when the seizing isn't too severe. You need to add a fat that is liquid at room temperature or melts easily and is neutral in flavor, or complementary to chocolate.
When adding fat, start with a very small amount, perhaps 1/2 to 1 teaspoon per cup (about 170g) of seized chocolate. Add it to the seized chocolate and stir vigorously and continuously. You might need to gently reapply a little heat if the chocolate has cooled down, but be very careful not to overheat it.
Add more fat, a tiny bit at a time, stirring constantly, until the chocolate begins to loosen and become smoother. Be patient; it can take a minute or two of stirring for the fat to incorporate and start breaking up the clumps. The goal is to achieve a usable consistency, though it may not be as perfectly smooth as correctly melted chocolate.
Using Refined Coconut Oil to Fix Seized Chocolate
Refined coconut oil is an excellent choice for rescuing seized chocolate because it has a neutral flavor and a relatively low melting point, becoming liquid easily. It's also a readily available pantry staple for many bakers. When your chocolate seizes, measure out a small amount of refined coconut oil – perhaps starting with 1 teaspoon for every 150-200 grams of seized chocolate. Gently heat the seized chocolate slightly if it has cooled, then stir in the melted coconut oil.
Continue stirring the mixture firmly. The coconut oil will help coat the sugar crystals and cocoa solids, facilitating their separation and allowing the cocoa butter to become more mobile again. You may need to add another half teaspoon or teaspoon of coconut oil, depending on the amount of chocolate and the severity of the seizing. Keep adding and stirring until the chocolate reaches a pourable or spreadable consistency. Remember that adding fat will change the overall composition slightly, potentially making the final product a little softer.
Employing Cocoa Butter for Smooth Chocolate Restoration
Using cocoa butter is arguably the most ideal fat for rescuing seized chocolate, as it is the natural fat component of chocolate itself. Adding cocoa butter won't introduce foreign flavors and will best maintain the chocolate's original characteristics, aside from the slightly altered texture from the initial seizing. Like coconut oil, cocoa butter melts easily and can help restore fluidity. Start by melting a small amount of cocoa butter separately.
Once you have a small amount of melted cocoa butter (again, perhaps 1 teaspoon per 150-200 grams of chocolate), add it gradually to the seized chocolate while stirring vigorously. Gentle warmth can help here. Stir continuously until the chocolate begins to smooth out. If it's still too thick, add a tiny bit more melted cocoa butter and continue stirring. This method is particularly useful if you plan to use the rescued chocolate in applications where maintaining pure chocolate flavor is paramount.
Anhydrous Milkfat (Ghee) as a Chocolate Seizing Solution
Anhydrous milkfat, commonly known as ghee or clarified butter, can also be used as a fat additive to rescue seized chocolate, though it introduces a slight buttery flavor. It's essentially butter with the water and milk solids removed, making it pure fat. This lack of water is key, as adding regular butter (which contains water) would only worsen the seizing. Ghee has a pleasant, slightly nutty flavor that can complement chocolate well in certain recipes.
To use ghee, gently melt a small quantity (e.g., 1/2 to 1 teaspoon per 150-200g chocolate). Add the melted ghee to the seized chocolate while stirring constantly over very low heat or off the heat if the chocolate is still warm. Stir until the texture improves. The milkfat helps to lubricate the seized particles. While effective, remember that ghee will impart its characteristic flavor, so consider if this is desirable for your specific baking project. This fat-addition approach is a cornerstone technique in a practical chocolate seizing troubleshooting guide.
Rescue Method 2: The Water Addition Technique (Carefully!)
This method sounds counter-intuitive given that water causes seizing, but it can work for severely seized chocolate, transforming it into a ganache-like consistency. The key is to add a sufficiently large amount of water, not just a drop or two. A small amount of water causes the sugar crystals to clump; a larger amount can dissolve the sugar and create a smooth emulsion again, similar to how ganache is made by combining chocolate and cream (which contains water).
This technique is not for the faint of heart and requires careful execution. It will fundamentally change the nature of the chocolate from pure melted chocolate to a chocolate-water mixture, making it suitable for different applications. It's a more advanced step in a chocolate seizing troubleshooting guide and should be approached with caution, as adding too little water can make the seizing even worse.
When to Use the Water Addition Method
The water addition method is best employed when your chocolate is severely seized and the fat addition method hasn't worked sufficiently or you need a different final consistency. If your chocolate has turned into a thick, paste-like or even crumbly solid mass, adding a significant amount of liquid might be the only way to make it usable again. This method is particularly suitable if you intended to make a ganache, a glaze, or a sauce, as these applications already incorporate liquid.
Do not use this method if you need the chocolate for tempering, dipping candies, or molding, as the added water will prevent the chocolate from setting properly with a snap. It's a rescue for texture and usability in certain contexts, not a restoration to its original form. If you're unsure, try the fat addition method first, as it's less drastic.
Step-by-Step Guide: Adding Water to Seized Chocolate
To attempt the water addition method, gently heat the seized chocolate again if it has cooled. Get some boiling water ready. The ratio is critical, but a general starting point is to add 1 tablespoon of boiling water for every 1 to 2 ounces (about 30-60 grams) of seized chocolate. Pour the boiling water directly into the seized chocolate.
Immediately begin stirring vigorously with a whisk or spatula. It might look worse at first, becoming even thicker or more clumpy. Keep stirring! The heat from the boiling water and the continuous agitation will help the sugar crystals dissolve and emulsify the mixture. Stir until it transforms into a smooth, glossy, ganache-like consistency. You might need to add another splash of boiling water if it's still too thick, but add it gradually and continue stirring until smooth.
Important Considerations: Avoiding Further Seizing
While adding water is the rescue method here, you still need to be careful about how you add it to avoid making things worse before they get better. Always use boiling water, not just warm or hot water. The high temperature helps with emulsification and dissolving the sugar. Add the water all at once (the initial amount), rather than drop by drop, and stir immediately and vigorously.
Do not stop stirring until the mixture becomes smooth. If you add the water and hesitate, you risk worsening the seizing. Also, be aware that the resulting mixture will be a water-based chocolate mixture, not pure chocolate. It will not behave like melted chocolate for things like tempering or solid chocolate candy making. Use this rescued chocolate in applications where the presence of water is acceptable or even desired, like sauces or ganaches.
Rescue Method 3: The Power of Emulsifiers
Emulsifiers are substances that help oil and water mix smoothly, preventing them from separating. Since chocolate seizing is essentially a breakdown of the emulsion between the cocoa butter (fat) and the sugar/cocoa solids (which are affected by water), adding an emulsifier can sometimes help restabilize the mixture and improve the texture. This is a less common home baking rescue method but is used commercially.
Adding a small amount of a suitable emulsifier can help to coat the dispersed particles in the seized chocolate, allowing them to distribute more evenly within the fat phase and preventing them from clumping together as severely. It's a technique that can be useful in a comprehensive chocolate seizing troubleshooting guide, particularly for bakers who work with chocolate frequently.
What are Emulsifiers and How They Help
Emulsifiers are molecules with one end that is attracted to water (hydrophilic) and another end that is attracted to fat (lipophilic). In the context of seized chocolate, emulsifiers can help bridge the gap between the cocoa butter and the water-affected sugar/cocoa solids. They essentially act as a mediator, holding the fat and water phases together in a stable mixture.
By coating the surface of the sugar crystals and cocoa solids, emulsifiers prevent them from aggregating into large clumps when moisture is present. This allows the cocoa butter to flow more freely around the particles, restoring a smoother, more fluid texture to the seized chocolate. While chocolate naturally contains some emulsifiers (like lecithin), adding a bit more can sometimes give it the extra help needed to overcome the seizing issue.
Using Soy Lecithin to Stabilize Seized Chocolate
Soy lecithin is a common food emulsifier found in many processed foods, including chocolate itself. It's available in granular, powder, or liquid form in many health food stores or online. A very small amount is usually sufficient. If you have seized chocolate, you could try adding a tiny pinch (perhaps 1/8 to 1/4 teaspoon per cup of chocolate) of lecithin powder or a drop or two of liquid lecithin.
Add the lecithin to the gently warmed seized chocolate and stir vigorously. The lecithin will work to emulsify the fat and any residual moisture, helping to break down the clumps and smooth out the texture. You should see an improvement in consistency as you stir. Soy lecithin is quite effective and doesn't impart a strong flavor, making it a good choice for chocolate rescue.
Sunflower Lecithin for Chocolate Rescue
For those avoiding soy, sunflower lecithin is an excellent alternative that functions similarly as an emulsifier. It is also available in various forms. Like soy lecithin, only a very small amount is needed to potentially help rescue seized chocolate. Add a tiny pinch or a drop to your seized chocolate while gently warming and stirring.
Sunflower lecithin will help stabilize the mixture and improve the texture by assisting in the emulsification process. Stir continuously until you observe the chocolate becoming smoother. Both soy and sunflower lecithin are powerful emulsifiers, so start with a minimal amount and add slightly more only if necessary. Using emulsifiers is a less traditional home rescue method but can be effective as part of a thorough chocolate seizing troubleshooting guide.
Beyond the Rescue: Using Rescued Chocolate in Baking

Adjusting Recipes for Rescued Chocolate
Once you've successfully rescued your seized chocolate using one of the methods above, it's important to understand that its properties might have changed slightly, depending on the rescue method used. If you added fat (like coconut oil or cocoa butter), the chocolate will have a slightly higher fat content. This might make it melt more easily or result in a slightly softer texture in your finished baked goods. If you used the water addition method, the chocolate is now essentially a ganache or sauce base and cannot be used in recipes requiring pure melted chocolate (like tempering or molding).
When incorporating fat-rescued chocolate into recipes, you might need to slightly reduce the amount of other fats (like butter or oil) in the recipe, though this often isn't strictly necessary unless you added a significant amount of fat. For water-rescued chocolate (ganache-like), think of it as a liquid ingredient. You can use it in place of ganache or melted chocolate mixed with cream/liquid in recipes for glazes, sauces, or moist cakes and brownies. You cannot simply substitute it cup-for-cup for pure melted chocolate in recipes like cookies or solid chocolate candies.
Best Baking Applications for Rescued Chocolate: Chocolate Crumb Topping, Ganache
Rescued chocolate, especially if it retains a slightly less-than-perfect texture even after rescue, is ideal for applications where ultimate smoothness isn't critical or where the texture is intentionally altered. One fantastic use is transforming slightly grainy, fat-rescued chocolate into a delicious chocolate crumb topping for muffins, cakes, or pies. Simply combine the rescued chocolate (it might be somewhat solid or very thick) with flour, sugar, and maybe some cold butter, then crumble it over your baked goods before baking.
Another prime application, particularly for chocolate rescued with the water addition method, is ganache. Since this method essentially creates a basic ganache, you can simply use it as is for glazes, fillings, or whipping into a frosting. Even fat-rescued chocolate can often be turned into a decent ganache by heating it with cream. Other great uses include incorporating it into moist brownie batter, using it as a layer in a no-bake dessert, or making a warm chocolate sauce.
Recipes That Shine with Rescued Chocolate
Many recipes can accommodate rescued chocolate, making sure your efforts to save it don't go to waste. For chocolate rescued with added fat, consider using it in dense, moist baked goods like brownies or chocolate cakes where a slightly different texture won't be detrimental. A moist chocolate loaf cake, for instance, can easily incorporate fat-rescued chocolate into the batter. Simply melt it gently and stir it in as the recipe directs for melted chocolate.
If you used the water addition method, think ganache-based recipes. A simple chocolate glaze for a Bundt cake, a filling for cupcakes, or a warm fudge sauce for ice cream are perfect uses. You can also incorporate this ganache-like mixture into very moist brownie or cake recipes, sometimes adjusting other liquid ingredients slightly.
For example, a recipe calling for 4 ounces of melted chocolate and 1/4 cup of milk might work well with 4 ounces of your water-rescued chocolate, adjusting the milk slightly depending on consistency. Utilizing seized chocolate in these ways is a practical element of any chocolate seizing troubleshooting guide.
Chocolate Seizing Troubleshooting: Advanced Tips and Tricks
Dealing with Severely Seized Chocolate: When to Cut Your Losses
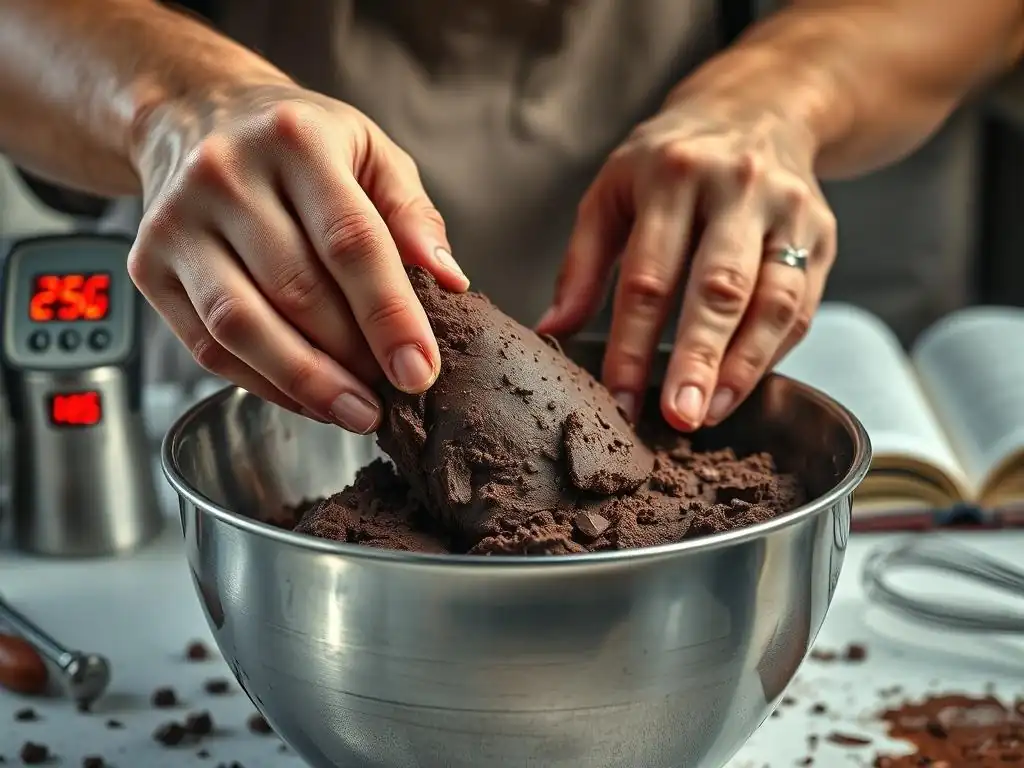
Sometimes, despite your best efforts following a chocolate seizing troubleshooting guide, the chocolate is too far gone or the intended application requires a level of smoothness that cannot be achieved with rescued chocolate. If the chocolate has become a completely dry, crumbly mass that doesn't respond to adding fat or even boiling water (in appropriate amounts), it might be unsalvageable for standard baking uses like melting or incorporating into batters.
In such cases, consider repurposing it in ways that don't require melting or a smooth consistency. You can let it cool and harden completely, then chop it up and use it as chocolate chips in cookies or muffins (though the texture will be different from standard chips). You could also grind it into a powder using a food processor and use it in place of some cocoa powder in recipes, though you'll need to account for the added fat. Sometimes, accepting that a batch is best used for a different purpose or discarded is the most practical step.
Temperature Control: The Ultimate Chocolate Seizing Prevention Strategy
While moisture is the direct cause of seizing, poor temperature control can contribute to the problem and make rescue more difficult. Melting chocolate too quickly or allowing it to get too hot can make it more susceptible to seizing if even a speck of moisture is introduced. Overheating can also cause the cocoa solids to burn, resulting in a bitter, acrid taste that no amount of rescue will fix.
Mastering gentle melting techniques is paramount. Use a double boiler over simmering, not boiling, water, ensuring the bowl doesn't touch the water. Stir frequently. If using a microwave, use medium or low power and heat in short bursts (20-30 seconds), stirring thoroughly between each burst. Remove from the microwave when there are still small lumps and stir until smooth from residual heat. Never walk away from chocolate melting on the stovetop or in the microwave. Constant vigilance and gentle heat are your best defense against needing a chocolate seizing troubleshooting guide in the first place.
Choosing the Right Chocolate for Your Baking Project: Minimizing Seizing Risk
The type and quality of chocolate you use can also influence its susceptibility to seizing. Compound chocolate (often labeled "baking melts" or "wafers") contains vegetable oils instead of or in addition to cocoa butter and often includes more sugar and emulsifiers. These chocolates are designed to melt smoothly and are much less prone to seizing from moisture or overheating compared to couverture or even standard baking bar chocolate. If you are new to working with melted chocolate or are making something where seizing is a high risk (like chocolate fountains), compound chocolate can be a safer choice.
High-quality bar chocolate or couverture chocolate (which contains a high percentage of cocoa butter) is more sensitive to temperature and moisture but offers superior flavor. When using these, strict adherence to gentle melting techniques and keeping moisture at bay is crucial. Dark chocolate is generally less prone to seizing than milk or white chocolate due to its higher cocoa solid and lower sugar/milk content. Understanding the properties of different chocolates helps you anticipate potential issues and apply the right steps from a chocolate seizing troubleshooting guide.
Mastering Chocolate Tempering: Avoiding Seizing from the Start
The Importance of Proper Chocolate Tempering
Tempering chocolate is a process of heating and cooling chocolate to specific temperatures to stabilize the cocoa butter crystals. When chocolate is properly tempered, it will set with a glossy finish, a firm snap when broken, and will resist melting at room temperature. It's essential for making professional-looking chocolate candies, dipping fruits or confections, and creating decorative elements. Untempered chocolate will set with streaks or bloom (white streaks or spots) and have a soft, crumbly texture.
Proper tempering also involves careful temperature control, which inherently minimizes the risk of overheating and makes the chocolate slightly less susceptible to minor temperature fluctuations during the process. While tempering doesn't directly prevent seizing from moisture, the disciplined temperature management required for tempering reinforces good habits that reduce overall risk factors. Mastering tempering is a valuable skill in any baker's repertoire and complements a good chocolate seizing troubleshooting guide by helping you avoid problems initially.
Tempering Techniques to Prevent Seizing
All standard tempering methods (tabling, seeding, or using cocoa butter silk/Mycryo) involve careful temperature control and avoiding moisture. The seeding method, for instance, involves melting chocolate to an initial temperature (around 115°F for dark, 105°F for milk/white), then cooling it down by stirring in solid, tempered chocolate (seed chocolate) until it reaches a working temperature (around 88-92°F for dark, 84-88°F for milk/white). Finally, it might be briefly warmed back up to the working temperature.
Throughout this process, maintaining the correct temperatures and, critically, ensuring absolutely no water comes into contact with the chocolate is paramount. The precise temperature ranges are designed to encourage the formation of stable beta crystals in the cocoa butter. Any moisture introduced at any stage will disrupt this crystalline structure and cause seizing, ruining the temper and the texture. Following a reliable tempering guide is key.
Tools for Successful Chocolate Tempering and Seizing Prevention
Using the right tools makes successful chocolate tempering and seizing prevention much easier. A reliable digital thermometer is essential for monitoring temperatures precisely during melting and tempering; guessing temperatures is a recipe for failure and increased seizing risk. A double boiler setup (a heatproof bowl set over a pot of simmering water, ensuring the bowl doesn't touch the water) provides gentle, even heat for melting.
Alternatively, a microwave used on low power with frequent stirring is also effective. For tempering, a marble slab (for the tabling method) or simply a clean, dry bowl and spatula (for seeding) are needed. Crucially, ensure all tools that touch the chocolate – bowls, spatulas, thermometers, whisks – are completely dry. Even a single drop of water can trigger seizing. Investing in quality tools and maintaining them properly is an important step in preventing issues and minimizing the need for a chocolate seizing troubleshooting guide.
Frequently Asked Questions
What exactly does it mean when chocolate seizes?
Chocolate seizing refers to the phenomenon where melted chocolate turns thick, grainy, and unworkable. This happens when moisture comes into contact with melted chocolate.
What's the most common cause of chocolate seizing during baking?
The most common culprit is water or steam getting into the melted chocolate. Even a tiny drop can trigger the seizing process, making it difficult to work with.
Can you actually reverse seized chocolate, or is it always ruined?
Yes, you can often reverse seized chocolate. The key is to add more liquid, such as hot water or melted butter, in small increments, until the chocolate smooths out.
Will adding more liquid affect the taste or texture of my final baked product?
Adding too much liquid can affect the final product's consistency and potentially dilute the chocolate flavor. It's crucial to add liquid slowly and carefully, just enough to smooth the chocolate.
Is there anything I can do to prevent chocolate from seizing in the first place?
Absolutely! Ensure all utensils and bowls are completely dry. Avoid steaming near the chocolate, and melt it gently over a double boiler or in short bursts in the microwave.
Final Reflection: Embracing the Sweetness of Chocolate Mastery
In a world where culinary creativity often meets unexpected challenges, the ability to troubleshoot chocolate seizing is more relevant than ever. As bakers and dessert enthusiasts navigate the complexities of chocolate, understanding how to rescue seized chocolate not only enhances our baking skills but also fosters resilience in the kitchen. The art of chocolate-making is a journey filled with both triumphs and tribulations, and mastering this skill can transform a potential disaster into a delightful success.
The influence of chocolate in our culture is profound, transcending mere indulgence to become a symbol of love, celebration, and comfort. The act of baking with chocolate has the power to bring people together, creating shared experiences that linger in our memories. As we learn to overcome obstacles like seizing, we not only improve our techniques but also deepen our connection to this beloved ingredient. Chocolate is the answer. Who cares what the question is?
This sentiment captures the essence of our relationship with chocolate, reminding us that even in moments of frustration, there is joy to be found in the process.
As you reflect on the lessons shared in this guide, I invite you to embrace the challenges that come with baking. Consider each mishap an opportunity for growth and creativity. Whether you’re a seasoned baker or just starting your culinary journey, remember that every experience with chocolate is a chance to learn and innovate. So, the next time you encounter seized chocolate, take a deep breath, apply the troubleshooting techniques, and let your passion for baking shine through. Your journey in the world of chocolate is just beginning, and the sweetest successes are yet to come.
Unleash Your Inner Chocolate Savior!
Thanks for diving into the world of chocolate rescue with us! You've now got the tools to handle those seized chocolate emergencies like a pro. Ready to put your newfound skills to the test?
- Whip up a batch of your favorite recipe using your perfectly salvaged chocolate. This is the ultimate test of your newly acquired skills—and the most delicious reward!
- Share your chocolate rescue stories – Let's build a community of bakers who refuse to let seized chocolate win! Tell us about your biggest chocolate disasters (and triumphs!) in the comments below.
- Experiment with different methods – Try out the techniques from the article on other types of chocolate. Each type has its own quirks!
What chocolatey challenge will you tackle first?