
Baking Rustic Bread Without a Dutch Oven: Alternative Methods

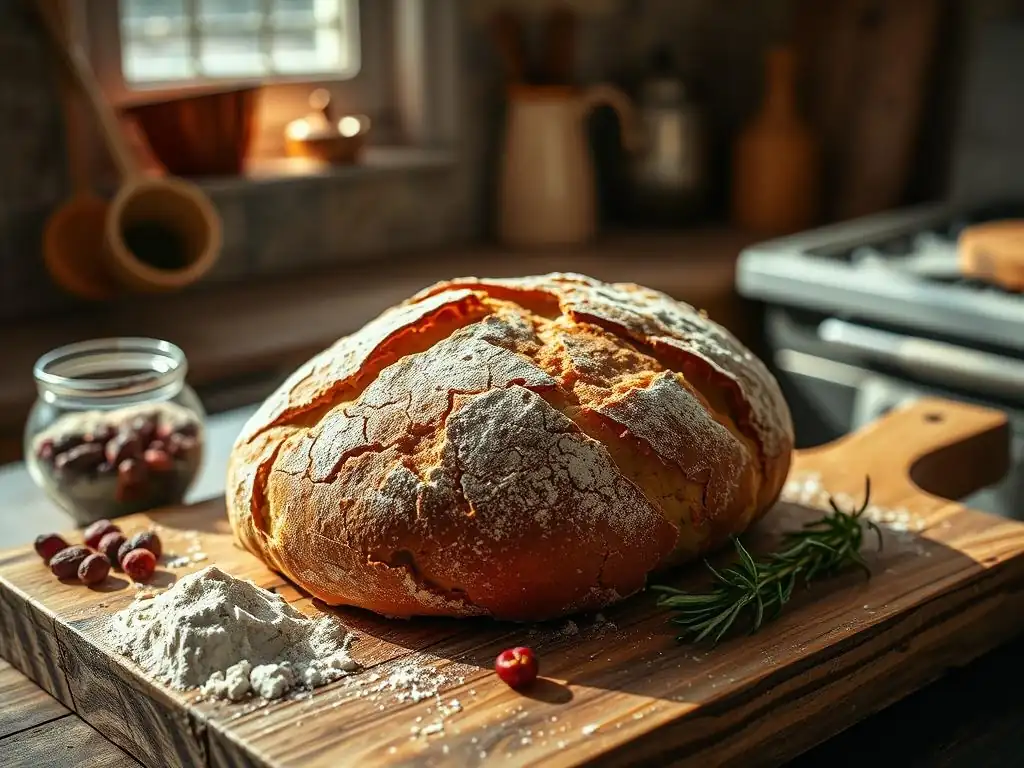
Welcome to BakeWithEase, where simplifying baking is our passion! Ever dreamt of that perfectly crusty, rustic loaf but don't have a Dutch oven? Prepare to be amazed! This article unveils surprisingly simple methods for baking delicious, easy Dutch oven-free bread, proving that incredible homemade bread is within everyone's reach. Discover the secrets and unlock a world of baking possibilities – let's get started!
- Introduction: Achieving Rustic Bread Perfection Without a Dutch Oven
- Understanding the Dutch Oven's Role in Rustic Bread Baking
- Alternative Methods for Baking Dutch Oven-Free Bread
- Tips for Achieving Dutch Oven-Like Results Without a Dutch Oven
- Troubleshooting Common Issues When Baking Rustic Bread Without a Dutch Oven
- Recipes for Dutch Oven-Free Bread
- Conclusion: Enjoying Delicious Rustic Bread, No Dutch Oven Required
-
Frequently Asked Questions
- How can I bake rustic bread without a Dutch oven?
- What is the key to a crispy crust when baking bread without a Dutch oven?
- Can I use a regular baking sheet instead of a baking stone or cast iron skillet?
- What temperature should I bake the bread at when using alternative methods?
- How do I know when the bread is done baking without a Dutch oven?
- Final Reflection: The Liberating Loaf: Baking Rustic Bread Beyond the Dutch Oven
- Unleash Your Inner Baker: Mastering Rustic Bread Without a Dutch Oven!
Introduction: Achieving Rustic Bread Perfection Without a Dutch Oven
Baking rustic bread at home is a deeply rewarding experience, yielding loaves with delightfully chewy interiors and crisp, crackly crusts. Often, recipes for achieving this result call for a Dutch oven, a heavy pot that creates the ideal environment for baking bread. However, not everyone owns a Dutch oven, and that shouldn't stop you from enjoying delicious, homemade rustic loaves.
The good news is that you can absolutely bake fantastic bread without this specific piece of equipment. This guide will walk you through alternative methods that prove baking Easy Dutch ovenfree bread is not only possible but also accessible with common kitchen items.
This article explores several effective ways to replicate the benefits of a Dutch oven using alternative tools and techniques. We'll delve into the science behind why a Dutch oven works so well and then show you how to achieve similar results using items like pizza stones, baking sheets, roasting pans, and even lava rocks. By understanding the principles of heat and steam, you can confidently bake beautiful, rustic loaves right in your standard oven. Get ready to discover simple, effective strategies for baking Easy Dutch ovenfree bread that will impress your taste buds and your friends.
Why Bake Rustic Bread Dutch Oven-Free? Exploring Alternatives
While Dutch ovens are excellent for bread baking, their cost can be prohibitive for some, ranging from $50 for basic cast iron to over $300 for enameled versions. Additionally, they are heavy and take up significant storage space, which might not be ideal for smaller kitchens. Exploring Easy Dutch ovenfree bread methods opens up the world of rustic baking to anyone, regardless of their budget or kitchen size. These alternative techniques often utilize items you already own, making the process more convenient and less of an investment.
Furthermore, experimenting with different methods can enhance your understanding of the baking process itself. By manipulating steam and heat in various ways, you gain valuable insights into how these factors influence crust development and crumb structure. For instance, learning to create steam manually might give you more control over the final texture compared to the contained environment of a Dutch oven. Embracing Easy Dutch ovenfree bread methods is about flexibility, accessibility, and deepening your baking knowledge.
Understanding the Dutch Oven's Role in Rustic Bread Baking
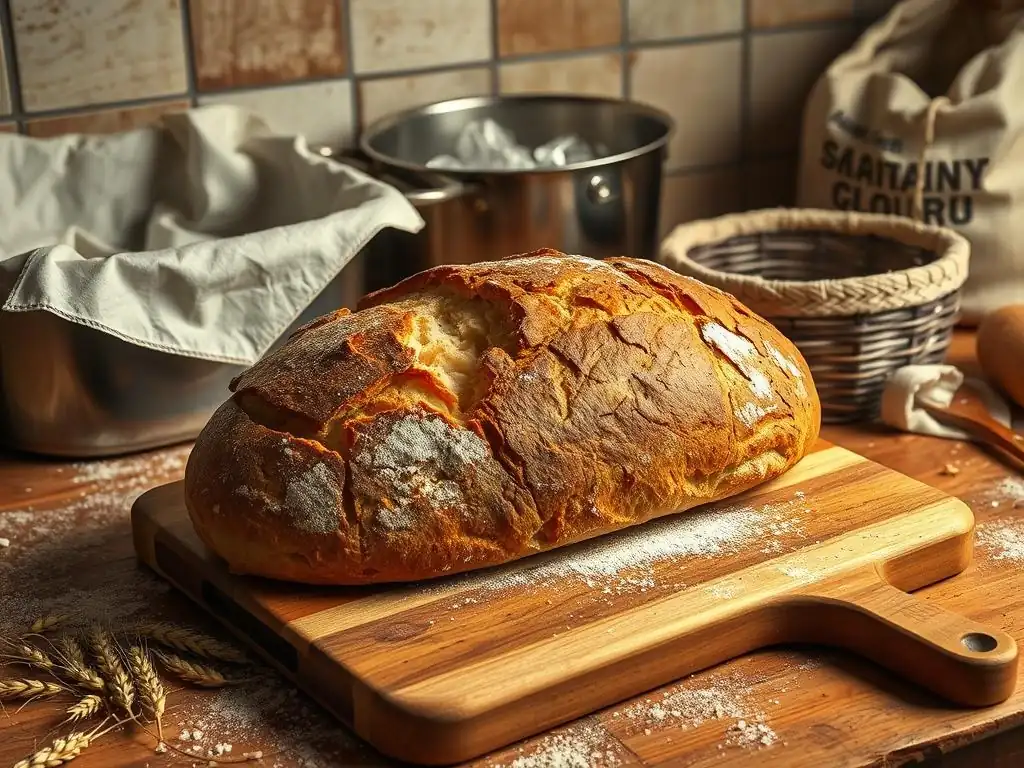
A Dutch oven acts like a mini-oven within your main oven, providing a controlled environment that is crucial for baking bread with a desirable rustic texture. Its heavy construction, typically cast iron, allows it to absorb and retain heat incredibly well. When preheated to high temperatures, often 450°F (230°C) or higher, the radiant heat from the pot's walls helps the dough achieve maximum oven spring quickly. This rapid rise in the initial stages of baking is key to developing an open, airy crumb structure.
Perhaps the most significant benefit of using a Dutch oven is its ability to trap steam. When you place the dough inside and cover the pot, the moisture released by the dough during baking is contained within the vessel. This steamy environment keeps the surface of the dough pliable for the first 15-20 minutes of baking. This pliability allows the dough to expand fully before the crust sets, preventing it from cracking prematurely and promoting a more significant rise. Without sufficient steam, the crust can form too early, restricting expansion and resulting in a denser loaf.
The Benefits of Baking Bread in a Dutch Oven: Heat Retention and Steam
The high heat retention of a cast iron Dutch oven is unparalleled in standard kitchenware. When preheated thoroughly, it provides a consistent, intense heat source that surrounds the dough. This ensures that the loaf begins to bake immediately upon contact with the hot surface and radiant walls.
For example, a typical 5-quart cast iron Dutch oven can hold temperatures above 400°F (200°C) for a significant period, which is essential for the rapid rise needed in rustic bread, often referred to as "oven spring." This intense heat helps set the structure of the loaf quickly, contributing to a better shape and volume.
The trapped steam is the other half of the equation. As mentioned, the dough releases moisture when it hits the hot environment. In a sealed Dutch oven, this moisture turns into steam, saturating the air around the loaf. This humid atmosphere keeps the crust soft and stretchy.
Think of it like a sauna for your bread! This allows the yeast to continue its final push of leavening and the dough to expand without being restricted by a hardening crust. After about 20 minutes, the lid is typically removed, allowing the moist surface to dry out and develop a deep golden-brown, crispy crust under dry heat.
Why Dutch Ovens Create a Crispy Crust and Open Crumb
The combination of intense heat and initial steam is precisely why Dutch ovens are so effective at producing a crispy crust and open crumb. During the initial steamed phase, the dough's surface remains moist and flexible. This allows the loaf to expand significantly, creating large air pockets within the dough, which translates to an open, irregular crumb structure characteristic of rustic bread like sourdough or ciabatta. Without this initial flexibility, the crust would harden prematurely, resulting in a denser crumb with smaller, more uniform holes.
Once the lid is removed, the direct, dry heat of the oven and the hot Dutch oven walls hits the now-expanded loaf. The moist surface rapidly dries out and undergoes the Maillard reaction, the chemical process responsible for browning and flavor development. The intense heat from the cast iron ensures that this browning happens quickly and evenly, creating a thick, shatteringly crisp crust. This two-stage process – steam for expansion and dry heat for crust development – is the secret sauce of Dutch oven baking, and replicating it is key to baking Easy Dutch ovenfree bread successfully.
Alternative Methods for Baking Dutch Oven-Free Bread
Achieving that perfect rustic loaf without a Dutch oven is entirely possible by focusing on the two key elements: high heat and steam. The following methods provide effective ways to replicate the Dutch oven environment using common kitchen equipment. Each method requires a slightly different setup but aims for the same goal – a well-risen loaf with a beautiful crust. These techniques make baking Easy Dutch ovenfree bread accessible to everyone.
By understanding how to use your existing tools to manage heat and create steam, you can bake delicious, professional-quality bread at home. Whether you have a pizza stone, a simple baking sheet, or even some lava rocks, there's a method here for you. Let's dive into the specifics of each technique to help you choose the best approach for your kitchen and your desired Easy Dutch ovenfree bread outcome.
Method 1: Baking on a Pizza Stone with Steam
Baking on a preheated pizza stone is an excellent way to mimic the radiant heat of a Dutch oven's bottom. A good quality pizza stone, typically made of ceramic or cordierite, absorbs and retains heat exceptionally well. When your dough is placed directly onto the hot stone, it receives a significant heat boost from underneath, promoting rapid oven spring similar to baking on the hot base of a Dutch oven. This method is widely used by home bakers to achieve a crispy bottom crust.
However, a pizza stone alone doesn't address the need for steam. To replicate the steamy environment of a Dutch oven, you need to introduce steam into your oven manually. This is usually done by placing a pan of hot water or ice cubes in the bottom of the oven during the initial baking phase.
The goal is to create a humid atmosphere around the bread for the first 15-20 minutes, allowing the crust to remain pliable and the loaf to expand fully before the crust sets. Combining the hot stone with external steam is a very effective way to bake Easy Dutch ovenfree bread.
Preparing Your Pizza Stone for Bread Baking
Preparation is key when using a pizza stone for bread. Place the pizza stone on an oven rack in the lower third of your oven. It's crucial to preheat the stone along with the oven for at least 30 minutes, preferably an hour, at your recipe's specified baking temperature (often 450-500°F / 230-260°C). This ensures the stone is fully saturated with heat, ready to give your dough that initial thermal shock needed for oven spring. Rushing this preheating step will result in a less effective bake.
While the stone preheats, prepare your dough for transfer. If your dough is in a proofing basket, you'll invert it onto a piece of parchment paper. The parchment paper serves two purposes: it makes transferring the dough onto the scorching hot stone much safer and easier, and it prevents the dough from sticking to the stone. Ensure the parchment paper is slightly larger than the base of your loaf but not so large that it bunches up excessively.
Creating Steam for Crusty Bread: Water Pan Technique
One of the most common and effective ways to create steam when baking on a pizza stone is using a pan of hot water. While your oven and pizza stone are preheating, place a sturdy metal baking pan (such as a broiler pan or an old cake pan) on the rack below the pizza stone. Just before you load the bread, carefully pour about 1-2 cups of boiling water into this hot pan. Be extremely cautious as hot steam will immediately rise. Close the oven door quickly to trap the steam.
Alternatively, you can achieve a similar effect by placing ice cubes in the hot pan just before loading the bread. The ice will melt and quickly turn into steam upon contact with the hot metal.
Some bakers even use lava rocks or metal nuts/bolts in the steam pan to provide more surface area for the water to flash into steam. The key is to generate a significant amount of steam right as the bread goes into the oven and keep the oven door closed for the first part of the bake to maintain this humid environment, enabling a truly Easy Dutch ovenfree bread experience with a great crust.
Baking Instructions for Pizza Stone Rustic Bread
Once your oven and pizza stone are fully preheated and your steam setup is ready, carefully slide your dough (on parchment paper) onto the hot pizza stone. If using the water pan method, pour the boiling water or add ice cubes to the pan below the stone just before loading the bread. Close the oven door immediately to trap the steam. Bake at the high initial temperature (e.g., 475°F / 245°C) for the first 15-20 minutes while the steam does its work.
After the initial steaming period, carefully open the oven door (releasing the trapped steam) and remove the steam pan. Lower the oven temperature to the finishing temperature specified in your recipe, typically around 425-450°F (220-230°C). Continue baking for another 20-30 minutes, or until the crust is deep golden-brown and the internal temperature of the loaf reaches 200-210°F (93-99°C).
The parchment paper can often be removed partway through the second phase if it seems to be preventing the bottom crust from browning, but this is optional. This two-stage baking process is fundamental to baking Easy Dutch ovenfree bread with excellent results.
Method 2: Using a Baking Sheet with a Roasting Pan Cover
This method cleverly uses a baking sheet for the base and a large roasting pan or oven-safe bowl as a cover to trap steam. It's a fantastic option if you don't have a pizza stone but have a sturdy baking sheet and a large enough cover. The baking sheet, when preheated, provides a hot surface for the dough, though it may not retain heat as effectively as a stone or cast iron. The real magic here comes from the cover, which replicates the steam-trapping function of a Dutch oven lid.
By covering the dough with a preheated roasting pan or bowl, you create a small, enclosed space where the dough's natural moisture is trapped. This ensures the humid environment necessary for maximum oven spring and a pliable crust during the crucial initial baking phase. This setup is relatively straightforward and requires minimal specialized equipment, making it a highly accessible way to bake Easy Dutch ovenfree bread right in your home oven.
Setting Up Your Baking Sheet and Roasting Pan
To set up this method, place a heavy-duty baking sheet (preferably one that won't warp at high temperatures) in your oven on a middle rack. If you have a second identical baking sheet, you can stack them for better heat retention. Place a large, oven-safe metal roasting pan or a large, oven-safe stainless steel or ceramic bowl (ensure it can withstand high heat, like 450°F / 230°C) on the rack above the baking sheet. Preheat both the baking sheet and the cover along with the oven to your recipe's specified temperature for at least 30-45 minutes.
The size of the cover is important; it needs to be large enough to completely enclose the loaf without touching it, allowing room for oven spring. Ensure the cover fits comfortably within your oven. Using a roasting pan is often easier as it has handles and is designed for oven use. A large metal bowl can also work, but be absolutely certain it is rated for high oven temperatures. This simple setup is the foundation for baking Easy Dutch ovenfree bread using this technique.
Trapping Steam: The Roasting Pan as a Makeshift Dutch Oven
The preheated roasting pan or bowl acts as your makeshift Dutch oven lid. When you place the dough on the hot baking sheet and quickly cover it with the hot roasting pan, you immediately trap the moisture released by the dough. This creates a localized steam bath around the loaf, just like in a Dutch oven. The heat from the preheated cover also radiates down onto the top of the loaf, aiding in initial expansion.
This trapped steam keeps the surface of the dough moist and flexible for the critical first 15-20 minutes of baking. This allows the gluten structure to stretch and the loaf to expand significantly before the crust begins to harden. Without this steam, the crust would set too early, restricting the rise and resulting in a denser loaf. This simple covering technique is a highly effective way to replicate the benefits of a Dutch oven and achieve excellent results when baking Easy Dutch ovenfree bread.
Baking Tips for Baking Sheet Bread
Load your dough onto the preheated baking sheet, ideally on a piece of parchment paper for easy transfer. Quickly and carefully place the hot roasting pan or bowl over the loaf, ensuring it fully covers the dough. Bake at the high initial temperature (e.g., 450°F / 230°C) for 15-20 minutes with the cover on.
After the initial covered bake, carefully remove the hot roasting pan using oven mitts. Be mindful of the burst of steam that will escape. Lower the oven temperature if your recipe calls for it (typically to 400-425°F / 200-220°C) and continue baking uncovered for another 20-30 minutes, or until the crust is golden brown and the internal temperature reaches 200-210°F (93-99°C). The uncovered baking allows the crust to dry out and crisp up beautifully. This method provides a reliable way to bake Easy Dutch ovenfree bread with a good crust and crumb.
Method 3: Baking on a Preheated Baking Sheet with Lava Rocks for Steam
This method combines the hot surface of a preheated baking sheet with an external steam source using lava rocks. It’s a variation of the pizza stone method but utilizes the common baking sheet you likely already own. Lava rocks are porous and excellent at retaining heat, making them ideal for generating steam when water is poured over them. This technique requires a bit more caution due to handling hot rocks and water, but it can produce fantastic results for Easy Dutch ovenfree bread.
The preheated baking sheet provides the necessary heat from below for oven spring, similar to the previous method. The lava rocks, placed in a pan below the bread, create a robust and consistent steam environment when water is added. This ensures the dough surface remains pliable, allowing for maximum expansion before the crust sets, leading to that desired open crumb and crispy crust.
Preparing Your Baking Sheet and Lava Rocks
Place a sturdy baking sheet on a middle rack in your oven and a metal pan (like a broiler pan or old roasting pan) containing about 1-2 pounds of clean lava rocks (available at garden supply stores or online) on the rack below it. Ensure the pan is large enough to contain the rocks and some water without overflowing.
Preheat both the baking sheet, the pan, and the lava rocks along with the oven to your desired high baking temperature (e.g., 475°F / 245°C) for at least 45-60 minutes. The longer preheat ensures the rocks are thoroughly heated, which is essential for generating sufficient steam.
While everything is preheating, prepare your dough on parchment paper for easy transfer. Have a kettle of boiling water ready to go. Safety is paramount with this method: wear oven mitts and be extremely careful when handling hot rocks and pouring boiling water into a hot oven. This setup provides the necessary components for baking Easy Dutch ovenfree bread using external steam generation.
Creating Steam for Crusty Bread: Lava Rocks Technique
Just before you are ready to load your dough into the oven, carefully pull out the rack with the pan of hot lava rocks slightly. Pour about 1-2 cups of boiling water over the hot rocks in the pan. The water will immediately flash into steam. Quickly and carefully slide the rack back into the oven.
Immediately load your dough (on parchment paper) onto the preheated baking sheet on the rack above the steam pan. Close the oven door as quickly as possible to trap the steam. This blast of steam is crucial for keeping the dough's surface moist and allowing it to expand fully during the initial 15-20 minutes of baking. The porous nature of the lava rocks helps sustain the steam for a longer period compared to just a pan of water, making this an effective technique for Easy Dutch ovenfree bread.
Baking Instructions for Baking Sheet Rustic Bread
With the oven preheated, the baking sheet hot, and steam filling the cavity from the lava rocks, carefully transfer your dough on parchment paper to the hot baking sheet. Bake at the high initial temperature (e.g., 475°F / 245°C) for the first 15-20 minutes. Do not open the oven door during this time if possible, to keep the steam contained.
After the initial steaming period, carefully open the oven door (releasing the steam) and remove the pan with the lava rocks. You can use tongs to remove the hot rocks if needed, but often just removing the pan is sufficient. Lower the oven temperature if required by your recipe (typically to 400-425°F / 200-220°C) and continue baking uncovered for another 20-30 minutes, or until the crust is a deep golden brown and the internal temperature is 200-210°F (93-99°C). This two-stage bake ensures both great oven spring and a perfect crust when baking Easy Dutch ovenfree bread with external steam.
Tips for Achieving Dutch Oven-Like Results Without a Dutch Oven
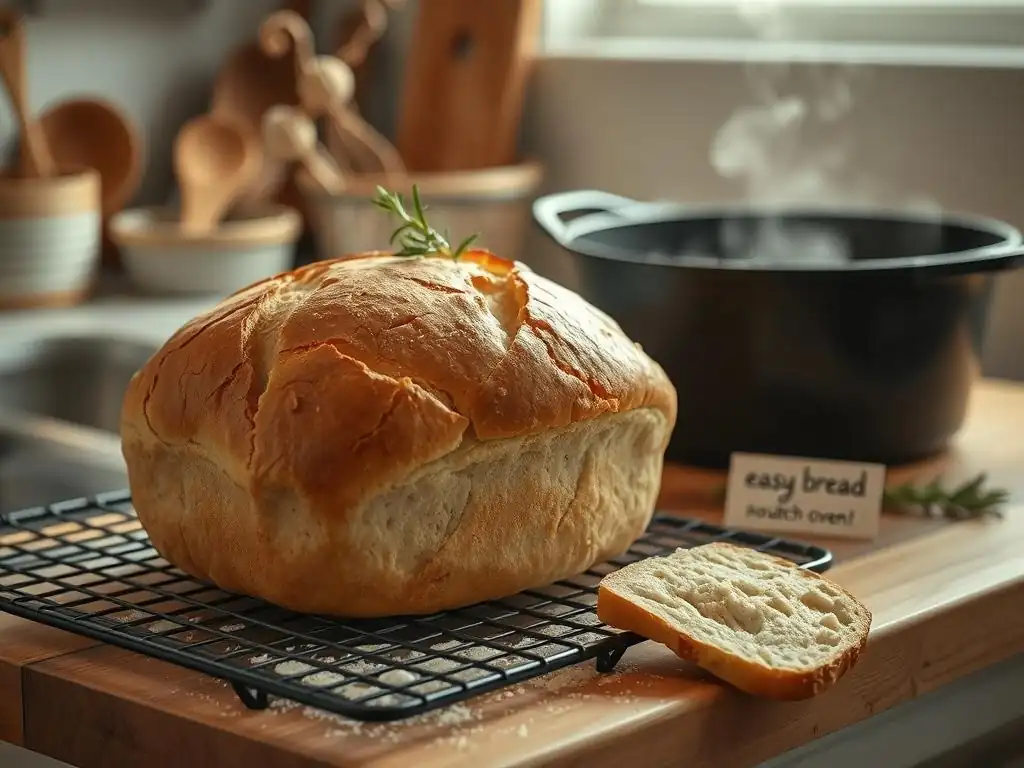
While the alternative methods outlined above are effective, paying attention to a few key details can significantly improve your results when baking Easy Dutch ovenfree bread. These tips focus on maximizing oven spring, developing a great crumb, and achieving that desirable crispy crust that is the hallmark of rustic bread. Mastering these techniques will help you get as close as possible to Dutch oven quality using standard kitchen equipment.
Consistency is key in baking, and understanding how steam, hydration, and temperature interact is vital. Don't be discouraged if your first few loaves aren't perfect; baking is a skill that improves with practice. By focusing on these specific aspects – steam management, dough hydration, scoring, and temperature control – you can elevate your Easy Dutch ovenfree bread game and consistently produce beautiful, delicious loaves.
Mastering the Art of Steam Injection
Effective steam injection during the first part of the bake is paramount for achieving a good crust and crumb when baking Easy Dutch ovenfree bread. Aim to create a saturated, humid environment around the loaf for at least the first 15-20 minutes. Using boiling water or ice in a preheated pan, or utilizing lava rocks as described in Method 3, generates a significant amount of steam quickly. Some bakers even spray the oven walls with water, though this is less effective for sustained steam.
The goal is to keep the surface of the dough moist and pliable, allowing it to stretch and expand fully before the crust sets. Without sufficient steam, the crust forms too early, restricting oven spring and resulting in a denser loaf and potentially blowout cracks on the sides. Experiment with the amount of water or ice you use (1-2 cups is a good starting point) and ensure your steam pan is placed on a lower rack so the steam rises and envelops the bread.
Dough Hydration: Key to a Great Crumb
The hydration level of your dough plays a significant role in the final crumb structure, especially when baking Easy Dutch ovenfree bread. Higher hydration doughs (those with a higher ratio of water to flour, often 70% or more) tend to yield a more open, airy crumb with larger, irregular holes. This is because the extra water facilitates gluten development and allows for greater expansion during fermentation and baking.
Working with high hydration dough can be challenging as it is stickier and harder to handle. Techniques like stretch and folds or coil folds during bulk fermentation can help build strength without excessive kneading. Using a bench scraper and a lightly floured surface can also aid in shaping. While lower hydration doughs (e.g., 60-65%) are easier to handle and still produce delicious bread, aiming for slightly higher hydration (say, 68-72%) when you're comfortable can significantly improve the openness of your crumb structure when baking Easy Dutch ovenfree bread.
Scoring Techniques for Optimal Oven Spring
Scoring, or slashing the surface of the dough just before baking, is not just for aesthetics; it's a functional step that directs the oven spring and helps achieve a well-shaped loaf. When the dough hits the hot oven, it expands rapidly. Without scoring, the crust will tear unpredictably at the weakest points. Proper scoring allows the loaf to expand in a controlled manner, promoting maximum rise and contributing to an open crumb.
Use a sharp blade, like a razor blade (a lame is ideal), or a very sharp knife to make quick, clean cuts about 1/2 inch deep. For a classic boule (round loaf), a single deep slash or a square pattern is common. For a batard (oval loaf), one or more diagonal slashes work well. Practice different scoring patterns to see how they affect your loaf's expansion. A well-executed score is essential for guiding the rise and achieving a beautiful shape when baking Easy Dutch ovenfree bread.
Baking Temperatures and Times for Dutch Oven-Free Bread
Achieving the correct balance of temperature and time is crucial for successful Easy Dutch ovenfree bread. Most rustic bread recipes call for a high initial temperature, often 450-500°F (230-260°C), to promote rapid oven spring and crust development. This high heat, combined with steam, is what gives the loaf its initial structure and volume. Maintain this high temperature for the first 15-20 minutes while the steam is present.
After the steaming phase, the temperature is typically reduced to 400-425°F (200-220°C) for the remainder of the bake. This lower temperature allows the inside of the loaf to cook through without the crust burning. The total baking time for a standard 1-2 pound loaf is usually between 30-50 minutes, depending on the size and density of the loaf and your specific oven. Always bake until the crust is a deep golden brown and the internal temperature reaches 200-210°F (93-99°C) for a fully cooked loaf. Using an instant-read thermometer is the most reliable way to check for doneness.
Troubleshooting Common Issues When Baking Rustic Bread Without a Dutch Oven
Even with the right methods and tips, you might encounter some challenges when baking Easy Dutch ovenfree bread. Issues like flat loaves, soggy bottoms, or pale crusts are common but usually fixable with a little adjustment. Understanding the potential causes behind these problems will help you diagnose and improve your technique for future bakes. Don't be discouraged; troubleshooting is a normal part of the baking process.
By identifying what went wrong, you can refine your approach to steam generation, dough handling, or oven temperature. Let's look at some frequent issues and how to address them to ensure your next attempt at Easy Dutch ovenfree bread is a success. Patience and observation are your best tools here.
Dealing with a Flat Loaf
A flat loaf, one that spreads out rather than rising upwards, can be caused by several factors when baking Easy Dutch ovenfree bread. One common reason is insufficient gluten development during mixing and fermentation. The dough needs enough structure to hold its shape during baking. Ensure you are performing adequate kneading, stretch and folds, or coil folds according to your recipe. Overproofing can also lead to a lack of oven spring; if the dough has fully risen and started to deflate before baking, it won't have the strength to rise further in the oven.
Another major culprit is insufficient steam and/or insufficient initial heat. If the oven isn't hot enough, or if there isn't enough steam to keep the crust pliable, the crust can set too quickly, restricting the loaf's ability to expand upwards. Ensure your oven and baking surface (stone or sheet) are fully preheated, and that you are generating ample steam right as the loaf goes in. Shaping technique also matters; a tight surface tension created during shaping helps the loaf hold its structure.
Preventing a Soggy Crust
A soggy or soft bottom crust is a frustrating issue when baking Easy Dutch ovenfree bread, often occurring when baking on a baking sheet. This usually happens because moisture gets trapped between the loaf and the baking surface, or because the bottom isn't exposed to enough direct heat after the steaming phase. Using parchment paper can sometimes contribute to this, as it can trap moisture.
To combat a soggy bottom, ensure your baking surface (pizza stone or baking sheet) is thoroughly preheated. If using parchment paper, try removing it partway through the uncovered baking phase (after the steam is gone) to allow the bottom to crisp up directly on the hot surface. If baking on a baking sheet, stacking two sheets can provide better heat retention and transfer. Ensure the oven temperature is adequate during the second, uncovered baking phase (typically 400-425°F / 200-220°C) to fully dry out and crisp the bottom crust.
Achieving the Perfect Golden-Brown Color
A pale crust on your Easy Dutch ovenfree bread usually indicates insufficient baking time or temperature during the final, uncovered phase. The golden-brown color and deep flavor of a rustic crust develop through the Maillard reaction, which requires high heat and sufficient time. If you remove the steam cover and the oven temperature is too low or the loaf doesn't bake long enough, the crust won't brown properly.
Ensure your oven is accurately calibrated; consider using an oven thermometer to check. Make sure you are baking at the correct temperature (typically 400-425°F / 200-220°C) during the uncovered portion of the bake. Don't be afraid to let the loaf bake until it reaches a deep golden-brown color; this often takes 20-30 minutes or even longer after the cover is removed. The internal temperature should also be 200-210°F (93-99°C), which ensures the inside is cooked and the outside has had enough time to brown.
Recipes for Dutch Oven-Free Bread
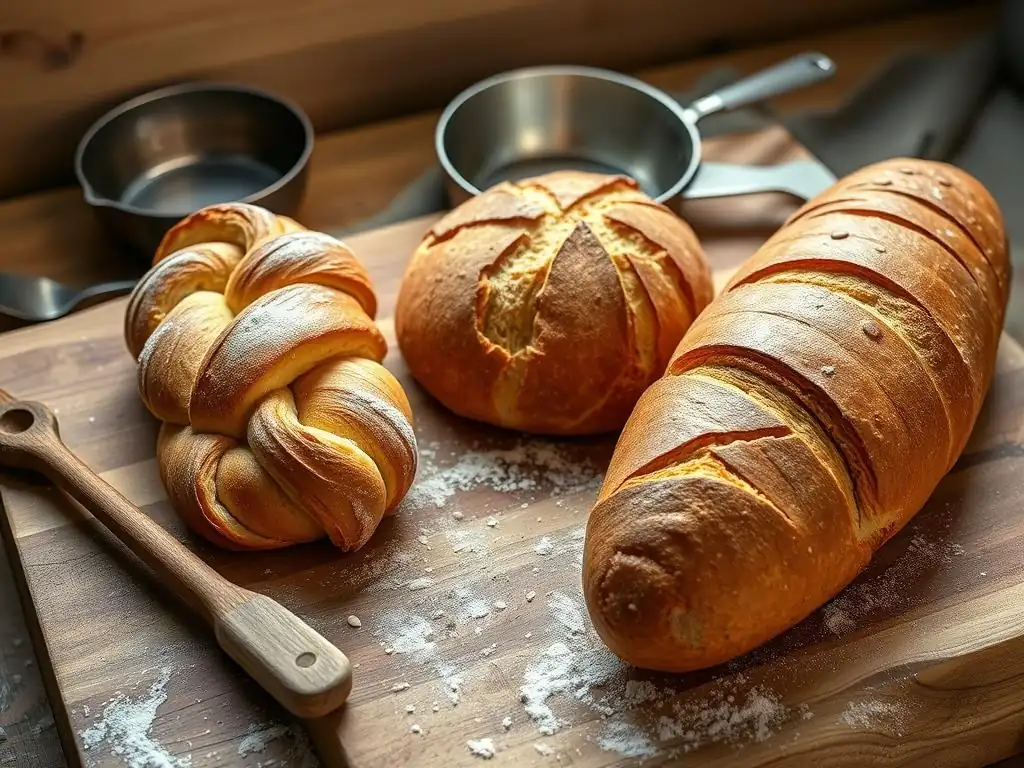
Now that you understand the principles and techniques for baking Easy Dutch ovenfree bread, it's time to put them into practice! While specific recipes will provide detailed ingredient lists and step-by-step instructions, here are brief outlines of two popular types of rustic bread that work wonderfully with the alternative methods discussed. These examples highlight how adaptable rustic bread baking can be.
Look for recipes specifically designed for high-hydration doughs baked at high temperatures with steam. Many standard rustic bread or no-knead bread recipes can be adapted for these Dutch oven-free methods. The key is to apply the steam technique (water pan, roasting pan cover, or lava rocks) during the first part of the bake and then finish baking uncovered to develop the crust.
Simple No-Knead Bread Baked on a Pizza Stone
A simple no-knead bread recipe is perfect for trying the pizza stone method. Typically, this involves mixing flour, water, salt, and a tiny amount of yeast, then allowing a long, slow fermentation (often 12-18 hours at room temperature). This long fermentation develops flavor and gluten structure with minimal effort.
To bake this using a pizza stone, preheat your oven and stone to 450-475°F (230-245°C) with a steam pan below for at least an hour. Shape the dough gently and transfer it on parchment paper to the hot stone, adding boiling water or ice to the steam pan. Bake with steam for 15-20 minutes, then remove the steam pan, lower the temperature slightly if needed, and continue baking uncovered until golden brown (another 20-30 minutes). This yields a fantastic Easy Dutch ovenfree bread with minimal hands-on time.
Crusty Artisan Loaf Baked on a Baking Sheet
An artisan loaf, perhaps one with a slightly shorter bulk fermentation followed by a cold proof, can be baked successfully using the baking sheet and roasting pan cover method. This type of dough might involve some stretch and folds to build strength.
Prepare your dough according to your chosen recipe. Preheat your oven to 450°F (230°C) with a heavy-duty baking sheet on a middle rack and a large metal roasting pan or oven-safe bowl on the rack above for at least 45 minutes. Carefully transfer the dough on parchment paper to the hot baking sheet and immediately cover it with the preheated roasting pan.
Bake covered for 15-20 minutes. Remove the cover, lower the temperature to 425°F (220°C), and bake uncovered for another 25-35 minutes until the crust is deeply colored and crisp. This method provides a reliable way to bake a beautiful Easy Dutch ovenfree bread using basic kitchen gear.
Conclusion: Enjoying Delicious Rustic Bread, No Dutch Oven Required
As you've seen, a Dutch oven is a helpful tool for baking rustic bread, but it is by no means essential. By understanding the core principles of heat retention and steam generation, you can successfully replicate the ideal baking environment using alternative methods and common kitchen equipment. Whether you use a pizza stone with a water pan, a baking sheet with a roasting pan cover, or even lava rocks for steam, you can achieve that coveted crispy crust and open crumb. Baking Easy Dutch ovenfree bread is entirely within reach!
Experiment with the different techniques, pay attention to dough hydration, scoring, and temperature, and don't be afraid to troubleshoot. Each bake is a learning opportunity. The joy of pulling a beautiful, crackling loaf of rustic bread from your oven is incredibly rewarding, and you can experience that joy without needing a specialized pot. So gather your flour, water, salt, and yeast, choose your preferred Easy Dutch ovenfree bread method, and start baking! Happy baking!
Frequently Asked Questions
How can I bake rustic bread without a Dutch oven?
You can achieve similar results using alternative methods like a baking stone or a preheated cast iron skillet. These methods help create a hot, enclosed environment essential for a good crust.
What is the key to a crispy crust when baking bread without a Dutch oven?
The key is to create steam in your oven. You can do this by placing a pan of hot water on the bottom rack or by spritzing the dough with water before baking.
Can I use a regular baking sheet instead of a baking stone or cast iron skillet?
While a regular baking sheet can be used, it won't retain heat as effectively. For better results, consider using a pizza stone or a heavy-duty baking sheet.
What temperature should I bake the bread at when using alternative methods?
Generally, bake at a high temperature, around 450-475°F (232-246°C), to encourage a good rise and crust formation. Adjust based on your oven and the specific recipe.
How do I know when the bread is done baking without a Dutch oven?
The bread is done when it has a hollow sound when tapped on the bottom and the internal temperature reaches 200-210°F (93-99°C). The crust should also be deeply golden brown.
Final Reflection: The Liberating Loaf: Baking Rustic Bread Beyond the Dutch Oven
The quest for perfectly crusty, rustic bread needn't be confined to the realm of Dutch oven ownership. This article has demonstrated that achieving that satisfyingly chewy crumb and deeply browned exterior is entirely possible without this specialized equipment, opening up the world of artisan bread baking to a much wider audience. The ease and accessibility of these alternative methods truly democratize the art of bread making.
The journey of mastering rustic bread, regardless of the tools used, is a deeply rewarding one. It's a process that connects us to a long tradition of food craftsmanship, fostering patience, precision, and a profound appreciation for simple ingredients. Bread is the staff of life,
a simple phrase, yet it encapsulates the fundamental role bread plays in our cultures and our personal lives, providing sustenance and comfort in equal measure. The methods explored here allow more people to experience this connection, to feel the satisfaction of creating something beautiful and nourishing from scratch.
Now, it's your turn. Consider the possibilities unlocked by these Dutch oven-free techniques. Will you experiment with a new baking stone, embrace the charm of a cast iron skillet, or perhaps even master the art of baking directly on the oven floor? Don't let the perceived need for specialized equipment limit your culinary aspirations. Embrace the challenge, savor the process, and enjoy the delicious rewards of your own homemade, rustic loaf. The journey begins with a single, perfectly imperfect, crusty slice.
Unleash Your Inner Baker: Mastering Rustic Bread Without a Dutch Oven!
Thanks for joining us on this baking adventure! We hope you discovered some fantastic alternatives to the Dutch oven for achieving that perfect rustic loaf. Now it's time to put your newfound knowledge into practice.
- Bake your own masterpiece! Try one of the methods we outlined – from the cast iron skillet to the baking stone – and experience the joy of crafting your own rustic bread. Remember to share your results with us!
- Experiment with different flours. Explore the unique textures and flavors offered by various flours like rye, whole wheat, or spelt. Document your baking journey and share your findings.
- Join our baking community! Head over to our forums to connect with other passionate bakers, share your tips and recipes, and help others on their baking journey.
Ready to transform your kitchen into a rustic bakery? What unique flour blend will you experiment with first?