
Getting the Perfect Rise in GlutenFree Baking: Binder Secrets

Welcome to BakeWithEase, your trusted partner in the delightful world of baking!
Ever struggled to get that perfect rise in your gluten-free bread? You're not alone! We're diving deep into the secrets of achieving bakery-worthy loaves, starting with essential gluten-free bread rise tips and uncovering the often-overlooked role of binders. Intrigued? Discover how these simple adjustments can transform your gluten-free baking experience and unlock the secrets to a light and airy crumb. Let's get baking!
- Introduction: Achieving Optimal Rise in Gluten-Free Bread
- Understanding Gluten's Role in Traditional Baking
- The Power of Binders in Gluten-Free Baking
- Top Gluten-Free Binders for Better Bread Rise
- Mastering the Techniques for Gluten-Free Bread Rise
- Troubleshooting Common Gluten-Free Baking Issues
- Conclusion: Unlock the Secret to Perfect Gluten-Free Bread Rise
-
Frequently Asked Questions
- What are the most common reasons for gluten-free bread not rising properly?
- What are "binders" and why are they so important in gluten-free bread baking?
- How can I ensure my gluten-free dough has enough moisture for a good rise?
- How does proofing time differ for gluten-free bread compared to traditional bread?
- What oven temperature and baking techniques are best for achieving optimal rise in gluten-free bread?
- Final Reflection: The Unexpected Joy of a Gluten-Free Rise
- Unlock Your Gluten-Free Baking Potential!
Introduction: Achieving Optimal Rise in Gluten-Free Bread
The Challenge of Gluten-Free Baking: Why Rise Matters
Baking gluten-free bread presents a unique set of challenges, particularly when it comes to achieving a satisfying rise. Unlike traditional wheat-based doughs, which rely on the protein network of gluten to trap gases produced by yeast or other leavening agents, gluten-free flours lack this inherent elasticity.
This absence means that simply substituting flours isn't enough; without something to provide structure and hold onto those precious air bubbles, gluten-free loaves often turn out dense, heavy, and lacking the desirable airy texture we associate with well-risen bread. Mastering Glutenfree bread rise tips is therefore a key goal for many home bakers transitioning to gluten-free.
The structure provided by gluten allows dough to stretch and expand as it proofs and bakes, creating that light, open crumb. In gluten-free baking, finding ways to replicate this structural support is paramount. A good rise not only affects the texture but also the overall appeal and digestibility of the bread. Getting a beautiful, high-rising loaf is a sign of success and often the difference between a crumbly brick and a delightful slice. This is where understanding the role of binders becomes absolutely essential in your journey towards better Glutenfree bread rise tips.
Understanding Binders
Binders are ingredients added to gluten-free recipes specifically to provide structure, elasticity, and cohesion that gluten would naturally offer. Think of them as the glue that holds your gluten-free dough together. Without effective binders, doughs made from flours like rice, almond, or oat would be crumbly and unable to form a cohesive mass capable of trapping the gases needed for expansion. They play a critical role in improving the texture, preventing crumbling, and most importantly, enabling dough to rise properly.
These binding agents work in various ways, from forming gels that trap moisture and gases to mimicking the viscoelastic properties of gluten. The choice and combination of binders can significantly impact the final outcome of your gluten-free bread, influencing its rise, crumb structure, moisture retention, and overall texture. Learning about the different types of binders and how to use them effectively is one of the most valuable Glutenfree bread rise tips you can acquire.
Understanding Gluten's Role in Traditional Baking
Gluten's Elasticity and its Impact on Bread Structure
In traditional baking, gluten, formed when proteins like glutenin and gliadin in wheat flour are hydrated and kneaded, creates a strong, elastic network. This network is like a balloon that can expand. When yeast produces carbon dioxide gas during fermentation, or when baking powder/soda reacts, this gas gets trapped within the gluten network. As the dough proofs, the network stretches, and then in the oven, the heat causes the gases to expand further, leading to the dough rising dramatically.
The elasticity allows the dough to hold its shape while expanding, and the strength ensures that the structure doesn't collapse. This results in a light, airy crumb with visible holes – the hallmark of well-risen bread. The more developed the gluten network, typically through kneading, the more potential the dough has for a significant rise and a chewy texture. Understanding this mechanism highlights the challenge in gluten-free baking: how do you achieve this gas-trapping, structure-holding ability without gluten?
The Absence of Gluten: Finding Suitable Replacements
The core problem in gluten-free baking is the lack of this inherent protein network. Flours derived from rice, corn, potato, nuts, and seeds simply do not contain gluten. When mixed with liquid, they might form a paste or a crumbly mass, but they won't develop the elastic structure needed to trap gases and achieve a good rise. This is why simply swapping wheat flour for a single gluten-free flour usually results in a dense, flat loaf.
To compensate for gluten's absence, bakers must rely on other ingredients to provide structure and binding. These replacements, the binders we'll discuss, work by absorbing liquid, becoming viscous, and helping the various gluten-free flours adhere to each other. While no single binder perfectly replicates all of gluten's properties, using them strategically, often in combination, is key to creating a dough that can capture gases and achieve a satisfying Glutenfree bread rise.
The Power of Binders in Gluten-Free Baking
What are Binders and Why are They Essential?
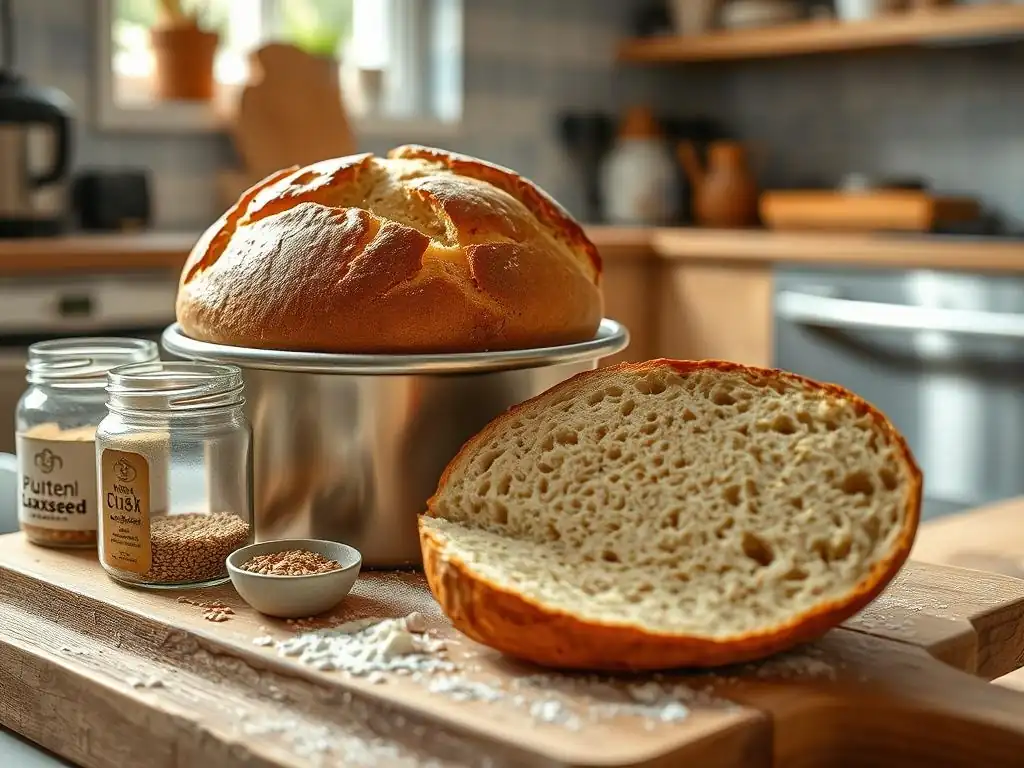
Binders in gluten-free baking are ingredients that mimic some of the functions of gluten, primarily providing structure, cohesion, and elasticity to the dough. They are typically hydrocolloids or fiber-rich substances that absorb water and form a gel-like or viscous consistency. Common examples include psyllium husk, xanthan gum, guar gum, chia seeds, and flaxseed meal. Without these binders, gluten-free doughs would often be too crumbly to handle or too loose to hold their shape and trap gases, leading to a dense, heavy final product.
Their essential role lies in creating a network within the dough that helps hold the ingredients together and provides internal structure. This structure is what allows the dough to expand as leavening agents produce gas and prevents it from collapsing during proofing and baking. Incorporating the right binders is one of the most critical Glutenfree bread rise tips because they directly enable the dough to achieve and maintain loft.
Key Functions of Binders: Structure, Moisture, and Rise
Binders perform several vital functions in gluten-free dough. Firstly, they provide structure, helping the disparate gluten-free flours stick together and form a workable dough. This cohesion is necessary for kneading (or mixing) and shaping the loaf. Secondly, many binders are excellent at moisture retention. Gluten-free flours often absorb less water than wheat flour, or release it more easily, leading to dry bread. Binders, especially those that form gels, help keep the crumb moist and extend the bread's shelf life.
Crucially, binders directly contribute to rise. By creating a flexible network, they enable the dough to trap the carbon dioxide produced by yeast or other leavening agents. As these gases expand during proofing and baking, the binder network stretches, allowing the loaf to increase in volume. Without sufficient binding power, the gas bubbles would simply escape, resulting in minimal Glutenfree bread rise and a dense, compact texture.
Top Gluten-Free Binders for Better Bread Rise
Psyllium Husk: The Ultimate Gluten-Free Binder
Psyllium husk, derived from the seeds of the Plantago ovata plant, is widely considered one of the most effective binders for gluten-free bread. It is highly absorbent and forms a thick, gelatinous consistency when mixed with liquid. This gel-like property is excellent at providing structure and elasticity, closely mimicking some of gluten's functions. Many experienced gluten-free bakers consider psyllium husk a non-negotiable ingredient for achieving a soft, pliable dough and significant Glutenfree bread rise.
When added to dough, psyllium husk absorbs a considerable amount of water, turning into a viscous gel that binds the gluten-free flours together. This gel network is elastic enough to trap gases during fermentation and strong enough to support the expanding structure during baking. Using psyllium husk often results in a dough that is much easier to handle and shape compared to doughs relying solely on other binders. It significantly improves the crumb structure, helping to create a lighter, less crumbly loaf.
How Psyllium Husk Affects Gluten-Free Dough
Psyllium husk's primary effect on gluten-free dough is its ability to absorb moisture and form a strong, elastic gel. This gel provides the necessary structure and cohesion that is missing without gluten. When you add psyllium husk (or powder) to your dry ingredients and then add liquid, it quickly begins to hydrate and swell, creating a viscous mass that binds the gluten-free flours together. This binding action makes the dough more pliable, less prone to crumbling, and easier to knead or mix.
Furthermore, the gel formed by psyllium husk helps to trap the gases produced by yeast or baking powder. As the dough proofs, these gases expand, and the psyllium network stretches to accommodate the growth, similar to how gluten behaves.
In the oven, the heat sets this structure, resulting in a loaf with improved volume and a softer, more open crumb. Approximately 1-2 tablespoons of whole psyllium husks (or 1-1.5 tablespoons of psyllium powder) per cup of gluten-free flour blend is a common starting point for many recipes, but the exact amount can vary based on the recipe and desired texture.
Tips for Using Psyllium Husk for Maximum Rise
To get the best Glutenfree bread rise tips when using psyllium husk, proper hydration is key. Psyllium needs sufficient liquid to form its gel. Ensure your recipe includes enough water or other liquid to fully hydrate the psyllium and the gluten-free flours. Often, adding the psyllium to the dry ingredients and then incorporating the liquid, or even mixing the psyllium with the liquid first to form a gel before adding to the dry ingredients, can be effective.
- Pre-gel Method: Some bakers prefer mixing psyllium husk or powder with the required liquid in the recipe and letting it sit for 5-10 minutes to form a thick gel before combining with the dry ingredients. This ensures the psyllium is fully hydrated before it enters the dough.
- Measure Accurately: Psyllium is potent. Too little won't provide enough structure; too much can make the dough gummy or dense. Use the amount specified in a trusted recipe or start with the general guideline (1-2 tbsp husks per cup of flour blend) and adjust.
- Consider Powder vs. Husk: Psyllium powder is more concentrated than whole husks, so you'll use less. If a recipe calls for husks but you only have powder, use about 30% less powder by weight or volume (e.g., 1 tbsp husks ≈ 1 tsp powder).
- Increase Hydration Slightly: Dough with psyllium husk often requires slightly more liquid than dough without it, as the psyllium absorbs so much water. Don't be afraid to add a little extra liquid if the dough seems too dry.
Chia Seeds: A Nutritious Binding Agent
Chia seeds, small powerhouses of nutrition, also serve as effective binders in gluten-free baking. When soaked in liquid, they form a gel-like coating as they absorb water, similar to flaxseed. This gel provides structure and moisture to gluten-free doughs, contributing to better texture and helping with Glutenfree bread rise tips. They are a popular choice for those looking for whole-food binding options that also add nutritional value, including omega-3 fatty acids and fiber.
Using ground or whole chia seeds involves creating a "chia egg" or incorporating them directly into the dough where they will absorb liquid. While they may not provide the same level of elastic structure as psyllium husk or xanthan gum, they are excellent for adding moisture, binding ingredients together, and preventing crumbling. They work particularly well in conjunction with other binders or in recipes where a slightly denser, moister crumb is acceptable or desired.
Chia Seed Gel: Creating Structure and Moisture
The binding power of chia seeds comes from their ability to absorb liquid, up to 10-12 times their weight, and form a mucilaginous gel. This gel is created when the soluble fiber on the outer coating of the seed dissolves in water. This gel is viscous and helps to bind the gluten-free flours together, providing cohesion to the dough. It also holds onto moisture, which is crucial in gluten-free baking to prevent dryness and improve texture.
To make a basic chia seed gel (often called a "chia egg" when substituting for eggs), combine 1 part chia seeds (whole or ground) with 3 parts water. For example, 1 tablespoon of chia seeds mixed with 3 tablespoons of water. Let the mixture sit for 5-10 minutes until it forms a thick gel. This gel can then be used in the recipe as a binder. Approximately 1-2 tablespoons of chia seeds (ground or whole) per cup of gluten-free flour blend is a general guideline, often used in combination with other binders for optimal Glutenfree bread rise.
Incorporating Chia Seeds for Improved Gluten-Free Bread Rise
While chia seeds primarily add moisture and structure, their gel-forming ability contributes indirectly to Glutenfree bread rise tips by helping the dough hold its shape and trap gases. To effectively incorporate chia seeds:
- Use Ground or Whole: Both work, but ground chia seeds tend to create a smoother gel and distribute more evenly throughout the dough. If using whole seeds, they will be visible in the final product.
- Make a Gel First: For best results, mix the chia seeds with the required liquid from the recipe and let them gel before adding them to the dry ingredients. This ensures the binding power is activated.
- Adjust Liquid: Since chia seeds absorb a significant amount of liquid, you may need to adjust the total liquid in your recipe slightly to achieve the correct dough consistency.
- Combine with Other Binders: Chia seeds are often used in combination with binders like psyllium husk or xanthan gum to leverage their moisture-retaining benefits alongside the stronger structure provided by others, leading to better Glutenfree bread rise.
Flaxseed Meal: Adding Fiber and Binding Power
Flaxseed meal, or ground flaxseeds, is another popular whole-food binder known for its high fiber content and ability to form a gel when mixed with liquid. Similar to chia seeds, flaxseed meal absorbs water and creates a mucilaginous consistency that helps bind gluten-free ingredients together. It adds a slightly nutty flavor and contributes to the nutritional profile of the bread. Using flaxseed meal is a great way to add both structure and healthy fats to your Glutenfree bread rise tips.
When ground and mixed with water, flaxseed meal forms a "flax egg" or slurry that effectively binds gluten-free dough. This binding action helps prevent crumbling and provides some elasticity, aiding in the dough's ability to trap gases. While it might not produce the same airy crumb as psyllium husk, it's excellent for creating moist, slightly denser loaves and works well in conjunction with other binders to improve overall structure and Glutenfree bread rise.
Flaxseed Meal Slurry: A Simple Binding Solution
Creating a flaxseed meal slurry is very similar to making a chia seed gel. The standard ratio is 1 part ground flaxseed meal to 3 parts water. For example, mix 1 tablespoon of ground flaxseed meal with 3 tablespoons of water. Stir well and let it sit for about 5-10 minutes until it thickens into a gel-like consistency. This slurry can then be used as a binder in your gluten-free bread recipe.
The soluble fiber in the flaxseed meal is responsible for this gel formation. This gel helps to hydrate the gluten-free flours, bind the ingredients, and provide some structural support. It also helps retain moisture in the baked bread, contributing to a softer crumb and longer shelf life. Approximately 1-2 tablespoons of ground flaxseed meal per cup of gluten-free flour blend is a common range, often used in combination with other binders for optimal results.
Using Flaxseed for Enhanced Gluten-Free Baking
To best utilize flaxseed meal for improving your Glutenfree bread rise tips:
- Always Use Ground: Whole flaxseeds will not form a gel and provide binding unless they are ground. Use pre-ground flaxseed meal or grind whole flaxseeds yourself just before use for maximum freshness.
- Prepare the Slurry First: Like chia seeds, mixing the flaxseed meal with the liquid and allowing it to gel before combining with dry ingredients is the most effective method for activating its binding properties.
- Adjust Liquid as Needed: The flaxseed slurry absorbs liquid, so ensure your total recipe liquid is sufficient to hydrate all ingredients and achieve the correct dough consistency.
- Combine Strategically: Flaxseed meal works wonderfully when paired with binders like psyllium husk or xanthan gum. The combination often yields a better balance of structure, moisture, and Glutenfree bread rise than using flaxseed alone.
Xanthan Gum: The Classic Gluten-Free Binder
Xanthan gum is perhaps one of the most widely used and recognized gluten-free binders. It is a polysaccharide produced by the fermentation of sugar by a bacterium ( Xanthomonas campestris). When added to liquid, it creates a highly viscous solution that is excellent at thickening and stabilizing. Xanthan gum is particularly effective at replicating the viscoelastic properties of gluten, making it a staple ingredient for many aiming for improved Glutenfree bread rise tips.
Its ability to create viscosity and elasticity makes it very good at trapping gases produced by leavening agents. It helps the gluten-free dough hold its structure, preventing it from collapsing during proofing and baking. While very effective, using too much xanthan gum can result in a gummy or unpleasant texture, so accurate measurement is crucial. It's a powerful tool for achieving a good rise and a less crumbly texture.
Xanthan Gum's Role in Mimicking Gluten
Xanthan gum works by creating a complex carbohydrate network when hydrated. This network is highly viscous and provides significant structure and stability to gluten-free dough. It helps to bind the various gluten-free flours together, preventing the dough from crumbling. More importantly, it replicates some of gluten's elasticity, allowing the dough to stretch and expand as gases are produced during fermentation and baking.
This elasticity is key to achieving a good rise. The xanthan gum network traps the carbon dioxide bubbles, allowing the loaf to increase significantly in volume without collapsing. It also helps to create a more cohesive crumb structure, reducing the tendency for gluten-free bread to be dry and crumbly. The amount needed is typically very small, often measured in teaspoons per cup of flour blend. A common guideline is about 1 teaspoon of xanthan gum per cup of gluten-free flour blend for bread, though this can vary based on the specific flours used and the recipe.
Tips for Using Xanthan Gum Effectively
Precise measurement is critical when using xanthan gum to improve your Glutenfree bread rise tips. A little goes a long way, and too much can make your bread gummy or rubbery.
- Measure Accurately: Use measuring spoons and level them carefully. Do not eyeball the amount.
- Mix with Dry Ingredients: Typically, xanthan gum is whisked thoroughly into the dry gluten-free flour blend before adding any liquid. This helps distribute it evenly and prevents clumping when wet.
- Consider Flour Type: The amount of xanthan gum needed can vary depending on the type of gluten-free flours in your blend. Recipes using lighter flours might need slightly more than those with heavier, whole-grain flours.
- Don't Overuse: Stick to recommended amounts in recipes. If adapting a recipe, start with the general guideline (approx. 1 tsp per cup of flour blend) and adjust in future attempts if needed. Excessive xanthan gum is a common cause of dense, gummy gluten-free bread.
Other Binding Options: Guar Gum, Tapioca Starch, and More
Beyond the most common binders, several other ingredients can contribute binding properties to gluten-free baking. Guar gum, derived from guar beans, functions similarly to xanthan gum as a thickener and stabilizer. Tapioca starch, also known as tapioca flour, is a starchy binder that provides chewiness and helps create a slightly crisp crust. Other starches like cornstarch or potato starch also offer some binding capabilities, primarily by gelatinizing when heated and helping to hold the structure.
Using alternative or supplementary binders can help fine-tune the texture and rise of your gluten-free bread. Each binder has slightly different properties and can affect the final crumb, crust, and moisture level in unique ways. Experimenting with these options, often in combination with primary binders, is part of mastering Glutenfree bread rise tips and achieving your desired bread characteristics.
Exploring Alternative Binders and Their Properties
- Guar Gum: Like xanthan gum, guar gum is a hydrocolloid that creates viscosity when hydrated. It's often used interchangeably with xanthan gum, though some bakers find it can result in a slightly different texture or flavor. It's effective at providing structure and aiding Glutenfree bread rise. Use similar amounts to xanthan gum, typically around 1 teaspoon per cup of flour blend for bread.
- Tapioca Starch: While not a primary binder for lift like psyllium or gums, tapioca starch (or flour) is an excellent secondary binder. It gelatinizes when heated, contributing to the bread's internal structure and providing chewiness. It also helps create a nice crust. It's often included in gluten-free flour blends for this purpose. Using too much can make the bread gummy, so it's best used as part of a blend or in specific amounts as directed by a recipe.
- Other Starches (Cornstarch, Potato Starch): These starches function similarly to tapioca starch, providing some binding and structure when heated. They are commonly found in commercial gluten-free flour blends. They absorb less water than gums or psyllium and don't provide the same elasticity, but they help bind the flours together and contribute to a softer crumb.
Combining Binders for the Perfect Gluten-Free Texture
Often, the best Glutenfree bread rise tips involve using a combination of binders rather than relying on just one. Different binders offer different benefits: psyllium husk provides strong structure and elasticity; chia or flaxseed meal add moisture and fiber; xanthan or guar gum offer viscosity and gas-trapping ability; and starches contribute to tenderness and crust.
For example, a common and effective combination involves using psyllium husk for primary structure and elasticity, along with a small amount of xanthan gum for added viscosity and gas trapping. Or, a recipe might use xanthan gum as the main binder and include flaxseed meal for added moisture and fiber. Experimenting with different ratios and combinations can help you discover what works best with your specific gluten-free flour blend and desired bread texture. Many successful gluten-free bread recipes leverage the synergistic effects of multiple binders to achieve optimal Glutenfree bread rise.
Mastering the Techniques for Gluten-Free Bread Rise
Hydration is Key: Achieving the Right Dough Consistency
Achieving the correct dough consistency is paramount for good Glutenfree bread rise. Unlike traditional wheat dough where you knead to develop gluten, gluten-free doughs often benefit from being wetter and more batter-like. Binders like psyllium husk, chia, and flaxseed absorb a lot of liquid and need sufficient hydration to activate their binding properties effectively. If the dough is too dry, the binders won't fully hydrate, resulting in a crumbly dough that can't trap gases and a dense loaf with minimal rise.
The ideal consistency for gluten-free bread dough is often described as being like a very thick cake batter or a wet cookie dough – too sticky to knead by hand on a floured surface in the traditional sense, but thick enough to hold a rough shape. Sufficient hydration allows the binders to form their structure, making the dough pliable enough to expand during proofing and baking. Don't be afraid of a wet dough; it's often the secret to a moist crumb and better Glutenfree bread rise tips.
The Importance of Resting Time for Binders
After mixing the ingredients, allowing the gluten-free dough to rest is a crucial step often overlooked but vital for maximizing Glutenfree bread rise. This resting time allows the binders, particularly psyllium husk, chia seeds, and flaxseed meal, to fully hydrate and form their gel-like structure. It gives the flours time to absorb moisture evenly and for starches to begin gelatinizing slightly.
A typical resting time might range from 10 to 30 minutes, depending on the recipe and the binders used. During this period, the dough will often thicken considerably as the binders absorb the liquid. This process is essential for creating the internal structure needed to support the subsequent rise. Skipping or shortening the resting time can result in binders that aren't fully active, leading to a less cohesive dough and reduced Glutenfree bread rise.
Proofing Gluten-Free Bread: Creating a Warm and Humid Environment
Proofing is the stage where the leavening agents (usually yeast) produce carbon dioxide gas, causing the dough to rise. For optimal Glutenfree bread rise, providing a warm and slightly humid environment is beneficial. Yeast is most active in temperatures between 75°F and 85°F (24°C and 30°C). A warm environment encourages yeast activity, leading to efficient gas production.
Humidity helps prevent the surface of the dough from drying out, which can restrict expansion and lead to a tough crust. You can create a suitable proofing environment in several ways: placing the dough in a slightly warm oven (turned off) with a pan of hot water on the rack below, using a proofing box, or simply covering the dough loosely with plastic wrap or a damp towel in a warm spot in your kitchen.
Proper proofing allows the dough, supported by the binder network, to expand and achieve significant volume before baking, contributing significantly to your Glutenfree bread rise tips.
Baking Temperatures and Times: Optimizing for Rise and Texture
The baking process is where the final and most dramatic Glutenfree bread rise occurs, often called "oven spring." The heat from the oven causes the trapped gases within the dough to expand rapidly and activates the binders and starches, which then set the structure. Baking at the correct temperature and for the appropriate duration is essential for achieving maximum rise and developing a good crust and crumb texture.
Many gluten-free bread recipes call for baking at a relatively high initial temperature (e.g., 400-425°F or 200-220°C) for the first 10-15 minutes. This initial burst of heat helps maximize oven spring. After this initial phase, the temperature is often reduced to ensure the bread bakes through without burning the crust (e.g., 375-400°F or 190-200°C).
Baking time varies depending on the size and shape of the loaf, but it's crucial to bake until the internal temperature reaches around 200-210°F (93-99°C) for a fully cooked loaf. Over-baking can lead to a dry crumb, while under-baking can result in a gummy texture and a loaf that collapses after cooling, negating your careful Glutenfree bread rise tips.
Troubleshooting Common Gluten-Free Baking Issues
Dense and Gummy Bread: Identifying the Causes
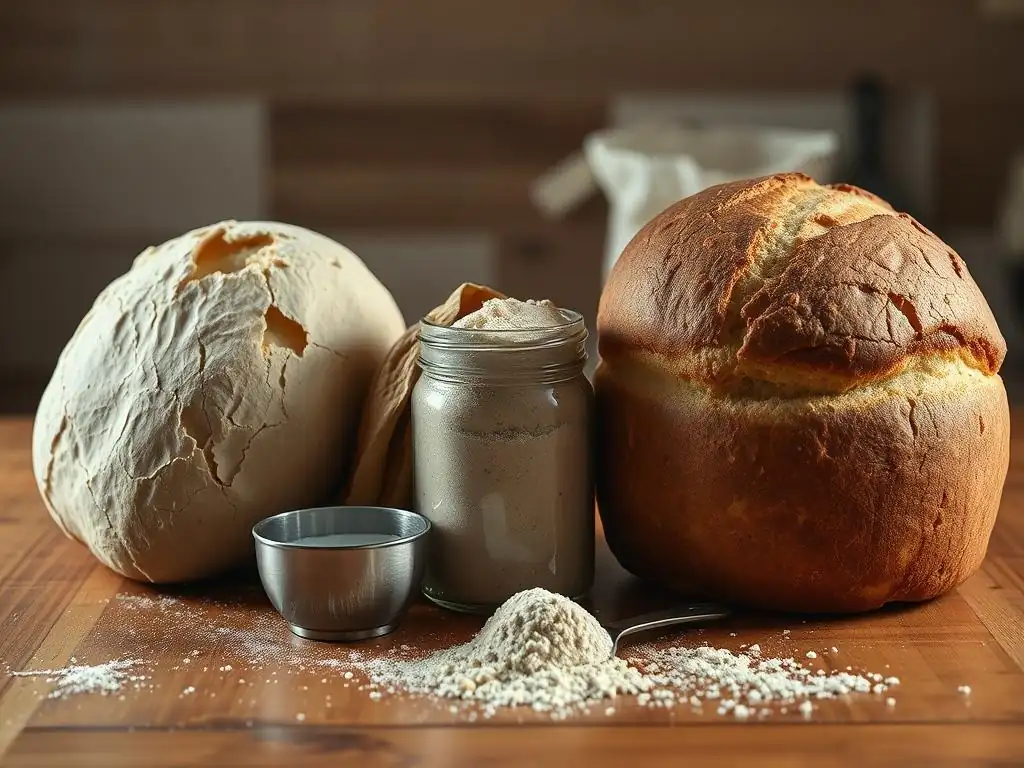
One of the most common frustrations in gluten-free baking is ending up with dense, gummy bread instead of a light, airy loaf. Several factors can contribute to this issue, often related to hydration and binders. A primary cause is insufficient liquid; if the dough is too dry, the binders cannot fully hydrate and form their structure, resulting in a compact crumb. Conversely, using too much binder, particularly xanthan or guar gum, can also lead to a gummy, unpleasant texture.
Another reason for density can be insufficient leavening or improper proofing. If the yeast isn't active or the dough isn't allowed to proof adequately in a warm environment, not enough gas will be produced to lighten the crumb. Using a gluten-free flour blend that is too heavy or lacks sufficient starch can also result in a denser loaf. Ensuring the right balance of hydration, using the correct amount of binders, and allowing for proper proofing are key Glutenfree bread rise tips to avoid a gummy outcome.
Lack of Rise: Common Mistakes and Solutions
A flat, dense loaf with minimal Glutenfree bread rise is disappointing but usually correctable. Common mistakes include:
- Insufficient or Incorrect Binders: Not using enough binder, or using a binder that isn't suitable for bread (like just starch), is a major culprit. Ensure your recipe includes a binder like psyllium husk or xanthan gum in the correct proportion.
- Not Enough Liquid: As mentioned, dry dough restricts expansion. Make sure your dough consistency is wet enough – like thick batter, not a stiff playdough.
- Inactive Yeast: Check the expiration date of your yeast and proof it in warm water with a pinch of sugar before adding to the dough to ensure it's active.
- Improper Proofing Conditions: Dough proofing in a cold environment will rise slowly or not at all. Ensure a warm (75-85°F / 24-30°C) and humid environment.
- Over-Proofing: While under-proofing is common, over-proofing can also cause issues. If the dough rises too much and then collapses before or during baking, it won't have the structure to rise again.
- Oven Temperature Issues: An oven that isn't hot enough won't provide the necessary oven spring. Ensure your oven is preheated properly, perhaps using an oven thermometer to check accuracy.
Crumbling Bread: Strengthening the Structure
Gluten-free bread can sometimes be excessively crumbly, falling apart easily when sliced. This indicates a lack of sufficient binding and structure. The primary causes are usually:
- Not Enough Binder: The dough doesn't have enough "glue" to hold the flour particles together. Increasing the amount of binder (within recommended limits) or using a stronger binder like psyllium husk can help.
- Insufficient Hydration: Dry dough is naturally more crumbly. Ensuring adequate liquid allows the binders to activate and the flours to hydrate, creating a more cohesive crumb.
- Incorrect Flour Blend: Some gluten-free flour blends are inherently more crumbly than others. Using a blend that includes a good balance of starchy and protein flours, along with a binder, is beneficial.
- Under-Baking: Bread that hasn't baked long enough may not have its internal structure fully set, leading to crumbling. Ensure the bread is baked through to the correct internal temperature.
Addressing these issues by focusing on adequate hydration, using appropriate binders, and following correct proofing and baking techniques are essential Glutenfree bread rise tips that also improve the overall texture and structure of your loaf.
Conclusion: Unlock the Secret to Perfect Gluten-Free Bread Rise
Mastering Gluten-Free Baking with the Right Binders.
Achieving a perfect rise in gluten-free bread might seem daunting, but it is entirely possible by understanding and effectively utilizing gluten-free binders. These essential ingredients are the unsung heroes of gluten-free baking, providing the structure, cohesion, and elasticity that gluten naturally offers. From the powerful gel-forming ability of psyllium husk to the stabilizing effects of xanthan gum and the moisture retention of chia and flaxseed, each binder plays a unique role in creating a dough capable of trapping gases and expanding beautifully.
By incorporating the right binders in the correct amounts and combining them strategically, you can transform dense, heavy loaves into light, airy bread with a wonderful crumb. Remember that technique is also key – proper hydration, adequate resting time, creating a warm and humid proofing environment, and baking at optimal temperatures all work in synergy with your chosen binders to maximize Glutenfree bread rise tips.
Experimentation is part of the journey, but with a solid understanding of how binders function, you are well on your way to unlocking the secret to consistently successful gluten-free bread baking and achieving that coveted rise.
Frequently Asked Questions
What are the most common reasons for gluten-free bread not rising properly?
The most common reasons include using incorrect binder ratios, insufficient proofing time, or inadequate oven temperature. These factors directly impact the bread's structure.
What are "binders" and why are they so important in gluten-free bread baking?
Binders are ingredients like xanthan gum, psyllium husk, or chia seeds that mimic the role of gluten. They are essential for structure and elasticity in gluten-free bread.
How can I ensure my gluten-free dough has enough moisture for a good rise?
Gluten-free flours tend to absorb more liquid than wheat flour. Make sure your recipe calls for sufficient hydration and that the dough has a slightly wet consistency before baking.
How does proofing time differ for gluten-free bread compared to traditional bread?
Gluten-free doughs often require longer proofing times than traditional doughs. Observe the dough's volume rather than strictly adhering to a set time, aiming for a noticeable increase in size.
What oven temperature and baking techniques are best for achieving optimal rise in gluten-free bread?
A slightly lower oven temperature and longer baking time can help. Baking with steam or using a Dutch oven can also improve crust formation and rise by trapping moisture.
Final Reflection: The Unexpected Joy of a Gluten-Free Rise
The quest for the perfect gluten-free loaf is more than just a baking challenge; it's a testament to human ingenuity and our enduring love of bread. The seemingly simple act of achieving a good rise in gluten-free baking reveals a fascinating world of science, experimentation, and ultimately, delicious reward. This journey, detailed throughout this article, highlights the crucial role of understanding binders and their impact on texture and volume.
The impact of mastering gluten-free baking extends far beyond the kitchen table. It's about empowerment, about reclaiming the joy of sharing homemade bread with loved ones, regardless of dietary restrictions. Bread is the staff of life,
a common saying reminds us, and for those following a gluten-free diet, achieving that "staff" can feel like a significant victory. This journey of discovery, filled with both successes and failures, underscores the importance of perseverance and the satisfaction of overcoming a culinary challenge. It's a testament to the power of adapting and innovating in the face of limitations.
Now, I invite you to consider your own baking experiences. What have you learned about the nuances of gluten-free baking? What challenges have you faced, and what triumphs have you celebrated? Remember the power of experimentation, the importance of understanding the science behind the rise, and the sheer joy of creating something delicious and nourishing. Don't be afraid to experiment with different binders, adjust your techniques, and most importantly, enjoy the process. The perfect gluten-free rise awaits you – embrace the challenge and savor the results.
Unlock Your Gluten-Free Baking Potential!
Thanks for taking the time to explore the secrets to a perfect gluten-free rise! We hope you now feel empowered to tackle those tricky gluten-free recipes. Ready to put your newfound knowledge into action?
- Try out one of the binder techniques today! Experiment with xanthan gum, guar gum, or even psyllium husk – each offers unique results. Note the differences in texture and rise.
- Share your baking triumphs (and challenges!) with our community in the comments below. Let's learn from each other's experiences!
- Consider exploring our other gluten-free baking resources on BakeWithEase.com (though that’s optional!). We have tons of recipes and tips just waiting for you.
What's your favorite gluten-free binder and why? Let's start a conversation!