
GlutenFree Bread Baking: Understanding Oven Spring

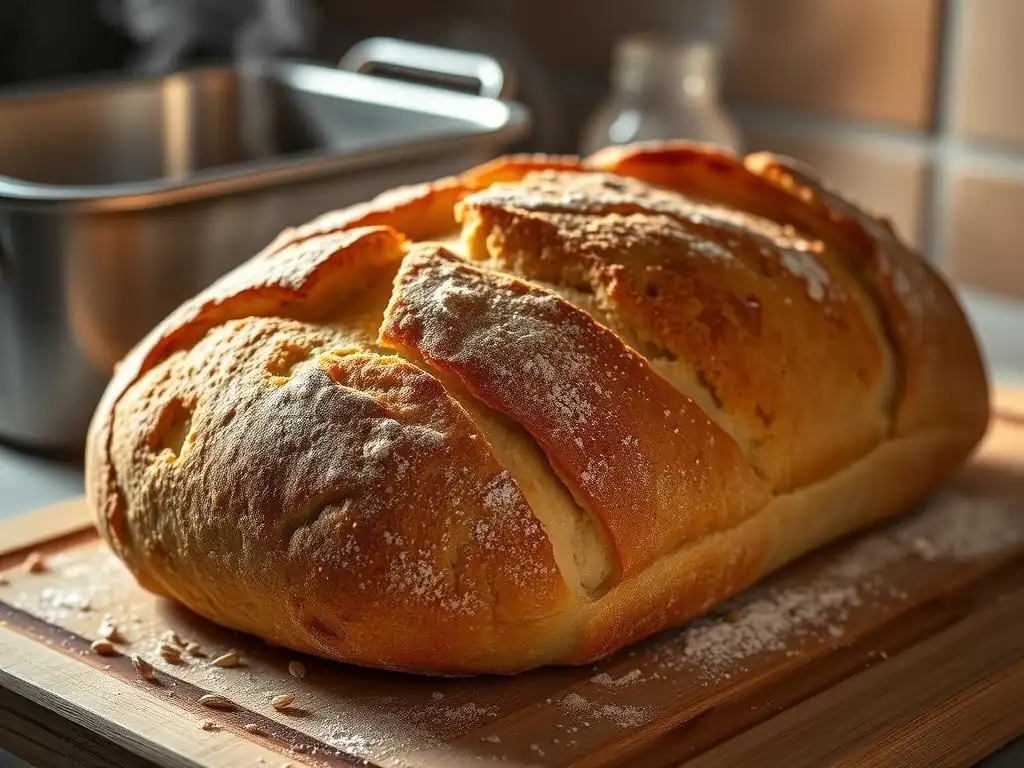
Welcome to BakeWithEase, your guide to confident baking! Ever wondered how to achieve that perfect rise in your gluten-free bread, the elusive oven spring that signals baking success? This article dives deep into the science and techniques behind achieving just that, unlocking the secrets to light, airy, and delicious gluten-free bread. Prepare to elevate your bread baking game!
- Gluten-Free Bread Baking: Achieving Optimal Oven Spring
- Understanding Oven Spring in Gluten-Free Bread
- The Science Behind Gluten-Free Bread Oven Spring
- Key Factors Influencing Gluten-Free Bread Oven Spring
- Troubleshooting Common Oven Spring Issues in Gluten-Free Bread
- Tips and Techniques for Achieving Great Gluten-Free Bread Oven Spring
- Gluten-Free Bread Recipes to Practice Oven Spring
- Conclusion: Mastering the Art of Gluten-Free Bread Oven Spring
-
Frequently Asked Questions
- ### What is oven spring, and why is it important in gluten-free bread baking?
- ### How does gluten absence affect oven spring in bread?
- ### What are some techniques to improve oven spring in gluten-free bread?
- ### What role does the baking temperature play in gluten-free bread oven spring?
- ### What are some common reasons for poor oven spring in gluten-free bread, and how can they be avoided?
- Final Reflection: The Unfolding Mystery of Gluten-Free Oven Spring
- Unleash Your Gluten-Free Baking Potential!
Gluten-Free Bread Baking: Achieving Optimal Oven Spring
Understanding Oven Spring in Gluten-Free Bread
Oven spring is a magical moment in baking where the dough undergoes its final, rapid expansion when first placed in the hot oven. For gluten-free bakers, mastering this phenomenon is often the key to transforming a dense, heavy loaf into a light, airy one. Unlike wheat bread, which relies on the elastic gluten network to capture gases and expand dramatically, gluten-free doughs require different techniques and ingredients to achieve a similar lift.
Understanding the dynamics of glutenfree bread oven spring is crucial for consistent, successful baking results. It’s the difference between a loaf that rises beautifully and one that stays stubbornly flat.
Defining Oven Spring: The Baker's Rise
Oven spring, technically known as the "final growth phase," is the swift increase in volume that occurs during the initial minutes of baking. As the heat penetrates the dough, several processes are triggered simultaneously: residual yeast activity accelerates, producing a final burst of carbon dioxide; trapped gasses (from proofing and mixing) expand rapidly due to the heat; and water in the dough turns to steam, further contributing to expansion. This quick, intense rise is what gives many breads their characteristic shape and internal structure.
For gluten-free bread, achieving significant oven spring presents a unique challenge due to the absence of gluten's elastic structure. The goal is to create a dough that can still capture and hold these expanding gasses effectively.
This critical phase typically lasts for the first 5 to 10 minutes of baking, depending on the size and type of loaf and the oven temperature. During this time, the dough's internal temperature rises from room temperature or proofing temperature to around 140°F (60°C). As the crust begins to set, the dough's ability to expand diminishes.
Maximizing glutenfree bread oven spring during this short window is paramount. It requires careful control over dough hydration, leavening, and the baking environment itself. Bakers often score their loaves just before baking to provide weak points where the dough can expand controllably, further enhancing the visual appeal and potential for a strong rise.
Why Oven Spring Matters for Gluten-Free Bread
For gluten-free bread, achieving a good oven spring is arguably even more important than for traditional wheat bread. Without gluten, the dough tends to be less extensible and less capable of trapping and holding large gas bubbles during proofing. A strong oven spring helps compensate for this limitation by providing a powerful final push of expansion just as the structure begins to set.
This expansion contributes directly to a lighter crumb texture, a larger loaf volume, and an overall more appealing loaf. A loaf with poor glutenfree bread oven spring is often dense, squat, and can feel heavy in the hand, lacking the airy quality desired in good bread.
Furthermore, sufficient oven spring can improve the crust formation and overall shape of the loaf. As the dough expands, the surface stretches and eventually sets into a firm crust. This helps support the internal structure.
A well-risen gluten-free loaf is also more likely to have a pleasing shape and a more open crumb structure compared to one that remains flat and dense. Mastering the factors that promote a healthy glutenfree bread oven spring is a key skill for any serious gluten-free baker aiming for results comparable to traditional loaves. It directly impacts the bread's texture, volume, and overall eating experience.
The Science Behind Gluten-Free Bread Oven Spring
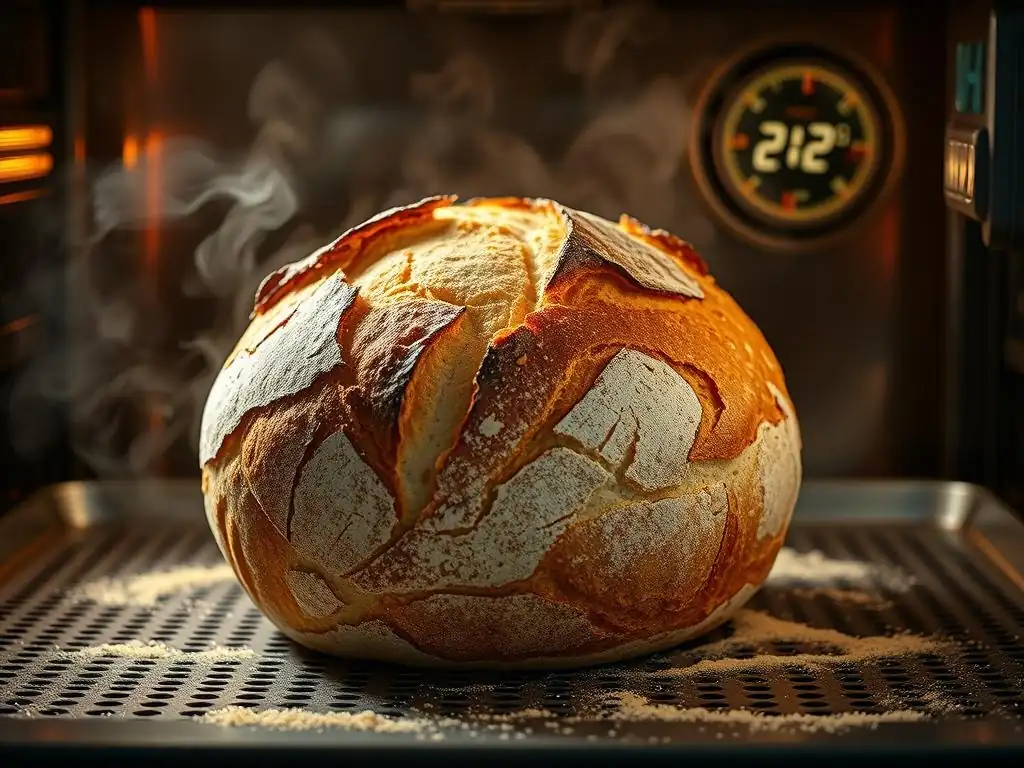
Understanding the scientific processes happening inside the dough when it hits the heat is fundamental to controlling glutenfree bread oven spring. While gluten-free doughs lack the viscoelastic properties of wheat dough, they still rely on gas production, expansion, and the setting of starches and proteins to achieve structure and rise. The interplay between heat, moisture, and the leavening agents is what drives this final burst of growth. It's a complex dance of chemical and physical changes occurring rapidly in the oven.
How Steam Affects Gluten-Free Bread Volume
Steam plays a critical role in maximizing glutenfree bread oven spring. When the dough is placed in a hot, humid oven, the surface stays pliable longer. This is because the high humidity prevents the crust from forming too quickly.
If the crust sets prematurely, it becomes rigid and restricts the dough's ability to expand. Steam keeps the exterior soft and flexible, allowing the internal pressure from expanding gases and steam generated within the dough itself to push outwards and upwards, resulting in greater volume. The water present in the dough rapidly converts to steam upon heating, and this steam contributes significantly to the internal pressure driving expansion.
Introducing additional steam into the oven environment during the initial baking phase is a common technique used by bakers, both gluten-free and traditional. This can be achieved by placing a tray of hot water in the oven, spraying the oven walls, or baking in a Dutch oven or cloche.
For gluten-free doughs, which can sometimes form a crust faster than wheat doughs due to different ingredient properties, maintaining a humid environment for the first 10-15 minutes is especially beneficial for promoting good glutenfree bread oven spring. A moist environment allows the dough to expand freely before the final crust sets, leading to a lighter, airier loaf.
Starch Gelatinization and its Role in Oven Spring
Starch gelatinization is a key process that contributes to the setting of the gluten-free bread structure during baking, working in tandem with oven spring. Gluten-free flours are rich in starches (like rice starch, tapioca starch, potato starch, etc.). As the dough heats up, the starch granules absorb moisture and swell.
When the temperature reaches a certain point (typically between 140°F and 180°F, or 60°C and 82°C, depending on the type of starch), the granules rupture and release amylose molecules, which form a gel-like matrix. This gelatinized starch matrix, along with any added gums (like xanthan or guar gum) or alternative binders (like psyllium husk), provides the structural support for the gluten-free bread.
This setting process is crucial because it stabilizes the structure created by the expanding gases during oven spring. The rapid expansion occurs while the dough is still relatively fluid and before the starches have fully gelatinized and the proteins (from eggs, dairy, or plant sources) have denatured and set. Once the starches gelatinize and the proteins set, the structure becomes fixed, and further significant expansion stops.
The timing is critical: sufficient expansion must occur before the structure sets. Effective glutenfree bread oven spring relies on achieving maximum gas expansion before the starch matrix becomes too rigid to allow further movement.
The Impact of Leavening Agents
Leavening agents are the primary drivers of gas production in bread dough, making them fundamental to achieving glutenfree bread oven spring. In gluten-free baking, common leavening agents include yeast, baking powder, and baking soda (often used in combination with an acid). Yeast produces carbon dioxide gas through fermentation over time, both during proofing and during the initial phase of baking until the temperature gets too high for the yeast to survive. This final burst of yeast activity in the hot oven contributes significantly to oven spring.
Baking powder and baking soda, on the other hand, produce carbon dioxide through chemical reactions, often triggered by moisture and heat. Baking powder is double-acting, meaning it produces gas when mixed with liquid and again when heated. Baking soda requires an acid (like buttermilk, yogurt, vinegar, or lemon juice) to react and produce gas.
These chemical leaveners provide a rapid production of gas, which is especially important in gluten-free doughs that may not trap yeast-produced gases as effectively as wheat dough. A balanced combination of yeast and chemical leaveners is often used in gluten-free recipes to ensure both sustained gas production during proofing and a strong final push for glutenfree bread oven spring in the oven.
Key Factors Influencing Gluten-Free Bread Oven Spring
Achieving optimal glutenfree bread oven spring is not a single-step process but rather the result of carefully managing several interconnected factors. From the initial selection of ingredients to the final moments in the oven, each stage plays a role. Understanding how these elements interact allows bakers to troubleshoot issues and consistently produce well-risen loaves. The right combination of flour blend, hydration, leavening, and baking technique is essential for success.
Flour Blend Selection for Optimal Rise
The choice of gluten-free flour blend is perhaps the most impactful decision affecting glutenfree bread oven spring. Different flours have varying properties regarding starch content, protein levels, and how they absorb water. A single gluten-free flour like rice flour often results in dense, heavy bread.
Successful gluten-free baking almost always requires a blend of different flours and starches to mimic the properties of wheat flour, specifically its ability to absorb liquid and provide some structure. A typical blend might include a mix of whole grain flours (like brown rice, sorghum, millet) and refined starches (like tapioca starch, potato starch, cornstarch).
Understanding Gluten-Free Flour Combinations
A balanced gluten-free flour blend is designed to provide structure, tenderness, and the ability to absorb sufficient liquid without becoming gummy. Whole grain gluten-free flours offer more structure and flavor but can be dense. Starches, while providing tenderness and helping with moisture retention, can lead to a gummy texture if used in excess. A common ratio might be roughly 60-70% whole grain flours to 30-40% starches.
For example, a blend might consist of brown rice flour, sorghum flour, tapioca starch, and potato starch. Experimenting with different ratios and types of flours is key to finding a blend that works well for your desired glutenfree bread oven spring and texture. Adding a binder like psyllium husk or xanthan gum is also crucial, as these ingredients help create a structure that can trap gases and support the oven spring.
The Role of Starches in Gluten-Free Baking
Starches are vital components of gluten-free flour blends, playing a significant role in both dough consistency and the final bread structure, which impacts glutenfree bread oven spring. Starches like tapioca, potato, and cornstarch contribute to the lightness and tenderness of the crumb. They absorb liquid during mixing and, more importantly, undergo gelatinization during baking, helping to set the structure. Tapioca starch, in particular, contributes to a slightly chewy texture and helps create a crisp crust.
Potato starch provides softness and moisture retention. However, relying too heavily on starches can lead to a gummy or overly soft interior that collapses easily. A thoughtful inclusion of starches within a broader blend is necessary to achieve good texture and support a strong glutenfree bread oven spring.
Hydration Levels and Dough Consistency
Hydration level, or the ratio of water to flour, is another critical factor influencing glutenfree bread oven spring. Gluten-free doughs often require higher hydration than wheat doughs because gluten-free flours tend to absorb liquids differently and less efficiently than wheat flour. Higher hydration results in a wetter, often batter-like or very soft dough, which can seem counterintuitive but is necessary for the starches to gelatinize properly and for steam production during baking. A well-hydrated dough is also more extensible (though still not like wheat dough) and allows gases to expand more freely during oven spring.
Achieving the Right Dough Consistency for Oven Spring
The ideal consistency for gluten-free bread dough is typically much wetter than you might expect if you're used to handling wheat dough. It should range from a thick batter that needs to be scooped into a pan to a very soft, sticky dough that can barely be shaped with wet hands. A dough that is too dry will be dense and heavy, with limited capacity for gas expansion, resulting in poor glutenfree bread oven spring.
Conversely, a dough that is too wet might spread excessively or collapse. Finding the right hydration level for your specific flour blend is crucial. This often involves starting with a recommended amount in a recipe and adjusting based on how the dough feels – it should be sticky and moist but have some body.
The Importance of Water Temperature
The temperature of the water used in gluten-free bread affects yeast activity and the initial consistency of the dough, indirectly influencing glutenfree bread oven spring. For yeast-leavened bread, using warm water (around 105-115°F or 40-46°C) helps to activate the yeast quickly and ensures consistent fermentation. Water that is too hot can kill the yeast, while water that is too cold will result in sluggish fermentation.
The water temperature also affects how quickly the dry ingredients hydrate. Using the specified water temperature in a recipe helps ensure the yeast is active and the dough develops the correct initial consistency needed for a good rise during proofing and subsequent oven spring.
Leavening Agents: Yeast, Baking Powder, and Sourdough Starter
The type and quantity of leavening agents used are fundamental to generating the gas needed for dough rise and, ultimately, glutenfree bread oven spring. Gluten-free recipes often employ a combination of leaveners to achieve the desired lift and texture. Yeast provides flavor and a steady rise over time, while chemical leaveners offer a quick burst of gas, particularly important as the dough heats up in the oven. Sourdough starters add flavor and unique leavening properties.
Best Practices for Using Yeast in Gluten-Free Dough
When using yeast in gluten-free dough, it's important to ensure the yeast is active. You can proof dry yeast in warm water with a pinch of sugar for 5-10 minutes until it becomes foamy. This confirms it's alive and ready to work.
Gluten-free doughs often benefit from a slightly higher proportion of yeast compared to wheat doughs, around 1.5-2% of the flour weight, though recipes vary. Proper proofing time is also key; the dough should increase significantly in volume (often doubling) but not be allowed to over-proof, as this can exhaust the yeast and lead to collapse in the oven, hindering glutenfree bread oven spring. The dough should be light and airy before baking.
Using Baking Powder Effectively in Gluten-Free Bread
Baking powder is a common addition to gluten-free yeast breads or used as the sole leavener in quick breads. It provides a reliable chemical lift, especially beneficial during the initial phase of baking when the heat activates the second reaction of double-acting baking powder. This rapid gas production supplements the yeast's final push and significantly aids glutenfree bread oven spring.
Ensure your baking powder is fresh; it loses potency over time. Store it in a cool, dry place and check its activity by adding a teaspoon to a small amount of hot water – it should fizz vigorously. Using the amount specified in a tested recipe is crucial for achieving the right balance of lift without an unpleasant chemical taste.
Sourdough Starter and its Impact on Gluten-Free Bread
Gluten-free sourdough baking is a growing area, offering complex flavors and natural leavening. A gluten-free sourdough starter is a fermented culture of gluten-free flour (like rice, sorghum, or millet) and water, containing wild yeasts and bacteria. These microorganisms produce lactic acid (for flavor) and carbon dioxide (for leavening).
Gluten-free sourdough can provide excellent lift, contributing to glutenfree bread oven spring, but often requires a well-maintained, active starter and careful proofing. Due to the lack of gluten structure, gluten-free sourdoughs often benefit from the addition of binders like psyllium husk to help trap the gases produced by the starter. The slightly acidic environment created by the starter can also affect the dough's properties and the activity of other ingredients like baking soda, if used.
Oven Temperature and Baking Time for Best Results
The oven environment, specifically temperature and the introduction of moisture, is paramount for maximizing glutenfree bread oven spring. A hot oven provides the necessary heat to trigger the rapid expansion of gases and the setting of the structure. Baking time is then about ensuring the bread is cooked through and the crust is properly formed.
Preheating Your Oven for Maximum Oven Spring
Properly preheating your oven is non-negotiable for achieving good glutenfree bread oven spring. The oven needs to be at the target temperature before the bread goes in, and ideally, allowed to heat for an extra 15-20 minutes after the indicator says it's ready to ensure the temperature is stable and the oven walls and baking surface (like a baking stone or Dutch oven) are fully heated. A hot environment immediately triggers the final burst of leavening activity and steam production, pushing the dough to expand before the crust sets.
Placing dough in a cool or insufficiently preheated oven will result in a slow, inadequate rise and poor glutenfree bread oven spring. Aim for typical bread baking temperatures, often starting high, around 425-450°F (220-230°C).
Temperature Control for Gluten-Free Bread
While starting at a high temperature is great for initiating oven spring, gluten-free bread often benefits from the temperature being reduced partway through the bake. A common approach is to bake at 425-450°F (220-230°C) for the first 15-20 minutes to maximize oven spring, and then reduce the temperature to 375-400°F (190-200°C) for the remainder of the baking time. This prevents the crust from burning while allowing the interior to cook through.
The exact temperatures and timing will depend on the specific recipe and the size of the loaf. Monitoring the bread's internal temperature is the most reliable way to know when it's done; it should reach around 200-210°F (93-99°C). Careful temperature management ensures both a good glutenfree bread oven spring and a fully baked interior.
Troubleshooting Common Oven Spring Issues in Gluten-Free Bread
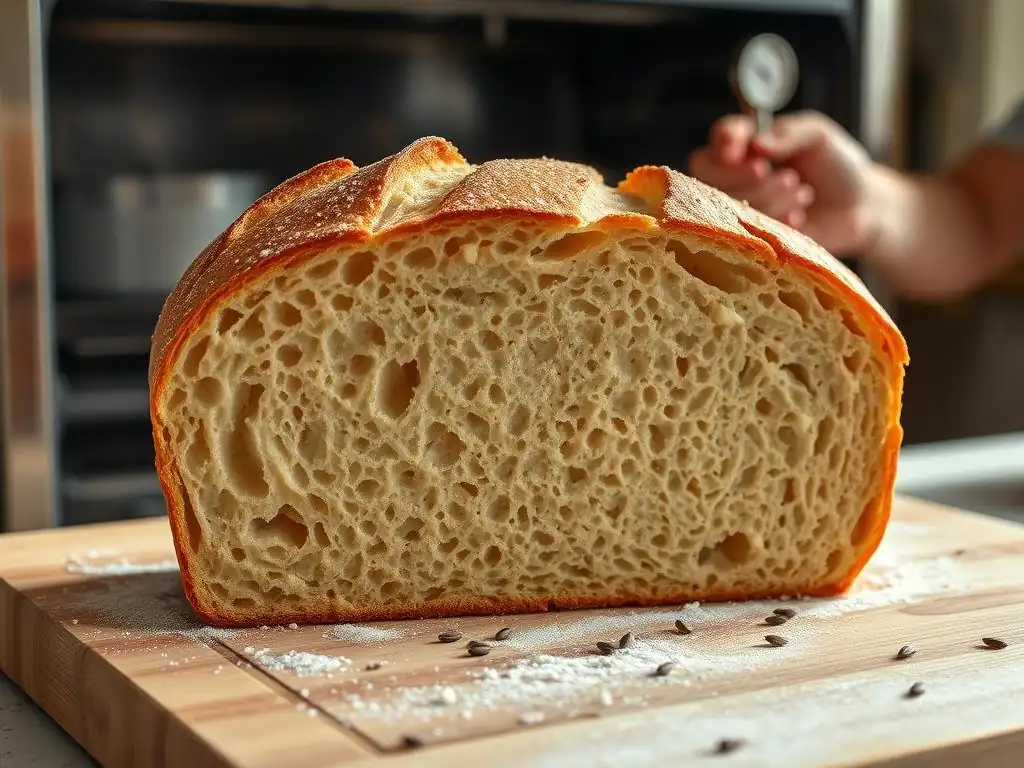
Even with careful attention to ingredients and technique, gluten-free bread can sometimes present challenges with oven spring. Issues like collapse, excessive density, or uneven rise are common. Understanding the potential causes behind these problems is the first step to fixing them and achieving consistent glutenfree bread oven spring. Troubleshooting involves reviewing each stage of the baking process, from mixing to baking.
Bread Collapses After Baking
One frustrating issue is when a gluten-free loaf looks promising during baking but then sinks or collapses significantly after being removed from the oven. This indicates that the internal structure was not strong enough to support the loaf's height once the external crust was no longer providing full support. It's a sign that the glutenfree bread oven spring might have been good initially, but the structure didn't set properly.
Identifying the Cause of Gluten-Free Bread Collapse
Common causes for gluten-free bread collapse include underbaking, over-proofing, or an incorrect balance of ingredients (too much liquid, not enough binder or starch). If the bread is removed from the oven before the starches and proteins have fully set, the structure will be weak. Over-proofing can lead to the dough exhausting its leavening power and the structure beginning to break down before baking. Too much moisture or insufficient structural support from binders like psyllium husk can also lead to a weak crumb that cannot hold its shape after the glutenfree bread oven spring.
Solutions for Preventing Gluten-Free Bread Collapse
To prevent collapse, ensure the bread is fully baked. Bake until the internal temperature reaches 200-210°F (93-99°C) and the crust is firm and golden brown. If you tap the bottom of the loaf, it should sound hollow. Be mindful of proofing times; proofing in a slightly cooler spot or for a shorter time might be necessary, especially if your kitchen is warm.
Ensure your recipe has an adequate amount of binder (like psyllium husk or xanthan gum) relative to the flour volume, as this provides essential structure. Reducing hydration slightly in subsequent bakes might also help if the dough felt excessively wet. Proper cooling is also crucial (see section below).
Dense and Heavy Gluten-Free Bread
A dense, heavy crumb is a common complaint in gluten-free baking and is directly related to poor glutenfree bread oven spring. If the dough doesn't rise sufficiently in the oven, it remains compressed, resulting in a tight, heavy texture instead of a light, airy one.
Addressing Density Issues in Gluten-Free Baking
Density often stems from insufficient leavening, inadequate hydration, or an inappropriate flour blend. If the yeast is inactive, or there isn't enough chemical leavener, the dough won't produce enough gas to rise. Dough that is too dry won't expand well. A flour blend that is too heavy on whole grain flours without enough starches or binders can also result in a dense loaf. The glutenfree bread oven spring is directly limited by the dough's ability to generate and expand gases.
Improving Texture in Gluten-Free Bread
To improve texture and promote a lighter crumb, first, verify your leavening agents are active and used in the correct quantities. Increase hydration slightly in your next attempt; gluten-free dough should be quite wet. Review your flour blend – ensure it includes a mix of whole grains and starches, and that you are using an effective binder like psyllium husk or xanthan gum (psyllium husk is often preferred for texture).
Ensuring a hot, steamy oven environment during the initial bake will also significantly help maximize glutenfree bread oven spring and improve crumb lightness. Gentle handling of the dough after proofing is also important to avoid degassing it too much.
Uneven Rise and Cracking
Sometimes, gluten-free bread will rise unevenly or develop large, uncontrolled cracks on the surface during baking. While some cracking is normal and even desirable (especially with scoring), excessive or uneven cracking can indicate issues that affect the overall glutenfree bread oven spring and final shape.
Preventing Uneven Rise in Gluten-Free Loaves
Uneven rise can be caused by uneven heat distribution in the oven (try rotating the loaf halfway through baking), or uneven dough consistency during mixing or shaping. If the dough was not mixed thoroughly, pockets of dry flour or uneven hydration can lead to parts of the loaf rising differently. Ensure all ingredients are well incorporated and the dough has a uniform consistency before proofing and baking.
Also, ensure the dough is evenly distributed in the baking pan or shaped uniformly if baking as a freeform loaf. Consistent temperature across the oven rack is also important for even glutenfree bread oven spring.
Managing Cracking in Gluten-Free Bread
Uncontrolled cracking often occurs when the crust sets too quickly before the interior has finished expanding during oven spring. As the inside continues to push outwards, the rigid crust breaks along points of least resistance. This can be exacerbated by insufficient hydration or lack of steam in the oven. To manage cracking and encourage controlled expansion, ensure adequate hydration in your dough.
Crucially, use scoring techniques (see below) just before baking. Scoring provides intentional weak points on the surface, allowing the dough to expand predictably along the cuts, leading to better shape and contributing positively to controlled glutenfree bread oven spring instead of random bursts. Using steam during the initial bake also keeps the crust pliable longer, reducing the likelihood of uncontrolled cracking.
Tips and Techniques for Achieving Great Gluten-Free Bread Oven Spring
Beyond the foundational elements of ingredients and temperature, specific techniques can be employed to further enhance glutenfree bread oven spring and improve the final loaf quality. These methods focus on managing the dough's surface tension and creating the optimal baking environment.
Scoring Techniques for Better Expansion
Scoring, or slashing, the surface of the dough just before it goes into the oven is a simple yet highly effective technique to control glutenfree bread oven spring and improve the loaf's appearance. The cuts provide predetermined weak points in the dough's surface. As the dough expands rapidly in the hot oven, it pushes outwards through these scores, allowing for maximum volume and preventing the crust from tearing randomly. This controlled expansion contributes significantly to a better shape and height.
Different Scoring Patterns and Their Effects
The pattern of scoring affects how the loaf expands. A single long slash down the center is common for pan loaves or oval freeform loaves and encourages the loaf to open up along that line. For round loaves, a cross pattern or multiple parallel slashes can be used.
More complex patterns are possible but primarily for aesthetics; their main function is still to allow the dough to expand. For gluten-free doughs, which might be less extensible, making the scores deep enough (around 1/2 inch or 1-1.5 cm) is important to ensure they open up properly during glutenfree bread oven spring. Experimenting with patterns can be fun, but the key is simply to provide openings for expansion.
Using a Sharp Knife or Lame
To score effectively, you need a very sharp blade. A baker's lame (a razor blade attached to a handle) is the ideal tool, allowing for clean, swift cuts that don't drag or tear the dough. A very sharp knife can also work, but it's often harder to achieve the same precision. The goal is to make confident, quick cuts. Hesitant cuts can snag the dough and hinder expansion. Scoring should be done just before placing the dough in the oven, as part of the final preparation for maximizing glutenfree bread oven spring.
Creating a Steamy Oven Environment
As discussed earlier, steam is vital for keeping the crust pliable during the initial phase of baking, allowing the dough to achieve maximum glutenfree bread oven spring. Creating a steamy environment in a home oven requires some effort, as standard ovens are designed to be dry-heat environments.
Methods for Introducing Steam into Your Oven
Several methods can be used to introduce steam. One common technique is to place a metal tray or cast iron pan on the bottom rack of the oven while it preheats. Just before placing the bread in the oven, carefully pour a cup of hot water or ice cubes into the hot tray. This will instantly create a burst of steam.
Be extremely cautious when doing this to avoid burns. Another method is to spray the walls of the oven with water using a clean spray bottle. Baking the loaf inside a preheated Dutch oven or cloche is arguably the most effective method for home bakers, as it traps the steam naturally released by the dough around the loaf for the crucial first part of the bake, perfectly supporting glutenfree bread oven spring.
Maintaining Humidity During Baking
The steamy environment is most critical for the first 10-20 minutes of baking. After this period, the crust should begin to set, and continuing with steam can actually hinder proper crust development. If using the hot water method, the steam will likely dissipate naturally. If using a Dutch oven or cloche, the lid is typically removed after 15-20 minutes to allow the crust to brown. The goal is to provide high humidity during the period of active glutenfree bread oven spring and then transition to dry heat to finish baking and develop a crisp crust.
Cooling Your Gluten-Free Bread Properly
While cooling happens after oven spring, it's a critical step that impacts the final texture and structure set during the bake. Improper cooling can ruin the results of successful glutenfree bread oven spring.
Avoiding Soggy Gluten-Free Bread
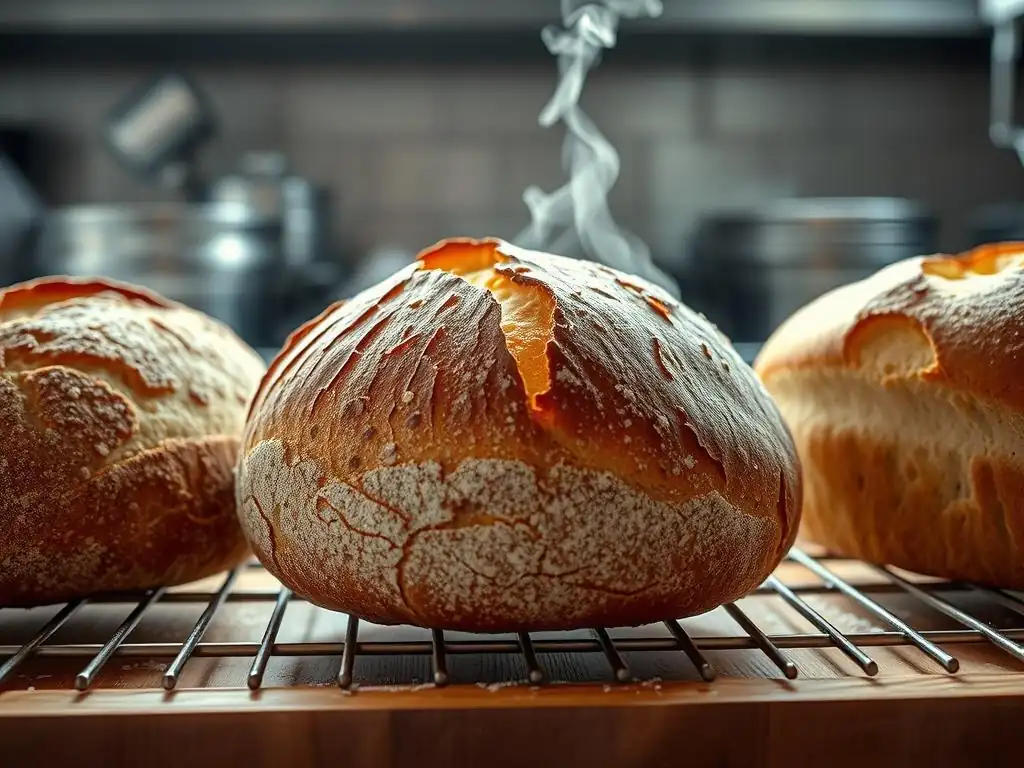
Gluten-free bread needs to cool completely on a wire rack to allow steam to escape. Placing a hot loaf on a solid surface traps steam, leading to a soggy bottom crust and potentially a gummy interior. The internal structure continues to set and firm up as it cools. Cutting into a hot gluten-free loaf is a common mistake; the crumb will be soft, sticky, and can collapse, negating the benefits of good glutenfree bread oven spring.
Allowing the Bread to Set After Baking
Cooling is not just about temperature; it's about allowing the internal structure to stabilize. As the bread cools, the starches continue to retrograde (recrystallize), which helps firm up the crumb and improves sliceability. This process can take several hours. For best results, let gluten-free bread cool for at least 2-3 hours, or even longer, before slicing. This patience ensures that the structure achieved through careful mixing, proofing, and glutenfree bread oven spring is preserved, resulting in the best possible texture.
Gluten-Free Bread Recipes to Practice Oven Spring
Putting knowledge into practice is key. Trying tested gluten-free bread recipes that focus on achieving a good rise will help you understand how the different factors discussed contribute to glutenfree bread oven spring. These recipes provide a starting point for experimentation and skill development.
Gluten-Free Sandwich Bread Recipe
A reliable gluten-free sandwich bread recipe is a great way to practice achieving consistent glutenfree bread oven spring. Look for recipes that use a blend of flours and starches, incorporate a binder like psyllium husk or xanthan gum, and provide clear instructions for hydration and proofing. A typical recipe might use a mix of brown rice flour, sorghum flour, tapioca starch, and potato starch, with psyllium husk as the binder. Hydration levels often range from 85% to over 100% relative to the total flour weight.
Pay close attention to the dough consistency – it should be very soft and sticky. Baking in a loaf pan helps support the dough during its rise and oven spring. Using a hot oven (e.g., 425°F/220°C) with steam for the first 15-20 minutes, then reducing the temperature, is a standard technique that promotes good oven spring in pan loaves.
Gluten-Free Sourdough Loaf Recipe
Tackling a gluten-free sourdough loaf allows you to explore natural leavening and its impact on glutenfree bread oven spring. These recipes typically require a well-established gluten-free sourdough starter (fed with a blend of gluten-free flours). The dough is often made with a mix of flours and starches, plus a binder like psyllium husk. Sourdough fermentation adds flavor and helps develop the dough structure.
Proofing times are often longer than for yeast-only breads. Baking in a preheated Dutch oven is highly recommended for gluten-free sourdough to maximize glutenfree bread oven spring by trapping steam. The high initial heat and trapped steam allow the dough to expand dramatically before the lid is removed to finish baking and crisp the crust. Mastering the starter's activity and proofing stages is crucial for success with glutenfree bread oven spring in sourdough.
Conclusion: Mastering the Art of Gluten-Free Bread Oven Spring
Achieving excellent glutenfree bread oven spring is a rewarding goal for any gluten-free baker. It's the moment the dough transforms in the heat, gaining significant volume and developing a lighter crumb. While gluten-free doughs present unique challenges compared to their wheat counterparts, they are absolutely capable of impressive rises with the right approach.
By understanding the science behind oven spring – the role of steam, starch gelatinization, and leavening agents – and by carefully controlling key factors like flour blend, hydration, and oven environment, you can significantly improve your results. Troubleshooting common issues and employing techniques like proper scoring and steam generation are essential steps on the path to consistently producing beautiful, well-risen gluten-free loaves. With practice and attention to these details, you can master the art of glutenfree bread oven spring and enjoy the satisfaction of baking delicious, airy gluten-free bread.
Frequently Asked Questions
### What is oven spring, and why is it important in gluten-free bread baking?
Oven spring is the rapid expansion of dough in the initial minutes of baking. It's crucial for gluten-free bread because it helps achieve a good rise and texture, compensating for the lack of gluten's elasticity.
### How does gluten absence affect oven spring in bread?
The absence of gluten makes it harder to trap gases and create a strong structure. This means gluten-free doughs often struggle to achieve the same oven spring as traditional breads, requiring other strategies.
### What are some techniques to improve oven spring in gluten-free bread?
Key techniques include using xanthan gum or psyllium husk to mimic gluten's structure, ensuring proper hydration of the dough, and baking in a preheated oven or using a Dutch oven.
### What role does the baking temperature play in gluten-free bread oven spring?
A high initial baking temperature is often essential for gluten-free breads. It allows the dough to rise quickly before the crust sets, maximizing the potential for oven spring.
### What are some common reasons for poor oven spring in gluten-free bread, and how can they be avoided?
Common issues include under-proofing the dough, using the wrong flour blend, or not having enough moisture. Ensuring accurate measurements, proper proofing time, and a well-hydrated dough are crucial.
Final Reflection: The Unfolding Mystery of Gluten-Free Oven Spring
The quest for a perfect gluten-free loaf is far from over, but understanding oven spring is a crucial step towards achieving that airy, light crumb we all crave. The seemingly simple act of baking gluten-free bread is, in reality, a complex dance of hydration, fermentation, and heat, all culminating in that critical moment of oven spring – the final rise that determines the texture and volume of our bread. Mastering this process is key to unlocking the full potential of gluten-free baking.
The journey of understanding oven spring has been a fascinating one, revealing the intricate science behind a seemingly simple process. It's a testament to the ingenuity and dedication of gluten-free bakers who constantly strive to improve upon traditional methods. The best bread is the bread you bake with love.
While this quote might seem simplistic, it speaks to the heart of gluten-free baking: the passion and perseverance required to overcome the unique challenges it presents. This pursuit of perfection, this constant striving for improvement, is what drives the community forward, sharing knowledge and inspiring innovation.
Now, it's your turn. Take what you've learned about oven spring and apply it to your next gluten-free loaf. Experiment with different techniques, observe the results, and don't be afraid to fail. Each failed loaf is a lesson learned, bringing you closer to that perfect, airy crumb. Embrace the process, celebrate the successes, and remember the joy of creating something delicious from scratch. The journey to mastering gluten-free bread baking is a rewarding one, and the perfectly risen loaf is just the delicious reward for your efforts.
Unleash Your Gluten-Free Baking Potential!
Thanks for diving deep into the world of gluten-free oven spring! You've now got the knowledge to conquer those frustrating bakes and create lighter, fluffier loaves. Ready to put your new skills to the test?
- Bake your best gluten-free bread yet: Try out one of the recipes mentioned in the article, paying close attention to the temperature and timing adjustments for optimal oven spring. Don't be afraid to experiment!
- Share your baking triumph (or challenge!): Post a picture of your creation on social media and tag #BakeWithEaseGlutenFree. We'd love to see your results!
- Explore our other gluten-free resources: Dive deeper into our library of recipes and guides for mastering other gluten-free baking techniques. You might discover your new favorite recipe!
What unexpected ingredient are you excited to try next to improve your gluten-free bread baking?