
Why Your Bread Looks Perfect Outside But Is Raw Inside

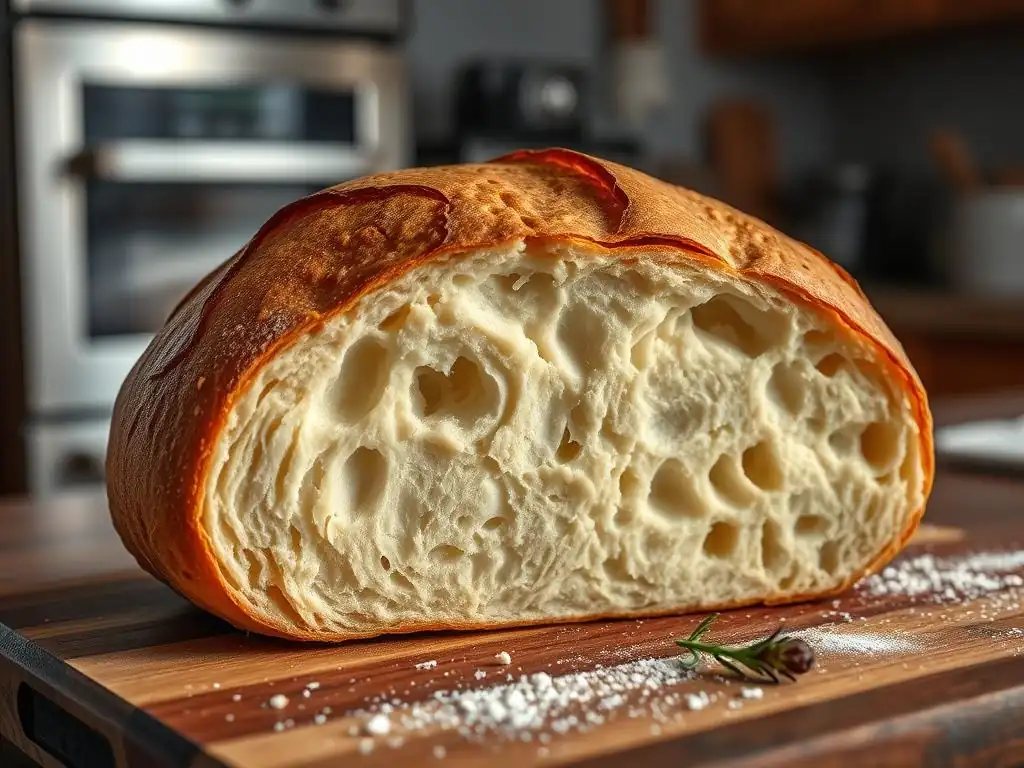
Welcome to BakeWithEase, your trusted guide to baking brilliance! Ever pulled a seemingly perfect loaf from the oven, only to discover a gummy, raw interior? You're not alone. In this article, we delve into the frustrating world of raw bread baking problems, uncovering the secrets to achieving that perfectly baked crumb every time. Discover the common pitfalls and simple fixes that will transform your baking from disappointing to delightful. Ready to banish the raw dough blues? Let's get started!
- Why Is My Bread Raw Inside? Troubleshooting Common Bread Baking Problems
- Common Causes of Undercooked Bread
- Solutions for Raw Bread Baking Problems: BakeWithEase Tips
- Advanced Techniques for Avoiding Raw Bread
- Conclusion: Achieving Perfectly Baked Bread Every Time
-
Frequently Asked Questions
- Why is my bread perfectly browned on the outside but still raw in the middle?
- How can I tell if my bread is fully baked inside without cutting into it?
- What role does dough hydration play in raw bread baking problems?
- Can using the wrong type of flour contribute to a raw center?
- What are some common mistakes beginners make that lead to raw bread?
- Final Reflection: The Unexpected Journey of a Loaf
- Unlock Perfectly Baked Bread: Master the Art of Even Cooking!
Why Is My Bread Raw Inside? Troubleshooting Common Bread Baking Problems
Introduction: The Perfect Loaf - Outside vs. Inside
Few things are as rewarding as pulling a golden-brown loaf of bread from the oven, its crust crackling invitingly. The aroma fills your kitchen, promising a delightful treat. However, the moment you slice into that seemingly perfect exterior and discover a dense, gummy, or downright raw interior, the satisfaction quickly turns to disappointment. This common issue, where the outside looks done but the inside remains undercooked, is a frequent source of frustration for bakers at all levels.
Understanding why this happens is the first step toward preventing it. It's a complex interplay of factors, from oven accuracy and baking time to the dough itself. This article will delve into the most common culprits behind raw bread baking problems and provide practical, easy-to-implement solutions. By identifying the specific issues affecting your bake, you can consistently achieve a perfectly cooked interior alongside that beautiful crust.
Understanding Raw Bread Baking Problems
Identifying the Problem: Crust Looks Great, Interior Is Doughy
The tell-tale sign of this particular bread baking problem is the stark contrast between the exterior and interior. The crust will have developed a lovely golden to deep brown color, feeling firm and sounding hollow when tapped on the bottom. It might even have a beautiful oven spring and appear like a professional bake from the outside.
However, upon slicing, the interior reveals its true state. Instead of a light, airy crumb with well-defined holes, you find a dense, wet, or sticky texture. The dough might even look pale or gray rather than the creamy color of properly baked bread. This doughy center indicates that heat failed to penetrate sufficiently or for long enough to fully cook the starch and set the gluten structure throughout the loaf.
Why Raw Dough Persists in the Center of Your Bread
The primary reason the center of bread remains raw is often insufficient heat transfer or inadequate baking time. The crust, being the outermost layer, is exposed directly to the oven's radiant and convective heat, causing it to brown and firm up relatively quickly through processes like the Maillard reaction. The interior, however, cooks primarily through the transfer of heat from the crust inwards and by the steam generated within the loaf.
If the oven temperature is too high, the crust forms and hardens rapidly, creating a barrier that prevents heat from efficiently reaching the core. Similarly, if the baking time is too short, the interior simply doesn't have enough time to reach the necessary temperature (typically 190-210°F or 88-99°C) to cook thoroughly, resulting in those frustrating raw bread baking problems. Factors like dough hydration and loaf size also play significant roles in how heat permeates the loaf.
Common Causes of Undercooked Bread
1. Oven Temperature Issues and Inaccurate Readings
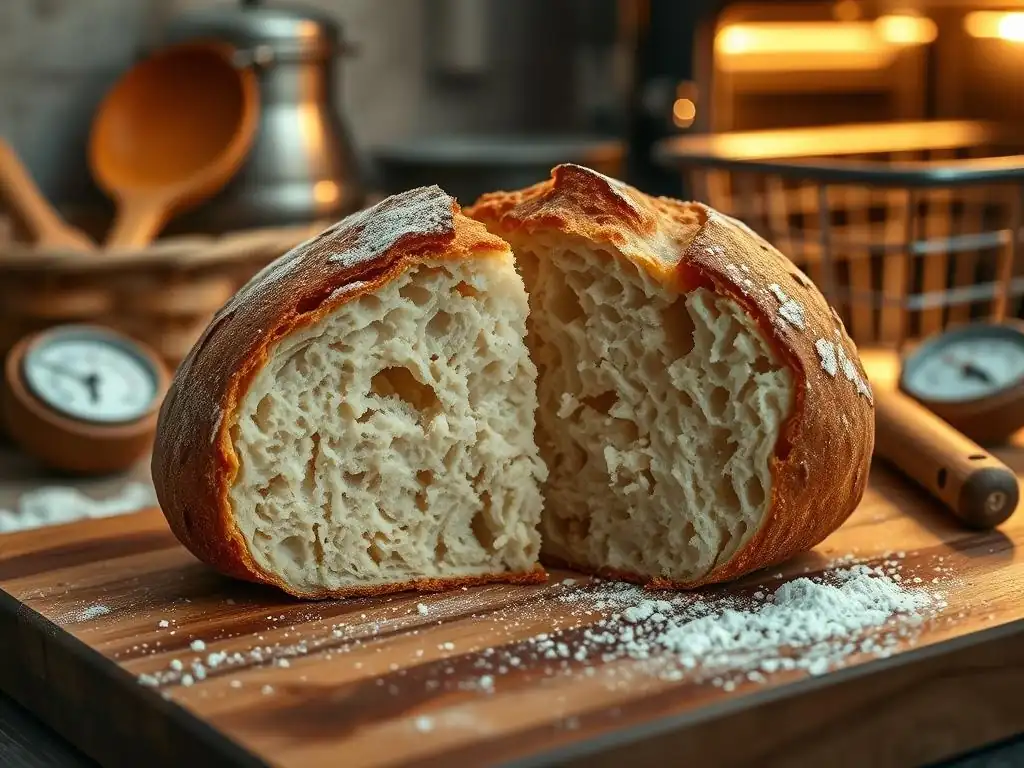
One of the most frequent contributors to a raw bread interior, despite a perfect crust, is an oven that isn't heating accurately. Many home ovens have thermostats that can be off by as much as 25-50°F (15-30°C) from the set temperature. If your oven is running significantly hotter than the recipe calls for, the crust will brown and harden prematurely before the internal temperature of the loaf has a chance to catch up and cook the center through.
Conversely, if your oven is running too cool, the entire loaf might bake slowly, but you might compensate by removing it based on the clock rather than true doneness, or the recipe's recommended time might be based on an accurate oven temperature, leading to an undercooked interior. This discrepancy between the dial setting and the actual temperature inside the oven is a major factor in many raw bread baking problems experienced by home bakers.
Calibrating Your Oven for Accurate Bread Baking
To address potential oven temperature inaccuracies, you may need to calibrate your oven. Some modern ovens have a built-in calibration function that allows you to adjust the temperature setting up or down by a certain number of degrees, often in 5 or 10-degree increments, typically allowing adjustments of +/- 15 to 35°F. Consult your oven's manual for specific instructions on how to do this.
If your oven doesn't have a calibration feature, or if you suspect the issue is more significant, you might need a service technician to professionally calibrate it. They can test the actual temperature and adjust the thermostat accordingly. Even a small adjustment of 10-20°F can make a significant difference in achieving an even bake and avoiding raw bread baking problems.
The Importance of an Oven Thermometer for Consistent Results
Regardless of calibration, using an inexpensive, standalone oven thermometer is one of the simplest and most effective ways to ensure your oven is at the correct temperature. Place it in the center of your oven and check the temperature after the oven has preheated for at least 20-30 minutes. You might be surprised to find that your oven is consistently hotter or cooler than the setting indicates, or that the temperature fluctuates significantly.
Monitoring the oven thermometer throughout the baking process gives you real-time data about the environment your bread is baking in. This allows you to make adjustments to your oven's dial setting to compensate for any discrepancies and maintain the target temperature specified in your recipe. This small tool is invaluable for diagnosing and preventing raw bread baking problems caused by temperature variations.
2. Baking Time: Not Long Enough in the Oven
Even in a perfectly calibrated oven, simply not baking the loaf for a sufficient amount of time is a primary cause of raw bread inside. Recipes provide estimated baking times, but these are just guides. Factors like the actual size and shape of your loaf, the temperature of your dough when it went into the oven, and even the moisture content of your ingredients can affect how long it takes for heat to penetrate to the center.
Pulling the bread out too early, perhaps because the crust looks done or you're strictly adhering to the recipe's minimum time, often leaves the interior undercooked. The external appearance can be misleading, as the crust develops color faster than the interior cooks. This impatience or over-reliance on the clock without checking for true doneness is a common source of raw bread baking problems.
Adjusting Baking Time Based on Loaf Size and Recipe
Recipe baking times are usually based on a specific loaf size or weight. If you make a larger loaf than the recipe intends, it will require a significantly longer baking time for the heat to reach and cook the center. For example, a recipe designed for a 500g (approx. 1 lb) loaf might suggest 30-35 minutes at 425°F, but doubling the dough to make a 1kg loaf could easily require 45-60 minutes or even longer at a slightly lower temperature to prevent the crust from burning.
Always consider the mass and thickness of your loaf. Thicker loaves, like a large boule or a loaf baked in a standard loaf pan, take longer for heat to penetrate the core compared to flatter loaves like ciabatta or baguettes. Be prepared to extend the baking time beyond the recipe's estimate, especially for larger or denser loaves, to avoid raw bread inside.
The "Tap Test" and Internal Temperature for Bread Doneness
Two reliable methods for checking if your bread is fully baked involve tapping and measuring internal temperature. The "tap test" is a classic method: carefully remove the loaf from the oven (using oven mitts!) and rap firmly on the bottom crust with your knuckles. A properly baked loaf, especially lean bread like sourdough or a country loaf, should sound hollow. If it sounds dull or heavy, it likely needs more time.
For ultimate certainty and to avoid raw bread baking problems, use an instant-read thermometer to check the internal temperature of the loaf. Insert the thermometer into the thickest part of the loaf, ideally from the bottom or side to minimize visible holes on top. Lean breads are typically done when they reach an internal temperature of 200-210°F (93-99°C), while enriched breads (containing eggs, milk, or butter) are usually done at 190-200°F (88-93°C). This is the most accurate way to determine true doneness.
3. Over-Proofing: A Surprising Culprit
While it might seem counterintuitive, allowing your dough to proof for too long can also lead to a dense, undercooked interior. Proofing, or fermentation, allows yeast to produce gases that make the dough light and airy. However, if the dough over-proofs, the gluten structure can become weakened, and the yeast may consume too much of the available sugars needed for oven spring and crust browning.
When an over-proofed loaf hits the hot oven, it lacks the necessary structure and residual sugars to achieve a good final rise (oven spring). This can result in a loaf that spreads outwards rather than upwards, creating a dense, collapsed structure. This dense structure hinders efficient heat penetration to the center during baking, increasing the likelihood of raw bread inside.
How Over-Proofing Affects Bread Structure and Baking
During proofing, yeast ferments sugars, producing carbon dioxide gas and alcohol. The gluten network traps these gases, causing the dough to rise. This process also develops flavor and conditions the gluten. However, prolonged fermentation, especially in warm conditions, can lead to the breakdown of the gluten structure by enzymes and the exhaustion of readily available sugars.
When such a dough is baked, the weakened gluten can't support the initial burst of heat and gas production (oven spring). The dough may collapse slightly or simply fail to expand properly. The lack of vigorous oven spring means the loaf remains dense, and the depleted sugars result in less energy for the yeast to produce a final push of gas and contribute to crust browning. This dense, less-airy structure makes it harder for heat to reach and fully cook the interior, contributing to raw bread baking problems.
Recognizing the Signs of Over-Proofing in Your Dough
Identifying over-proofed dough is key to preventing raw bread issues stemming from this cause. Visual cues include dough that looks overly puffy and fragile, has potentially started to flatten or spread out, and may have very large, irregular bubbles visible just beneath the surface. The surface might appear dull rather than taut and slightly shiny.
The most reliable test is the "poke test." Gently but firmly poke the dough with a floured finger. If the indentation springs back immediately and completely, the dough is likely under-proofed. If it springs back slowly but leaves a small indentation, it's likely perfectly proofed. If the indentation remains completely or mostly, and the dough feels fragile or deflates slightly when poked, it is likely over-proofed.
4. Hydration Levels: Too Much Moisture in the Dough
High hydration doughs, those with a high ratio of water to flour (e.g., 75% hydration or more), are popular for achieving open, airy crumbs. However, working with very wet doughs can be challenging, and if not handled correctly, the excess moisture can contribute to raw bread baking problems. Water requires more energy to heat up and turn to steam than the dry components of flour.
If a very wet dough is not baked for long enough or at the correct temperature, the high moisture content in the center can prevent it from reaching the necessary temperature to set the starch and gluten structure properly. The outside may brown and firm up due to direct heat, but the interior remains wet and heavy because the heat hasn't had sufficient time to drive out or convert the excess moisture into steam that can contribute to the bake.
Balancing Hydration for Optimal Bread Texture
Finding the right hydration level is crucial for texture, but it also impacts bake time and heat penetration. While high hydration (70-80% or more) can yield open crumbs, it also increases the risk of a gummy interior if not baked properly. Lower hydration doughs (60-65%) are generally easier to handle and more forgiving during baking, reducing the likelihood of raw bread inside.
Consider starting with recipes that use moderate hydration levels, perhaps in the 65-70% range, especially if you are new to baking or troubleshooting raw bread baking problems. As you gain experience, you can gradually increase hydration levels, being mindful that wetter doughs may require longer baking times or adjustments to oven temperature to ensure the center cooks through.
Adjusting Recipes for Different Flour Types and Humidity
It's important to remember that different flours absorb water differently. High-protein flours like bread flour can typically absorb more water than lower-protein all-purpose flour. Whole wheat or rye flours also absorb significantly more water and more slowly than white flours due to the presence of bran and germ. A hydration level that works perfectly for one type of flour might be too high or too low for another, affecting the dough's consistency and bake.
Environmental humidity also plays a role. In very humid conditions, flour may absorb more moisture from the air, meaning you might need slightly less water than the recipe calls for. Conversely, in very dry climates, you might need a little extra water. Paying attention to how the dough feels as you mix it, rather than blindly following a hydration percentage, and making small adjustments based on the flour and environment can help prevent raw bread baking problems related to excess moisture.
5. Incorrect Mixing and Dough Development
Proper gluten development is fundamental to successful bread baking. Gluten, formed by the proteins in flour when mixed with water and kneaded, creates a network that gives bread its structure, elasticity, and ability to trap gases produced by yeast. If the dough is not mixed or kneaded sufficiently, the gluten network will be weak or underdeveloped.
An underdeveloped gluten structure results in a dough that is less able to hold its shape and trap gases effectively. This can lead to a denser loaf with a tighter crumb structure. Like over-proofed dough, this density makes it harder for heat to penetrate evenly and efficiently to the center of the loaf during baking, increasing the risk of encountering raw bread inside.
The Importance of Proper Gluten Development for Even Baking
A well-developed gluten network creates a strong, elastic framework throughout the dough. This structure allows the dough to stretch and expand during fermentation and oven spring, resulting in a light, open crumb. Critically, this open structure facilitates better heat transfer throughout the loaf.
When the gluten is properly developed, the heat from the oven can more easily penetrate the interior via the interconnected air pockets within the crumb structure. This even heat distribution ensures that the entire loaf, including the very center, reaches the necessary temperature to cook the starch and set the proteins, preventing those frustrating raw bread baking problems.
Techniques for Achieving Strong Gluten Structure
Gluten development is achieved through mixing and kneading. Different techniques can be used depending on the dough's hydration and your preference. For lower hydration doughs, traditional kneading on a counter or using a stand mixer with a dough hook is effective. Kneading stretches and aligns the gluten strands. You'll know the gluten is developing as the dough becomes smoother, less sticky, and more elastic.
For higher hydration doughs, techniques like stretch and folds or the Rubaud method (a vigorous mixing technique) are often used. These methods develop gluten without the need for extensive traditional kneading, which can be difficult with very wet dough. The "windowpane test" is a good indicator of sufficient gluten development: take a small piece of dough and gently stretch it between your fingers. If you can stretch it thin enough to see light through it without tearing, the gluten is well-developed.
Solutions for Raw Bread Baking Problems: BakeWithEase Tips
1. Verify Your Oven Temperature and Baking Time
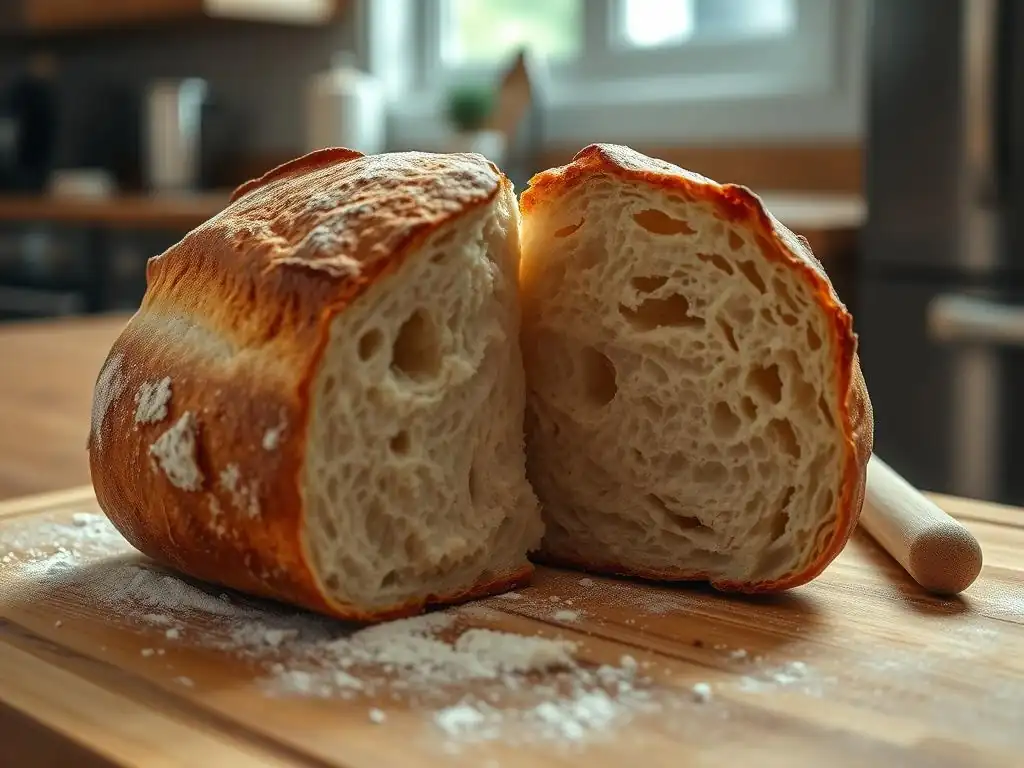
As established, inaccurate oven temperature and insufficient baking time are prime suspects for raw bread inside. The first step in troubleshooting is to verify both. Use an oven thermometer to check the actual temperature inside your oven against the setting. If there's a significant discrepancy (more than 15-20°F), adjust your oven's dial accordingly or consider calibration.
Once you're confident in your oven's temperature, focus on baking time. Don't rely solely on the clock. Instead, use visual cues and physical tests to determine doneness. While a golden-brown crust is a good sign, it's not definitive proof that the interior is cooked. Be prepared to extend the baking time if necessary, especially for larger loaves or if you suspect your dough was particularly moist.
Increase Baking Time Gradually, Monitoring the Crust
If you suspect your bread is coming out with a raw interior, try increasing the baking time in your next bake. Add an extra 5-10 minutes initially and check the loaf again. If the crust is browning too quickly, you may need to tent the loaf loosely with aluminum foil for the latter part of the baking time. This protects the crust from burning while allowing the interior more time to cook through.
Monitor the loaf carefully during this extended baking period. The goal is to allow the internal temperature to rise sufficiently without charring the exterior. A slightly darker crust is often acceptable and adds flavor, but burnt is not. This gradual increase in time, combined with crust protection if needed, is a practical approach to solving raw bread baking problems related to timing.
Lowering the Oven Temperature and Extending Baking Time
Another effective strategy, particularly for larger or higher hydration loaves prone to raw centers, is to bake at a slightly lower temperature for a longer period. For instance, if a recipe calls for 450°F for 30 minutes, you might try baking at 400-425°F for 40-50 minutes. This allows heat to penetrate more gently and evenly into the center before the crust becomes too thick or dark.
This method is especially useful when using Dutch ovens or baking stones. After an initial period at a higher temperature (e.g., 20-30 minutes at 450-500°F) to achieve oven spring and crust set, lowering the temperature to 400-425°F for the remainder of the bake allows the interior to catch up without the crust burning. This gentle, extended bake significantly reduces the likelihood of raw bread inside.
2. Check the Internal Temperature of Your Bread
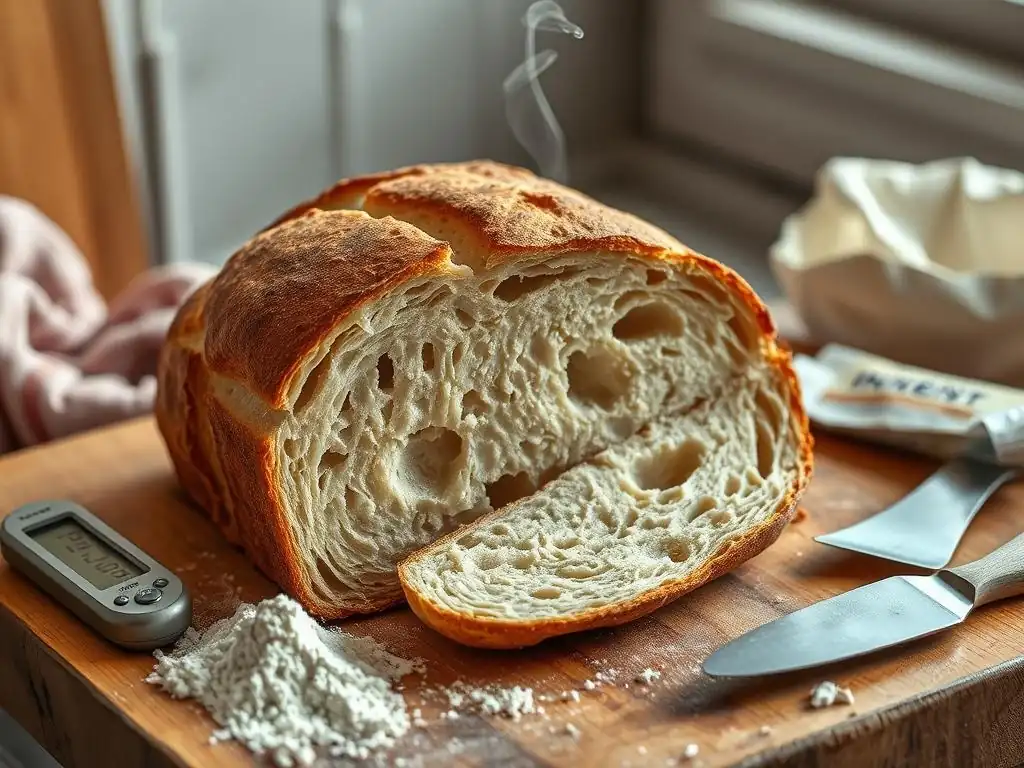
As mentioned earlier, checking the internal temperature is the most reliable way to confirm your bread is fully baked and avoid raw bread baking problems. Visual cues and the tap test are helpful, but temperature doesn't lie. An instant-read thermometer is an essential tool for any serious bread baker.
Insert the thermometer into the thickest part of the loaf, avoiding any large air pockets, which can give a falsely high reading. The thermometer should register within the target range for your type of bread. If it's below the range, the bread needs more time in the oven, even if the crust looks perfect.
Using a Thermometer to Ensure Doneness
To use an instant-read thermometer effectively, pull the loaf out of the oven and quickly insert the probe horizontally into the base or side, aiming for the center. Hold it there for a few seconds until the reading stabilizes. If the temperature is too low, return the loaf to the oven for another 5-10 minutes and check again. Repeat until the desired internal temperature is reached.
This method takes the guesswork out of knowing when your bread is truly ready. It's a simple step that can prevent the disappointment of slicing into a beautiful loaf only to find a raw, doughy interior. Investing in a good quality instant-read thermometer will significantly improve the consistency of your bread baking results and help you overcome common raw bread baking problems.
Target Internal Temperatures for Different Types of Bread
The ideal internal temperature varies slightly depending on the type of bread you are baking. For lean doughs made primarily from flour, water, yeast, and salt, such as sourdough, baguettes, or rustic country loaves, the target internal temperature is typically between 200°F (93°C) and 210°F (99°C). Baking closer to 210°F will result in a drier crumb and a firmer crust.
For enriched doughs containing ingredients like milk, eggs, sugar, or butter, such as challah, brioche, or soft sandwich bread, the target internal temperature is slightly lower, usually between 190°F (88°C) and 200°F (93°C). These doughs have a softer crumb structure and higher moisture content from the enriching ingredients, and overbaking can dry them out. Knowing these ranges is key to ensuring your bread is cooked through without being dry.
3. Adjust Your Proofing Time
If you suspect over-proofing is contributing to your raw bread baking problems, adjust your proofing strategy. Pay close attention to the "poke test" and proofing cues mentioned earlier. Instead of adhering strictly to a time given in a recipe, which can vary greatly depending on ambient temperature and yeast activity, learn to read the dough itself.
Aim for dough that is properly proofed – it should be significantly increased in volume (often doubled, but this varies by recipe) and pass the poke test by slowly springing back, leaving a small indentation. If your dough is reaching this stage much faster than expected, consider reducing the proofing time in subsequent bakes or proofing in a cooler location, such as the refrigerator for a longer, slower fermentation.
Shorter Proofing Times for Better Oven Spring
Sometimes, slightly under-proofing (proofing until the dough springs back halfway during the poke test) can be beneficial, particularly for loaves baked in a very hot oven or a Dutch oven. This leaves a little "energy" in the dough for a more vigorous oven spring. A stronger oven spring helps the loaf expand upwards, creating a more open structure.
This more open structure facilitates better heat penetration during the bake. The initial rapid expansion in the hot oven helps distribute heat more effectively throughout the interior. While you don't want severely under-proofed dough, finding the sweet spot just before full proof can help ensure the center cooks through and prevent raw bread inside, especially in challenging baking setups.
The "Poke Test" for Determining Proofing Readiness
Mastering the poke test is one of the most valuable skills for a bread baker seeking to avoid raw bread baking problems. To perform it, flour your finger lightly to prevent sticking. Gently but firmly press the surface of the dough to create an indentation about half an inch deep.
Observe how the indentation recovers. If it springs back immediately and completely, the dough needs more proofing time. If it springs back slowly and leaves a small, lasting indentation, it is optimally proofed and ready for baking. If the indentation remains fully or mostly and the dough feels fragile, it is over-proofed. Use this test consistently to gauge your dough's readiness.
4. Reduce Hydration in the Dough
If you consistently struggle with raw bread inside despite proper baking time and temperature, especially with high hydration recipes, consider reducing the hydration slightly. Even a 5% reduction in water can make a significant difference in dough handling and how easily heat penetrates the loaf during baking.
Experiment with a recipe you know yields a raw interior and try reducing the water content by 25-50 grams per 500 grams of flour. While this might result in a slightly less open crumb initially, it will make the dough easier to work with and reduce the amount of moisture that needs to be cooked out of the center, making it easier to achieve a fully baked interior and resolve those frustrating raw bread baking problems.
Start with Less Water and Add More as Needed
When trying a new recipe, especially a high hydration one, or when baking in humid conditions, it's wise to hold back a small amount of the water initially (e.g., 25-50ml per 500g flour). Mix the dough and see how it feels. Different flours and environments require different amounts of water to achieve the desired consistency.
If the dough feels too stiff after the initial mixing, you can gradually add the reserved water, a tablespoon at a time, until the dough reaches the consistency described in the recipe or feels right to you. This cautious approach allows you to adjust for variations in flour absorption and humidity, helping you achieve the correct dough consistency from the start and minimize the risk of raw bread inside due to excessive moisture.
Adjusting Hydration Based on Your Flour
As mentioned earlier, the type of flour used significantly impacts how much water it can absorb. All-purpose flour typically absorbs less water than bread flour, which has a higher protein content. Whole wheat and rye flours absorb even more water due to the bran and germ, and they absorb it more slowly. Using a hydration percentage designed for bread flour with all-purpose flour, for instance, will likely result in a much wetter, stickier dough than intended.
When substituting flours or trying recipes with different flour types, be prepared to adjust the hydration. If using lower-protein flour, you may need less water. If using whole grains, you may need more water and a longer rest period (autolyse) to allow the flour to fully hydrate. Understanding how your specific flour behaves is crucial for getting the hydration right and preventing raw bread baking problems.
5. Improve Dough Mixing and Kneading Techniques
Ensuring your dough has a strong, well-developed gluten structure is essential for achieving a light crumb and even heat distribution. If your bread consistently turns out dense with a raw center, review your mixing and kneading process. Are you kneading for long enough? Is the dough passing the windowpane test?
If kneading by hand, ensure you are using an effective technique that works the dough sufficiently. If using a stand mixer, make sure you are mixing on the correct speed for the recommended time, and that the dough is actually being kneaded by the hook, not just riding up it. Under-mixed dough is a common cause of a dense structure that impedes heat penetration and leads to raw bread inside.
Proper Kneading Techniques for Gluten Development
Traditional kneading involves folding the dough over, pressing down and away, and repeating. This action stretches and aligns the gluten strands. Aim for dough that is smooth, elastic, and no longer sticky (though some doughs remain slightly tacky). This can take anywhere from 10 to 20 minutes by hand, depending on the dough and your technique.
For wetter doughs, techniques like the French fold (or slap and fold) are very effective. This involves picking up the dough, slapping it onto the counter, and folding it over itself repeatedly. Alternatively, performing a series of stretch and folds over an hour or two, with rest periods in between, builds gluten strength in high-hydration doughs with minimal hands-on time. Whichever method you use, the goal is a dough that is strong, elastic, and passes the windowpane test.
Using a Stand Mixer vs. Hand Kneading
Both stand mixers and hand kneading can achieve proper gluten development, but they require different approaches. A stand mixer is often faster and less physically demanding. Using the dough hook on a medium speed (typically speed 2 or 3 on most mixers) for 8-12 minutes is often sufficient for lean doughs, though some enriched doughs may require longer. Watch the dough; it should pull away from the sides of the bowl and form a smooth ball around the hook.
Hand kneading provides a tactile connection to the dough, allowing you to feel its development. While it takes longer, many bakers find it therapeutic and a great way to learn the feel of properly developed dough. Aim for a smooth, elastic texture that resists tearing when stretched. Regardless of the method, the key is to ensure the dough has transformed from a shaggy mass into a cohesive, stretchy network capable of supporting the loaf's structure and promoting even baking.
Advanced Techniques for Avoiding Raw Bread
Using a Baking Stone or Dutch Oven for Even Heat Distribution
Beyond the basics, certain baking tools can significantly improve heat transfer and help prevent raw bread baking problems. A baking stone or steel, preheated in the oven, provides a consistent, high-temperature surface that transfers heat directly to the base of the loaf. This thermal mass helps the bottom crust set quickly and drives heat upwards into the loaf, promoting a more even bake.
Similarly, baking bread in a preheated Dutch oven creates a steamy environment in the initial stages of baking while also acting as a radiant heat source surrounding the loaf. The cast iron (or ceramic) of the Dutch oven retains and distributes heat exceptionally well, ensuring that the loaf is cooked evenly from all sides. This enclosed environment also traps steam released by the dough, which keeps the crust soft initially, allowing for maximum oven spring before it dries out and hardens.
The Benefits of Preheating Your Baking Stone
Properly preheating your baking stone or steel is critical to its effectiveness. Placing dough on a cold or insufficiently preheated surface will not provide the necessary thermal boost to the base, resulting in poor oven spring and potentially a dense, undercooked bottom or center. The stone needs time to absorb and store enough heat from the oven.
Most recommendations suggest preheating the stone or steel in the oven at your target baking temperature (often 450-500°F) for at least 30 minutes, and preferably 45-60 minutes, after the oven indicates it has reached temperature. This ensures the stone is fully saturated with heat, providing maximum impact when the dough is placed on it. This intense bottom heat is invaluable for driving the bake upwards and preventing raw bread inside.
Understanding Maillard Reaction and Crust Development
The Maillard reaction is a complex chemical process responsible for the browning and flavor development of the bread crust. It occurs when amino acids and reducing sugars react at high temperatures, typically above 300°F (150°C). This reaction happens on the surface of the bread, which is directly exposed to the hot, dry oven air.
The interior of the bread, however, cooks at much lower temperatures (eventually reaching 190-210°F). The cooking process inside relies on heat transfer and the gelatinization of starches, not the Maillard reaction. A beautiful, dark crust (indicating a strong Maillard reaction) is a sign that the surface reached a high temperature, but it doesn't guarantee the interior has cooked through. Understanding this distinction is key to recognizing that crust color alone is not a reliable indicator of internal doneness and why checking internal temperature is so important to avoid raw bread baking problems.
Conclusion: Achieving Perfectly Baked Bread Every Time
Encountering raw bread inside, despite a beautiful crust, is a common hurdle in the baking journey. It points to specific issues in your process, often related to oven temperature, baking time, dough proofing, hydration, or mixing. By systematically addressing these potential raw bread baking problems, you can dramatically improve the consistency and quality of your loaves.
Remember that successful bread baking is a combination of understanding the science and developing intuition through practice. Pay close attention to your oven's behavior, use tools like an oven thermometer and an instant-read thermometer, learn to read your dough's proofing level, and be mindful of how hydration and gluten development affect the bake. Each loaf, even a less-than-perfect one, offers valuable lessons.
Mastering Bread Baking: Practice Makes Perfect
Like any skill, mastering bread baking requires practice and patience. Don't be discouraged by raw bread baking problems; see them as opportunities to learn. Keep a baking journal to note variables like oven temperature settings, actual temperature readings, proofing times, dough feel, and final internal temperature. This will help you identify patterns and make informed adjustments for future bakes.
Each type of bread, each recipe, and even each batch of flour can behave slightly differently. Embrace the process of experimentation and adjustment. With persistence and attention to detail, you will develop the feel for your dough and the rhythm of your oven, leading to consistently well-baked bread with a perfect interior every time.
Resources for Further Learning on BakeWithEase.com
Navigating the world of bread baking can seem daunting at first, but resources are available to help you troubleshoot common issues and refine your techniques. On BakeWithEase.com, you can find a wealth of information designed for bakers of all levels.
Explore detailed guides on understanding yeast, mastering kneading techniques, perfecting proofing, and using essential tools like baking stones and Dutch ovens. Dive into our collection of recipes, starting with simpler ones and gradually working your way up to more complex loaves. We provide step-by-step instructions and tips to help you build confidence and overcome challenges, including persistent raw bread baking problems, on your journey to baking delicious, perfectly cooked bread.
Frequently Asked Questions
Why is my bread perfectly browned on the outside but still raw in the middle?
This is often due to the oven temperature being too high. The outside cooks too quickly, preventing the center from baking through. Also, consider the dough hydration; very wet doughs take longer to cook.
How can I tell if my bread is fully baked inside without cutting into it?
Use a digital thermometer to check the internal temperature. For most breads, aim for an internal temperature between 200-210°F (93-99°C). A hollow sound when you tap the bottom can also indicate doneness.
What role does dough hydration play in raw bread baking problems?
Higher hydration doughs, meaning doughs with more water, require a longer baking time. The excess moisture needs to evaporate, so longer baking at a lower temperature is often necessary.
Can using the wrong type of flour contribute to a raw center?
Yes, using a flour with too low a protein content can affect the bread's structure. A weaker gluten network can lead to a gummy or raw texture, particularly in the center.
What are some common mistakes beginners make that lead to raw bread?
Beginners often under-bake their bread, fearing over-browning. Also, neglecting to preheat the oven properly or opening the oven door too frequently can disrupt the baking process and lead to a raw center.
Final Reflection: The Unexpected Journey of a Loaf
The seemingly simple act of baking bread reveals a complex interplay of science and art, and mastering it requires a keen understanding of heat transfer and ingredient interaction. A perfectly browned crust hiding a raw interior is a frustratingly common problem, highlighting the delicate balance needed for successful baking. This isn't just about a failed loaf; it's about understanding the fundamental principles that govern the transformation of flour, water, and yeast into a nourishing and delicious staple.
The frustration of a raw center, however, is a powerful teacher. It forces us to slow down, to observe, and to appreciate the subtle nuances of the baking process. It reminds us that even the most seemingly straightforward tasks can hold unexpected challenges. The best bread is made with patience and care; it's a reflection of the baker's attention to detail.
This quote, though not directly about raw bread, speaks to the heart of the matter: success in baking, like in many aspects of life, comes from a deep understanding of the process and a willingness to learn from our mistakes.
So, the next time you encounter a raw center, don't despair. Instead, use it as an opportunity for growth. Reflect on your technique, adjust your recipe, and experiment with different approaches. Remember the lessons learned here – about oven temperature, proofing time, and the importance of a well-hydrated dough – and apply them to your future baking endeavors. Embrace the journey, for it is in the process of learning and refining that we truly discover the magic of baking, and the satisfaction of a perfectly baked loaf.
Unlock Perfectly Baked Bread: Master the Art of Even Cooking!
Thanks for taking the time to learn about achieving perfectly baked bread! We hope you found our tips on avoiding raw centers helpful. Ready to take your baking skills to the next level?
- Master the oven spring: Try our recommended technique of preheating your oven for an extra 15 minutes, then using the "oven peek" method described in the article to check for proper rise. This is the most effective solution to your raw bread problem!
- Experiment with different flours and hydration levels: Note down your findings for future reference – you'll become a bread-baking expert in no time!
- Share your baking triumphs (and challenges!) with our community on social media using #BakeWithEasePerfectLoaf.
What unique method will you try next to ensure your bread is perfectly baked from crust to crumb?