
Your Croissant Baking Journey Starts Here: An Intermediate Baker's Guide


Welcome to BakeWithEase, where we transform baking dreams into delicious realities!
Ever dreamt of the perfect, flaky croissant, but felt intimidated by the process? You're in the right place. Delve into our Easy Homemade Croissant Recipe Guide and discover the secrets to achieving bakery-quality results in your own kitchen. Unlock the art of laminated dough and begin your journey towards mastering this classic pastry. Ready to elevate your baking skills? Let's get started!
- Mastering the Art of Croissant Baking: An Intermediate Guide from BakeWithEase
- Level Up Your Baking: Creating Easy Homemade Croissants
- Understanding the Fundamentals of Croissant Dough for Intermediate Bakers
-
Easy Homemade Croissant Recipe Guide: Step-by-Step Instructions
- Ingredient List for Perfect Croissant Dough
- Step 1: Preparing the Détrempe - The Foundation of Your Croissant
- Step 2: Making the Butter Block - The Secret to Flaky Layers
- Step 3: Lamination Process: Folding and Turning Techniques for Intermediate Bakers
- Step 4: Shaping Your Croissants: The Classic Crescent Shape
- Step 5: Proofing Your Croissants: Achieving Optimal Rise
- Step 6: Baking to Golden Perfection: Time and Temperature
- Troubleshooting Common Croissant Baking Problems
- Advanced Croissant Baking Techniques for the Home Baker
- Storing and Enjoying Your Homemade Croissants
- Beyond the Basics: Taking Your Croissant Baking Skills Further
- Celebrate Your Baking Success: Enjoying Your Easy Homemade Croissants
- Frequently Asked Questions
- Final Reflection: The Golden-Brown Promise of Homemade Happiness
- Unleash Your Inner Pastry Chef!
Mastering the Art of Croissant Baking: An Intermediate Guide from BakeWithEase
Welcome to the exciting world of croissant baking! If you've moved beyond simple cookies and cakes and are ready to tackle a more challenging yet incredibly rewarding pastry, this guide is for you. Croissants, with their signature flaky layers and buttery aroma, are a true test of baking skill, requiring patience, precision, and a good understanding of dough handling. At BakeWithEase, we believe that with the right guidance, anyone can achieve delicious results at home. This guide is specifically designed for intermediate bakers looking to elevate their technique and confidently create stunning homemade croissants.
This comprehensive guide will walk you through each critical step, from understanding the science behind lamination to shaping and baking your pastries to golden perfection. We'll demystify the process, breaking it down into manageable stages. While croissants require attention to detail, the satisfaction of pulling a tray of warm, buttery croissants from your own oven is unparalleled. Let's embark on this delightful journey together and unlock the secrets to baking these iconic French pastries right in your kitchen.
Level Up Your Baking: Creating Easy Homemade Croissants
For many intermediate bakers, the croissant represents a significant step up, often perceived as daunting due to the intricate process of lamination. However, with a structured approach and clear instructions, making easy homemade croissants becomes an achievable goal. This section is dedicated to providing you with the essential knowledge and confidence needed to tackle this project. We'll focus on making the process understandable and manageable, ensuring you build a solid foundation in laminated dough techniques.
Achieving those perfect, airy layers requires understanding the interaction between butter and dough during repeated folding and rolling. This guide simplifies these complex steps, offering tips and insights that can prevent common pitfalls. We aim to make this journey enjoyable and educational, transforming what might seem like a difficult task into a rewarding baking adventure. Get ready to impress yourself and your loved ones with your newfound ability to create beautiful, flaky croissants from scratch.
Why This Guide? Perfecting Your Croissant Technique with BakeWithEase
This guide is tailored specifically for intermediate bakers who have some experience but are looking to refine their skills and tackle more advanced pastries like croissants. We go beyond a basic recipe, focusing on the why behind each step, explaining the science of lamination, proofing, and baking temperatures. Understanding these principles is crucial for diagnosing issues and adapting techniques, making you a more intuitive and skilled baker. At BakeWithEase, we empower you with knowledge, not just instructions.
Furthermore, this easy homemade croissant recipe guide breaks down the process into manageable segments, designed to fit into a home baker's schedule. We acknowledge that professional equipment isn't always available and provide tips for achieving excellent results with standard kitchen tools. Our goal is to equip you with the techniques and confidence to produce consistently high-quality croissants, turning a challenging bake into a reliable success.
Understanding the Fundamentals of Croissant Dough for Intermediate Bakers
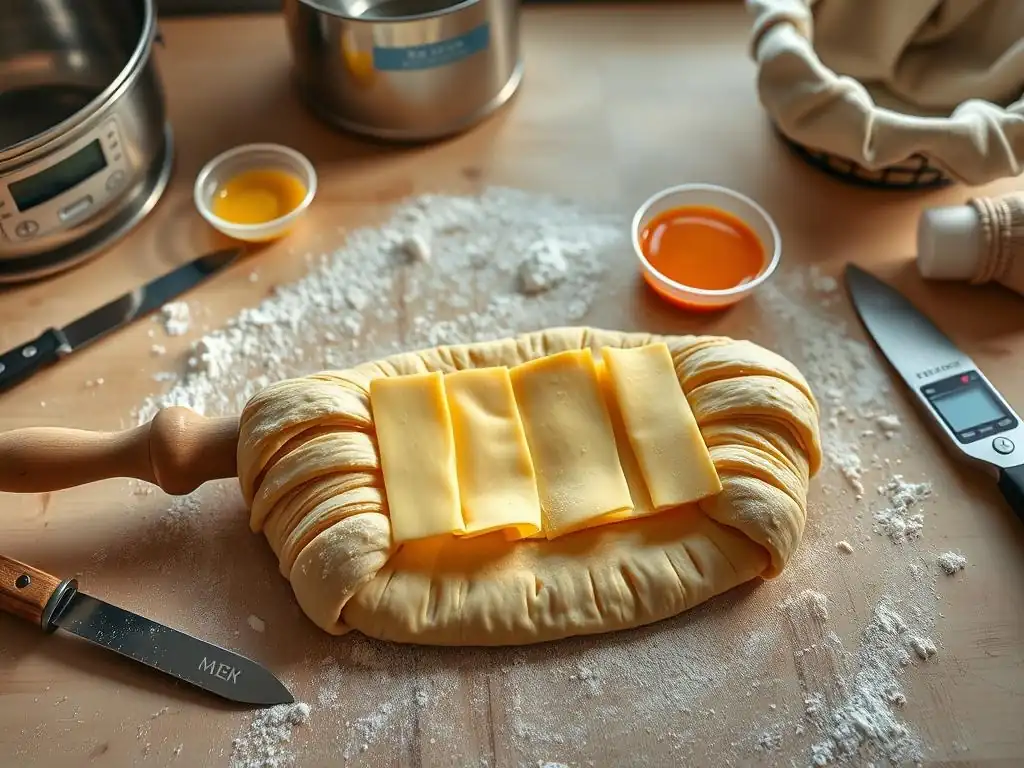
At its heart, croissant dough is a lean dough (low in fat and sugar compared to enriched doughs) wrapped around a block of butter. The magic happens during lamination, where repeated folding and rolling create alternating layers of dough and butter. When baked, the water in the butter turns to steam, forcing the dough layers apart and creating that characteristic flaky texture. The initial dough, called the détrempe, is typically made from flour, water, yeast, a little sugar, salt, and sometimes a small amount of fat.
The success of your croissant dough hinges on several factors: the quality of ingredients, precise mixing and kneading, careful temperature control throughout the process (especially keeping the butter and dough cold), and executing the lamination steps correctly. An intermediate baker understands that rushing any stage, particularly chilling periods, will compromise the final texture. Patience and attention to detail are paramount when working with laminated doughs.
The Importance of High-Quality Ingredients for Homemade Croissants
Using high-quality ingredients is non-negotiable when aiming for exceptional homemade croissants. The flour, for instance, should ideally be a good bread flour with a protein content of around 12-13%. This protein develops gluten, which provides the structure necessary for the dough to hold its shape through lamination and proofing, resulting in a light, airy interior. Using a lower protein all-purpose flour might result in a less structured dough that struggles to hold layers.
Crucially, the butter must be high-quality, unsalted butter with a relatively high fat content, ideally around 82-84%. European-style butters are often preferred for their higher fat and lower water content, which makes them more pliable for the butter block (beurrage) and less likely to leak during lamination. Cheap butter with higher water content can break down, incorporate into the dough instead of staying in distinct layers, and lead to greasy, less flaky croissants. The yeast should be active and fresh, as proper proofing is vital for the final rise and texture.
Key Techniques: Lamination, Proofing, and Baking
Lamination is the signature technique for croissants, involving encasing a butter block within the détrempe and repeatedly folding and rolling the dough. This process creates hundreds of alternating layers of dough and butter. A typical lamination schedule involves two or three "turns" or folds (like a book fold or a letter fold), interspersed with chilling periods to keep the butter firm and the dough relaxed. For an easy homemade croissant recipe guide, focusing on three turns is common to achieve sufficient layers (potentially hundreds or even thousands depending on the fold type).
Proofing is the critical stage where the shaped croissants rise before baking. This happens in a warm, humid environment, ideally around 75-80°F (24-27°C) with about 75% humidity. During proofing, the yeast produces carbon dioxide, causing the dough layers to expand.
Proper proofing is essential for a light, airy crumb; under-proofed croissants will be dense, while over-proofed ones can collapse during baking. Baking is the final transformation, where high initial heat sets the layers and creates steam from the butter, causing the rapid rise (oven spring) and separation of layers, resulting in the signature flaky texture. The temperature is often reduced partway through baking to ensure the interior cooks fully without the exterior burning.
Easy Homemade Croissant Recipe Guide: Step-by-Step Instructions
Embarking on your easy homemade croissant recipe guide journey requires following steps precisely. While the process takes time due to chilling periods, each stage is manageable. We've broken it down into logical steps to make it approachable for the intermediate baker. From mixing the initial dough to shaping and baking, attention to detail at each phase is key to achieving that coveted flaky, buttery result.
Follow along carefully, and don't be discouraged if your first batch isn't perfect. Croissant making is a skill that improves with practice. This guide provides a solid foundation, but subtle variations in ingredients, environment, and handling can influence the outcome. Think of this as your roadmap to mastering one of baking's most rewarding challenges.
Ingredient List for Perfect Croissant Dough
To make approximately 12-15 medium-sized croissants, you will need the following high-quality ingredients. Precision in measurement is important, ideally using a kitchen scale for accuracy, especially for the flour and liquids. Using approximate cup measures can lead to inconsistencies in hydration and dough texture, which are crucial for lamination.
Here is a standard list, representative of what you might find in an easy homemade croissant recipe guide:
- Strong bread flour: Approximately 500 grams (about 4 cups)
- Cold water: Approximately 160-180 grams (about 2/3 to 3/4 cup), adjusted based on flour absorption
- Milk (whole or 2%): Approximately 160-180 grams (about 2/3 to 3/4 cup), also cold
- Active dry or instant yeast: Approximately 10-12 grams (about 2.5 teaspoons)
- Granulated sugar: Approximately 50-60 grams (about 1/4 cup)
- Fine sea salt: Approximately 10-12 grams (about 2 teaspoons)
- Unsalted butter (for détrempe): Approximately 25-30 grams (about 2 tablespoons), softened
- High-quality unsalted butter (for butter block): Approximately 250-280 grams (about 1 cup + 2-3 tablespoons), very cold
Ensure all liquid ingredients and the butter for the butter block are thoroughly chilled before you begin. The temperature of your ingredients plays a significant role in controlling the dough temperature throughout the mixing and lamination process, which is vital for preventing the butter from melting into the dough layers.
Step 1: Preparing the Détrempe - The Foundation of Your Croissant
The détrempe is the initial dough, a relatively simple mixture that forms the base for your laminated pastry. In a large mixing bowl or the bowl of a stand mixer, whisk together the flour, sugar, salt, and yeast. If using active dry yeast, you might need to activate it first in a small amount of the lukewarm milk or water (around 105-115°F or 40-46°C), letting it bloom for 5-10 minutes until foamy, before adding to the dry ingredients.
Add the cold water and milk to the dry ingredients, along with the softened butter for the détrempe. Mix until the dough just comes together, then knead (by hand or mixer with a dough hook) for about 5-8 minutes until it forms a smooth, elastic dough that passes the windowpane test (you can stretch a small piece thin enough to see light through it without tearing). Avoid over-kneading, as this can make the dough too tough.
Shape the dough into a rough rectangle, wrap tightly in plastic wrap, and refrigerate for at least 1-2 hours, or ideally overnight. Chilling is crucial; it relaxes the gluten and chills the dough thoroughly, preparing it for the incorporation of the cold butter block.
Step 2: Making the Butter Block - The Secret to Flaky Layers
The butter block, or beurrage, is arguably the most critical component for achieving flaky layers. You need high-quality, cold butter, but it must be pliable enough to roll out without cracking. Take your cold butter (approximately 250-280 grams) and place it between two sheets of parchment paper. Using a rolling pin, gently pound the butter to soften it slightly and make it malleable, being careful not to melt it.
Once pliable, roll the butter into a rectangle measuring approximately 8x6 inches (20x15 cm). The thickness should be uniform. If the butter becomes too soft during this process, pop it back into the refrigerator for a few minutes to firm up. The goal is a cold, flexible butter block that is the correct dimensions to fit within your rolled-out détrempe. A well-prepared butter block is essential for even distribution within the dough layers during lamination, which is key to a successful easy homemade croissant recipe guide.
Step 3: Lamination Process: Folding and Turning Techniques for Intermediate Bakers
Lamination is where the magic happens, creating hundreds of alternating layers of dough and butter through repeated folding and rolling. This easy homemade croissant recipe guide typically uses a "book fold" or "letter fold" method, repeated multiple times with chilling in between. The key is to keep the dough and butter cold and the workspace floured just enough to prevent sticking without incorporating excess flour into the dough.
Remove the chilled détrempe from the refrigerator and roll it out on a lightly floured surface into a rectangle approximately 16x12 inches (40x30 cm). Place the prepared butter block in the center of the dough rectangle. Fold the sides of the dough over the butter block, like an envelope, ensuring the butter is fully enclosed and the seams are sealed. This package of dough encasing the butter is now ready for its first turn.
First Fold: Achieving Consistent Layers
With the butter enclosed in the dough, you're ready for the first "turn." Ensure your workspace is lightly floured. Roll the dough package out into a rectangle approximately 24x10 inches (60x25 cm). Try to maintain even thickness throughout the rectangle. Brush off any excess flour from the surface.
Now, perform a "letter fold" or "single fold": imagine dividing the rectangle into three equal sections lengthwise. Fold one end over the middle section, then fold the other end over that, like folding a letter. This creates three layers of dough and two layers of butter. Wrap the folded dough tightly in plastic wrap and refrigerate for at least 30-45 minutes to allow the butter to firm up and the dough to relax. Proper chilling is crucial between each turn to prevent the butter from melting and mixing into the dough.
Second Fold: Building Flakiness
After the chilling period, remove the dough from the refrigerator. Place it on your lightly floured surface with the folded edge facing you (like the spine of a book). Roll the dough out again into a rectangle approximately 24x10 inches (60x25 cm), maintaining even thickness.
Perform the second "letter fold" just as you did the first time: fold one end over the middle third, then fold the other end over that. This fold adds another layer of dough and butter, increasing the total number of layers geometrically. After this second turn, you will have created numerous distinct layers. Wrap the dough tightly again and refrigerate for another 30-45 minutes minimum. This chilling step is vital for the success of your easy homemade croissant recipe guide, ensuring the layers remain separate and the butter stays cold.
Third Fold: Refining the Dough
The third and final turn further refines the layers, bringing you closer to that perfect croissant texture. Remove the dough from the refrigerator and place it on your lightly floured surface with the folded edge facing you. Roll the dough out one last time into a rectangle approximately 24x10 inches (60x25 cm).
Perform the final "letter fold." After this third turn, you have completed the lamination process. The dough is now ready to be shaped. Wrap the dough tightly and give it a final, longer chill in the refrigerator, ideally for 1-2 hours or even overnight. This extended chilling period is important for relaxing the gluten completely and firming up the dough before shaping, making the cutting and rolling process much easier and cleaner.
Step 4: Shaping Your Croissants: The Classic Crescent Shape
Shaping is where your laminated dough transforms into recognizable croissants. Remove the chilled dough from the refrigerator. On a lightly floured surface, roll the dough out into a large rectangle, aiming for a thickness of about 1/8 inch (3-4 mm). The dimensions will vary depending on how many croissants you plan to make, but a typical size might be around 12x36 inches (30x90 cm). Ensure the edges are relatively straight.
Using a sharp knife or a pizza cutter, trim the edges to create clean lines. Then, cut the large rectangle into long triangles. For classic croissants, the base of each triangle is typically about 4-5 inches (10-12 cm), and the height (length) is around 10-12 inches (25-30 cm). Make a small notch (about 1/2 inch or 1 cm) in the center of the base of each triangle.
Starting from the base, gently stretch the triangle slightly and roll it up towards the point, widening the base notch as you roll. Curve the ends inward to form the classic crescent shape. Place the shaped croissants on baking sheets lined with parchment paper, leaving ample space between them for proofing.
Step 5: Proofing Your Croissants: Achieving Optimal Rise
Proofing is a critical step that allows the croissants to rise and develop flavor before baking. This process requires a warm, humid environment. An ideal temperature is between 75-80°F (24-27°C) with high humidity (around 75%). You can create a proofing environment in your oven by placing a pan of hot water on the bottom rack (with the oven turned off) and placing the baking sheet with croissants on a higher rack.
Proof the croissants until they are visibly puffy, jiggly when gently shaken, and the layers are clearly defined but not yet separated. This typically takes 1.5 to 2.5 hours, depending on the temperature and humidity of your proofing environment. A properly proofed croissant will have doubled or nearly doubled in size.
If you gently press the dough, it should slowly spring back, leaving a slight indentation. Over-proofing can cause the layers to separate or the structure to collapse during baking, while under-proofing results in a dense, heavy croissant. Prepare an egg wash (one egg beaten with a tablespoon of milk or cream) and gently brush the tops of the proofed croissants just before baking for a golden finish.
Step 6: Baking to Golden Perfection: Time and Temperature
Baking is the final step that transforms your proofed dough into flaky, golden croissants. Preheat your oven to a high temperature, typically around 400-425°F (200-220°C). The initial high heat helps to set the layers quickly and create significant oven spring as the water in the butter turns to steam.
Place the baking sheet in the preheated oven. After about 10-15 minutes, or once the croissants have puffed up and are starting to turn golden brown, reduce the oven temperature to around 375-380°F (190-195°C). Continue baking for another 10-15 minutes, or until the croissants are deep golden brown all over and feel light when lifted. The total baking time is usually between 20-30 minutes.
Baking time will vary based on your oven and the size of your croissants, so keep a close eye on them. A thoroughly baked croissant will be golden on the outside and have a light, airy, honeycomb-like structure inside. Remove from the oven and let cool slightly on a wire rack before enjoying.
Troubleshooting Common Croissant Baking Problems
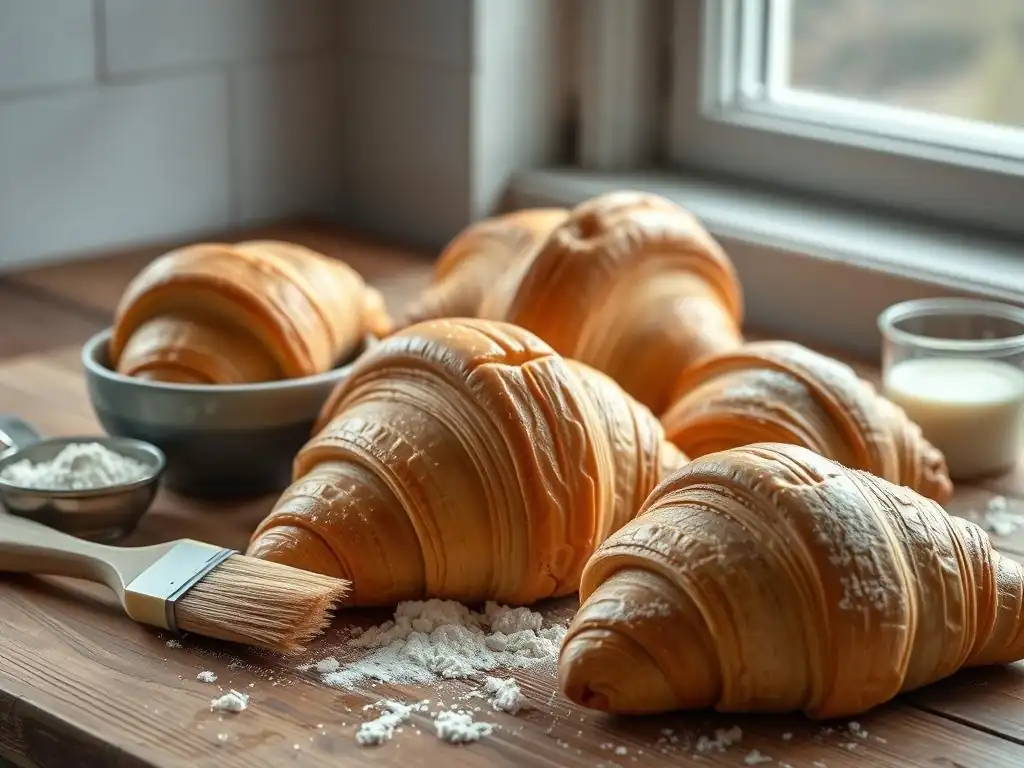
Even with a detailed easy homemade croissant recipe guide, challenges can arise. Croissant making is sensitive to temperature, technique, and ingredient quality. Don't be discouraged by imperfections in your first few attempts. Identifying the cause of common problems is the first step to improving your technique and achieving better results next time.
Here are some frequent issues encountered by intermediate bakers and how to address them. Understanding why something went wrong is key to preventing it from happening again. Practice truly makes perfect when it comes to laminated doughs.
My Croissants Aren't Flaky Enough: Identifying the Cause
Lack of flakiness is a common issue, often stemming from problems during the lamination process. The primary cause is usually the butter melting into the dough layers instead of remaining as distinct sheets. This can happen if the butter block is too soft, the dough is too warm during rolling and folding, or the chilling periods between turns are insufficient.
To fix this, ensure your butter is cold but pliable (not hard and brittle) and that your dough is well-chilled before starting lamination and between each fold. Work quickly when rolling and folding, and keep your workspace cool. Using high-quality butter with a higher fat content (like European butter, 82%+ fat) is also crucial, as it's more resistant to melting at slightly warmer temperatures. If you notice butter leaking during rolling, stop, wrap the dough, and chill it thoroughly before attempting to continue.
Croissants Are Too Dense: Addressing Proofing Issues
Dense, heavy croissants are typically a result of improper proofing. This means the dough didn't rise sufficiently before baking. Under-proofing is the most common culprit, where the yeast hasn't had enough time in a warm, humid environment to produce enough gas to expand the dough layers.
Ensure your proofing environment is warm (75-80°F or 24-27°C) and humid. Give the croissants adequate time to rise – this can take 1.5 to 2.5 hours, or even longer depending on conditions. The dough should look significantly puffed and feel light. Check for proper proofing by gently poking a croissant; the indentation should slowly spring back. If it springs back immediately, it needs more time. If the indentation remains, it's likely over-proofed (though over-proofing usually leads to collapse, not just density). Also, ensure your yeast is fresh and active.
Croissants Spread During Baking: Butter Leakage Solutions
Croissants that spread out into flat puddles during baking are often experiencing significant butter leakage. This happens when the butter layers melt and run out of the dough before the structure has set in the oven. The primary reasons are insufficient chilling after shaping, under-proofing (which means the structure isn't fully developed to contain the melting butter), or the oven not being hot enough initially.
To prevent spreading, ensure your shaped croissants are well-chilled for at least 30 minutes before proofing. This firms up the butter. Also, make sure they are properly proofed, as a well-proofed croissant has a better structure. Crucially, preheat your oven to the correct high temperature (400-425°F or 200-220°C) before baking. The rapid initial heat helps set the dough layers before the butter melts completely. If butter is leaking during proofing, your proofing environment might be too warm, or the dough wasn't chilled enough after shaping.
Advanced Croissant Baking Techniques for the Home Baker
Once you've mastered the basics of this easy homemade croissant recipe guide and are consistently producing flaky, delicious plain croissants, you might be ready to explore more advanced techniques and variations. Croissant dough serves as a fantastic base for numerous creative applications.
Expanding your repertoire can involve experimenting with different ingredients, adding flavors, or trying your hand at classic variations like pain au chocolat. These steps allow you to personalize your baking and delve deeper into the versatility of laminated dough.
Experimenting with Different Flours for Unique Flavors
While bread flour is standard for its gluten strength, experimenting with other flours can introduce subtle flavor nuances and textural variations to your homemade croissants. Using a portion of high-quality all-purpose flour (up to 20-30% mixed with bread flour) can sometimes yield a slightly more tender crumb, though you need to be mindful of the reduced gluten development.
For more adventurous bakers, incorporating a small percentage (perhaps 10-15%) of whole wheat flour or even a specialty flour like spelt can add nutty or earthy undertones. Keep in mind that whole grain flours absorb more liquid and their bran can interfere with gluten development, potentially affecting lamination and flakiness. Adjustments to hydration might be necessary, and you might see a slight reduction in overall rise and flakiness compared to 100% white bread flour, but the flavor complexity can be a rewarding trade-off.
Adding Flavors to Your Croissant Dough: Chocolate, Almond, and More
Beyond the classic plain croissant, the laminated dough is a perfect vehicle for incorporating various flavors. Chocolate is perhaps the most popular addition. To make pain au chocolat, you simply place one or two batons (sticks) of dark chocolate at the wide end of a dough triangle before rolling it up. Using high-quality baking chocolate is essential for a good melt.
Other additions can include:
- Almond: Filling with frangipane (almond cream) before shaping or splitting baked croissants and filling them, then topping with sliced almonds and powdered sugar.
- Fruit: Adding a small amount of jam or fruit compote (ensure it's not too watery) at the base before rolling.
- Savory: Incorporating cheese, herbs, or even pre-cooked bacon bits into the dough layers during the final roll-out before shaping, or adding fillings before rolling.
Experimenting with these additions allows you to customize your easy homemade croissant recipe guide experience and create a variety of pastries from a single batch of dough.
Mastering Pain au Chocolat: A Croissant Variation
Pain au chocolat, or chocolate croissant, is a beloved classic variation that is relatively easy to master once you have the basic croissant technique down. The process follows the same steps for preparing and laminating the dough. The difference comes during the shaping stage.
Instead of cutting the dough into triangles, you roll the dough into a large rectangle, about 1/8 inch (3-4 mm) thick, and cut it into smaller rectangles, roughly 4x8 inches (10x20 cm). Place a baton of dark chocolate (specifically designed for baking, as it holds its shape better) along the short end of a dough rectangle, roll it up once, place a second baton, and roll it up completely. This encases the chocolate within layers of dough.
Proof and bake as you would regular croissants. The result is a rich, flaky pastry with a molten chocolate center. For an easy homemade croissant recipe guide variation, pain au chocolat is a perfect next step.
Storing and Enjoying Your Homemade Croissants

The best way to enjoy homemade croissants is undoubtedly fresh from the oven when they are still warm and the layers are at their crispiest. However, if you find yourself with leftovers (a rare occurrence! ), or if you want to bake ahead, proper storage and reheating methods can help preserve their quality.
Understanding how to store and reheat will ensure you can savor your delicious creations for a little longer, maintaining some of that wonderful texture you worked so hard to achieve with your easy homemade croissant recipe guide.
Best Practices for Storing Freshly Baked Croissants
Once your croissants have cooled completely on a wire rack (this is important to prevent condensation), the best way to store them for short periods (1-2 days) is at room temperature in a paper bag. A paper bag allows some air circulation, which helps prevent them from becoming soggy. Avoid storing them in airtight plastic containers or bags, as this traps moisture and quickly makes the crust soft and chewy rather than crisp.
For longer storage (up to a month), croissants can be frozen. Let them cool completely, then wrap each croissant individually in plastic wrap, followed by a layer of aluminum foil or place them in a freezer-safe bag. Freezing preserves their quality much better than refrigeration, which can actually make them stale faster due to starch retrogradation.
Reheating Croissants for Optimal Texture
Reheating croissants properly can revive some of their flakiness. If stored at room temperature, place them on a baking sheet and warm them in a preheated oven at around 300-325°F (150-160°C) for 5-10 minutes, until warmed through and the crust crisps up slightly. Avoid using a microwave, as this will make them soft and chewy.
If reheating from frozen, you can place the frozen croissants directly on a baking sheet and bake in a preheated oven at 325-350°F (160-175°C) for 15-20 minutes, or until thawed and heated through and the layers are crisp again. The exact time will depend on the size of the croissant and your oven. Reheating brings back much of the original texture and aroma, making them almost as good as fresh.
Beyond the Basics: Taking Your Croissant Baking Skills Further
Successfully navigating this easy homemade croissant recipe guide is just the beginning! Croissant baking is a skill with endless possibilities for refinement and exploration. Once you feel comfortable with the fundamental techniques, you can delve into more advanced methods and variations that can push your baking to the next level.
Consider exploring different lamination techniques or joining a community of fellow bakers to share experiences and learn from others. The journey of mastering croissants is continuous and rewarding.
Exploring Different Lamination Techniques for Superior Results
While the single "letter fold" repeated three times is common in an easy homemade croissant recipe guide, professional bakers often use different folding patterns to achieve even more layers and potentially finer flakiness. One such technique is the "book fold" or "double fold," where the dough is folded in half, then in half again (like closing a book).
A typical professional lamination schedule might involve one single fold followed by two double folds. This sequence can create significantly more layers than three single folds, leading to an exceptionally delicate and airy crumb structure. Experimenting with these different folding patterns, while maintaining strict temperature control and chilling times, can help you discover which method yields the results you prefer. It requires precision but can lead to a noticeable improvement in the final texture.
Joining the BakeWithEase Community: Sharing Your Croissant Creations
Baking is often a solitary activity, but sharing your successes and challenges with others can be incredibly motivating and educational. The BakeWithEase community is a fantastic place to connect with fellow baking enthusiasts who are also on their journey to mastering pastries like croissants.
Sharing photos of your beautiful, flaky homemade croissants, asking questions about techniques, or offering advice based on your experiences can accelerate your learning and help others. Engaging with the community provides support, inspiration, and access to a wealth of collective knowledge that goes beyond any single easy homemade croissant recipe guide. Don't hesitate to show off your hard work!
Celebrate Your Baking Success: Enjoying Your Easy Homemade Croissants
Congratulations! You've embarked on and completed the challenging yet incredibly rewarding process of making homemade croissants using this easy homemade croissant recipe guide. Take a moment to appreciate the journey you've taken, the skills you've developed, and the delicious result of your hard work.
There's nothing quite like the aroma of freshly baked croissants filling your kitchen. Slice one open to admire the beautiful honeycomb structure of the interior layers you created through careful lamination and proofing. Enjoy your warm, buttery pastry as is, or pair it with your favorite jam, butter, or a cup of coffee. You've earned it! This achievement is a testament to your growing skills as an intermediate baker and a delicious milestone in your baking adventure.
Frequently Asked Questions
What skill level is required for this croissant recipe?
This guide is aimed at intermediate bakers. While the recipe is designed to be straightforward, some prior experience with yeast doughs and lamination techniques is helpful.
What makes this croissant recipe "easy"?
The recipe focuses on simplified techniques and easy-to-find ingredients. It avoids overly complex processes and aims for a manageable timeframe for home bakers.
How long does it take to make these croissants from start to finish?
The entire process, including resting and proofing, typically takes around 24-36 hours. The majority of this time is passive, allowing for flexibility.
What are the most critical steps for achieving flaky layers in croissants?
Proper lamination (folding the butter into the dough) and maintaining cold temperatures throughout the process are crucial for creating those signature flaky layers.
Can I substitute ingredients in this croissant recipe?
While some substitutions are possible, it's generally recommended to stick to the recipe for best results. Substituting flour or butter types can significantly impact the texture and rise of the croissants.
Final Reflection: The Golden-Brown Promise of Homemade Happiness
The pursuit of the perfect croissant, once a daunting culinary Everest, is now within reach for even the intermediate baker. This journey, detailed in this guide, demonstrates that mastering this seemingly complex pastry is achievable with patience, precision, and a touch of playful experimentation. The reward? A taste of buttery, flaky perfection that surpasses anything store-bought can offer.
The impact of homemade baking, particularly of such a challenging yet rewarding item as the croissant, extends far beyond the simple act of creating a delicious treat. It's a testament to our capacity for growth, a celebration of the process, and a connection to a rich culinary heritage. Baking is at once child's play and adult joy. And love, of course.
This quote perfectly captures the essence of this journey; it's a process that can be both simple and deeply fulfilling, a source of joy and pride.
Now, I invite you to take what you've learned and embark on your own croissant adventure. Don't be afraid to experiment, to adjust the recipe to your preferences, and to embrace the inevitable imperfections along the way. Each slightly misshapen croissant, each slightly uneven layer, is a step closer to mastering your own unique style. The true reward isn't just the perfectly golden-brown crescent, but the journey itself, the satisfaction of creating something beautiful and delicious with your own two hands. So, gather your ingredients, preheat your oven, and let the baking begin!
Unleash Your Inner Pastry Chef!
Thanks for joining us on this delicious journey into the world of croissant baking! We hope you’ve gained the confidence and knowledge to tackle this classic treat. Ready to take your skills to the next level?
- Bake your own masterpiece! Use the techniques you’ve learned to create your first perfect croissants. Don't be afraid to experiment – the results will be worth it!
- Share your creations! Show off your beautiful, buttery croissants on social media using #BakeWithEaseCroissants and inspire others.
- Explore our other recipes: Dive deeper into the world of baking with our extensive collection of recipes, including more challenging pastries!
Ready to transform your kitchen into a Parisian patisserie? Let's see your amazing creations!