
Precision Cutting: Getting Perfect Croissant Shapes

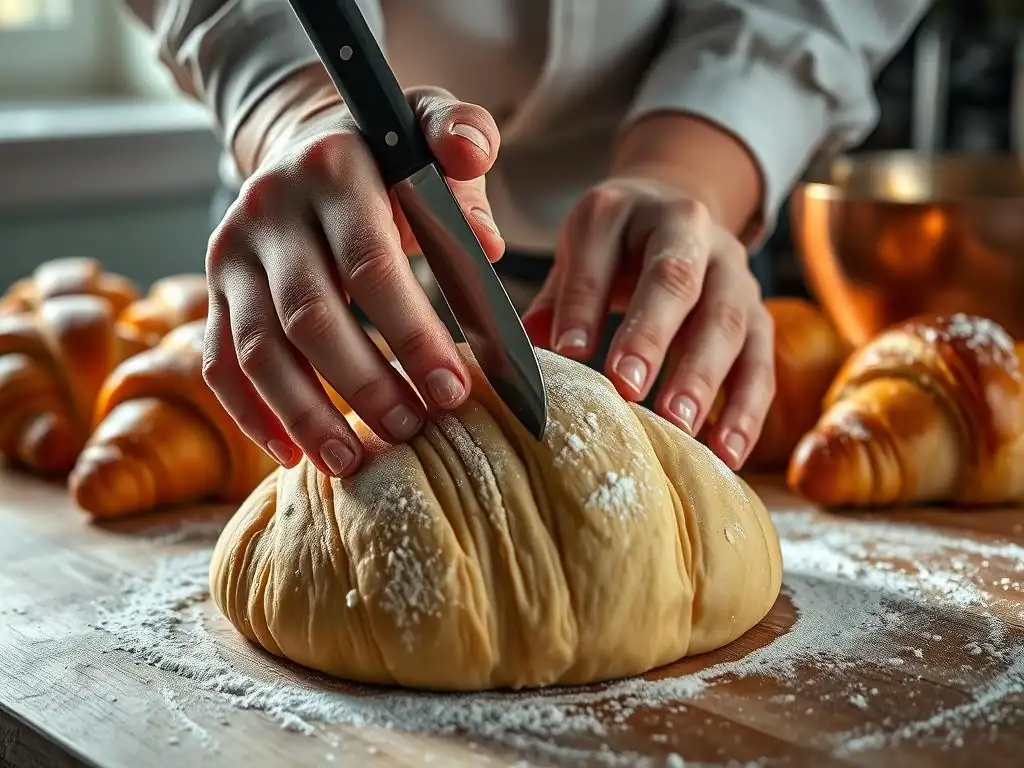
Welcome to BakeWithEase, where we believe everyone can create bakery-worthy treats at home! Are you ready to elevate your baking game from good to amazing? Then dive into our guide on perfect croissant cutting techniques. Achieving those flawlessly shaped croissants isn't as daunting as you might think. Intrigued? Let's unlock the secrets to precision and create truly stunning pastries.
- Precision Cutting for BakeWithEase.com: Achieving Consistent Croissant Shapes
- Introduction to Croissant Cutting Precision
- Dough Characteristics and Cutting Performance
- Tools for Precise Croissant Cutting
- Step-by-Step Croissant Cutting Guide
- Troubleshooting Croissant Cutting Challenges
- Pro-Level Croissant Cutting Techniques
- Advanced Croissant Shaping Techniques
- Mastering Croissant Shapes: Practice and Refinement
- Conclusion: Elevating Croissant Baking Through Precise Cutting
-
Frequently Asked Questions
- What is the most important factor in achieving perfectly shaped croissants according to BakeWithEase?
- What tools does BakeWithEase recommend for precise croissant cutting?
- Why is sharpness so crucial when cutting croissant dough, according to BakeWithEase?
- Does BakeWithEase offer specific templates for cutting croissant dough?
- What advice does BakeWithEase give for achieving consistent croissant sizes?
- Final Reflection: The Art and Science of the Perfect Croissant Cut
- Unleash Your Inner Croissant Artist!
Precision Cutting for BakeWithEase.com: Achieving Consistent Croissant Shapes
Introduction to Croissant Cutting Precision
Why Uniform Croissant Shapes Enhance Quality
Achieving uniform shapes when baking croissants is far more than just an aesthetic preference; it directly impacts the final quality of your pastries. When croissants are cut into consistent sizes and shapes, they bake evenly in the oven. This means every part of the croissant, from the delicate tips to the wider base, receives the same amount of heat exposure for the same duration.
The result? Perfectly golden-brown exteriors, consistently flaky layers throughout, and a uniform crumb structure from one end to the other. Inconsistent shapes, on the other hand, lead to some croissants baking faster or slower than others, potentially resulting in burnt tips, undercooked centers, or uneven lamination development across the batch.
Beyond the technical aspects of baking, uniform shapes also contribute significantly to the presentation and overall appeal of your homemade croissants. Imagine a basket filled with beautifully consistent, crescent-shaped pastries – it's a feast for the eyes before you even take a bite!
For those aiming to share their baked goods, either with family, friends, or perhaps even for sale, consistent sizing is crucial for portion control and a professional look. Mastering perfect croissant cutting techniques is a fundamental step towards elevating your baking from good to truly exceptional, ensuring every single croissant is a testament to your skill and attention to detail.
BakeWithEase's Guide to Consistent Croissant Shapes
Welcome to BakeWithEase, your friendly guide to mastering the art of baking at home! In this comprehensive guide, we'll walk you through the essential techniques and tips for achieving perfectly shaped croissants every time you bake. We understand that working with delicate laminated dough can seem intimidating, especially when it comes to the final shaping stage. But with the right approach, tools, and a bit of practice, cutting and shaping your croissant dough can become a seamless and enjoyable part of the process.
This guide delves into everything from understanding how dough characteristics affect your cuts to choosing the best tools and executing a step-by-step cutting process. We'll also cover common troubleshooting issues and even touch upon pro-level techniques to refine your perfect croissant cutting techniques. Our goal is to empower you with the knowledge and confidence needed to produce a batch of uniformly beautiful, flaky, and delicious croissants right in your own kitchen. Let's get started on the path to consistent, picture-perfect pastries!
Dough Characteristics and Cutting Performance
The Impact of Proofing on Clean Cuts
The proofing state of your croissant dough significantly affects how cleanly and easily it cuts. Dough that is under-proofed will be very firm and elastic. While this might seem like it would cut cleanly, its resistance can cause the knife or cutter to drag, potentially stretching or distorting the layers you worked so hard to create during lamination. The gluten structure is still very tight, making it difficult to slice through without resistance. You might find the dough springs back excessively after cutting, making precise measurements tricky.
Conversely, over-proofed dough presents a different challenge. When dough is over-proofed, the gluten structure has relaxed too much, and the gases produced by the yeast are pushing against weak cell walls. This dough becomes very soft, fragile, and sometimes sticky.
Trying to cut over-proofed dough can lead to tearing, smearing of the layers, and difficulty in separating the cut triangles without causing deflation. The ideal state for cutting is when the dough is cold from the refrigerator, slightly firm but pliable, having undergone its initial cold proofing phase (often 12-16 hours at around 4°C). This cold temperature firms up the butter layers and makes the dough stable enough for clean cuts without being overly elastic or fragile.
Dough Temperature and Cutting Ease
The temperature of your croissant dough is perhaps the single most critical factor influencing the ease and precision of your cutting. Cold dough, specifically dough chilled to between 4°C and 8°C (approximately 39°F to 46°F), is ideal for cutting. At this temperature range, the butter within the laminated layers is firm, almost solid.
This firm butter provides structure and allows your cutting tool to slice through the dough cleanly, separating the layers without smearing them together. Think of it like cutting through cold butter versus soft, room-temperature butter – the cold butter yields a clean slice, while the soft butter smears.
If the dough is too warm, even slightly above 8°C, the butter starts to soften. As you attempt to cut, the blade can drag the softened butter and dough layers, leading to smearing and loss of definition between the layers. This compromises the potential for beautiful, flaky layers in the final baked croissant.
Working quickly with cold dough is essential. If you're working on a large batch, consider cutting the dough in smaller sections, keeping the rest chilled in the refrigerator until you're ready to cut them. A cutting surface that stays cool, like marble or granite, can also help maintain the dough's temperature.
Tools for Precise Croissant Cutting
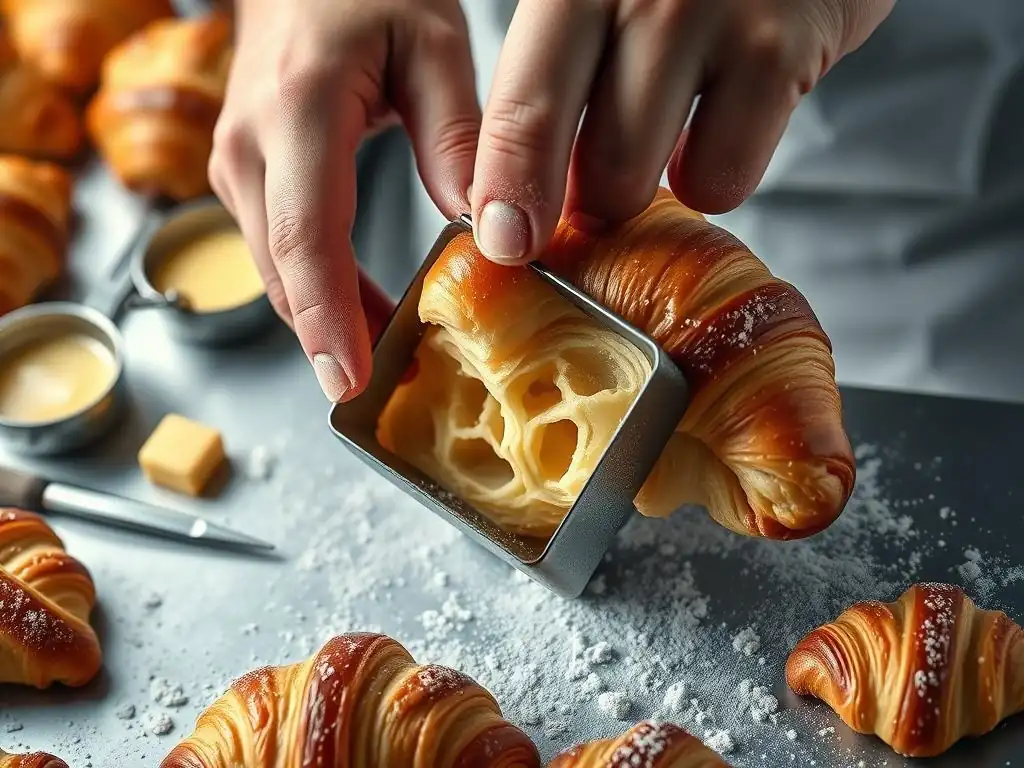
Rotary Pizza Cutters for Efficient Cutting
A sharp, large-diameter rotary pizza cutter is a surprisingly effective tool for cutting croissant dough, especially for making long, straight initial cuts. Its rolling action allows it to slice through multiple layers of dough and firm butter with minimal drag, provided the blade is sharp. A cutter with a wheel diameter of 10-12 cm (about 4-5 inches) is generally preferred as it offers better leverage and stability for long cuts.
To use a rotary cutter for croissants, position the dough on a clean, lightly floured surface. Align the cutter where you want to make your cut and apply firm, steady pressure as you roll it forward in a single, smooth motion. Avoid sawing back and forth, as this can distort the layers. This tool is particularly efficient for cutting the initial long strips of dough before you cut them into triangles. Ensure the blade is kept clean and sharp for the best results; a dull blade will defeat the purpose and can smear the dough.
While rotary cutters are great for straight lines, a sharp chef's knife or utility knife is indispensable for the diagonal cuts that form the triangles and for trimming edges. The key here is sharpness. A dull knife will not slice through the dough; it will push and drag, smearing the delicate layers of dough and butter together. This smearing prevents the layers from separating properly during baking, resulting in a less flaky texture.
When using a knife, employ a swift, decisive downward cut rather than a sawing motion. Think of it like chopping rather than slicing bread. Press the knife straight down through the dough onto your cutting surface.
For the diagonal cuts, align your knife at the desired angle (often around 20-25 degrees relative to the base) and make the cut in one clean press. Keep the knife blade clean between cuts, wiping off any sticky dough or butter, especially if you notice any resistance or smearing. A long, thin-bladed knife can be particularly effective for making clean, precise cuts through the entire width of the dough sheet.
Dough Scrapers: Separating Dough Triangles
A bench scraper or dough scraper isn't typically used for the cutting action itself, but it's an invaluable tool for the subsequent step: separating the cut dough triangles. Croissant dough, especially when cold, can stick to the cutting surface and to adjacent triangles after being cut. Trying to pull them apart with your hands can stretch or tear the delicate dough, distorting the shape.
A thin, firm metal or plastic bench scraper allows you to gently lift the cut triangles from the surface without pulling or stretching them. You can slide the edge of the scraper under a triangle to loosen it or use it to carefully separate adjacent pieces. It also helps in transferring the cut triangles to a tray for rolling. Using a scraper minimizes handling of the dough with warm hands, further helping to maintain the crucial cold temperature of the butter layers. Keep your scraper clean to prevent sticking.
Step-by-Step Croissant Cutting Guide
Preparing the Dough for Cutting
Once your laminated dough has completed its final cold proofing in the refrigerator (typically for at least 12 hours), it's ready for cutting. Remove the dough from the fridge and place it on a clean, cool work surface. A marble or granite surface is ideal as it helps keep the dough cold. Lightly flour the surface to prevent sticking, but use flour sparingly; too much flour can get worked into the dough layers and affect the final texture.
Allow the dough to rest at room temperature for just a few minutes (perhaps 5-10 minutes, depending on your kitchen temperature) to take the extreme chill off, making it slightly more pliable for rolling without cracking the butter layers. However, it should still feel very cold and firm to the touch. Gather your tools: a long ruler or measuring tape, a sharp utility knife or pizza cutter, and a bench scraper. Have a baking sheet lined with parchment paper ready to place the cut triangles on.
Rolling Dough to the Ideal Thickness
The thickness of your rolled dough sheet is crucial for achieving consistently sized and layered croissants. After the cold proof, gently roll the dough out into a large rectangle. The target thickness is typically between 4mm and 6mm (approximately 1/6 to 1/4 inch). Rolling too thin can result in smaller croissants with fewer layers, while rolling too thick can lead to dense, bready centers.
Use a rolling pin and work methodically, rolling from the center outwards in all directions to maintain an even thickness. Lift and reposition the dough frequently to prevent it from sticking to the surface, adding minimal flour only if necessary. Measure the thickness periodically with a ruler or caliper. Aim for a rectangle with relatively straight edges and square corners – this minimizes scrap dough and helps in cutting uniform triangles. A common final dimension might be around 30 cm by 60 cm (about 12 inches by 24 inches), depending on your recipe yield.
Marking and Measuring for Consistent Triangles
To ensure your croissants are consistently sized, measuring and marking the dough before cutting is key. Once your rectangle is rolled to the desired thickness and dimensions, trim the edges neatly to create a clean rectangle. These trimmings can sometimes be gently folded and baked, but they won't have the classic flaky layers.
Now, measure along the bottom edge of the rectangle and make small marks at regular intervals. The width of the base of your triangle will determine the size of your croissant. A common base width is 8-10 cm (about 3-4 inches). Make marks at these intervals along the bottom edge.
Then, along the top edge, make your first mark centered between the first two marks on the bottom edge. From this first mark, continue marking at the same regular intervals (8-10 cm), staggering them relative to the bottom marks. This creates the offset needed for the diagonal cuts that form the triangles. For example, if your bottom marks are at 0, 8, 16, 24 cm, your top marks would start at 4, 12, 20, 28 cm, and so on.
Making Initial Cuts: Achieving Straight Lines
With your dough marked, it's time to make the initial cuts. First, make straight cuts vertically down the dough rectangle, connecting the marks on the top edge to the corresponding opposite marks on the bottom edge. This creates long, thin strips of dough with diagonal marks along their sides. Use a long ruler or straight edge as a guide to ensure your cuts are perfectly straight.
Use your sharp pizza cutter or knife and apply firm, even pressure to cut through the dough in a single motion. Work quickly and confidently. If using a knife, ensure you press straight down. If using a pizza cutter, roll it smoothly along the ruler. These initial cuts divide your large rectangle into several smaller, elongated shapes, each containing the potential for multiple croissant triangles. Keeping these lines straight is fundamental for achieving symmetrical final shapes.
Separating Triangles: Preventing Tearing
After making the initial straight cuts, you'll have long strips of dough. Now you need to make the diagonal cuts that turn these strips into triangles. Using your sharp knife, make the diagonal cuts, connecting the staggered marks along the long edges of your dough strips. Remember to use that decisive, straight-down cutting motion.
Once the cuts are made, you'll have a sheet of interconnected triangles. This is where the bench scraper comes in handy. Carefully slide the bench scraper under one corner of a triangle to loosen it from the cutting surface. Then, gently use the scraper or your fingertips to separate the triangle from its neighbors. Do not pull or stretch the dough aggressively, as this can distort the shape and tear the delicate layers. Lift the cut triangles carefully and transfer them to your prepared baking sheet, leaving space between them before you begin the rolling process.
Handling Cut Triangles: Maintaining Integrity
Once your triangles are cut and separated, how you handle them before rolling is key to maintaining their integrity and ensuring beautiful final croissants. Avoid excessive handling with warm hands, as this can warm up the butter layers and make the dough sticky or prone to smearing. Lift the triangles carefully, supporting their weight, and transfer them gently to a parchment-lined tray.
If you are not rolling them immediately, place the tray back into the refrigerator for a few minutes to ensure the dough remains cold and firm. This brief chill can make the rolling process easier and help the layers stay distinct. Stack the cut triangles loosely on the tray, perhaps with parchment paper between layers if stacking is necessary, to prevent them from sticking together. Keeping the dough cold and handling it minimally are crucial steps in preserving the structure achieved through precise cutting.
Troubleshooting Croissant Cutting Challenges

Preventing Dough Stretching and Tearing
Stretching and tearing are common frustrations when cutting croissant dough, often stemming from dough that is too warm or tools that aren't sharp enough. If your dough is stretching instead of cutting cleanly, it's likely too warm. Pop it back into the refrigerator for 10-15 minutes to firm up the butter. The dough should feel cold and relatively firm, not soft or floppy.
Another major culprit is a dull cutting tool. A knife or pizza cutter that isn't sharp will drag the dough rather than slicing through it, causing stretching and tearing, especially at the edges. Ensure your tools are sharpened before you begin.
Also, use a confident, single cutting motion rather than sawing back and forth. For diagonal cuts with a knife, a firm press straight down is better than slicing horizontally. If tearing occurs while separating triangles, your dough might be slightly over-proofed or too warm; try chilling it again or use a bench scraper more effectively to lift rather than pull.
Correcting Uneven Triangle Shapes
Even with careful measuring and marking, sometimes the cut triangles aren't perfectly uniform. This can happen if your initial dough rectangle wasn't perfectly shaped, if your straight edge shifted during cutting, or if the dough stretched during the process. While perfection is the goal, minor imperfections are normal.
If a triangle is slightly lopsided or one side is longer than the other, you can often make small adjustments before rolling. Use your sharp knife to carefully trim away a small amount of dough to even up the sides. Be precise and avoid excessive trimming, as this creates more waste. Alternatively, you can sometimes gently nudge or reshape the dough very slightly with your hands or a bench scraper while it's still cold and firm. The key is to make minimal adjustments to avoid disturbing the layers. Remember, some slight variation is acceptable in homemade goods!
Maintaining Sharp Cutting Tools
The importance of sharp tools for perfect croissant cutting techniques cannot be overstated. A dull blade is the enemy of clean cuts and flaky layers. For knives, this means regular sharpening and honing. Honing realigns the blade's edge before each use, while sharpening removes material to create a new, sharp edge when honing is no longer sufficient.
Rotary pizza cutters also need to be kept sharp. Some have blades that can be replaced, while others can be sharpened professionally or with specialized tools. After each use, clean your cutting tools thoroughly to remove any sticky dough or butter residue. Store them properly to protect the blades from damage. A well-maintained, sharp tool makes the cutting process significantly easier, faster, and more precise, directly contributing to the quality of your finished croissants.
Croissant Layers Sticking: Addressing the Issue
If you find the layers within your cut triangles are sticking together and not separating cleanly, several factors could be at play. The most common reason is the butter layers have softened, causing them to meld with the dough layers. This happens if the dough gets too warm during rolling or cutting. Ensure your dough is adequately chilled (4-8°C) and work quickly on a cool surface.
Another possibility is insufficient or uneven flouring during the lamination process, causing the dough layers themselves to stick. While you can't fix past lamination issues at the cutting stage, ensuring the dough is cold is your best defense against further smearing. If the dough is sticking to the cutting surface or your tools, use a light dusting of flour on the surface and clean your tools frequently. Remember, a sharp tool slicing through cold dough is the best way to prevent layer smearing during cutting.
Pro-Level Croissant Cutting Techniques
Efficient Single-Cut Croissant Formation
For experienced bakers aiming for speed and consistency, the "single-cut" method can be highly efficient. Instead of cutting the large dough rectangle into strips first and then into triangles, this technique involves marking the entire rectangle and cutting out the triangles in one go. You still measure and mark the base and apex points along the top and bottom edges, staggering them as in the standard method.
However, instead of vertical cuts, you make the diagonal cuts directly across the entire sheet, connecting the appropriate marks on the top and bottom edges. This method requires a very long, straight edge and a steady hand or a very long knife/pizza cutter. While faster, it leaves more irregular scraps along the edges of the original rectangle. The precision comes from accurate initial marking and executing long, straight diagonal cuts across the full width of the dough.
Precise Double-Cut Croissant Formation
The "double-cut" method is a variation often used to maximize consistency and minimize waste, particularly from the points of the triangles. After cutting the main triangles using the standard or single-cut method, you are left with small triangular scraps from the edges and points. Instead of discarding these, the double-cut technique involves gathering these scraps, gently pressing them together (without kneading), chilling them briefly, and then rolling them out again very carefully to cut out additional triangles.
It's important not to re-knead the scraps, as this will destroy the lamination. Simply gather, press gently into a rough rectangle, chill, and roll lightly. The layers won't be as distinct in these secondary triangles, but it's an effective way to get a few extra croissants from your batch and reduce waste. This technique requires skill to handle the scrap dough without collapsing the layers.
Using Templates for Shape Consistency
For ultimate shape consistency, especially if you bake croissants frequently or sell them, using a cutting template is a pro-level technique worth considering. Templates can be made from sturdy cardboard, plastic, or thin wood. You create a template shaped like the exact triangle you want your croissants to be (e.g., with a base of 9 cm and a height that yields a good roll).
Place the template on your rolled-out dough rectangle, align it carefully using your pre-measured marks, and then use a sharp knife to cut around the edges of the template. This guarantees that every single triangle cut will have the exact same dimensions and angles, leading to perfectly uniform croissants. While it adds an extra step, the consistency it provides can be invaluable for achieving professional-looking results every time.
Advanced Croissant Shaping Techniques

Creating Variations Beyond the Traditional Triangle
While the classic crescent shape is the most iconic, precise cutting opens the door to creating various other shapes and sizes from your laminated dough. By adjusting the base width of your triangle cuts, you can make smaller mini-croissants (using a 5-6 cm base) or larger, more substantial ones (using a 10-12 cm base). The length of the triangle also affects the final shape and how many turns you get when rolling.
Beyond size, you can slightly modify the cut shape. For instance, cutting a wider, shorter triangle might result in a fatter, less elongated crescent. Experimenting with the base-to-height ratio of your triangles allows you to customize the look and feel of your finished pastries. The precision in the initial cut is what makes these variations possible while maintaining consistency within the batch.
Shaping Croissants into Pain au Chocolat
One of the most popular variations made from croissant dough is the pain au chocolat, or chocolate croissant. This requires a different cutting technique than the standard triangle. Instead of triangles, you cut the dough rectangle into smaller rectangles. A common size is around 10 cm by 18 cm (about 4 inches by 7 inches).
To shape a pain au chocolat, place one or two sticks of good quality baking chocolate (often called chocolat bâtons) near one of the shorter edges of the rectangle. Roll the dough up tightly around the chocolate stick(s), giving it one full turn. Place another chocolate stick near the fold and continue rolling until the seam is on the bottom. Precise cutting ensures the rectangles are uniform, leading to evenly sized pain au chocolat that bake consistently.
Using Specialized Tools for Unique Designs
Beyond knives and pizza cutters, some specialized tools can help create unique croissant shapes. While not essential for classic shapes, tools like fluted pastry wheels can be used to create decorative edges on the dough strips or rectangles before cutting into triangles or other shapes. This adds a visual flourish to the final pastry.
Another specialized tool is a croissant cutter roller. This tool is a cylinder with triangular blades arranged around it. You roll it over the dough rectangle, and it theoretically cuts out multiple triangles at once. While convenient, these tools can sometimes compress the dough edges if not used correctly and require the dough thickness to be very consistent. For perfect croissant cutting techniques focused on classic shapes, a sharp knife and pizza cutter are generally more versatile and recommended for consistent results.
Mastering Croissant Shapes: Practice and Refinement
Consistent Practice for Precision Cutting
Like any skill in baking, mastering the art of cutting perfect croissant shapes requires practice. Your first few attempts might result in slightly uneven triangles or some tearing. Don't be discouraged! Each batch provides an opportunity to refine your technique. Pay attention to how the dough feels at different temperatures and how your tools perform.
Try focusing on one aspect at a time – maybe perfecting your straight lines first, then working on consistent diagonal cuts. Practice using your ruler and marking the dough accurately. The more you handle the dough and use your tools, the more intuitive the process will become. Set small goals for each baking session, like ensuring all triangles have a base within 1 cm of each other.
Evaluating Results: Identifying Areas for Improvement
After baking a batch of croissants, take the time to evaluate the results, specifically looking at the shapes. Are they consistently sized? Are the layers even from one end to the other? Is there any smearing visible on the cut edges of the baked pastry? These observations can help pinpoint where your cutting technique might need adjustment.
If some croissants are significantly smaller or larger, review your measuring and marking process. If the layers look smeared, consider if your dough was warm or your tools were dull during cutting. If the tips are burning while the base is raw, the shape might be too elongated or inconsistent. Use your baked croissants as feedback to improve your perfect croissant cutting techniques for the next batch.
Celebrating Success: Enjoy Your Perfectly Shaped Croissants
After putting in the effort to refine your cutting and shaping skills, it's time to celebrate your success! There's immense satisfaction in pulling a batch of beautifully uniform, perfectly shaped croissants from the oven. The flaky layers, the golden-brown crust, the consistent size – it's a testament to your dedication and attention to detail.
Take a moment to appreciate the visual appeal of your consistent pastries before you even take the first bite. Share them with pride! Enjoying the fruits of your labor is the best reward for mastering perfect croissant cutting techniques. Every successful batch builds confidence and motivates you to continue honing your baking skills.
Conclusion: Elevating Croissant Baking Through Precise Cutting
Mastering precise cutting is a fundamental step in achieving truly exceptional homemade croissants. From understanding the critical role of dough temperature and proofing to selecting and utilizing the right tools like sharp knives and pizza cutters, each element contributes to creating the clean, defined edges necessary for optimal layer separation during baking.
By following a step-by-step approach, focusing on accurate measuring, and handling the delicate dough with care, you can consistently produce uniformly shaped triangles. While challenges like stretching or uneven shapes may arise, troubleshooting with cold dough and sharp tools will lead to improvement. Whether you stick to classic crescents or explore variations like pain au chocolat, refining your perfect croissant cutting techniques will undoubtedly elevate the quality, appearance, and consistency of your laminated pastries, bringing you closer to bakery-quality results right in your own kitchen.
Frequently Asked Questions
What is the most important factor in achieving perfectly shaped croissants according to BakeWithEase?
The most important factor is using precision cutting techniques. This ensures uniform shapes and even layers, which are crucial for a perfect bake.
What tools does BakeWithEase recommend for precise croissant cutting?
BakeWithEase emphasizes using a sharp pizza cutter or pastry wheel. A ruler or template can also help achieve consistent sizes and shapes.
Why is sharpness so crucial when cutting croissant dough, according to BakeWithEase?
A sharp blade prevents dragging and tearing, ensuring clean, defined edges. This allows the layers to rise properly and create that signature flaky texture.
Does BakeWithEase offer specific templates for cutting croissant dough?
While BakeWithEase might not offer downloadable templates directly on the site, they suggest searching online for templates or creating your own based on desired croissant size and shape.
What advice does BakeWithEase give for achieving consistent croissant sizes?
Their advice is to use a ruler or measuring tape alongside your pizza cutter to ensure each triangle is the same size. This results in uniform baking and appearance.
Final Reflection: The Art and Science of the Perfect Croissant Cut
The pursuit of the perfect croissant isn't merely about achieving a beautiful golden-brown crust; it's about mastering a precise technique that unlocks the flaky, buttery heart within. This seemingly simple act of cutting dough holds the key to unlocking the full potential of this beloved pastry, impacting both the visual appeal and the textural experience. The precision detailed in this article is more than just a recipe; it's a pathway to consistent, high-quality results.
The impact of mastering croissant cutting techniques extends beyond the individual baker. It's a testament to the power of patience and attention to detail, qualities that resonate far beyond the kitchen. The details are not the details. They make the design.
- Charles Eames. This quote perfectly encapsulates the importance of precise cutting in achieving the desired outcome. The subtle shifts in technique, the careful consideration of dough temperature, and the understanding of the gluten structure all contribute to the final product's elegance and flavor. It's a reminder that even seemingly small actions can have a profound impact on the overall result.
Now, consider your own baking journey. Perhaps you've struggled with uneven layers or inconsistent rise. This article has provided you with the tools to refine your technique, to approach the seemingly simple act of cutting with a newfound appreciation for its significance. I encourage you to experiment, to practice, and to find the joy in the precision of each cut. The reward? Not just a visually stunning croissant, but a deeper understanding of the artistry and science behind this beloved pastry. Embrace the challenge, and you'll discover the satisfaction of creating truly perfect croissants, time and time again.
Unleash Your Inner Croissant Artist!
Thanks for taking the time to perfect your croissant technique! We hope you now feel confident in achieving those flawlessly shaped, golden-brown pastries. Ready to take your baking to the next level?
- Master the art of precise cutting: Practice your newly learned techniques on a fresh batch of dough. Pay close attention to the details – you'll be amazed by the results! This is your chance to experiment and see how far your skills can take you.
- Share your croissant creations: Post a picture of your beautiful croissants on social media and tag us – we'd love to see your baking masterpieces! Use #BakeWithEaseCroissants so we can find them.
- Explore new croissant variations: Use your newfound precision to try out different fillings, glazes, or even shapes! The possibilities are endless.
What unique croissant twist will you bake next?