
Creating Delicate Edible Flowers: Working with Wafer Paper

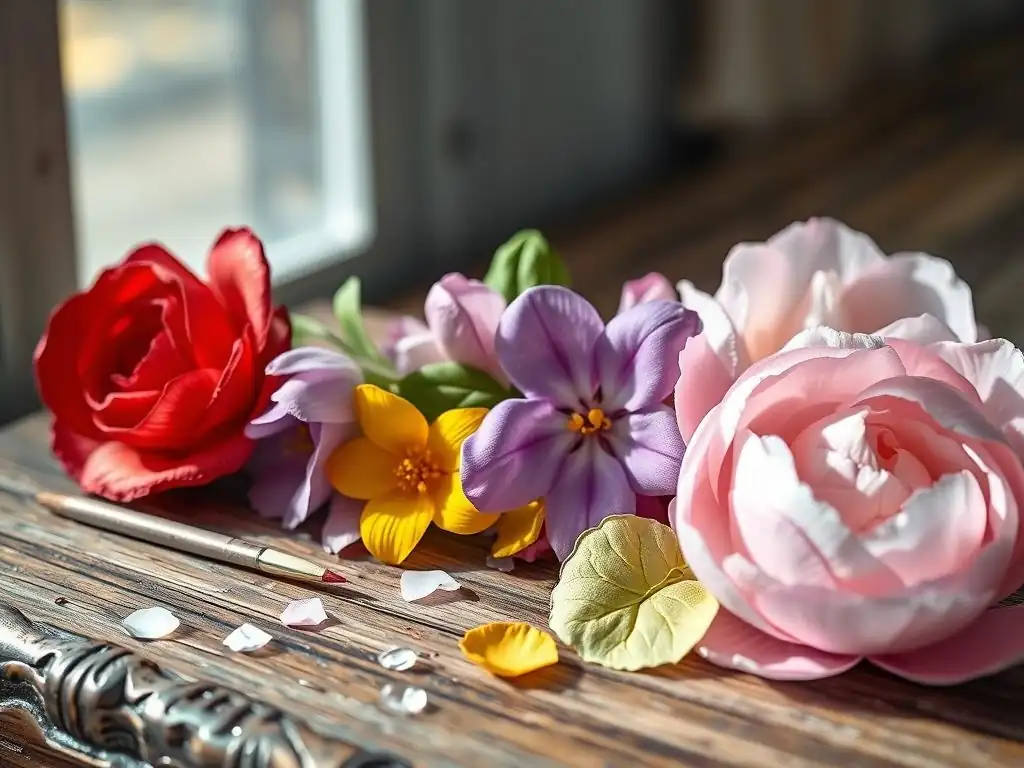
Welcome to BakeWithEase, your ultimate guide to unlocking baking brilliance! Ever dreamt of crafting breathtaking, delicate decorations? Dive into the fascinating world of edible flower wafer paper and discover how to transform simple ingredients into stunning floral artistry. Intrigued? Let's unravel the secrets of this advanced baking technique and elevate your creations to a whole new level of elegance.
- Introduction to Edible Flower Wafer Paper Creations
- Understanding Wafer Paper for Edible Flowers
- Essential Tools and Materials for Wafer Paper Flowers
- Step-by-Step Guide: Making Basic Wafer Paper Flowers
- Advanced Techniques for Realistic Edible Flowers
- Coloring Wafer Paper for Stunning Edible Flowers
- Troubleshooting Common Wafer Paper Flower Problems
- Incorporating Edible Wafer Paper Flowers into Your Baked Goods
- Wafer Paper Flower Inspiration: Design Ideas and Examples
- Tips for Success: Mastering Edible Flower Wafer Paper Art
- Conclusion: Unleash Your Creativity with Edible Wafer Paper Flowers
-
Frequently Asked Questions
- How easy is it to work with edible flower wafer paper for beginners?
- What types of edible flowers can I create using wafer paper?
- What are the best methods for coloring edible flower wafer paper?
- How do I attach wafer paper flowers to my baked goods?
- How should I store edible flower wafer paper creations to maintain their quality?
- Final Reflection: The Enduring Bloom of Edible Wafer Paper Art
- Unleash Your Inner Floral Artist: Craft Stunning Edible Flowers!
Introduction to Edible Flower Wafer Paper Creations
Elevating Your Baking with Wafer Paper Flowers
Baking is an art form, and decoration is often the final flourish that transforms a delicious treat into a stunning masterpiece. While buttercream flowers are classic and sugar paste (fondant/gumpaste) offers incredible detail, working with edible flower wafer paper opens up a world of delicate, lightweight, and often more realistic floral creations.
Imagine a cascade of translucent petals gracing a wedding cake or a single, perfect bloom adorning a delicate cupcake – this is the magic you can achieve with edible flower wafer paper. It allows bakers of all skill levels to add sophisticated, visually striking elements to their work without the weight or density of traditional sugar mediums.
Mastering the use of edible flower wafer paper involves understanding its unique properties and learning specific techniques for cutting, shaping, and coloring. Unlike heavy sugar decorations, wafer paper flowers are incredibly light, making them ideal for placement on delicate surfaces or for creating large, dramatic arrangements that wouldn't be possible with heavier materials. From simple single-layer blossoms to complex, multi-petal roses and peonies, the versatility of edible flower wafer paper empowers you to bring your most intricate floral visions to life, adding that professional touch to your baked goods.
Why Choose Wafer Paper for Edible Flowers?
So, why opt for edible flower wafer paper over other popular mediums like gumpaste or royal icing? The primary reasons are its unique texture, lightweight nature, and relative ease of use once you understand its properties.
Wafer paper (also known as rice paper, though it's not typically made from rice) is incredibly thin, often ranging in thickness from about 0.27mm to 0.35mm for standard sheets, allowing for very fine, delicate petals that can mimic the translucency of real flowers. This thinness also means the finished flowers are exceptionally light; a large wafer paper rose might weigh only a few grams, compared to a similar size gumpaste rose which could weigh 50-100 grams or more, depending on its construction.
Furthermore, edible flower wafer paper dries quickly in the air without needing special drying agents or extended curing times like some sugar pastes. This can significantly speed up the decoration process, allowing you to create many elements relatively quickly. While it requires specific handling techniques to avoid cracking or wilting from moisture, its ability to be subtly shaped, layered, and colored makes it a preferred choice for creating realistic, ethereal edible flowers that truly stand out on cakes, cookies, and other confections. Its neutral flavor also means it doesn't overpower the taste of your delicious baked goods.
Understanding Wafer Paper for Edible Flowers
What is Wafer Paper? Composition and Types
Wafer paper, often used for edible flower creations, is primarily made from potato starch, water, and vegetable oil. Despite its common alternative name "rice paper," it rarely contains rice. This simple composition results in a thin, slightly translucent, and generally flavorless sheet that is entirely edible. The quality and composition can vary slightly between manufacturers, affecting its flexibility and how it reacts to moisture and colorants. Some premium wafer papers might have a smoother finish or be formulated for greater flexibility.
There are generally two main types of wafer paper you'll encounter for edible decorations: standard (or flexible) wafer paper and wafer card. Standard wafer paper is the thinner, more pliable type, typically used for creating petals, leaves, and other delicate shapes for edible flower wafer paper art. It's the workhorse for realistic floral work. Wafer card is thicker and more rigid, often used for printing images or structural elements, though it can sometimes be used for firmer leaves or bases in floral arrangements. For most edible flower wafer paper projects, you'll primarily be working with the standard, thinner variety.
Key Characteristics of Wafer Paper for Floral Decorations: Thickness, Texture, and Flexibility
When working with edible flower wafer paper, understanding its core characteristics is crucial for success. As mentioned, thickness is a key factor; standard wafer paper designed for flowers is thin (around 0.27-0.35mm), allowing for delicate shaping and layering. Thicker paper is harder to manipulate into curved, realistic petal shapes. The texture is typically smooth on one side and slightly rougher on the other; the rough side often holds color better and is preferred for painting or dusting.
Flexibility is perhaps the most important characteristic to manage. Wafer paper is naturally brittle when dry and can crack or break if bent sharply. It gains flexibility when exposed to a tiny amount of moisture (like steam or a very light application of edible glue or alcohol-based colorant), allowing it to be shaped and molded. However, too much moisture will cause it to become sticky, wavy, or even dissolve. Mastering the balance of moisture is key to successfully creating beautiful edible flower wafer paper petals and leaves.
Storing Wafer Paper Properly: Ensuring Freshness and Usability
Proper storage is absolutely vital for keeping your edible flower wafer paper in optimal condition and preventing issues like brittleness or warping. Wafer paper is highly sensitive to humidity. High humidity can make it soft, sticky, and difficult to handle, while very low humidity can make it excessively brittle and prone to cracking. The ideal storage environment is cool, dry, and away from direct sunlight and moisture sources.
It's best to store wafer paper flat in its original packaging, often a sealed plastic bag, or in an airtight container. Adding a small food-safe desiccant pack (like those found in vitamin bottles) to the container can help absorb excess moisture, especially in humid climates. Avoid storing it in the refrigerator or freezer, as condensation can form and ruin the paper. When stored correctly, a pack of edible flower wafer paper can last for a year or more, ensuring it's ready whenever inspiration strikes for your next edible flower wafer paper creation.
Essential Tools and Materials for Wafer Paper Flowers
Must-Have Tools for Cutting and Shaping Wafer Paper
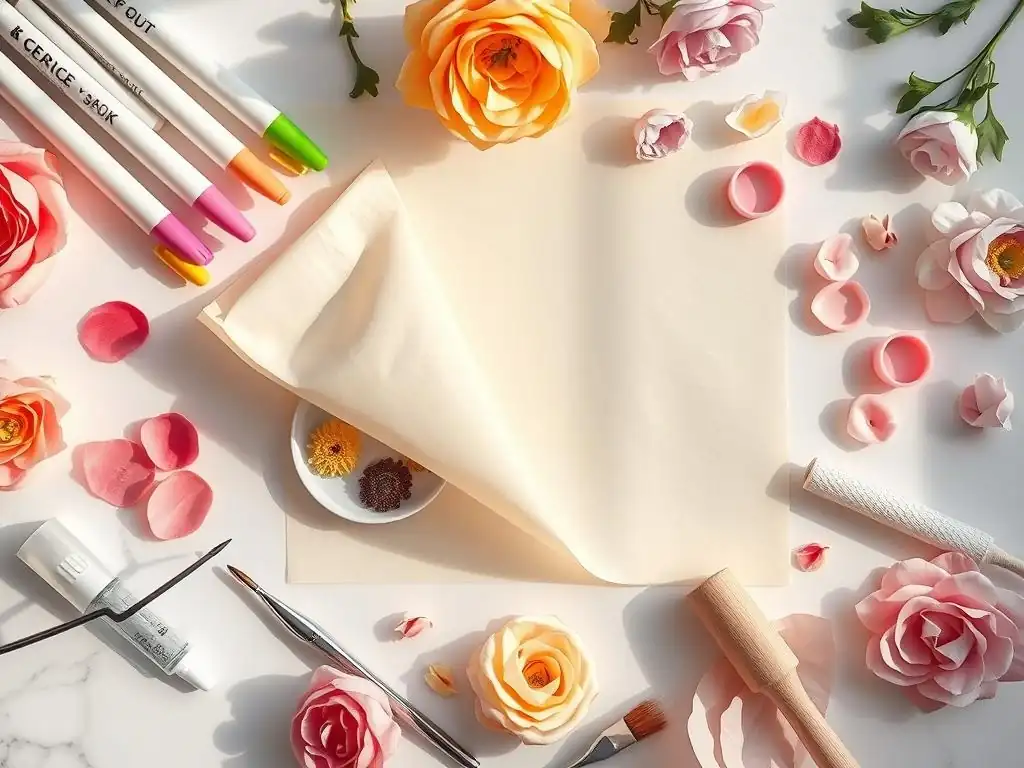
Creating beautiful edible flower wafer paper requires a few specific tools that make the process much easier and allow for greater precision. Sharp scissors, particularly small, detail scissors, are essential for cutting out petal and leaf shapes cleanly. A craft knife or scalpel with a fresh blade is also incredibly useful for intricate cuts or creating fine fringes. For repetitive shapes, paper punches (ensure they are clean and dedicated to food use) can save significant time, especially for smaller flowers or consistent leaf sizes.
Beyond cutting, shaping tools are key to adding dimension. Ball tools of various sizes are used to soften the edges of petals and create curves. Foam pads (like flower shaping foam) provide a soft surface to work on when using ball tools, preventing the paper from tearing and allowing for gentle manipulation. Veining tools or silicone veining mats are crucial for adding realistic texture to petals and leaves, mimicking natural veins. Having a variety of these tools will significantly enhance your ability to create lifelike edible flower wafer paper decorations.
Edible Glue and Colorants: Achieving Realistic and Vibrant Flowers
Edible glue is the bonding agent that holds your edible flower wafer paper creations together. A simple edible glue made from CMC powder (cellulose gum) and water is commonly used. It should be thin enough to apply easily but thick enough to create a bond without saturating the paper. Some decorators also use clear alcohol (like vodka or edible alcohol) as a "glue," especially for very delicate pieces, as it evaporates quickly, minimizing the risk of warping.
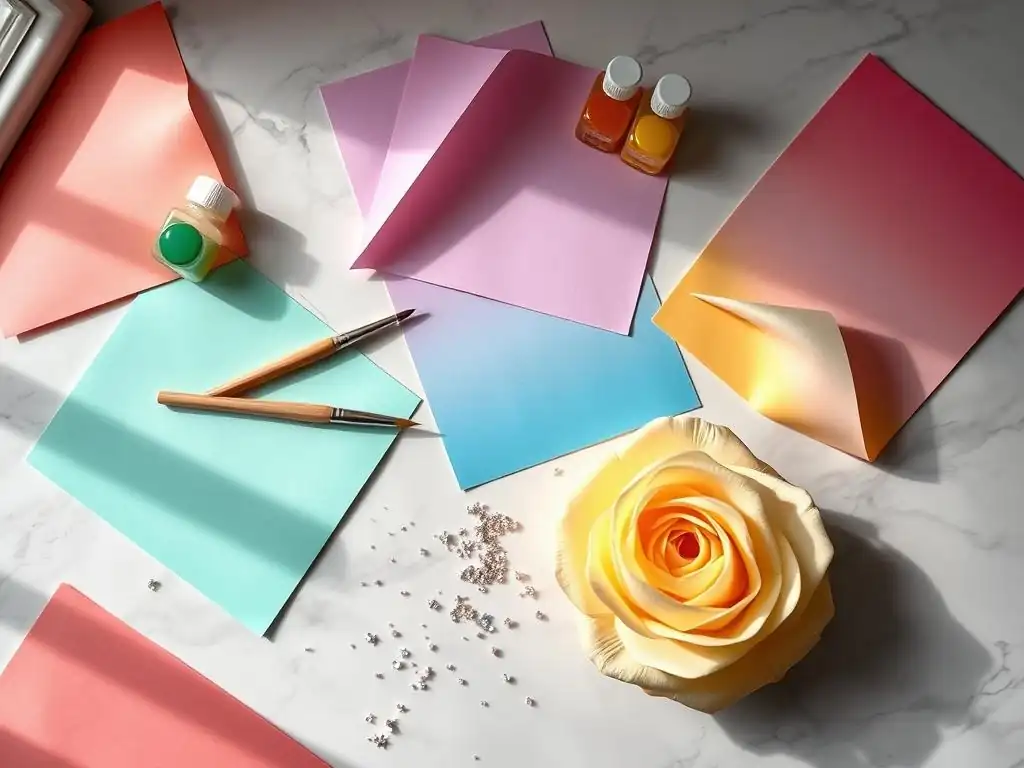
For coloring edible flower wafer paper, a range of edible colorants can be used. Edible dusts (petal dusts, luster dusts) are fantastic for dry brushing subtle colors, highlights, and realistic shading. Gel food colors diluted heavily with clear alcohol can be painted onto the paper. Edible airbrush colors are also effective for applying smooth, even coats or gradients. Always use colorants specifically labeled as "edible" and suitable for use on confectionery. Vibrant, realistic edible flower wafer paper relies heavily on skillful coloring techniques.
Other Useful Supplies: Tweezers, Paintbrushes, Floral Wire
Several other supplies will round out your edible flower wafer paper toolkit. Fine-tipped tweezers are invaluable for handling small, delicate petals and placing them precisely during assembly. A set of food-safe paintbrushes in various sizes (fine tips for detail, larger flat brushes for dusting) are essential for applying colorants and glue.
For creating flowers with stems or those that need to be inserted into a cake, food-safe floral wire (often taped with floral tape) is used. Ensure the wire is gauged appropriately for the size and weight of your flower. A small dish for your edible glue, a palette for mixing colors, and a non-stick mat or parchment paper to work on will also be very helpful as you delve into the art of making edible flower wafer paper.
Step-by-Step Guide: Making Basic Wafer Paper Flowers
Preparing Your Wafer Paper for Cutting
Before you begin cutting, ensure your edible flower wafer paper is in good condition – not too brittle and not too soft. If it feels very brittle, a very brief exposure to steam (holding it carefully a few feet above a steaming kettle for just a second or two) can add a tiny bit of flexibility, but be extremely cautious not to overdo it. Lay your paper flat on a clean, dry surface, like a non-stick mat or parchment paper.
You can draw or trace petal and leaf templates onto the wafer paper with a food-safe marker, or if you're comfortable, cut freehand. For consistency, especially when making many petals of the same size for edible flower wafer paper projects, using templates is highly recommended. Ensure your cutting tools (scissors, craft knife, or punches) are clean and sharp for crisp edges.
Cutting Basic Flower Shapes: Petals, Leaves, Centers
The next step for your edible flower wafer paper creation is cutting out the individual components. For a simple five-petal flower, you might cut a single shape with five rounded lobes. For more complex flowers like roses or peonies, you'll cut multiple individual petals in varying sizes – smaller ones for the center and progressively larger ones for the outer layers. A typical rose might require 20-40 petals ranging from 1cm to 5cm in length.
Leaves can be cut using leaf-shaped templates or freehand. Centers can be simple circles, fringed strips, or small cones, depending on the type of flower you're creating with your edible flower wafer paper. Cut carefully to avoid tearing the delicate paper. If using punches, press down firmly and quickly on a stable surface.
Shaping and Molding Wafer Paper Petals: Adding Dimension
This is where your edible flower wafer paper begins to come to life. Shaping adds crucial dimension and movement. Using a ball tool on a foam pad, gently run the tool along the edges of the petals to thin and ruffle them. You can also cup the center of the petal by pressing the ball tool into the middle. For creating a curve along the length of a petal, gently pull it over a rounded surface like a dowel or even your finger.
For more advanced shaping, a tiny amount of moisture is key. Dip a brush very lightly into clear alcohol or edible glue and paint a thin line or wash onto the part of the petal you want to shape. As the moisture slightly softens the edible flower wafer paper, gently mold it into the desired curve or cup shape. Hold the shape for a few seconds as the moisture evaporates (alcohol evaporates faster than glue), and the paper will set in its new form.
Assembling Your First Wafer Paper Flower: Gluing Techniques
Assembling your edible flower wafer paper involves layering the shaped petals and securing them with edible glue. Start with the center piece, whether it's a small cone or a tight cluster of small petals. Apply a tiny amount of edible glue to the base of the first layer of petals and attach them around the center, overlapping slightly.
Continue adding layers of petals, progressively using larger sizes, overlapping them and rotating the flower as you go to create a natural, full look. Apply glue sparingly – just a small dot or thin line is usually sufficient. Too much glue will make the edible flower wafer paper soggy and visible. Use tweezers to handle and place smaller petals. Allow layers to dry slightly before adding the next if necessary, especially for larger flowers.
Advanced Techniques for Realistic Edible Flowers
Creating Layered Wafer Paper Flowers: Depth and Texture
Creating layered edible flower wafer paper flowers is the key to achieving realism and depth. Instead of a single row of petals, you build the flower outwards from the center, adding multiple concentric layers. A typical rose might involve 5-7 layers of petals, each slightly larger than the last, with petal counts per layer varying from 3-5 in the center to 7-10 or more in the outer layers. This layering creates a fuller, more natural bloom.
Varying the shaping of petals within different layers also adds texture. Inner petals might be cupped tightly, middle petals gently curved, and outer petals more open and ruffled. Using different shades of color on different layers can further enhance the depth and realism of your edible flower wafer paper creations. Pay attention to how real flowers overlap and arrange their petals for inspiration.
Veining Wafer Paper Petals: Using Texture Mats and Tools
Adding veins is a crucial step for making your edible flower wafer paper leaves and petals look truly lifelike. Silicone veining mats designed for sugar flowers work perfectly with wafer paper. Place the cut and shaped petal or leaf onto the corresponding half of the mat, press the other half down firmly (or use a rolling pin), and the texture of the veins will be impressed into the wafer paper.
Alternatively, you can use veining tools – pointed or serrated tools designed for sugar work. Place the petal or leaf on a foam pad and gently press or drag the veining tool along the surface to create vein lines. Be careful not to press too hard, as this can tear the delicate edible flower wafer paper. Adding veins before shaping can sometimes be easier for leaves, while for petals, it's often done after initial shaping but before final assembly.
Dusting with Edible Powders: Achieving Realistic Color Gradients
Edible dusts, such as petal dusts and luster dusts, are indispensable for coloring edible flower wafer paper and achieving realistic gradients and shading. Petal dusts offer matte, natural colors, while luster dusts provide a subtle shimmer. Apply dusts dry with a soft paintbrush. Start with a small amount of dust on the brush and tap off the excess before applying to the paper.
Build up color gradually, focusing on areas where color would naturally concentrate on a real flower, such as the base of petals, edges, or veins. You can blend colors by applying different shades next to each other and gently brushing over the transition. For deeper colors or washes, mix petal dusts with a tiny amount of clear alcohol (like vodka) to create a paint-like consistency, which allows for more intense color application on your edible flower wafer paper.
Adding Stamens and Pistils: Completing Your Edible Flower
To complete your realistic edible flower wafer paper creation, adding a stamen and pistil can make a significant difference. Edible stamens can be purchased pre-made – they often resemble small threads with a bulbous tip and come in various colors. You can also make your own using floral wire dipped in edible glue and then into edible pollen dust or fine edible sprinkles.
Attach the stamens and pistil (if adding one) to the center of your flower before adding the final layers of petals. Use a tiny amount of edible glue to secure them. For some flowers, like poppies or lilies, prominent stamens are a defining feature and essential for realism. Including these details elevates your edible flower wafer paper art from simple shapes to botanical representations.
Coloring Wafer Paper for Stunning Edible Flowers
Choosing the Right Edible Colorants: Gel, Powder, Liquid
Selecting the appropriate edible colorant is key to achieving the desired look for your edible flower wafer paper.
- Edible Dusts (Petal Dusts, Luster Dusts, Highlighter Dusts): These powders are excellent for dry brushing, shading, and adding subtle or metallic finishes. They are applied directly with a brush and are ideal for creating soft gradients and highlights. Petal dusts give a matte finish, perfect for naturalistic flowers.
- Gel Food Colors: Highly concentrated, gel colors need to be diluted significantly with clear alcohol (like vodka or edible alcohol) when used on wafer paper. Applying them directly or with too much water will cause the paper to warp or dissolve. Diluted gels can be painted or airbrushed.
- Liquid Food Colors: Generally less concentrated than gels and often water-based. Water-based liquid colors are not recommended for direct application to large areas of wafer paper as they can cause warping and disintegration. They are best used sparingly, if at all, and primarily for mixing with other mediums or in very specific, controlled techniques.
For most detailed work and vibrant, non-warped results on edible flower wafer paper, edible dusts and alcohol-diluted gel colors are the preferred choices.
Coloring Techniques: Painting, Airbrushing, and Dipping
Several techniques can be employed to color edible flower wafer paper:
- Dry Dusting: Using a soft brush, apply edible dusts directly to shaped or flat wafer paper. This is perfect for shading, adding blush to petals, or creating highlights. It's a controlled method that allows for gradual color build-up.
- Painting with Alcohol-Based Colors: Dilute gel colors or petal dusts with clear alcohol. Use fine brushes to paint details, veins, or washes onto the paper. The alcohol evaporates quickly, minimizing moisture damage. This allows for more intense, localized color than dry dusting.
- Airbrushing: Using an airbrush with edible airbrush colors (often alcohol-based or specially formulated) allows for smooth, even coverage and gradients. This is great for base colors or creating soft transitions on larger edible flower wafer paper pieces.
- Dipping (with caution): For solid colors, very quickly dipping a piece of wafer paper into a mixture of alcohol and colorant is possible, but requires speed and practice to avoid saturation. Alternatively, some decorators use a very diluted alcohol/color mix and quickly brush it over the entire piece.
Each technique offers different effects, and combining them often yields the most realistic results on your edible flower wafer paper.
Creating Custom Colors: Blending Edible Colorants
Achieving the perfect shade for your edible flower wafer paper often requires blending colorants. Just like painting on a canvas, you can mix different edible dusts together on a palette to create custom shades for dry brushing. Start with a base color and gradually mix in small amounts of other colors until you reach the desired hue.
When painting with alcohol-based colors, mix diluted gel colors or dusts on a palette before applying them to the wafer paper. This allows you to test the color intensity and shade. Keep a small piece of scrap wafer paper handy to test your custom color mixes before applying them to your final edible flower wafer paper petals. Remember to mix enough of a custom color if you need it for multiple petals or flowers, as recreating an exact shade can be tricky.
Sealing Your Colored Wafer Paper: Preventing Color Bleeding
While edible dusts generally stay in place, some colorants, especially alcohol-based paints, can be susceptible to bleeding, particularly if exposed to humidity or if layers are stacked before being fully dry. A common technique to help seal the color and add a very slight sheen is to apply a thin coat of edible glaze or confectioners' glaze spray.
However, applying any liquid sealant to edible flower wafer paper must be done extremely carefully and thinly to avoid warping or dissolving the paper. A light mist from an airbrush with edible glaze or a very quick, thin brush application is usually sufficient. Ensure the colored paper is completely dry before attempting to seal it. Proper storage in a dry environment after coloring and assembly is also key to preventing color bleeding and maintaining the integrity of your edible flower wafer paper creations.
Troubleshooting Common Wafer Paper Flower Problems
Wafer Paper Cracking or Tearing: Prevention and Solutions
Cracking and tearing are common frustrations when working with edible flower wafer paper, especially for beginners. The primary cause is usually the paper being too dry and brittle, or bending it too sharply without sufficient moisture. To prevent this, ensure your wafer paper is stored correctly in a stable, dry environment. If it feels brittle, try the brief steam exposure technique described earlier to add a tiny bit of flexibility before shaping.
When shaping, use soft tools on a foam pad and apply pressure gently. For sharp bends or tight curves, apply a minimal amount of alcohol or edible glue along the line you want to bend to soften the paper momentarily. If a small tear occurs during shaping or assembly, a tiny dot of edible glue can sometimes mend it, especially if it's on an area that will be covered by another petal. Practice with scrap pieces of edible flower wafer paper to get a feel for how much it can tolerate.
Edible Glue Issues: Drying Time and Adhesion Problems
Problems with edible glue usually involve either it not sticking or making the edible flower wafer paper too wet. If your glue isn't sticking, it might be too thin, or you might not be using enough. Ensure you're applying a small but sufficient amount where the pieces overlap. Press and hold the pieces together for a few seconds to allow the glue to begin setting.
If the glue is making the paper soggy or taking too long to dry, you are likely using too much glue or the glue is too thick (as thick glue contains more water). Dilute your edible glue slightly if it seems too viscous. Apply glue with a fine brush or toothpick for precision.
Drying time depends on humidity and the amount of glue; it can range from a few minutes to up to an hour for larger, more glued areas. Using alcohol as a "glue" for very small attachments can significantly speed up drying. Always allow components to dry sufficiently before moving or further assembling your edible flower wafer paper creations.
Color Bleeding or Fading: Maintaining Vibrant Colors
Color bleeding on edible flower wafer paper is often caused by excess moisture – either from the environment (humidity), from wet glue, or from using water-based colorants incorrectly. To prevent bleeding, work in a low-humidity environment if possible. Ensure edible glue is applied sparingly and is not excessively wet. Use alcohol-based colorants or dry dusts for painting and shading. If you use water-based colors for specific techniques (like mixing with petal dusts), ensure they are applied very thinly and allowed to dry completely.
Fading can occur if colored edible flower wafer paper is exposed to direct sunlight for extended periods. Store finished decorations away from light. Some vibrant food colors, particularly reds and blues, are inherently less light-stable than others. Using high-quality edible colorants specifically designed for confectionery can also help maintain vibrancy in your edible flower wafer paper art.
Addressing Humidity and Storage Concerns
Humidity is the nemesis of edible flower wafer paper. High humidity makes the paper soft, floppy, and sticky, making it difficult to shape and increasing the risk of warping and color bleeding. Low humidity makes it brittle and prone to cracking. The best way to address this is through proper storage in an airtight container with a desiccant pack.
When working in a humid environment, try to work quickly and in a climate-controlled room if possible. Minimize handling of the paper. Allow shaped and colored pieces to dry fully in a dry area before assembly. Once assembled, store finished edible flower wafer paper decorations in airtight containers away from any moisture source until ready to use. Avoid placing them directly onto very wet frosting or surfaces until just before display.
Incorporating Edible Wafer Paper Flowers into Your Baked Goods
Attaching Wafer Paper Flowers to Cakes and Cupcakes
Attaching your beautiful edible flower wafer paper creations securely to baked goods requires a bit of care. For cakes covered in buttercream or ganache, the slight tackiness of the frosting is often enough to hold lightweight wafer paper flowers in place. Apply a tiny dab of buttercream or edible glue to the base of the flower or the points of contact and gently press it onto the cake surface.
For cakes covered in fondant or gumpaste, edible glue or royal icing works well. Apply a small amount to the back of the flower and press it onto the dry sugar surface. For larger or heavier (though wafer paper is light, arrangements can add weight) edible flower wafer paper pieces, you might need to insert floral wire (taped and food-safe) into the cake for support, or create small wells in the frosting/fondant for the flower base to sit in. For cupcakes, a swirl of frosting is usually sufficient to hold a single bloom.
Using Wafer Paper Flowers in Sugar Work Displays
Edible flower wafer paper isn't limited to just cakes. They can be stunning additions to sugar work displays, adding height, color, and delicate texture. Imagine wafer paper blossoms incorporated into sugar paste structures, wired into bouquets for cake toppers, or used to decorate edible centerpieces. Their lightweight nature makes them ideal for adding dimension without causing delicate sugar structures to collapse.
When incorporating them into larger sugar work pieces, you can attach them using edible glue, royal icing, or by inserting wired flowers into pre-made holes or supports in the sugar structure. The translucent quality of some edible flower wafer paper types can create beautiful effects when layered over colored sugar paste elements in a display.
Creating Edible Flower Bouquets: Centerpieces and Decorations
Wafer paper flowers are perfect for creating entirely edible bouquets or floral arrangements that can serve as cake toppers, standalone centerpieces, or decorative elements. By wiring individual flowers and leaves using food-safe floral wire and tape, you can assemble them just like real floral arrangements.
These edible flower wafer paper bouquets can be inserted into a cake (using a food-safe barrier like a posy pick or straw), placed in an edible container made of sugar paste, or arranged on a board as part of a larger display. Their lightness means even large bouquets are manageable. Consider creating a variety of flower types and sizes using edible flower wafer paper for a diverse and realistic-looking arrangement.
Designing Floral Arrangements for Different Baking Projects
The design of your edible flower wafer paper arrangements should complement the specific baking project. For a formal wedding cake, classic, realistic roses, peonies, and perhaps some delicate filler flowers like hydrangeas or baby's breath might be appropriate. A fun birthday cake might feature bright, whimsical fantasy flowers or oversized blooms.
Consider the scale of the baked good – larger cakes can handle larger, more dramatic edible flower wafer paper arrangements, while cupcakes or small tarts require smaller, simpler blossoms. Think about color palettes that match the cake design or theme. Practice arranging your wafer paper flowers on a practice board or a cake dummy before committing them to your final baked masterpiece to ensure the composition is pleasing.
Wafer Paper Flower Inspiration: Design Ideas and Examples
Classic Flower Designs: Roses, Peonies, and Hydrangeas
Some of the most popular and rewarding flowers to create with edible flower wafer paper are classics like roses, peonies, and hydrangeas.
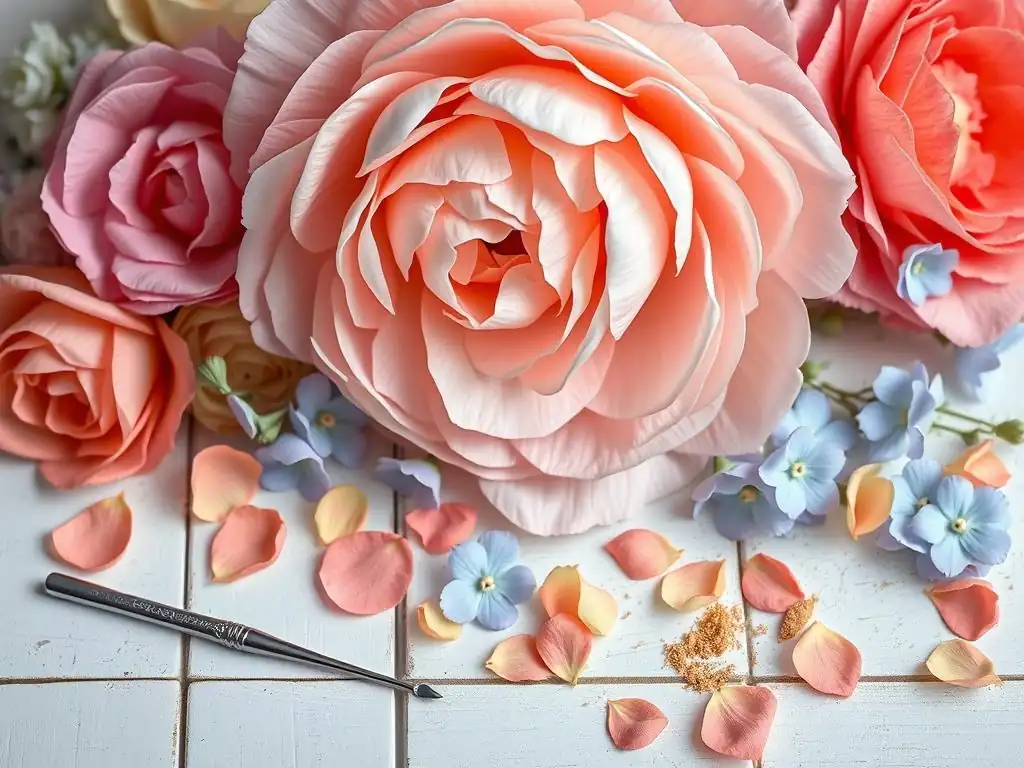
- Wafer Paper Roses: These are built layer by layer, starting with a tight bud center and progressively larger, shaped petals added around it. A full, open rose can use 30-40 petals. Techniques like ruffling edges and cupping petals are essential.
- Wafer Paper Peonies: Known for their lush, full appearance, wafer paper peonies involve many layers of ruffled and crinkled petals, often with a detailed stamen center. Using different shades of pink, white, or coral edible dusts brings them to life.
- Wafer Paper Hydrangeas: These are made from many small, simple four-petal florets. Cutting these small shapes from edible flower wafer paper, shaping them slightly, and then grouping dozens together creates a stunning, voluminous effect perfect for filling in arrangements or creating borders.
Mastering these classic forms provides a strong foundation for creating a wide variety of edible flower wafer paper designs.
Modern Wafer Paper Flower Arrangements: Unique and Contemporary Styles
Edible flower wafer paper isn't just for traditional blooms. It's incredibly versatile for modern, contemporary designs. Think abstract floral shapes, geometric patterns incorporating floral elements, or minimalist arrangements featuring stylized blossoms. Oversized, single-petal flowers with dramatic ruffles or sharp, architectural folds are popular in modern cake design.
Using bold, unconventional colors, metallics, or even incorporating printed wafer paper elements can push the boundaries of edible flower wafer paper art. Consider creating fantasy flowers that don't exist in nature, allowing your creativity to run wild. These modern approaches often focus on form, texture, and striking visual impact, showcasing the unique properties of edible flower wafer paper in new ways.
Seasonal Edible Flower Designs: Spring, Summer, Autumn, and Winter
Aligning your edible flower wafer paper designs with the seasons adds a thoughtful touch to your baked goods.
- Spring: Delicate blossoms like cherry blossoms, daffodils, tulips, and small filler flowers in pastel shades.
- Summer: Vibrant, bold blooms such as sunflowers, poppies, large roses, and dahlias in bright yellows, reds, and oranges.
- Autumn: Richly colored flowers like chrysanthemums, dahlias, and leaves in warm tones of red, orange, yellow, and brown, perhaps with metallic accents.
- Winter: White or icy-toned flowers, perhaps stylized poinsettias, white roses, or frosty branches made from wafer paper, sometimes dusted with edible glitter for a touch of sparkle.
Creating seasonal edible flower wafer paper allows you to tailor your decorations perfectly to holidays, events, or just the time of year.
Customizing Wafer Paper Flowers for Special Occasions
One of the great advantages of working with edible flower wafer paper is the ability to completely customize your floral decorations for any special occasion. For weddings, you can match the flowers to the bridal bouquet, replicate specific sentimental blooms, or use the wedding colors. For birthdays, create flowers in the recipient's favorite color or style.
Corporate events can feature edible flower wafer paper in company colors or stylized to match a brand identity. Baby showers might feature soft, delicate flowers in pastel shades. The ability to precisely control the color, size, and type of flower means your edible flower wafer paper creations can be perfectly tailored to make any event uniquely special and delicious.
Tips for Success: Mastering Edible Flower Wafer Paper Art
Practice and Patience: Honing Your Wafer Paper Skills
Mastering the art of creating edible flower wafer paper takes practice. Your first attempts might not be perfect, and that's okay! Start with simple shapes and basic flowers before moving on to more complex designs. Don't get discouraged by initial cracking, tearing, or gluing mishaps. Each attempt teaches you more about how the material behaves.
Set aside dedicated time to experiment and hone your techniques. Try making multiple versions of the same petal or flower to refine your shaping and assembly process. Patience is key – allow glue to dry, build layers carefully, and take your time with delicate steps. The more you practice working with edible flower wafer paper, the more intuitive it will become, and the better your results will be.
Experimenting with Different Techniques and Designs
Once you've mastered the basics, don't be afraid to experiment. Try different cutting tools, explore various shaping methods, and play with different colorant types and techniques. Can you create texture without a veining mat? Can you achieve a watercolor effect with diluted colors?
Try designing new flower shapes or combining elements from different tutorials. Experiment with using different thicknesses of edible flower wafer paper if available. Pushing your boundaries through experimentation is how you develop your unique style and discover new possibilities with this versatile medium.
Keeping Up-to-Date with New Wafer Paper Products and Tools
The world of edible decorations is constantly evolving, with new products and tools regularly becoming available. Stay informed about new types of edible flower wafer paper that might offer different properties (like extra flexibility), new edible colorant formulations, or innovative tools designed specifically for working with wafer paper.
Follow reputable cake decorators and suppliers online, attend workshops (in person or virtual), and read baking blogs and magazines. Being aware of the latest advancements can introduce you to techniques or materials that can significantly improve your edible flower wafer paper creations and make the process easier or allow for new effects.
Cleaning and Maintaining Your Wafer Paper Tools
Properly cleaning and maintaining your tools is essential for hygiene and for ensuring they perform correctly for your edible flower wafer paper projects. Clean scissors, knives, and punches immediately after use to prevent any residue from building up, which could affect future cuts. Use warm, soapy water and dry thoroughly.
Silicone mats and shaping tools should also be cleaned gently with soap and water. Keep paintbrushes dedicated solely to food use and clean them according to the type of colorant used (water or alcohol-based). Store tools cleanly and organized. Well-maintained tools make working with delicate edible flower wafer paper much smoother and contribute to a better final product.
Conclusion: Unleash Your Creativity with Edible Wafer Paper Flowers
The Versatility of Edible Wafer Paper in Baking Decoration
As we've explored, edible flower wafer paper is an incredibly versatile medium for decorating baked goods. Its unique properties – thinness, lightness, and ability to be shaped and colored – allow for the creation of delicate, realistic, and stunning floral decorations that are difficult to achieve with other edible materials. From classic roses and peonies to modern abstract designs, wafer paper empowers bakers to add intricate, beautiful, and fully edible flowers to their cakes, cupcakes, cookies, and sugar displays.
Whether you're aiming for botanical accuracy or whimsical fantasy, edible flower wafer paper adapts to your vision. It's a medium that rewards patience and practice, offering endless possibilities for creative expression in the world of edible art. Embrace its nuances, learn its secrets, and you'll find yourself creating breathtaking edible flower wafer paper pieces that elevate your baking to new heights.
Continuing Your Wafer Paper Flower Journey: Resources and Inspiration
Your journey with edible flower wafer paper is just beginning! Continue to explore, experiment, and learn. Seek out online tutorials and videos from experienced wafer paper artists – seeing techniques demonstrated can be incredibly helpful. Look at real flowers and botanical illustrations for inspiration on shapes, colors, and arrangements.
Join online baking communities or forums where you can share your edible flower wafer paper creations, ask questions, and learn from others. Don't be afraid to try new flower types or challenge yourself with more complex designs. With practice and a willingness to experiment, you'll find that working with edible flower wafer paper becomes not just a skill, but a truly enjoyable artistic process that adds extraordinary beauty to your baked goods.
Frequently Asked Questions
How easy is it to work with edible flower wafer paper for beginners?
Wafer paper is surprisingly forgiving! It's easy to cut and shape, making it beginner-friendly for creating simple flower designs. Just be mindful of moisture as it can dissolve.
What types of edible flowers can I create using wafer paper?
You can create a wide variety! Popular choices include roses, peonies, and daisies. The thin and pliable nature of wafer paper allows for intricate petal details.
What are the best methods for coloring edible flower wafer paper?
Using edible food coloring pens or airbrushing are popular choices. Diluted gel food coloring applied with a fine brush also works well, ensuring vibrant and even color distribution.
How do I attach wafer paper flowers to my baked goods?
A small dab of edible glue or royal icing works perfectly. Ensure the surface is dry and lightly dampened for better adhesion, creating a secure and beautiful finish.
How should I store edible flower wafer paper creations to maintain their quality?
Store them in an airtight container at room temperature, away from humidity and direct sunlight. This will prevent them from becoming brittle or sticky, preserving their delicate beauty.
Final Reflection: The Enduring Bloom of Edible Wafer Paper Art
The delicate artistry of creating edible wafer paper flowers isn't just a fleeting trend; it's a blossoming testament to our enduring desire to transform the ordinary into the extraordinary. This intricate craft, detailed throughout this article, offers a unique avenue for culinary creativity, adding a touch of elegance and whimsy to cakes, cookies, and other confections. The accessibility of wafer paper, coupled with the seemingly endless possibilities for design, makes it a medium ripe for exploration by both seasoned bakers and enthusiastic beginners.
The impact of edible flower artistry extends beyond the purely aesthetic. It speaks to a deeper human need for beauty and detail, a desire to elevate the everyday experience through thoughtful creation. The details are not the details. They make the design.
– Charles Eames. This quote perfectly encapsulates the essence of working with wafer paper; the meticulous shaping, coloring, and assembling of each petal contributes to a final product that is far greater than the sum of its parts. It's a process that fosters patience, precision, and a profound appreciation for the delicate beauty of nature.
Now, it's your turn to cultivate your own creative garden. Consider the techniques and inspiration shared within these pages, and let them spark your own unique edible flower designs. Don't be afraid to experiment, to push boundaries, and to let your creativity bloom. The world of edible wafer paper art awaits – embrace the challenge, and watch your creations flourish.
Unleash Your Inner Floral Artist: Craft Stunning Edible Flowers!
Thanks for joining us on this journey into the world of wafer paper flowers! We hope you've discovered the beauty and surprising ease of creating these delicate edible masterpieces. Ready to take your skills to the next level?
- Craft your dream flower: Choose your favorite bloom from the article and try recreating it. We know you can do it! Take a photo and share your creation with us – we'd love to see it.
- Explore new techniques: Experiment with different wafer paper colors and textures. The possibilities are endless! Think about creating a whole bouquet.
- Share your creations: Don't be shy! Show off your beautiful edible flowers on social media and inspire other bakers. Tag us!
What stunning floral designs will you create next?