
Basic Sourdough Recipe: Avoiding Common Mistakes Informative Guide

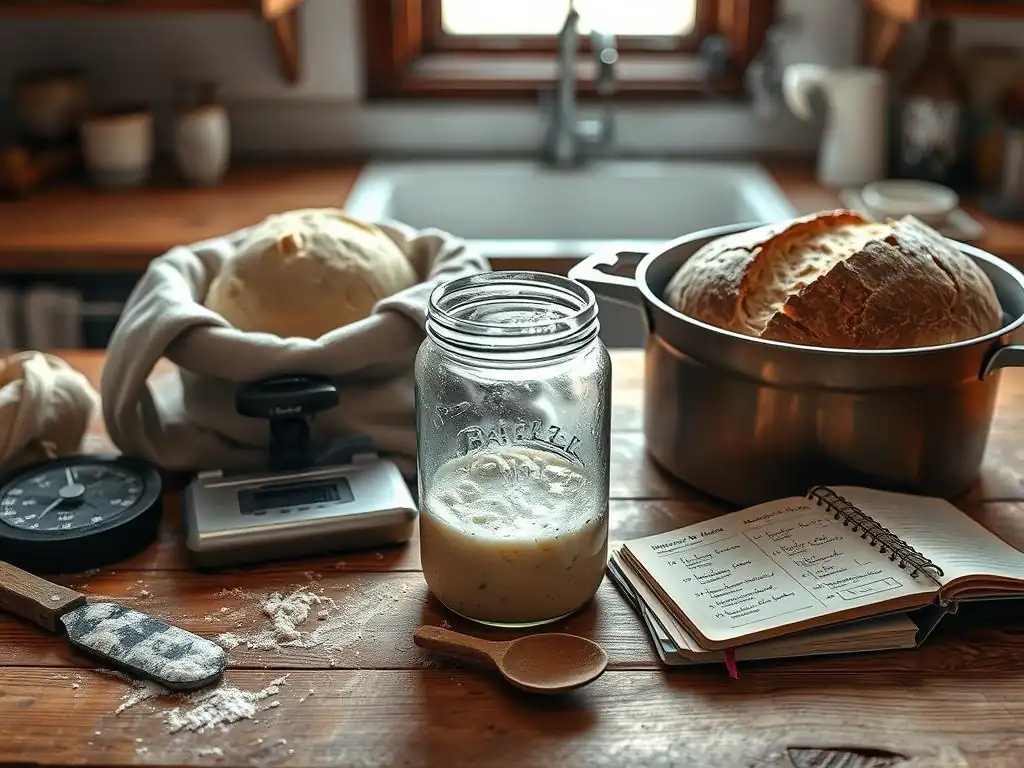
Welcome to BakeWithEase, where baking becomes a delightful adventure! Ever wrestled with a Sourdough starter that just won't cooperate? Our detailed sourdough starter troubleshooting guide is here to help you confidently navigate the quirks of this ancient baking art. Discover the secrets to a thriving starter and bake like a pro! Eager to avoid common pitfalls and unlock the perfect loaf? Let's get baking!
- Mastering Sourdough: A Comprehensive Guide to Baking Success
- Introduction to Sourdough Baking
- The Sourdough Starter: Cultivating Your Leaven
- Troubleshooting Your Sourdough Starter
-
The Basic Sourdough Recipe: From Starter to Loaf
- Ingredients: Flour, Water, Salt, and Starter
- Autolyse: Hydrating the Flour for Optimal Dough Development
- Mixing and Kneading: Developing Gluten Strength
- Bulk Fermentation: The First Rise for Flavor Development
- Shaping: Creating a Taut Dough Structure
- Proofing: The Final Rise Before Baking
- Baking: Achieving a Golden Crust and Open Crumb
- Common Sourdough Mistakes and Their Solutions
- Tips and Tricks for Consistent Sourdough Success
- Advanced Sourdough Techniques
- Conclusion: Embracing the Art of Sourdough
-
Frequently Asked Questions
- How do I know if my sourdough starter is active enough to bake with?
- What are some common reasons why my sourdough starter isn't rising?
- My sourdough bread is too dense. What could be the cause?
- What's the best type of flour to use for feeding my sourdough starter?
- How often should I feed my sourdough starter?
- Final Reflection: The Enduring Magic of Sourdough, One Loaf at a Time
- Unleash Your Inner Baker: Craft the Perfect Sourdough Loaf!
Mastering Sourdough: A Comprehensive Guide to Baking Success
Introduction to Sourdough Baking
The Allure of Sourdough: Flavor, Health, and Tradition
Sourdough bread holds a special place in the world of baking, renowned for its distinctive tangy flavor, chewy texture, and beautiful golden crust. Unlike breads leavened with commercial yeast, sourdough relies on a natural fermentation process driven by wild yeast and beneficial bacteria present in the flour and air. This unique leavening not only creates incredible texture and rise but also imparts complex flavors that develop over hours, or even days, of fermentation. Baking with sourdough is a rewarding journey, connecting you to ancient baking traditions and the simple magic of transforming flour and water into a delicious loaf.
Beyond its captivating taste and texture, sourdough is often perceived to have potential health benefits. The long fermentation process can help break down complex carbohydrates and gluten, potentially making the bread easier to digest for some individuals. Additionally, the presence of lactic acid bacteria can enhance the bioavailability of certain nutrients. While not a cure-all, choosing sourdough can be a mindful step towards incorporating naturally fermented foods into your diet, continuing a tradition practiced across cultures for centuries.
Understanding Sourdough: A Fermented Bread
At its core, sourdough is a fermented bread, meaning it utilizes a living culture of microorganisms to leaven the dough. This culture, known as a sourdough starter, is a symbiotic community of wild yeasts and lactic acid bacteria (primarily Lactobacillus species). The wild yeasts consume sugars in the flour, producing carbon dioxide gas which causes the bread to rise, much like commercial yeast.
Simultaneously, the lactic acid bacteria consume sugars and produce lactic and acetic acids. These acids contribute significantly to the signature tangy flavor of sourdough and also help preserve the starter and the dough. The balance between yeast activity and bacterial acid production is key to a healthy starter and a flavorful loaf. Understanding this dynamic process is fundamental to successful sourdough baking.
The Sourdough Starter: Cultivating Your Leaven
Building a Starter: From Flour and Water to Active Culture
Creating your own sourdough starter is a simple yet fascinating process that requires just two ingredients: flour and water. Typically, you start by mixing equal parts by weight of unbleached flour (like all-purpose or whole wheat) and non-chlorinated water in a jar. For example, you might start with 50 grams of flour and 50 grams of water. This initial mixture provides the food and hydration necessary for the wild microorganisms present in the flour and environment to begin colonizing and multiplying. Over the first few days, you might see little activity, or perhaps just a few small bubbles.
The crucial step in building a starter is the daily feeding process. Each day, or sometimes twice a day in warmer conditions, you discard a portion of the starter (this manages volume and concentrates the microbial activity) and feed the remainder with fresh flour and water, again usually in equal parts.
For instance, you might discard all but 50 grams of the old starter and feed it with 50 grams of fresh flour and 50 grams of water. Within about 7 to 14 days, depending on temperature and conditions, your mixture should transform into a bubbly, airy, and pleasantly tangy culture that reliably doubles or triples in size after feeding.
Feeding and Maintaining: Keeping Your Starter Thriving
Once your starter is active and mature, maintaining it becomes a routine. The frequency of feeding depends largely on where you store it. A starter kept at room temperature (around 70-75°F or 21-24°C) is very active and typically needs to be fed daily, sometimes even twice a day if it's particularly vigorous or the temperature is warmer. A common feeding ratio is 1:1:1 (starter:water:flour by weight), but ratios like 1:2:2 or even 1:5:5 can be used to slow down fermentation if you need to feed less often or plan to store it longer.
For less frequent baking, storing your starter in the refrigerator is an excellent option. In the cooler environment (around 38-40°F or 3-4°C), microbial activity slows significantly, and you only need to feed it about once a week. Before baking, you'll need to revive it by feeding it at room temperature one or more times until it becomes active and bubbly again, typically doubling within 4-8 hours depending on the temperature and feeding ratio. A healthy, well-maintained starter should smell fresh and tangy, not overwhelmingly acidic or off-putting.
Troubleshooting Your Sourdough Starter

Weak Starter: Signs and Revival Techniques
A common challenge when starting or maintaining a culture is dealing with a weak sourdough starter. Signs that your starter is struggling include minimal or no rise after feeding, a thin or watery consistency that doesn't thicken much, very few bubbles, and a lack of that characteristic tangy aroma, sometimes replaced by an unpleasant, flat smell. Several factors can contribute to a weak starter, such as infrequent feeding, keeping it in too cold an environment, using heavily chlorinated water, or using bleached or low-quality flour that lacks sufficient microbial activity and nutrients.
If you're facing a weak sourdough starter, this troubleshooting guide offers several revival techniques. First, try feeding it more frequently, perhaps every 12 hours, to give the microbes a consistent food source. Using warm water, ideally around 75-80°F (24-27°C), can also help stimulate activity.
Consider switching to a different type of flour for a few feedings; organic rye or whole wheat flour often contain more diverse and active microbes that can give your starter a boost. Always use filtered or non-chlorinated water, as chlorine can inhibit microbial growth. Consistent feeding and a slightly warmer environment are usually the best ways to nurse a weak starter back to health.
Identifying and Addressing Mold Contamination
Identifying mold is a critical step in troubleshooting sourdough starter health, as mold usually means the end of that culture. Mold typically appears as fuzzy patches on the surface of the starter, often in shades of green, black, pink, or even orange or blue. Do not confuse mold with "hooch," which is a dark liquid that can separate on top of a hungry starter – hooch is normal and can be stirred in or poured off. Mold, however, is a sign of unwanted fungal growth.
Unfortunately, if you see mold on your sourdough starter, the safest course of action is to discard the entire culture and start fresh. While you might only see mold on the surface, mold spores can permeate the entire jar, and consuming them can be harmful. Attempting to salvage a moldy starter is generally not recommended by experts. This is a clear instance where your sourdough starter troubleshooting guide directs you to discard and begin the process of cultivating a new, healthy starter from scratch, ensuring your future bakes are safe and delicious.
Off-Putting Odors: Causes and Corrective Actions
A healthy sourdough starter should smell pleasantly tangy, yeasty, or slightly alcoholic (like beer or wine). However, sometimes a starter can develop off-putting odors, which are key indicators when troubleshooting sourdough starter problems. A very strong smell of acetone or nail polish remover is common and usually indicates that the starter is very hungry and has produced a lot of acetic acid as it ran out of food. A cheesy, rotten, or sewage-like smell, on the other hand, is a red flag for potential contamination or an imbalance that is difficult to correct.
Corrective actions depend on the smell. For the acetone smell, this is a sign your starter needs more frequent feeding or a larger feeding ratio. Try discarding a larger portion before feeding or switch to a 1:2:2 or 1:3:3 feeding ratio to provide more food relative to the starter volume.
If the smell persists or is very strong, giving it a few feedings every 12 hours can help. For cheesy or rotten smells, it's often best to discard the starter entirely, as this can indicate the presence of undesirable bacteria. A good sourdough starter troubleshooting guide emphasizes trusting your nose – if it smells wrong, it likely is.
Texture and Consistency Problems: Diagnosis and Solutions
The texture and consistency of your sourdough starter can also signal issues, providing important clues for sourdough starter troubleshooting. A starter that is consistently too thin and runny after feeding, even at its peak, might indicate that it's overhydrated or that the flour isn't absorbing water well. Conversely, a starter that is too thick and pasty, even hours after feeding, might be underhydrated or not developing properly. Consistency also changes over time; a starter will be thicker right after feeding and thinner as the microbes break down the flour.
Diagnosing texture issues often involves looking at your feeding ratios and measurements. If your starter is too thin, try slightly increasing the amount of flour or decreasing the water in your feeding ratio. If it's too thick, add a little more water.
Using a kitchen scale for precise measurements (rather than volume cups) is highly recommended for consistent results. Remember that different types of flour absorb water differently; whole wheat or rye flour will typically require more water than white bread flour to achieve a similar consistency. Adjusting your feeding strategy based on the desired consistency is a practical solution detailed in any good sourdough starter troubleshooting guide.
The Basic Sourdough Recipe: From Starter to Loaf
Ingredients: Flour, Water, Salt, and Starter
Creating a basic sourdough loaf requires just four fundamental ingredients, each playing a crucial role. The flour provides the structure (gluten) and the food for the starter. Bread flour, with its higher protein content (typically 12-14%), is excellent for developing strong gluten networks needed for a good rise and open crumb. Water hydrates the flour, activates the gluten, and allows the yeast and bacteria to work. Using filtered or non-chlorinated water is best, as chlorine can inhibit microbial activity.
Salt is essential for flavor, controlling fermentation speed, and strengthening the gluten structure. Non-iodized salt, like sea salt or kosher salt, is preferred. Finally, an active, bubbly sourdough starter is your leavening agent, providing the wild yeast and bacteria necessary for the dough to rise and develop its signature flavor. A typical ratio for a standard loaf might be around 500 grams of strong bread flour, 375 grams of water (75% hydration), 10 grams of salt (2%), and 100 grams of active starter (20%).
Autolyse: Hydrating the Flour for Optimal Dough Development
The autolyse step is a simple yet powerful technique that significantly improves dough handling and gluten development. It involves mixing just the flour and water from your recipe until no dry bits remain, then letting this shaggy mixture rest for a period, typically from 30 minutes to an hour, but sometimes longer. During this resting phase, the flour fully hydrates, and enzymes naturally present in the flour begin to break down proteins, starting the gluten development process without any mechanical kneading.
The benefits of autolyse are numerous. The dough becomes noticeably smoother, more extensible, and less sticky, making subsequent mixing and kneading much easier. It allows for better gluten development with less effort, potentially leading to a more open crumb structure in the final loaf. This initial hydration step sets the stage for the rest of the bread-making process, ensuring your flour is optimally prepared to become a beautiful sourdough loaf.
Mixing and Kneading: Developing Gluten Strength
After the autolyse period, the active sourdough starter and salt are added to the dough. The starter is usually gently mixed in first to ensure it's evenly distributed, followed by the salt. Incorporating the salt can make the dough feel tighter initially, as salt strengthens the gluten network. The goal of this stage is to fully integrate the starter and salt and further develop the gluten structure to give the dough strength and elasticity.
Instead of traditional, continuous kneading, many sourdough bakers use a series of "stretch and folds" or "coil folds" over a period of time, typically 1.5 to 2.5 hours, performing a set every 30-45 minutes. These gentle techniques help build gluten strength and tension without overworking the dough. You can test for sufficient gluten development using the "windowpane test": gently stretch a small piece of dough; if it can be stretched thin enough to see light through it without tearing, the gluten is well developed.
Bulk Fermentation: The First Rise for Flavor Development
Bulk fermentation, also known as the first rise, is perhaps the most critical stage for developing the characteristic flavor and structure of sourdough bread. This is the period after initial mixing and kneading (or stretch and folds) where the dough is left to rise as a single mass. The duration of bulk fermentation varies significantly depending on the ambient temperature and the activity of your starter, typically ranging from 4 to 8 hours at average room temperature (around 70-75°F or 21-24°C).
During bulk fermentation, the yeast produces carbon dioxide, causing the dough to increase in volume (aiming for a 50-100% increase), while the bacteria produce organic acids, contributing to the sourdough tang. The dough should feel airy and bubbly by the end of this stage. A good indicator that bulk fermentation is complete is the "poke test": gently poke the dough with a wet finger; if the indentation slowly springs back only partially, it's likely ready for shaping.
Shaping: Creating a Taut Dough Structure

Shaping is the process of forming the bulk-fermented dough into its final desired form, such as a boule (round) or a batard (oval). The primary goal of shaping is to create tension on the surface of the dough. This surface tension acts like a skin, providing structure that helps the loaf hold its shape during proofing and promotes a good "oven spring" (the final burst of rising in the oven).
The shaping process usually involves gently handling the dough to avoid degassing it too much while folding and tucking it to create a smooth, taut surface. After shaping, the dough is typically placed seam-side up in a proofing basket (banneton) that has been well-dusted with flour (rice flour works well to prevent sticking). The banneton supports the dough and helps it maintain its shape during the final proof.
Proofing: The Final Rise Before Baking
Proofing, or the final rise, is the period after shaping and before baking where the dough rests and continues to ferment. This stage is crucial for achieving the desired texture and rise in the finished loaf. There are two main methods for proofing: warm proofing at room temperature (typically 1-4 hours) or cold proofing in the refrigerator (usually 8-16 hours or even longer). Cold proofing is very popular as it slows down fermentation, allowing for deeper flavor development and making the dough easier to handle and score.
Knowing when your dough is perfectly proofed is key to avoiding common sourdough mistakes. The poke test is again your friend here. Gently poke the side of the dough: if the indentation slowly springs back most of the way, it's likely under-proofed. If it springs back only slightly and leaves a small indentation, it's correctly proofed and ready to bake. If the indentation remains completely, the dough is over-proofed and may collapse.
Baking: Achieving a Golden Crust and Open Crumb
Baking is where the magic happens, transforming the proofed dough into a beautiful loaf with a golden crust and airy interior. For best results at home, baking in a preheated Dutch oven is highly recommended. The sealed environment of the Dutch oven traps steam released by the dough, which keeps the crust soft initially, allowing the loaf to expand fully (oven spring) before the crust sets. Preheat your oven and Dutch oven to a high temperature, typically between 450°F and 500°F (230-260°C), for at least 30-60 minutes to ensure everything is scorching hot.
Carefully transfer the proofed dough into the hot Dutch oven (often after scoring the top). Bake with the lid on for the first part of the bake, usually around 20 minutes. This trapped steam phase is crucial for maximum oven spring. After this time, remove the lid and continue baking for another 20-25 minutes, or until the crust is deep golden brown and the internal temperature reaches 200-210°F (93-99°C). Baking without the lid allows the crust to dry out and crisp up beautifully.
Common Sourdough Mistakes and Their Solutions
Proofing Challenges: Recognizing Over-Proofing and Under-Proofing
Proofing is a delicate balance, and misjudging it is one of the most common sourdough mistakes. Over-proofing occurs when the dough has risen too much during the final proof. Signs include the dough spreading out and losing its shape in the proofing basket, feeling overly airy and fragile, and the poke test leaving a permanent indentation that doesn't spring back at all. An over-proofed loaf will often have poor oven spring and result in a flat, dense crumb structure because the yeast has exhausted much of its leavening power before hitting the oven heat.
Conversely, under-proofing means the dough hasn't risen enough before baking. Signs include a very dense crumb with large, irregular holes or tunnels, a loaf that tears or bursts unpredictably during baking (not along the score marks), and a dough that feels very firm and springs back quickly when poked. An under-proofed loaf often has a heavy, sometimes gummy texture. The solution to proofing challenges lies in learning to read the dough itself using the poke test and adjusting proofing times based on temperature, not just following a recipe's timing rigidly.
Kneading Issues: Achieving Proper Dough Texture
Achieving the correct dough texture through mixing and kneading (or stretch and folds) is fundamental to successful sourdough. Under-kneading is a frequent issue, resulting from insufficient development of the gluten network. Signs include a dough that feels shaggy, weak, and doesn't hold its shape well, tears easily when stretched, and lacks elasticity. An under-kneaded dough won't trap gases effectively, leading to poor oven spring and a dense, tight crumb.
While less common with gentle sourdough techniques like stretch and folds, it is possible to over-knead, especially with mechanical mixers. Over-kneading breaks down the gluten structure, causing the dough to become sticky, slack, and lose its ability to hold tension. The solution to kneading issues is practice and paying attention to the dough's feel and appearance. Regularly performing the windowpane test during the mixing/folding phase helps you assess gluten development and know when enough strength has been built.
Oven Temperature: Achieving the Perfect Bake
The temperature of your oven during baking significantly impacts the final loaf. Baking at too low a temperature is a common cause of a pale crust, poor oven spring, and a potentially dense interior. The initial high heat is crucial for providing the burst of energy needed for the final rise in the oven (oven spring) and for setting the crust. If the temperature is too low, the dough may not expand fully before the crust hardens.
On the other hand, if the oven is too hot, or if the heat is applied too intensely too quickly without sufficient steam (like baking on a tray without a Dutch oven), the crust can set prematurely or even burn before the inside of the loaf is fully cooked. Using an oven thermometer to verify your oven's actual temperature is highly recommended, as oven thermostats can be inaccurate. Preheating your oven and baking vessel (like a Dutch oven) thoroughly for 30-60 minutes ensures the high heat needed for a great bake.
Dense Crumb and Gummy Texture: Troubleshooting Techniques
A dense crumb and a gummy texture are disappointing results that can stem from various issues, often interconnected with sourdough starter troubleshooting and dough handling. One primary cause is under-proofed dough, where the yeast hasn't produced enough gas to create an open structure. A weak or inactive starter can also lead to a dense loaf, as it lacks the power to properly leaven the dough during bulk fermentation and proofing. Insufficient bulk fermentation time or temperature can also contribute to a tight crumb.
Another significant, often overlooked, reason for a gummy texture is slicing the bread before it has fully cooled. Hot bread is still undergoing structural changes as steam escapes and starches set. Cutting into it too early can compress the interior and result in a wet, gummy slice.
To troubleshoot a dense or gummy loaf, ensure your starter is active and healthy (referencing your sourdough starter troubleshooting guide! ), allow sufficient time for both bulk fermentation and proofing (using the poke test), and always let your baked loaf cool completely on a wire rack for at least 2-3 hours before slicing.
Tips and Tricks for Consistent Sourdough Success

Hydration Levels: Achieving the Ideal Dough Consistency
Hydration refers to the ratio of water to flour in your dough, expressed as a percentage of the flour weight. It's a key factor influencing dough consistency and the final crumb structure. A dough with higher hydration (e.g., 75-85%) will be wetter, stickier, and often yields a more open, airy crumb. However, it can be more challenging to handle and shape, especially for beginners. Lower hydration doughs (e.g., 65-70%) are much easier to work with, less sticky, but tend to produce a slightly denser crumb.
Finding your ideal hydration level is crucial for consistent success. It's often recommended to start with a moderate hydration (around 70-75%) and gradually increase it as you become more comfortable handling wetter doughs. Keep in mind that different flours absorb water differently; whole wheat flour, for example, typically requires more water than white bread flour to achieve a similar consistency. Experimentation and paying attention to how the dough feels are key to mastering hydration.
Scoring Techniques: Enhancing Oven Spring and Aesthetics
Scoring involves making deliberate cuts on the surface of the proofed dough just before it goes into the oven. This isn't just for decoration; it serves a vital functional purpose. As the dough hits the high heat of the oven, it undergoes a rapid expansion known as oven spring. Scoring controls where this expansion happens. Without scores, the crust would set too quickly, and the expanding gases would find the weakest point, causing the loaf to burst unpredictably.
Using a very sharp blade, like a baker's lame or a razor blade, is essential for clean cuts that open up nicely. The angle and depth of your cuts influence the outcome. Shallow cuts are often used for decorative patterns, while deeper, angled cuts (like a single long cut on a batard) are functional, guiding the primary expansion. Practicing different scoring patterns can not only enhance your loaf's oven spring but also turn each bake into a unique work of art.
Flour Varieties: Exploring Flavor and Texture
While a basic sourdough recipe often calls for bread flour, exploring different flour varieties can significantly impact the flavor, texture, and handling of your dough and even your starter. Incorporating whole wheat flour (typically 10-50% of the total flour) adds nutty flavors and extra nutrients, but it also absorbs more water and speeds up fermentation due to higher enzyme activity. Rye flour introduces a distinct, earthy tang and creates a denser, sometimes gummier crumb, as it has less gluten-forming protein than wheat.
Other flours like spelt, einkorn, or kamut can bring unique historical flavors and nutritional profiles. When using different flours, especially in higher percentages, be prepared to adjust your hydration levels and potentially your fermentation times. For instance, a starter fed with rye or whole wheat flour often becomes more vigorous, while doughs containing significant amounts of these flours may ferment faster than those made solely with white flour. Experimenting with blends allows you to customize your sourdough to your taste.
Advanced Sourdough Techniques
Whole Wheat Sourdough: Adapting the Recipe
Baking with 100% or high percentages of whole wheat flour in sourdough requires some specific adaptations compared to baking with white flour. Whole wheat flour contains the bran and germ, which absorb significantly more water than refined white flour. Therefore, you'll typically need to increase the hydration level in your recipe, often by 5-10% or even more, to achieve a dough consistency similar to a white sourdough loaf. This increased water absorption also means whole wheat doughs can feel stickier.
Furthermore, the presence of bran and germ also means whole wheat flour has more enzymes and nutrients, which tend to speed up fermentation. Bulk fermentation and proofing times for whole wheat sourdough are often shorter than for white sourdough, so you need to pay close attention to the dough's signs of readiness rather than relying solely on time. Handling whole wheat dough gently during shaping is also important, as the bran particles can tear the gluten network if overworked.
Rye Sourdough: Incorporating Rye Flour for Unique Flavors
Rye flour presents unique characteristics for sourdough bakers due to its low gluten content and high levels of pentosans, which are gums that absorb a lot of water but don't form a strong elastic network like wheat gluten. This means doughs with high percentages of rye will be much stickier, less elastic, and won't develop a strong gluten structure in the same way wheat doughs do. Rye lends a distinct, often intense, earthy and tangy flavor to bread.
When incorporating rye, you can use a small percentage (e.g., 10-20%) in a standard wheat sourdough recipe to add flavor and improve the starter's activity. For high-percentage or 100% rye loaves, the techniques differ significantly. Kneading is often minimal or non-existent, and the dough is typically very wet and sticky, sometimes shaped with wet hands or spatulas directly into a tin or proofing basket. Rye also ferments quickly, so monitoring the dough closely is essential.
Adjusting Fermentation Times: Adapting to Environmental Conditions
One of the biggest variables in sourdough baking is the impact of temperature on fermentation speed. Yeast and bacteria are much more active in warmer conditions and significantly slower in cooler conditions. Understanding this is key to adjusting fermentation times and avoiding common issues like over- or under-proofing. For example, a dough that takes 6 hours to bulk ferment at 75°F (24°C) might take only 3-4 hours at 80°F (27°C) or require 8-10 hours at 68°F (20°C).
Instead of strictly following recipe times, which are often based on average room temperature, learn to read your dough. Focus on the signs of sufficient bulk fermentation (volume increase, airiness, poke test) and proofing (poke test). If your kitchen is warm, shorten the times; if it's cool, extend them. You can manipulate dough temperature by using warmer or cooler water, or by placing the dough in a warmer spot (like an oven with just the light on) or a cooler spot (like the refrigerator for cold proofing) to control the pace of fermentation.
Conclusion: Embracing the Art of Sourdough
Celebrating Your Baked Creations
Embarking on the sourdough journey is an exploration into the fascinating world of microbial fermentation and the simple pleasure of creating something truly artisanal. Each loaf baked is a testament to your patience, learning, and connection to a timeless craft. Don't be discouraged by initial challenges; they are part of the learning process. Every bake, whether perfect or slightly imperfect, provides valuable insights into how your starter behaves, how your dough responds, and how your environment affects the process.
Take pride in your creations! Share your loaves with friends and family, savor the unique flavor and texture you've coaxed from just flour, water, salt, and your active starter. The satisfaction of slicing into a warm, crackling loaf you made yourself is immense. Remember that consistency comes with practice, and even experienced bakers encounter surprises. Embrace the journey and celebrate each delicious success along the way.
Resources for Further Learning
The world of sourdough baking is vast and offers endless opportunities for learning and experimentation. While this guide provides a solid foundation and sourdough starter troubleshooting tips, there are many avenues to deepen your knowledge. Numerous excellent books dedicated solely to sourdough baking offer detailed recipes, scientific explanations, and advanced techniques. Online communities and forums are invaluable resources for asking questions, sharing experiences, and troubleshooting specific issues with fellow bakers.
Consider exploring different flours, experimenting with higher hydration levels, or trying advanced techniques like incorporating inclusions (seeds, cheese, herbs) into your dough. You can also delve deeper into understanding baker's percentages or optimizing your baking setup. The key is to keep experimenting, tasting, and learning from every bake. The art of sourdough is a continuous journey of discovery, yielding delicious rewards.
Frequently Asked Questions
How do I know if my sourdough starter is active enough to bake with?
An active starter will have doubled in size within a few hours of feeding and exhibit plenty of bubbles. It should also have a slightly sour, tangy smell.
What are some common reasons why my sourdough starter isn't rising?
Possible causes include incorrect temperature, using chlorinated water, or insufficient feeding. Make sure to use unchlorinated water and keep your starter in a warm place.
My sourdough bread is too dense. What could be the cause?
Dense sourdough often results from under-proofing or using a weak starter. Longer proofing times and a more active starter are often the solution.
What's the best type of flour to use for feeding my sourdough starter?
A mix of unbleached all-purpose flour and whole wheat flour is generally recommended. The whole wheat flour provides extra nutrients for the yeast and bacteria.
How often should I feed my sourdough starter?
At room temperature, feeding every 12-24 hours is ideal. If stored in the refrigerator, feed once a week.
Final Reflection: The Enduring Magic of Sourdough, One Loaf at a Time
The seemingly simple act of baking sourdough bread reveals a complex interplay of science and patience, a truth made acutely relevant in our fast-paced world. Mastering the art of sourdough isn't just about creating delicious bread; it's about embracing a process that demands attention, understanding, and a willingness to learn from mistakes. The journey, with its occasional failures and triumphant successes, is as rewarding as the final product.
The enduring appeal of sourdough lies not only in its unique flavor profile but also in its connection to a time-honored tradition. It's a tangible link to the past, a reminder of simpler times when food production was a more intimate and hands-on process. This connection resonates deeply, fostering a sense of accomplishment and self-sufficiency that is increasingly valuable in our modern lives. Bread is the staff of life,
a simple phrase that holds profound truth, especially when considering the effort and care involved in creating sourdough. The process itself is a meditation, a slow and deliberate act that fosters mindfulness and connection.
Now, armed with a deeper understanding of sourdough's intricacies, I invite you to embark on your own baking journey. Don't be discouraged by setbacks; embrace them as opportunities for growth and learning. Each loaf, whether perfectly risen or slightly imperfect, represents a step forward in your mastery of this ancient craft. Remember the lessons learned here, and most importantly, enjoy the process. The reward is not just delicious bread, but a deeper connection to yourself, your food, and the rich history of baking.
Unleash Your Inner Baker: Craft the Perfect Sourdough Loaf!
Thanks for joining us on this sourdough journey! We hope you now feel confident in tackling those common baking pitfalls. Ready to put your newfound knowledge into practice?
- Bake your own masterpiece! Try out the recipe today, and keep notes on what works best for you. Each loaf is a unique experiment!
- Share your sourdough success (or even your struggles!) with us in the comments below. We love hearing from our baking community!
- Consider experimenting with different flours or hydration levels – the possibilities are endless!
What unique twist will you add to your next sourdough loaf?