
Creating a Sourdough Starter Culture: Your Baking Legacy Begins


Welcome to BakeWithEase!
Ready to unlock the magic of sourdough? You've arrived at the perfect place to embark on a journey of flavor and texture. We're thrilled you're here to discover the secrets behind crafting incredible bread at home. This guide dives deep into sourdough starter maintenance tips, but what if you could effortlessly maintain a healthy starter that consistently delivers exceptional results? Let's explore the essential techniques that will transform your baking and ensure your sourdough starter thrives for years to come!
- Cultivating a Rye Sourdough Starter: A Baker's Journey
- Understanding Rye Sourdough Starters: A Distinct Flavor Profile
- Building a Rye Sourdough Starter: A Day-by-Day Guide
- Maintaining a Rye Sourdough Starter: Long-Term Viability
- Advanced Rye Sourdough Techniques: Enhancing Flavor and Texture
- Avoiding Common Rye Sourdough Starter Mistakes
- Baking with Your Active Rye Sourdough: A Simple Recipe
- Avoiding Common Rye Sourdough Starter Mistakes
- Baking with Your Active Rye Sourdough: A Simple Recipe
- Conclusion: The Enduring Art of Rye Sourdough Baking
-
Frequently Asked Questions
- How long does it typically take to create a sourdough starter from scratch?
- What flour type is best for starting a sourdough culture?
- How often should I feed my sourdough starter once it's established?
- What are the signs that my sourdough starter is ready to bake with?
- Can I use tap water to feed my sourdough starter?
- Final Reflection: Cultivating Patience, Harvesting Flavor
- Unleash Your Inner Baker: Start Your Sourdough Journey Today!
Cultivating a Rye Sourdough Starter: A Baker's Journey
Understanding Rye Sourdough Starters: A Distinct Flavor Profile
Benefits of Rye Sourdough: Flavor, Texture, and Nutrition
Rye sourdough starters offer a unique depth of flavor compared to those made solely with wheat flour. Rye inherently possesses a richer, more tangy profile, which translates directly into the finished bread. This distinct taste is often described as earthy, slightly sour, and complex, providing a wonderful counterpoint to the mild sweetness found in some baked goods.
Beyond flavor, rye also contributes significantly to the texture of baked goods. The pentosans in rye flour absorb more water than wheat, leading to a moister crumb and a longer shelf life for the bread. This moisture content also makes rye bread incredibly satisfying and less prone to drying out quickly.
Furthermore, incorporating rye flour into your sourdough starter and subsequent baking adds nutritional value. Rye is a good source of dietary fiber, including beta-glucans, which have been linked to various health benefits like improving cholesterol levels. It also contains essential minerals such as magnesium, phosphorus, and zinc, and B vitamins. While the fermentation process slightly alters the nutrient profile, the overall contribution of rye flour makes rye sourdough a more nutrient-dense option compared to breads made exclusively with refined wheat flour. Understanding these benefits is key to appreciating the journey of maintaining your sourdough starter with rye.
Rye Flour Composition: Key to a Successful Starter
Rye flour differs significantly from wheat flour in its protein structure and carbohydrate composition. Unlike wheat, rye contains very little gluten-forming protein. This means that while rye sourdough bread still rises due to the leavening power of the starter, it won't develop the same strong, elastic gluten network as wheat bread. This characteristic is precisely why rye breads often have a denser crumb structure. The lack of strong gluten allows the natural enzymes in rye to break down starches more easily during fermentation, contributing to the flour's rapid fermentation properties.
A critical component of rye flour is its high level of non-starch polysaccharides, particularly pentosans. These compounds have an exceptional ability to absorb water, often holding up to ten times their weight in liquid. This high water absorption is a double-edged sword: it contributes to the moist crumb but can also make rye dough sticky and harder to handle.
The enzymes (amylases) in rye are also very active, and the sourdough fermentation process with rye helps to manage their activity, preventing excessive breakdown of starch which could result in a gummy texture. Understanding these properties is crucial for successful sourdough starter maintenance tips specifically tailored for rye.
Building a Rye Sourdough Starter: A Day-by-Day Guide
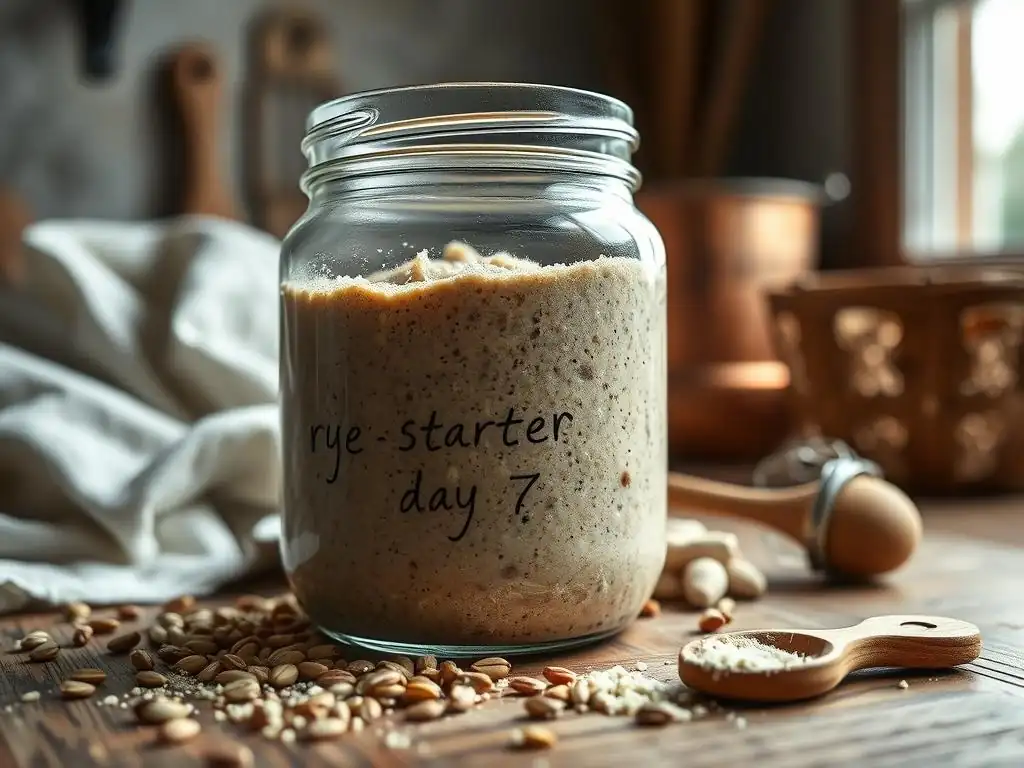
Day 1: Initial Rye Flour and Water Mixture
Starting a rye sourdough culture is a straightforward process, typically requiring just rye flour and water. On day one, you'll combine equal parts by weight of warm water and whole-grain rye flour. For instance, a common starting point is mixing 50 grams of whole-grain rye flour with 50 grams of warm (around 75-80°F or 24-27°C) non-chlorinated water in a clean jar.
Using whole-grain rye is often recommended initially because it contains more of the natural microorganisms needed to kickstart fermentation. Stir the mixture thoroughly until no dry clumps remain and it has a consistency similar to a thick batter or paste.
After mixing, loosely cover the jar. A lid resting on top or a piece of cloth secured with a rubber band works well, allowing gases to escape while preventing contaminants from entering. Place the jar in a warm spot, ideally around 70-75°F (21-24°C), away from direct sunlight or drafts.
The goal is to provide a hospitable environment for wild yeasts and bacteria present in the flour and air to begin colonizing the mixture. While you might not see much activity on day one, this initial mix is the foundation of your future sourdough starter, marking the beginning of your sourdough starter maintenance routine.
Days 2-7: Consistent Feeding and Observation of Rye Starter Activity
From day two onwards, you'll begin a consistent feeding schedule. For the first few days (typically days 2-4), you might feed once every 24 hours. A standard feeding involves discarding a portion of the starter (leaving perhaps 25-50 grams) and feeding it with fresh rye flour and water, again in equal parts by weight. For example, if you leave 50 grams of starter, you would add 50 grams of rye flour and 50 grams of water.
Stir well. During these early days, you might observe some initial bubbling or even a layer of liquid (hooch) forming on top. This is normal and indicates bacterial activity.
As the days progress (days 5-7 and beyond), you should start seeing more vigorous activity. Bubbles will become more consistent, and the starter will begin to rise significantly after feeding, often doubling or tripling in volume before slowly collapsing.
The smell will also evolve from potentially unpleasant or acetone-like odors in the early stages to a more pleasant, tangy, and slightly alcoholic aroma. Once your starter consistently doubles in size within 4-12 hours after feeding and shows a bubbly, airy texture, it is likely ready to be considered active and ready for baking, or ready for a less frequent sourdough starter maintenance schedule.
Identifying a Vigorous and Healthy Rye Sourdough Culture
A truly vigorous and healthy rye sourdough culture exhibits specific signs that indicate it's populated with a robust and balanced community of wild yeasts and lactic acid bacteria. The most telling sign is its consistent rise and fall after feeding. Within a predictable timeframe (which can vary depending on temperature and feeding ratio, but often 4-12 hours), the starter should reliably double or even triple in volume. You'll see numerous bubbles throughout the culture, not just on the surface, and the texture will become light and airy, almost like a sponge.
Another key indicator is the aroma. A healthy rye starter should smell pleasantly tangy, slightly sour, and perhaps a bit like ripe fruit or beer. It should not have strong off-putting smells like nail polish remover (which indicates excessive acetic acid production, often due to infrequent feeding) or mold. You can also perform the "float test," although this is more indicative for wheat starters.
Take a small spoonful of starter at its peak rise and gently drop it into a glass of water. If it floats, it generally indicates sufficient gas production. However, for dense rye starters, this test isn't always definitive. Consistent, predictable activity after feeding is the best measure of a healthy culture, essential for effective sourdough starter maintenance tips.
Maintaining a Rye Sourdough Starter: Long-Term Viability
Optimal Rye Sourdough Feeding Frequency
Maintaining a healthy rye sourdough starter long-term requires a consistent feeding schedule, but the frequency depends largely on how you store it. If kept at room temperature (around 70-75°F or 21-24°C), a rye starter typically needs to be fed daily, sometimes even twice a day if the temperature is warmer or you are using a high feeding ratio (e.g., feeding 1 part starter with 3 parts flour and 3 parts water).
Daily feeding ensures that the yeast and bacteria have a constant supply of fresh nutrients and prevents the buildup of excessive acidity or depletion of food sources, which can weaken the culture.
For less frequent baking, storing your rye starter in the refrigerator is an excellent option. Refrigeration significantly slows down fermentation, allowing you to feed it much less often. A refrigerated rye starter can typically be fed once a week or even every two weeks.
Before storing, feed the starter and let it become active for a few hours at room temperature before placing it in the fridge. When you want to bake, take it out and feed it daily at room temperature for 1-3 days until it is consistently vigorous again. This adjusted feeding schedule is a core component of practical sourdough starter maintenance tips for busy bakers.
Addressing Common Rye Sourdough Challenges
Even with careful maintenance, you might encounter common issues with your rye sourdough starter. One frequent problem is the appearance of a liquid layer on top, known as "hooch." Hooch is alcohol produced by the yeast when they've consumed most of the available food. A small amount is normal, especially if feeding is infrequent. You can either pour it off or stir it back in (stirring adds acidity).
Excessive hooch indicates the starter is hungry and needs more frequent feeding or a larger feeding ratio. Another challenge is a lack of activity or sluggishness. This can be caused by cold temperatures, infrequent feeding, or using chlorinated water. Warming up the starter, switching to non-chlorinated water, or increasing feeding frequency usually resolves this.
Mold is a more serious issue. If you see any fuzzy, colored spots (green, black, orange, or pink), the starter is contaminated and should be discarded entirely. Maintaining cleanliness of your jar and utensils is crucial to prevent mold. Sometimes, a starter might develop an unpleasant, strong smell, like nail polish remover. This is acetic acid and indicates the starter is very hungry and acidic. Consistent, regular feeding will help balance the microbial population and improve the aroma. Patience and observation are key to troubleshooting and effective sourdough starter maintenance tips.
Storing Rye Sourdough: Refrigeration and Revitalization
Refrigeration is the most common method for storing rye sourdough when you're not baking daily. After feeding your starter and allowing it to become active for a few hours at room temperature, place the covered jar in the refrigerator. The cooler temperature slows down the metabolic activity of the yeast and bacteria, preserving the starter for longer periods, typically one to two weeks between feedings. Using a jar with a loose-fitting lid or burping it occasionally is wise, as some gas production will still occur.
To revitalize a refrigerated rye starter for baking, take it out of the fridge and let it come to room temperature for an hour or two. Then, begin feeding it daily (or even twice daily if needed) at room temperature. You will likely need 1-3 days of consistent feeding before the starter returns to its peak vigor, reliably doubling or tripling in size within 4-12 hours after feeding. Always check for consistent activity before using it in a bake. Discarding a portion before each feeding during this revitalization process is also part of good sourdough starter maintenance tips.
Advanced Rye Sourdough Techniques: Enhancing Flavor and Texture
Adjusting Hydration for Different Rye Breads
Hydration, the ratio of water to flour in your starter and dough, plays a significant role in the final texture of rye bread. A standard rye sourdough starter is often maintained at 100% hydration (equal parts flour and water by weight). However, for baking different types of rye bread, you might adjust the hydration of your final dough. For instance, traditional dense, dark rye breads often use lower hydration doughs, sometimes below 70%, which contributes to their compact crumb.
Conversely, lighter, airier rye loaves or those incorporating a mix of wheat and rye might use higher hydration, perhaps 75% or more. When working with rye, remember its high water absorption capacity. A dough that feels sticky at, say, 75% hydration with wheat flour will feel much stickier with rye flour at the same hydration. Experimenting with hydration in your dough, while keeping your starter consistently maintained, allows you to achieve varying crumb structures, from very dense pumpernickel styles to slightly lighter loaves. This is an advanced aspect of sourdough starter maintenance tips applied to baking.
Incorporating Other Flours for Complex Flavor Profiles
While a pure rye sourdough starter provides a strong, distinct flavor, you can incorporate other flours into your starter or dough to create more complex profiles. Feeding your starter occasionally with a mix of rye and whole wheat or bread flour can subtly alter its microbial balance and flavor characteristics over time. Some bakers maintain separate starters for different flour types (e.g., a pure rye starter and a pure wheat starter), but you can also experiment with mixed feedings for a single starter.
When baking, substituting a portion of the rye flour in your recipe with strong bread flour (high gluten) will create a dough that is easier to handle and results in a loaf with more structure and a less dense crumb. Adding a small amount of malted flour can boost fermentation and add a touch of sweetness. Even incorporating flours like spelt or buckwheat can introduce unique earthy or nutty notes. The key is to understand how each flour type impacts the dough structure and flavor profile while keeping your base sourdough starter maintenance consistent.
Revitalizing a Dormant Rye Sourdough Starter
Sometimes, a rye sourdough starter might become dormant due to prolonged storage in the refrigerator without feeding, or if it has been neglected at room temperature. A dormant starter will show little to no activity, might have a significant layer of hooch, and could smell very acidic. Revitalizing it requires consistent care and patience. Start by discarding most of the dormant starter, leaving only a small amount (e.g., 10-20 grams). Feed this small amount with fresh rye flour and water (e.g., 50g flour, 50g water). Stir well.
Place the starter in a warm spot. For the first few days, feed it frequently, perhaps every 12 hours, discarding a portion before each feed. You might not see much activity initially. As you continue this feeding schedule, you should start to notice small bubbles, then more consistent rising. It can take anywhere from 3 to 7 days or even longer for a very dormant starter to become fully active again. Be patient and persistent with the regular feeding. Once it is consistently doubling or tripling in size, it's ready for baking or normal sourdough starter maintenance tips.
Avoiding Common Rye Sourdough Starter Mistakes
Over-Fermentation and Under-Fermentation in Rye
Over-fermentation and under-fermentation are common pitfalls when working with rye sourdough. Over-fermentation occurs when the starter (or dough) is allowed to ferment for too long, either at room temperature or between feedings. Signs in a starter include a significant amount of hooch, a very strong, pungent, acidic smell, and a texture that becomes very thin and watery. Over-fermented dough can lose its structure and result in a flat, dense loaf with a harsh sour flavor. This often happens when sourdough starter maintenance is neglected.
Under-fermentation, on the other hand, means the starter or dough hasn't developed sufficiently. The starter might not double in size reliably, or the dough doesn't show significant signs of activity (like rising and developing bubbles). Under-fermented dough results in a dense, heavy loaf with a weak or undeveloped flavor. To avoid these, learn to read your starter and dough.
Pay attention to visual cues (rise, bubbles), aroma, and texture. Use the float test for wheat starters (though less reliable for rye) or monitor the rise relative to a marker on the jar. Adjusting feeding frequency and temperature are key sourdough starter maintenance tips to manage fermentation speed.
Maintaining Cleanliness and Preventing Contamination
Cleanliness is paramount in sourdough starter maintenance to prevent unwanted microbial growth, particularly mold. Always use clean jars and utensils when feeding or transferring your starter. Wash jars thoroughly with hot, soapy water and rinse well to remove any soap residue, which can inhibit fermentation. While sterilization isn't usually necessary for sourdough, ensuring your equipment is free from food residues and visible contaminants is important.
Keep the area around your starter clean as well, away from potential sources of mold or other bacteria. Covering your starter jar loosely helps prevent airborne contaminants from entering while still allowing gases to escape. If you ever see any signs of mold (fuzzy spots of any color), discard the entire starter and start over. Do not try to salvage it by scooping off the moldy part, as the mold spores are likely throughout the culture. Regular feeding and maintaining a healthy, active starter also makes it more resistant to invasion by undesirable microbes.
Achieving Desired Rye Sourdough Consistency
The consistency of your rye sourdough starter directly impacts its handling and performance. A standard 100% hydration starter will have a thick, batter-like consistency. This is generally easy to work with and promotes a good balance of yeast and bacterial activity.
However, some bakers prefer a stiffer starter (lower hydration, e.g., 50-70% water to flour) or a more liquid one (higher hydration, e.g., 120% or more). A stiffer starter ferments more slowly and develops more acetic acid, leading to a tangier flavor. A more liquid starter ferments faster and tends to develop more lactic acid, resulting in a milder sourness.
While adjusting starter hydration is an advanced technique often related to specific baking outcomes, maintaining a consistent hydration level for your chosen method is crucial for predictable sourdough starter maintenance. If you want to change the hydration, do so gradually over a few feedings. Pay attention to how the texture feels – it should be consistent each time you feed it at your chosen hydration. If it seems too thick or thin, adjust the amount of water or flour slightly during the next feeding. Consistency in feeding ratio and hydration is key to a stable and predictable starter.
Baking with Your Active Rye Sourdough: A Simple Recipe
Recipe: Basic 100% Rye Sourdough Bread
Here is a simple recipe for a basic 100% rye sourdough bread using your active rye starter. This recipe highlights the unique characteristics of rye.
- Ingredients:
- 100 grams active rye sourdough starter (100% hydration)
- 400 grams dark or medium rye flour
- 350-380 grams warm water (adjust based on flour absorption)
- 8-10 grams fine sea salt
- Instructions:
- In a large bowl, combine the active starter and warm water. Stir to disperse the starter.
- Add the rye flour and salt. Mix with a spoon or stiff spatula until no dry flour remains. Rye dough will be very sticky and shaggy; do not expect it to develop like wheat dough.
- Cover the bowl and let it ferment at room temperature (around 70-75°F or 21-24°C) for 2-4 hours. This is the bulk fermentation. You might see some surface bubbling but likely not significant rise.
- Prepare a loaf pan by greasing it or lining it with parchment paper. Rye dough is too sticky to hold its shape well for freeform loaves without significant practice or forms.
- Transfer the sticky dough into the prepared loaf pan. Smooth the top with a wet spatula.
- Cover the pan loosely and proof at room temperature for another 1-3 hours, or refrigerate for 8-12 hours for a longer, tangier proof. Look for some increase in volume and small cracks or bubbles on the surface.
- Preheat oven to 450°F (230°C). If desired, score the top of the loaf with a wet knife.
- Bake for 15 minutes at 450°F, then reduce temperature to 400°F (200°C) and bake for another 30-40 minutes, or until the internal temperature reaches 200-210°F (93-99°C).
- Remove from pan and let cool completely on a wire rack before slicing (at least 2-4 hours, ideally longer). Slicing warm rye bread can result in a gummy texture.
This recipe requires attention to timing, but mastering your sourdough starter maintenance tips will ensure your starter is ready when you are.
Achieving a Perfect Rye Sourdough Crust and Crumb
Achieving the desired crust and crumb in 100% rye sourdough bread differs from wheat bread. The crust on rye bread is typically thinner and less crackly than a well-baked wheat loaf. To get a good crust, baking at a high initial temperature helps.
Using steam during the first part of the bake is also beneficial; this can be achieved by baking in a Dutch oven with the lid on for the first 15-20 minutes or by placing a tray of hot water at the bottom of your oven. Steam keeps the surface moist, allowing the dough to expand before the crust sets.
The crumb of 100% rye bread will be dense, moist, and uniform, without the large, open holes typical of wheat sourdough. This is due to the lack of strong gluten development. A gummy crumb is a common issue, often caused by underbaking, slicing the bread before it's fully cooled, or excessive enzymatic activity (sometimes related to starter health or dough handling). Ensuring the bread reaches the correct internal temperature (200-210°F) and allowing it to cool completely are crucial steps. Proper sourdough starter maintenance tips contribute to a healthy starter, which is the foundation for a well-fermented, non-gummy crumb.
Incorporating Seeds and Spices into Rye Sourdough
Rye bread pairs wonderfully with various seeds and spices, enhancing both flavor and texture. Common additions include caraway seeds, which provide a classic rye bread flavor; fennel seeds; coriander; or a blend of these. Seeds like sunflower, pumpkin, flax, or poppy seeds can be added to the dough for texture and visual appeal, or used as a topping. Soaking seeds before adding them to the dough is often recommended, especially for larger or harder seeds, as it prevents them from absorbing moisture from the dough during fermentation and baking, which could lead to a dry crumb around the seeds.
Spices can be added directly to the dough along with the flour and salt. For seeds, you can mix them into the dough during the initial mixing phase. A common ratio is around 5-10% of the total flour weight in seeds. Experiment with different combinations to find your favorite. These additions not only make the bread more interesting but can also add nutritional benefits. Ensuring your sourdough starter maintenance tips are followed for a vigorous starter is key, as the added weight and structure of seeds and spices can sometimes slightly impact the dough's rise.
Avoiding Common Rye Sourdough Starter Mistakes
Over-Fermentation and Under-Fermentation in Rye
Over-fermentation in rye sourdough, whether in the starter or the dough, manifests differently than in wheat. An over-fermented rye starter will often develop a very strong, sharp, almost vinegary or acetone-like smell, accompanied by a significant layer of hooch. The starter's structure breaks down, becoming very liquid and losing its ability to rise predictably after feeding. Using an over-fermented starter can result in a dough that lacks structure, is extremely sticky, and produces a dense, overly sour, and sometimes bitter loaf. Regular sourdough starter maintenance, specifically timely feeding, prevents this.
Under-fermentation is equally problematic. An under-fermented rye starter will be sluggish, not showing significant volume increase or bubbling after feeding. It might smell bland or only slightly sour. Using an under-fermented starter in dough will lead to a loaf that doesn't rise properly, resulting in a very dense, heavy bread with a raw or underdeveloped flavor. The key to avoiding both extremes is learning to recognize the signs of a healthy, active starter at its peak and using it or feeding it appropriately. Monitoring time and temperature, and observing the starter's activity level are crucial sourdough starter maintenance tips.
Maintaining Cleanliness and Preventing Contamination
Preventing contamination is a non-negotiable aspect of successful sourdough starter maintenance. While the acidic environment of a healthy starter makes it somewhat resistant to harmful bacteria, it is susceptible to mold spores and other airborne contaminants. Always use clean, food-grade containers for your starter. Wash jars thoroughly with hot water and soap, ensuring no soap residue remains, as this can inhibit fermentation. Avoid using containers that have previously held non-food items or strong chemicals.
Store your starter away from potential sources of mold, such as ripening fruit or compost bins. Cover the starter jar loosely with a lid, plastic wrap, or a clean cloth secured with a rubber band. This allows gases produced during fermentation to escape while preventing dust, insects, or mold spores from entering. If you ever see any colored, fuzzy growth in your starter, it indicates mold, and the entire culture must be discarded to avoid potential health risks. Consistent feeding and a healthy, active starter environment are your best defense against contamination.
Achieving Desired Rye Sourdough Consistency
The consistency of your rye sourdough starter, determined by its hydration level, is a key factor in its behavior and the type of bread it's best suited for. Most bakers maintain a 100% hydration starter (equal weight of flour and water), which results in a thick, porridge-like texture. This consistency is relatively easy to manage and provides a good balance of yeast and bacterial activity for general baking. However, you can intentionally adjust hydration.
A lower hydration starter (stiffer) ferments slower and develops more acetic acid, leading to a sharper tang. A higher hydration starter (more liquid) ferments faster and promotes lactic acid production, resulting in a milder sourness. The consistency should be uniform throughout the starter, without dry pockets of flour or separated layers of liquid (unless hooch has formed). If your starter's consistency seems off for its hydration level (e.g., too thick for 100% hydration), ensure you are measuring ingredients accurately by weight and mixing thoroughly during feeding. Consistent sourdough starter maintenance includes maintaining the desired hydration level.
Baking with Your Active Rye Sourdough: A Simple Recipe
Recipe: Basic 100% Rye Sourdough Bread
Here is a straightforward recipe to use your vibrant rye sourdough starter to bake a foundational 100% rye bread. This recipe is designed to be simple while respecting the unique properties of rye.
- Ingredients:
- 100g active rye sourdough starter (100% hydration, fed within the last 4-12 hours and showing peak activity)
- 400g medium or dark rye flour (using organic flour can sometimes enhance flavor)
- 360g warm water (around 80°F or 27°C; adjust slightly based on your flour's absorption)
- 9g fine sea salt
- Instructions:
- In a mixing bowl, combine the active rye starter and the warm water. Stir gently until the starter is mostly dissolved into the water.
- Add the rye flour and salt to the bowl. Use a sturdy spoon or spatula to mix everything together until there are no dry clumps of flour visible. The dough will be very sticky and dense, unlike wheat dough. Avoid overmixing; just ensure everything is incorporated.
- Cover the bowl with plastic wrap or a damp cloth. Let the dough rest at room temperature (ideally 72-78°F or 22-26°C) for a bulk fermentation period of 2.5 to 4 hours. You may see some slight puffing or surface bubbles, but significant rise is unlikely with 100% rye.
- While the dough is fermenting, prepare a standard loaf pan (approximately 9x5 inches). Grease it well with butter or oil, or line it with parchment paper for easy removal.
- Using a wet spatula or wet hands, transfer the sticky rye dough into the prepared loaf pan. Smooth the top surface of the dough as best you can.
- Cover the loaf pan loosely with plastic wrap or place it inside a large plastic bag. Let the dough proof at room temperature for another 1 to 3 hours, or place it in the refrigerator for a slower proof of 8 to 14 hours. The dough should show a slight increase in volume and potentially some small cracks on the surface.
- About 30 minutes before baking, preheat your oven to 450°F (230°C). If using a baking stone or steel, place it on the middle rack during preheating.
- Score the top of the loaf if desired (use a wet sharp knife or lame). Place the pan in the preheated oven. For steam, you can place a tray with a cup of hot water on the rack below the loaf pan.
- Bake for 15 minutes at 450°F with steam, then carefully remove the steam source, reduce the oven temperature to 400°F (200°C), and continue baking for another 35-45 minutes, or until the internal temperature of the bread reaches 205-210°F (96-99°C).
- Remove the loaf from the oven and immediately turn it out onto a wire rack. Let it cool completely, for at least 2-4 hours (preferably longer), before slicing. Slicing too early will result in a gummy texture.
Following solid sourdough starter maintenance tips ensures your starter is active and ready, which is the most crucial step for a successful rye bake.
Achieving a Perfect Rye Sourdough Crust and Crumb
The ideal crust on a 100% rye sourdough loaf is different from a wheat loaf. It's typically thinner, slightly chewy, and less prone to developing large, blistered bubbles. To achieve a good crust, baking at a high initial temperature with steam is essential. Steam keeps the surface of the dough moist, allowing it to expand fully before the crust hardens. Baking in a preheated Dutch oven with the lid on for the first part of the bake is an excellent method for trapping steam around the loaf.
The crumb of 100% rye bread is naturally dense, moist, and uniform. It won't have the open, airy structure characteristic of wheat sourdough due to rye's low gluten content. A common issue is a gummy crumb, which is usually a sign of underbaking or slicing the bread before it has fully cooled. Ensuring the loaf reaches the correct internal temperature (205-210°F or 96-99°C) during baking is critical. Equally important is allowing the bread to cool completely on a wire rack for several hours before slicing. Patience during the cooling phase is just as vital as diligent sourdough starter maintenance.
Incorporating Seeds and Spices into Rye Sourdough
Rye bread's robust flavor profile makes it an excellent canvas for incorporating various seeds and spices. Caraway seeds are a classic addition, providing that distinctive "deli rye" flavor. Other popular spices include fennel seeds, coriander, or a pre-mixed rye bread spice blend. These can be added directly to the dough during the initial mixing stage. The typical amount is around 1-2% of the flour weight for spices, depending on desired intensity.
Adding seeds like sunflower, pumpkin, flax, or poppy seeds introduces wonderful texture and visual appeal. You can mix them into the dough (often 5-15% of flour weight) or press them onto the exterior before baking. For larger or harder seeds, soaking them in hot water for 30 minutes to an hour and draining before adding to the dough can prevent them from absorbing moisture from the bread during baking, which could lead to a drier crumb around the seeds. These additions complement the tangy flavor developed through careful sourdough starter maintenance.
Conclusion: The Enduring Art of Rye Sourdough Baking
The Versatility and Rewards of Rye Sourdough
Cultivating and baking with a rye sourdough starter is a deeply rewarding journey that connects you to ancient baking traditions. The resulting bread offers a depth of flavor and unique texture that is distinct from wheat-based loaves. Rye sourdough is incredibly versatile; it can be baked into dense, dark loaves perfect for open-faced sandwiches, lighter loaves mixed with wheat, or even incorporated into crackers or other baked goods. The process of maintaining your sourdough starter, watching it bubble and grow, is a continuous learning experience that hones your baking intuition.
Beyond the delicious results, baking with rye sourdough is also about patience and understanding natural fermentation. It teaches you to work with living organisms and adapt to variables like temperature and flour type. The health benefits associated with fermented rye also add to its appeal. Whether you stick to classic recipes or experiment with additions, the skill of sourdough starter maintenance opens up a world of flavorful possibilities in your kitchen, leaving you with a tangible baking legacy.
Resources for Advanced Rye Sourdough Bakers
For those looking to deepen their understanding and skills in rye sourdough baking, numerous resources are available. Exploring books dedicated specifically to rye bread or sourdough baking can provide in-depth knowledge on different rye flour types (light, medium, dark, pumpernickel), various hydration levels, and techniques like multiple build preferments (like a "rye sour"). Online forums and communities dedicated to sourdough are invaluable for troubleshooting and sharing experiences with other bakers navigating the nuances of rye.
Following experienced rye bakers on social media or their websites can offer visual guides and advanced tips. Consider experimenting with traditional European rye bread recipes, many of which have been refined over centuries. Advanced sourdough starter maintenance tips for rye might include experimenting with different feeding ratios, refreshing schedules, or even capturing wild yeasts from specific sources. The world of rye sourdough is vast and offers endless opportunities for learning and delicious experimentation.
Frequently Asked Questions
How long does it typically take to create a sourdough starter from scratch?
It usually takes around 7-14 days to create a viable sourdough starter from scratch. This timeframe depends on factors like room temperature and flour type.
What flour type is best for starting a sourdough culture?
Whole wheat flour or rye flour are often recommended initially. They contain more naturally occurring yeasts and bacteria to kickstart the fermentation.
How often should I feed my sourdough starter once it's established?
Once established, feed your sourdough starter once a day at room temperature, or once a week in the refrigerator. Adjust feeding based on usage and activity.
What are the signs that my sourdough starter is ready to bake with?
Signs of readiness include doubling in size after feeding, a bubbly texture, and a slightly tangy aroma. These indicate active fermentation.
Can I use tap water to feed my sourdough starter?
It's generally recommended to use filtered water to feed your starter. Tap water can contain chlorine or other additives that may inhibit the fermentation process.
Final Reflection: Cultivating Patience, Harvesting Flavor
The enduring appeal of sourdough bread lies not just in its tangy complexity, but in the deeply personal journey of nurturing its creation. From the initial bubbling excitement of a nascent starter to the satisfying thud of a perfectly formed loaf, the process mirrors life's own rhythms of growth, patience, and reward. This journey, far from being a mere baking technique, becomes a testament to the power of mindful creation.
The act of maintaining a sourdough starter is a powerful metaphor for the sustained effort required to cultivate anything meaningful. It demands consistent attention, a willingness to adapt to its ever-changing needs, and a deep respect for the living organism you're nurturing. This connection to something living, something that responds directly to your care, is profoundly rewarding. The best things in life are worth waiting for,
a sentiment perfectly encapsulates the slow, deliberate process of sourdough baking, and the rich rewards it yields.
Now, consider your own "starter." What projects, relationships, or dreams require the same patient nurturing as your sourdough? What aspects of your life could benefit from the mindful attention and consistent care that this process demands? Take a moment to reflect on this, and perhaps, like the flourishing starter, you'll discover unexpected growth and a deeper appreciation for the beauty of slow, deliberate progress. Embrace the journey, and let the legacy of your own "starter" begin.
Unleash Your Inner Baker: Start Your Sourdough Journey Today!
Thanks for taking the time to learn about the magic of sourdough! You've now unlocked the secrets to creating a thriving starter culture – a truly rewarding experience. Ready to put your new knowledge into practice?
- Begin your sourdough adventure! Mix your starter ingredients today and watch the transformation begin. Document your progress – you’ll be amazed at what you create!
- Share your sourdough story! Tell us about your experience on our social media channels – we'd love to see your starter's progress and hear your tips!
- Explore our comprehensive sourdough recipe collection on BakeWithEase.com (this will be a link on the actual website) to discover countless baking possibilities once your starter is ready.
What unique flavour will your sourdough starter bring to your next loaf? Let's hear your thoughts in the comments!