
Beyond Buttercream: Exploring Advanced Frosting Decoration Techniques

Welcome to BakeWithEase, where we transform baking dreams into delicious realities! Ready to elevate your cake decorating game? You've landed in the right place. This week, we're diving deep into advanced buttercream frosting decorating techniques. Forget basic swirls – prepare to master intricate designs, textures, and stunning visual effects. But what secrets lie beyond the classic spatula? Read on to unlock the secrets and turn your next cake into a masterpiece!
- Beyond Buttercream: Mastering Advanced Frosting Decoration Techniques for Stunning Cakes
- Understanding Buttercream Fundamentals for Advanced Decoration
- Advanced Buttercream Piping Techniques: Creating Textures and Patterns
- Buttercream Painting Techniques: Turning Cakes into Canvases
- Buttercream Transfers: A Versatile Decoration Method
- Incorporating Other Elements with Buttercream for Advanced Designs
- Troubleshooting Common Buttercream Decorating Problems
- Advanced Buttercream Cake Decorating Ideas & Inspiration
-
Frequently Asked Questions
- What are some examples of advanced buttercream frosting decorating techniques?
- What tools are essential for advanced buttercream decorating?
- How can I achieve a smooth, flawless buttercream finish on my cake?
- What kind of buttercream is best for detailed decorating?
- Where can I find step-by-step guides for learning these advanced techniques?
- Final Reflection: The Ever-Evolving Art of Frosting
- Unleash Your Inner Cake Artist: Master Frosting Techniques Today!
Beyond Buttercream: Mastering Advanced Frosting Decoration Techniques for Stunning Cakes
Elevate Your Cake Decorating Skills with Advanced Buttercream Techniques
Moving beyond a simple swirl or smooth finish opens up a world of artistic possibilities for your cakes. Mastering advanced buttercream frosting decorating techniques transforms your baked goods into edible masterpieces, allowing you to express creativity and impress with stunning visual appeal. This level of decoration requires a deeper understanding of buttercream's properties, precise execution, and a willingness to experiment with tools and methods you might not have used before. It's about taking your foundational baking skills and applying them to create intricate textures, realistic elements, and breathtaking designs that truly stand out.
Diving into advanced buttercream techniques involves learning how to manipulate consistency, utilize specialized piping tips, and even apply buttercream like paint. Think about the delicate petals of a realistic buttercream flower, the intricate patterns of brush embroidery, or the sharp lines of a geometric design. These aren't achieved by chance but through targeted practice and knowledge of specific techniques. Whether you aspire to create towering textured cakes, detailed painted scenes, or flawless transfers, the journey into advanced buttercream decoration is rewarding and pushes the boundaries of what you thought was possible with frosting.
Understanding Buttercream Fundamentals for Advanced Decoration
The Importance of Buttercream Consistency in Advanced Techniques
The success of almost every advanced buttercream frosting decorating technique hinges critically on achieving the perfect consistency. Buttercream that is too stiff will be difficult to pipe smoothly, leading to jagged edges, cracks, or even breaking your piping bag. Conversely, buttercream that is too soft will lose its shape quickly, making intricate details like delicate flower petals or sharp lines impossible to achieve.
For techniques like piping realistic flowers, a medium-stiff consistency that holds peaks but is still pliable enough to flow through a small tip is essential. For painting, a slightly thinner, but not runny, consistency is needed to spread smoothly like paint.
Temperature plays a significant role in buttercream consistency. A buttercream that was perfect at room temperature can become too soft in a warm kitchen or too stiff after being refrigerated. Learning to adjust your buttercream by adding a tiny bit of liquid (like milk or cream) to soften it or a little more powdered sugar (or chilling briefly) to stiffen it is a core skill. For example, if attempting advanced piping like ruffles or scales, a consistency that holds a defined edge when piped is necessary.
A simple test involves piping a small swirl; if it holds its shape sharply, it's likely suitable for detail work. If it slumps immediately, it needs adjusting. Mastering this foundational understanding is paramount before tackling more complex advanced buttercream frosting decorating techniques.
Different Types of Buttercream for Advanced Decorating: A Comparison (Swiss, Italian, French, Korean)
Not all buttercreams are created equal when it comes to advanced decoration. Different types offer unique textures, stabilities, and handling properties. Swiss Meringue Buttercream (SMBC), made by whisking heated egg whites and sugar into a meringue before adding butter, is known for its exceptionally smooth, silky texture and moderate stability.
It's less sweet than American buttercream and pipes cleanly, making it suitable for many detailed techniques, though it can be sensitive to temperature fluctuations. Italian Meringue Buttercream (IMBC), similar to SMBC but made with hot sugar syrup poured into whipped egg whites, is often considered the most stable option, holding up well in warmer conditions and providing a very smooth finish ideal for sharp edges and fine piping work.
French Buttercream, made with egg yolks and sugar syrup, is rich and creamy but less stable than meringue-based buttercreams. While delicious as a filling, its higher fat content and softer texture make it less ideal for intricate piping or sharp external decoration, especially in warm environments. Korean Glossy Buttercream, a newer popular choice for realistic floral piping, often incorporates a flour paste (tangzhong) or cornstarch cooked with milk, then combined with butter and powdered sugar.
This type is renowned for its incredible stability, smooth texture, and ability to hold very fine details without melting or collapsing, making it a top choice for advanced buttercream flower artists seeking lifelike results. Understanding these differences allows you to select the best buttercream type for the specific advanced buttercream frosting decorating techniques you plan to use.
Achieving the Perfect Buttercream Base for Intricate Designs
Before you can apply advanced buttercream frosting decorating techniques, you need a flawless canvas. Achieving a perfectly smooth, level buttercream base coat is fundamental. This involves applying a crumb coat – a thin layer of buttercream that traps any loose crumbs – and chilling the cake until firm, typically for 15-30 minutes. Following the crumb coat, apply a thicker final layer of buttercream.
The goal is an even thickness covering the entire cake surface. Techniques like using an offset spatula and a bench scraper are crucial here. Hold the scraper flush against the side of the cake and rotate the cake turntable to smooth the sides. Use the offset spatula to smooth the top, working from the outside edge towards the center.
For an exceptionally smooth finish, especially for techniques like buttercream painting or sharp edges, consider using a hot scraper or spatula. Dip your metal scraper or spatula in hot water, wipe it dry immediately, and then run it over the chilled buttercream surface. The heat slightly melts the surface, allowing you to achieve a glass-like smoothness.
Some decorators repeat this process multiple times, chilling the cake between passes, for the sharpest edges. Ensuring your cake layers are level before frosting and filling them evenly also contributes significantly to a stable and smooth base. A wobbly or uneven foundation will make even the most advanced buttercream frosting decorating techniques look messy.
Advanced Buttercream Piping Techniques: Creating Textures and Patterns
Mastering Buttercream Piping Tips for Unique Effects
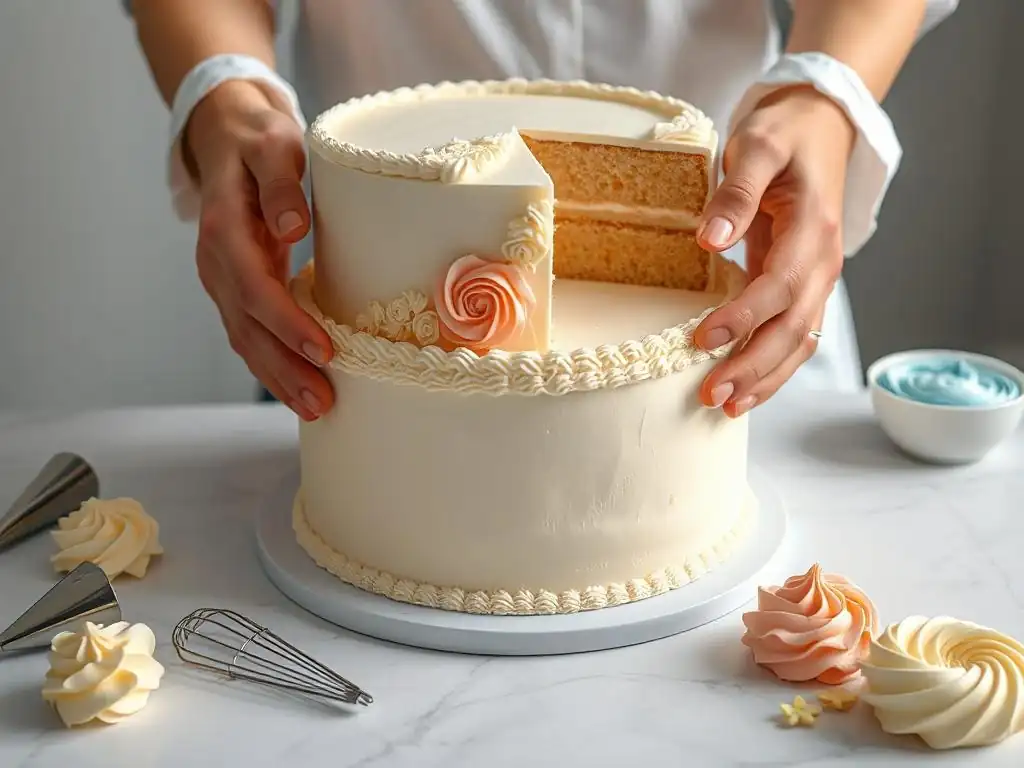
Moving into advanced buttercream piping requires a deeper understanding of the vast array of piping tips available beyond the basic star and round shapes. Petal tips, like the Wilton 104 or 124, are indispensable for creating ruffles, swags, and, most importantly, flower petals. Their teardrop shape allows you to control the width and thickness of the piped line by changing the angle and pressure.
Leaf tips (e.g., Wilton 352) have a V-shaped opening that creates realistic leaf shapes with a simple squeeze and pull motion. For textures like fur or grass, a multi-opening tip (like Wilton 233 or 234) is used, which pushes out multiple thin strands simultaneously.
Specialty tips open up even more possibilities. Basketweave tips (like Wilton 47) create woven patterns, while shell tips (e.g., Wilton 21 or 1M) are versatile for borders, rosettes, and simple textures. Mastering these advanced buttercream frosting decorating techniques with different tips involves practicing consistent pressure and angle. The speed at which you move the piping bag also affects the outcome – slower movement often results in thicker lines or larger ruffles, while faster movement creates thinner, more delicate effects. Don't be afraid to experiment with different tips and buttercreams on parchment paper before applying them to your cake.
Creating Realistic Floral Buttercream Decorations
Piping realistic buttercream flowers is one of the most sought-after advanced buttercream frosting decorating techniques. This often involves using petal tips and a flower nail, especially for classic roses. You build the flower layer by layer, starting with a base bud and adding individual petals with varying pressure and angle to mimic natural growth.
Techniques for other flowers like peonies, ranunculus, hydrangeas, and succulents utilize different tip combinations and piping methods, sometimes piping directly onto the cake surface. For example, hydrangeas are made by piping small dots close together using a small star tip, while succulents often use leaf tips to create layered, pointed petals.
Color shading is also crucial for realistic flowers. This can be achieved by striping the inside of the piping bag with different shades of buttercream or by blending colors directly as you pipe. For instance, for a rose, you might stripe the bag with a darker pink on one side and a lighter pink or white on the other to create natural highlights and shadows.
The stability and texture of the buttercream are paramount here; a very stable buttercream, like Korean Glossy Buttercream, is often preferred because it holds delicate petal shapes crisply without wilting, even when building up multiple layers. Mastering realistic floral advanced buttercream frosting decorating techniques requires significant practice to control pressure, angle, and petal placement.
Advanced Buttercream Textures: Ruffles, Scales, and More
Beyond smooth finishes and piped flowers, advanced buttercream frosting decorating techniques allow you to create stunning textures directly on the cake surface. Ruffles are created using a petal tip (like the 104), holding the thicker end towards the cake and moving the bag up and down or side to side while applying consistent pressure.
Varying the angle and pressure changes the look of the ruffle, from tight and delicate to loose and flowing. Scales can be made by piping overlapping dots or semicircles with a round tip or even using the back of a spoon or offset spatula to press and drag buttercream applied to the cake side.
Other textures include basketweave, which uses a flat or basketweave tip to create an interwoven pattern by piping alternating horizontal and vertical lines. Wood grain effects can be achieved by applying buttercream and then dragging a comb or spatula through it in wavy lines.
Creating these textures requires a specific buttercream consistency – usually medium-stiff – that holds its shape but is still pliable enough to be manipulated. Practice on a dummy cake or the side of a bowl is highly recommended to get a feel for the pressure and movement needed for each specific advanced buttercream frosting decorating technique.
Piping Buttercream Letters and Calligraphy: A Detailed Guide
Piping clean, elegant letters and calligraphy in buttercream is a subtle yet impactful advanced buttercream frosting decorating technique. It requires a steady hand, consistent pressure, and the right buttercream consistency. Typically, a small round piping tip (like a #2 or #3) is used for fine lines and details, while slightly larger tips might be used for thicker, bolder lettering. The buttercream should be smooth, free of air bubbles, and slightly on the stiffer side of medium consistency to ensure sharp, defined lines that don't spread.
For perfect placement, it's often helpful to gently mark the cake surface or even transfer an outline of your text using a template pressed lightly onto a chilled, crusted buttercream surface. Practice piping the alphabet and different fonts on parchment paper first. Focus on maintaining even pressure throughout each stroke and lifting the piping bag cleanly at the end of each letter or word.
For calligraphy, understanding the flow and connection between letters is key. While it seems simple, achieving professional-looking piped text is a challenging advanced buttercream frosting decorating technique that significantly elevates the overall presentation of your cake.
Buttercream Painting Techniques: Turning Cakes into Canvases
Introduction to Buttercream Painting: Tools and Materials
Buttercream painting is an advanced buttercream frosting decorating technique that allows you to use your cake as a canvas, applying buttercream like paint to create intricate designs, scenes, and even portraits. The basic tools include food-safe brushes (various sizes and shapes, similar to art brushes), an offset spatula or palette for mixing colors, and gel or powder food colors. You'll need a smooth, chilled buttercream base on your cake, often made with a crusting buttercream type (like American buttercream) which forms a slight crust when exposed to air, providing a stable surface to paint on.
The "paint" itself is created by mixing small amounts of buttercream with gel food colors. For a thinner consistency suitable for fine lines and detailed work, you can add a tiny drop of clear extract (like vanilla or lemon) or vegetable oil to the colored buttercream mixture. However, be cautious not to add too much liquid, as it can make the buttercream greasy or difficult to control.
Having a selection of brushes allows you to create different strokes, from broad washes of color with a flat brush to fine details with a small round brush. This advanced buttercream frosting decorating technique truly merges the skills of baking and fine art.
Mastering Color Blending and Shading in Buttercream Painting
Achieving realistic or artistic effects in buttercream painting relies heavily on your ability to blend and shade colors. Just like with traditional painting, you can mix your desired hues on a palette (or a plate) before applying them to the cake, or you can blend colors directly on the cake surface. For smooth transitions and gradients, apply colors side by side and gently blend them together using a clean brush or the tip of an offset spatula while the buttercream is still soft. This is similar to the wet-on-wet technique in painting.
To create depth and dimension, use shading techniques. Apply darker shades in areas that would naturally be in shadow and lighter shades or highlights where light would hit. This often involves applying a base color, letting it crust slightly if using a crusting buttercream, and then adding layers of darker or lighter buttercream on top. For example, painting a leaf involves starting with a base green, adding darker green for shadows along veins, and lighter green or yellow for highlights. Mastering color blending and shading is a key component of creating compelling visuals with advanced buttercream frosting decorating techniques.
Creating Realistic Scenes and Portraits with Buttercream
Painting realistic scenes or portraits in buttercream is one of the most challenging and rewarding advanced buttercream frosting decorating techniques. This level of detail requires not only mastery of color blending and shading but also a good understanding of form, perspective, and light. Often, decorators will start by gently sketching or transferring a basic outline of the scene or portrait onto the chilled buttercream surface. Then, they build up layers of color and detail, much like painting on canvas.
Patience is essential. You might apply a base layer, chill the cake to set it, and then add more details, shadows, and highlights. For portraits, paying close attention to subtle variations in skin tone, the direction of light, and facial features is critical. Using very fine brushes for details like eyes or hair is common. While achieving photo-realism can take years of practice, creating recognizable and artistic scenes or likenesses with buttercream is achievable with dedication to these advanced buttercream frosting decorating techniques.
Advanced Buttercream Painting Techniques: Palette Knife Painting
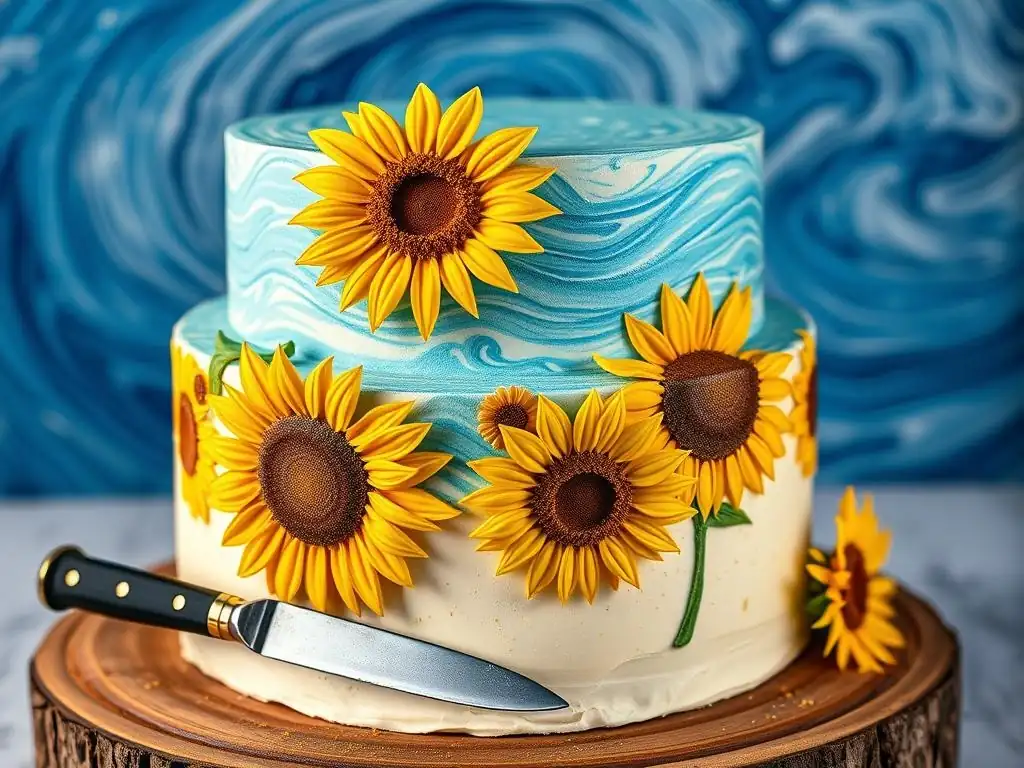
Palette knife painting is an advanced buttercream frosting decorating technique borrowed directly from oil painting, where thick applications of paint are applied using a knife. In buttercream, small offset spatulas or actual food-safe palette knives are used to apply buttercream thickly, creating visible strokes and texture. This technique is excellent for creating abstract designs, textured floral arrangements (like impasto flowers), or adding a rustic, artistic feel to a cake.
To perform this technique, scoop a small amount of colored buttercream onto the knife and apply it to the cake surface with varying pressure and angle. You can layer colors, scrape through existing layers, or swirl the buttercream to create different effects. The texture created by the knife strokes adds depth and visual interest. While it might seem less precise than brush painting, mastering the control of the knife and the consistency of the buttercream is key to creating intentional and beautiful designs using this advanced buttercream frosting decorating technique.
Advanced Buttercream Painting Techniques: Brush Embroidery
Brush embroidery is a classic and elegant advanced buttercream frosting decorating technique that mimics the look of embroidered fabric. It's typically done on a smooth, crusted buttercream surface. The technique involves piping a line or design element (like a petal, leaf, or scroll) using a small round piping tip (such as a #2 or #3) with buttercream that is slightly on the stiffer side. Immediately after piping a short section, use a clean, dry food-safe brush to drag the buttercream from the piped line inwards towards the center of the design.
This dragging motion softens the edge of the piped line and creates a delicate, stitched appearance. You work in small sections, piping and then brushing, before the buttercream crusts too much. For designs with multiple elements, like lace patterns or intricate floral motifs, you build up the design section by section, ensuring each element has the characteristic brushed edge. The contrast between the slightly raised, defined edge and the softened, brushed interior gives this advanced buttercream frosting decorating technique its unique texture and appeal.
Buttercream Transfers: A Versatile Decoration Method
Creating Buttercream Transfers: Step-by-Step Guide
Buttercream transfers are an ingenious advanced buttercream frosting decorating technique that allows you to create intricate designs, logos, or characters on a flat surface and then transfer them seamlessly onto your cake. The basic process involves placing your desired design (printed or drawn) beneath a piece of parchment paper or acetate. Secure the paper so it doesn't move. Using stiff buttercream and piping tips, pipe the outline of your design onto the parchment, following the lines beneath. For multi-colored designs, pipe in the different colors, filling in sections as needed.
Once the piping is complete, you can add a thin layer of background buttercream over the entire design if desired (this helps unify the transfer and makes it easier to handle). Place the entire transfer sheet flat in the freezer until the buttercream is completely frozen and solid, typically 30 minutes to several hours depending on the size and thickness. This freezing step is crucial as it allows the buttercream design to hold its shape when transferred.
Using Buttercream Transfers for Intricate Designs and Logos
Buttercream transfers are particularly useful for designs that require sharp lines, specific shapes, or text that would be difficult to pipe directly onto a curved cake surface. They are perfect for replicating logos, cartoon characters, detailed illustrations, or messages in a specific font. Because you are working flat, you have more control and can achieve a higher level of precision than trying to freehand pipe complex designs directly onto the cake.
Once frozen solid, the transfer is carefully peeled off the parchment paper or acetate and applied to a chilled cake. The cold buttercream adheres quickly to the cake's surface. This advanced buttercream frosting decorating technique ensures that elements like intricate patterns or detailed images are rendered accurately and cleanly, making them ideal for themed cakes or those requiring specific branding or imagery.
Tips and Tricks for Perfect Buttercream Transfers
Achieving perfect buttercream transfers requires attention to detail and timing.
- Use stiff buttercream for piping the design outlines and details; this helps them hold their shape when frozen and transferred.
- Ensure your cake is chilled before applying the transfer; this helps the transfer adhere quickly and prevents the cake's buttercream from melting.
- Work quickly once you remove the transfer from the freezer, as it will start to soften rapidly at room temperature.
- Place the transfer carefully onto the cake surface and press gently and evenly to ensure full contact.
- Slowly and carefully peel back the parchment paper or acetate, starting from one corner, ensuring the buttercream design is sticking to the cake. If any part isn't sticking, gently press it back down and refreeze the transfer briefly before trying again.
- Tiny air bubbles can sometimes get trapped; try to pipe smoothly to minimize these.
- For designs that need to appear a specific way (like text that reads left-to-right), remember to pipe the design in reverse on the parchment paper so it appears correctly once transferred to the cake. Mastering these tips enhances your execution of this advanced buttercream frosting decorating technique.
Incorporating Other Elements with Buttercream for Advanced Designs
Combining Buttercream with Fondant Accents
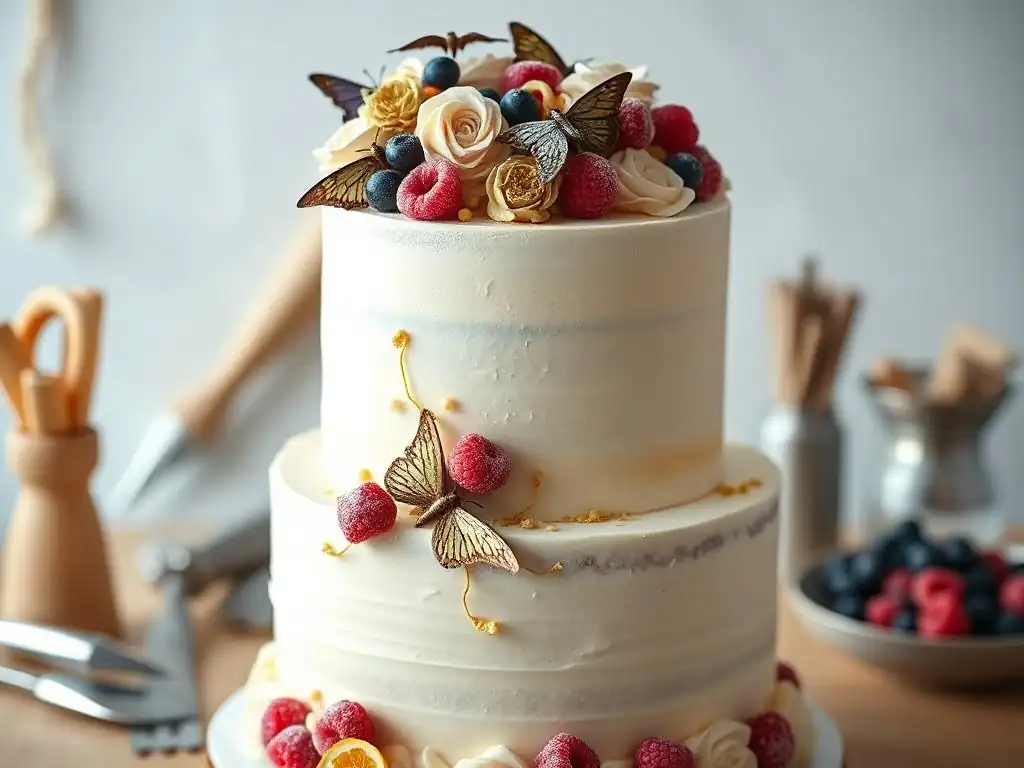
Integrating fondant elements with buttercream is a popular advanced buttercream frosting decorating technique that leverages the strengths of both mediums. While buttercream provides a delicious flavor and soft texture, fondant is excellent for creating sharp shapes, smooth panels, intricate cutouts, or detailed figures. You can frost a cake smoothly with buttercream and then add fondant details like stripes, polka dots, geometric shapes, or even a fondant plaque with a message. Conversely, a cake covered in fondant can have buttercream details piped onto it.
This combination allows for creative contrast in texture and finish. For example, a cake with smooth buttercream sides might feature a sharp fondant top edge or fondant cutouts applied to its surface. Detailed fondant figures or sugar flowers can be placed atop a buttercream-frosted cake. Ensuring that the buttercream is chilled before applying fondant elements helps prevent smudging and allows the fondant to adhere cleanly. This advanced buttercream frosting decorating technique offers versatility, combining the ease and flavor of buttercream with the structural and decorative possibilities of fondant.
Using Edible Sprays and Dusts to Enhance Buttercream Decorations
Edible sprays and dusts are fantastic tools for adding shimmer, color, and dimension to advanced buttercream frosting decorating techniques. Luster dusts, petal dusts, and edible glitters can be applied dry with a brush for subtle sparkle or mixed with clear extract (like vodka or lemon extract, which evaporates quickly) to create an edible paint. This paint can be used to add metallic accents (gold, silver, bronze), highlight details on piped flowers, or add a wash of color.
Edible spray colors or airbrush colors can be used to create gradients, add overall color washes, or stencil designs onto a crusted buttercream surface. For instance, you might spray a finished buttercream cake with a pearlescent spray for an all-over shimmer or use an airbrush to add subtle shading around piped elements. When using dusts or sprays on buttercream, it's often best if the buttercream has crusted slightly to prevent the dust/spray from causing smudges or melting the surface. These elements add an extra layer of sophistication and visual impact to your advanced buttercream frosting decorating techniques.
Adding Textural Elements like Crumbs and Nuts to Buttercream
Incorporating edible textural elements like cookie crumbs, cake crumbs, chopped nuts, or shredded coconut directly into or onto buttercream is a simple yet effective advanced buttercream frosting decorating technique. These elements can be used to create specific visual effects, add flavor and texture, or even cleverly hide imperfections. For example, crushed chocolate cookies are commonly pressed into buttercream to create a "dirt" effect for garden or construction-themed cakes.
Chopped nuts or shredded coconut can be pressed into the buttercream around the base or sides of a cake for a rustic or tropical look. Cake crumbs can be used to create a rough, textured surface. This technique is often applied after the main buttercream layer is smooth. Simply hold the cake over a tray or piece of parchment paper and gently press the desired crumbs or nuts onto the buttercream surface where you want the texture. This advanced buttercream frosting decorating technique adds both visual interest and a pleasing textural contrast to the smooth frosting.
Troubleshooting Common Buttercream Decorating Problems
Preventing Buttercream from Melting or Cracking
Two common frustrations when executing advanced buttercream frosting decorating techniques are melting and cracking. Buttercream melting is usually a result of warmth – either the room is too hot, your hands are too warm when piping, or the cake itself is too warm. To prevent melting, work in a cool environment (ideally below 72°F or 22°C). Chill your buttercream briefly if it becomes too soft while working. If piping, consider chilling your piping bag periodically. If frosting a cake, work on a chilled cake and return it to the refrigerator as needed.
Cracking, conversely, often happens when buttercream is too stiff or when a cold cake is brought too quickly into a warm environment, causing condensation and stress on the frosting. Ensure your buttercream consistency is appropriate for the technique; for frosting cakes, it should be smooth and spreadable, not stiff. If working with a chilled cake, allow it to come to temperature gradually in a cooler spot before moving it to a warmer area, if possible. Using a buttercream type less prone to crusting (like Swiss or Italian meringue) can also help prevent surface cracking common with some American buttercreams.
Fixing Buttercream Imperfections: Air Bubbles, Uneven Surfaces
Even with careful preparation, imperfections like air bubbles or uneven surfaces can appear when working with buttercream. Air bubbles often get incorporated during mixing. To minimize them, beat your buttercream on low speed for a few minutes after it's fully combined, or gently stir it with a spatula to force air out. If you find bubbles while piping, gently squeeze the bag to push the air out or poke the bubble on the cake with a pin and smooth over.
Uneven surfaces after frosting can be fixed with a bit of patience. For small dents or marks, apply a little extra buttercream and smooth it with a small offset spatula. For larger uneven areas, you may need to scrape off the affected section and reapply buttercream, smoothing with a bench scraper. Using the hot scraper technique mentioned earlier is excellent for smoothing out minor imperfections on a chilled cake. Don't be afraid to scrape off an area and re-frost it if needed to achieve the smooth base required for many advanced buttercream frosting decorating techniques.
Dealing with Buttercream Color Bleeding
Color bleeding is a frustrating issue, especially when using contrasting colors side-by-side in advanced buttercream frosting decorating techniques like transfers or detailed piping. Dark colors, particularly red, black, and deep blues, are most prone to bleeding. To minimize bleeding, always use high-quality gel or powder food colors, which are more concentrated than liquid colors and require less quantity.
If applying contrasting colors directly next to each other, especially dark next to light, allow the first color to set or crust slightly before applying the second. For critical areas, some decorators will pipe a thin barrier line of white buttercream between the two colors. Keeping the cake cool is also crucial, as warmth exacerbates color bleeding.
Chilling the cake after applying contrasting colors helps set the buttercream and reduce the likelihood of colors running into each other. While it can be challenging with very vibrant, dark colors, these steps significantly reduce the risk of color bleeding affecting your advanced buttercream frosting decorating techniques.
Advanced Buttercream Cake Decorating Ideas & Inspiration
Geode Cake - Detailed Techniques
The Geode cake is a stunning example of an advanced buttercream frosting decorating technique that mimics natural crystal formations. It involves cutting an indentation into the side of a buttercream-frosted cake and lining it with rock candy or sugar crystals. First, frost your cake smoothly with buttercream and chill it. Using a sharp knife, carefully cut a shallow, irregular shape into the side of the chilled cake.
Remove the cake you cut out. Then, fill the cavity with a thin layer of fresh buttercream or edible glue. Press various sizes and colors of rock candy or sugar crystals into the cavity to resemble a geode formation.
Around the edge of the "geode," apply layers of buttercream in shades that transition from the crystal color to the main cake color, using an offset spatula or palette knife to create a rough, rock-like texture. Edible gold leaf or metallic dust can be applied along the edge of the geode for a touch of luxury and realism, mimicking mineral veins. This advanced buttercream frosting decorating technique requires careful planning and execution to create a believable crystalline effect contrasted with the textured buttercream "rock."
Gravity-Defying Cake - Detailed Techniques
Creating a gravity-defying cake is an impressive advanced buttercream frosting decorating technique that involves engineering as much as decorating. These cakes feature elements that appear to float or pour, like a tipping bottle or a hovering object. The core technique involves building a hidden internal support structure, usually made from food-safe dowels, boards, and sometimes specialized kits. This structure must be strong enough to support the weight of the cake and decorations.
The cake is then baked and carved to fit around the structure. Buttercream is used to cover the cake and structure, often creating the illusion of movement or pouring. For example, a "pouring milk" cake involves a structure that holds a carton above the cake, with buttercream piped around the structure to look like milk cascading down. This advanced buttercream frosting decorating technique requires precise measurements, secure assembly of the support, and careful application of buttercream to conceal the structure and create a convincing illusion.
Resources for Learning More Advanced Buttercream Techniques (Books, Online Courses)
To truly master advanced buttercream frosting decorating techniques, continuous learning and practice are key. While online tutorials offer quick glimpses, structured learning resources provide in-depth knowledge. Comprehensive baking books dedicated to cake decorating often feature detailed sections on various buttercream types, piping techniques, and decorating methods, complete with step-by-step instructions and visual guides. Look for titles that specifically mention advanced techniques, sugar artistry, or professional cake decorating.
Online courses and workshops specifically focused on advanced buttercream skills are also invaluable. Many platforms offer courses taught by experienced cake artists that cover topics like realistic floral piping, buttercream painting, or structured cakes in detail. These resources often include video demonstrations, allowing you to see the techniques being performed and learn at your own pace. Investing in reliable educational materials is a fantastic way to expand your skills and gain confidence in executing complex advanced buttercream frosting decorating techniques.
Frequently Asked Questions
What are some examples of advanced buttercream frosting decorating techniques?
Some advanced techniques include piping intricate designs, using different nozzle sizes and shapes, and creating textured effects like ruffles or rosettes.
What tools are essential for advanced buttercream decorating?
Essential tools include a high-quality piping bag, a variety of piping tips, a turntable, and potentially palette knives for smoothing and shaping.
How can I achieve a smooth, flawless buttercream finish on my cake?
A smooth finish requires a crumb coat to trap loose crumbs, followed by a final layer of buttercream, and using a bench scraper or offset spatula to achieve a smooth surface.
What kind of buttercream is best for detailed decorating?
Swiss meringue buttercream and Italian meringue buttercream are often preferred for detailed work due to their smooth texture and stability at room temperature. American buttercream can also be used, but may require adjustments for consistency.
Where can I find step-by-step guides for learning these advanced techniques?
BakeWithEase.com offers step-by-step guides, recipes, and video tutorials to help bakers of all levels master advanced buttercream decorating techniques.
Final Reflection: The Ever-Evolving Art of Frosting
The artistry of advanced buttercream frosting techniques is no longer a niche skill; it's a vibrant, dynamic element of modern baking, influencing everything from professional pastry shops to home kitchens. The intricate designs and stunning textures achievable through these techniques are transforming cakes from simple desserts into breathtaking works of edible art, captivating audiences and inspiring a new generation of bakers.
The impact of these advanced techniques extends far beyond the visual appeal. They represent a dedication to craftsmanship, a pursuit of perfection, and a celebration of creativity. The meticulous detail and precision required foster a sense of accomplishment and mindfulness, qualities increasingly valued in our fast-paced world. The details are not the details. They make the design.
– Charles Eames. This quote perfectly encapsulates the importance of mastering these techniques, transforming a simple cake into a truly memorable experience.
Now, it's your turn. Consider the techniques explored in this article – from delicate piping to stunning airbrushing – and how you can incorporate them into your own baking journey. Don't be afraid to experiment, to push your boundaries, and to discover the unique artistry that lies within you. The world of advanced buttercream frosting is vast and waiting to be explored; let your creativity be your guide.
Unleash Your Inner Cake Artist: Master Frosting Techniques Today!
Thanks for taking the time to explore the world of advanced frosting! We hope you've gained some inspiring ideas to elevate your baking game. Now it's time to put your newfound knowledge into practice.
- Dive into a new frosting technique: Choose one of the advanced techniques discussed – perhaps the delicate piping roses or the stunning ombre effect – and try it on your next cake. Document your creation and share it on social media using #BakeWithEaseAdvancedFrosting!
- Experiment with flavor combinations: Don't be afraid to get creative! Try combining different frosting flavors and colors for unexpected results.
- Challenge yourself with a complex design: Find a cake decorating project you've been putting off and tackle it. You'll surprise yourself with what you can accomplish!
What unique frosting creation will you be whipping up next?