
The Power of Autolyse: Improving Baguette Crumb and Texture

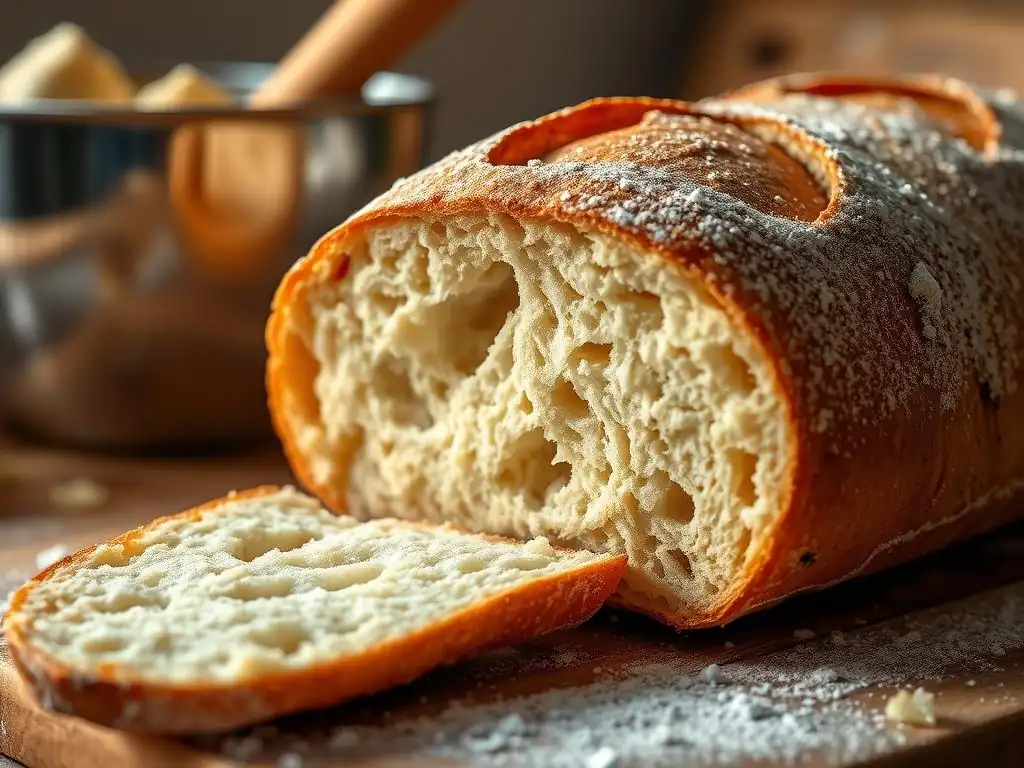
Welcome to BakeWithEase, your trusted guide to unlocking baking brilliance! Ever wondered how to achieve that perfect, airy crumb in your baguette? This is where your journey begins. We're diving deep into the transformative power of autolyse, revealing the secrets to a baguette texture you've only dreamed of. Prepare to elevate your bread baking and discover how this simple technique can revolutionize your results. Ready to unlock the secrets to a superior autolyse baguette crumb texture? Let's get baking!
- Mastering Autolyse: Achieving Superior Baguette Crumb and Texture
- Introduction to Autolyse in Baguette Baking
- The Science Behind Autolyse: Enhancing Baguette Quality
- Autolyse Technique: A Step-by-Step Guide for Baguette Bakers
- Autolyse: Troubleshooting Common Issues in Baguette Baking
- Autolyse vs. Other Baguette Dough Development Methods: A Comparison
- Achieving the Perfect Baguette: Advanced Tips and Techniques
- Recipes: Autolyse Baguette Recipes
- Conclusion: Mastering Autolyse for Exceptional Baguettes
-
Frequently Asked Questions
- What is the autolyse technique and why is it used in baguette baking?
- How does autolyse specifically affect the crumb texture of a baguette?
- What is the ideal autolyse time for a baguette recipe aiming for optimal crumb texture?
- Can you over-autolyse a baguette dough, and what are the signs of over-autolysing?
- What other factors, besides autolyse, contribute to a desirable baguette crumb texture?
- Final Reflection: Unleashing the Potential of Autolyse in Your Baking
- Unleash Your Inner Boulanger: Elevate Your Baguette Baking!
Mastering Autolyse: Achieving Superior Baguette Crumb and Texture
Introduction to Autolyse in Baguette Baking
What is Autolyse and Why is it Crucial for Baguettes?
Autolyse is a simple yet powerful technique in bread baking, particularly beneficial for recipes like baguettes where a delicate crumb and crisp texture are desired. At its core, autolyse involves mixing just the flour and water from your recipe and letting this mixture rest before adding other ingredients like salt and yeast. This initial resting period allows the flour to fully hydrate and natural enzymatic activity to begin, kickstarting the gluten development process without any mechanical kneading.
For baguettes, which often use higher hydration levels and require a specific open, airy crumb structure, the autolyse technique is crucial. It helps manage the dough's hydration more effectively from the start and sets the stage for easier handling and superior development later.
The importance of autolyse for achieving a perfect baguette crumb texture cannot be overstated. By giving the flour and water time to interact undisturbed, the gluten network begins to form naturally. This leads to dough that is less sticky, more extensible, and easier to work with during subsequent steps like kneading or folding.
Furthermore, the initial hydration and enzyme action during autolyse contribute directly to the final structure of the loaf. This passive development helps create the large, irregular holes characteristic of a great baguette crumb, enhancing both its appearance and mouthfeel. It's a fundamental step towards mastering the art of artisan baguette baking and significantly improves the overall autolyse baguette crumb texture.
Understanding the Benefits of Autolyse on Baguette Dough Development
Incorporating autolyse into your baguette baking routine yields several significant benefits for dough development. Firstly, it allows the flour to absorb water more completely and evenly. This thorough hydration is essential for developing a strong, flexible gluten network capable of trapping the gases produced during fermentation, which is key to achieving an open autolyse baguette crumb texture.
Secondly, the resting period enables the dough to become more extensible and less elastic, making it easier to stretch and fold later without tearing. This reduced elasticity translates to less resistance during shaping, allowing bakers to form baguettes with the desired long, slender shape more easily.
Beyond hydration and extensibility, autolyse also reduces the overall kneading time required. Since gluten development begins during the rest, less mechanical work is needed to achieve the desired dough structure. This can help prevent oxidation, which can negatively impact the color and flavor of the final baguette.
A dough that has undergone autolyse often feels smoother and more pliable from the outset, indicating that the gluten proteins are aligning and relaxing. This initial ease of handling is a direct benefit that impacts every subsequent step, ultimately contributing to a better rise, a more consistent bake, and the coveted light and airy autolyse baguette crumb texture.
The Science Behind Autolyse: Enhancing Baguette Quality
How Autolyse Facilitates Gluten Development in Baguette Dough
The magic of autolyse lies in its ability to facilitate gluten development with minimal effort. Wheat flour contains proteins, primarily glutenin and gliadin. When water is added, these proteins link together to form gluten, the network that gives bread dough its structure and elasticity.
During autolyse, the absence of salt is key; salt can tighten the gluten network, making it harder for the proteins to hydrate and link initially. By resting the mixture of just flour and water, the gluten proteins have the opportunity to hydrate fully and begin forming connections passively. This process is akin to letting puzzle pieces find their places without being forced.
Furthermore, enzymes naturally present in flour, such as proteases, are activated during autolyse. Proteases work by breaking down some of the protein bonds, which helps to relax the dough and increase its extensibility. While it might seem counterintuitive to break down proteins when you want to build a gluten network, this controlled breakdown actually makes the dough more pliable and allows the gluten strands to align more easily during subsequent gentle folding or kneading.
This results in a more uniform and stronger gluten structure capable of supporting the characteristic open autolyse baguette crumb texture. A typical autolyse rest of 20-60 minutes at room temperature is usually sufficient to kickstart this process effectively for baguette dough.
The Impact of Hydration on Dough Extensibility During Autolyse
Hydration level plays a crucial role in how autolyse impacts dough extensibility, especially for baguettes which often feature higher hydration percentages, sometimes ranging from 70% to 80% or even higher relative to the flour weight. With higher hydration, the flour particles are more thoroughly separated by water, allowing the gluten proteins to move and link more freely. During the autolyse rest, this ample water supply ensures maximum hydration of the proteins, leading to a dough that feels significantly more relaxed and extensible compared to a lower hydration dough rested for the same amount of time.
A highly hydrated dough undergoing autolyse becomes remarkably pliable. This increased extensibility is invaluable for shaping baguettes, which require careful handling to maintain the internal structure necessary for a good crumb. The dough stretches easily without tearing, allowing bakers to create the long, tensioned shape that promotes oven spring and contributes to the characteristic elongated holes in the autolyse baguette crumb texture. Without adequate hydration during autolyse, the dough would remain tighter and more resistant, making shaping more difficult and potentially resulting in a denser crumb.
Enzyme Activity During Autolyse: Improving Dough Structure and Flavor
Beyond protease activity, other enzymes like amylase are also active during the autolyse period. Amylase breaks down complex starches in the flour into simpler sugars. While some of these sugars provide food for the yeast during fermentation (contributing to rise and flavor), the enzymatic breakdown itself also influences the dough's structure and the final baguette's characteristics. The presence of more readily available sugars can lead to more vigorous fermentation, contributing to a lighter, airier crumb.
The enzymatic action during autolyse also contributes subtle complexities to the flavor profile of the finished baguette. The breakdown of starches and proteins can create precursors for flavor compounds that develop further during fermentation and baking. While the most significant flavor development comes from fermentation and the Maillard reaction during baking, the initial enzymatic work during autolyse lays a positive foundation. This enzymatic pre-digestion, combined with the enhanced gluten development and hydration, collectively improves the dough's handling properties, its ability to rise, and ultimately, contributes to the delightful autolyse baguette crumb texture and overall quality.
Autolyse Technique: A Step-by-Step Guide for Baguette Bakers
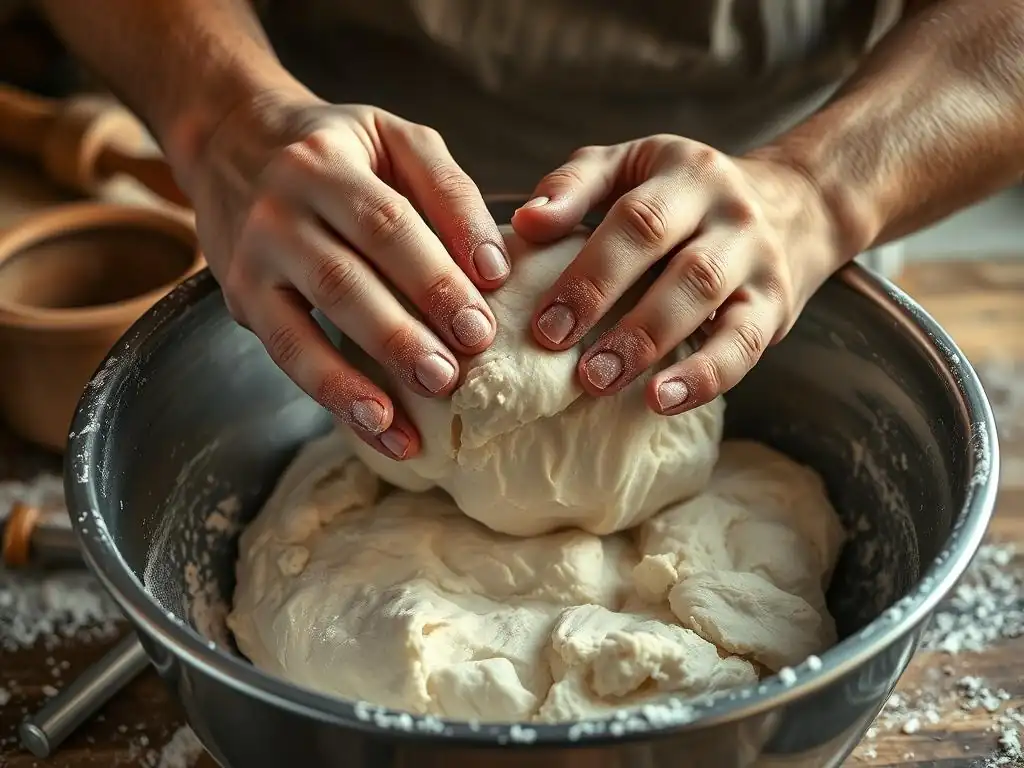
Ingredients and Equipment for Successful Autolyse
Implementing the autolyse technique for your baguettes is straightforward and requires only the most basic baking ingredients and equipment. The essential ingredients for the autolyse step itself are simply:
- Flour (typically bread flour or a mix including a small percentage of whole wheat for flavor)
- Water (usually specified by weight in baker's percentages, representing the full hydration of the final dough)
You will need the specified amount of flour and water from your baguette recipe. It's important to use the correct temperature water as specified in your recipe, as temperature affects the rate of enzyme activity. For equipment, you'll need:
- A mixing bowl (large enough to comfortably mix the dough)
- A scale (for accurate measurement of flour and water by weight, which is crucial for consistent results, especially with higher hydration doughs)
- A spatula or dough scraper (for initial mixing)
- Plastic wrap or a damp towel (to cover the bowl during the rest period and prevent the dough from drying out)
That's it! The simplicity of the ingredients and equipment underscores how easily this powerful technique can be integrated into any baguette recipe to improve the autolyse baguette crumb texture.
Step 1: Mixing Flour and Water for Optimal Hydration
The first step in the autolyse process is to combine the flour and water from your recipe. Weigh out the precise amounts of flour and water directly into your mixing bowl. It's important to use the total amount of water specified in the recipe for this step, even if other wet ingredients like starter or yeast solution are added later.
Using a spatula, spoon, or even your hands, mix the flour and water until just combined. There's no need for vigorous kneading at this stage. The goal is simply to ensure that all the flour is hydrated and there are no dry pockets remaining.
The mixture will look shaggy and rough at first – this is perfectly normal. Resist the urge to overmix; you are not trying to develop gluten through mechanical action yet, only to bring the ingredients together so the flour can begin absorbing the water. Ensure the sides of the bowl are scraped down so all the dough mass is together.
Step 2: Determining the Ideal Autolyse Rest Period: Time and Temperature
Once the flour and water are mixed, cover the bowl tightly with plastic wrap or a damp kitchen towel to prevent the surface of the dough from drying out and forming a skin. Then, let the mixture rest.
The ideal duration for the autolyse rest period can vary depending on the type of flour used and the desired outcome, but a common range for baguette dough is between 20 minutes and 1 hour at room temperature (around 70-75°F or 21-24°C). Some bakers prefer longer autolyse periods, up to several hours, especially with whole wheat flours which take longer to hydrate.
- Typical Autolyse Times:
- White Bread Flour: 20 minutes to 1 hour
- Flour blends including whole wheat: 30 minutes to 2 hours
- Very high hydration doughs: Often benefit from longer rests (e.g., 1-2 hours)
- Temperature: A warmer environment speeds up enzyme activity, while a cooler environment slows it down. Standard room temperature is usually sufficient.
During the rest, the dough will visibly transform, becoming smoother and more pliable. You'll notice it's less shaggy and begins to show some elasticity. This period allows the natural enzymes to start their work and the gluten network to begin forming passively, setting the stage for improved autolyse baguette crumb texture.
Step 3: Integrating Remaining Ingredients After Autolyse Completion
After the autolyse rest period is complete, it's time to incorporate the remaining ingredients into the dough. These typically include salt, yeast (or sourdough starter), and sometimes a small amount of malt or sugar. Adding salt after autolyse is standard practice because salt can restrict the initial hydration and enzyme activity.
Gently add the salt and yeast (or starter) to the surface of the autolysed dough. You can then mix these in using a gentle kneading motion, folding, or by briefly using a stand mixer on a low speed. The dough, already partially developed and relaxed from the autolyse, will incorporate these ingredients more easily than if they had been added at the very beginning.
Continue mixing or folding just until the new ingredients are evenly distributed throughout the dough mass. From this point, you will proceed with your standard baguette recipe's bulk fermentation and shaping steps, benefiting from the improved dough structure achieved through autolyse, which directly contributes to the desired autolyse baguette crumb texture.
Autolyse: Troubleshooting Common Issues in Baguette Baking
Managing Sticky Dough After Autolyse: Techniques and Solutions
It's common for dough, especially high-hydration baguette dough, to feel quite sticky after the autolyse rest period. This stickiness is often a sign of good hydration and developing extensibility, but excessive stickiness can be challenging to work with. If your dough feels excessively sticky and difficult to handle, here are a few techniques and solutions:
- Assess Hydration: Double-check your water measurement. Even a slight excess of water can dramatically increase stickiness, especially with certain flours.
- Work Surface: Use a minimally floured surface or lightly wet your hands and scraper when handling very sticky dough. Avoid adding excessive dry flour, which can negatively impact hydration and crumb.
- Gentle Handling: Remember that the autolysed dough is already partially developed. Use gentle stretch-and-fold techniques rather than aggressive kneading. These methods build strength without making the dough stickier.
- Consider Flour Type: Different flours absorb water differently. If you're using a new flour, you might need to slightly adjust hydration in future batches.
- Give it Time: Sometimes, the dough just needs a little more time during bulk fermentation and subsequent folds to fully organize its structure and become less sticky. The gluten network continues to strengthen, which helps manage hydration.
A slightly sticky dough is often a sign of good potential for an open autolyse baguette crumb texture. The key is learning to work with it using proper technique rather than trying to eliminate the stickiness with excessive flour.
Adapting Autolyse Time for Different Flour Types
The type of flour you use significantly impacts the ideal autolyse duration. Different flours have varying protein content and absorption rates.
- All-Purpose Flour: Generally requires a shorter autolyse, perhaps 20-40 minutes, as it has lower protein and hydrates relatively quickly.
- Bread Flour: The most common choice for baguettes, bread flour has higher protein and benefits from an autolyse of 30 minutes to 1 hour to fully hydrate and start developing gluten.
- Whole Wheat or Other Whole Grain Flours: These flours contain bran and germ, which absorb significantly more water and take longer to hydrate. If using a blend with whole wheat (even 10-20%), consider extending the autolyse time to 1-2 hours to allow the bran to soften and prevent it from cutting the developing gluten strands.
Observing the dough is key. Regardless of the clock time, the dough should look smoother and feel more extensible than when you first mixed it. If it still looks shaggy and tight after the recommended time, a longer autolyse might be beneficial for that specific flour. Adapting the autolyse time ensures you get the maximum benefit for developing the best autolyse baguette crumb texture from your chosen flour.
Preventing Over-Autolysis: Identifying and Correcting Issues
While beneficial, it is possible to over-autolyse dough, though it's less common with standard white flour and typical baguette autolyse times (under 1-2 hours). Over-autolysis occurs when the enzymatic activity, particularly protease, breaks down too much of the protein structure.
- Identifying Over-Autolysis:
- The dough becomes excessively slack, almost liquidy, with little to no structure.
- It tears very easily when stretched and doesn't hold tension.
- It may feel greasy or slimy.
- It lacks elasticity and doesn't bounce back when poked.
- Preventing Over-Autolysis:
- Stick to recommended autolyse times, especially when first experimenting.
- Control dough temperature; warmer temperatures accelerate enzyme activity. Avoid autolysing in a very hot environment for extended periods.
- Be more cautious with longer autolyse times (several hours) or when using flours with very high enzyme activity.
- Correcting Over-Autolysis (Limited Options):
- If slightly over-autolysed, try incorporating the salt and yeast and proceeding with aggressive stretch-and-folds or even a brief period of stand mixer kneading to try and rebuild some structure.
- Adding a small amount of additional flour might help, but this changes the hydration and can affect the final result.
- In severe cases, the dough might be irrecoverable for baguettes requiring strong structure and an open crumb. It might be repurposed for a flatter bread like focaccia or as part of a future dough.
Understanding the signs of over-autolysis helps prevent this issue, ensuring the technique contributes positively to your autolyse baguette crumb texture rather than detracting from it.
Autolyse vs. Other Baguette Dough Development Methods: A Comparison
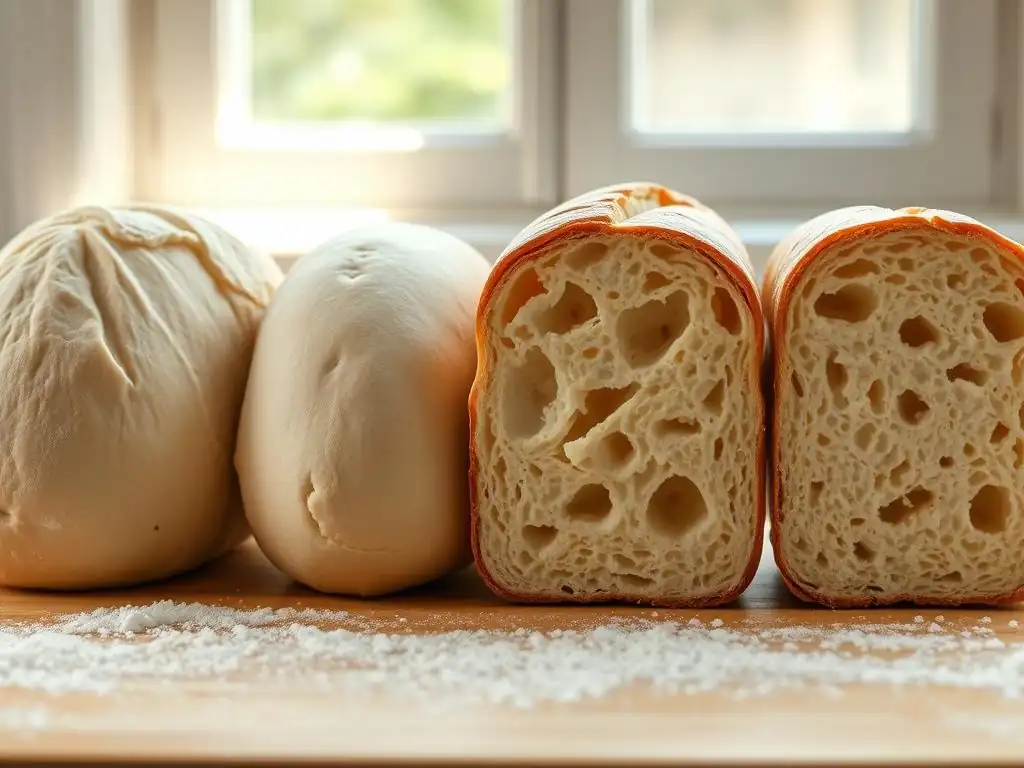
Autolyse Advantages: Structure, Flavor, and Texture
Autolyse offers distinct advantages over methods that rely solely on mechanical kneading or very long, passive fermentation without an initial rest. The primary benefit is the passive development of gluten, which results in a dough that is stronger yet more extensible. This unique combination leads to:
- Improved Structure: The gluten network develops more uniformly and aligns more easily, providing a robust framework capable of supporting the open, airy autolyse baguette crumb texture.
- Enhanced Flavor: While subtle, the enzymatic activity during autolyse can contribute to better sugar availability for fermentation, potentially leading to more complex flavors and better crust browning. Avoiding excessive mechanical kneading can also prevent oxidation, preserving the flour's natural sweetness and color.
- Superior Texture: The increased extensibility and gentle gluten development promote the formation of larger, more irregular air pockets in the crumb, which is the hallmark of artisan baguettes. The dough is also easier to handle and shape, allowing for better tensioning, which further aids in achieving the desired crumb.
- Reduced Kneading Time: This saves effort and can be beneficial for bakers with limited time or those wishing to avoid intensive kneading.
In essence, autolyse provides a head start on gluten development and hydration in a way that optimizes the dough's potential for achieving the ideal autolyse baguette crumb texture.
Alternative Dough Development Methods: Considerations and Trade-offs
While autolyse is highly recommended for baguettes, other methods exist, each with its own considerations:
- Intensive Mechanical Kneading: This method relies heavily on a mixer or vigorous hand kneading to develop gluten rapidly.
- Pros: Fast gluten development.
- Cons: Can oxidize the dough (leading to a whiter crumb and less complex flavor), generates heat (which can speed up fermentation prematurely), and might result in a tighter, less extensible dough compared to autolyse, potentially hindering the achievement of a very open autolyse baguette crumb texture.
- No-Knead Methods: These rely on very long fermentation periods (often 12-24 hours or more) for gluten development through enzymatic action and time.
- Pros: Minimal effort, can develop complex flavors.
- Cons: Less control over dough development compared to methods involving some handling, can sometimes result in a less predictable crumb structure, and may require longer overall process time.
- Minimal Kneading with Folds: This involves a short initial mix followed by a series of stretch-and-folds during bulk fermentation.
- Pros: Good balance of mechanical and passive development, builds strength gradually.
- Cons: Requires active intervention over a period of time.
Autolyse can be used in conjunction with minimal kneading/folds or even as a preliminary step for no-knead doughs to enhance hydration. For baguettes, combining autolyse with gentle folding during bulk fermentation is often considered the optimal approach for balancing ease of handling, structural development, and achieving the desired autolyse baguette crumb texture.
Achieving the Perfect Baguette: Advanced Tips and Techniques
High Hydration Baguettes: Maximizing Crumb Openness and Flavor
Baguettes are often made with relatively high hydration levels, sometimes exceeding 75% or even 80%. Working with high hydration dough can be challenging, but it's key to maximizing crumb openness and developing rich flavor. The autolyse technique is particularly beneficial here.
- Autolyse is Essential: For high hydration doughs, a longer autolyse (e.g., 1-2 hours) allows the flour to fully absorb the large amount of water, making the dough significantly more manageable before kneading/folding begins. It transforms a potentially soupy mix into a dough with initial structure.
- Gentle Handling: Once the autolyse is complete and other ingredients are added, avoid aggressive kneading. Rely on a series of gentle stretch-and-folds during bulk fermentation (e.g., every 30-45 minutes for the first 1.5-2 hours). This builds strength gradually while preserving the delicate structure needed for large air pockets.
- Fermentation Control: High hydration doughs often ferment faster. Watch the dough, not just the clock. Look for significant volume increase (e.g., 50-75%) and signs of activity.
- Cold Retardation: Many high hydration baguette recipes benefit from a long, cold fermentation in the refrigerator (12-24 hours). This slows down fermentation, develops flavor, and makes the dough much easier to handle and shape when cold, further aiding in achieving a beautiful autolyse baguette crumb texture.
Mastering high hydration dough with autolyse unlocks the potential for incredibly light, open, and flavorful baguettes.
Scoring Techniques for Optimal Baguette Expansion and Appearance
Scoring (or slashing) the surface of the baguette before baking is not just for aesthetics; it's critical for controlling oven spring and achieving the classic shape and autolyse baguette crumb texture. As the dough bakes, it expands rapidly. Without scores, the crust would tear unpredictably. Scores provide weak points where the dough can expand in a controlled manner.
- Blade: Use a very sharp blade, like a razor blade (lame), held at an angle.
- Angle: Hold the blade at a shallow angle (around 20-30 degrees) relative to the dough surface. This creates a flap (ear) that lifts during baking.
- Overlap: For a standard baguette, make several overlapping scores down the length of the loaf. Each score should overlap the previous one by about one-third to one-half its length.
- Depth: The depth depends on the dough. For well-developed dough with good tension, scores can be 1/2 to 1 inch deep. Under-proofed dough might require slightly deeper scores, while over-proofed dough needs very shallow scores.
- Confidence: Make the scores quickly and confidently. Hesitation can cause the blade to drag and tear the dough.
Proper scoring allows the internal structure, developed partly through the autolyse technique, to expand fully in the oven, contributing significantly to the final volume and the desired autolyse baguette crumb texture.
Baking Temperatures and Steam: Essential Elements for Baguette Perfection
Achieving a crisp crust and open crumb in baguettes requires high temperatures and the presence of steam during the initial phase of baking.
- High Temperature: Baguettes are typically baked at high temperatures, often between 450°F and 500°F (230°C - 260°C). A preheated baking stone or steel is highly recommended to provide a burst of heat from underneath, promoting rapid oven spring. Preheat your oven and stone/steel for at least 30-60 minutes to ensure they are fully heated.
- Steam: Steam is crucial during the first 10-15 minutes of baking. The steam keeps the surface of the dough moist and elastic, allowing it to expand fully before the crust sets. Without steam, the crust would harden too quickly, restricting oven spring and resulting in a denser crumb and potentially burst sides.
- Methods for creating steam:
- Placing a tray of hot water on the bottom rack of the oven.
- Spraying the oven walls with water (use caution! ).
- Using a Dutch oven or cloche (though less traditional for the long baguette shape, cloches specifically designed for baguettes exist).
- Adding ice cubes to a hot tray on the bottom rack.
- Methods for creating steam:
- Ventilating: After the initial steam period, the oven should be vented (steam removed) to allow the crust to dry out and become crisp and golden brown. This is usually done by opening the oven door slightly for a few seconds or removing the steam tray.
The combination of high heat and steam allows the dough, properly developed through techniques like autolyse, to achieve maximum expansion and develop the characteristic thin, crisp crust and open autolyse baguette crumb texture.
Recipes: Autolyse Baguette Recipes
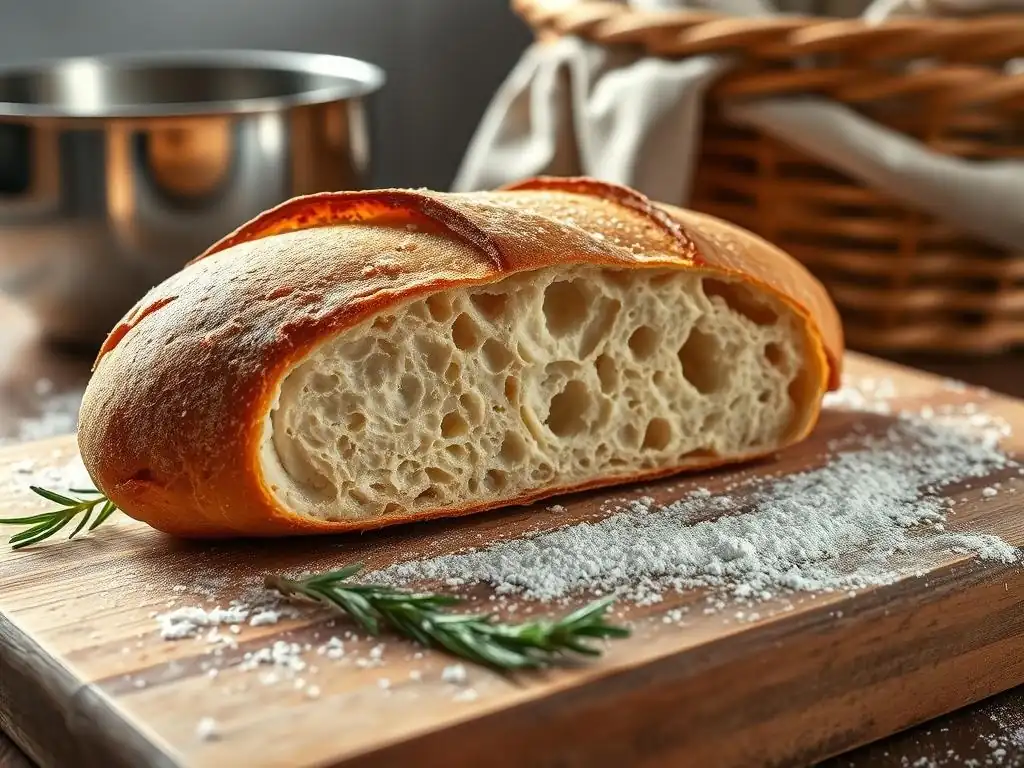
Classic Autolyse Baguette Recipe Outline
This outline shows how autolyse fits into a standard baguette process.
- Ingredients: Bread Flour, Water, Salt, Instant Yeast (or Active Dry Yeast).
- Autolyse Step: Combine all the flour and all the water in a bowl. Mix until no dry flour remains.
- Autolyse Rest: Cover and let rest at room temperature for 30-60 minutes.
- Add Remaining Ingredients: Sprinkle salt and yeast over the dough. Mix or gently knead until fully incorporated (1-3 minutes).
- Bulk Fermentation: Let the dough rise at room temperature, performing 3-4 stretch-and-folds every 30-45 minutes during the first 2 hours. Total bulk fermentation time might be 2.5-3 hours, or longer in a cooler environment, until the dough is airy and has increased significantly in volume (e.g., 60-80%).
- Divide and Preshape: Gently turn the dough onto a lightly floured surface. Divide into portions (e.g., 3-4 equal pieces for standard baguettes). Gently preshape each piece into a rough log or rectangle.
- Bench Rest: Cover and let rest for 15-20 minutes.
- Final Shape: Shape each preshaped piece into a baguette.
- Proofing: Place shaped baguettes in a floured couche or on parchment paper, separated by folds. Proof for 45-75 minutes at room temperature, or longer in the refrigerator.
- Bake: Preheat oven to 475°F (245°C) with baking stone/steel and steam setup. Score baguettes and transfer to the hot stone/steel. Bake with steam for 10-15 minutes, then remove steam and continue baking for 15-20 minutes until golden brown and crisp.
This process leverages the autolyse technique upfront to improve dough handling and contribute to the desired autolyse baguette crumb texture.
Poolish Autolyse Baguette Recipe Outline
Adding a poolish (a liquid preferment) enhances flavor. Autolyse works well with this method.
- Poolish Preparation: Combine equal parts flour and water with a tiny amount of yeast (e.g., 0.1-0.2% of flour weight) the night before. Let ferment at room temperature for 12-16 hours until bubbly and fragrant.
- Main Dough Ingredients: Flour, Water, Salt, Yeast (optional small amount), and the Poolish.
- Autolyse Step: Combine main dough flour and main dough water in a bowl. Mix until no dry flour remains.
- Autolyse Rest: Cover and let rest at room temperature for 30-60 minutes.
- Combine Autolyse and Poolish: Add the poolish, salt, and any additional yeast to the autolysed dough. Mix until fully incorporated.
- Bulk Fermentation, Preshape, Bench Rest, Final Shape, Proofing, Baking: Follow the steps outlined in the Classic Autolyse Baguette Recipe.
Using autolyse with a poolish combines the benefits of prefermented flavor development with the structural advantages of the initial flour/water rest, leading to a baguette with excellent flavor and autolyse baguette crumb texture.
Sourdough Autolyse Baguette Recipe Outline
Autolyse is highly effective when working with sourdough, particularly for managing hydration and developing structure with natural leavening.
- Ingredients: Bread Flour, Water, Salt, Active Sourdough Starter.
- Autolyse Step: Combine all the flour and all the water (excluding the water in the starter) in a bowl. Mix until no dry flour remains.
- Autolyse Rest: Cover and let rest at room temperature for 30 minutes to 2 hours (longer rests are common with sourdough as the starter is added later).
- Add Remaining Ingredients: Add the active sourdough starter and salt to the autolysed dough. Mix until fully incorporated.
- Bulk Fermentation: Let the dough rise at room temperature, performing stretch-and-folds periodically (e.g., every 45-60 minutes) for the first 2-3 hours. Total bulk fermentation time is typically longer for sourdough (e.g., 4-6 hours depending on starter strength and temperature) until the dough is bubbly and has significantly increased in volume. Cold retardation in the refrigerator for 12-24 hours is often beneficial after an initial warm bulk fermentation.
- Divide and Preshape: Follow the steps outlined in the Classic Autolyse Baguette Recipe.
- Bench Rest: Follow the steps outlined in the Classic Autolyse Baguette Recipe.
- Final Shape: Follow the steps outlined in the Classic Autolyse Baguette Recipe.
- Proofing: Proof at room temperature (shorter time, e.g., 1-2 hours) or cold in the refrigerator (longer time, e.g., 8-16 hours). The cold proof makes shaping and scoring easier and contributes to a better autolyse baguette crumb texture.
- Bake: Follow the steps outlined in the Classic Autolyse Baguette Recipe.
Autolyse is a valuable technique in sourdough baguette baking, helping to manage higher hydration doughs and promote the open, airy crumb structure desired in artisan loaves made with natural leavening.
Conclusion: Mastering Autolyse for Exceptional Baguettes
Autolyse: A Key to Unlocking Baguette Potential
Autolyse is far more than just a resting period; it's a fundamental technique that unlocks the full potential of your baguette dough. By allowing flour and water to hydrate and interact undisturbed, you initiate passive gluten development and activate beneficial enzymes. This simple step results in dough that is easier to handle, more extensible, and possesses a superior structure capable of achieving the sought-after open autolyse baguette crumb texture. From managing high hydration levels to reducing kneading time and enhancing flavor potential, the benefits of autolyse are numerous and directly contribute to a higher quality finished baguette.
Incorporating autolyse into your baguette baking process is a relatively easy adjustment that yields significant rewards. It represents a shift towards working with the dough's natural properties rather than forcing development through mechanical means. Whether you are a beginner looking to improve your results or an experienced baker aiming for true artisan quality, mastering the autolyse technique is a key step on the path to baking truly exceptional baguettes with that perfect crisp crust and airy autolyse baguette crumb texture.
Further Resources: Expanding Your Baguette Baking Knowledge
While mastering autolyse is a crucial piece of the puzzle, achieving the perfect baguette involves understanding several other techniques and variables. To continue expanding your knowledge and refine your skills, explore resources on:
- Understanding baker's percentages for precise recipe scaling and hydration control.
- The nuances of fermentation, including bulk fermentation and proofing times and temperatures.
- Developing effective stretch-and-fold or coil folding techniques for building dough strength.
- Advanced shaping methods for creating consistent baguette forms.
- Troubleshooting common baking issues like dense crumb, tough crust, or poor oven spring.
By combining your understanding of autolyse with ongoing learning in these areas, you'll be well-equipped to consistently produce beautiful, delicious baguettes with that ideal autolyse baguette crumb texture. Happy baking!
Frequently Asked Questions
What is the autolyse technique and why is it used in baguette baking?
Autolyse is a mixing technique in bread baking where flour and water are combined and allowed to rest before other ingredients are added. This promotes gluten development and improves hydration, leading to a better crumb.
How does autolyse specifically affect the crumb texture of a baguette?
Autolyse helps create a more open and airy crumb structure in baguettes. It allows the flour to fully hydrate, which results in a more extensible dough that can stretch and form larger air pockets during baking.
What is the ideal autolyse time for a baguette recipe aiming for optimal crumb texture?
The ideal autolyse time can vary, but typically ranges from 20 minutes to 1 hour. Experimentation is key, but a longer autolyse generally results in a more developed gluten network and a more open crumb.
Can you over-autolyse a baguette dough, and what are the signs of over-autolysing?
Yes, over-autolysing is possible. Signs include a sticky and difficult-to-handle dough, and potentially a weaker gluten structure that doesn't hold its shape well during baking.
What other factors, besides autolyse, contribute to a desirable baguette crumb texture?
Besides autolyse, other crucial factors include proper hydration, dough handling techniques (gentle shaping), oven temperature, and steam injection during the initial baking phase.
Final Reflection: Unleashing the Potential of Autolyse in Your Baking
The transformative power of autolyse in baguette baking is not merely a technique; it's a revelation. Understanding this simple yet profound step unlocks a world of improved crumb structure and texture, resulting in baguettes that are not only visually stunning but also possess a superior eating experience. This is particularly relevant today, as home bakers are increasingly seeking to elevate their skills and create artisan-quality bread in their own kitchens.
The impact of autolyse extends beyond the individual loaf. It represents a shift in baking philosophy, moving away from rushed processes towards a more mindful and deliberate approach. This emphasis on allowing the flour and water to interact before adding other ingredients resonates with broader cultural trends towards slow food and artisanal craftsmanship. The best things in life are worth waiting for,
and this certainly holds true for the development of flavor and texture in a well-crafted baguette through autolyse.
Now, consider your own baking journey. Will you embrace the potential of autolyse and unlock a new level of excellence in your baguettes? Experiment with different hydration levels, resting times, and flour types to discover what works best for you. The journey of mastering autolyse is a rewarding one, filled with delicious discoveries and the satisfaction of creating truly exceptional bread. Don't just bake a baguette; craft a masterpiece.
Unleash Your Inner Boulanger: Elevate Your Baguette Baking!
Thanks for taking the time to explore the magic of autolyse! You've now unlocked a key to achieving that perfect, airy crumb and delightful texture in your baguettes. Ready to put your new knowledge into practice?
- Bake a test baguette: This is your chance to experience the difference autolyse makes firsthand. Use your newfound knowledge to whip up a batch today. Note the crumb and texture, and compare it to your previous attempts!
- Share your results: Post a picture of your improved baguette on social media—tag us @BakeWithEase! We'd love to see your baking success.
- Explore different flours: Experiment with different types of flour to see how autolyse affects each. What surprising texture discoveries await?
So, what incredible baguette creations will you be baking next?