
Hand Kneading High Hydration Dough: Techniques for Success

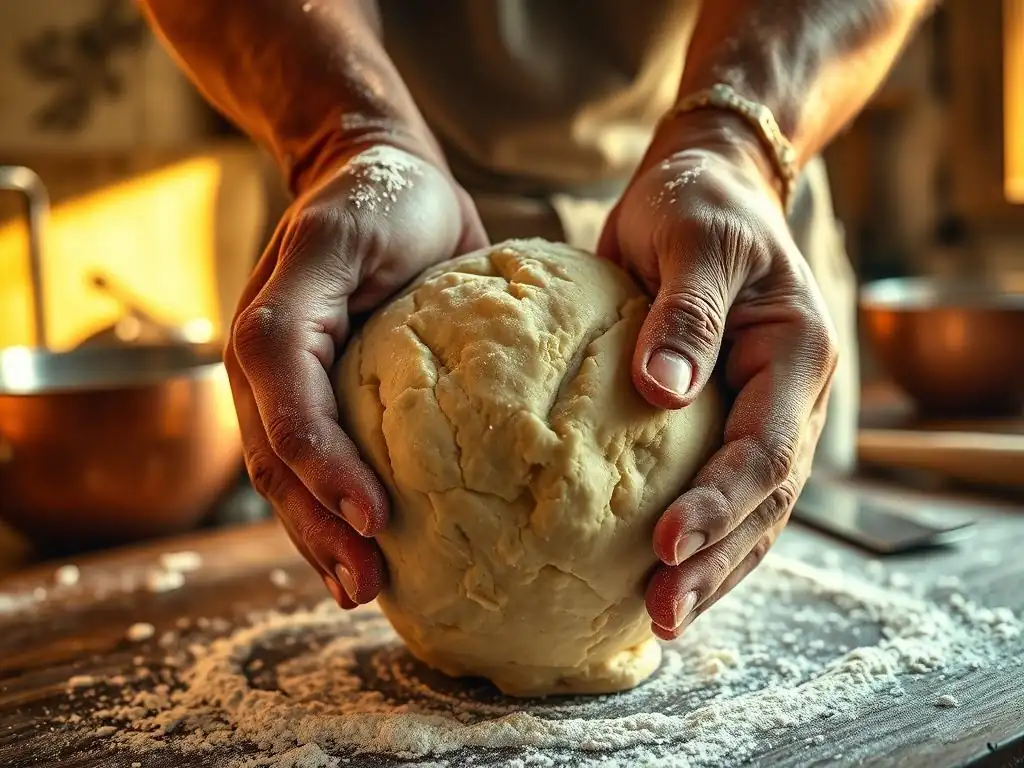
Welcome to BakeWithEase, your kitchen companion for all things baking! Ever wondered if you could conquer the seemingly impossible – hand kneading high hydration dough? It's more achievable than you think! Unlock the secrets to mastering this technique and discover how to create incredibly airy and flavorful breads. Ready to get your hands doughy? Let's get started!
- Introduction to Hand Kneading High Hydration Dough
- Essential Techniques for Hand Kneading High Hydration Dough
- Advanced Hand Kneading Methods for High Hydration Dough
- Fermentation and Proofing High Hydration Dough
- Troubleshooting Common Issues with Hand Kneaded High Hydration Dough
- Recipes for Hand Kneaded High Hydration Dough
- Conclusion: Mastering the Art of Hand Kneading High Hydration Dough
-
Frequently Asked Questions
- How does high hydration dough differ from regular dough?
- What are the benefits of hand kneading high hydration dough?
- What are some essential techniques for hand kneading high hydration dough?
- What ingredients are particularly important when working with high hydration dough?
- How do I know when my high hydration dough is properly kneaded?
- Final Reflection: The Joy and Mastery of Hand-Kneaded High Hydration Dough
- Unleash Your Inner Baker: Master High Hydration Dough!
Introduction to Hand Kneading High Hydration Dough
What is High Hydration Dough and Why Hand Knead?
High hydration dough refers to dough with a relatively high percentage of water compared to flour, typically 70% or more hydration (where water is 70% or more of the flour weight). For example, if you use 500 grams of flour, 70% hydration means using 350 grams of water.
This high water content results in a very wet, often sticky dough that can yield incredibly open crumb structures and a wonderfully chewy texture in the final baked product, like artisan loaves or certain types of pizza dough. Hand kneading this type of dough is a traditional method that bakers have used for centuries to develop gluten, the protein network essential for trapping gases and giving bread its structure.
Choosing to hand knead high hydration dough, even with its challenges, offers a unique connection to the baking process. It allows you to feel the dough's transformation firsthand, understanding its readiness through touch rather than relying solely on a machine. While mixers can certainly handle wet dough, the manual process provides a tactile feedback loop, helping you learn the subtle cues of gluten development and dough strength. It's a rewarding skill that builds intuition and control, leading to a deeper understanding of the dough's behavior.
The Challenges of Working with Wet Dough
Working with dough that has high hydration presents unique challenges compared to lower hydration doughs (like a standard sandwich loaf at 60-65% hydration). The primary difficulty is stickiness. A dough with 75% or 80% hydration will cling relentlessly to your hands, the work surface, and any tools you use. This stickiness can make traditional kneading methods, like the push-and-fold technique used for drier doughs, very difficult and messy.
Furthermore, high hydration dough initially lacks structure and strength. It tends to spread out rather than hold its shape, making it seem unmanageable at first. Developing a strong gluten network in such a wet environment requires specific techniques that encourage the flour proteins to link together without incorporating excessive extra flour, which would lower the hydration and change the desired outcome. Mastering hand kneading high hydration dough is about learning how to work with the wetness, not fight it.
Why Choose Hand Kneading Over a Mixer?
While stand mixers with dough hooks are efficient for kneading, especially for large batches or stiff doughs, hand kneading high hydration dough offers distinct benefits. For many bakers, it's about the sensory experience – the feel of the dough evolving from a shaggy mass to a smooth, elastic ball is incredibly satisfying. Hand kneading also allows for more nuanced control over the dough's temperature, as you're not generating the mechanical heat that a powerful mixer can produce, which is crucial for slow fermentation processes like those used in sourdough.
Beyond the tactile pleasure, hand kneading high hydration dough can sometimes lead to a subtly different crumb structure. The specific stretching and folding motions used in hand kneading can create unique layers and air pockets that contribute to an open, irregular crumb pattern highly prized in artisan breads. Although a mixer can achieve similar results, the baker's hands provide an immediate feedback loop, allowing for real-time adjustments based on how the dough feels, something a timer or dough hook alone cannot replicate.
Essential Techniques for Hand Kneading High Hydration Dough
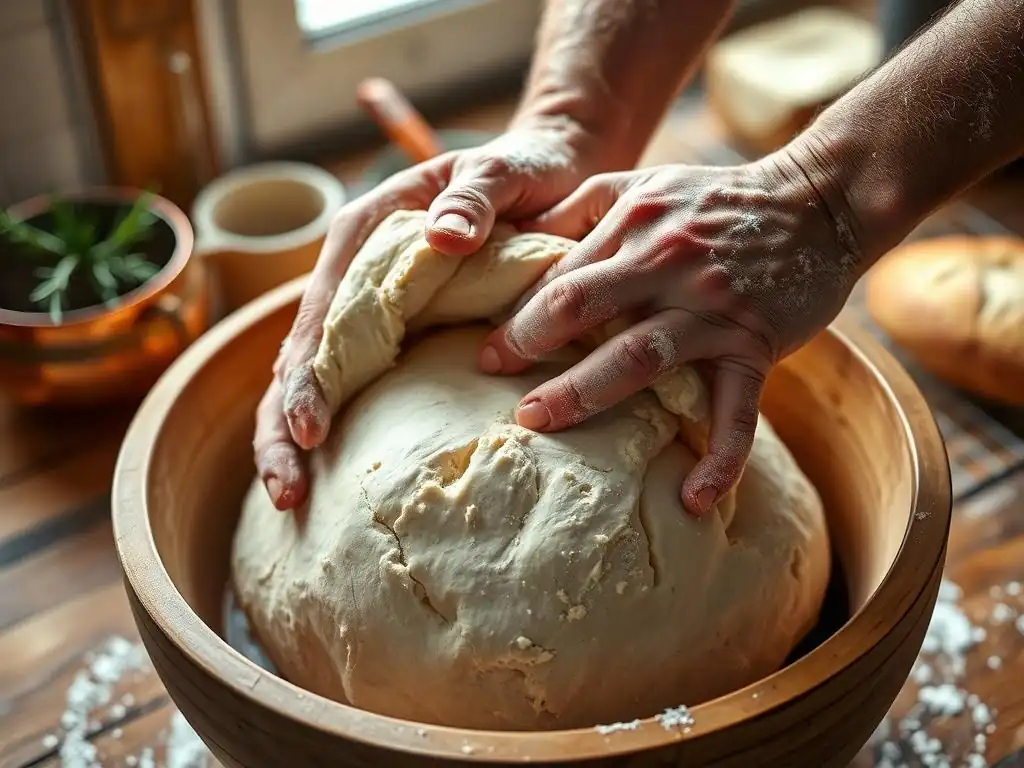
Preparing for Success: Ingredients and Tools
Successful hand kneading high hydration dough begins before your hands even touch the mixture. The quality and type of your ingredients play a significant role in how the dough behaves. Using the right flour and ensuring your water temperature is appropriate sets the stage for effective gluten development and fermentation. Thinking ahead about the tools you'll need will also save you frustration when working with a sticky dough.
Having your workspace ready is also key. Clear a sufficient area, ideally on a surface that is easy to clean. Some bakers prefer wood, others stainless steel or laminate countertops. Having a small amount of water or oil nearby (but not flour) can be helpful for managing sticky hands, though the goal is to use these sparingly, if at all, to maintain the intended hydration level.
Flour Selection for High Hydration Doughs
Choosing the right flour is paramount when working with high hydration dough. You generally need a flour with a higher protein content, typically bread flour, which contains around 12-14% protein. This higher protein level means there's more potential for gluten formation when the flour is hydrated and kneaded. Strong gluten is necessary to build the structure required to support the large amount of water and the gases produced during fermentation in a wet dough.
Using an all-purpose flour (often 10-11% protein) might make hand kneading high hydration dough more challenging, as the weaker gluten network will struggle to develop sufficient strength to handle the wetness and maintain structure. While some recipes might call for a blend, a good quality bread flour is usually the foundation for successful high hydration hand kneading, providing the necessary framework for a beautiful, open crumb.
The Importance of Water Temperature
Water temperature significantly impacts the dough's final temperature, which in turn affects the rate of fermentation. For hand kneading high hydration dough, controlling fermentation is crucial, especially during the bulk ferment stage. Often, recipes for high hydration doughs, particularly sourdoughs, call for cooler water (around 70-75°F or 21-24°C) to slow down the initial fermentation. This slower pace allows for longer bulk fermentation periods, which contribute to better flavor development and give you more time to perform necessary folds and develop strength through hand kneading.
Conversely, if you're in a cooler environment or using a recipe designed for a faster rise, slightly warmer water (perhaps 80-85°F or 27-29°C) might be used. However, be cautious with very warm water, as it can accelerate fermentation too quickly, making the dough harder to manage and potentially leading to a less complex flavor profile. Aiming for a final dough temperature (after mixing) in the optimal range, often cited as 75-78°F (24-26°C), is a good target, and adjusting your water temperature is the primary way to achieve this when hand kneading.
Essential Hand Kneading Tools
While the beauty of hand kneading high hydration dough is its simplicity, a few tools can make the process much smoother. A sturdy bowl for the initial mix is essential. Beyond that, the most indispensable tool is a bench scraper or dough scraper. This flat, rigid tool is invaluable for scraping the sticky dough from your work surface and your hands, allowing you to gather and manipulate the wet mass effectively without adding excess flour.
Other helpful items include a kitchen scale for precise measurement (crucial for hydration calculations), a clean work surface (like wood, laminate, or stainless steel), and possibly a small container of water or oil for keeping hands minimally damp if needed (again, use sparingly). Some bakers also like having a clean, damp cloth nearby for wiping hands or tools quickly.
The Initial Mix: Combining Ingredients Effectively
The first step in hand kneading high hydration dough is bringing the ingredients together into a shaggy mass. This stage is sometimes called the autolyse or fermentolyse if the flour and water (and sometimes starter/yeast) are mixed and left to rest before adding salt and further kneading. The autolyse, typically lasting 20 minutes to an hour, allows the flour to fully hydrate and enzymes to begin breaking down starches, which helps with gluten development and makes the dough more extensible later.
When initially mixing, use your hands or a spatula/dough whisk to combine the flour and water (and starter/yeast if not autolysing) until no dry pockets of flour remain. The mixture will be very wet and sticky. At this point, resist the urge to knead vigorously. The goal is just to hydrate the flour. After the initial mix, especially if performing an autolyse, the dough will feel less shaggy and slightly smoother, already showing the beginnings of gluten formation without any strenuous hand kneading.
The First Knead: Developing Initial Strength
Once your ingredients are combined and potentially autolysed, it's time to start developing the gluten network through hand kneading. For high hydration doughs, traditional kneading methods are often ineffective due to stickiness. Instead, techniques that involve stretching and folding the dough onto itself are preferred. These methods build strength gradually by aligning the gluten strands.
This initial kneading phase might involve a few sets of gentle folds over the first hour or so. The dough will still be quite wet and may tear easily, but with each fold, you'll notice it becoming slightly smoother and more cohesive. The key is patience and using techniques that work with the dough's wetness rather than against it.
The French Fold Technique
The French Fold, also known as the slap and fold or stretch and fold on the counter, is a highly effective method for hand kneading high hydration dough. It involves picking up the dough from one side, stretching it upwards, and then folding it back over itself, often with a slight "slap" onto the counter to help incorporate air and build tension. You then rotate the dough and repeat the process.
This technique is excellent because it stretches the gluten structure without requiring excessive flour on the surface. It can feel awkward and messy at first, as the dough will stick and spread. However, as you continue for several minutes (perhaps 5-10 minutes in the initial knead), you'll feel the dough become more elastic, less sticky, and start to hold its shape better. It's a dynamic way to build strength quickly in a wet dough.
The Stretch and Fold Method for High Hydration Dough
The Stretch and Fold method is a gentler alternative or complement to the French Fold, often performed periodically during the bulk fermentation. This technique is typically done in the bowl or on a lightly wet surface. You gently stretch a portion of the dough upwards and fold it back over the rest of the dough. Rotate the bowl and repeat this process 3-4 times, effectively folding the dough onto itself from different sides.
This method is particularly good for developing strength incrementally over time with minimal mess. Doing 3-4 sets of stretch and folds every 30-60 minutes during the first 2-3 hours of bulk fermentation is a common approach for high hydration doughs. Each set helps align the gluten strands, building tension and structure, preparing the dough for shaping and proofing.
Managing Stickiness: Tips and Tricks
Managing the inherent stickiness is perhaps the biggest hurdle when hand kneading high hydration dough. It's easy to get frustrated when the dough clings to everything. However, there are several strategies you can employ that minimize mess and allow you to work effectively without resorting to adding lots of extra flour, which would decrease the hydration level you're aiming for.
Remember that some stickiness is normal and expected with high hydration dough. The goal isn't to make it completely non-sticky like a lower hydration dough, but rather to make it manageable. Patience and practice with the right techniques will significantly improve your ability to handle wet dough.
Using a Dough Scraper Effectively
A dough scraper is your best friend when hand kneading high hydration dough. Use the straight edge of the scraper to gently lift and separate the sticky dough from your work surface. When performing techniques like the French Fold, the scraper can help you gather the dough cleanly between folds. It's also invaluable for portioning the dough later.
Don't be afraid to use the scraper frequently to keep your surface relatively clear and to help you manipulate the dough. Think of it as an extension of your hand, allowing you to interact with the very wet dough without getting completely covered in it. A metal scraper is often preferred over plastic as it's thinner and more rigid, making it more effective at getting under sticky dough.
Lightly Oiling Your Hands and Work Surface
While adding flour is generally discouraged when working with high hydration dough to maintain the intended ratio, lightly oiling your hands or the work surface can be an effective way to reduce stickiness. Use just a tiny amount of neutral oil, like vegetable or olive oil. Rub a thin film onto your hands before beginning to knead or perform folds. This creates a barrier that prevents the dough from adhering as readily.
Similarly, a very thin film of oil on your work surface can help. However, use oil sparingly, as too much can interfere with gluten development or create a greasy crust. Some bakers prefer just using water on their hands or surface, which also helps prevent sticking without adding fat, though it can evaporate quickly. Experiment to see what works best for you and your dough.
Bench Resting the Dough
Allowing the dough to rest periodically during the hand kneading process is a simple yet effective technique for managing stickiness and developing gluten. A short bench rest, perhaps 5-10 minutes, allows the gluten strands you've just worked to relax and align. This relaxation makes the dough less resistant to stretching and folding and often slightly less sticky.
If you're finding the dough particularly difficult to handle or feeling frustrated, cover it and walk away for 10-15 minutes. When you return, you'll likely find it's much easier to work with. This principle is why techniques like the autolyse and periodic stretch and folds during bulk fermentation are so effective – they leverage rest periods to improve the dough's structure and handleability over time.
Advanced Hand Kneading Methods for High Hydration Dough
The Slap and Fold Technique for Wet Dough
The Slap and Fold technique, a variation of the French Fold, is particularly well-suited for very high hydration doughs (80% hydration and above) that are too wet to knead conventionally. This method involves repeatedly picking up the dough, slapping it onto the work surface, stretching it out, and folding it back on itself. The action is dynamic and helps to develop strength and incorporate air efficiently.
It might seem counterintuitive to slap a wet, sticky dough, but the force and motion encourage rapid gluten development. Think of it less as aggression and more as a rhythmic dance with the dough. It's initially messy, but as you continue, the dough will transform, becoming elastic and cohesive, eventually passing the windowpane test.
Mastering the Slap and Fold Motion
Mastering the slap and fold motion requires rhythm and confidence. Start by scooping the dough up with both hands from underneath. Lift it, let it stretch with gravity, and then slap the far end of the dough onto a clean, un-floured surface. Keep holding the near end. With the far end anchored, quickly stretch the dough towards you, folding it over the part you're holding. Then, release your hold, scoop the mass up again, rotate it slightly, and repeat the slap-stretch-fold motion.
The key is to work relatively quickly once you start, maintaining a consistent rhythm. Don't worry about the mess initially; focus on the motion. As you slap and fold, you're essentially creating tension and aligning gluten strands. After 5-10 minutes of continuous slapping and folding, you'll notice a significant change in the dough's texture – it will become smoother, stronger, and less likely to stick aggressively.
Adjusting Technique for Different Hydration Levels
While the slap and fold is excellent for very wet doughs (like 80%+ hydration ciabatta or sourdough), you might adjust the intensity and duration for slightly lower high hydration levels (like 70-75%). For doughs in the 70-75% range, a combination of gentle stretch and folds in the bowl and perhaps a shorter period of French Folds on the counter might be sufficient, interspersed with rests.
For extremely wet doughs (85% or higher), the slap and fold might be the primary hand kneading technique used initially, as other methods are too difficult. The wetter the dough, the more the slap and fold relies on gravity and the dough's own weight to help with the stretch. Pay attention to how the dough feels – if it's tearing excessively, you might be working it too hard or too quickly; a brief rest can help.
Windowpane Test: Knowing When Your Dough is Ready
The windowpane test is a classic method for checking if your dough has developed sufficient gluten strength through hand kneading. It's particularly useful for high hydration doughs, as it indicates the elasticity and extensibility needed to trap the gases produced during fermentation and achieve an open crumb.
To perform the test, gently take a small piece of dough (about the size of a golf ball) from the main mass. Carefully stretch and pull it with your fingers. If the dough is properly kneaded, you should be able to stretch it thin enough to see light through it, like a translucent windowpane, without it tearing. If it tears easily before becoming thin, it needs more hand kneading or perhaps another rest period followed by more folds.
Fermentation and Proofing High Hydration Dough
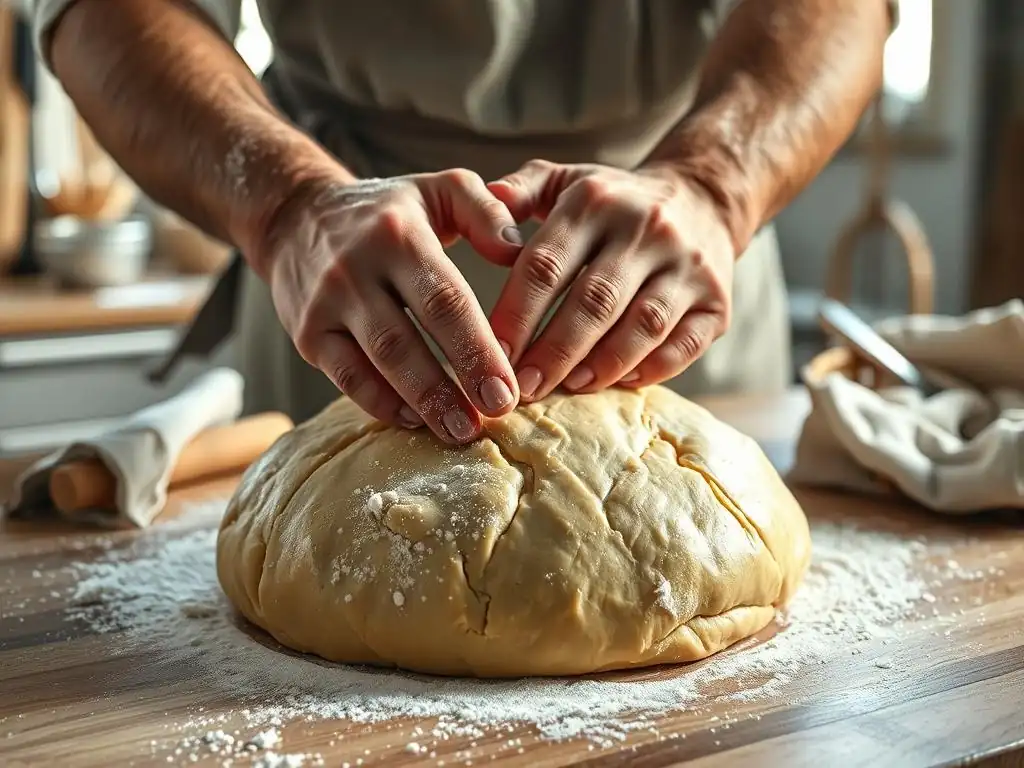
Bulk Fermentation: Developing Flavor and Strength
Bulk fermentation, the first rise after hand kneading, is a critical phase for high hydration dough. During this period, yeast or sourdough starter produces carbon dioxide, causing the dough to rise, while also developing complex flavors through metabolic processes. For high hydration dough, bulk fermentation also plays a key role in building structure and strength through periodic folds.
The duration and temperature of bulk fermentation significantly impact the final bread. A typical bulk ferment for high hydration dough might last anywhere from 2 to 6 hours, or even longer in cooler conditions or with less starter/yeast. For example, a sourdough with 20% starter in a room at 75°F (24°C) might bulk ferment for 3-4 hours, while the same dough at 68°F (20°C) could take 5-6 hours. The dough should visibly increase in volume, perhaps by 50-80%, and feel airy and alive.
Understanding the Importance of Temperature and Time
Temperature and time are intertwined during bulk fermentation of high hydration dough. Warmer temperatures accelerate yeast activity, leading to faster rising, while cooler temperatures slow it down. For optimal flavor development and manageable dough, many bakers aim for a moderate bulk fermentation temperature, typically between 70-78°F (21-26°C). Using cooler water and performing the bulk ferment at room temperature often falls within this range.
Monitoring the dough's progress by feel and appearance is more reliable than strictly adhering to a time given in a recipe, as ambient temperature varies. A dough that has doubled in a warm environment might be over-fermented, while one that has only increased by 50% in a cool environment might be perfectly ready. Look for signs like increased volume, a slightly domed surface, and air bubbles visible through the side of the container if using a clear one.
Performing Folds During Bulk Fermentation
Periodic folds during bulk fermentation are essential for hand kneading high hydration dough. These folds, typically stretch and folds performed every 30-60 minutes during the first few hours, help to:
- Build strength and structure by aligning gluten strands.
- Equalize temperature throughout the dough.
- Distribute nutrients for the yeast.
- Degas the dough slightly, promoting a finer, more even crumb (though aggressive degassing is avoided for open crumb).
For a dough with 75% hydration, you might perform 3-4 sets of stretch and folds in the bowl during the first 2-3 hours of a 4-hour bulk ferment. Each set involves gently stretching the dough from the edges and folding it towards the center. This process creates layers and tension, making the dough easier to handle and shape later, and contributing significantly to the final loaf's structure and volume.
Shaping and Proofing High Hydration Dough
Shaping high hydration dough requires a delicate touch to maintain the airy structure developed during bulk fermentation. Aggressive handling can deflate the dough and result in a dense loaf. The goal is to create surface tension that will help the loaf hold its shape and achieve good oven spring while preserving the internal gas bubbles.
After shaping, the dough undergoes final proofing (or proofing), where it rests before baking. This can be done at room temperature for a shorter time or in the refrigerator for a longer, slower ferment that further enhances flavor (cold proofing). High hydration dough is often proofed in a proofing basket (banneton) to help it maintain its shape.
Gentle Shaping Techniques
Given the slack nature of high hydration dough, shaping requires technique rather than force. Lightly flour your work surface and hands, but use flour sparingly. Techniques like the "pre-shape," where you gently form the dough into a rough ball or log and let it rest for 10-20 minutes, help relax the gluten and make the final shape easier.
For the final shape (e.g., a boule or batard), use your hands and possibly a bench scraper to coax the dough into the desired form, creating tension on the surface by gently pulling and tucking the dough underneath itself. Avoid pressing hard or degassing the dough excessively. The goal is to create a taut outer skin while keeping the interior airy. For a 70% hydration dough, you might find it easier to handle than an 80% hydration dough, requiring less reliance on the bench scraper for support during shaping.
Proofing Baskets and Liners
Proofing baskets, often made of rattan (bannetons) or plastic, are invaluable for proofing high hydration dough. Their purpose is to support the dough and prevent it from spreading outwards during the final rise, helping it maintain its shape and build vertical structure. They are typically floured generously (rice flour works particularly well as it's less likely to be absorbed by the dough) to prevent sticking.
Linen liners can also be used with proofing baskets. They provide a smooth surface and help wick away a small amount of moisture from the dough's surface, which can contribute to a crispier crust. Whether using a basket or a cloth-lined bowl, ensuring the dough doesn't stick is paramount when it comes time to transfer it for baking. A cold proof in the refrigerator also helps firm up the dough, making it easier to handle before baking.
Troubleshooting Common Issues with Hand Kneaded High Hydration Dough
Dough Too Sticky: Causes and Solutions
One of the most common frustrations when hand kneading high hydration dough is excessive stickiness. While some stickiness is normal, dough that is impossible to handle might be due to several factors. The most obvious cause is simply the high water content – dough at 80% hydration will naturally be much stickier than dough at 70%. However, insufficient gluten development can also make the dough feel more like a liquid mess than a cohesive mass.
If your dough feels overwhelmingly sticky and isn't showing signs of developing strength after initial kneading and rests, consider if you used the correct flour (low protein flour will hinder gluten development) or if your initial mixing was thorough enough to hydrate all the flour. Resist the urge to add large amounts of flour to your work surface or the dough itself, as this will lower the hydration.
Instead, focus on using a bench scraper, lightly wetting or oiling your hands/surface, and incorporating rest periods followed by gentle stretch and folds or slap and folds. Trust the process; often, stickiness decreases as gluten develops.
Dough Too Slack: Developing Strength
Dough that is too slack and doesn't hold any shape, even after some hand kneading and folds, indicates a lack of sufficient gluten development. This can happen if the flour doesn't have enough protein (like using cake flour by mistake! ), if the kneading/folding techniques weren't effective, or if the dough hasn't had enough time during bulk fermentation for the gluten network to strengthen.
If your dough feels very weak and tears easily when stretched, it needs more work to build strength. Continue performing gentle stretch and folds every 30-60 minutes during bulk fermentation. Consider trying the more vigorous slap and fold technique if you haven't already, as it's very effective for developing strength quickly in wet doughs. Ensure your fermentation environment isn't too cold, as low temperatures can slow down enzymatic activity that aids gluten development. Given time and consistent folding, the dough should gradually gain tension and elasticity.
Uneven Fermentation: Identifying and Correcting
Uneven fermentation in hand kneaded high hydration dough can manifest as large, irregular bubbles in some parts of the dough and dense areas in others, or simply inconsistent rise throughout the mass. This can be caused by temperature variations within the dough or uneven distribution of yeast/starter during the initial mix.
Performing periodic folds during bulk fermentation is a key way to correct uneven fermentation. Folds help to equalize the temperature throughout the dough and redistribute the yeast/starter, ensuring consistent activity. If you notice some areas rising faster than others, gently folding the dough will bring the cooler parts to the warmer exterior and distribute the active yeast more evenly. Ensuring your bulk fermentation environment has a relatively stable temperature (e.g., in a proofer or oven with the light on) also helps promote even rising.
Recipes for Hand Kneaded High Hydration Dough
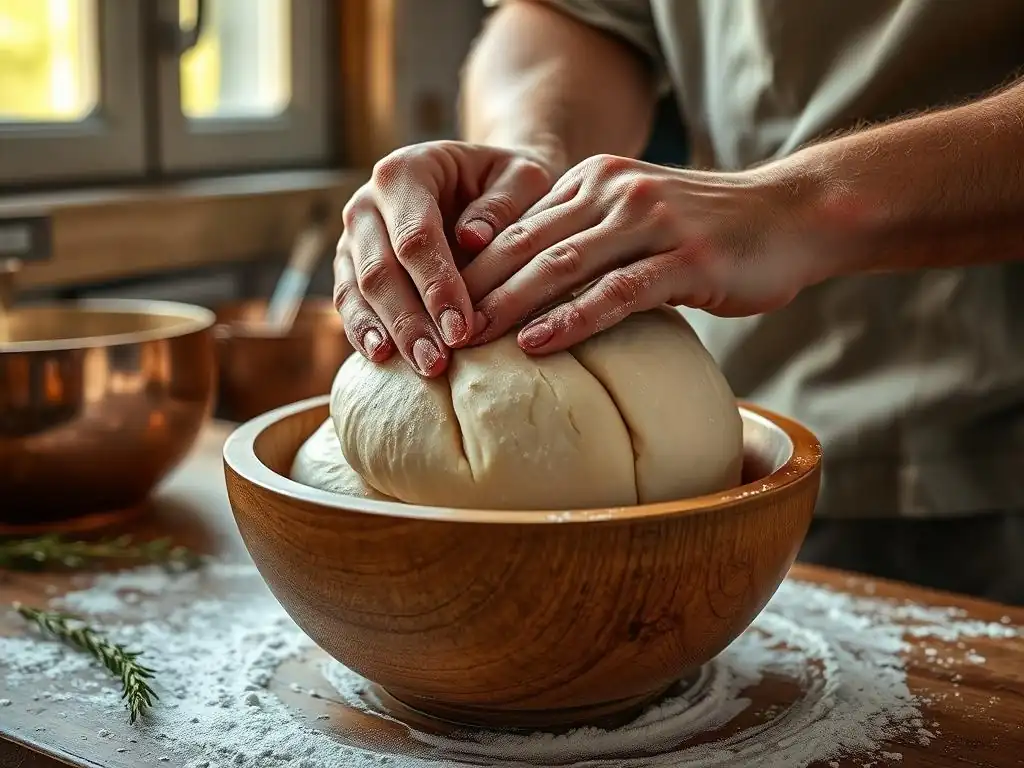
High Hydration Sourdough Boule
A classic high hydration dough to hand knead is a sourdough boule, often made with 75-80% hydration. The long fermentation time typical of sourdough, combined with periodic hand kneading (stretch and folds), develops incredible flavor and structure. This process results in a loaf with a chewy crust and a beautiful, open, and airy interior crumb.
Hand kneading high hydration sourdough dough connects you directly to the dough's development, allowing you to feel the changes in its strength and elasticity over several hours. While it requires patience, the tactile feedback helps you understand when the dough is truly ready for shaping and baking.
Ingredients for Sourdough Boule
Here are approximate ingredients for a single high hydration sourdough boule (around 78% hydration):
- 400g Strong Bread Flour (approx. 13% protein)
- 310g Water (approx. 78°F / 26°C)
- 80g Active Sourdough Starter (fed and bubbly)
- 8g Fine Sea Salt
Note: Hydration is calculated based on flour weight. Water (310g) / Flour (400g) = 0.775 or 77.5%. Starter hydration varies, but for calculation purposes, it's often considered 100% hydration (40g flour, 40g water), slightly increasing overall dough hydration.
Hand Kneading Instructions for Sourdough Boule
- Initial Mix: In a large bowl, combine flour and water. Mix until no dry flour remains. Rest (autolyse) for 30-60 minutes.
- Add Starter & Salt: Add the active starter and salt to the dough. Wet your hands slightly and incorporate them by gently squeezing and folding the dough within the bowl for 1-2 minutes until evenly distributed.
- First Knead (Optional Slap & Fold): If the dough is very slack, perform 5-10 minutes of Slap and Fold on a clean, un-floured surface until it starts to show some tension and comes together slightly. Rest for 15 minutes.
- Bulk Fermentation & Folds: Place dough in a clean bowl. Over the next 3-4 hours (at 75°F / 24°C), perform 3-4 sets of Stretch and Folds every 45-60 minutes. Gently stretch one side up and fold over the center, rotate, and repeat 3 more times per set.
- Monitor: Dough should increase by 50-80% and feel airy and strong by the end of bulk fermentation.
- Shape & Proof: Gently pre-shape, rest 20 mins, then final shape into a boule, creating surface tension. Place seam-side up in a floured banneton. Proof at room temp for 1-2 hours or cold proof in the fridge for 8-12 hours.
- Bake: Bake in a preheated Dutch oven or baking stone at 450°F (230°C).
High Hydration Focaccia
High hydration focaccia dough is incredibly forgiving and a joy to hand knead. Often made with 75-85% hydration and enriched with olive oil, it's too wet for traditional kneading but responds beautifully to gentle handling and folds. The result is a light, airy bread with a crispy bottom and a wonderfully soft, open crumb.
Hand kneading this type of dough allows you to fully appreciate its transformation from a sticky batter-like consistency to a slightly more manageable, bubbly mass after bulk fermentation and folds. The process is less about developing maximum strength and more about encouraging extensibility and airiness.
Ingredients for Focaccia
Here are approximate ingredients for a high hydration focaccia (around 80% hydration):
- 500g Bread Flour (approx. 12% protein)
- 400g Water (approx. 75°F / 24°C)
- 2g Instant Yeast OR 100g Active Sourdough Starter
- 10g Fine Sea Salt
- 30g Extra Virgin Olive Oil (plus more for the pan and top)
Note: This recipe includes yeast as an option, making it a faster process than sourdough. The olive oil is added after the initial mix.
Hand Kneading Instructions for Focaccia
- Initial Mix: In a large bowl, combine flour, water, and yeast/starter. Mix until just combined. Rest for 20-30 minutes.
- Add Salt & Oil: Sprinkle salt over the dough. Pour the 30g of olive oil over the top.
- Incorporate: Use your hands to gently fold and squish the oil and salt into the dough until mostly incorporated. The dough will be very wet and sticky.
- Bulk Fermentation & Folds: Cover the bowl. Over the next 2-3 hours (at 75°F / 24°C), perform 3-4 sets of Stretch and Folds every 30-45 minutes. Wet your hands slightly to prevent sticking. Gently stretch a portion of the dough from underneath and fold it over the top. Rotate the bowl and repeat 3 more times per set. The dough will become progressively smoother and more bubbly.
- Transfer & Proof: Generously oil a baking pan (e.g., 9x13 inch) with olive oil. Gently pour/scrape the dough into the pan, trying not to deflate it. Dimple the surface with oiled fingers.
- Final Proof: Cover the pan and let it proof at room temperature for 1-1.5 hours, or until significantly risen and bubbly.
- Bake: Drizzle with more olive oil, add toppings (rosemary, flaky salt). Bake at 425°F (220°C) for 25-30 minutes until golden brown.
Conclusion: Mastering the Art of Hand Kneading High Hydration Dough
The Benefits of Hand Kneading
Mastering hand kneading high hydration dough offers several rewarding benefits beyond simply producing delicious bread. It provides a deeper understanding of dough development, allowing you to feel the gluten network forming and the dough's readiness. This tactile knowledge is invaluable and builds intuition that can improve all aspects of your baking.
Furthermore, hand kneading can be a meditative and satisfying process. The rhythmic motion and focus required can be a welcome break from the hurried pace of modern life. It connects you to traditional baking methods and provides a sense of accomplishment as you transform a sticky, wet mass into a beautifully structured dough ready for baking.
Further Resources for Baking with High Hydration Dough
To continue your journey in hand kneading high hydration dough, explore various online baking communities and reputable baking websites (like BakeWithEase.com!). Look for video tutorials demonstrating techniques like the French Fold and Slap and Fold, as seeing the motion can be incredibly helpful. Many excellent baking books also delve into the science and technique behind high hydration doughs. Practice is key – don't be discouraged by initial sticky messes. Each loaf is a learning experience, and with persistence, you'll confidently hand knead even the wettest doughs.
[ ] Review article for tone consistency (Educational, Friendly)
[ ] Check all ### headers have >=2 detailed paragraphs with specific/approx data/examples
[ ] Ensure keyword "Hand kneading high hydration dough" and variations are used naturally
[ ] Verify all prohibited elements (links, images, etc.) are excluded
[ ] Check for fluency, accuracy, and varied sentence structure
[ ] Ensure Markdown elements are used for visual appeal where appropriate
Frequently Asked Questions
How does high hydration dough differ from regular dough?
High hydration dough contains a significantly larger water-to-flour ratio, typically exceeding 70%. This results in a stickier and more challenging dough to handle compared to traditional doughs.
What are the benefits of hand kneading high hydration dough?
Hand kneading allows for greater control over the dough's development, enabling you to feel the gluten forming. This is particularly helpful with high hydration dough, where over-mixing is a concern.
What are some essential techniques for hand kneading high hydration dough?
Employing techniques like the stretch and fold method is crucial. This method develops gluten without excessive kneading, creating strength and structure in the dough.
What ingredients are particularly important when working with high hydration dough?
Using high-protein flour is vital for supporting the high water content. Also, autolysing the flour and water before kneading improves hydration and gluten development.
How do I know when my high hydration dough is properly kneaded?
The dough should feel stronger and more elastic, even though it will still be sticky. A windowpane test can help determine if sufficient gluten development has occurred.
Final Reflection: The Joy and Mastery of Hand-Kneaded High Hydration Dough
The art of hand-kneading high hydration dough remains surprisingly relevant today, a testament to the enduring connection between human touch and culinary excellence. In a world increasingly dominated by automated processes, the tactile experience of working with this challenging yet rewarding dough offers a unique path to understanding flour, water, and the magic of fermentation. It's a journey of patience, precision, and ultimately, delicious results.
The influence of this technique extends beyond the simple act of bread making. It speaks to a broader cultural shift towards mindful consumption and appreciation for handcrafted goods. The satisfaction derived from nurturing a dough, feeling its transformation under your hands, is deeply rewarding. It connects us to a long tradition of bakers, each contributing to the evolution of this ancient craft. Bread is the staff of life,
they say, and in the careful kneading of high hydration dough, we find a deeper understanding of that truth. It's not just about sustenance; it's about the process, the connection, and the artistry involved.
Now, consider your own relationship with food, with creation. Will you embrace the challenge of hand-kneading high hydration dough? I invite you to try it. Don't be intimidated by the initial difficulty; the rewards—the airy crumb, the delicate texture, the profound sense of accomplishment—are well worth the effort. Embrace the mess, feel the dough, and discover the joy of connecting with your food on a deeper, more meaningful level. The journey of mastering this technique is a journey of self-discovery, a testament to the power of patience, and a celebration of the simple, yet profound, act of baking bread.
Unleash Your Inner Baker: Master High Hydration Dough!
Thanks for taking the time to explore the world of high hydration dough! We hope you gained valuable insights into achieving that perfect, chewy texture. Now it's time to put your new knowledge into practice.
- Knead your way to success: Try kneading a high hydration dough today! Experiment with different flours and hydration levels to discover your perfect recipe. Even small adjustments make a big difference!
- Share your creations: Snap a photo of your beautiful loaf and share it on social media – tag us! We'd love to see your baking journey unfold.
- Dive deeper: Explore more advanced techniques and recipes on our website (bakewithease.com – although you can't click it here, you can always copy and paste it! ).
What unique ingredient will you experiment with in your next high-hydration dough adventure?