
From Fridge to Flame: Expert Handling of ColdFermented Dough

Welcome to BakeWithEase, your kitchen companion on the journey to baking brilliance! Ever wondered how to unlock the full potential of your cold-fermented dough? Our latest article, "From Fridge to Flame: Expert Handling of Cold Fermented Dough," dives deep into the secrets of cold fermented dough handling, revealing techniques to transform your loaves from good to extraordinary. Curious to learn how a little chill can lead to incredible flavor and texture? Let's get baking!
- Understanding Cold Fermented Dough Handling for Pizza Baking
- Preparing for Expert Cold Fermented Dough Handling
- Step-by-Step Guide to Handling Cold Fermented Dough from Fridge to Flame
- Optimizing Dough Flavor and Texture Through Cold Fermented Dough Techniques
- Baking Cold Fermented Dough: Achieving the Perfect Crust and Crumb
- Troubleshooting Common Challenges in Cold Fermented Dough Handling
- Advanced Tips for Mastering Cold Fermented Dough Handling in Pizza Making
- Conclusion: Elevating Your Pizza Baking with Expert Cold Fermented Dough Handling
-
Frequently Asked Questions
- How long can I cold ferment dough for the best results?
- What's the ideal temperature for cold fermenting dough in the refrigerator?
- How should I prepare my cold-fermented dough for baking after removing it from the fridge?
- Why is cold fermentation beneficial for my bread?
- Can I punch down cold-fermented dough before shaping it?
- Final Reflection: The Transformative Power of Patience in Baking
- Unleash Your Inner Baker: Master Cold Fermentation!
Understanding Cold Fermented Dough Handling for Pizza Baking
What is Cold Fermentation and Its Role in Dough Development
Cold fermentation is a process where yeasted dough is allowed to rise slowly in a refrigerated environment, typically between 3°C and 5°C (37°F-41°F). This significantly slows down yeast activity compared to room temperature fermentation. While slower, this extended, cool rest allows enzymes within the dough to break down complex carbohydrates and proteins into simpler sugars and amino acids. This enzymatic action is crucial for developing a deeper, more complex flavor profile in the final baked product. The slow pace also allows for more controlled gluten development.
During this prolonged period, the gluten network in the dough gradually strengthens and becomes more extensible without the risk of over-proofing that can occur rapidly at warmer temperatures. This slow gluten development contributes to a better structure and oven spring when the dough is finally baked. The low temperature also inhibits the production of certain byproducts that can lead to a yeasty or overly acidic flavor, instead promoting the development of aromatic compounds. Effective cold fermented dough handling starts with understanding these fundamental processes and how they contribute to the unique qualities of cold-fermented pizza dough.
Benefits of Using Cold Fermented Dough in Pizza Recipes
Utilizing cold fermented dough offers several significant advantages for pizza making, primarily revolving around enhanced flavor and improved texture. The extended cold rest allows for the development of rich, nuanced flavors that a quick room-temperature rise simply cannot achieve. Think of the difference between a quickly proofed bread and a slow-fermented sourdough – cold fermentation pushes the dough towards that more complex, artisanal taste. This deeper flavor profile makes the crust itself a star component of the pizza, not just a vehicle for toppings.
Beyond flavor, cold fermentation dramatically impacts the dough's structure and handling characteristics. The slow gluten development results in a dough that is often more extensible and easier to stretch without tearing, provided it's handled correctly after refrigeration. It tends to produce a crust with a superior crumb structure – often featuring a mix of small, even bubbles and larger, irregular air pockets (the "alveoli" desired in Neapolitan-style pizza). This translates to a lighter, airier crust with a satisfying chew, contributing significantly to the overall pizza experience. Mastering cold fermented dough handling is key to consistently achieving these desirable results.
Key Differences Between Cold Fermented and Room Temperature Dough
The primary difference between cold fermented and room temperature dough lies in the rate of fermentation and the duration it takes. Room temperature dough ferments much faster, often doubling in size within 1-3 hours depending on the yeast amount and ambient temperature. This speed can be convenient for quick recipes but limits the time available for flavor compounds to develop and gluten to relax gradually.
Cold fermented dough, in contrast, requires a significantly longer time, typically ranging from 24 hours to several days, sometimes even up to 7 days for very low-yeast recipes. The extremely slow fermentation allows for extensive enzymatic activity and subtle flavor development.
Another major difference is in handling properties directly out of fermentation. Room temperature dough is usually pliable and warm, ready for shaping relatively quickly after its final rise. Cold fermented dough, however, is stiff and cold directly from the refrigerator. Proper cold fermented dough handling requires bringing the dough to a suitable temperature before shaping, as attempting to stretch cold, stiff dough will likely result in tearing and a poor crust structure. The texture and extensibility also differ; cold fermented dough, when properly handled post-refrigeration, often feels smoother and more elastic than a quickly risen dough, offering superior stretchability.
Preparing for Expert Cold Fermented Dough Handling
Selecting Ingredients Ideal for Cold Fermentation
Choosing the right ingredients is foundational for successful cold fermentation. Flour type is particularly important. High-protein flours, typically bread flour or Tipo 00 flour, are excellent choices because their higher gluten content can withstand the extended fermentation period without breaking down. A flour with around 12-14% protein is often recommended.
Lower protein flours might struggle to maintain structure over several days in the fridge. The quality of yeast also matters; while instant or active dry yeast works well, using a smaller amount than you would for a quick rise is essential to prevent over-proofing during the long cold rest. A common ratio might be as little as 0.1% to 0.5% yeast relative to the flour weight for multi-day ferments.
Water quality is also a factor, though less critical than flour or yeast. Using filtered water free of high chlorine levels can be beneficial, as chlorine can inhibit yeast activity. Salt is crucial for flavor and controlling fermentation rate; typically, salt is added at 1.8% to 2.5% of the flour weight.
Some recipes might also include a small amount of olive oil, which can contribute to crust tenderness and flavor, or a pinch of sugar, which provides initial food for the yeast but is used up early in the process. Ensuring accurate measurements, often by weight using a kitchen scale, is vital as small variations in ingredients can significantly impact the outcome of cold fermented dough handling over several days.
Equipment Essentials for Managing Cold Dough
Effective cold fermented dough handling relies on having the right tools. A reliable kitchen scale is paramount for accurately measuring ingredients, especially the tiny amounts of yeast often used in long cold ferments. Mixing can be done by hand or with a stand mixer, but a good quality bowl is essential for the fermentation process. For cold fermentation, airtight containers are non-negotiable.
These prevent the dough from drying out in the refrigerator and provide a contained environment for the slow rise. Food-grade plastic containers with tight-fitting lids, or even large zip-top bags, work well. Ensure the container is large enough to accommodate the dough doubling or even tripling in volume.
Other useful equipment includes a dough scraper or bench knife for dividing and manipulating the dough without tearing it, and a clean, floured surface or proofing boxes/baskets for the final proofing step after the dough comes out of the fridge. A digital thermometer can be helpful for checking the dough's internal temperature before shaping to ensure it's adequately warmed up. While not strictly 'essential' for the cold fermentation itself, having the right tools for mixing, storing, and handling the dough after fermentation significantly streamlines the cold fermented dough handling process and contributes to a better final result.
Understanding Dough Hydration and Texture in Cold Fermentation
Dough hydration, the ratio of water to flour by weight, plays a significant role in the texture and handling of cold fermented dough. Higher hydration levels (e.g., 70% or more) typically result in a wetter, stickier dough that can be more challenging to handle initially but often leads to a lighter, airier crust with larger air pockets. Lower hydration levels (e.g., 60-65%) yield a stiffer, easier-to-handle dough that produces a denser crumb structure.
The ideal hydration often depends on the flour type used, as different flours absorb water differently, and personal preference for crust texture. Experimentation is key to finding the hydration level that works best for your flour and desired outcome.
During cold fermentation, the dough's texture changes. Initially, after mixing, the dough might be shaggy or slightly sticky. Over several days in the refrigerator, the gluten network develops, and the dough becomes smoother, more elastic, and less sticky as the flour fully hydrates. However, it will remain stiff and cold.
Understanding this expected texture change is part of successful cold fermented dough handling. When you remove the dough from the fridge, its texture will be firm. As it warms up, it will become more pliable and extensible, but still different from room-temperature dough. It's crucial not to confuse the initial stiffness of cold dough with under-development; the long rest has already done much of the work.
Step-by-Step Guide to Handling Cold Fermented Dough from Fridge to Flame
Proper Dough Removal and Temperature Adjustment Before Shaping
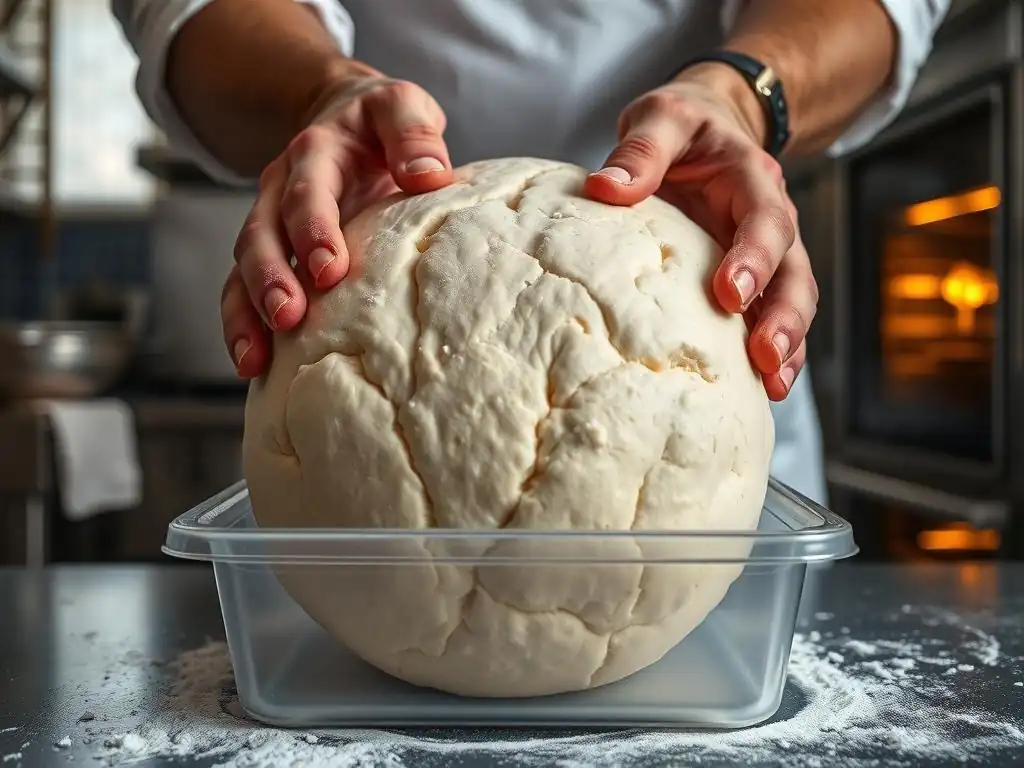
The most critical step in cold fermented dough handling after refrigeration is allowing the dough to warm up properly before you attempt to shape it. Removing the dough directly from the cold fridge and trying to stretch it will likely cause it to tear and resist shaping because the gluten is stiff and not relaxed.
The goal is to bring the dough's internal temperature up to a point where the gluten is pliable and extensible, typically between 10°C and 16°C (50°F-60°F), though some bakers prefer it slightly warmer. This process, often called "tempering" or "resting out," usually takes 1 to 3 hours at room temperature, depending on the ambient temperature and the size of the dough ball.
To temper the dough, gently remove it from its cold fermentation container. You can place the dough balls on a lightly floured surface, spaced apart, or in individual proofing containers or bowls, lightly floured and covered loosely with plastic wrap or a damp cloth to prevent a skin from forming. Avoid placing them in a warm spot (like near a hot oven) as this can cause the outside to warm too quickly while the inside remains cold, leading to uneven handling.
Patience is key here; rushing this step will compromise your ability to stretch the dough and achieve a good crust. You'll notice the dough become softer, more relaxed, and slightly puffier as it warms up, indicating it's ready for the next stage of cold fermented dough handling.
Techniques for Gentle Dough Handling to Preserve Gas Retention
Once the cold fermented dough has tempered, it's crucial to handle it gently to preserve the precious carbon dioxide gas bubbles created during fermentation. These bubbles are responsible for the airy crumb structure and oven spring. Aggressive kneading or pressing down firmly will deflate the dough, resulting in a dense, flat crust. Think of the dough ball as a delicate balloon filled with air that you want to gently coax into shape.
Start by transferring the dough ball to your lightly floured work surface. Avoid using excessive flour, which can make the dough tough. Instead of kneading, focus on stretching and shaping. Use your fingertips to gently press down the center of the dough ball, leaving a small rim around the edge (this will become the crust).
Then, lift the dough and use the backs of your hands or knuckles to gently stretch it outwards, letting gravity assist. Rotate the dough as you stretch to create an even circle (or your desired shape). This gentle cold fermented dough handling technique minimizes deflation and helps maintain the open structure developed during the long cold rest.
Effective Stretching and Shaping Methods for Cold Fermented Pizza Dough
With the cold fermented dough tempered and ready, various gentle techniques can be used for stretching and shaping. A popular method for achieving a classic round pizza shape involves using your hands. After creating the initial rim by pressing the center, lift the dough and hold it vertically, letting gravity stretch it downwards. Gently rotate the dough, allowing the weight of the dough itself to pull it into a larger circle. You can also lightly stretch the edges with your hands, supporting the dough from underneath. Avoid pulling or tearing.
Another method, suitable for slightly firmer doughs or if you're less experienced with hand-stretching, is using a rolling pin very gently. However, be aware that rolling can push out more gas than hand-stretching, potentially leading to a denser crust. If using a rolling pin, use minimal pressure and roll outwards from the center, rotating the dough frequently.
For rectangular or odd shapes, you can gently press and pull the dough into the desired form on your work surface or directly on your pizza peel. Regardless of the method chosen, the key to successful cold fermented dough handling during shaping is to be patient and gentle, respecting the dough's structure.
Tips for Preventing Dough Tearing and Overworking
Preventing tears and overworking is vital when handling cold fermented dough, as both can ruin the desired crust texture. Tearing often happens when the dough is not sufficiently tempered, meaning it's still too cold and stiff. Ensure your dough has rested out of the fridge for long enough to become pliable. If the dough resists stretching or springs back excessively, it likely needs more resting time. Cover it and leave it for another 15-30 minutes.
Overworking the dough, either through aggressive kneading post-fermentation (which should be avoided) or excessive stretching and reshaping, can tighten the gluten structure too much and push out air, resulting in a tough, dense crust. Once you've shaped the dough, try to avoid reshaping it multiple times. If a tear does occur during stretching, you can often gently pinch the edges back together.
For small tears, this is usually sufficient. For larger tears, or if the dough is being particularly difficult, it might be better to gently reform the dough into a ball, let it rest covered for 15-20 minutes to relax the gluten, and then attempt to stretch it again. Patience and a light touch are your best allies in effective cold fermented dough handling.
Optimizing Dough Flavor and Texture Through Cold Fermented Dough Techniques
Enhancing Flavor Profiles via Extended Cold Fermentation
The primary driver of complex flavor in cold fermented dough is the extended time spent in the refrigerator. As yeast activity slows significantly at cold temperatures, enzymes within the flour have more time to break down starches into simple sugars. These sugars are then consumed by the yeast, but at a much slower pace than at room temperature, producing a wider range of aromatic compounds, including organic acids like lactic and acetic acid.
These acids contribute to the subtle tang and depth often associated with artisanal bread and pizza crusts. The longer the cold fermentation, generally the more pronounced and complex these flavors become.
For instance, a dough cold-fermented for 24 hours will have a noticeably better flavor than a quick room-temperature dough, but a dough fermented for 72 hours or even 5 days can develop even deeper, more nuanced notes. Experimenting with fermentation times is a core aspect of optimizing cold fermented dough handling for flavor.
Using a smaller amount of yeast allows for longer fermentation times without the risk of the dough becoming excessively sour or breaking down the gluten structure too much. Some bakers even push cold fermentation to 7 days or more for highly specialized results, though this requires careful control of yeast levels and flour strength.
Managing Gluten Structure for Optimal Crust Texture
Managing the gluten structure is paramount for achieving the desired crust texture with cold fermented dough. The long, slow fermentation in the cold allows the gluten network to develop strength and elasticity gradually. This slow development often leads to a more extensible dough that can be stretched thin without tearing, while still retaining enough structure to hold its shape and trap gas bubbles during baking. The key is to preserve this developed structure through careful handling after fermentation.
Aggressive handling, deflation, or insufficient resting after refrigeration can damage the delicate gluten network and push out the air bubbles, leading to a dense crust. Conversely, proper cold fermented dough handling—gentle shaping, adequate tempering time, and avoiding overworking—helps maintain the integrity of the gluten. This results in a crust with a desirable balance of chewiness and airiness, characterized by an open crumb structure with irregular pockets. Hydration also plays a role; higher hydration doughs, when properly handled, tend to produce a more open, irregular crumb due to the higher water content facilitating steam expansion during baking.
Balancing Dough Resting Times Post-Refrigeration
Balancing the resting time after removing the cold fermented dough from the refrigerator is critical for successful shaping and baking. This resting period, or tempering, allows the dough to warm up and relax. If the dough is shaped too soon while still cold and stiff, the gluten will be tight and resistant, making stretching difficult and increasing the risk of tearing. The dough will likely spring back, resulting in a smaller, thicker pizza. A common indicator of insufficient rest is dough that is difficult to stretch thin or keeps shrinking back immediately after stretching.
Conversely, letting the dough rest for too long at room temperature after cold fermentation can lead to over-proofing. While the yeast is slow in the fridge, it becomes active again as the dough warms. If left too long, the dough can become overly gassy, weak, and difficult to handle, potentially collapsing or resulting in a very dense crust with little oven spring because the gluten structure has been stretched too thin.
The ideal resting time depends on the ambient temperature and the dough ball size, typically ranging from 1 to 3 hours until the dough is pliable but still holds its shape well. Observing the dough's texture and behavior is key to finding the sweet spot for optimal cold fermented dough handling before baking.
Baking Cold Fermented Dough: Achieving the Perfect Crust and Crumb
Oven Preparation and Temperature Settings for Cold Dough Baking
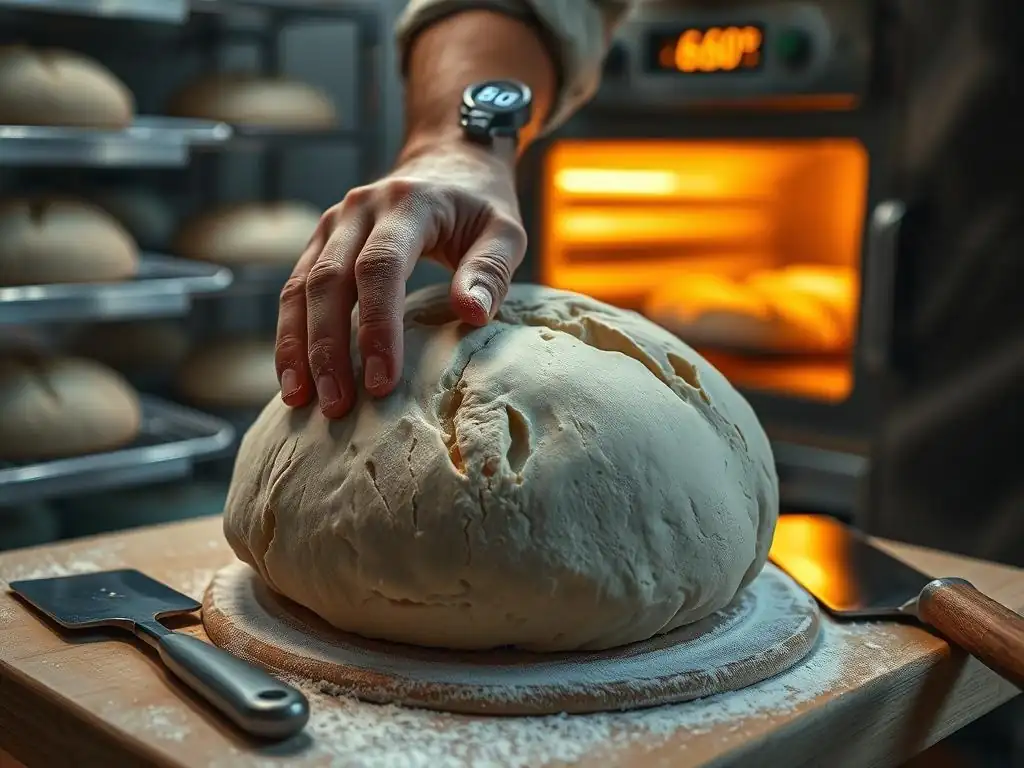
Proper oven preparation is crucial when baking pizza made with cold fermented dough, as these doughs benefit significantly from high temperatures to achieve maximum oven spring and a crispy crust. For home ovens, aiming for the highest possible temperature is recommended, typically between 230°C and 260°C (450°F-500°F). However, using a pizza stone or steel is arguably more important than just the air temperature. A pizza stone or steel, preheated in the oven for at least 45-60 minutes at the maximum temperature, provides a scorching hot surface that transfers heat rapidly to the base of the pizza.
This intense heat transfer from the stone or steel is what causes the dough to puff up quickly (oven spring) and cook the bottom crust to a perfect crispness before the top burns. Without a preheated surface, the bottom crust cooks too slowly, resulting in a pale, soft base.
Position the stone or steel on the top rack for quicker cooking and better charring of the crust edges, or lower for a more evenly cooked top and bottom. Ensuring your oven and baking surface are fully preheated is a non-negotiable step for successful cold fermented dough handling during the final baking stage.
Baking Time Adjustments When Using Cold Fermented Dough
Baking time for pizza made with cold fermented dough can vary slightly depending on the oven temperature, the thickness of the crust, and the amount of toppings. Because cold fermented dough is typically baked at high temperatures, the cooking time is relatively short. In a home oven at 250°C (480°F) with a preheated stone, a thin-crust pizza might cook in as little as 6-10 minutes. A thicker crust or a pizza with more toppings might take slightly longer, perhaps 10-14 minutes.
It's important to watch the pizza closely, especially the first time you bake a cold fermented dough in your specific oven. Look for the crust edges to be puffed up and golden brown, with some desirable charring (leoparding) if using a very hot surface. The base should be firm and lightly browned when you lift a corner.
Since cold fermented dough often has a great structure, it can handle these high temperatures well, promoting rapid expansion and a light crumb. Adjustments might be needed based on whether you prefer a crispier or chewier crust; longer baking times at slightly lower temperatures can increase crispness but might reduce the airiness of the crumb.
Using Heat Sources and Techniques to Maximize Oven Spring
Maximizing oven spring is a key goal when baking cold fermented dough, as it contributes to the airy, open crumb structure. This is achieved by exposing the dough to intense heat as quickly as possible. As mentioned, a preheated pizza stone or steel is the most effective way to deliver this initial heat to the base, causing rapid expansion of the gas bubbles within the dough. The high ambient air temperature in the oven also contributes to the overall oven spring.
Another technique is to ensure the dough is properly tempered and handled gently, preserving the gas bubbles. Launching the pizza quickly and confidently onto the hot stone minimizes heat loss.
Some bakers also use a broiler element in the final minutes of baking to give the top crust and edges an extra burst of heat, promoting more rapid browning and puffing, especially if the bottom is cooking faster than the top. While not strictly 'cold fermented dough handling' in the shaping sense, these baking techniques are the culmination of successful handling, allowing the dough's developed structure to perform optimally in the heat.
Troubleshooting Common Challenges in Cold Fermented Dough Handling
Identifying and Fixing Overproofed or Underproofed Cold Dough
Recognizing the signs of overproofed or underproofed cold dough is crucial for successful cold fermented dough handling. Overproofed cold dough often appears excessively bubbly, sometimes with bubbles on the surface that have popped or are about to pop. When you go to shape it, it may feel weak, tear easily, and lack elasticity, offering little resistance.
It might also smell overly alcoholic or strongly acidic. Overproofing typically occurs if the dough was left in the fridge too long for the amount of yeast used, or if it was allowed to temper at room temperature for an excessive period. While difficult to fully salvage, you can sometimes gently fold the dough a few times to build a little tension before shaping, or use it for a focaccia or pan pizza where structure is less critical.
Underproofed cold dough, on the other hand, will feel dense and tight even after adequate tempering. It will be difficult to stretch, offering significant resistance and springing back aggressively. The surface might appear smooth with few visible bubbles. This usually happens if the cold fermentation time was too short for the amount of yeast and temperature, or if the dough wasn't given enough time to temper.
The fix for underproofed dough is simple: give it more time. If it's still cold and tight, return it to the fridge for more fermentation time. If it's tempered but still tight, let it rest longer at room temperature, checking its pliability periodically. Proper cold fermented dough handling involves learning to read the dough's readiness.
Addressing Dough Stickiness and Handling Difficulties
Stickiness is a common issue in cold fermented dough handling, particularly with higher hydration doughs. If the dough is excessively sticky and difficult to handle even after tempering, a few things might be the cause. It could be slightly overproofed, causing the gluten structure to break down and release moisture. Alternatively, it might simply be the nature of a high-hydration dough. Using too much flour on your work surface can be counterproductive, as it can make the crust tough.
Instead of excessive flour, try using a minimal amount of flour on your hands and surface, or work on a surface that is slightly damp rather than floured, which can help prevent sticking without adding dry flour to the dough. A dough scraper is invaluable for manipulating sticky dough. If the dough feels very wet and slack, you might consider reducing the hydration slightly in your next batch.
Ensuring the dough is adequately tempered helps; cold dough can feel stickier than it is because it's less pliable. Gentle techniques like stretching over your knuckles or letting gravity do the work can also minimize contact and stickiness during cold fermented dough handling.
Solutions for Uneven Baking and Crust Issues with Cold Fermented Pizza
Uneven baking and crust issues with cold fermented pizza can be frustrating. Common problems include a pale, undercooked bottom crust, burnt edges, or a dense, uneven crumb. A pale bottom crust is almost always due to insufficient heat transfer from the baking surface. Ensure your pizza stone or steel is fully preheated at the maximum oven temperature for the recommended time (at least 45-60 minutes). Launching the pizza onto a properly preheated surface is key.
Burnt edges with an undercooked center can happen if the top heat source (like a broiler) is too intense compared to the bottom heat, or if the pizza is too close to the top element. Adjusting the rack position can help. A dense or uneven crumb can result from several cold fermented dough handling errors: underproofing, overproofing, not allowing enough tempering time, or handling the dough too aggressively and deflating it.
Reviewing your process, from fermentation time to post-fridge resting and shaping techniques, is necessary to identify the cause. Consistency in temperature, time, and gentle handling are the solutions to achieving a perfectly baked cold fermented crust.
Advanced Tips for Mastering Cold Fermented Dough Handling in Pizza Making
Incorporating Preferments and Starters in Cold Fermented Dough Recipes
Taking cold fermented dough handling to the next level often involves incorporating preferments like a poolish or biga, or using a sourdough starter. A poolish is a wet, equal-part flour and water mixture with a small amount of yeast, typically fermented at room temperature for several hours before being added to the final dough. A biga is a drier preferment, usually 50-60% hydration, also fermented for a period before being combined with the remaining ingredients. Sourdough starters are natural leavening agents made from fermented flour and water, containing wild yeasts and bacteria.
Adding a preferment or using a starter introduces more complex flavors and aromas earlier in the process. It also often contributes to a stronger gluten structure and better oven spring. When using these in a cold fermented dough recipe, the amount of commercial yeast (if any is used in addition to a starter) is typically reduced even further.
The cold fermentation period then further develops the complexity introduced by the preferment or starter. Mastering cold fermented dough handling with preferments requires understanding how their initial fermentation time and temperature impact the overall cold fermentation duration and the final dough characteristics.
Adjusting Ingredients and Techniques for Different Flour Types
Different flour types behave differently during cold fermentation and require adjustments in hydration and handling techniques. High-protein bread flour and Italian Tipo 00 flour are common choices for cold fermented pizza dough due to their strong gluten network which withstands long fermentation. However, even within these types, protein content and absorption rates vary between brands. A flour with 13% protein might handle a 70% hydration cold ferment beautifully, while a 12% protein flour might be too slack at that hydration and require a reduction to 65%.
Using whole wheat or alternative flours presents further challenges. Whole wheat flour contains bran and germ, which can cut gluten strands, potentially weakening the dough during a long cold ferment. Recipes using significant amounts of whole wheat might require slightly higher hydration (as whole wheat absorbs more water) and potentially a shorter cold fermentation time or a higher proportion of strong white flour to maintain structure. Cold fermented dough handling with different flours involves experimentation to find the right hydration and fermentation schedule that works with the specific flour's characteristics.
Seasonal Considerations: Temperature and Humidity Effects on Cold Fermentation
Environmental factors like temperature and humidity can significantly impact cold fermented dough handling, even during the refrigeration phase and especially during the tempering and proofing stages. While the refrigerator temperature is relatively stable, fluctuations can occur, and the dough's activity level is still influenced by its environment before and after the cold rest. In warmer months, dough might ferment slightly faster in the fridge if your refrigerator temperature creeps up, and it will certainly warm up and proof much faster when removed for tempering.
In humid conditions, dough can feel stickier, requiring adjustments in handling by using less flour or relying more on water or oil on your hands and surface. In drier conditions, dough can form a skin more quickly while tempering, necessitating careful covering with plastic wrap or a damp cloth.
Paying attention to the ambient temperature and humidity in your kitchen allows you to make informed decisions about how long to temper the dough, how much flour to use for handling, and even slight adjustments to hydration or yeast levels in the initial mix. Successful cold fermented dough handling means being adaptable to your environment.
Conclusion: Elevating Your Pizza Baking with Expert Cold Fermented Dough Handling
Recap of Best Practices from Fridge to Flame
Mastering cold fermented dough handling is a journey that significantly elevates your homemade pizza. We've covered the essential steps, starting with understanding the slow, flavor-building process that happens in the cold environment, typically between 3°C and 5°C, over 24 hours to several days. Key benefits include deeper flavor complexity and a superior crust texture with an open, airy crumb. Proper preparation involves selecting high-protein flours, using accurate measurements (often by weight), and storing the dough in airtight containers in the refrigerator.
The crucial stage of cold fermented dough handling from fridge to flame involves carefully tempering the dough at room temperature (aiming for 10°C-16°C internal temperature) for 1-3 hours until pliable. Gentle handling techniques are vital to preserve the gas developed during fermentation, avoiding deflation. Stretching methods should be kind to the dough, preventing tears by ensuring adequate rest and avoiding overworking.
Finally, baking on a preheated pizza stone or steel at the highest oven temperature (230°C-260°C) maximizes oven spring and achieves that perfect crispy base and airy crust. Troubleshooting issues like stickiness or uneven baking often comes back to these core principles of temperature, time, and gentle cold fermented dough handling.
Encouragement to Experiment and Perfect Cold Fermented Pizza Dough Techniques
Achieving pizza perfection with cold fermented dough handling is less about following a recipe rigidly and more about understanding the process and learning to read your dough. The ranges provided for temperatures, times, and hydration are guides, but your specific flour, yeast, refrigerator temperature, and ambient kitchen conditions will influence the outcome. Don't be discouraged by initial challenges like stickiness or uneven crusts. Each batch is a learning opportunity.
We encourage you to experiment! Try different cold fermentation durations (24, 48, 72 hours, or even longer). Vary your hydration slightly to see how it affects handling and texture. Test different tempering times to find what works best in your kitchen. Pay attention to how the dough feels and behaves at each stage – this tactile knowledge is key to becoming an expert in cold fermented dough handling. With practice and patience, you'll consistently produce pizzas with incredible flavor and texture, making the effort of cold fermentation truly rewarding. Your best homemade pizza is just a cold ferment away!
Frequently Asked Questions
How long can I cold ferment dough for the best results?
Cold fermentation typically works best between 24-72 hours. Going beyond this can lead to over-proofing and a weaker dough structure, impacting your final bake.
What's the ideal temperature for cold fermenting dough in the refrigerator?
The sweet spot is between 35-40°F (2-4°C). This temperature slows down yeast activity significantly, allowing flavors to develop without excessive rising.
How should I prepare my cold-fermented dough for baking after removing it from the fridge?
Allow the dough to warm up slightly at room temperature for about 30-60 minutes. This helps relax the gluten and makes it easier to shape and score.
Why is cold fermentation beneficial for my bread?
Cold fermentation enhances flavor development by allowing enzymes to break down complex starches over time. This results in a richer, more complex taste.
Can I punch down cold-fermented dough before shaping it?
Generally, no. Punching down deflates the delicate air pockets created during the long, slow fermentation. Gently shape the dough instead.
Final Reflection: The Transformative Power of Patience in Baking
The art of cold fermented dough isn't just about technique; it's about embracing a slower, more mindful approach to baking, a philosophy increasingly relevant in our fast-paced world. The meticulous attention to detail required—from precise hydration levels to careful temperature control—mirrors the patience and dedication needed to cultivate anything truly worthwhile. This isn't just about making bread; it's about cultivating a deeper connection with the process and the resulting product.
The impact of cold fermentation extends beyond the kitchen. It reflects a growing appreciation for traditional methods and a rejection of instant gratification. The resulting bread, with its complex flavors and superior texture, stands as a testament to the rewards of patience. Slow is smooth, smooth is fast
– a mantra often heard in various fields, perfectly encapsulates the essence of cold fermentation. It's a reminder that taking the time to do things properly often leads to superior results, both in baking and in life.
Now, consider your own baking journey. What aspects of your life could benefit from the same mindful approach you've learned through mastering cold fermented dough? I invite you to embrace the slow, deliberate process, not just in baking, but in all aspects of your life. Experiment with patience, allow for fermentation, both in the kitchen and beyond, and discover the transformative power of a slower pace. The rewards, like the perfectly risen loaf, will be well worth the wait.
Unleash Your Inner Baker: Master Cold Fermentation!
Thanks for taking the time to explore the world of cold-fermented dough! You've now unlocked a secret to creating incredibly flavorful and textured bread. Ready to put your newfound knowledge into practice?
- Bake your first cold-fermented loaf: Use the techniques you just learned to create a delicious sourdough, focaccia, or your favorite bread recipe using cold fermentation. Record your experience!
- Share your baking journey: Post a picture of your masterpiece on social media and tag #BakeWithEaseColdFerment – let's inspire each other!
- Explore advanced cold fermentation techniques: Dive deeper into the science behind cold fermentation and experiment with different flours and hydration levels. What new flavor profiles will you uncover?
What unique twist will you add to your next cold-fermented creation? Let's hear about it in the comments below!