
Basic Sourdough Bread in a Dutch Oven: Recipe & Tips

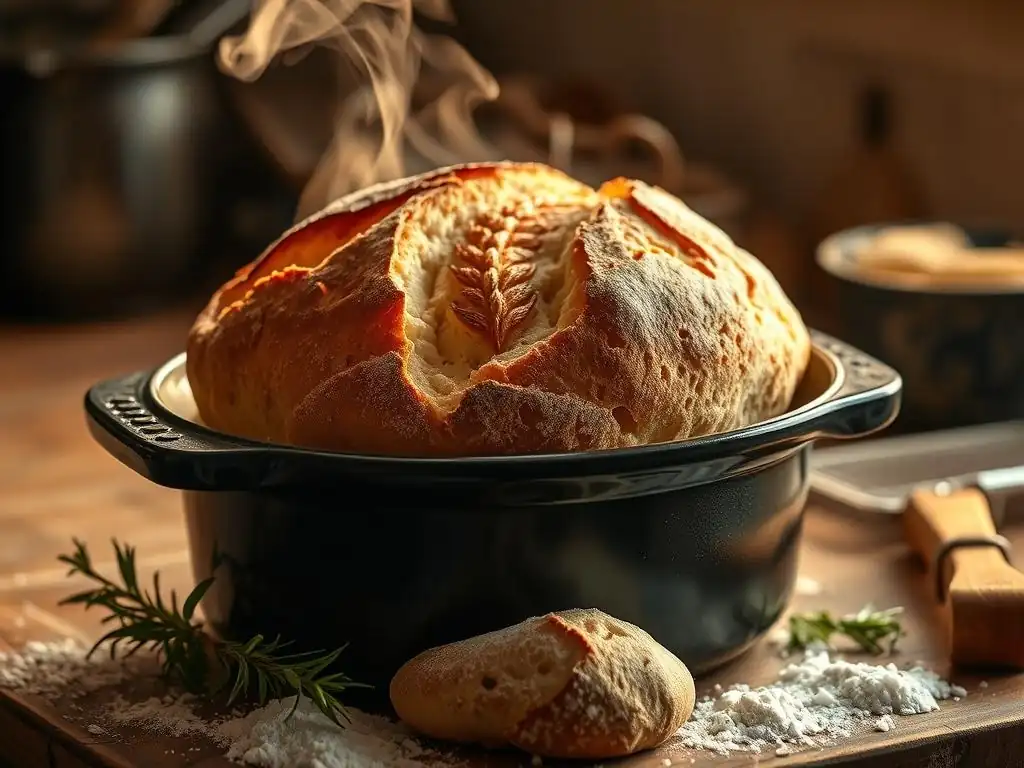
Welcome to BakeWithEase, your trusted companion on your baking journey! Ever dreamt of effortlessly creating a rustic, crusty loaf of sourdough bread? You're in the right place. Unlocking the secrets to a perfect sourdough has never been easier. Dive in to discover our easy Dutch oven sourdough recipe and transform your kitchen into a haven of delicious aromas. Ready to bake? Let's get started!
- Easy Dutch Oven Sourdough Recipe: Bake With Ease
- Introduction to Dutch Oven Sourdough Baking
- BakeWithEase's Easy Dutch Oven Sourdough Recipe: Step-by-Step
- Tips and Tricks for Perfect Dutch Oven Sourdough
- Storing Your Homemade Sourdough
- Conclusion: Mastering the Art of Easy Dutch Oven Sourdough
-
Frequently Asked Questions
- What makes this sourdough recipe "easy" compared to other sourdough recipes?
- Why use a Dutch oven for sourdough bread?
- How long does it take to make this sourdough bread, start to finish?
- What if I don't have a sourdough starter? How can I get one?
- Can I adjust the recipe for different types of flour?
- Final Reflection: The Humble Loaf, a Journey of Discovery
- Unleash Your Inner Baker: Craft Your Perfect Loaf!
Easy Dutch Oven Sourdough Recipe: Bake With Ease
Introduction to Dutch Oven Sourdough Baking
Why Bake Sourdough in a Dutch Oven?
Baking sourdough bread in a Dutch oven is a technique highly favored by both amateur and professional bakers, and for good reason. This method creates a miniature oven environment inside your main oven. Initially, with the lid on, the Dutch oven traps the steam released by the baking dough.
This trapped steam is crucial; it keeps the surface of the loaf moist during the critical initial phase of baking. A moist surface allows the dough to expand fully before the crust sets, leading to significantly better oven spring and a more open crumb structure. Without sufficient steam, the crust would form too quickly, restricting the loaf's ability to rise.
Beyond managing steam, the cast iron (or other heavy material) of a Dutch oven provides excellent heat retention and distribution. The consistent, high heat radiating from all sides of the pot helps the loaf bake evenly and develops a beautiful, deeply colored crust. This method mimics the conditions of a professional bakery deck oven, which uses radiant heat and steam injection to achieve superior results. For home bakers, especially those without dedicated steam-injection ovens, a Dutch oven is the most accessible and effective way to replicate these ideal baking conditions for a truly exceptional loaf of sourdough.
Achieving a Crispy Crust and Open Crumb with a Dutch Oven
The secret to that coveted crispy crust and airy, open crumb in homemade sourdough often lies in the Dutch oven. During the first part of the bake, with the lid on, the trapped steam ensures the dough remains pliable. This allows the loaf to expand dramatically – a phenomenon known as oven spring – as the gases within the dough are rapidly heated.
A typical loaf might increase in volume by 30-50% during this phase. This vigorous expansion stretches the gluten structure, contributing directly to a more open internal crumb. The steam also delays the formation of the crust, preventing it from becoming hard and brittle too early in the bake cycle.
Once the initial steaming period is complete (usually after 20-30 minutes), removing the lid allows the accumulated steam to escape and exposes the loaf directly to the dry heat of the oven. This is when the crust truly begins to form and caramelize, developing its characteristic golden-brown color and satisfying crunch.
The intense heat from the preheated Dutch oven base also helps to rapidly set the bottom crust. This two-stage baking process – steamy environment followed by dry heat – is the fundamental principle behind using a Dutch oven for sourdough and is highly effective for achieving professional-quality results right in your home kitchen.
BakeWithEase's Easy Dutch Oven Sourdough Recipe: Step-by-Step
Ingredients for Your Dutch Oven Sourdough
Essential Sourdough Ingredients List
Creating a delicious, easy Dutch oven sourdough recipe starts with just a few fundamental ingredients. You will need active sourdough starter, high-quality bread flour (typically with a protein content of 12-14%), water, and salt. That's it!
For a standard loaf, a common ratio by baker's percentage might look something like this: 100% bread flour, 70-75% water, 20% active sourdough starter, and 2% salt. This means if you use 500 grams of flour, you would use 350-375 grams of water, 100 grams of starter, and 10 grams of salt. Using weight measurements with a kitchen scale is crucial for consistency in baking, as volume measurements (like cups) can vary significantly.
The quality of your ingredients matters. Using a strong bread flour with good gluten potential is essential for developing the structure needed to trap the gases produced by the starter, leading to a good rise and open crumb. The water should ideally be non-chlorinated, as chlorine can potentially inhibit the activity of the wild yeast and bacteria in your starter.
Fine sea salt or kosher salt is preferred over iodized table salt, which can impart a metallic taste and potentially interfere with fermentation. Ensuring your sourdough starter is active and bubbly is perhaps the most critical ingredient; a sluggish starter will result in a dense, flat loaf.
Understanding Sourdough Starter Hydration
Sourdough starter hydration refers to the ratio of water to flour by weight used when feeding your starter. It's usually expressed as a percentage, where the weight of the flour is 100%. A 100% hydration starter, for example, is fed with equal weights of flour and water (e.g., 50 grams flour and 50 grams water). This is the most common hydration level for sourdough starters and the one typically assumed unless otherwise specified in a recipe, including our easy Dutch oven sourdough recipe. Understanding your starter's hydration is important because it affects its consistency and fermentation speed.
A higher hydration starter (e.g., 125%) will be looser and ferment slightly faster than a lower hydration starter (e.g., 75%), which will be stiffer. The hydration of your starter also slightly impacts the overall hydration of your final dough. While most easy Dutch oven sourdough recipes assume a 100% hydration starter, if your starter is different, you may need to make minor adjustments to the water added to the main dough to achieve the desired consistency. Consistency in feeding and maintaining your starter's hydration is key to predictable baking results.
Equipment Needed for Dutch Oven Sourdough
Dutch Oven Size and Material Recommendations
Choosing the right Dutch oven is key for a successful easy Dutch oven sourdough bake. A 5 to 7-quart (roughly 4.7 to 6.6-liter) cast iron Dutch oven is the most popular and highly recommended size for baking a standard 1-1.5 kg loaf of sourdough. This size provides enough space for the dough to expand without touching the sides, and it's large enough to handle most home-sized loaves.
Cast iron is the material of choice due to its exceptional ability to retain and distribute heat evenly. Enamelled cast iron is also excellent and often easier to clean, though some prefer the raw cast iron surface.
The lid is just as important as the pot itself. A tight-fitting lid is essential to trap the steam released by the dough during the initial baking phase. Some bakers even prefer a lid that is flat or slightly inverted to allow the loaf to rise fully without hitting the lid prematurely. While cast iron is ideal, other heavy-duty pots made from materials like ceramic or stoneware designed for oven use can also work, provided they have a tight-fitting lid and can withstand high oven temperatures, typically up to 450-500°F (230-260°C).
Other Essential Baking Tools
Beyond the Dutch oven, several other tools are indispensable for an easy Dutch oven sourdough recipe. A digital kitchen scale is paramount for accurate measurement of ingredients by weight, ensuring consistent results. You'll also need a large mixing bowl, preferably non-reactive like glass, ceramic, or stainless steel. A dough scraper (both a bench scraper and a bowl scraper) is incredibly helpful for handling sticky dough, dividing, and shaping.
For proving (rising) the dough, a proofing basket (banneton) lined with flour is traditional and helps the dough maintain its shape and creates a nice pattern on the crust. If you don't have a banneton, a bowl lined with a floured tea towel works well. Parchment paper is highly recommended for easily transferring the shaped dough into the hot Dutch oven. Finally, a lame or a sharp razor blade is needed for scoring the dough just before baking, and cooling rack is essential for allowing the finished loaf to cool properly, which is crucial for texture development.
The Sourdough Dough Making Process
Step 1: Autolyse - The Foundation of Flavor
The autolyse is a simple yet powerful technique in sourdough baking, and it's a great starting point for an easy Dutch oven sourdough recipe. It involves mixing just the flour and water from the recipe and letting them rest for 20 minutes up to several hours. During this rest period, the flour absorbs the water fully, initiating gluten development without the need for mechanical kneading. Enzymes in the flour also start breaking down complex carbohydrates into simpler sugars, which the yeast and bacteria in the starter will later feed on, contributing to better flavor development.
Performing an autolyse makes the subsequent mixing process much easier. The dough becomes more hydrated and pliable, requiring less kneading time to achieve a strong gluten structure. For example, a dough mixed without autolyse might require 15-20 minutes of kneading, while an autolysed dough might only need 5-10 minutes of gentle folding. While not strictly mandatory for a beginner's easy Dutch oven sourdough recipe, incorporating an autolyse significantly improves dough handling and the final bread's texture and flavor.
Step 2: Mixing and Kneading Your Sourdough Dough
After the autolyse (if you choose to do it), the next step in our easy Dutch oven sourdough recipe is incorporating the sourdough starter and salt. Add the active starter to the dough and mix thoroughly to distribute it evenly. A common technique is to dimple the starter into the dough with wet fingers and then perform a series of folds or gentle kneading until the starter is fully incorporated.
Once the starter is mixed in, let the dough rest for 10-15 minutes before adding the salt. Adding salt slightly after the starter allows the starter to begin interacting with the flour unimpeded initially.
Once the salt is added, mix it in thoroughly. Now, you'll work on developing the gluten structure. For a high-hydration sourdough like this easy Dutch oven sourdough recipe often calls for (70-75% hydration), traditional kneading can be messy. Instead, techniques like 'stretch and folds' or 'coil folds' are highly effective. These involve wetting your hands, gently stretching a portion of the dough up, and folding it over onto itself. Repeating this motion around the bowl builds strength and tension in the dough gradually over time without aggressive handling.
Step 3: Bulk Fermentation: The Importance of Time and Temperature
Bulk fermentation, also known as the first rise, is a critical phase in making an easy Dutch oven sourdough recipe. This is the period after mixing where the dough rests as a single mass, allowing the wild yeast and bacteria in the starter to ferment the sugars, produce carbon dioxide gas (which causes the dough to rise), and develop complex flavors. The duration of bulk fermentation is highly dependent on the ambient temperature and the activity of your starter.
In a warm kitchen (around 75-80°F or 24-27°C), bulk fermentation might take 4-6 hours. In a cooler environment (68-72°F or 20-22°C), it could take 8-12 hours or even longer.
During bulk fermentation, you will typically perform several sets of 'stretch and folds' or 'coil folds' during the first 2-3 hours. These sets, usually 3-4 performed 30-60 minutes apart, help to build gluten strength and distribute the yeast and gas bubbles evenly throughout the dough. By the end of bulk fermentation, the dough should have increased significantly in volume (often by 50-100%), look visibly gassy, and feel lighter and more airy. It should also pass the "windowpane test," meaning you can gently stretch a small piece of dough thin enough to see light through it without tearing.
Monitoring Dough Rise and Adjusting Fermentation Time
Monitoring the dough's rise during bulk fermentation is more about observing the dough's activity and structure than strictly following a clock. While time ranges are helpful guidelines for an easy Dutch oven sourdough recipe, temperature fluctuations and starter strength mean you must learn to read the dough. Look for signs of fermentation: the dough should become visibly larger, domed, and show small bubbles on the surface.
A good indicator is placing a small piece of dough (a " aliquot jar ") in a straight-sided container to track its percentage increase in volume. Aiming for a 50-75% increase in the aliquot jar is a common target before moving to shaping.
If your kitchen is warmer than expected, the dough will ferment faster. You might see a 75% increase in volume in just 4 hours at 80°F (27°C). Conversely, in a cooler kitchen, it might take 10 hours to reach that same increase at 68°F (20°C).
If fermentation is too short, the dough won't have enough strength or flavor development. If it's too long (over-proofed), the gluten structure can collapse, resulting in a flat, dense loaf with a poor crust. Practice and observation are key; feeling the dough (it should feel airy and jiggly) and seeing the visible signs of fermentation are more reliable indicators than just the time.
Step 4: Shaping Your Sourdough Loaf
Shaping is a crucial step in our easy Dutch oven sourdough recipe, as it builds tension on the surface of the dough, which is essential for achieving good oven spring and a beautiful loaf shape. After bulk fermentation, gently turn the dough out onto a lightly floured surface. Be careful not to degas it too much; you want to preserve those precious gas bubbles.
You'll typically pre-shape the dough first, which involves gently forming it into a rough ball or log and letting it rest for 20-30 minutes. This rest period, called bench rest, allows the gluten to relax, making the final shaping much easier.
For the final shape, you'll want to create significant surface tension. For a boule (round loaf), gently coax the dough into a taut ball by pulling sections from the sides and folding them over the top, then flipping it over and using your hands or a bench scraper to gently pull the dough towards you, creating tension on the underside.
For a batard (oval loaf), you'll typically fold the dough into thirds like a letter, then roll it up tightly from one end, sealing the seam. The goal is a smooth, taut outer skin that will hold its shape and expand upwards during baking.
Creating Tension for Optimal Oven Spring
The surface tension created during shaping is directly related to how well your sourdough loaf will rise in the Dutch oven. When the dough is placed in the hot oven, the taut outer layer acts like a skin, directing the expanding gases inwards and upwards. Without sufficient tension, the dough might spread outwards into a flatter disc rather than rising upwards. Imagine the surface tension as a balloon; the tighter the surface, the more effectively it contains the expanding air (or CO2 in our case) and directs its force.
Building tension effectively involves careful handling. Avoid using too much flour on your shaping surface, as this can prevent the dough from gripping the surface, making it hard to create tension. Work relatively quickly but gently. Each fold and tuck should aim to tighten the outer layer. After shaping, the dough is placed seam-side up (for a boule) or seam-side down (for a batard) in a floured proofing basket. As it rests, the dough will settle into the basket's shape, and the tension you created will help it hold that form, ready for its final rise.
Step 5: Cold Proofing - Developing Flavor and Structure
Cold proofing, also known as retardation, is a highly recommended step in an easy Dutch oven sourdough recipe, although not strictly mandatory if you're in a hurry. After shaping, the dough in its proofing basket is placed in the refrigerator for an extended period, typically 8 to 24 hours, but sometimes even longer (up to 48 hours). The cold temperature significantly slows down the fermentation process. While yeast activity is reduced, the lactic acid bacteria in the starter continue to work, producing more organic acids.
This slow, cold fermentation has several benefits. Firstly, it allows for deeper flavor development, resulting in a more complex, tangy sourdough. Secondly, the cold temperature firms up the dough, making it much easier to score just before baking. A cold, firm dough holds the score pattern beautifully, contributing to controlled oven spring and an attractive final loaf. Finally, cold proofing offers incredible flexibility for the baker, allowing you to bake the loaf whenever it's convenient within that 24-48 hour window, rather than being tied to a strict bulk fermentation schedule.
Baking Your Sourdough in a Dutch Oven
Step 6: Preheating Your Dutch Oven
Properly preheating your Dutch oven is absolutely critical for achieving a perfect crust and maximizing oven spring in your easy Dutch oven sourdough recipe. Place the empty Dutch oven with its lid in your oven and preheat the oven to a high temperature, typically between 450°F and 500°F (230°C and 260°C). Allow the oven and the Dutch oven to preheat for at least 30 minutes, and preferably 45-60 minutes. This ensures that the cast iron is thoroughly heated through, storing a significant amount of thermal energy.
This intense stored heat provides an immediate burst of energy to the dough when it's placed inside. The rapid transfer of heat from the hot base of the Dutch oven helps to set the bottom crust quickly and initiates rapid expansion of gases within the dough, contributing significantly to oven spring. Skipping or shortening the preheating step will result in a less effective bake, potentially leading to a flatter loaf and a less developed crust.
Step 7: Scoring Your Sourdough Loaf
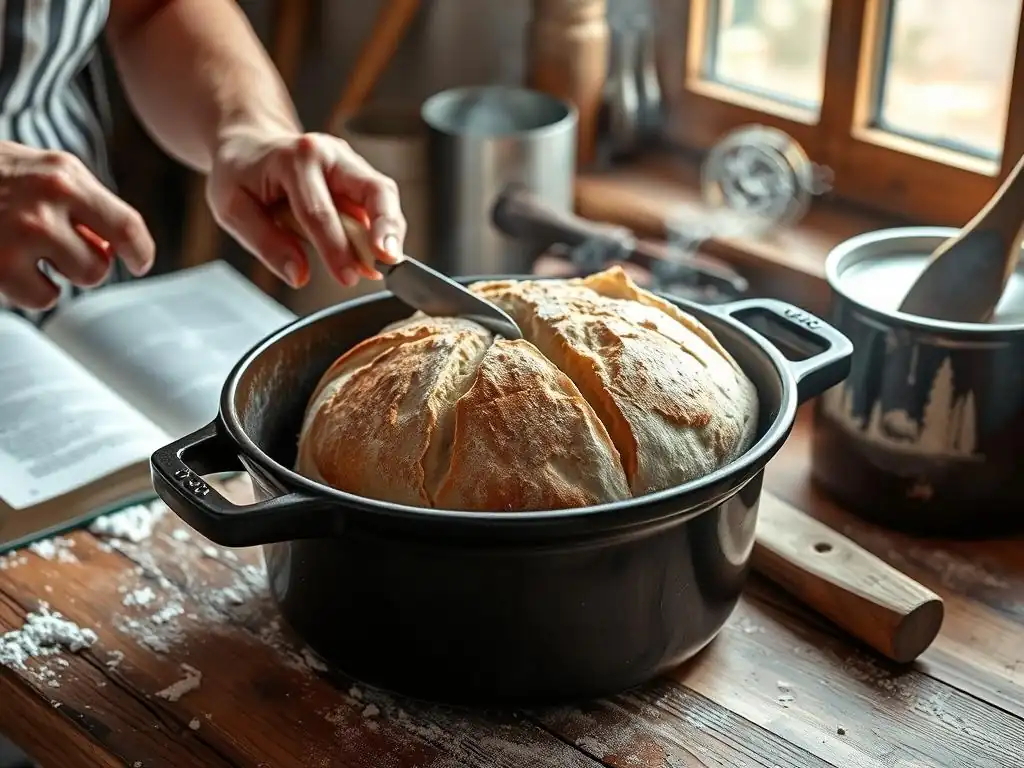
Scoring, or slashing, the surface of your sourdough loaf just before baking is a crucial step for several reasons in our easy Dutch oven sourdough recipe. Firstly, it provides controlled vents for the steam and gases to escape during oven spring. Without scoring, the crust would set randomly, causing the loaf to burst unpredictably at its weakest points, resulting in an uneven shape and potentially a less appealing appearance. By creating intentional cuts, you direct the expansion of the loaf.
Secondly, scoring is an opportunity for artistic expression! Different scoring patterns not only guide the rise but also create beautiful designs on the finished crust. Common patterns include a simple single slash down the middle for a batard, a cross shape for a boule, or more intricate leaf or ear patterns created with overlapping cuts. Use a very sharp blade, like a lame or razor blade, and make swift, confident cuts about 1/4 to 1/2 inch deep. A cold-proofed dough is much easier to score cleanly than a room-temperature dough.
Scoring Patterns for a Beautiful Sourdough
The scoring pattern you choose for your easy Dutch oven sourdough recipe influences both the final shape of the loaf and its aesthetic appeal. A single, deep slash running lengthwise along a batard is a classic and functional cut that encourages the loaf to open up dramatically along the score, often creating a beautiful "ear" if the tension and scoring depth are just right. For a boule, a simple cross shape allows the loaf to expand evenly outwards from the center.
More decorative patterns, like multiple parallel slashes, a wheat stalk design, or intricate shapes, require a steady hand and a sharp blade. These patterns still function to control the rise but also serve purely visual purposes. The key to any scoring pattern is making clean, decisive cuts. Hesitant cuts can tear the dough surface, leading to a less attractive finish and potentially inhibiting proper expansion. Experimenting with different patterns is part of the fun of mastering your easy Dutch oven sourdough recipe!
Step 8: Baking: Achieving the Perfect Bake
Baking your easy Dutch oven sourdough recipe involves two main stages within the hot Dutch oven. Carefully transfer the scored dough into the preheated Dutch oven using parchment paper as a sling. Place the lid on the Dutch oven and carefully put it back into the oven. Bake with the lid on for the first 20-30 minutes. This initial phase traps the steam released by the dough, allowing for maximum oven spring and keeping the crust pliable for expansion.
After the initial covered bake, carefully remove the lid. The loaf should have significantly increased in volume and appear pale with a slightly set crust. Now, continue baking with the lid off for another 20-30 minutes, or until the crust is a deep golden brown and the internal temperature of the loaf reaches 200-210°F (93-99°C). Baking without the lid allows the excess moisture to escape and the crust to fully color and crisp up.
Adjusting Baking Time for Different Dutch Oven Materials
While the general baking principles remain the same for an easy Dutch oven sourdough recipe, the material of your Dutch oven can slightly influence baking times and temperatures. Cast iron, being an excellent heat retainer, provides very consistent heat. Enamelled cast iron performs similarly but might transfer heat slightly less aggressively than raw cast iron, potentially requiring an extra minute or two of baking time to achieve the same crust color.
Heavier pots made of stoneware or ceramic designed for high-temperature baking will also work, but they might take longer to preheat thoroughly and could require minor adjustments to baking time or temperature. For example, if you notice the bottom crust is browning too quickly in a raw cast iron pot, you might try reducing the oven temperature slightly after removing the lid, perhaps by 10-15°F (5-8°C). Always use an instant-read thermometer to check the internal temperature; this is the most reliable way to know if your loaf is fully baked, regardless of the pot material.
Step 9: Cooling and Enjoying Your Homemade Sourdough
Once your easy Dutch oven sourdough loaf has reached the desired internal temperature and crust color, carefully remove it from the Dutch oven and place it on a wire cooling rack immediately. Resist the urge to cut into your beautiful loaf right away! This cooling period is absolutely essential for the bread's texture and flavor development. As the loaf cools, residual heat continues to cook the interior slightly, and moisture redistributes throughout the crumb.
Cutting into a hot loaf will result in a gummy, dense texture. Allow the loaf to cool for at least 1-2 hours, preferably longer, for a standard-sized loaf. As it cools, the crust will crisp up further, and the crumb structure will set properly. This waiting period is perhaps the hardest part of the entire process, but it's vital for enjoying the full potential of your homemade, easy Dutch oven sourdough bread. Once fully cooled, slice, and savor the fruits of your labor!
Tips and Tricks for Perfect Dutch Oven Sourdough

Troubleshooting Common Sourdough Issues
Even with an easy Dutch oven sourdough recipe, you might encounter issues. One common problem is a dough that seems weak or doesn't hold its shape well during shaping. This could be due to insufficient gluten development during bulk fermentation (not enough folds) or using a lower protein flour. If your dough feels slack, try incorporating an extra set of gentle folds during bulk fermentation or ensuring you're using a high-quality bread flour with at least 12% protein content.
Another frequent issue is the dough sticking to the proofing basket. This usually happens if the basket wasn't floured sufficiently or if the dough was too wet on the surface. Ensure you use enough rice flour (which doesn't absorb moisture from the dough as readily as wheat flour) or a 50/50 mix of rice and bread flour to dust your banneton generously. If using a linen liner, rub the flour into the fabric well. Gently loosen the edges with your fingers before attempting to invert the dough onto parchment paper.
Dense Crumb? Here's What To Do
A dense, heavy crumb is a common frustration when learning to bake sourdough, even with an easy Dutch oven sourdough recipe. Several factors can contribute to this. One primary culprit is an inactive or weak sourdough starter. If your starter isn't bubbly, doubling in volume within 4-8 hours after feeding (depending on temperature), it won't produce enough gas to leaven the dough properly. Ensure your starter is active by feeding it regularly and using it at its peak (when it has roughly doubled and is full of bubbles).
Another reason for a dense crumb is insufficient fermentation, either during bulk fermentation or cold proofing. The dough didn't have enough time to develop enough gas and gluten structure. Ensure your dough increases significantly in volume (50-75% is a good target) during bulk fermentation and feels light and airy. Under-mixing or under-folding can also lead to a poor gluten network incapable of trapping gases, resulting in a tight crumb. Review your technique for stretch and folds or coil folds to ensure you are building adequate strength in the dough.
Flat Loaf? Tips for Better Oven Spring
A flat loaf that spreads outwards rather than rising upwards is another common issue that can plague even an easy Dutch oven sourdough recipe attempt. This is often linked to dough that lacks sufficient structure and tension. As mentioned earlier, proper shaping is key. You need to build significant surface tension during the final shaping phase so that the dough has the structural integrity to expand upwards when hit with the heat of the Dutch oven.
Over-proofing can also lead to a flat loaf. If the dough ferments for too long, the gluten structure can weaken and eventually collapse, especially if it's left at warm temperatures for too long. The dough might look bubbly and large, but it lacks the strength to hold its shape during baking. Pay close attention to the signs of bulk fermentation completion (volume increase, feel, aliquot jar) rather than relying solely on time. If you suspect over-proofing, you can try shaping more firmly and baking immediately without cold proofing, although results may vary.
Burnt Crust? Adjusting Heat and Baking Time
A burnt or excessively dark bottom crust is a frequent complaint when using a Dutch oven, particularly raw cast iron, for an easy Dutch oven sourdough recipe. This happens because the base of the Dutch oven is in direct contact with the oven rack and absorbs a significant amount of radiant heat. If your bottom crust is consistently too dark while the top is perfect, the heat from the bottom is too intense.
To mitigate this, you can try reducing the oven temperature slightly after removing the lid for the second phase of baking, perhaps by 25°F (15°C). Another effective method is to place a baking sheet or a pizza stone on the rack below the Dutch oven during the entire preheating and baking process.
This acts as a heat shield, blocking some of the direct radiant heat from the oven element and preventing the bottom of the Dutch oven from getting excessively hot. You can also lift the loaf out of the Dutch oven entirely for the last 10-15 minutes of baking and place it directly on the oven rack if the top needs more color but the bottom is done.
Sourdough Baking Tips for Beginners
For beginners tackling an easy Dutch oven sourdough recipe, consistency is key. Start by mastering one simple recipe before experimenting with variations. Get to know your starter: how it behaves, how quickly it rises after feeding in your specific kitchen environment. This understanding is fundamental to timing your bakes correctly. Use a digital scale for all ingredients; baking is a science where precise ratios yield predictable results.
Don't be discouraged by early failures. Sourdough baking has a learning curve. A dense loaf or a flat loaf is part of the process. Keep notes on what you did (temperatures, times, how the dough felt) so you can learn from each bake. Watching videos of experienced bakers performing techniques like stretch and folds or shaping can be incredibly helpful in understanding the feel and look of properly developed dough. Patience and practice are your best tools!
Measuring Ingredients Accurately
Accurate measurement is paramount in baking, especially with something as sensitive as sourdough. Using a digital kitchen scale to measure ingredients by weight (grams or ounces) is vastly superior to using volume measurements (cups). Flour, for instance, can vary significantly in weight per cup depending on how it's scooped and its humidity level. 1 cup of flour can weigh anywhere from 120 to 150 grams. This variation, when multiplied across several cups, can drastically alter the hydration of your dough.
An easy Dutch oven sourdough recipe typically provides ingredient amounts by weight for this very reason. For example, a recipe might call for 500g of bread flour, 375g of water, 100g of active starter, and 10g of salt. Weighing these amounts precisely ensures you have the correct hydration and ingredient ratios every single time, which leads to more consistent and successful bakes. Investing in a good digital scale is one of the best things a beginner sourdough baker can do.
Understanding Sourdough Starter Activity
Understanding your sourdough starter's activity level is perhaps the single most important factor for success with any easy Dutch oven sourdough recipe. An active starter is one that has been recently fed and is vigorously producing carbon dioxide bubbles. It should have roughly doubled (or more) in volume within a predictable timeframe (usually 4-8 hours at room temperature, 70-75°F or 21-24°C) after being fed. It will appear bubbly throughout and have a pleasant, tangy aroma.
Using a starter that hasn't reached its peak activity will result in a sluggish fermentation and a dense, under-risen loaf. Conversely, using a starter that has peaked and begun to fall back down will have already used up much of its leavening power.
The ideal time to use your starter for baking is when it's at or just past its peak – typically when it has doubled and is still full of bubbles. A simple float test (dropping a small piece of starter into water; it should float if active) can be a quick check, but observing its volume increase after feeding is more reliable.
Variations on the Basic Dutch Oven Sourdough Recipe
Once you've mastered the basic easy Dutch oven sourdough recipe, you can explore countless variations to add flavor and texture. Incorporating herbs and spices is a simple way to elevate your loaf. Rosemary, thyme, dill, or even a blend like Herbs de Provence can be kneaded into the dough during the mixing phase. Spices like black pepper, caraway seeds, or smoked paprika also add interesting dimensions. A popular addition is roasted garlic and rosemary, mixed in during the final fold before shaping.
For a sweeter loaf, consider adding ingredients like cinnamon, raisins, or dried cranberries. These are typically added towards the end of the mixing or during the first set of folds in bulk fermentation to ensure they are evenly distributed. When adding wet ingredients like roasted garlic or cheese, be mindful that they can slightly alter the dough's hydration, so you might need minor adjustments to your water amount in future bakes.
Adding Herbs and Spices for Flavor
Adding herbs and spices is a fantastic way to customize your easy Dutch oven sourdough recipe and create unique flavor profiles. For fresh herbs like rosemary or thyme, chop them finely and add them during the mixing phase or during the first one or two sets of stretch and folds. A common ratio might be 1-2 tablespoons of chopped fresh herbs per 500g of flour. Dried herbs are more potent, so use slightly less, perhaps 1-2 teaspoons.
Spices can be added with the salt during the mixing stage. Consider adding 1-2 teaspoons of caraway seeds for a rye-like flavor profile, or a teaspoon of black pepper for a subtle kick. For a loaf with roasted garlic, roast a head or two until soft, mash the cloves, and gently fold them into the dough during the last set of stretch and folds or just before shaping. The key is to distribute the additions evenly throughout the dough without overworking it.
Incorporating Seeds and Grains
Incorporating seeds and grains adds both flavor, texture, and nutritional value to your easy Dutch oven sourdough bread. Seeds like sesame, poppy, sunflower, pumpkin, and flax seeds can be added whole or toasted for enhanced flavor. A common method is to add them directly to the dough during the mixing phase or during the first few sets of folds. For a 500g flour recipe, you might add anywhere from 50g to 100g of mixed seeds.
For a more substantial addition, you can create a "soaker" or "porridge" with grains like oats, cracked wheat, or rye berries. A soaker involves soaking the grains in hot water for several hours or overnight to soften them before adding them to the dough. A porridge involves cooking the grains with water until they form a thick consistency and letting them cool before adding.
These additions increase the overall hydration of the dough, so you might need to reduce the initial water slightly or handle a wetter dough. Adding a mix of toasted seeds to the outside of the loaf before proofing also creates a lovely crust.
Storing Your Homemade Sourdough
Keeping Your Sourdough Fresh
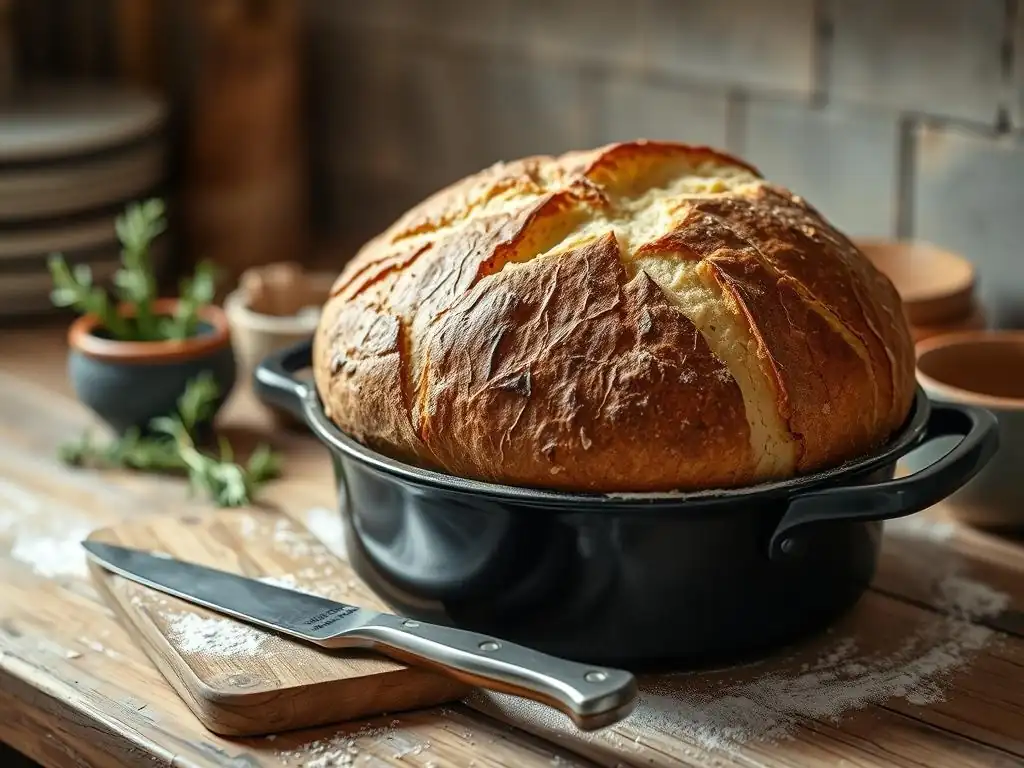
Once your easy Dutch oven sourdough loaf has cooled completely, proper storage is essential to maintain its freshness, especially the crispy crust. The enemy of a crispy crust is moisture. Storing the loaf in an airtight container immediately after cooling will trap moisture and quickly soften the crust. The best way to store sourdough for the first day or two is simply cut-side down on a cutting board or wrapped loosely in a linen or cotton bread bag. This allows the crust to remain relatively crisp while protecting the cut surface from drying out.
For longer storage, or if you prefer a softer crust, you can wrap the cooled loaf tightly in plastic wrap or beeswax wrap, or place it in a resealable plastic bag. Stored this way at room temperature, a sourdough loaf will typically stay fresh for 3-4 days. Avoid storing sourdough in the refrigerator, as this accelerates the staling process. If you won't finish the loaf within a few days, freezing is the best option.
Sourdough Bread Storage Ideas
For extended storage of your easy Dutch oven sourdough, freezing is highly effective. Once the loaf is completely cool, you can freeze it whole, in halves, or sliced. To freeze whole or halved, wrap it tightly in plastic wrap, then place it in a large freezer bag or wrap it again in foil to prevent freezer burn. To freeze sliced bread, it's easiest to slice the entire loaf first, then stack the slices and wrap them tightly in plastic wrap before placing the stack in a freezer bag.
Frozen sourdough can last for several months (typically up to 3-6 months) without significant loss of quality. To thaw a whole or half loaf, unwrap it and let it sit at room temperature for several hours, or reheat it gently in a warm oven (around 300-350°F or 150-175°C) for 15-20 minutes to refresh the crust. Slices can be toasted directly from frozen or thawed quickly at room temperature. Freezing allows you to enjoy your delicious homemade easy Dutch oven sourdough whenever you like, without worrying about it going stale.
Conclusion: Mastering the Art of Easy Dutch Oven Sourdough
Frequently Asked Questions
What makes this sourdough recipe "easy" compared to other sourdough recipes?
This recipe focuses on simplified techniques and easy-to-find ingredients to make sourdough accessible to beginners. It minimizes the need for specialized equipment beyond a Dutch oven.
Why use a Dutch oven for sourdough bread?
A Dutch oven creates a steam-filled environment during baking, which helps the bread achieve a crispy crust and a soft, airy interior.
How long does it take to make this sourdough bread, start to finish?
The entire process, including feeding the starter, bulk fermentation, proofing, and baking, can take around 24-36 hours, but active hands-on time is minimal.
What if I don't have a sourdough starter? How can I get one?
BakeWithEase.com likely offers instructions on creating your own sourdough starter or recommends reliable sources for purchasing a healthy starter.
Can I adjust the recipe for different types of flour?
While the recipe is designed for specific flours, you can experiment. However, be prepared to adjust hydration levels as different flours absorb water differently, impacting the final dough consistency.
Final Reflection: The Humble Loaf, a Journey of Discovery
The art of sourdough baking, once a mysterious craft, is experiencing a remarkable resurgence, proving that simple ingredients and patient techniques can yield extraordinary results. This renewed interest isn't just a fleeting trend; it's a testament to our growing desire for connection to our food, a yearning for authenticity in a fast-paced world. The ease and deliciousness of crafting a sourdough loaf in a Dutch oven, as detailed in this recipe, makes this ancient process accessible to everyone.
The journey of baking sourdough, from the initial anticipation of the starter's bubbly activity to the satisfying thud of the loaf hitting the oven, is deeply rewarding. It's a process that teaches patience, observation, and the importance of respecting natural rhythms. Bread is the staff of life,
they say, and in making it yourself, you truly connect with that fundamental truth. This simple act of baking transcends mere sustenance; it becomes a mindful practice, a connection to generations past who relied on similar methods to nourish themselves.
Now, consider your own kitchen. Imagine the aroma of freshly baked sourdough filling your home, the satisfying crust yielding to a soft, tangy crumb. You too can experience this joy. Don't be intimidated by the seemingly complex process; embrace the challenge, experiment with different flours and techniques, and discover the unique satisfaction of creating something beautiful and delicious from scratch. The journey of baking sourdough is a journey of self-discovery, a testament to the power of simple ingredients and patient hands. Begin your own loaf today.
Unleash Your Inner Baker: Craft Your Perfect Loaf!
Thanks for joining us on this sourdough journey! We hope you gained valuable insights into crafting delicious, rustic loaves. Now it's time to put your newfound knowledge into practice.
- Bake your first sourdough masterpiece! Use the recipe and tips from this article to create your own stunning sourdough bread. Don't be afraid to experiment – that's half the fun!
- Share your baking adventures! Post a picture of your creation on social media and tag us – we’d love to see your results!
- Explore our other sourdough recipes: We have a whole range of variations, from rye to multigrain, waiting to be discovered on BakeWithEase.
What unique ingredient will you add to your next sourdough loaf to elevate its flavor?