
Baking Enriched Doughs in Different Pans: Tips and Tricks

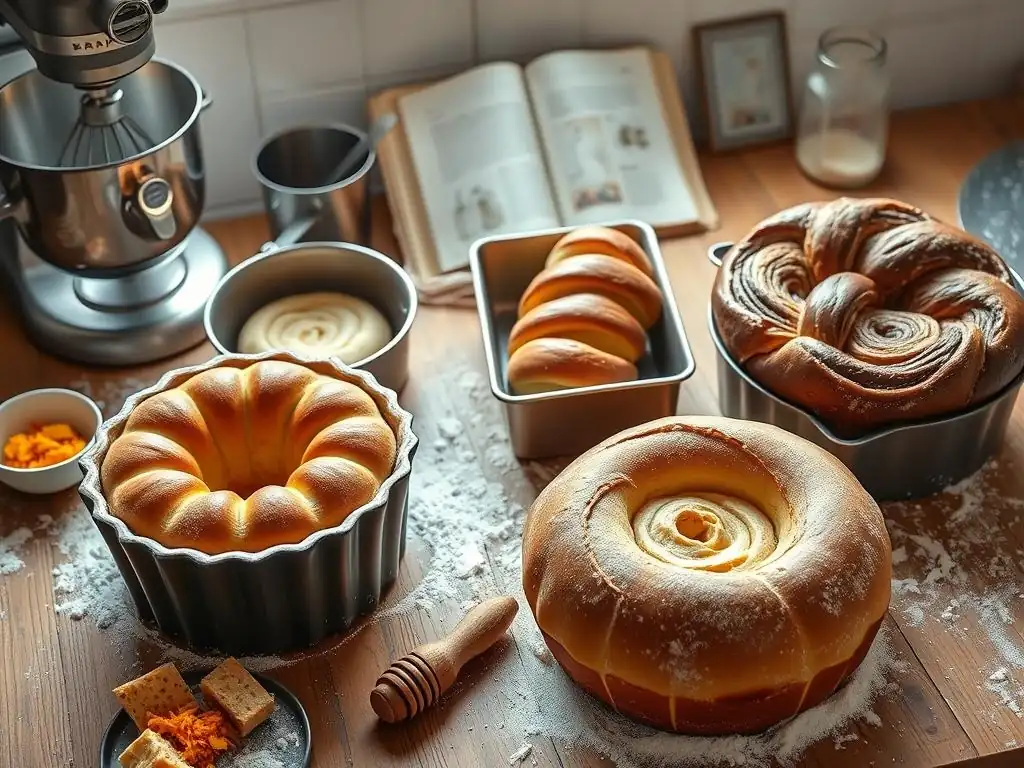
Welcome to BakeWithEase, your trusted companion on your baking journey! Ever wondered how the right pan can transform your enriched dough from good to spectacular? Dive into our comprehensive guide on Enriched Dough Pan Baking Tips and unlock the secrets to perfectly baked, golden-brown loaves, pastries, and more. Discover the nuances of different pan types and how they impact your bake, and learn how to adapt your techniques for flawless results every time. Ready to elevate your enriched dough baking? Let's get started!
- Baking Enriched Doughs in Different Pans: Tips and Tricks for BakeWithEase
- Mastering Enriched Dough Baking: A Guide for Intermediate Bakers
- Understanding Enriched Doughs for Baking Success
- Choosing the Right Pan for Your Enriched Dough
- Enriched Dough Pan Preparation: Ensuring a Smooth Release
- Baking Temperatures and Times for Enriched Doughs in Various Pans
- Specific Baking Tips for Different Enriched Dough Recipes and Pans
- Troubleshooting Common Enriched Dough Baking Problems
- Advanced Techniques for Perfect Enriched Dough Baking
- Enriched Dough Pan Baking Tips Recap: Key Takeaways
-
Frequently Asked Questions
- What is enriched dough, and why does it matter when choosing a pan?
- What pan materials are best for baking enriched doughs?
- How does pan size affect the baking time of enriched doughs?
- Can I use a glass pan for baking enriched dough? What are the considerations?
- What are some common problems I might encounter when baking enriched dough in a pan, and how can I solve them?
- Final Reflection: The Art and Science of Enriched Doughs
- Unleash Your Inner Baker: Master the Art of Enriched Doughs!
Baking Enriched Doughs in Different Pans: Tips and Tricks for BakeWithEase
Mastering Enriched Dough Baking: A Guide for Intermediate Bakers
Baking with enriched doughs opens up a world of delicious possibilities, from fluffy brioche to sweet babka and decadent cinnamon rolls. Unlike lean doughs made primarily with flour, water, salt, and yeast, enriched doughs incorporate ingredients like butter, eggs, sugar, and milk. These additions contribute to a richer flavor, softer texture, and a beautiful golden crust.
However, working with these doughs, especially when baking them in various pans, requires specific knowledge and techniques to achieve optimal results. This guide will walk you through understanding enriched doughs, choosing the right pan, preparing it properly, adjusting baking parameters, and troubleshooting common issues, providing essential enriched dough pan baking tips for your baking journey.
Successfully baking enriched doughs in different pans is a skill that improves with practice. The interaction between the dough's composition and the pan's material, size, and shape significantly impacts the final bake. A pan that's too large can result in a flat, dry loaf, while one that's too small can lead to overflow and an undercooked center.
Understanding these dynamics is key to consistently producing baked goods with the perfect rise, texture, and color. By paying attention to the details of pan selection and preparation, along with mastering baking temperatures and times, you can elevate your enriched dough creations from good to truly exceptional, applying effective enriched dough pan baking tips along the way.
Understanding Enriched Doughs for Baking Success
What Are Enriched Doughs? A Beginner's Overview
Enriched doughs are a category of yeasted dough distinguished by the addition of fats (like butter or oil), dairy (milk or cream), eggs, and/or sugar. These ingredients significantly alter the dough's structure and handling characteristics compared to lean doughs used for baguettes or classic pizza crusts. The fat and sugar tenderize the crumb, making it softer and more cake-like, while eggs contribute richness, structure, and a beautiful golden hue to the finished product. The higher sugar content also aids in browning during baking.
The presence of these enriching ingredients inhibits gluten development to some extent. While kneading is still necessary to build structure, the fats coat the gluten strands, preventing them from forming a tight network. This results in a more tender crumb rather than a chewy one. The sugar feeds the yeast, contributing to fermentation and rise, but too much sugar can actually slow down yeast activity. Understanding this balance is crucial for developing recipes and mastering enriched dough pan baking tips.
Key Ingredients in Enriched Dough Recipes (Butter, Eggs, Sugar)
Butter is a primary enriching agent, adding richness, flavor, and contributing to a tender crumb. It's typically added after the initial gluten development, often kneaded in gradually. The fat coats the flour particles and gluten strands, preventing the formation of a tough, chewy structure. Using softened, but not melted, butter is generally recommended for optimal incorporation into the dough. The amount of butter can vary significantly, from a small percentage for lightly enriched doughs to a very high percentage (sometimes exceeding the weight of the flour) for rich brioche or challah.
Eggs contribute fat, protein, and liquid to the dough. The yolks add richness and tenderness due to their fat content, while the whites provide protein that aids in structure and contributes to a softer crumb. Eggs also contribute to the dough's golden color and help create a moist texture.
Sugar serves multiple purposes: it feeds the yeast, adds sweetness, helps with browning through caramelization, and tenderizes the dough by interfering with gluten development. The amount of sugar can range from just a tablespoon or two for slightly sweet rolls to a significant proportion for sweet breads like babka or cinnamon rolls. Milk or other dairy liquids are often used instead of water, adding further richness and contributing to a softer crumb due to their fat and protein content.
The Science Behind Enriched Dough Fermentation
Fermentation in enriched doughs, while similar to lean doughs in principle (yeast consuming sugars and producing carbon dioxide and alcohol), is influenced by the additional ingredients. Sugar provides an immediate food source for the yeast, often leading to a vigorous initial rise. However, if the sugar concentration is very high, it can create an osmotic pressure that draws water out of the yeast cells, actually slowing down fermentation. Bakers often manage this by using osmotolerant yeast strains or by controlling the amount of sugar in the initial mix.
Fats and proteins from butter, eggs, and milk can also impact fermentation. While they don't directly feed the yeast, they can affect the dough's structure and the retention of gases produced by the yeast. The tenderizing effect of fats means the gluten network is less rigid, but if properly developed, it can still trap gases effectively. The richness of the dough also means it often requires longer fermentation times compared to lean doughs to develop flavor fully, especially during a cold proof. Understanding these subtle differences helps in timing your rises correctly before applying enriched dough pan baking tips.
Choosing the Right Pan for Your Enriched Dough
Exploring Different Pan Types for Baking: A Comprehensive Guide
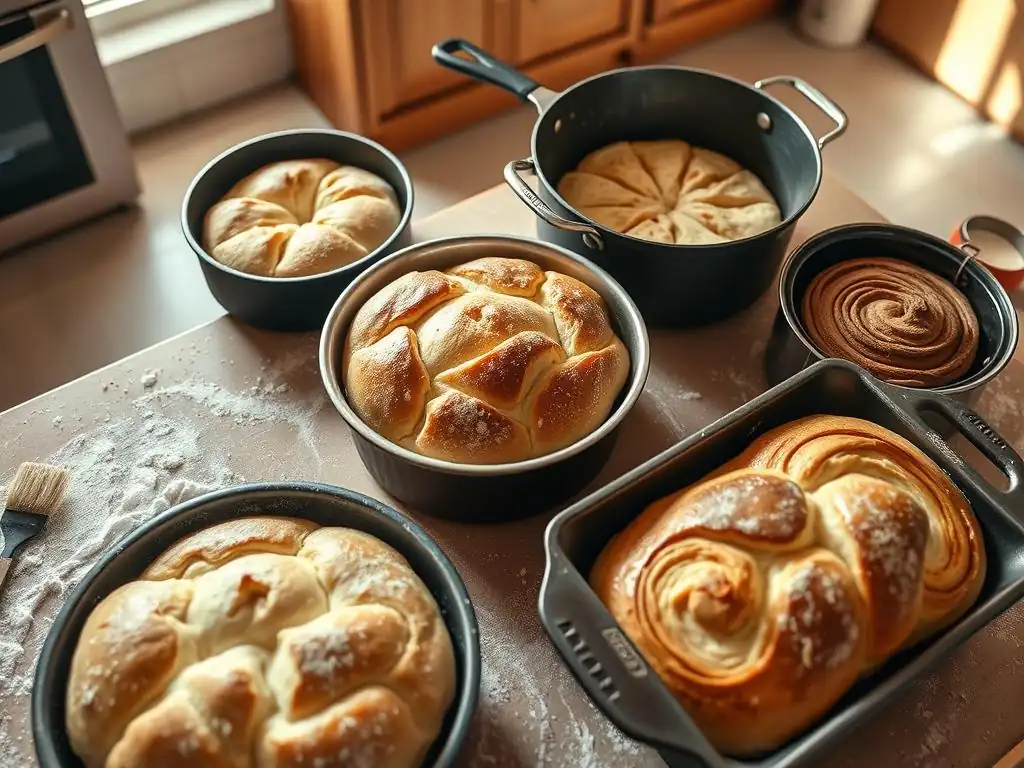
Selecting the appropriate pan is a critical step in achieving a perfect bake for your enriched dough. The pan's type, material, size, and shape all influence how heat is transferred to the dough, affecting its rise, crust formation, and overall texture. Using the right pan ensures the dough has the necessary support to rise properly without collapsing and that the final product is evenly baked and beautifully shaped. This section will explore common pan types used for enriched doughs and their best applications, providing essential enriched dough pan baking tips.
Different pans are designed for specific purposes, and matching the pan to the enriched dough recipe is key. A loaf pan is ideal for free-form breads that need structure, while a round pan is perfect for cakes or doughs meant to be sliced like a pie. Specialty pans like Bundt pans or brioche molds offer unique shapes. Considering the dough's consistency – whether it's a firm brioche or a softer babka dough – and how much it is expected to rise will guide your pan choice.
Loaf Pans: Perfect for Brioche and Sweet Breads
Loaf pans are rectangular and provide excellent support for enriched doughs that are shaped into a log, such as brioche, challah, or sweet quick breads. The high sides of the pan help the dough rise upwards, resulting in a tall, evenly shaped loaf. Metal loaf pans, especially those made from aluminum or steel, conduct heat efficiently, promoting good browning of the crust. Darker pans will absorb and radiate more heat, potentially leading to faster browning, so adjustments in baking time or temperature might be needed.
For a standard 1.5-pound loaf of brioche, a 9x5-inch loaf pan is typically used. This size allows the dough to rise significantly, often doubling or tripling in volume during proofing and baking.
Using a pan that is too large for the amount of dough will result in a flatter loaf with a less impressive rise, while a pan that is too small can cause the dough to overflow during baking, creating a messy situation and potentially an uneven bake. Ensuring the pan is adequately filled, usually about 2/3 to 3/4 full before the final proof, is an important enriched dough pan baking tip.
Round Cake Pans: Ideal for Babka and Coffee Cakes
Round cake pans, typically 8 or 9 inches in diameter and 2 to 3 inches deep, are versatile for baking enriched doughs shaped into coils, swirls, or simply placed as a single piece. They are perfect for babka, coffee cakes, or large cinnamon rolls baked as a single unit. The round shape allows for even heat distribution from the sides, contributing to a uniform bake. Metal cake pans are common, offering good heat conductivity, while glass or ceramic pans heat slower but retain heat longer.
When baking babka in a round pan, the dough is often rolled, filled, and then coiled or arranged in the pan. An 8 or 9-inch pan works well for a babka made from a standard enriched dough recipe using around 3-4 cups of flour. The pan's depth is important to contain the rising dough. Using parchment paper on the bottom of the pan is highly recommended for easy removal, especially with sticky fillings common in babka.
Bundt Pans: Creating Beautifully Shaped Enriched Doughs
Bundt pans are recognizable by their distinctive fluted or grooved sides and central tube, which helps distribute heat more evenly to the center of dense cakes and enriched doughs. They create visually stunning baked goods without needing complex shaping techniques. Enriched doughs like German Gugelhupf or some types of sweet yeast cakes are traditionally baked in Bundt pans. The intricate designs require thorough pan preparation to prevent sticking.
Bundt pans come in various sizes, with a 10-cup capacity being standard for many recipes. The central tube allows heat to penetrate the middle of the dough, ensuring that the thickest part cooks through at the same rate as the edges. Due to their detailed surfaces, Bundt pans require meticulous greasing and flouring (or using a baking spray specifically designed for intricate molds) to ensure the baked item releases cleanly. This is a crucial enriched dough pan baking tip for Bundt pans.
Springform Pans: Baking Cheesecakes and Delicate Enriched Doughs
Springform pans have sides that can be unlatched and removed from the base, making them ideal for delicate baked goods that are difficult to invert or lift out of a standard pan. While most commonly associated with cheesecakes, they can also be used for certain enriched dough applications, particularly those with soft textures or substantial fillings, like some layered coffee cakes or even deep-dish style sweet pizzas made with enriched dough.
The ability to remove the sides means the finished product remains intact and its structure is preserved. Springform pans are typically round, ranging from 8 to 10 inches in diameter. Due to the potential for leaks at the base where the sides meet, it's often advisable to wrap the bottom of the pan in foil, especially if using a water bath, or if the dough or filling is very wet. Ensuring the latch is securely fastened before adding the dough is essential.
Factors to Consider When Selecting a Pan (Material, Size, Shape)
Pan material significantly impacts heat transfer. Metal pans (aluminum, steel) heat up quickly and conduct heat efficiently, leading to good crust development and browning. Darker metal pans absorb more heat and can result in faster, sometimes excessive, browning.
Glass or ceramic pans heat up slower and retain heat longer, which can be beneficial for very moist enriched doughs, promoting a more even bake throughout, but they may require a slightly lower oven temperature or longer baking time. Silicone pans are non-stick and flexible, making release easy, but they don't conduct heat as well as metal, which can affect crust formation.
Pan size and shape are crucial for the dough's structure and rise. The volume of the dough should be appropriate for the pan's capacity to prevent overflowing or a flat bake. As a general rule, the dough should fill the pan about 2/3 to 3/4 full before the final proof.
The shape determines the final form of the baked good; a loaf pan yields a rectangular loaf, a round pan yields a circular cake or bread, and a Bundt pan creates a decorative shape. Considering how the dough will expand during proofing and baking is key to selecting the right pan size for your enriched dough pan baking tips success.
Enriched Dough Pan Preparation: Ensuring a Smooth Release
Greasing and Flouring: The Traditional Method
The traditional method of preparing a pan for baking enriched dough involves thoroughly greasing the interior surface, followed by dusting it with flour. This creates a barrier between the dough and the pan, preventing sticking. Butter, shortening, or oil can be used as the greasing agent. Ensure all surfaces, including corners and edges, are well-coated. Softened butter or shortening is often easier to apply evenly than liquid oil.
Once greased, add a tablespoon or two of flour to the pan. Tilt and rotate the pan, tapping gently, to distribute the flour evenly across the greased surfaces. Excess flour should be tapped out. This method works well for most enriched doughs baked in metal pans, creating a reliable non-stick surface. For chocolate doughs or dark baked goods, cocoa powder can be used instead of flour to avoid white marks on the crust.
Using Baking Spray: A Convenient Alternative
Baking spray, which often contains flour mixed with oil and sometimes lecithin, offers a quick and convenient way to prepare pans. It provides a non-stick coating in one easy step. Ensure you use a baking spray that specifically mentions it contains flour for baking applications, as regular cooking sprays might not provide sufficient non-stick properties for enriched doughs, which can be quite sticky.
When using baking spray, hold the can upright and spray an even, light coat over the entire interior surface of the pan, including corners and edges. Avoid over-spraying, as this can lead to a gummy residue on the baked good. Baking spray is particularly useful for intricate pans like Bundt pans, where reaching all surfaces with traditional greasing and flouring can be challenging. It's a reliable option for many enriched dough pan baking tips scenarios.
Parchment Paper Liners: Preventing Sticking and Easy Removal
Using parchment paper is an excellent way to ensure enriched doughs don't stick and makes removal from the pan incredibly easy. For loaf pans, you can create a sling by cutting a piece of parchment paper to fit the width of the pan and long enough to hang over the ends. This allows you to easily lift the finished loaf out of the pan. For round pans, cut a circle of parchment paper to fit the bottom. You can also cut strips to line the sides if desired.
While parchment paper on the bottom is often sufficient, especially in conjunction with greased sides, lining the entire pan offers the best protection against sticking. This method is particularly recommended for very sticky or delicate enriched doughs. Although it adds a small extra step in preparation, the ease of removing the baked item without damage is often well worth the effort, making it a valuable enriched dough pan baking tip.
Baking Temperatures and Times for Enriched Doughs in Various Pans
Temperature Adjustments Based on Pan Material (Metal vs. Glass)
The material of your baking pan significantly influences how heat is transferred to the dough, necessitating potential adjustments to your oven temperature. Metal pans, especially aluminum or steel, conduct heat efficiently and quickly. This promotes good browning of the crust. If using a dark-colored metal pan, which absorbs and radiates more heat, you might need to slightly reduce the oven temperature (by about 25°F or 15°C) or shorten the baking time to prevent the crust from over-browning before the interior is cooked through.
Glass or ceramic pans, on the other hand, heat up more slowly than metal but retain heat for a longer period. This slower, more even heat transfer can be beneficial for dense or very moist enriched doughs, allowing the interior to cook thoroughly without the exterior burning. When using a glass pan, it's often recommended to reduce the oven temperature by about 25°F (15°C) compared to a metal pan recipe to prevent the edges from overcooking before the center is done. These adjustments are key enriched dough pan baking tips for achieving optimal results regardless of your equipment.
Baking Time Variations Depending on Pan Size and Shape
The size and shape of the pan directly impact the baking time required for an enriched dough. A larger pan filled with the same amount of dough as a smaller pan will result in a thinner layer of dough, which will bake faster.
Conversely, a smaller pan filled appropriately will have a thicker mass of dough that requires more time to cook through to the center. For example, baking a standard enriched dough recipe in a 9x13 inch rectangular pan (like for cinnamon rolls) will take significantly less time than baking the same amount of dough shaped into a large loaf in a 9x5 inch loaf pan.
The shape of the pan also matters. A Bundt pan with its central tube allows heat to penetrate the center more effectively than a solid loaf or cake pan, potentially reducing the overall baking time for a given volume of dough. Recipes often specify the pan size and type for which the baking time is intended.
If substituting a different size or shape, you will likely need to adjust the baking time – shorter for larger, flatter pans, and longer for smaller, deeper, or more voluminous pans. Always use visual cues and internal temperature to confirm doneness, rather than relying solely on the recipe's time estimate, especially when applying these enriched dough pan baking tips.
Using a Thermometer to Check for Doneness in Enriched Doughs
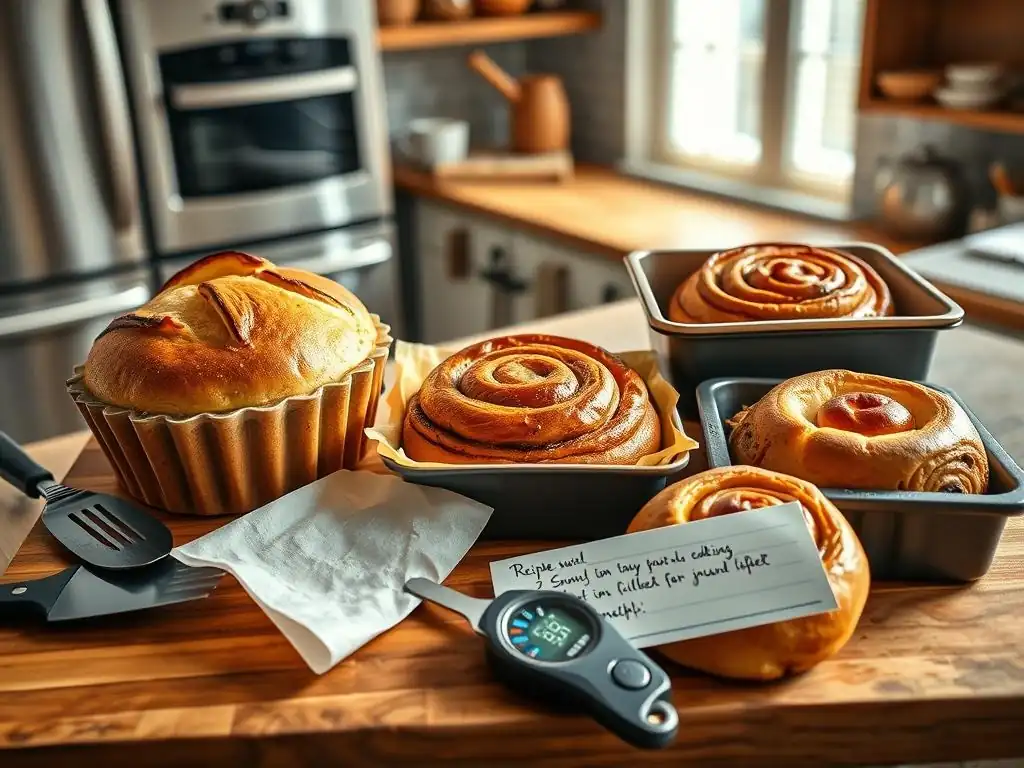
Relying solely on visual cues like crust color or the "tap test" (tapping the bottom of a loaf to hear a hollow sound) can be unreliable for enriched doughs, especially those with high sugar or fat content that brown quickly. The most accurate way to determine if an enriched dough is fully baked is to check its internal temperature using an instant-read thermometer. This is arguably the most important of all enriched dough pan baking tips for consistency.
For most enriched breads and sweet doughs, the internal temperature when fully baked should be between 190°F (88°C) and 200°F (93°C). Insert the thermometer into the thickest part of the loaf or cake, avoiding any fillings or the bottom of the pan. If the temperature is below this range, continue baking and check again after a few minutes. Using a thermometer eliminates guesswork and ensures your enriched dough is cooked through, preventing a raw or doughy center while avoiding over-baking and drying out the crumb.
Specific Baking Tips for Different Enriched Dough Recipes and Pans
Baking Brioche in a Loaf Pan: Achieving a Golden Crust
When baking brioche in a loaf pan, the goal is a beautiful, deep golden-brown crust and a light, airy interior. Proper proofing is key; allow the shaped brioche dough to rise in the greased and floured (or parchment-lined) loaf pan until it has nearly doubled in size and risen significantly above the rim.
Over-proofing can lead to collapse in the oven, while under-proofing will result in a dense crumb and insufficient rise. An egg wash (a beaten egg mixed with a little water or milk) applied gently before baking enhances the golden color and gives the crust a lovely sheen.
Brioche is often baked at a moderate temperature, typically between 350°F (175°C) and 375°F (190°C), for 30 to 40 minutes, depending on the size of the loaf. Baking at too high a temperature can cause the crust to brown too quickly before the interior is cooked. If the crust is browning too fast, you can loosely tent the loaf with aluminum foil for the remainder of the baking time.
The internal temperature should reach 190-200°F (88-93°C) when tested with a thermometer. Allowing the brioche to cool slightly in the pan before transferring it to a wire rack is also important to prevent it from collapsing. These are critical enriched dough pan baking tips for brioche.
Baking Babka in a Round Pan: Preventing Soggy Bottoms
Baking babka in a round pan requires careful attention to prevent the often-generous filling from making the bottom of the babka soggy. Ensuring the dough is properly sealed around the filling during shaping is the first step. Using a round cake pan (8 or 9 inches) that is well-greased and lined on the bottom with parchment paper provides a non-stick surface for the base. For very wet fillings, some bakers even sprinkle a thin layer of breadcrumbs or finely ground nuts on the bottom of the pan before adding the dough, which can help absorb excess moisture.
Babka is typically baked at a moderate temperature, around 350°F (175°C), for 45 to 60 minutes, depending on the pan size and the amount of filling. The longer baking time is needed to ensure the center, especially where the dough and filling are layered thickly, is fully cooked. If the top is browning too quickly, tenting with foil is recommended.
Checking the internal temperature (aiming for 190-200°F or 88-93°C in the thickest part, avoiding large pockets of filling) is the best way to confirm doneness. Applying a simple syrup or glaze while the babka is still warm also helps keep it moist and adds shine. These specific enriched dough pan baking tips address common babka challenges.
Baking Cinnamon Rolls in a Baking Dish: Avoiding Overbrowning
When baking cinnamon rolls in a baking dish (usually a rectangular or square pan), the main challenge is often preventing the edges and bottoms from over-browning or becoming dry before the centers are cooked and gooey. Using a light-colored metal or ceramic baking dish can help distribute heat more gently than a dark metal pan. Greasing the dish thoroughly is important, but excessive grease can sometimes lead to overly fried bottoms.
Cinnamon rolls are typically baked at around 375°F (190°C) for 20 to 30 minutes. Arranging the rolls relatively close together in the pan helps them support each other as they rise and keeps the interior moist. If the tops are browning too quickly, especially in the corners of the pan, covering the dish loosely with aluminum foil about halfway through the baking time is an effective strategy.
The rolls are done when they are golden brown on top and cooked through in the center; the internal temperature of a central roll should be around 190°F (88°C). Applying icing while they are warm allows it to melt slightly and seep into the rolls. Following these enriched dough pan baking tips ensures tender, gooey cinnamon rolls.
Baking Panettone in a Special Panettone Mold: Achieving Perfect Height
Panettone, the tall Italian Christmas bread, requires a special tall, cylindrical paper mold to achieve its characteristic height and shape. These molds provide significant support for the very rich, soft, and heavily enriched dough, which would otherwise spread out horizontally. The mold allows the dough to rise dramatically upwards both during the final proof and in the oven.
The dough is proofed in the mold until it nearly reaches the top. Panettone is typically baked at a moderate temperature, around 350-375°F (175-190°C), for a relatively long time, often 45-60 minutes or even longer for very large panettone. The tall mold helps insulate the sides, allowing the top to brown and form a dome while the interior bakes through.
A crucial, almost unique, enriched dough pan baking tip for panettone is that it is often hung upside down immediately after baking using skewers threaded through the base. This prevents the tall, delicate structure from collapsing as it cools. The internal temperature should reach 195-205°F (90-96°C) due to the high moisture content from fruit and eggs.
Troubleshooting Common Enriched Dough Baking Problems
Dough Sticking to the Pan: Prevention and Solutions
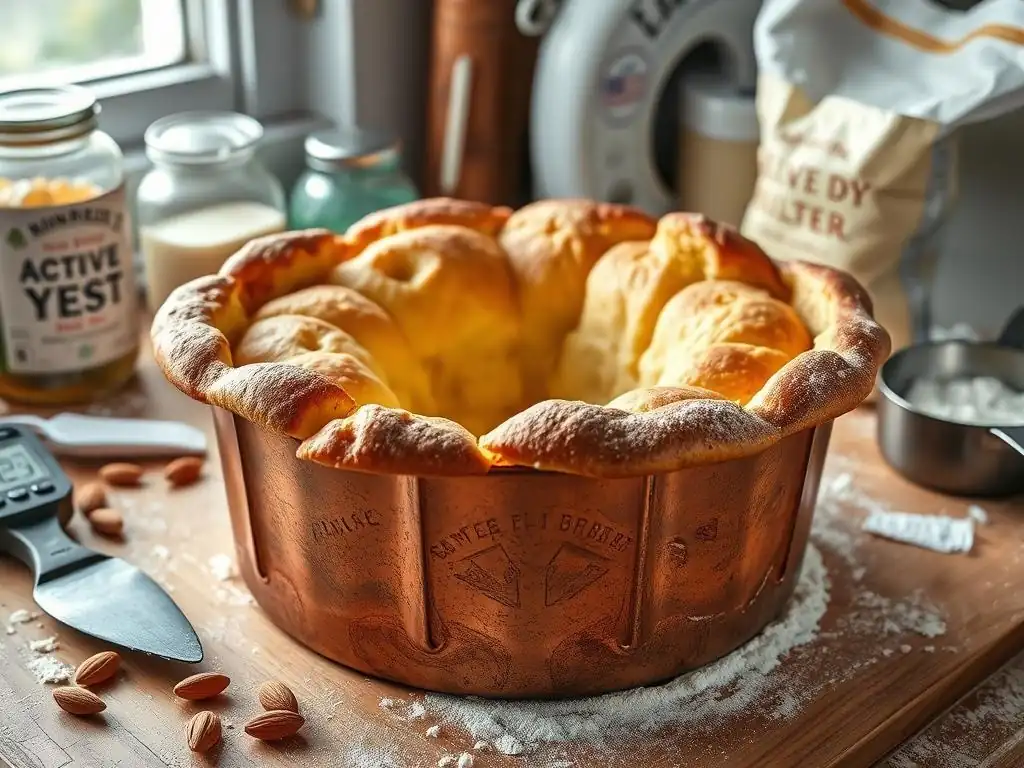
Dough sticking to the pan is a frustrating issue that can ruin the shape and appearance of your baked enriched dough. The best solution is prevention through proper pan preparation. Always grease and flour the pan thoroughly, use baking spray, or line with parchment paper as recommended for the specific pan type and dough richness. For intricate pans like Bundt molds, ensure every nook and cranny is coated.
If you find your baked good is stuck after cooling slightly, try running a thin, flexible spatula or knife around the edges of the pan to loosen it. For loaf pans, gently shaking the pan might help. If using a parchment sling, slowly and carefully lift the loaf out.
For Bundt cakes, inverting the pan onto a wire rack shortly after removing it from the oven (usually after 5-10 minutes of cooling) often works best, allowing the residual heat to help release it. If it still won't budge after cooling a bit, you might need to re-warm the bottom of the pan slightly (e.g., placing it on a warm, damp towel for a few minutes) to melt any stuck sugar or fat, then try inverting again.
Uneven Baking: Identifying and Correcting Hot Spots
Uneven baking, where one part of the enriched dough bakes faster or browns more than another, is often caused by hot spots in your oven or improper heat distribution due to the pan or rack position. Most ovens have variations in temperature; the back or sides might be hotter than the front or center. Using an oven thermometer can help you identify your oven's hot spots.
To combat uneven baking, rotate your pan halfway through the baking time. If you notice one side of a loaf or cake is browning significantly faster, turn the pan 180 degrees. If baking multiple items, avoid overcrowding the oven, which can impede air circulation. Ensure your oven is fully preheated before placing the dough inside.
If using a dark pan that causes the bottom or edges to brown too quickly, try placing it on a lighter-colored baking sheet or using a silicone mat underneath to provide some insulation. Adjusting rack position can also help; often, baking in the center of the oven provides the most even heat. These enriched dough pan baking tips help ensure uniform results.
Collapsed Dough: Understanding the Causes and How to Avoid It
A collapsed enriched dough, either during proofing or in the oven, is usually a sign of over-proofing or insufficient structural development. Over-proofing occurs when the dough is allowed to rise for too long; the gluten structure becomes stretched too thin and can no longer support the gas produced by the yeast, leading to deflation. This can happen before baking if the dough looks puffy and fragile and deflates when gently poked, or during baking if it rises dramatically and then sinks in the center.
Insufficient kneading or gluten development can also cause collapse. Enriched doughs need enough structure to hold their shape and rise. Ensure you knead the dough until it passes the windowpane test (a small piece can be stretched thinly without tearing).
Baking at too low a temperature can also contribute to collapse, as the crust sets too slowly to support the rising dough. Ensuring the oven is properly preheated and baking at the recommended temperature helps set the structure quickly. Following proofing times carefully based on visual cues (dough should be puffy but still hold its shape when gently touched) is key to avoiding this issue with your enriched dough pan baking tips.
Over-Browning or Burning: Adjusting Baking Time and Temperature
Over-browning or burning, especially of the crust or bottom, is a common issue when baking enriched doughs due to their sugar and fat content which promote rapid browning. This often happens when the oven temperature is too high, the baking time is too long, or a dark-colored pan is used without adjustment.
If you notice the crust is browning too quickly but the interior is not yet done, loosely tent the pan with aluminum foil. This reflects heat away from the top surface, slowing down the browning process while allowing the inside to continue baking. If you consistently experience over-browning, try reducing your oven temperature by 25°F (15°C) in subsequent bakes, especially if using dark metal pans.
Ensure you are using an oven thermometer to verify your oven's actual temperature, as they can often be inaccurate. Checking the internal temperature of the dough with an instant-read thermometer is the most reliable way to know when it's done, allowing you to remove it before it burns. These proactive enriched dough pan baking tips prevent burnt crusts.
Advanced Techniques for Perfect Enriched Dough Baking
Using a Water Bath (Bain-Marie) for Moist Enriched Doughs
For very rich and delicate enriched doughs, such as some types of sweet yeast cakes or cheesecakes baked on an enriched dough base, using a water bath (bain-marie) can help create a moist, even baking environment. This technique involves placing the pan containing the dough inside a larger pan filled with hot water. The water bath helps regulate the temperature around the pan, preventing the edges from setting and drying out too quickly and promoting a more even rise and a creamy texture.
When using a water bath for enriched doughs, it's crucial to use a springform pan or a regular pan that is completely sealed to prevent water from seeping in. Wrapping the bottom of the pan securely with several layers of heavy-duty aluminum foil is essential. The water level in the larger pan should come at least halfway up the sides of the baking pan.
Place the setup carefully in the preheated oven. The steam generated by the hot water also contributes to a humid baking environment, which can help the crust stay tender longer. This is a helpful enriched dough pan baking tip for achieving ultimate moisture.
Cold Proofing Enriched Doughs for Enhanced Flavor
Cold proofing, or retarding the final rise of enriched dough in the refrigerator, is an excellent technique for developing deeper flavors and improving the dough's texture. The cold temperature slows down yeast activity significantly but allows enzymes within the dough to break down starches into sugars and proteins into amino acids, resulting in a more complex flavor profile. It also makes the dough easier to handle and score.
After the initial bulk fermentation and shaping, place the shaped enriched dough in its prepared pan, cover it tightly with plastic wrap (oiled to prevent sticking), and refrigerate for anywhere from 8 to 48 hours, depending on the recipe and desired flavor development. Before baking, allow the dough to sit at room temperature for 30-60 minutes (or longer for very long cold proofs) to take the chill off and allow the final proof to complete slightly.
The dough may not appear to rise dramatically in the fridge but will often have a significant oven spring. Cold proofing is a valued enriched dough pan baking tip among experienced bakers for its flavor benefits.
Adding Glazes and Toppings: Finishing Touches for Your Baked Goods
Finishing your baked enriched dough with glazes or toppings adds flavor, texture, and visual appeal. Glazes can be applied before or after baking. An egg wash applied before baking gives the crust a beautiful shine and golden color. For sweet enriched doughs, a simple syrup (equal parts sugar and water heated until sugar dissolves) brushed on immediately after removing from the oven adds moisture and a subtle sheen.
Icing or sugar glazes are typically applied after the baked item has cooled slightly or completely. A simple powdered sugar glaze mixed with milk or lemon juice is classic for cinnamon rolls or sweet breads. More elaborate toppings might include streusel, nuts, or seeds added before baking, or drizzles of chocolate or caramel after cooling. Consider the sweetness and richness of your enriched dough when choosing a glaze or topping to ensure the flavors complement each other. These final enriched dough pan baking tips complete your creation.
Enriched Dough Pan Baking Tips Recap: Key Takeaways
Selecting the Right Pan, Preparing it Properly, and Adjusting Baking Times
Mastering enriched dough pan baking involves a few key considerations. First, select the right pan for your specific enriched dough recipe. Consider the dough's volume and consistency, and match it to the pan's size and shape, whether it's a loaf pan for brioche, a round pan for babka, or a special mold for panettone. The pan material also matters, influencing heat transfer and browning.
Second, prepare the pan properly to prevent sticking. Thoroughly greasing and flouring, using baking spray, or lining with parchment paper creates a non-stick barrier essential for easy release, especially with sticky enriched doughs.
Finally, be prepared to adjust baking temperatures and times based on your pan material, size, and shape, as well as your specific oven. Use an oven thermometer to verify temperature accuracy and an instant-read thermometer to check the internal temperature of your baked good (aiming for 190-200°F or 88-93°C for most enriched doughs) for definitive doneness. By paying attention to these enriched dough pan baking tips, you can confidently bake delicious, perfectly shaped, and evenly cooked enriched doughs every time.
Frequently Asked Questions
What is enriched dough, and why does it matter when choosing a pan?
Enriched dough is dough that contains added fats, sugars, and/or eggs. These additions impact the dough's structure and require pans that can handle the extra moisture and potential for a denser crumb.
What pan materials are best for baking enriched doughs?
Metal pans, particularly those with a non-stick coating or a light color, are generally recommended. These materials distribute heat evenly and prevent the dough from sticking, ensuring a well-baked loaf.
How does pan size affect the baking time of enriched doughs?
Larger pans require longer baking times, while smaller pans may bake faster. Always monitor the internal temperature of the dough and adjust baking time accordingly to prevent over- or under-baking.
Can I use a glass pan for baking enriched dough? What are the considerations?
Yes, you can, but glass pans retain heat more than metal, potentially leading to over-browning of the crust. Reduce the oven temperature slightly (25°F) to compensate.
What are some common problems I might encounter when baking enriched dough in a pan, and how can I solve them?
Common issues include the dough sticking to the pan, uneven baking, and a dense or gummy texture. Ensure the pan is properly greased, use a thermometer to check doneness, and avoid over-mixing the dough.
Final Reflection: The Art and Science of Enriched Doughs
The perfect loaf, born from the perfect pan – this isn't just a baker's dream, it's a crucial element in achieving consistently delicious enriched doughs. The seemingly simple act of choosing and preparing a pan significantly impacts the final texture, rise, and overall appeal of your bread, pastries, or cakes. Understanding this fundamental connection elevates your baking from a hobby to a true craft.
The journey through different pan types – from classic loaf pans to innovative silicone molds – has highlighted the subtle yet profound influence of material, shape, and size on the baking process. This exploration isn't merely about technical proficiency; it's about understanding the interplay between heat distribution, structural support, and the very essence of the dough itself. As the old adage goes, The proof is in the pudding (or, in our case, the bread! ).
The nuances we've explored underscore the importance of mindful preparation and the rewarding satisfaction of a perfectly baked creation.
Now, it's your turn. Consider the pans in your kitchen – their strengths, their limitations. Experiment with different materials and shapes, paying close attention to how they interact with your enriched doughs. Don't be afraid to fail; each attempt brings you closer to mastering the art of baking, and the reward – a perfectly risen, golden-brown loaf – is well worth the effort. Embrace the journey, and happy baking!
Unleash Your Inner Baker: Master the Art of Enriched Doughs!
Thanks for taking the time to explore the wonderful world of enriched doughs! We hope you gained valuable insights into achieving perfectly baked goods every time. Now it's time to put your new knowledge into practice.
- Bake your dream loaf: Try your hand at one of the recipes mentioned in the article, adapting it to the pan you’re most excited to use. Note the differences in rise and texture!
- Share your baking journey: Post a picture of your creation on social media and tag us – we’d love to see your results! Use #BakeWithEaseEnrichedDoughs to join the conversation.
- Explore new pan possibilities: Research different pan materials and sizes – how will they change the outcome of your next enriched dough masterpiece?
Ready to transform your baking skills? What unique pan are you going to experiment with next?