
Fermenting International Breads: Explore Unique Starters and Techniques

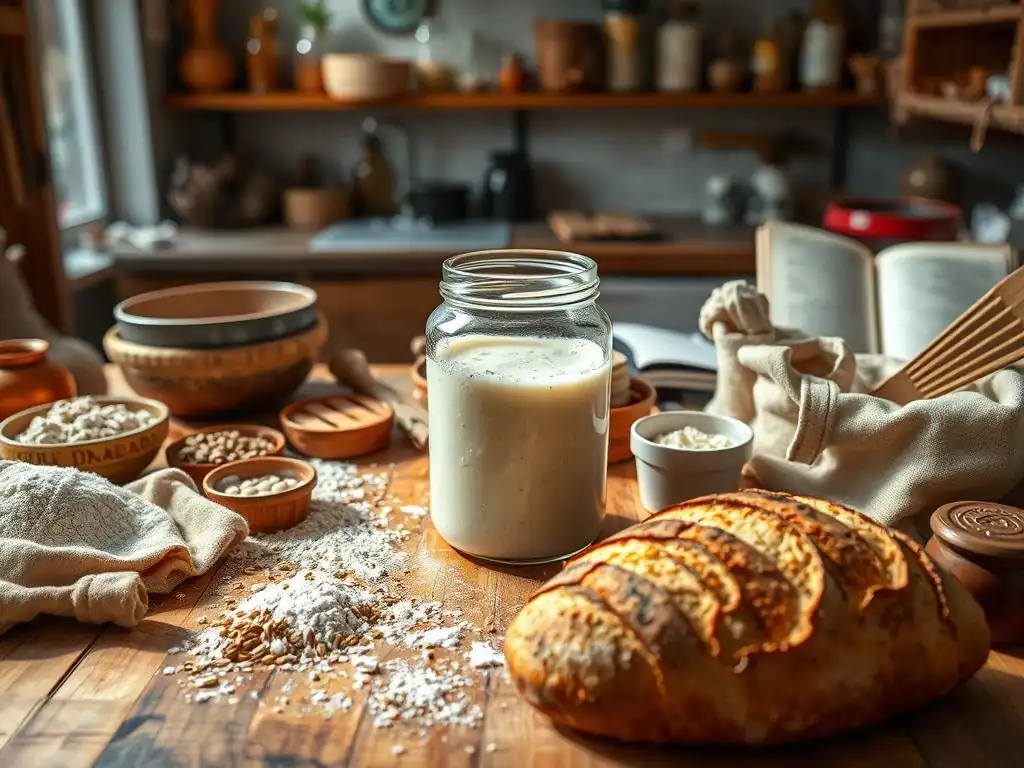
Welcome to BakeWithEase, where the magic of baking unfolds! Ever dreamt of crafting artisanal bread with that perfect tangy flavor? Then you're in the right place. This week, we're diving deep into the fascinating world of sourdough, starting with a comprehensive sourdough starter recipe for beginners. Prepare to unlock the secrets of fermentation and embark on a flavorful journey – what makes your starter unique? Let's explore together!
- Introduction to International Bread Fermentation
- Understanding Sourdough Starters for International Breads
- Sourdough Starter Recipe Beginners: A Step-by-Step Guide
- Unique International Bread Starters and Their Characteristics
- Techniques for Fermenting International Breads
- Baking International Breads: Recipes and Tips
- Troubleshooting Common Sourdough Baking Issues
- The Art of Adapting Sourdough Starters to Different Flours
- Conclusion: Embrace the World of Fermented International Breads
-
Frequently Asked Questions
- What is a sourdough starter, and why is it important for baking international breads?
- Where can I find a simple sourdough starter recipe for beginners?
- Can I use the same sourdough starter for all types of international breads?
- How long does it typically take to develop a usable sourdough starter from scratch?
- What are some common problems beginners face when making a sourdough starter, and how can I avoid them?
- Final Reflection: The Global Symphony of Sourdough
- Unleash Your Inner Bread Baker: New Flavor Adventures Await!
Introduction to International Bread Fermentation
Discovering the World of Bread Through Fermentation
Fermentation is the magical process that transforms simple flour and water into complex, flavorful bread. It's a cornerstone of baking found in nearly every culture around the globe, long before commercial yeast became widely available. This ancient technique relies on wild yeasts and bacteria naturally present in the environment and on grains, creating a symbiotic culture of bacteria and yeast (SCOBY) often referred to as a sourdough starter. Exploring international breads through the lens of fermentation reveals a fascinating diversity in flavors, textures, and techniques shaped by local ingredients and traditions.
Embarking on the journey of international bread baking opens up a world far beyond the standard loaf. From the tangy rye breads of Eastern Europe to the airy boules of France and the unique inclusions in Lithuanian loaves, fermentation plays a crucial role in defining character. Understanding how different starters behave and how fermentation is managed in various climates and cultures is key to recreating these authentic tastes at home. It's a deep dive into culinary history and microbial science, offering endless possibilities for the adventurous baker.
Why Explore International Bread Baking?
Exploring international bread baking is about more than just trying new recipes; it's about connecting with global culinary heritage and expanding your baking repertoire significantly. Each country or region often has signature bread styles born from specific grains, available starters, and traditional fermentation methods. Learning these techniques broadens your understanding of dough development, flavor profiles, and the subtle art of working with natural leavens. It challenges you to adapt your skills and embrace the unique characteristics that different starters and flours bring to the final product.
Furthermore, delving into international breads provides a deeper appreciation for the role of fermentation in creating complex flavors that are simply unattainable with commercial yeast alone. The lactic and acetic acids produced by bacteria in a sourdough starter, for instance, contribute unique tang and depth. Experiencing the difference between a bread leavened with a robust rye starter versus one using a mild wheat starter highlights the profound impact of the leavening agent on the final bread's taste, aroma, and texture. It's an enriching experience that makes you a more intuitive and skilled baker.
Understanding Sourdough Starters for International Breads
What is a Sourdough Starter? A Beginner's Guide
A sourdough starter is essentially a living culture, a mix of flour and water that harbors wild yeasts and lactic acid bacteria from the environment and the grain itself. When kept at a suitable temperature and fed regularly, these microorganisms ferment the sugars in the flour, producing carbon dioxide (which leavens the bread) and organic acids (which give sourdough its characteristic flavor and improve shelf life). Think of it as your own natural, perpetual leavening agent, a stark contrast to the single-species Saccharomyces cerevisiae found in commercial yeast packets.
Creating and maintaining a sourdough starter is a rewarding process, central to many international bread traditions. For a beginner sourdough starter, the journey involves patience and consistency. The wild yeasts capture air and produce gas, causing the starter to rise and become bubbly, while the bacteria produce acids that lower the pH, inhibiting spoilage and contributing tang. This dynamic ecosystem needs regular feeding (adding more flour and water) to keep the microorganisms active and healthy, ready to leaven your next loaf of French boule or Russian rye.
The Role of Fermentation in Bread Flavor and Texture
Fermentation is the primary architect of flavor and texture in naturally leavened breads. As the wild yeasts consume sugars, they produce ethanol and carbon dioxide. The carbon dioxide creates the gas bubbles that give bread its open crumb structure and airy texture. Simultaneously, the lactic acid bacteria produce lactic and acetic acids. Lactic acid contributes a milder, yogurt-like tang, while acetic acid provides a sharper, vinegary note, especially noticeable in rye breads. The balance of these acids, influenced by factors like temperature, hydration, and feeding schedule, dictates the final flavor profile.
Beyond leavening and flavor, fermentation also impacts the dough's structure. Enzymes in the flour, activated during fermentation, begin to break down proteins and starches. This process, particularly the breakdown of proteins into amino acids, contributes to complex flavor compounds that develop during baking (the Maillard reaction). The acids produced also strengthen the gluten network, allowing the dough to trap more gas and achieve a better rise. Proper fermentation leads to a more digestible bread with improved keeping qualities, a hallmark of traditional international loaves.
Sourdough Starter Recipe Beginners: A Step-by-Step Guide
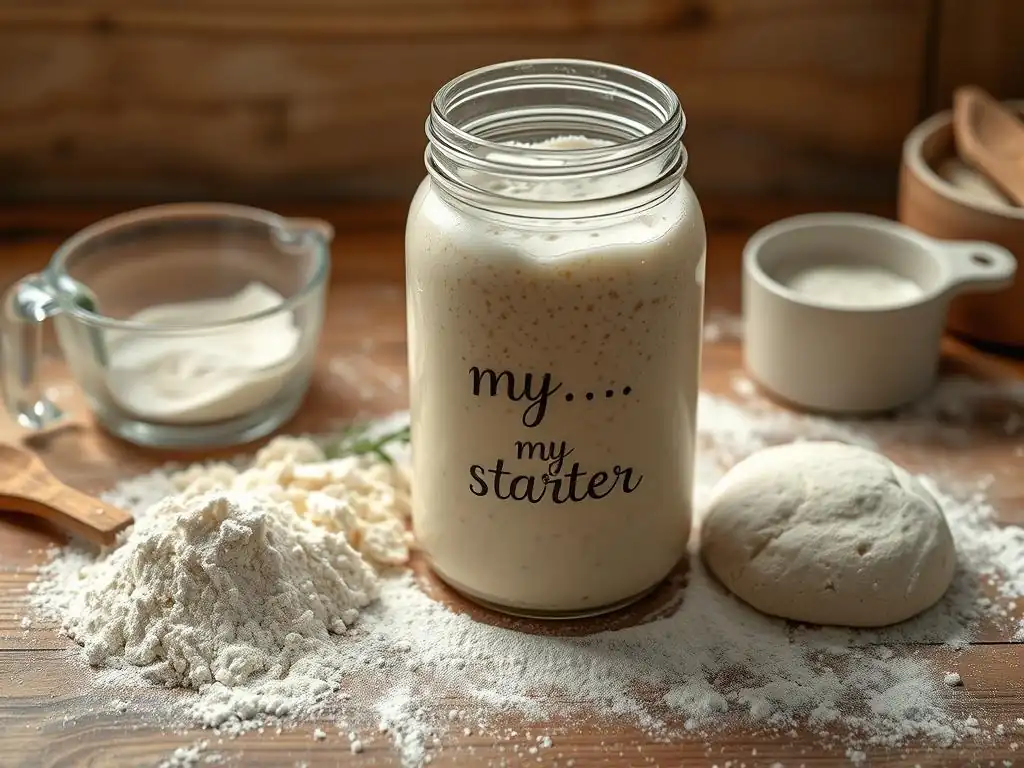
Creating your own sourdough starter for beginners is a simple process that requires only two ingredients and a little patience. This basic method will yield a versatile starter suitable for many international bread recipes. The key is consistency in feeding and observation.
Ingredients for Your First Sourdough Starter
To begin your journey with a sourdough starter recipe beginners can easily follow, you only need two fundamental ingredients:
- All-Purpose Flour (Unbleached is often preferred as it contains more natural microbes)
- Non-Chlorinated Water (Filtered or bottled water works best, as chlorine can inhibit microbial growth)
That's it! The magic comes from the microorganisms already present in the flour and the environment. Starting with just these two elements allows you to cultivate your unique microbial community.
Equipment Needed to Make a Sourdough Starter
You won't need much specialized equipment to start your sourdough journey. For this beginner sourdough starter recipe, gather these items:
- A clean glass jar or plastic container (at least 1-quart capacity, clear is helpful for observation). Avoid metal initially, though most modern stainless steel is fine.
- A lid or cover (loosely fitting, like a jar lid placed gently on top, plastic wrap secured with a rubber band and poked with holes, or a clean cloth). The starter needs to breathe but shouldn't dry out.
- A kitchen scale (highly recommended for accuracy, especially when scaling up recipes).
- A spoon or spatula for mixing.
- A rubber band or marker to indicate the starter's level on the jar.
Having a scale is particularly helpful for maintaining consistent ratios, which is crucial when you're learning how to make a sourdough starter for beginners.
The Initial Mix: Flour and Water Ratios Explained
The most common ratio for a beginner sourdough starter is 1:1 by weight for flour and water. This creates a relatively wet starter (100% hydration) which is easy to mix and observe activity. For example, you might start with:
- 50 grams All-Purpose Flour
- 50 grams Non-Chlorinated Water
Combine the flour and water in your clean jar. Mix thoroughly until there are no dry spots of flour. The mixture will be thick and pasty. Scrape down the sides of the jar and loosely cover it. Place the jar in a warm spot, ideally between 70-80°F (21-27°C). Temperatures outside this range can slow down or alter microbial activity.
Feeding Your Starter: The Daily Routine
After the initial mix, you will start a daily feeding routine. For the first 24-48 hours, you might not see much activity. This is normal. On day 2 or 3, you will begin discarding a portion of the starter before feeding. This reduces the overall volume and ensures the microorganisms have a concentrated source of fresh food.
Here's a typical feeding schedule for a beginner sourdough starter:
- Day 1: Mix initial flour and water. Cover loosely and leave at room temperature.
- Day 2: Observe. You might see small bubbles or a faint smell. Do not feed yet unless you see significant activity (unlikely this early).
- Day 3 onwards: Each day, discard about half (or slightly more) of your starter. Feed the remaining starter with fresh flour and water, maintaining the 1:1 ratio. For example, discard down to 50g of starter, then add 50g flour and 50g water. Mix well. Mark the level of the starter on the jar.
Consistency is key during this phase. Feed your starter around the same time each day. You are looking for signs of life: bubbles, a sour or yeasty smell, and the starter rising after feeding.
Recognizing When Your Starter is Ready for Baking
Your sourdough starter is typically ready for baking when it consistently doubles in size within 4-8 hours after being fed and is full of bubbles. This usually takes about 7 to 14 days, sometimes longer depending on temperature and environment.
Signs of a ready starter:
- Volume Increase: It reliably rises significantly after feeding (at least doubles).
- Bubbles: The surface and sides of the jar show lots of bubbles.
- Texture: It has a light, airy, spongy consistency.
- Smell: It smells pleasantly yeasty and slightly sour, not like strong alcohol or rotten.
- Float Test (Optional but helpful): Take a small spoonful of starter at its peak (when it's doubled and bubbly) and gently drop it into a glass of water. If it floats, it's generally ready to leaven bread. If it sinks, it may need more time to develop strength.
Once your starter consistently passes these tests, you have a mature, active culture ready to use in your first sourdough loaf! This beginner sourdough starter is your gateway to the world of fermented international breads.
Unique International Bread Starters and Their Characteristics
While a standard wheat-based sourdough starter is common, many international breads utilize different grains or even fruits and vegetables to cultivate unique starter cultures, each imparting distinct characteristics to the final loaf.
Exploring Different Types of Starters
The type of flour used to maintain a starter significantly impacts its microbial composition and the resulting flavor profile. A starter fed exclusively with rye flour will develop a different balance of yeasts and bacteria compared to one fed with white wheat flour. This is partly due to the different nutrient profiles and enzyme activity in various grains. Hydration levels also play a role; stiff starters (lower hydration) tend to favor acetic acid bacteria, resulting in a tangier bread, while wet starters (higher hydration) often promote lactic acid bacteria, leading to a milder sourness.
Beyond different flours, some traditional methods incorporate other ingredients to kickstart or maintain the culture. These can include fruit, potatoes, or even yogurt, introducing different microbial communities that influence the starter's activity and the bread's final flavor. These unique starters are often intrinsically linked to the specific bread types they are used to make, contributing to regional variations and culinary identity. Understanding these differences is key to authentically recreating international loaves.
Fruit-Based Starters: Apple Starter and its Influence on Cider Bread
Fruit, particularly apples or raisins, can be used to initiate a sourdough starter, leveraging the wild yeasts present on the fruit's skin. An apple starter, for instance, might be created by fermenting apple pieces in water for a few days, then straining the liquid and using it to hydrate flour. The yeasts found on fruit can be particularly vigorous initially, helping to quickly establish a culture. While often transitioned to a flour-and-water diet for maintenance, a starter initially cultured this way may retain some unique characteristics or be used specifically for certain applications.
A notable example is using an apple-based starter (or a standard starter fed with apple cider instead of water) to make breads like Cider Bread. The starter's activity might be influenced by the natural sugars and microbes from the cider, potentially leading to a slightly different fermentation profile. While the apple flavor itself might not be pronounced in the final baked bread, the microbial population fostered by the apple influence can contribute subtle fruity or complex notes, pairing wonderfully with ingredients like walnuts or spices often found in such loaves.
Rye Starters: Polish Rye Starter and its Role in Pumpernickel
Rye flour is exceptionally rich in enzymes and nutrients that make it ideal for cultivating robust and active starters, often referred to as levain de seigle or zakwas. Rye starters tend to ferment quickly and produce a significant amount of lactic acid, contributing a characteristic tang essential to traditional rye breads. Unlike wheat starters, rye starters often don't develop a strong gluten network, so their rise is primarily due to gas production. A Polish rye starter, for example, is a staple in Eastern European baking.
This type of starter is crucial for dense, flavorful breads like Pumpernickel. Traditional German Pumpernickel is often made with coarsely ground rye and relies heavily on a slow, long bake and the unique fermentation profile of a rye starter for its deep color and slightly sweet, malty flavor. The high acidity from the rye starter also helps break down the rye flour's starches, contributing to the bread's moist crumb and extended shelf life, a practical benefit in historical baking contexts.
Potato Starters: Lithuanian Potato Starter and its Impact on Kugelis Bread
Potato starters, sometimes called bulvės raugas in Lithuanian, are another intriguing example of how local ingredients influence fermentation. These starters can be made by fermenting boiled, mashed potatoes with flour and water. Potatoes provide sugars and nutrients that can support a different microbial community compared to a pure flour-and-water starter. The enzymes in potatoes can also influence the dough's texture and moisture retention.
A Lithuanian potato starter is traditionally used to leaven breads like Kugelis bread, a savory potato bread often containing bacon or onion. The potato starter contributes a unique tenderness and moisture to the crumb, distinct from breads made with wheat starters. While the primary flavor may come from the potatoes and other additions in the loaf itself, the starter's fermentation byproducts add subtle layers of complexity and help create the specific texture desired for this regional specialty.
Techniques for Fermenting International Breads
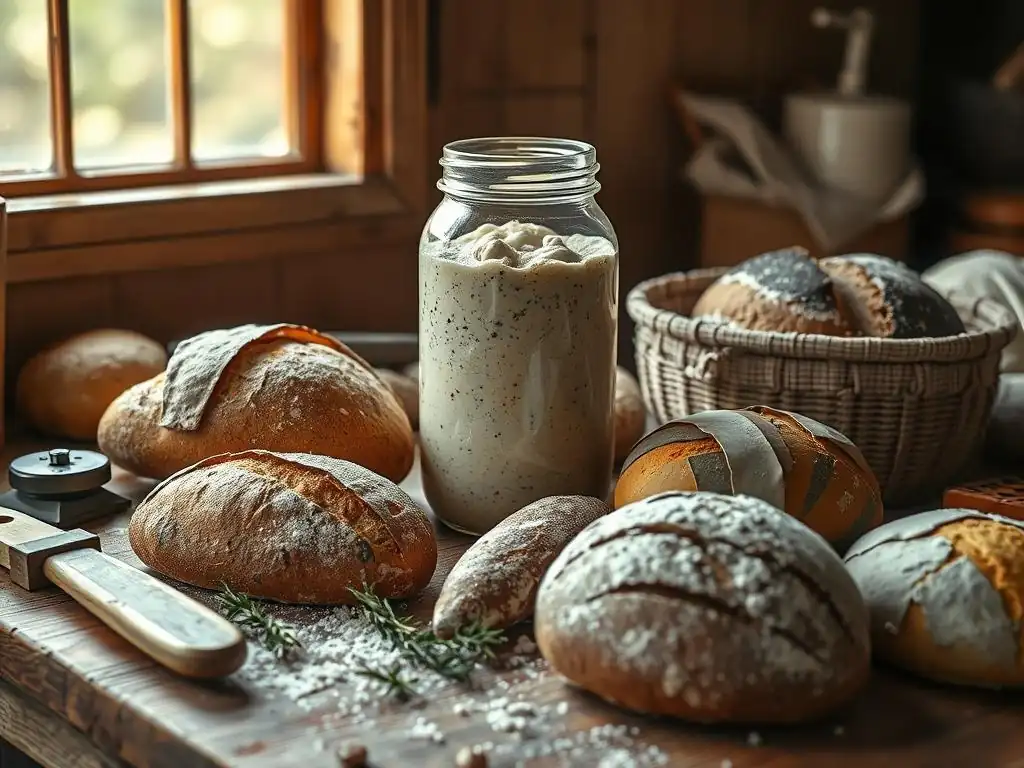
Mastering the art of fermenting international breads involves understanding several key stages and techniques that build flavor and structure.
Autolyse: Enhancing Dough Hydration and Flavor
Autolyse is a simple yet powerful technique where you mix just the flour and water from a recipe and let it rest for 20 minutes to several hours before adding the starter and salt. This resting period allows the flour to fully hydrate and enzymes within the flour to begin breaking down proteins and starches. This breakdown helps gluten strands start forming naturally without mechanical mixing.
The benefits of autolyse include improved dough extensibility, easier mixing once the starter and salt are added, and enhanced flavor development. By giving the flour a head start on hydration and enzymatic activity, you create a better environment for the subsequent fermentation process once the starter is introduced. Many traditional European bread methods implicitly or explicitly incorporate long rest periods akin to autolyse.
Bulk Fermentation: The First Rise Explained
Bulk fermentation, also known as the first rise, is the period after the starter (and salt, after autolyse if used) is mixed into the dough and before the dough is divided and shaped. This is where the majority of the dough's leavening and flavor development occurs. During bulk fermentation, the yeast produces carbon dioxide, causing the dough to rise, while the bacteria produce organic acids that contribute to flavor and condition the gluten.
The length and temperature of bulk fermentation vary significantly depending on the recipe, starter strength, and desired outcome. A typical range might be 2-6 hours at room temperature, often involving several "stretch and folds" or "coil folds" during the first part of the process to build dough strength. Paying attention to the dough's texture, volume increase (often aiming for a 30-60% increase), and the appearance of bubbles is crucial for determining when bulk fermentation is complete. Over-fermenting at this stage can lead to a weak, gummy dough.
Proofing: The Final Rise and Flavor Development
Proofing, or the second rise, is the final fermentation period after the dough has been shaped and placed in its final baking vessel or proofing basket. This stage allows the shaped loaf to increase in volume and for final flavor compounds to develop before baking. Proofing can be done at room temperature or in the refrigerator (cold proofing).
Cold proofing (at refrigerator temperatures, typically 38-40°F or 3-4°C) significantly slows down yeast activity but allows bacterial activity to continue, leading to a more pronounced sour flavor. It also makes the dough easier to handle and score. Cold proofing can range from 8 to 48 hours or even longer for some recipes.
Room temperature proofing is faster, typically 1-3 hours, and results in a milder flavor. Knowing when proofing is complete is critical; the dough should look visibly increased in size and feel light and airy, but not so fragile that it collapses easily when gently poked (the "poke test").
Scoring Techniques for Different Bread Styles
Scoring, or slashing the surface of the dough just before baking, serves several purposes. Functionally, it allows the dough to expand predictably in the oven ("oven spring") without bursting uncontrollably. Aesthetically, it creates beautiful patterns unique to different bread styles. The depth, angle, and pattern of the score influence how the loaf expands.
Different international breads have signature scoring patterns. A classic French boule might have a few curved slashes or a single large cross. A Batard (oval loaf) often gets a series of overlapping diagonal slashes. Rye breads, which often have less oven spring due to the nature of the flour, might be scored simply down the middle or docked all over with a fork (pricked) to prevent cracking. Understanding the dough's characteristics and the desired final shape informs the appropriate scoring technique.
Baking International Breads: Recipes and Tips
Let's look at how a sourdough starter can be used in different international bread contexts.
Recipe 1: French Boule - Using a Sourdough Starter
The French Boule is a classic round loaf known for its crisp crust and open, airy crumb. It's a perfect first loaf to bake once your beginner sourdough starter is active.
Ingredients for French Boule
- 100 grams active sourdough starter (fed 4-8 hours prior and bubbly)
- 350 grams warm water (around 80-85°F / 27-29°C)
- 500 grams strong bread flour
- 10 grams fine sea salt
This simple ingredient list, focusing on quality flour and an active starter, is the foundation of a great boule.
Step-by-Step Baking Instructions
- Mix (Autolyse): In a large bowl, whisk the warm water and active sourdough starter together. Add the flour and mix with a spoon or your hand until no dry flour remains. It will be a shaggy dough. Cover and let rest for 30-60 minutes (autolyse).
- Add Salt: Sprinkle the salt over the dough. Wet your hand and gently work the salt into the dough using a pinching or folding motion for a few minutes until incorporated.
- Bulk Fermentation with Folds: Cover the bowl. Over the next 2-4 hours (depending on room temperature), perform 3-4 sets of stretch and folds or coil folds at 30-45 minute intervals. Wet your hands slightly to prevent sticking. After the last fold, let the dough rest undisturbed until it has increased by about 50-60% and shows visible bubbles.
- Shape: Gently turn the dough out onto a lightly floured surface. Shape it into a taut round boule.
- Proof: Place the shaped dough seam-side up into a floured banneton or a bowl lined with a floured cloth. Cover and proof at room temperature for 1-2 hours, or cold proof in the refrigerator for 8-16 hours.
- Preheat Oven & Baking Vessel: About 45 minutes before baking, place a Dutch oven or baking stone with a steam setup in your oven and preheat to 475°F (245°C).
- Score and Bake: Carefully invert the proofed dough onto parchment paper or directly into the hot Dutch oven. Score the top of the loaf. Cover the Dutch oven and bake for 20 minutes.
- Finish Baking: Remove the lid (if using a Dutch oven) or remove the steam setup. Reduce the oven temperature to 450°F (230°C) and bake for another 20-25 minutes, or until the crust is deep golden brown and the internal temperature is around 205-210°F (96-99°C).
- Cool: Transfer the baked loaf to a wire rack and let cool completely for at least 1-2 hours before slicing.
Tips for Perfecting French Boule
- Use a strong, active starter. A weak starter is a common cause of dense bread.
- Don't rush bulk fermentation. Look at the dough, not just the clock. It should feel airy and show signs of fermentation.
- Develop good shaping tension to help the loaf hold its shape and achieve good oven spring.
- Ensure adequate steam in the oven during the initial bake. Steam keeps the crust pliable, allowing the loaf to expand fully. A Dutch oven is the easiest way to achieve this at home.
- Allow the bread to cool completely before slicing. Slicing hot bread can result in a gummy interior.
Recipe 2: Russian Rye Bread - Using a Rye Starter
Russian Rye bread, often dark and dense with a distinct tangy flavor, is a testament to the power of a well-maintained rye starter. This recipe uses a mature rye starter for authentic flavor.
Ingredients for Russian Rye Bread
- 150 grams active rye sourdough starter (fed 4-8 hours prior)
- 300 grams warm water (around 85-90°F / 29-32°C)
- 300 grams dark rye flour
- 200 grams strong bread flour (or a mix of bread flour and whole wheat)
- 10 grams salt
- Optional: 1 tbsp molasses or barley malt extract for color and flavor
Note the higher ratio of rye flour and the use of a rye starter compared to the French Boule.
Step-by-Step Baking Instructions
- Mix Dough: In a large bowl, whisk the active rye starter and warm water. Add the rye flour, bread flour, salt, and optional molasses/malt. Mix until a shaggy dough forms. Rye dough will be much stickier than wheat dough.
- Bulk Fermentation: Cover the bowl and let the dough ferment at room temperature for 2-3 hours. Rye dough develops strength differently than wheat, so extensive folding isn't always necessary, but one or two gentle folds in the first hour can help. The dough may not increase dramatically in size but should show signs of fermentation (bubbles, slightly airy).
- Shape: Turn the sticky dough onto a generously floured surface (use rye flour or rice flour to prevent sticking). Gently shape into a loaf – a simple log or boule works well. Avoid overworking the dough.
- Proof: Place the shaped loaf seam-side down into a floured banneton or a loaf pan lined with parchment paper. Cover and proof at room temperature for 1-2 hours, or cold proof in the refrigerator for 8-24 hours. Rye dough doesn't typically show as much visual proofing as wheat dough. It should feel light and airy.
- Preheat Oven: Preheat your oven to 450°F (230°C) with a baking stone or steel inside if using. Prepare a steam setup (like a tray of hot water on the bottom rack).
- Bake: Carefully transfer the proofed loaf onto the hot baking stone or into the prepared loaf pan. Score the top (a simple slash or docking works well for rye). Bake with steam for 15 minutes.
- Finish Baking: Remove the steam source. Reduce oven temperature to 400°F (200°C) and bake for another 30-40 minutes, or until the crust is dark and the internal temperature reaches 205-210°F (96-99°C). Rye bread often benefits from a longer, slower bake.
- Cool: Transfer to a wire rack. It's essential to cool rye bread completely, ideally for several hours or even overnight, before slicing. This allows the crumb structure to set and flavors to meld.
Tips for Perfecting Russian Rye Bread
- Use a dedicated rye starter or feed your standard starter with rye flour for a few days before baking to boost the rye characteristics.
- Embrace the stickiness of rye dough; generous flouring of your workspace and hands is necessary during shaping.
- Rye bread benefits greatly from steam during the initial bake for better crust development.
- Do not slice rye bread warm! It needs significant time to cool and allow the starches to stabilize, otherwise, the crumb will be gummy. A long, cool rest improves texture and flavor dramatically.
- Consider adding caraway seeds or coriander for traditional Russian rye flavor.
Troubleshooting Common Sourdough Baking Issues
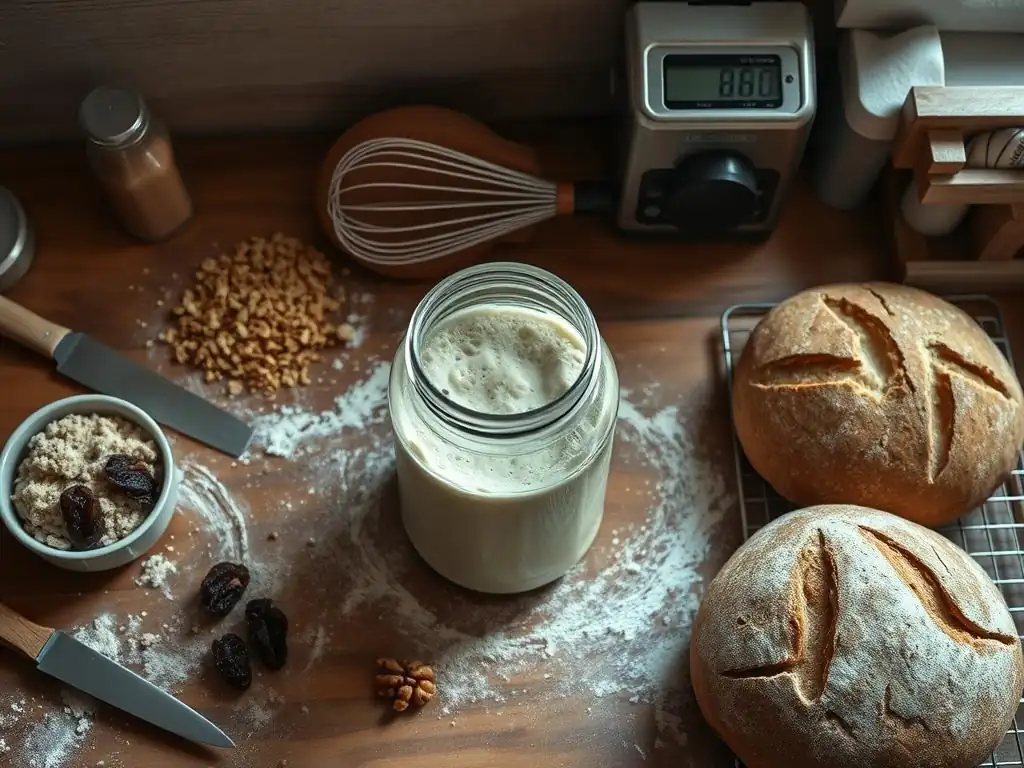
Even with a healthy starter, baking with sourdough can present challenges. Here are some common issues and how to address them.
Dense Bread: Identifying and Solving the Problem
Dense bread is a common frustration for beginner sourdough bakers. This usually indicates insufficient leavening power. The primary culprits are typically a weak or inactive starter, inadequate bulk fermentation, or insufficient proofing. If your starter isn't consistently doubling within 4-8 hours after feeding, it's likely not strong enough to lift a loaf. Revive it with more frequent feedings at optimal temperatures until it's vigorous.
During bulk fermentation and proofing, the dough needs time to develop gas and structure. If cut short, the loaf won't have enough trapped gas for a light crumb. Monitor your dough's progress visually (aim for ~50% volume increase in bulk, noticeable lightness in proofing) rather than strictly by time, as fermentation speed varies with temperature. Ensure your shaping technique builds sufficient tension to give the loaf structure without degassing it excessively.
Sour Bread: Controlling Acidity in Your Starter
While some tang is desirable in sourdough, overly sour or vinegary bread can be off-putting. Excessive sourness is often caused by an imbalance in the starter favoring acetic acid bacteria, which thrive in stiffer, cooler conditions and when the starter hasn't been fed frequently enough (allowing acids to build up).
To reduce sourness, try feeding your starter more frequently (perhaps twice a day if kept at room temperature) with a higher ratio of fresh flour and water to starter (e.g., 1:3:3 or 1:5:5 starter:flour:water by weight). Using warmer water for feedings and keeping the starter in a warmer environment (75-80°F / 24-27°C) can encourage lactic acid bacteria, which produce milder flavors. Using the starter when it's at its peak activity, rather than when it's past its peak and starting to collapse (which indicates high acidity), will also result in a milder loaf.
Flat Bread: Understanding the Importance of Gluten Development
Flat bread, or a loaf that spreads out rather than rising upwards, can be caused by several factors, often related to gluten development and structure. Insufficient kneading or folding during bulk fermentation means the gluten network isn't strong enough to trap the gases produced by the yeast. Using flour with too low protein content will also result in a weak structure.
Over-fermentation or over-proofing can also lead to flat bread. If the dough ferments for too long, the gluten structure can break down, and the dough loses its ability to hold shape and rise. Shaping technique is also critical; a loaf that isn't shaped with enough tension will spread outwards during baking. Ensure you're using strong bread flour (around 12-14% protein), developing the dough adequately through mixing and folding, and proofing for the correct amount of time so the dough is airy but still has structure.
The Art of Adapting Sourdough Starters to Different Flours
Once you've mastered a beginner sourdough starter recipe and baked your first few loaves, you might want to explore using different types of flour in your starter or your dough. This opens up a vast world of flavors and textures.
Working with Different Types of Flour
Different flours behave very differently in a sourdough starter and dough due to their varying protein content, starch composition, and enzyme activity. Whole wheat flour and rye flour, for instance, contain more nutrients and enzymes than white all-purpose or bread flour, which can make starters fed with these flours more active initially but also potentially degrade faster if not fed regularly. The higher fiber content in whole grain flours also affects dough handling and gluten development.
When incorporating different flours into your starter feeding routine, start gradually. You can convert a white starter to a rye starter by gradually increasing the percentage of rye flour in each feeding over several days. Observe how the starter behaves – its rise time, peak, and smell – as you change the flour. Using a mix of flours (e.g., 50% white, 50% whole wheat) for your starter can offer a balance of activity and flavor.
Adjusting Hydration Levels for Various Flours
Hydration refers to the ratio of water to flour in your starter or dough, typically expressed as a percentage of the flour weight. A 100% hydration starter uses equal weights of flour and water. Different flours absorb water differently. Whole wheat and rye flours absorb significantly more water than white flour due to their higher fiber content.
When baking with different flours, you'll almost always need to adjust the hydration level compared to an all-white loaf. A dough made with 50% rye flour will require more water to achieve a similar consistency to a dough made with 100% white flour. Conversely, a dough made with a very high-protein white bread flour might handle a higher hydration than one made with standard all-purpose. Experimentation is key, but generally, increase water for whole grains and reduce slightly for lower-protein flours, always observing the dough's feel and consistency.
Conclusion: Embrace the World of Fermented International Breads
Exploring the world of fermented international breads is a deeply rewarding aspect of baking. From understanding what is a sourdough starter for beginners to mastering the nuances of different flours and fermentation techniques, each loaf baked is a step deeper into a rich global tradition. The journey from a simple sourdough starter recipe beginners can follow to crafting complex rye or fruit-leavened loaves is one of continuous learning and delicious discovery.
Continuing Your Bread Baking Journey
Armed with the knowledge of how to make a sourdough starter for beginners and an understanding of fermentation techniques, you are well-equipped to continue exploring the vast landscape of international breads. Don't be afraid to experiment with different flours, hydration levels, and fermentation times. Seek out recipes from specific regions that pique your interest and try to understand the historical and cultural context behind their unique methods and ingredients. Your active sourdough starter is not just a baking ingredient; it's a living link to bakers across history and around the world, waiting to help you create your next masterpiece.
Frequently Asked Questions
What is a sourdough starter, and why is it important for baking international breads?
A sourdough starter is a fermented culture of flour and water that acts as a natural leavening agent. It's important because it imparts a unique tangy flavor and texture to breads, especially international varieties.
Where can I find a simple sourdough starter recipe for beginners?
BakeWithEase.com offers a beginner-friendly sourdough starter recipe. It provides step-by-step instructions and easy-to-find ingredients, making it perfect for those new to sourdough baking.
Can I use the same sourdough starter for all types of international breads?
While a single starter can be used, different international breads may benefit from variations. You can adjust the hydration levels or flours in your starter to better suit specific recipes and flavor profiles.
How long does it typically take to develop a usable sourdough starter from scratch?
Developing a usable sourdough starter generally takes about 7-14 days. It requires regular feeding and observation to ensure the culture is active and strong enough for baking.
What are some common problems beginners face when making a sourdough starter, and how can I avoid them?
Common issues include mold growth, inactivity, and unpleasant smells. Avoid these by using clean equipment, maintaining a consistent temperature, and following a reliable recipe like the one on BakeWithEase.com.
Final Reflection: The Global Symphony of Sourdough
The humble sourdough starter, a cornerstone of baking traditions worldwide, is experiencing a renaissance. Its accessibility, coupled with the growing interest in artisanal bread making, has transformed it from a niche pursuit to a widely embraced culinary practice. This renewed appreciation speaks volumes about our desire for connection to both our food and our shared human history.
The journey through diverse international sourdough techniques has been a profound one, revealing the intricate relationship between culture, geography, and the simple act of bread making. Each starter, with its unique microbial fingerprint, reflects the terroir and traditions of its origin. It's a testament to the power of shared knowledge and the enduring legacy of culinary heritage. Bread is the staff of life,
they say, and in exploring these diverse starters, we discover that this staff is crafted with the hands and hearts of countless generations.
Now, armed with a deeper understanding of sourdough's global tapestry, I invite you to embark on your own baking adventure. Don't be intimidated by the seemingly complex process; embrace the journey of nurturing your starter, experimenting with different flours and techniques, and discovering the unique flavor profiles that await. The rewards – the satisfying aroma of freshly baked bread, the crust's satisfying crackle, and the taste of a truly handcrafted loaf – are well worth the effort. Let your sourdough starter be a testament to your own creativity and connection to this ancient and enduring art.
Unleash Your Inner Bread Baker: New Flavor Adventures Await!
Thanks for joining us on this flavorful journey into the world of international fermented breads! We hope you've gained a deeper appreciation for the artistry and science behind creating truly unique loaves. Ready to take your baking to the next level?
- Dive into your first international starter: Choose one of the starter cultures discussed – perhaps the tangy sourdough from San Francisco or the robust rye from Germany – and start your own fermentation experiment today! This is your chance to truly master a new skill and unlock incredible flavors.
- Share your baking triumphs (and challenges!): Post photos of your creations and tag us on social media – we love seeing your baking journey unfold! Let's inspire each other!
- Explore further: Delve deeper into the resources listed in the article for more insights into specific techniques and regional variations.
Ready to transform your kitchen into a global bakery? What exciting international bread will you attempt first?