
Classic Basic Sourdough Boule Recipe (StepbyStep)

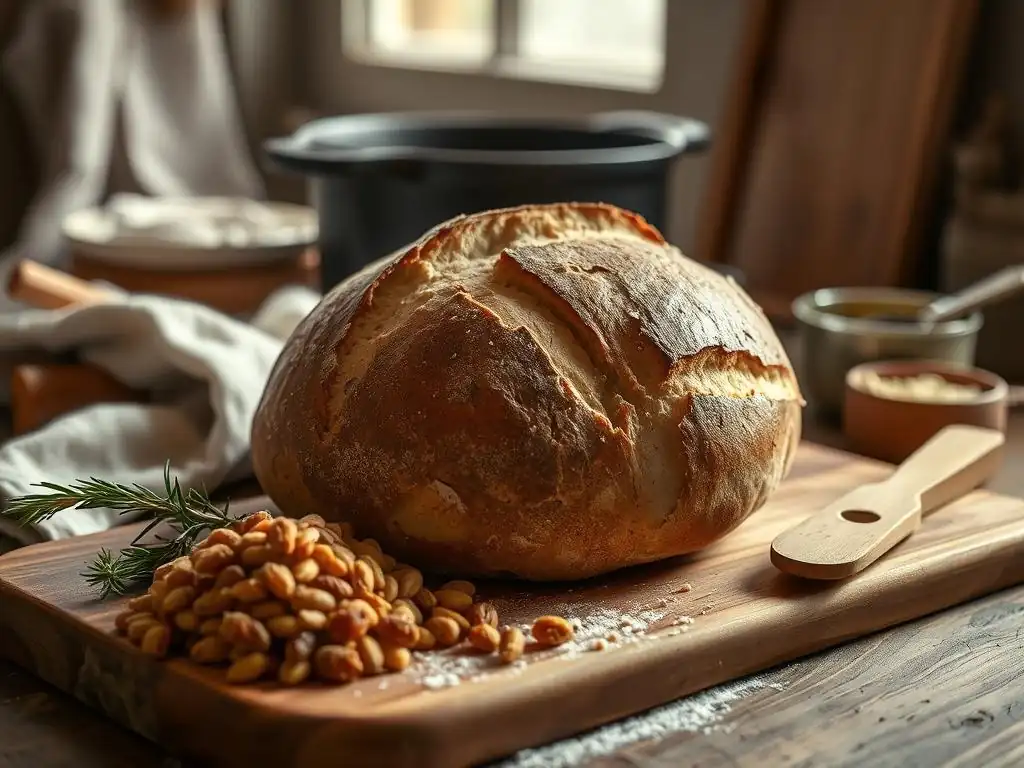
Welcome to BakeWithEase, where the journey to baking mastery begins! Are you ready to unlock the secrets of a perfectly crusty, tangy sourdough boule? While this recipe falls under our Intermediate Baking category, don't be intimidated! We'll guide you through each step of our Easy Beginner Sourdough Boule Recipe, simplifying the process and ensuring incredible results. Curious about achieving that signature sourdough flavor and airy crumb? Let's get baking!
- Classic Sourdough Boule Recipe (Step-by-Step)
- Introduction to Sourdough Boule Baking
- Essential Equipment for Sourdough Success
- Ingredients for Sourdough Boule
- Step-by-Step Guide to Baking Sourdough
- Troubleshooting Your Sourdough Boule
- Variations on the Basic Sourdough Recipe
- Storing Your Sourdough Boule
- Conclusion: Mastering the Art of Sourdough
-
Frequently Asked Questions
- How difficult is this sourdough boule recipe for a beginner?
- What makes this sourdough boule "classic" and "basic"?
- How long does the entire process take from start to finish?
- What if I don't have a Dutch oven or a suitable baking vessel?
- What are some common mistakes beginners make with sourdough and how can I avoid them?
- Final Reflection: The Humble Boule, A Gateway to Baking Joy
- Unleash Your Inner Baker: Craft the Perfect Sourdough Boule!
Classic Sourdough Boule Recipe (Step-by-Step)
Introduction to Sourdough Boule Baking
Why Bake Your Own Sourdough?
Baking your own sourdough bread is a rewarding experience that connects you to a centuries-old tradition. Beyond the simple satisfaction of pulling a warm, fragrant loaf from your oven, there are tangible benefits. For instance, baking at home can be significantly more cost-effective than buying artisan loaves; a store-bought sourdough boule might cost upwards of $6-$8, while the ingredients for a homemade one could be as low as $1-$2, especially if you bake frequently. Furthermore, you have complete control over the ingredients, ensuring no unnecessary additives are used.
The process itself, from nurturing your starter to shaping and baking, offers a unique blend of science and artistry. It encourages patience and observation, teaching you to understand dough by feel and appearance. For many home bakers, mastering an easy beginner sourdough boule recipe becomes a source of pride and a delicious way to share homemade goodness with friends and family. It's more than just food; it's a craft you develop over time.
The Appeal of Sourdough
Sourdough bread holds a special place in the baking world, largely due to its distinctive flavor profile and unique texture. The characteristic tang comes from the lactic and acetic acids produced by the wild yeast and bacteria in the sourdough starter during fermentation. This natural leavening process also contributes to a more complex flavor compared to commercial yeast breads.
Beyond taste, sourdough often boasts a wonderfully chewy interior (the crumb) punctuated by irregular air pockets (the alveoli) and a beautifully crisp, sometimes blistered, crust. This combination provides a delightful textural contrast in every bite. The prolonged fermentation can also make sourdough easier for some people to digest compared to quickly risen breads, breaking down some of the starches and gluten. It's a bread that truly engages the senses, making an easy beginner sourdough boule recipe a sought-after skill.
Essential Equipment for Sourdough Success
Must-Have Tools
To embark on your sourdough journey, a few key pieces of equipment will make the process much smoother. First and foremost, a reliable digital kitchen scale is crucial. Baking, especially with sourdough, is a science that relies on precise ratios. Measuring ingredients by weight (grams) is far more accurate than by volume (cups). You'll also need a large mixing bowl, preferably glass or plastic, for combining ingredients and the initial bulk fermentation.
A Dutch oven or a heavy pot with a tight-fitting lid is essential for baking. The lidded environment traps steam released by the dough, creating a moist atmosphere that allows the bread to expand fully before the crust sets. A standard 5 or 6-quart Dutch oven is typically sufficient for baking a single boule. Lastly, a bench scraper is incredibly useful for handling the sticky dough, dividing it, and cleaning your workspace.
Optional Equipment
While not strictly necessary for your first easy beginner sourdough boule recipe, certain tools can improve your results or simplify the process. A proofing basket, often called a banneton, provides support for the shaped dough during its final rise and helps create a lovely pattern on the crust. They come in various materials, like cane or wood pulp.
A bread lame (pronounced "lahm") or a sharp razor blade mounted on a handle is used for scoring the dough's surface just before baking. Proper scoring allows the bread to expand in a controlled manner in the oven, preventing blowouts and contributing to a beautiful ear. A dough whisk can be helpful for the initial mixing of the wet and dry ingredients, as its open structure prevents dough from clumping. Finally, a digital instant-read thermometer can help you check the internal temperature of your baked loaf (aiming for around 205-210°F or 96-99°C) to ensure it's fully cooked.
Ingredients for Sourdough Boule
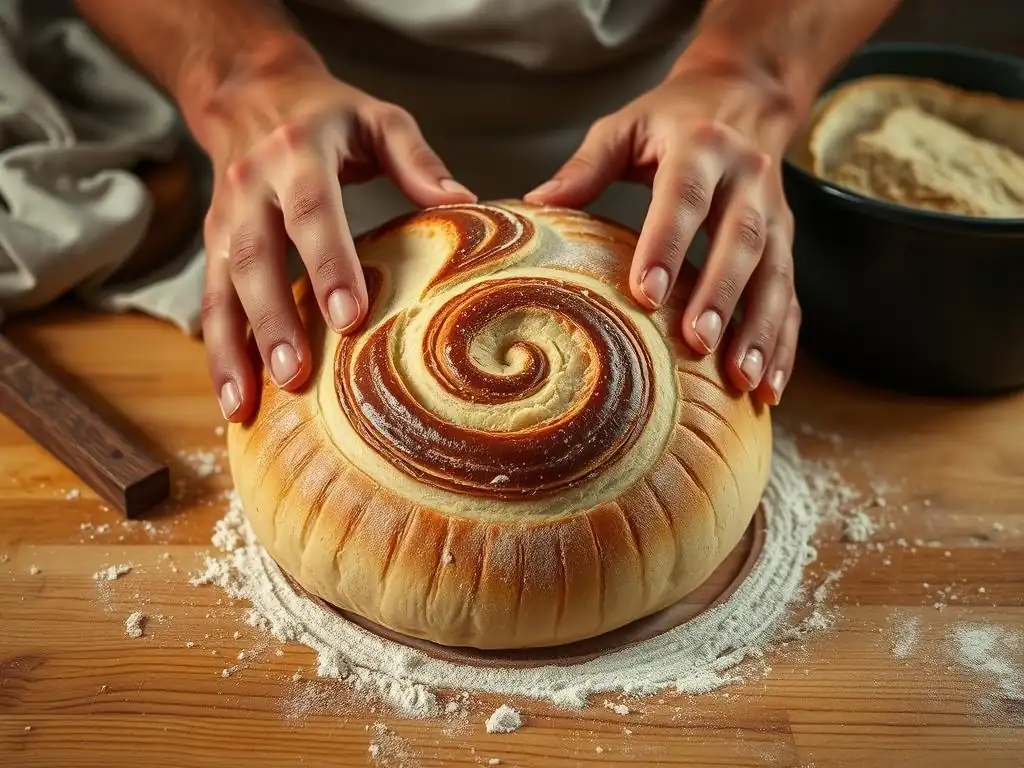
High-Quality Flour
The quality and type of flour you use significantly impact your sourdough boule. Bread flour is a common choice for sourdough because it typically has a higher protein content (around 12-14%) compared to all-purpose flour (around 10-12%). This higher protein level means more gluten can develop, resulting in a stronger dough structure capable of trapping the gases produced by the starter, leading to a better rise and a more open crumb.
While bread flour is excellent, you can certainly make a delicious easy beginner sourdough boule recipe using good quality all-purpose flour. Many bakers also incorporate a percentage of whole wheat or rye flour (often 10-30% of the total flour weight) for added flavor, nutrition, and complexity. Ensure your flour is fresh and stored properly to maintain its quality. Using organic or stone-ground flours can also introduce unique flavors.
The Importance of Water Temperature
Water plays a critical role in hydration and dough temperature, both of which influence fermentation speed. The temperature of the water you mix with your flour and starter directly affects the dough's overall temperature. A common target dough temperature for bulk fermentation is between 75-80°F (24-27°C), as this range is optimal for the activity of the wild yeast and bacteria in your starter.
If your kitchen is cold, using warmer water (around 85-90°F or 29-32°C) can help bring the dough temperature into the desired range. Conversely, in a warm environment, cooler water (around 70-75°F or 21-24°C) might be necessary. Using filtered or non-chlorinated water is often recommended, as high levels of chlorine can potentially inhibit microbial activity in the starter. Aim for accuracy when measuring water; for example, 350 grams of water is a common amount for a standard loaf.
Salt: The Flavor Enhancer
Salt is more than just a flavor enhancer in bread; it also plays a structural role. It helps to strengthen the gluten network, leading to better dough handling and oven spring. Without salt, dough can feel slack and difficult to shape. However, adding too much salt can inhibit yeast activity, slowing down fermentation. The typical salt percentage in sourdough bread is around 1.8% to 2.2% of the total flour weight. For a recipe using 500 grams of flour, this would translate to about 9 to 11 grams of salt.
It's generally best to use non-iodized salt, such as fine sea salt or kosher salt, as iodine can sometimes negatively affect yeast activity, although this effect is often debated and may be negligible in small amounts. Ensure the salt is fully dissolved or evenly distributed throughout the dough during the mixing process. Delaying the addition of salt until after the autolyse phase (mixing flour and water) is a common practice, as it allows the flour to hydrate more fully initially.
Maintaining a Healthy Sourdough Starter
A vibrant, active sourdough starter is the heart of any successful sourdough boule recipe. A healthy starter is a living culture of wild yeast and lactic acid bacteria that thrives on a regular feeding schedule of flour and water. Signs of a healthy starter include consistent doubling or tripling in volume within 4-12 hours after feeding (depending on temperature and feeding ratio), a bubbly and airy texture, and a pleasant, slightly tangy aroma.
To maintain your starter, store it at room temperature and feed it daily, or store it in the refrigerator and feed it once a week. Common feeding ratios are 1:1:1 (starter:water:flour by weight) or 1:2:2 for less frequent feeding. Always discard a portion before feeding to maintain a manageable amount and ensure the microbes have enough food. Using your starter when it is at its peak activity – typically a few hours after feeding when it has significantly risen and is full of bubbles – is crucial for leavening your easy beginner sourdough boule recipe.
Step-by-Step Guide to Baking Sourdough
Step 1: Preparing Your Sourdough Starter
The first step to baking your easy beginner sourdough boule recipe is ensuring your starter is active and ready to work. If your starter is stored in the refrigerator, take it out 1-2 days before you plan to bake and feed it at room temperature until it shows consistent activity. For example, if you plan to bake on Saturday morning, take your starter out Thursday morning and feed it. Feed it again Friday morning and potentially Friday evening, depending on how quickly it becomes active.
To feed your starter, measure out a small amount of your existing starter (e.g., 25 grams). Discard the rest (or use it in discard recipes like pancakes or crackers). Mix the measured starter with equal weights of lukewarm water (e.g., 50 grams) and flour (e.g., 50 grams). Stir until well combined, ensuring no dry flour remains. Place the mixture back in its jar or container, cover loosely, and let it sit at room temperature (ideally 70-80°F or 21-27°C) until it's bubbly and has significantly increased in volume, typically doubling or more.
Feeding Your Starter
Feeding your starter provides the necessary nutrients for the wild yeast and bacteria to multiply and produce carbon dioxide, which is essential for leavening. The ratio of starter, water, and flour you use for feeding affects the speed and characteristics of its activity. A 1:1:1 ratio (starter:water:flour by weight) is common for frequent feeding, while a 1:2:2 ratio provides more food, allowing the starter to stay active longer before needing another feed, which is useful if you can't feed it every 12 hours.
For example, using a 1:1:1 ratio, you might combine 25g starter, 50g water, and 50g flour. With a 1:2:2 ratio, you might combine 25g starter, 100g water, and 100g flour. Consistency in feeding time and temperature helps build a strong, reliable starter. Observe how long it takes your starter to reach its peak after feeding; this timing helps you plan your baking schedule. Aim to use your starter when it's at its peak or just beginning to fall.
Testing Starter Readiness: The Float Test
A simple and effective way to check if your sourdough starter is active enough to leaven bread is the float test. This test works because an active starter, full of carbon dioxide bubbles, will be less dense than water. To perform the test, gently take a small spoonful of your starter from the peak of its rise after feeding – try not to deflate it.
Carefully drop this spoonful into a glass of room-temperature water. If the starter floats on the surface, it is likely ready to use for your easy beginner sourdough boule recipe. If it sinks to the bottom, it needs more time to ferment and develop gas, or it may need more consistent feeding to build strength. Remember that the float test is a good indicator but not the only indicator; observing consistent doubling or tripling in volume is also a strong sign of readiness.
Step 2: Autolyse: Hydrating the Flour
Autolyse is a simple yet powerful technique that involves mixing just the flour and water in your recipe and letting it rest before adding the starter and salt. This step allows the flour to fully hydrate and gives the gluten-forming proteins (glutenin and gliadin) a head start in bonding and developing, without the interference of salt or the acidity of the starter.
For a typical easy beginner sourdough boule recipe, you might mix 500g flour with 350g water (a 70% hydration dough based on flour weight). Combine these two ingredients in your mixing bowl until no dry flour remains – it will look shaggy and not smooth. Cover the bowl and let it rest for anywhere from 30 minutes to 1 hour, or even longer for certain flours.
Mixing Flour and Water
The process of mixing for the autolyse is straightforward. Measure your specified amount of flour into your mixing bowl. Then, measure your water (using the temperature appropriate for your desired dough temperature) and pour it over the flour. Use your hands, a spoon, or a dough whisk to combine the two ingredients.
Mix until all the flour is incorporated and there are no dry pockets. The mixture will be rough and somewhat sticky, not smooth like a developed dough. Avoid kneading at this stage; the goal is just to hydrate the flour. Once mixed, cover the bowl to prevent the surface from drying out during the rest period. A plastic shower cap or plastic wrap works well.
The Benefits of Autolyse
Allowing the flour and water to rest during the autolyse phase offers several advantages that contribute to a better sourdough boule. Firstly, it allows for complete hydration of the flour particles. This leads to a more extensible dough that is easier to handle and shape later on.
Secondly, the autolyse process kickstarts enzymatic activity within the dough, specifically the breakdown of starches into simpler sugars that the yeast can feed on, and the initial development of the gluten network without manual kneading. This means you'll likely need less kneading or fewer stretch and folds later to achieve a well-developed dough structure, making the overall process simpler for a beginner. It's a passive step that yields significant benefits for your easy beginner sourdough boule recipe.
Step 3: Mixing the Dough: Combining Starter and Salt
After the autolyse period is complete, it's time to incorporate your active sourdough starter and the salt into the hydrated flour mixture. This step marks the beginning of the bulk fermentation phase, where the yeast starts working on the sugars and the bacteria begin producing acids for flavor. Your dough will likely feel a bit softer and more pliable after the autolyse.
Gently spread your measured amount of active starter over the surface of the autolysed dough. Sprinkle the salt over the starter. Now, you need to mix these in. This can be done by hand using a "pinching and folding" method or by briefly using a stand mixer with a dough hook. The goal is to evenly distribute the starter and salt throughout the dough.
Adding Starter and Salt
Incorporating the starter and salt requires mixing them thoroughly into the dough. If mixing by hand, use wet hands to prevent sticking. Pinch sections of the dough and fold them over the starter and salt, repeating until they seem mostly incorporated. Then, you can perform a series of folds within the bowl, bringing the edge of the dough up and over the center, rotating the bowl a quarter turn, and repeating. Do this for 5-10 minutes until the starter and salt are integrated.
Using a stand mixer, mix on a low speed (like speed 1 or 2) for 5-8 minutes. The dough will initially be sticky but should start to pull away from the sides of the bowl as gluten develops. Stop occasionally to scrape down the sides. Ensure there are no streaks of unmixed starter or visible salt granules. This thorough mixing is key for consistent leavening and flavor in your easy beginner sourdough boule recipe.
Developing Gluten
While the autolyse starts gluten development passively, the mixing stage actively builds the gluten network. Gluten is the protein structure that gives bread dough its elasticity and strength, allowing it to trap the carbon dioxide produced by the yeast. Kneading or performing folds stretches and aligns these protein strands, creating a strong framework.
After the initial mixing of starter and salt, you'll continue to develop gluten through a series of stretch and folds during the bulk fermentation (discussed in the next step). The dough should gradually become smoother, more elastic, and less sticky with each round of folds. A well-developed dough, essential for a good oven spring and open crumb in your easy beginner sourdough boule recipe, will pass the "windowpane test" – you should be able to gently stretch a small piece of dough thin enough to see light through it without it tearing.
Step 4: Bulk Fermentation: The First Rise
Bulk fermentation, also known as the first rise, is the crucial period where the dough develops flavor, texture, and volume. It begins after the starter and salt are mixed in and ends when you divide and pre-shape the dough. During this time, the wild yeast consumes sugars and produces carbon dioxide gas, causing the dough to rise, while the bacteria produce organic acids, contributing to the characteristic sourdough tang.
The duration of bulk fermentation is highly dependent on the dough temperature and the activity of your starter. In a warm kitchen (75-80°F or 24-27°C), it might take 4-6 hours. In a cooler environment, it could take significantly longer. You are looking for visual cues: the dough should increase in volume by about 50-80% and show signs of fermentation like bubbles on the surface and along the sides of the bowl.
Understanding Bulk Fermentation
Bulk fermentation is where the magic of sourdough really happens. It's not just about the dough getting bigger; it's about the complex microbial activity transforming the simple ingredients into flavorful bread. The wild yeast produces gas, inflating the dough, while the lactic acid bacteria produce acids. These acids tenderize the gluten, improve the dough's extensibility, and contribute to the sour flavor.
Monitoring the dough's development during this phase is key to a successful easy beginner sourdough boule recipe. Don't rely solely on time; observe the dough's volume increase and its texture. It should feel airy and lighter. Over-fermenting can lead to a slack, difficult-to-handle dough and a dense final loaf, while under-fermenting results in a tight crumb and poor oven spring. Aim for the sweet spot where the dough is bubbly and has gained significant volume.
Performing Stretch and Folds
Stretch and folds are a technique used during the first few hours of bulk fermentation to build dough strength and equalize temperature throughout the mass. They gently develop gluten without aggressive kneading, trapping air and creating tension. Typically, you perform 3-5 sets of stretch and folds during the first 2-3 hours of bulk fermentation, with 30-60 minutes of rest time between each set.
To perform a stretch and fold, wet your hand slightly to prevent sticking. Grab the dough from one side of the bowl, stretch it upwards gently without tearing it, and then fold it back over the center of the dough. Rotate the bowl a quarter turn and repeat this process 3-4 times for one set of folds. The dough will resist stretching more with each subsequent set, indicating gluten development. After the last set of folds, let the dough rest undisturbed for the remainder of the bulk fermentation period.
Step 5: Shaping the Boule
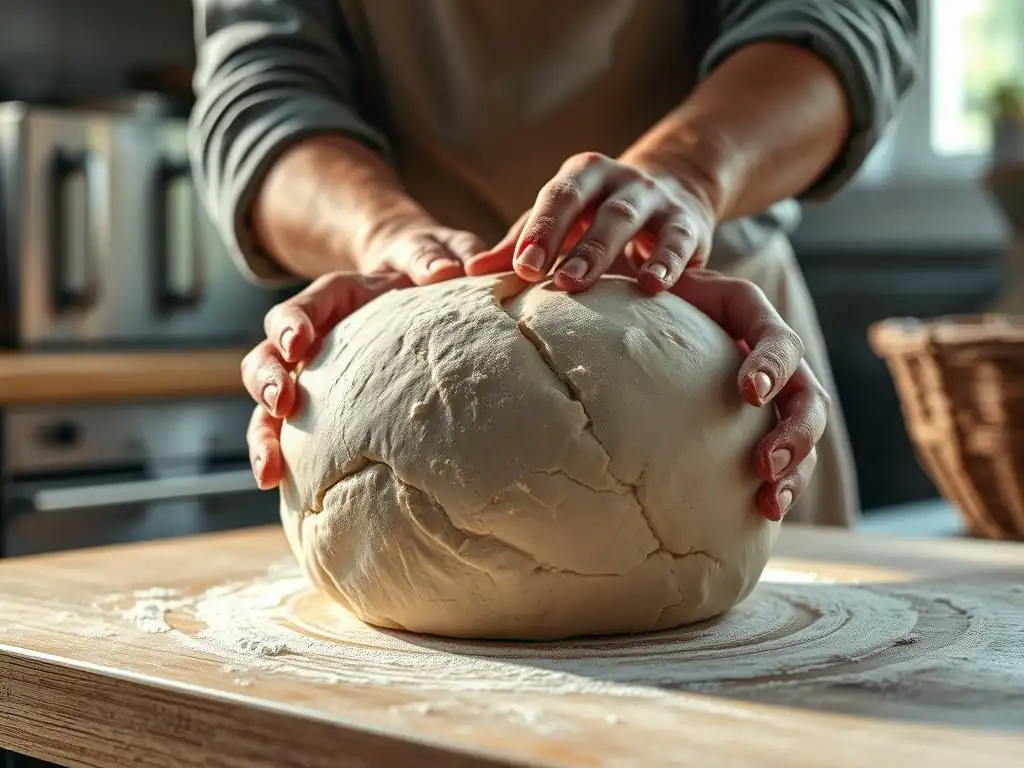
Once bulk fermentation is complete, it's time to transform the shaggy, expanded dough into a taut, round boule shape. This step is crucial for creating surface tension, which helps the loaf hold its shape during proofing and provides the structure needed for a good oven spring. Shaping involves two main stages: pre-shaping and final shaping.
Turn the dough out gently onto a lightly floured surface. Be careful not to degas it too much. For pre-shaping, you want to lightly form the dough into a rough ball or rectangle, depending on your final shape. The goal is to create a little initial tension on the surface.
Pre-Shaping
Pre-shaping helps organize the dough and build some initial surface tension before the final shaping. For a boule, the common method is to gently form the dough into a loose round. Lightly flour your work surface and the top of the dough. Using a bench scraper or your hands, gently cup the dough and pull it towards you while rotating it, tucking the edges underneath to create a rough ball.
Alternatively, you can gently fold the edges of the dough towards the center like an envelope, then flip it over and gently round it using the surface friction. The pre-shaped dough should look like a somewhat neat mound. Cover the pre-shaped dough with a clean kitchen towel or plastic wrap and let it rest for 20-30 minutes. This resting period allows the gluten to relax, making the final shaping much easier and preventing the dough from tearing.
Final Shaping Techniques
After the short rest, the dough is ready for final shaping into a tight boule. This step is critical for giving your easy beginner sourdough boule recipe its final structure and surface tension. Lightly flour your work surface again. Gently flip the pre-shaped dough over so the seam side is up.
There are several techniques for final boule shaping, but a common one involves folding the dough into a neat package. Stretch the dough gently into a rough rectangle. Fold the top edge down to the center, then the bottom edge up to the center, overlapping slightly. Now, fold one side over to the center, and then the other side over.
Flip the dough over so the seam is underneath and use your hands or a bench scraper to gently cup the dough and rotate it, building tension on the surface against the work surface. The goal is a smooth, taut ball. Place the shaped dough seam-side up into a floured proofing basket.
Step 6: Proofing: The Second Rise
Proofing, also known as the final rise, is the period after shaping where the dough rests and continues to ferment before baking. This is where the shaped boule gains its final volume and the flavors continue to develop. The duration and temperature of proofing significantly impact the final loaf.
The most common method for an easy beginner sourdough boule recipe is cold proofing in the refrigerator. This slows down fermentation considerably, allowing for a longer proof (8-16 hours or even up to 24 hours). Cold proofing develops more complex flavors and makes the dough much easier to score straight from the fridge. Room temperature proofing (2-4 hours) is faster but requires closer monitoring to prevent over-proofing and can result in a slightly less tangy flavor.
Choosing the Right Proofing Basket
A proofing basket (banneton) is highly recommended for the final rise of your sourdough boule. It provides support to the shaped dough, preventing it from spreading outwards and helping it maintain its round shape as it expands. Bannetons are typically made from cane or wood pulp and come in various sizes and shapes. For a standard boule recipe using 500g of flour, a 9-inch round banneton is a good size.
Before placing the shaped dough in the basket, you need to flour the basket generously to prevent the dough from sticking. Rice flour is often preferred because its starch structure is less likely to be absorbed by the dough, making it very effective for dusting. You can also use a mixture of rice flour and bread flour (e.g., 50/50). Simply sprinkle the flour into the basket and tap out the excess. Place the shaped dough seam-side up into the floured basket.
Cold Proofing vs. Room Temperature Proofing
Deciding between cold proofing and room temperature proofing depends on your schedule and desired outcome for your easy beginner sourdough boule recipe. Cold proofing in the refrigerator (at around 38-40°F or 3-4°C) slows down fermentation significantly. This extended, slow fermentation allows for deeper flavor development and the accumulation of more organic acids, resulting in a tangier loaf. It also makes the dough firmer and easier to score cleanly just before baking.
Room temperature proofing (at around 70-75°F or 21-24°C) is much faster, typically taking 2-4 hours. The dough will increase in volume more rapidly. This method is convenient if you want to bake the same day you mix the dough. However, it requires careful monitoring; over-proofing at room temperature happens quickly and can lead to a slack dough that collapses in the oven. For beginners, cold proofing is often recommended due to its flexibility and the ease of handling the cold dough for scoring and transferring to the oven.
Step 7: Baking the Sourdough Boule
Baking is the moment of truth for your easy beginner sourdough boule recipe! The goal is to achieve maximum oven spring, develop a beautiful, crisp crust, and ensure the interior is fully cooked. Baking sourdough typically involves starting at a high temperature in a humid environment (usually created by a lidded Dutch oven) and then finishing the bake at a slightly lower temperature in a dry environment.
Preheating your oven and baking vessel is a critical first step. Place your Dutch oven (with its lid) in the oven while it preheats. This ensures the pot is scorching hot, which helps create immediate steam and gives the dough a strong initial push.
Preheating Your Oven
Properly preheating your oven and Dutch oven is non-negotiable for achieving a good oven spring and crust on your sourdough boule. You need a high temperature to set the crust quickly while allowing the interior to expand. Preheat your oven to a high temperature, typically between 450°F and 500°F (230°C and 260°C).
Place your empty Dutch oven, with the lid on, inside the oven while it preheats. Allow at least 30-60 minutes for the oven and the pot to reach the target temperature. Using an oven thermometer can help you verify the actual temperature, as many home ovens are inaccurate. A sufficiently hot Dutch oven provides the necessary thermal mass to transfer heat efficiently to the dough.
Scoring the Boule
Scoring the dough just before it goes into the oven is essential. Scoring, or slashing, the surface of the dough creates controlled weak points that allow the dough to expand predictably as the gases inside rapidly expand in the hot oven (the "oven spring"). Without scoring, the crust would set too quickly, and the expanding gases would find the weakest spot, often resulting in an uncontrolled burst or a less symmetrical loaf.
Use a sharp blade, such as a bread lame or a razor blade, to make quick, decisive cuts on the surface of your cold-proofed dough. Common scoring patterns include a single long slash down the center (which often creates a prominent "ear"), a cross pattern, or multiple parallel slashes. The depth and angle of the cuts (often holding the blade at a 30-45 degree angle for an ear) influence how the bread opens up. Practice makes perfect with scoring your easy beginner sourdough boule recipe.
Baking with Steam
Baking with steam is crucial during the initial phase of baking. Steam keeps the surface of the dough moist and elastic, preventing the crust from setting prematurely. This allows the dough to expand fully during the oven spring, resulting in a larger, airier loaf with a more open crumb. The lidded Dutch oven method is the easiest way to achieve a steamy environment in a home oven.
Carefully transfer your scored dough from the proofing basket into the preheated Dutch oven (using parchment paper can make this easier and safer). Place the lid back on the Dutch oven and bake at the high temperature for the first part of the bake, typically 20-25 minutes. After this initial period, remove the lid. The crust will have set but will still be pale. Reduce the oven temperature slightly (e.g., to 425-450°F or 220-230°C) and continue baking for another 20-25 minutes, or until the crust is deep golden brown and the internal temperature of the loaf reaches 205-210°F (96-99°C).
Step 8: Cooling and Enjoying
The final, and perhaps most difficult, step is patience! Once your beautiful sourdough boule is out of the oven, it needs time to cool completely on a wire rack. This step is just as important as any other in the baking process.
Allowing the bread to cool allows the internal structure to set properly and prevents the inside from becoming gummy. It also allows the flavors to fully develop. Slicing into a hot loaf releases steam too quickly, which can negatively impact the crumb texture.
Allowing the Boule to Cool Completely
It might be tempting to slice into your warm, fragrant easy beginner sourdough boule recipe immediately, but resisting this urge is vital for the best texture and flavor. Place the loaf on a wire cooling rack, ensuring air can circulate around the entire loaf.
Allow the bread to cool for at least 1-2 hours, or preferably longer, before slicing. During this time, residual heat continues to cook the interior slightly, and moisture redistributes throughout the loaf. The crust will also crisp up as it cools. Cutting too early can result in a gummy, dense interior.
Slicing and Serving
Once your sourdough boule has cooled completely, it's ready to be sliced and enjoyed! Use a sharp serrated bread knife for clean cuts through the crisp crust and chewy interior.
Sourdough is incredibly versatile. Enjoy slices simply with butter, use it for sandwiches, make toast, or serve it alongside soups and stews. The satisfaction of slicing into a loaf you made yourself, especially your first easy beginner sourdough boule recipe, is immense. Admire the open crumb structure you worked to achieve!
Troubleshooting Your Sourdough Boule
Even with a detailed easy beginner sourdough boule recipe, challenges can arise. Understanding common issues helps you identify what went wrong and improve your next bake. Don't be discouraged by imperfections; each loaf teaches you something new about the process.
Common problems include loaves that are dense, flat, or have a tough crust. Often, these issues are related to the starter's activity, fermentation timing, or shaping technique. Keeping a baking journal can be helpful to track variables like room temperature, bulk fermentation time, and starter behavior, allowing you to pinpoint potential causes for problems.
Common Problems and Solutions
One frequent issue is dough that is difficult to handle – either too sticky or too stiff. If it's too sticky, it might be over-hydrated (too much water) or under-developed (needs more stretch and folds). If it's too stiff, it could be under-hydrated or the flour absorbed less water than expected. Adjusting hydration slightly in future bakes based on your flour and environment helps.
Another common problem is a lack of oven spring, resulting in a flat loaf. This can be caused by an inactive starter, under-proofing (not enough gas production), or over-proofing (gluten structure weakened, gases escaped). Poor shaping can also contribute, as insufficient surface tension won't support the loaf's rise. Observing your dough's activity and feel throughout the process is key to diagnosing these issues in your easy beginner sourdough boule recipe.
Addressing Dense Sourdough
A dense crumb is a common disappointment in sourdough baking. It typically indicates that the dough did not rise sufficiently during fermentation and baking. The most frequent causes are using an inactive or weak sourdough starter – if your starter isn't doubling reliably, it won't provide enough lift. Ensure your starter is vigorous and used at its peak.
Another major culprit for density is under-proofing during bulk fermentation. The dough needs enough time to develop sufficient gas bubbles. If you cut bulk fermentation short, the loaf won't have the necessary internal structure and gas volume to expand properly in the oven. Ensure your dough has increased in volume by at least 50% and shows visible signs of fermentation before moving to shaping. Baking at too low a temperature can also hinder oven spring and contribute to a dense result.
Fixing Flat Boules
A flat, pancake-like sourdough boule is often a sign of over-proofing or insufficient dough strength. Over-proofing occurs when the dough ferments for too long, especially at warm temperatures. The gluten structure, which holds the gas, breaks down, and the dough loses its tension and ability to hold shape. The dough might look very bubbly and spread out in the proofing basket. For a beginner sourdough boule recipe, monitoring bulk fermentation and potentially using cold proofing can help avoid this.
Insufficient dough strength can also lead to flatness. This might be due to using a low-protein flour, not developing the gluten enough during mixing and stretch and folds, or poor final shaping that doesn't create enough surface tension. Ensure you are using appropriate flour, performing enough folds to build strength, and practicing your shaping technique to create a taut surface on the boule before proofing.
Variations on the Basic Sourdough Recipe
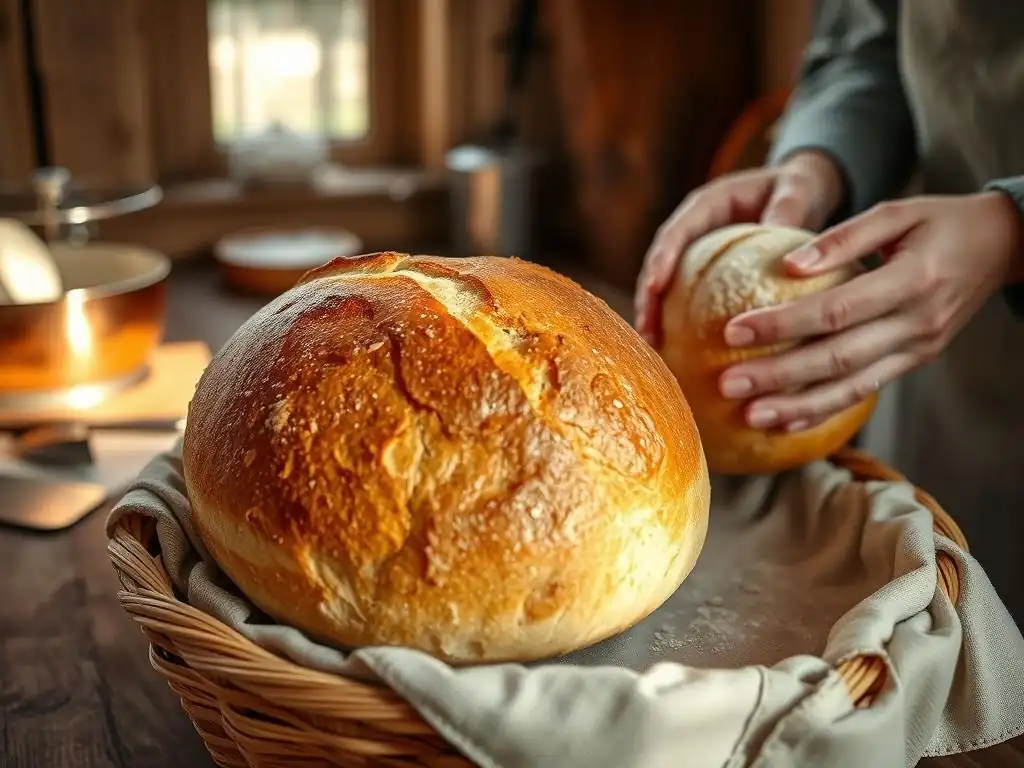
Once you've mastered the classic easy beginner sourdough boule recipe, you can easily explore variations to add different flavors and textures. Simple additions can transform your basic loaf into something unique and exciting.
Experimenting with different flours, mix-ins, and hydration levels allows you to personalize your sourdough baking. These variations often follow the same fundamental steps of mixing, bulk fermentation, shaping, and baking, with adjustments made for the specific ingredients used.
Adding Flavors: Herbs, Seeds, and More
Incorporating mix-ins is a fantastic way to add flavor and texture to your sourdough boule. Seeds like sesame, poppy, sunflower, or pumpkin seeds can be added to the dough during the initial mixing phase. A common approach is to add them as a percentage of the total flour weight, perhaps 5-10% for a noticeable but not overwhelming presence. You can also roll the shaped dough in seeds before placing it in the proofing basket.
Fresh or dried herbs, roasted garlic, olives, or cheese are other popular additions. Herbs like rosemary or thyme pair wonderfully. Add these mix-ins during the last set of stretch and folds or just before shaping to ensure they are evenly distributed. Be mindful that additions like olives or cheese can add moisture or fat, which might slightly alter dough handling or require minor adjustments to hydration for your easy beginner sourdough boule recipe.
Whole Wheat Sourdough Adaptation
Adapting the basic recipe to include whole wheat flour adds nutty flavor and increased nutritional value. Whole wheat flour absorbs more water than white flour due to the presence of the bran and germ, and its sharper edges can interfere slightly with gluten development.
To incorporate whole wheat into your easy beginner sourdough boule recipe, start by substituting a portion of the white flour, perhaps 20-30% of the total flour weight. You will likely need to increase the hydration slightly (add a little more water) to achieve a similar dough consistency, as whole wheat is thirstier. The bulk fermentation might also proceed a bit faster due to the nutrients in the whole wheat flour. Pay attention to the dough's feel and appearance rather than strictly following the clock when adapting.
Storing Your Sourdough Boule
Proper storage is essential to keep your homemade sourdough boule fresh and delicious for as long as possible. Unlike commercial bread with preservatives, sourdough relies on its natural acidity for some preservation, but it will still eventually dry out.
The best storage method depends on how quickly you plan to consume the bread. For short-term storage (a day or two), simply leaving the cut side down on a cutting board can work. For longer storage, preventing moisture loss is key.
Best Practices for Keeping Your Bread Fresh
For optimal freshness, store your sourdough boule at room temperature, not in the refrigerator, which can actually make bread stale faster. Once cut, place the cut side down on a clean surface.
For longer storage at room temperature (2-3 days), wrap the cooled loaf loosely in a linen bread bag, a clean kitchen towel, or paper bag to allow some air circulation while preventing excessive drying. Avoid airtight plastic bags or containers for whole loaves at room temperature, as they can trap moisture and soften the crust. If the crust softens, you can crisp it up again by reheating the loaf in a hot oven for a few minutes.
Freezing Sourdough Bread
Freezing is an excellent option for storing your easy beginner sourdough boule recipe if you won't finish it within a few days. Properly frozen sourdough can maintain its quality for several months.
To freeze, ensure the loaf is completely cooled. You can freeze it whole, in halves, or presliced. For presliced bread, it's easy to take out just what you need. Wrap the bread tightly in plastic wrap, ensuring no surface is exposed to prevent freezer burn. Then, place the plastic-wrapped bread into a freezer bag or wrap it again in aluminum foil for an extra layer of protection. To thaw, unwrap the bread and let it sit at room temperature, or reheat slices directly from frozen in a toaster or oven.
Conclusion: Mastering the Art of Sourdough
Baking a classic sourdough boule from scratch is a journey, not a destination. It involves learning to work with a living ingredient – your starter – and understanding the subtle cues of dough development. While this easy beginner sourdough boule recipe provides a clear path, remember that environmental factors like temperature and humidity play a significant role, and your results will evolve with practice.
The process, from the initial mix to the final golden loaf, offers a unique connection to the food you eat. It's a rewarding craft that engages patience, observation, and a little bit of science.
The Satisfaction of Baking
There's a profound sense of accomplishment that comes with successfully baking your own sourdough boule. The aroma filling your kitchen, the visual appeal of a well-scored crust, and the satisfying crackle as you slice into it are unparalleled. Holding a warm loaf that you nurtured from flour and water is a tangible reward for your efforts.
This satisfaction extends beyond the physical product; it's about mastering a skill and connecting with a timeless tradition. Each successful loaf builds confidence, and even the less-than-perfect ones teach valuable lessons. The journey of baking an easy beginner sourdough boule recipe is as fulfilling as enjoying the final product.
Encouragement for Bakers
Don't be intimidated by the perceived complexity of sourdough. Every experienced sourdough baker started somewhere, and likely had a few "learning loaves" along the way! This easy beginner sourdough boule recipe is designed to break down the process into manageable steps.
Embrace the learning process, pay attention to your dough, and don't be afraid to experiment once you have the basics down. Your starter will strengthen over time, your dough-handling skills will improve, and soon you'll be consistently baking beautiful, delicious sourdough boules. Stick with it, trust the process, and enjoy the incredible journey of baking your own bread!
Frequently Asked Questions
How difficult is this sourdough boule recipe for a beginner?
This recipe is designed with beginners in mind. It emphasizes simple techniques and uses easy-to-find ingredients, making it an accessible entry point into sourdough baking.
What makes this sourdough boule "classic" and "basic"?
The recipe uses traditional sourdough methods with minimal ingredients – flour, water, salt, and a starter. It focuses on the fundamental steps of sourdough baking, providing a solid foundation.
How long does the entire process take from start to finish?
The entire process, including feeding the starter, mixing, bulk fermentation, shaping, proofing, and baking, can take around 24-48 hours. Most of this time is hands-off, allowing the dough to develop flavor.
What if I don't have a Dutch oven or a suitable baking vessel?
While a Dutch oven is recommended for achieving a crispy crust and optimal oven spring, you can use a baking stone or sheet pan. Be sure to create steam in the oven using ice cubes or a pan of hot water.
What are some common mistakes beginners make with sourdough and how can I avoid them?
Common mistakes include under-fermenting or over-fermenting the dough and using a weak or inactive starter. Pay close attention to the dough's texture and volume, and ensure your starter is bubbly and doubled in size before using.
Final Reflection: The Humble Boule, A Gateway to Baking Joy
The art of sourdough baking, once perceived as an esoteric pursuit, is experiencing a remarkable resurgence, fueled by a desire for homemade goodness and a deeper connection to the food we consume. This simple boule recipe, designed for beginners, acts as a testament to the accessibility and rewarding nature of this ancient craft. The seemingly complex process, broken down step-by-step, reveals itself to be surprisingly manageable, even enjoyable.
The journey of creating a sourdough boule is more than just following a recipe; it's a process of nurturing life, of patiently observing the subtle changes in the dough, and of experiencing the profound satisfaction of crafting something beautiful and delicious from simple ingredients. The best things in life are simple, but not easy.
This quote perfectly encapsulates the essence of sourdough baking – the simplicity of the ingredients belies the dedication and patience required, yielding a reward far exceeding the effort. The enduring appeal of sourdough lies not only in its taste but also in the meditative process, a welcome respite from the frenetic pace of modern life.
Now, I invite you to embark on your own sourdough journey. Don't be intimidated by the seemingly complex process; embrace the challenge, savor the learning, and relish the incredible aroma and taste of a freshly baked boule. The satisfaction of creating something with your own hands, something so fundamentally connected to the earth and its bounty, is a truly enriching experience. So, gather your ingredients, find your rhythm, and let the magic of sourdough unfold. Your first perfect boule awaits.
Unleash Your Inner Baker: Craft the Perfect Sourdough Boule!
Thanks for joining us on this sourdough journey! We hope you gained valuable insights and newfound confidence in tackling this classic bread. Now it's time to put your knowledge into action.
- Bake your own masterpiece: Using the recipe and techniques outlined above, try baking your own sourdough boule. Remember, practice makes perfect!
- Share your creations: Post a picture of your finished loaf on social media and tag us – we'd love to see your baking successes (and even your learning moments! ).
- Explore sourdough variations: Consider experimenting with different flours or adding unique ingredients to personalize your boule. What exciting flavors will you discover?
Ready to transform your kitchen into a bakery? What unique twist will you add to your first (or next!) sourdough boule?