
Achieving That Perfect Chocolate Shine: A Simple Tempering Guide.

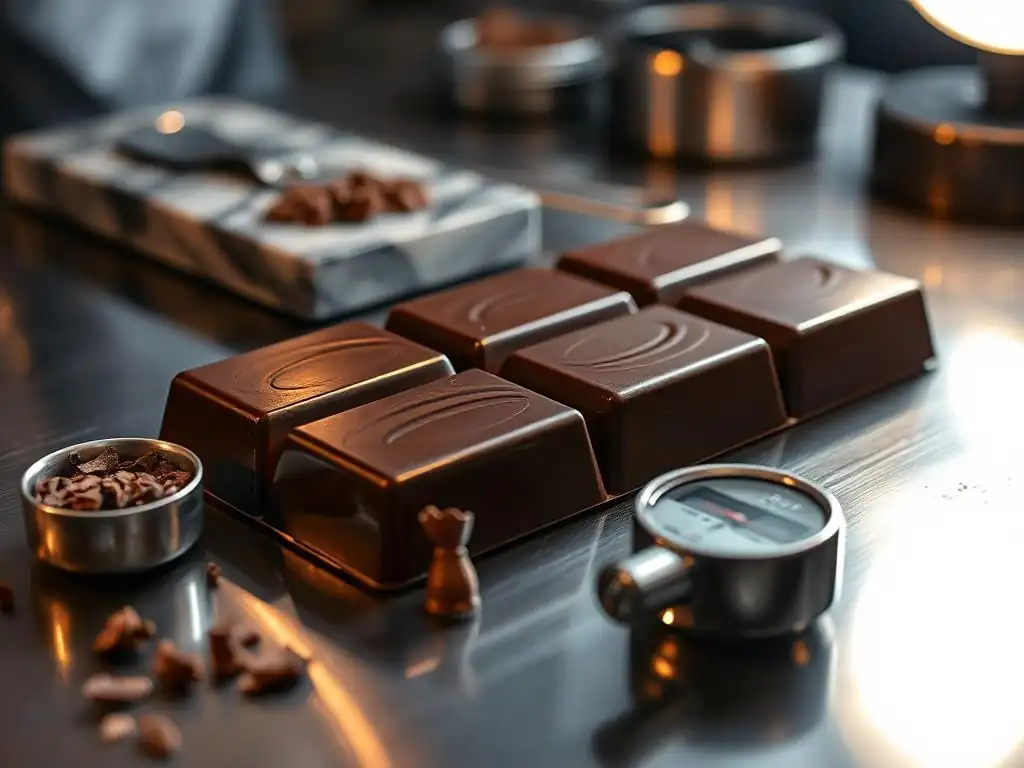
Welcome to BakeWithEase, your companion on the journey to baking brilliance! Ever wondered how professional chocolatiers achieve that mesmerizing shine and satisfying snap in their creations? Unlock the secrets with our Chocolate Tempering Guide for Beginners, a crucial step in mastering advanced baking techniques. Prepare to transform your chocolate work from amateur to exquisite, and discover the simple steps to a flawless finish. Intrigued? Let's get started!
- Achieving That Perfect Chocolate Shine: A Simple Tempering Guide for Beginners
- Introduction to Chocolate Tempering: Unlock Professional Results at Home
- Chocolate Tempering Guide Beginners: Step-by-Step Instructions
- Method 1: The Seeding Method - A Beginner-Friendly Approach
- Method 2: Microwave Tempering - A Quick and Easy Option
- Method 3: Water Bath Tempering - Precise Temperature Control
- Troubleshooting Common Chocolate Tempering Problems
- Using Tempered Chocolate: Applications and Creative Ideas
- Tips and Tricks for Perfect Chocolate Tempering Every Time
- Advanced Chocolate Techniques: Beyond the Basics
- Conclusion: Mastering Chocolate Tempering for Baking Excellence
- Frequently Asked Questions
- Final Reflection: The Enduring Allure of a Perfect Chocolate Shine
- Unleash Your Inner Chocolatier: Master the Perfect Shine!
Achieving That Perfect Chocolate Shine: A Simple Tempering Guide for Beginners
Introduction to Chocolate Tempering: Unlock Professional Results at Home
Why Temper Chocolate? The Importance of Tempering for Baking
Tempering chocolate is a fundamental technique for anyone looking to elevate their baking and confectionery skills. It's the process of carefully melting and cooling chocolate to stabilize the cocoa butter crystals within it. Without proper tempering, chocolate sets with a dull, streaky appearance and a soft, crumbly texture.
Imagine dipping strawberries in melted chocolate only for them to melt in your hand or making chocolate bark that lacks that satisfying snap – that's often due to untempered chocolate. Tempering ensures your chocolate sets hard, has a beautiful glossy shine, breaks with a clean snap, and resists melting at room temperature, making it ideal for dipping, molding, and decorating.
Beyond aesthetics, tempering chocolate also impacts its shelf life and mouthfeel. Properly tempered chocolate is less prone to fat bloom (those grayish streaks that appear on the surface) and sugar bloom (a powdery white coating), which, while harmless, significantly detract from the chocolate's appeal. The stable crystal structure in tempered chocolate contributes to a smooth, melt-in-your-mouth texture rather than a waxy or grainy feel. For beginners learning chocolate tempering, understanding this 'why' is crucial – it's not just an extra step, but the key to professional-looking and tasting chocolate creations right from your own kitchen.
Understanding Chocolate Structure: Cocoa Butter and Crystal Formation
At the heart of chocolate tempering lies cocoa butter, the fat component of chocolate. Cocoa butter is polymorphic, meaning it can solidify into different crystal structures depending on how it cools. There are primarily six types of cocoa butter crystals, but only one, known as Form V, is stable and desirable for confectionary purposes. Form V crystals melt at just above body temperature (around 33.8°C or 93°F), providing that characteristic smooth melt. Untempered chocolate contains a mix of unstable crystal forms that melt at various lower temperatures, leading to the dull finish, poor snap, and susceptibility to bloom.
The goal of tempering is to encourage the formation of these stable Form V crystals while eliminating the unstable ones. This is achieved by carefully controlling the temperature during melting and cooling. When chocolate is fully melted, all crystal structures are gone.
As it cools, different crystal forms begin to appear at specific temperature ranges. By cooling the chocolate to a specific working temperature range (different for dark, milk, and white chocolate) and often adding already tempered chocolate (seeding), we promote the growth of Form V crystals. This controlled process ensures that when the chocolate sets, it contains a high proportion of these stable crystals, resulting in the desired shine, snap, and stability, making this chocolate tempering guide beginners friendly and effective.
Chocolate Tempering Guide Beginners: Step-by-Step Instructions
Gathering Your Tools: Essential Equipment for Tempering Chocolate
Successful chocolate tempering relies heavily on precise temperature control, which means having the right tools is essential. First and foremost, you'll need a reliable thermometer. An instant-read digital thermometer is highly recommended for its accuracy and speed, allowing you to monitor temperature changes quickly. Infrared thermometers can also work but measure surface temperature, so stirring is key.
Avoid old-fashioned candy thermometers that are slow to react. You'll also need a heatproof bowl – glass or stainless steel are good choices. Stainless steel conducts heat more evenly, which can be beneficial. For the water bath method, a saucepan that the bowl can sit over without touching the water is necessary.
Other helpful tools include a rubber spatula or silicone scraper for stirring and scraping down the sides of the bowl, ensuring even melting and cooling. A clean, dry work surface is also important, especially if you plan to use the tabling method (though this guide focuses on easier methods for beginners). For testing the temper, small pieces of parchment paper or the tip of a knife are useful.
Crucially, ensure all your equipment is completely dry; even a single drop of water can cause chocolate to seize, turning it into a grainy, unusable mass. Having these tools ready before you start is a key step in any simple chocolate tempering guide beginners can follow successfully.
Choosing Your Chocolate: Selecting the Right Chocolate for Tempering Success
Not all chocolate is created equal when it comes to tempering. For best results, you should use "real" chocolate, which contains only cocoa butter as the fat source, not vegetable oils or other fat substitutes. Look for terms like "couverture chocolate" on the packaging, as this signifies high-quality chocolate with a higher percentage of cocoa butter (typically 30-39%), specifically designed for tempering and professional applications.
Chocolate chips, especially standard baking chips, often contain stabilizers or less cocoa butter that prevent them from melting and tempering properly. They are designed to hold their shape during baking, not to achieve a glossy, snappy finish when melted and reset.
The type of chocolate – dark, milk, or white – will affect the specific temperature ranges you need to work with. Dark chocolate, with its higher cocoa solids and cocoa butter content, generally has the highest working temperature range (around 31-32°C or 88-90°F). Milk chocolate has a slightly lower range (around 30-31°C or 86-88°F) due to the added milk solids and sugar.
White chocolate, containing only cocoa butter, sugar, and milk solids (no cocoa solids), has the lowest range (around 28-30°C or 82-86°F). Using high-quality chocolate specifically intended for melting and tempering is perhaps the most important factor for beginners attempting to master this technique.
Method 1: The Seeding Method - A Beginner-Friendly Approach
Step 1: Melting the Chocolate - Gentle Heating Techniques
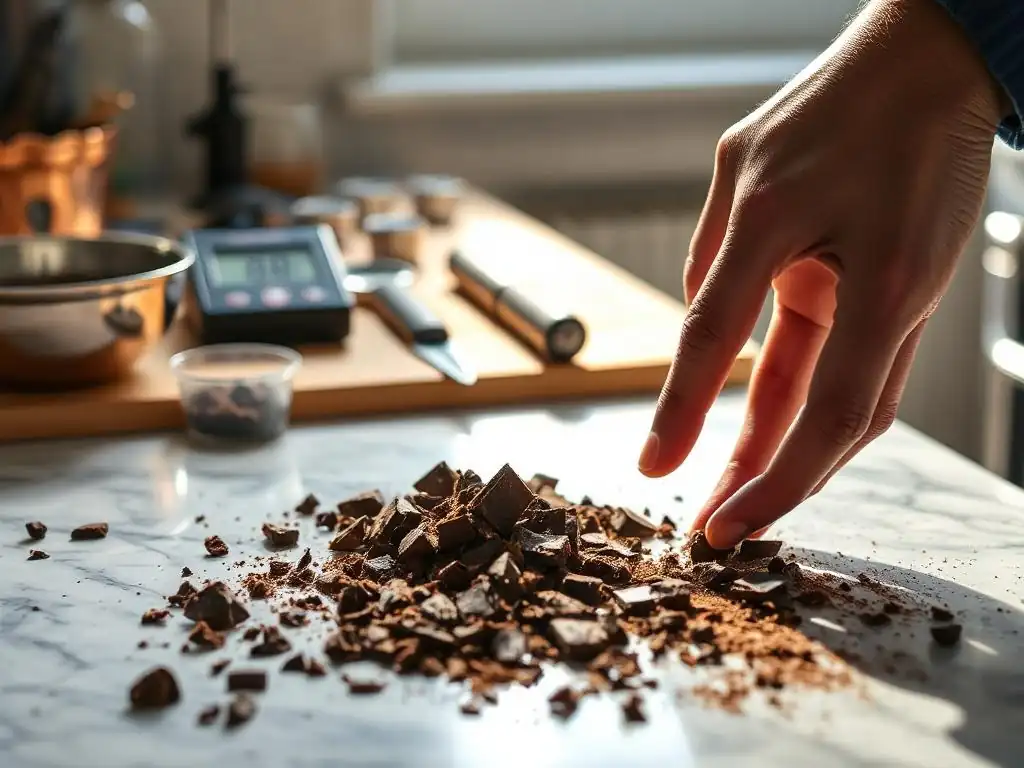
The first step in the seeding method for this chocolate tempering guide beginners can easily follow is melting the chocolate. It's crucial to melt the chocolate gently to avoid burning it or overheating it initially, which can destroy the necessary cocoa butter crystals. Chop your chocolate into small, uniform pieces; this helps it melt more evenly.
Place about 2/3 of your chopped chocolate into a dry, heatproof bowl. You can use a double boiler setup (a bowl set over a pot of simmering, not boiling, water, ensuring the bottom of the bowl doesn't touch the water) or carefully use a microwave.
When using a double boiler, stir the chocolate frequently as it melts. The steam from the simmering water provides gentle, indirect heat. For microwave melting, use short bursts of power (20-30 seconds at a time) on medium power (around 50%), stirring thoroughly after each burst.
Even when it looks mostly melted, stir it for another minute or two; residual heat will melt the remaining small pieces. Heat the chocolate until it reaches a specific temperature: for dark chocolate, aim for around 45-50°C (113-122°F); for milk or white chocolate, aim for 40-45°C (104-113°F). This initial melting phase destroys all the unstable cocoa butter crystals.
Step 2: Seeding with Callets - Adding Tempered Chocolate for Crystal Formation
Once your chocolate is fully melted and has reached the target temperature from Step 1, remove it from the heat source (either off the double boiler or out of the microwave). This is where the "seeding" comes in. Add the remaining 1/3 of your unmelted, finely chopped chocolate or chocolate callets (small drops of chocolate that are already tempered) to the melted chocolate in the bowl.
Stir continuously with your spatula. The purpose of adding this solid chocolate is twofold: it helps cool down the melted chocolate, and the stable Form V crystals present in the solid chocolate act as "seeds," encouraging the melted cocoa butter to crystallize into the desirable Form V structure as it cools.
Keep stirring gently but consistently. As the chocolate cools and the solid pieces melt into the liquid, you'll notice the mixture starting to thicken slightly and become less fluid. Continue stirring until all the added chocolate pieces have melted completely and the temperature of the mixture drops into the working temperature range: around 31-32°C (88-90°F) for dark chocolate, 30-31°C (86-88°F) for milk chocolate, and 28-30°C (82-86°F) for white chocolate. This careful cooling and stirring phase is critical for building the stable crystal structure, a key part of this chocolate tempering guide beginners can master with practice.
Step 3: Testing for Temper - Checking the Chocolate's Stability
After reaching the correct working temperature and ensuring all the seed chocolate has melted, it's time to test if your chocolate is properly tempered. This is a crucial step before you start using the chocolate for your creations. The most common test involves dipping the tip of a knife, a spoon, or a small piece of parchment paper into the chocolate. Ensure the item you use is clean and completely dry. Just a thin layer of chocolate is needed for the test.
Once dipped, set the knife, spoon, or parchment aside at room temperature (ideally between 20-22°C or 68-72°F). Do not place it in the refrigerator, as this will force it to set regardless of whether it's tempered. A properly tempered chocolate sample should start to set and become firm within 3-5 minutes and should be completely solid within 10 minutes.
It should also have a smooth, glossy surface and no streaks or dull spots. If it sets quickly, is shiny, and snaps when broken (if testing on a solid piece), your chocolate is in temper and ready to use. If it remains soft, sticky, or sets with streaks and a dull finish, it's not tempered, and you'll need to reheat slightly and try seeding/cooling again.
Step 4: Maintaining Temper - Keeping the Chocolate in Working Condition
Once your chocolate is in temper and passes the test, you need to maintain it within its specific working temperature range while you use it. This is typically around 31-32°C (88-90°F) for dark, 30-31°C (86-88°F) for milk, and 28-30°C (82-86°F) for white chocolate. If the temperature drops below this range, the chocolate will start to solidify in the bowl, becoming too thick to work with. If it goes too high, the stable Form V crystals you've worked hard to create will melt, and the chocolate will fall out of temper.
To maintain the temperature, you can return the bowl briefly to your gentle heat source (like the warm, but not simmering, water bath or very short microwave bursts) and stir constantly, checking the temperature frequently. Alternatively, for the water bath method, you can simply keep the bowl over the warm water, stirring regularly. The key is to add just enough heat to keep it fluid without exceeding the working temperature.
If the chocolate starts to thicken, gently warm it a degree or two while stirring until it's fluid again. If it falls out of temper (becomes dull or streaky when tested), you'll need to reheat it to the initial melting temperature and repeat the seeding and cooling process.
Method 2: Microwave Tempering - A Quick and Easy Option
Step 1: Microwaving the Chocolate - Short Bursts and Careful Monitoring
Microwave tempering is often hailed as the simplest chocolate tempering guide beginners can start with, primarily because it requires minimal equipment beyond a microwave and a bowl. Start by placing about 2/3 of your finely chopped real chocolate or callets into a microwave-safe bowl. Heat the chocolate in very short intervals, typically 20-30 seconds at a time, using medium power (50%) on your microwave. This low power and short duration are crucial to prevent overheating the chocolate.
After each heating interval, remove the bowl and stir the chocolate thoroughly with a rubber spatula. Even if the chocolate doesn't look melted after the first few bursts, stir it well; the heat distributes throughout the chocolate, and stirring helps promote even melting. Continue heating and stirring in these short bursts. You will notice the chocolate gradually softening and melting. Stop microwaving when there are still a few small, unmelted pieces visible in the bowl. Do not heat until it is completely liquid, as this often means you've gone past the ideal temperature range.
Step 2: Stirring and Cooling - Promoting Proper Crystal Formation
Once you've stopped microwaving with those small, unmelted pieces remaining, remove the bowl from the microwave. Now, stir the chocolate continuously and vigorously. The residual heat in the melted chocolate, combined with the stirring action, will cause those remaining solid pieces to melt. These solid pieces act as the "seeds" containing stable Form V crystals, similar to the seeding method. As you stir, the chocolate will continue to cool down, and the presence of these seed crystals encourages the entire batch to crystallize into the desired stable form.
Keep stirring until the chocolate is completely smooth and has reached its working temperature range: approximately 31-32°C (88-90°F) for dark, 30-31°C (86-88°F) for milk, and 28-30°C (82-86°F) for white chocolate. Use your digital thermometer to check the temperature periodically while stirring. The chocolate should thicken slightly as it cools into this range. This method relies on careful monitoring and the addition of seed crystals via the unmelted pieces to guide the tempering process effectively within the microwave environment.
Step 3: Testing for Temper - Ensuring a Smooth, Glossy Finish
After you've thoroughly stirred the chocolate to achieve the correct working temperature, it's time to verify that it is properly tempered before you begin using it for dipping, molding, or coating. This test confirms whether the stable Form V crystals have successfully formed and are dominant in your batch. Take a small, clean, dry piece of parchment paper or dip the tip of a clean, dry knife or spoon into the chocolate, coating it thinly.
Set the dipped item aside at a comfortable room temperature (around 20-22°C or 68-72°F). Avoid placing it in a refrigerator or freezer, as rapid cooling can sometimes give a false positive temper test. Observe the chocolate as it cools. A properly tempered chocolate sample should begin to set within 3-5 minutes and be completely firm and dry to the touch within 10 minutes.
It should also have a beautiful, even shine across its surface and no dull spots or streaks. If the chocolate sets quickly with a glossy finish and snaps cleanly, you have successfully tempered it using the microwave method. If it remains soft, sticky, or develops a dull appearance, it has not tempered correctly and will need to be re-melted and tempered again.
Method 3: Water Bath Tempering - Precise Temperature Control
Step 1: Setting Up the Water Bath - Gentle and Consistent Heat
The water bath method, also known as the double boiler method, provides a very gentle and consistent heat source, making it an excellent technique for beginners learning chocolate tempering as it reduces the risk of scorching. To set up a water bath, you'll need a saucepan and a heatproof bowl that fits snugly on top of the saucepan without touching the bottom.
Fill the saucepan with about an inch or two of water. It's crucial that the water level is low enough so that when the bowl is placed on top, the bottom of the bowl does not touch the water.
Bring the water in the saucepan to a gentle simmer over low to medium heat. Once simmering, reduce the heat to low or remove the pan from the heat source entirely if your stove holds heat well. The idea is to use the steam from the hot water to indirectly heat the bowl above. Place your heatproof bowl containing your finely chopped real chocolate or callets over the saucepan. Ensure no steam escapes from the sides and that absolutely no water or steam condensation gets into the chocolate, as even a tiny amount can cause it to seize.
Step 2: Melting the Chocolate - Avoiding Overheating
With your bowl of chopped chocolate placed over the gently simmering or hot water bath, begin stirring the chocolate with a dry rubber spatula. Stirring helps the chocolate melt evenly and prevents hotspots. Continue stirring as the chocolate slowly melts from the indirect heat of the steam. This method is slower than direct heat but offers much greater control, which is beneficial for beginners.
Heat the chocolate until it is fully melted and smooth, and reaches its initial melting temperature: approximately 45-50°C (113-122°F) for dark chocolate, and 40-45°C (104-113°F) for milk and white chocolate. Use your digital thermometer to check the temperature periodically. Do not overheat the chocolate beyond these temperatures, as this can make tempering more difficult.
Once the chocolate is completely melted and at the correct initial temperature, remove the bowl from the saucepan. Dry the bottom of the bowl thoroughly to ensure no water is introduced into the chocolate during the next steps. This controlled melting is foundational to a successful chocolate tempering guide beginners can rely on.
Step 3: Cooling and Stirring - Achieving the Correct Temperature
After removing the melted chocolate from the water bath and drying the bowl, the next critical step is to cool the chocolate down to its working temperature while encouraging the formation of stable Form V crystals. This is achieved by continuous stirring. Stir the chocolate gently but consistently with your spatula. As you stir, the chocolate will begin to cool down.
Monitor the temperature with your digital thermometer. The goal is to cool the chocolate to the specific working temperature range for the type of chocolate you are using: typically 31-32°C (88-90°F) for dark, 30-31°C (86-88°F) for milk, and 28-30°C (82-86°F) for white chocolate. Stirring helps distribute the heat evenly and promotes the correct crystal formation as the temperature drops.
Continue stirring until the chocolate reaches the lower end of its working temperature range and starts to thicken slightly. If it cools too much and becomes too thick to work with, you can gently warm it back up slightly (see Step 4 in the Seeding Method or Water Bath Tempering section for maintaining temper).
Step 4: Testing for Temper - Confirming Proper Tempering
Once your chocolate has been melted, cooled through stirring, and is within the correct working temperature range (31-32°C for dark, 30-31°C for milk, 28-30°C for white), you must perform the temper test to confirm that the stable Form V crystals have successfully formed. This step is identical regardless of the tempering method used and is essential for any simple chocolate tempering guide beginners follow.
Dip a small, thin, clean, and completely dry object, such as the tip of a knife, a metal spoon, or a strip of parchment paper, into the chocolate, coating it thinly. Set this test piece aside at room temperature, ideally between 20-22°C (68-72°F). Avoid putting it in the refrigerator, as this can give a misleading result. Observe the test piece over the next few minutes.
A properly tempered chocolate sample will begin to set within 3-5 minutes and should be firm, non-sticky, and completely set within 10 minutes. It should also exhibit a beautiful, even shine and show no signs of dullness or streaks. If your test piece sets quickly with a glossy finish, your chocolate is correctly tempered and ready for use. If it remains soft or develops a dull appearance, the tempering was unsuccessful, and you'll need to re-melt the chocolate and repeat the process.
Troubleshooting Common Chocolate Tempering Problems
Chocolate Seizing: What to Do When Chocolate Becomes Grainy
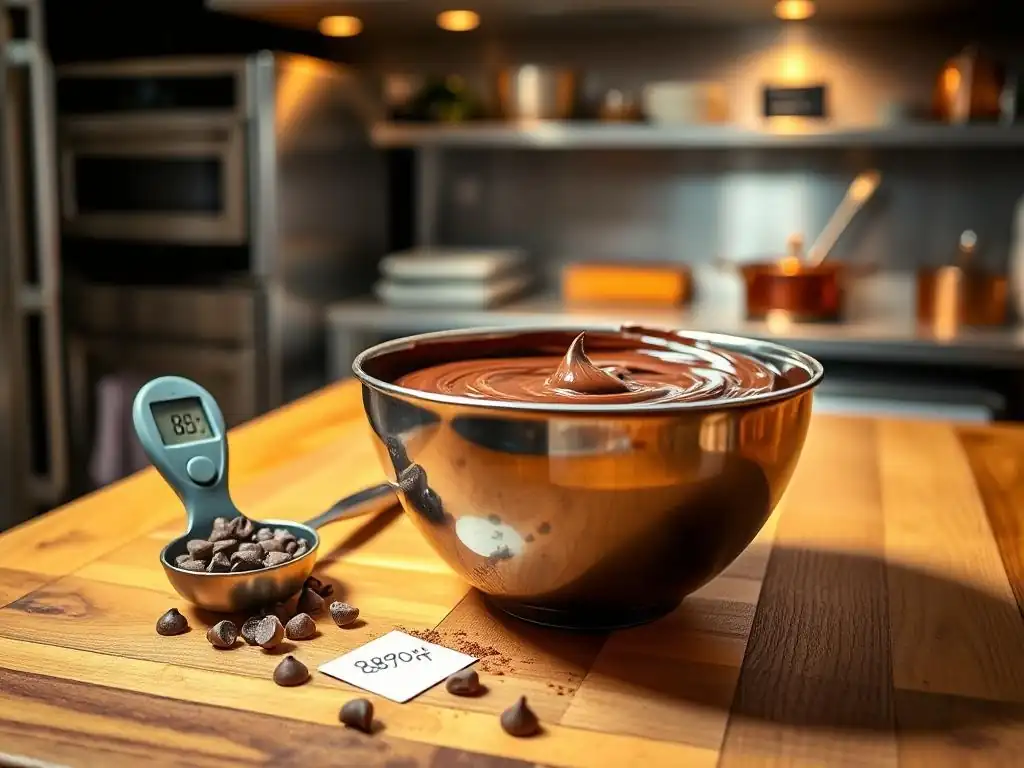
Chocolate seizing is one of the most common and frustrating problems encountered when melting or tempering, especially for beginners. It happens when chocolate comes into contact with even a tiny amount of water or steam while melting. The sugar crystals in the chocolate attract the water, forming a syrup that causes the chocolate solids to clump together, resulting in a thick, grainy, and unusable paste. This can occur if using a water bath where the bowl isn't sealed properly, allowing steam in, or if a wet utensil is used, or even if melting chocolate on a humid day.
Unfortunately, once chocolate has seized due to water, it's very difficult to return it to a smooth, fluid state suitable for tempering or coating applications. The best course of action is often to try and salvage it for other uses, like baking. You can sometimes "rescue" seized chocolate by stirring in a small amount of hot fat, such as melted cocoa butter, vegetable oil, or clarified butter, one tablespoon at a time, until it becomes a smooth, albeit much thinner, sauce.
However, this mixture will not temper correctly and is only suitable for applications like brownies or hot fudge sauce. The key takeaway for any chocolate tempering guide beginners should heed is prevention: ensure all equipment is bone dry and protect the chocolate from any contact with water or steam.
Bloom on Chocolate: Preventing and Addressing Fat Bloom and Sugar Bloom
Bloom refers to the unappetizing grayish or white coating that can appear on the surface of chocolate. There are two main types: fat bloom and sugar bloom. Fat bloom is the most common and occurs when chocolate is stored at inconsistent temperatures, especially warm ones. The unstable cocoa butter crystals (Forms I-IV) melt and migrate to the surface, recrystallizing into larger, visible crystals that create a dull, grayish film. This often happens if tempered chocolate gets too warm or if untempered chocolate cools slowly or at too high a temperature.
Sugar bloom, less common but also frustrating, occurs when chocolate is exposed to moisture, such as being moved from a cold refrigerator into a warm, humid room. Condensation forms on the surface, dissolving sugar crystals. As the moisture evaporates, the sugar recrystallizes into larger, visible crystals on the surface, creating a powdery white coating.
Both types of bloom affect appearance and texture (can feel gritty) but are harmless. The best prevention is proper tempering (to create stable crystals) and correct storage (cool, dry, consistent temperature, ideally 15-18°C or 59-64°F). Chocolate with bloom can often be re-melted and tempered properly to restore its shine and snap, as the blooming is a surface issue, not a fundamental problem with the chocolate itself.
Chocolate Not Setting: Understanding the Causes and Solutions
One of the most discouraging outcomes for beginners following a chocolate tempering guide is when their chocolate simply doesn't set properly, remaining soft, sticky, or even liquid after cooling. The primary reason for this is that the chocolate is not in temper.
This means the stable Form V cocoa butter crystals did not form sufficiently during the cooling process. This can happen if the initial melting temperature was too low (not destroying unstable crystals), if the chocolate wasn't cooled to the correct working temperature range, or if it was cooled too quickly or too slowly without proper stirring to encourage crystal formation.
If your chocolate isn't setting or sets with a dull, streaky finish, it indicates a failed temper. The solution is to re-melt the chocolate completely to the initial melting temperature (45-50°C for dark, 40-45°C for milk/white) to eliminate all existing crystal structures, and then repeat the tempering process carefully, paying close attention to temperature control and stirring.
Ensure you are using real chocolate with sufficient cocoa butter content, as chocolate with vegetable oil substitutes (like many baking chips) will not temper correctly. Patience and precise temperature monitoring are key to overcoming this common issue and achieving success with your simple chocolate tempering guide beginners attempt.
Using Tempered Chocolate: Applications and Creative Ideas
Making Chocolate Decorations: Creating Stunning Garnishes
Tempered chocolate is the secret ingredient for creating beautiful and professional-looking chocolate decorations that add flair to cakes, pastries, and desserts. Because tempered chocolate sets hard and maintains its shape at room temperature, it's perfect for piping intricate designs, making chocolate curls, or crafting delicate shards and geometric shapes. Simply pour or spread the tempered chocolate onto a piece of parchment paper or acetate sheet. For piped designs, transfer the chocolate to a piping bag with a fine tip.
While the chocolate is still fluid but starting to thicken slightly within its working temperature range, you can pipe names, patterns, or lace-like structures. For curls or shards, let the chocolate set partially until it's firm but still flexible, then use a scraper or knife to create curls or break/cut it into desired shapes.
Once fully set (which happens quickly when tempered), these decorations can be easily peeled off the paper/acetate and handled without melting or losing their shape, making them ideal for pre-making and adding to desserts just before serving. This application truly highlights the benefit of mastering a chocolate tempering guide beginners can use for impressive results.
Coating Desserts: Achieving a Smooth, Professional Finish
One of the most popular uses for tempered chocolate is coating various desserts to achieve a smooth, glossy, and snappy shell. This includes dipping candies, truffles, cake pops, fruit, and even biscuits. The key is to ensure the item you are dipping is cool and dry. Any moisture or warmth can cause the chocolate to seize or bloom. Holding the item with a dipping fork or skewer, immerse it fully in the bowl of tempered chocolate, ensuring it is completely covered.
Lift the item out, allowing excess chocolate to drip back into the bowl. You can gently tap the fork or skewer against the side of the bowl to remove excess chocolate and achieve a thin, even coating. For items like truffles, you can roll them directly in the tempered chocolate using two forks. Place the coated items on a piece of parchment paper to set at room temperature. Properly tempered chocolate will set quickly (within minutes) with a beautiful, hard, glossy shell that provides a satisfying snap when bitten into, unlike untempered chocolate which would set softly and dully.
Chocolate Candies and Truffles: Perfecting the Art of Chocolate Confectionery
Tempering chocolate is absolutely essential for making homemade chocolate candies and truffles that rival those from a professional chocolatier. When making molded chocolates, tempered chocolate ensures that the candies release easily from the molds and have a brilliant shine and a firm shell. Simply pour tempered chocolate into clean, dry polycarbonate or silicone molds, tap gently to remove air bubbles, pour out excess chocolate to create a shell (for filled candies), or fill completely (for solid candies), and scrape the top clean.
For truffles, once the ganache centers are rolled and chilled, dipping them in tempered chocolate provides that perfect, snappy coating. The stable structure of tempered chocolate prevents the cocoa butter from migrating out of the ganache and causing bloom on the surface over time. Mastering the techniques in this chocolate tempering guide beginners are learning allows you to create professional-quality bonbons, filled chocolates, and truffles that look stunning, have a delightful texture, and remain stable at room temperature, making them perfect for gifting or enjoying.
Tips and Tricks for Perfect Chocolate Tempering Every Time
Temperature Control: The Key to Success
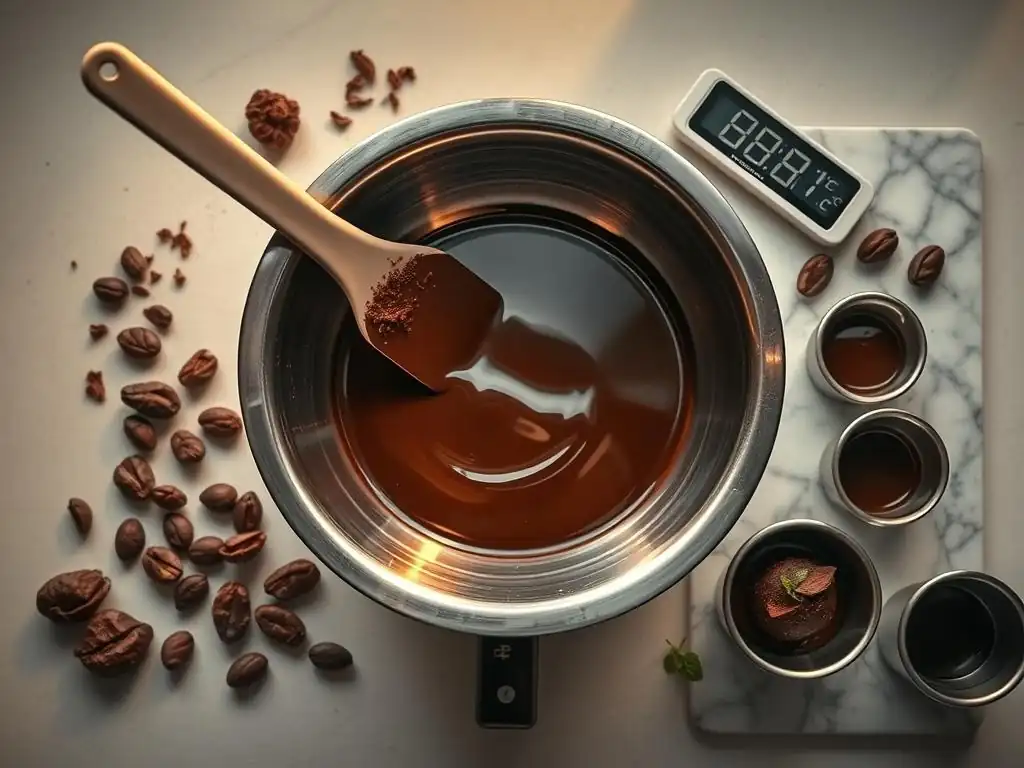
Precise temperature control is arguably the single most important factor in successful chocolate tempering. Each type of chocolate (dark, milk, white) has specific temperature ranges for melting, cooling, and working, and staying within these ranges is non-negotiable for achieving proper temper. For dark chocolate, melt to 45-50°C (113-122°F), cool to 31-32°C (88-90°F) for working. For milk chocolate, melt to 40-45°C (104-113°F), cool to 30-31°C (86-88°F) for working. For white chocolate, melt to 40-45°C (104-113°F), cool to 28-30°C (82-86°F) for working.
Using a reliable digital thermometer is crucial for monitoring these temperatures accurately. Don't guess! Even a few degrees outside the target range can result in a failed temper. During the cooling phase (seeding or stirring), watch your thermometer constantly. As the chocolate cools, it will start to thicken slightly as it enters the working range – this is a visual cue, but the thermometer is the definitive guide. Maintaining the chocolate within the working temperature while you use it is equally important; use gentle heat sources or stir frequently to prevent it from cooling too much or overheating.
Patience and Practice: Mastering the Art of Tempering
Chocolate tempering can feel intimidating at first, and it's common for beginners to not get it perfect on the first try. The process requires patience, attention to detail, and a willingness to practice. Don't be discouraged if your first attempt results in dull or streaky chocolate. Remember that chocolate can almost always be re-melted and re-tempered. Each attempt is a learning opportunity to refine your technique, understand how your equipment behaves, and become more attuned to the subtle changes in the chocolate's texture and flow at different temperatures.
Start with a simple chocolate tempering guide beginners can follow, like the seeding or microwave method, and use high-quality chocolate designed for tempering. Work in a cool, dry environment if possible, as high humidity can complicate the process. Pay close attention to each step, especially the temperature monitoring and the temper test. As you gain experience, you'll develop a feel for the chocolate's consistency at the correct working temperature, but always rely on your thermometer initially. Like any baking skill, mastery comes with repetition and learning from your attempts.
Storage of Tempered Chocolate: Maintaining Quality and Shine
Once you've successfully tempered chocolate and used it to create beautiful confections or decorations, proper storage is key to maintaining its quality, shine, and snap. Tempered chocolate should be stored in a cool, dry place with a consistent temperature, away from direct sunlight and strong odors. The ideal storage temperature for chocolate is typically between 15-18°C (59-64°F). Avoid storing tempered chocolate in the refrigerator if possible, as the cold, humid environment can cause sugar bloom and dull the surface.
If refrigeration is necessary due to a warm climate, place the chocolate in an airtight container to protect it from moisture and condensation when you eventually remove it. Allow chilled chocolate to come to room temperature slowly before handling. Properly stored tempered chocolate can maintain its temper, shine, and snap for several months, depending on the type of chocolate and its other ingredients (like fillings). Understanding proper storage is the final step in ensuring the beautiful results achieved through a simple chocolate tempering guide beginners master are enjoyed for as long as possible.
Advanced Chocolate Techniques: Beyond the Basics
Working with Different Types of Chocolate: Dark, Milk, and White Chocolate Tempering
While the fundamental principles of tempering remain the same across different types of real chocolate (melting unstable crystals, forming stable ones through controlled cooling and stirring), the specific temperature ranges vary significantly for dark, milk, and white chocolate. This difference is due to their differing compositions, particularly the percentage of cocoa solids and the presence of milk solids and sugar. Dark chocolate, having the highest proportion of cocoa solids and often cocoa butter, requires the highest melting and working temperatures.
Milk chocolate, with added milk powder and sugar, has slightly lower temperature requirements. White chocolate, containing no cocoa solids but milk solids and sugar, has the lowest temperature range.
Successfully tempering different chocolates means adhering strictly to their specific temperature guidelines. For example, cooling dark chocolate to the temperature range suitable for white chocolate (28-30°C) will likely result in it being too cold and setting too quickly in the bowl or failing to temper correctly. Conversely, keeping white chocolate at the working temperature for dark chocolate (31-32°C) will cause its stable crystals to melt, taking it out of temper. Mastering these distinct temperature profiles is a step beyond the basic simple chocolate tempering guide beginners initially learn, allowing for versatile work with various chocolate types.
Creating Custom Chocolate Blends: Experimenting with Flavors
Once comfortable with tempering basic dark, milk, and white chocolates, bakers can explore creating custom chocolate blends. This involves combining different types of tempered chocolate or adding flavorings to tempered chocolate to achieve unique tastes and colors. For instance, you could blend dark chocolate with milk chocolate to create a custom "dark milk" chocolate with a desired balance of bitterness and sweetness. Or, you could combine white chocolate with a small amount of tempered dark or milk chocolate to create a subtly colored and flavored chocolate for specific applications.
When creating blends, it's important to temper each type of chocolate separately according to its specific temperature guide, then combine the tempered chocolates while they are still within their respective working temperature ranges. The final mixture's working temperature will be somewhere between the temperatures of the chocolates being blended. Flavorings such as oil-based extracts, colored cocoa butter, or finely ground freeze-dried fruit powders can also be stirred into tempered chocolate.
It's crucial to use oil-based or fat-soluble flavorings and colors, as water-based ones will cause the chocolate to seize. This experimentation allows for creative confectionery limited only by imagination, building upon the foundational skills from a simple chocolate tempering guide beginners start with.
Conclusion: Mastering Chocolate Tempering for Baking Excellence
Tempering chocolate might seem like a complex technique at first glance, but with a clear chocolate tempering guide beginners can easily follow, like the steps outlined here, it's an achievable skill that unlocks a world of professional-quality baking and confectionery. Understanding the role of cocoa butter crystals and the importance of precise temperature control are the cornerstones. Whether you opt for the seeding method, microwave tempering, or the water bath technique, patience, attention to temperature, and practice are your best allies.
Successfully tempered chocolate transforms simple ingredients into glossy, snappy creations, from elegant dipped strawberries to perfect molded candies and delicate decorations. Troubleshooting common issues like seizing, bloom, or chocolate not setting becomes manageable once you understand their causes and solutions. By starting with quality chocolate, using the right tools, and following a reliable process, any beginner can master the art of chocolate tempering. Embrace the learning curve, practice these techniques, and enjoy the satisfying results of achieving that perfect chocolate shine in your own kitchen.
Frequently Asked Questions
What is chocolate tempering and why is it important?
Tempering is the process of stabilizing the cocoa butter crystals in chocolate. It results in a smooth, glossy finish and a satisfying snap, preventing bloom (unattractive white streaks).
Is tempering chocolate difficult for beginners?
While it can seem daunting, our guide breaks down chocolate tempering into easy-to-follow steps. With patience and the right tools, even beginners can achieve perfectly tempered chocolate.
What equipment do I need to temper chocolate?
You'll need a double boiler or heat-safe bowl, a thermometer (ideally a digital one), and something to stir with. A seed chocolate is also helpful for some methods.
What are the signs that my chocolate isn't properly tempered?
Untempered chocolate will likely be streaky, dull, and soft. It may also have a grainy texture and won't snap cleanly when broken.
Can I use any type of chocolate for tempering?
Yes, you can temper dark, milk, and white chocolate, but each requires slightly different temperature ranges. Our guide provides specific temperatures for each type.
Final Reflection: The Enduring Allure of a Perfect Chocolate Shine
The pursuit of that flawless chocolate sheen isn't merely a culinary pursuit; it's a testament to the power of precision and patience in achieving perfection. A perfectly tempered chocolate bar, with its captivating gloss and satisfying snap, elevates a simple treat into a work of art. This guide aimed to demystify the process for beginners, showing that achieving this seemingly elusive quality is within everyone's reach.
The impact of mastering chocolate tempering extends far beyond the kitchen. It's a skill that fosters a deeper appreciation for the nuances of ingredients and the importance of meticulous technique. The satisfaction derived from creating something beautiful and delicious is deeply rewarding. As the renowned pastry chef, Jacques Torres, once said, Chocolate is a magical ingredient. It's a canvas for creativity, and tempering is the key to unlocking its full potential.
This sentiment resonates deeply, highlighting the transformative power of mastering even the simplest of culinary techniques.
Now, it's your turn. Don't be intimidated by the seemingly complex process of chocolate tempering. Take the knowledge you've gained from this guide, experiment with different techniques, and embrace the journey of creating your own flawlessly shiny, delectable chocolate creations. The reward – the sheer joy of crafting something beautiful and delicious with your own hands – is well worth the effort. Remember, the perfect shine is within your grasp.
Unleash Your Inner Chocolatier: Master the Perfect Shine!
Thanks for taking the time to learn about chocolate tempering! You've now got the skills to create stunning, glossy treats. Ready to put your new knowledge into practice?
- Dive into your next baking project: Try tempering chocolate for your favorite recipe – that decadent ganache or perfectly smooth truffles are calling your name!
- Share your chocolate creations: Show off your perfectly tempered masterpieces on social media and inspire others! Use #BakeWithEaseShine to connect with our community.
- Experiment with different types of chocolate: Explore the nuances of dark, milk, and white chocolate tempering – discover your favorite!
What delicious chocolate adventure will you embark on first?