
From Peaks to Pies: How to Use Meringue in a Variety of Stunning Desserts

Welcome to BakeWithEase, your ultimate baking companion!
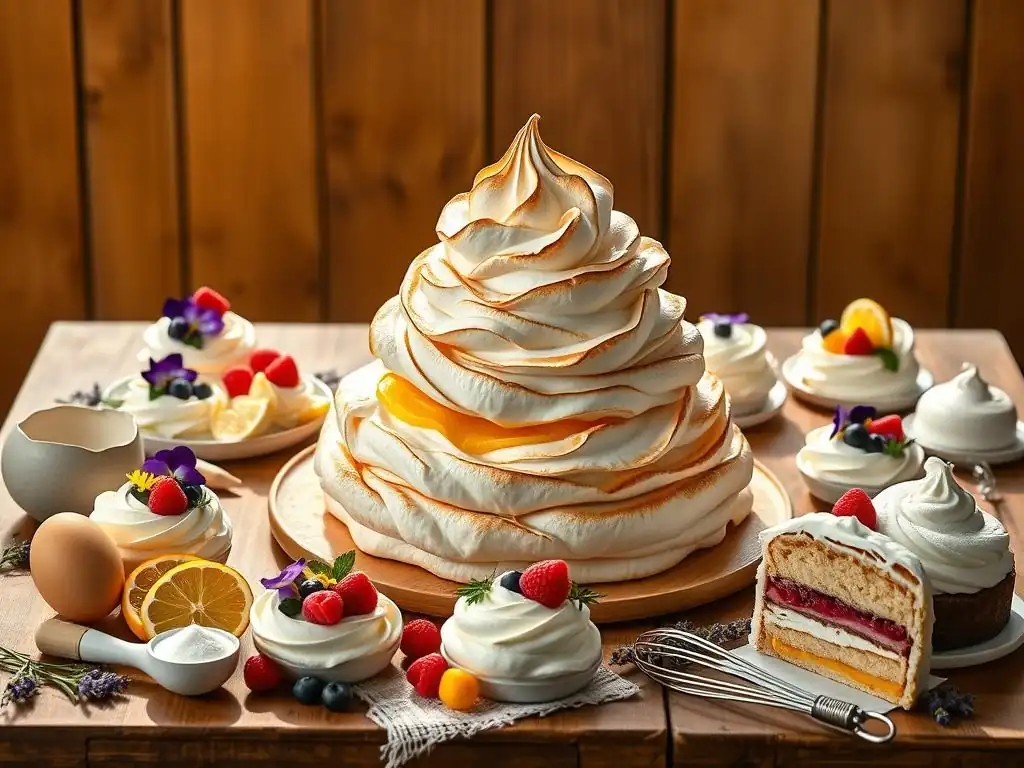
Ever wondered how to achieve that perfect, glossy meringue? Discover the secrets behind crafting stunning meringue desserts with our comprehensive guide. Whether you're dreaming of towering peaks or delicate pie toppings, prepare to unlock a world of possibilities and elevate your baking skills. Ready to explore easy meringue desserts recipes and transform your creations? Dive in and let's bake!
- The Art of Meringue: From Classic Pies to Elegant Desserts
- Understanding Meringue: A Foundation for Baking Success
- Meringue-Topped Pies: Elevating Classic Flavors
- Meringue Cookies and Pavlovas: Delicate and Airy Confections
- Meringue-Based Creations: Cakes and Other Desserts
- Troubleshooting Meringue Challenges
- Tips and Tricks for Meringue Mastery
- Conclusion: Unleashing the Potential of Meringue
-
Frequently Asked Questions
- What exactly is meringue, and what makes it so versatile in desserts?
- BakeWithEase.com mentions easy meringue dessert recipes. Are these truly beginner-friendly, even for someone new to baking?
- Can I use different types of sugar when making meringue, and will it affect the final outcome?
- I've heard meringue can be tricky. What are some common mistakes people make, and how can I avoid them when following BakeWithEase.com recipes?
- Beyond pies, what are some other "stunning desserts" I can create using meringue based on BakeWithEase.com's resources?
- Final Reflection: The Enduring Allure of the Meringue
- Unleash Your Inner Pastry Chef: Meringue Magic Awaits!
The Art of Meringue: From Classic Pies to Elegant Desserts
Understanding Meringue: A Foundation for Baking Success
What is Meringue and Its Role in Baking?
Meringue is a delicate confection made by whipping egg whites until stiff peaks form, then gradually adding sugar. This process transforms the liquid egg white into a stable foam, trapping air bubbles that expand during baking, creating a light and airy texture. The protein structure in the egg whites, primarily albumin, denatures and reforms around the air bubbles as they are whipped, providing the necessary stability. Sugar plays a crucial role not only in sweetening but also in stabilizing the foam; it dissolves and coats the protein network, preventing it from collapsing and giving the meringue a glossy sheen.
Beyond its simple composition, meringue is a versatile fundamental in the baker's toolkit. It can be baked low and slow to create crisp, melt-in-your-mouth cookies, or used as a topping for pies, providing a sweet contrast to tart fillings. When gently folded into batters, it can lighten cakes and soufflés, contributing to a tender crumb and impressive lift. Understanding the basic science behind whipping egg whites and incorporating sugar is the first step towards mastering a wide range of delightful meringue desserts recipes easy to execute once the foundational technique is grasped.
Exploring Different Types of Meringue: Italian, Swiss, and French
There are three primary methods for preparing meringue, each offering distinct characteristics and suited for different applications. French meringue is the simplest, made by whipping raw egg whites with sugar until stiff. It's the least stable and best used immediately, often folded into batters or baked into simple meringue cookies at low temperatures, typically around 200-225°F (90-110°C) for 1-2 hours. This method yields the classic light, crisp meringue.
Swiss meringue involves warming egg whites and sugar together over a water bath to about 130-140°F (55-60°C) before whipping until cool and stiff. The gentle heat dissolves the sugar more completely and partially cooks the egg whites, resulting in a more stable, glossy, and smooth meringue than the French method. It's excellent for frostings, like Swiss meringue buttercream, or for piping and lightly torching, offering greater reliability for decorative purposes in various meringue desserts recipes easy to elevate with a refined finish.
Italian meringue is the most stable, made by pouring hot sugar syrup (heated to about 240-250°F or 115-120°C) into whipping egg whites. This method fully cooks the egg whites and creates a very stable, dense, and glossy meringue ideal for mousses, buttercreams, and as a sturdy topping that can be easily torched without baking, providing a safe and stable option for many elegant meringue desserts.
Meringue-Topped Pies: Elevating Classic Flavors
Lemon Meringue Pie: A Timeless Delight
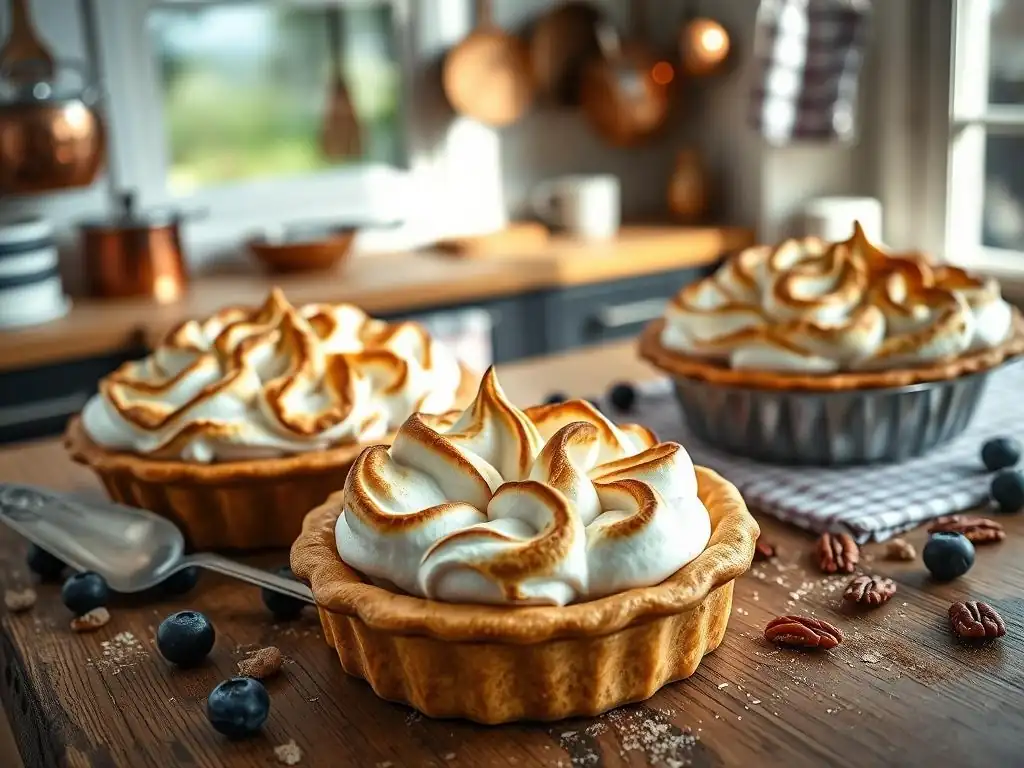
Lemon meringue pie stands as a quintessential example of how meringue can transform a simple fruit filling into an iconic dessert. The bright, tart lemon curd filling provides a perfect counterpoint to the sweet, airy meringue topping. The success of this pie hinges on the balance between the intensely flavored filling and the visually striking meringue. A common ratio for the curd involves approximately 1 cup of lemon juice, 1 to 1.5 cups of sugar, several egg yolks, and a thickening agent like cornstarch or flour, cooked until thick enough to hold its shape when cooled.
The meringue topping is typically a French or Swiss meringue piled high and baked or torched until golden. Achieving that signature height and beautiful browning requires careful technique. For a baked meringue, a temperature around 350-375°F (175-190°C) for a short period (5-10 minutes) is often used to brown the peaks quickly without overcooking the base, which can lead to weeping. Alternatively, using a kitchen torch provides instant browning and allows precise control over the color, making it a popular finish for many simple meringue desserts recipes, including this classic pie.
Crafting the Ideal Tangy Lemon Curd
Crafting the perfect tangy lemon curd involves balancing acidity, sweetness, and richness. Freshly squeezed lemon juice is essential for that vibrant, clean flavor; using bottled juice often results in a less bright taste. The ratio of sugar to lemon juice is key – too little sugar makes it overly sour, too much masks the lemon flavor. A typical starting point might be a 1:1 ratio by volume, adjusted to taste. Egg yolks contribute richness and help with thickening, while a starch like cornstarch or flour provides structure, preventing the curd from being too runny.
Cooking the curd requires patience and constant stirring over medium-low heat. The mixture needs to reach a temperature where the egg yolks cook and the starch activates, usually around 170-180°F (77-82°C). Cooking it too fast or over too high heat can scramble the eggs. Once thickened to a pudding-like consistency, removing it from the heat and stirring in a knob of cold butter adds glossiness and a smooth texture. Straining the curd through a fine-mesh sieve ensures a silky-smooth finish, free of any potential cooked egg bits.
Achieving a High, Golden-Brown Meringue
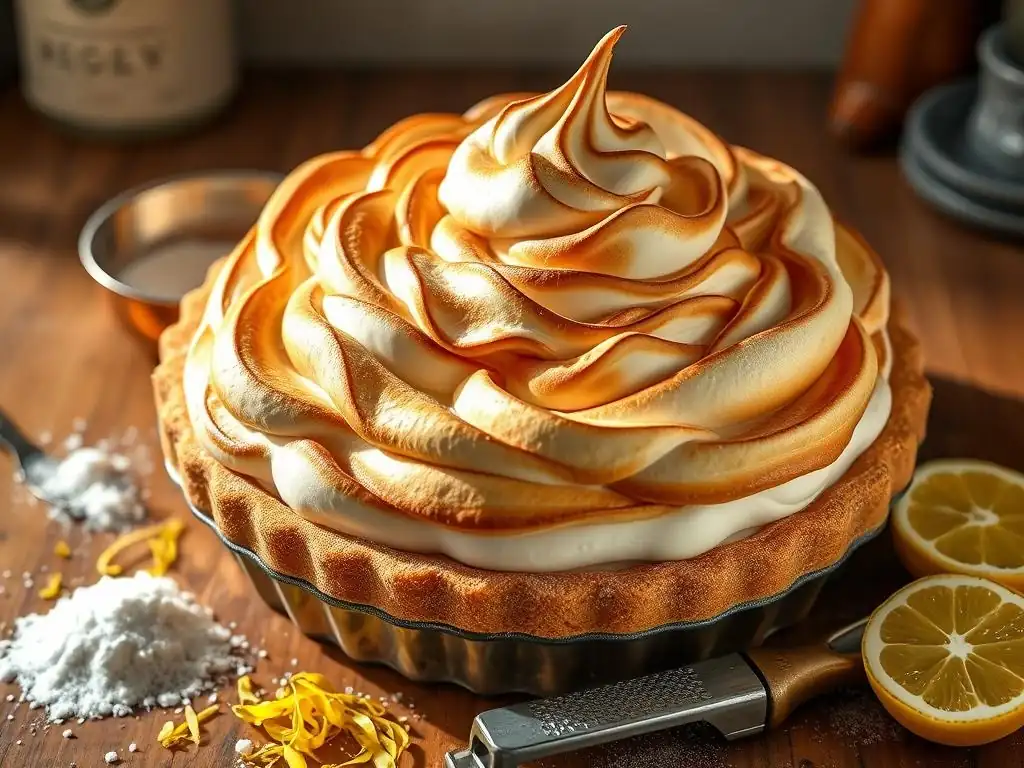
Achieving a high, stable meringue for topping a pie starts with clean equipment – any trace of fat can prevent egg whites from whipping properly. Using room temperature egg whites (around 68-70°F or 20-21°C) also helps them whip to their maximum volume. For a French meringue, gradually adding superfine sugar (caster sugar) once the egg whites reach soft peaks helps the sugar dissolve more easily, resulting in a smoother, more stable foam. A general ratio is about 2 tablespoons of sugar per large egg white, though some recipes use more for a sweeter, denser meringue.
To get that beautiful golden-brown finish, you have two main options. Baking the pie with the meringue at a high temperature (around 350-375°F or 175-190°C) for 5-10 minutes allows the exterior to brown quickly. Watch it constantly as it can go from perfectly toasted to burnt in seconds. Alternatively, using a kitchen torch provides precise control. Hold the torch flame a few inches from the meringue surface and move it constantly to achieve even browning on the peaks and swirls. This method is often preferred for its speed and control, especially for meringue desserts recipes easy to assemble quickly.
Key Lime Meringue Pie: A Zesty Tropical Treat
Key lime meringue pie offers a delightful variation on the classic, substituting the familiar tartness of lemons with the unique zestiness of Key limes. The smaller, more aromatic Key limes provide a distinct floral and slightly less acidic flavor profile compared to Persian limes. The filling typically relies on condensed milk, egg yolks, and fresh Key lime juice, which thickens the mixture naturally through a reaction between the acidic juice and the milk proteins, often without the need for additional starch.
Topping this vibrant green-yellow filling with a cloud of white or lightly torched meringue adds not just sweetness but also a visually appealing contrast. While traditional Key lime pies might be topped with whipped cream, the addition of meringue elevates it to a more formal dessert. The bright, slightly floral notes of the Key lime pair wonderfully with the pure sweetness of the meringue, creating a balanced and refreshing bite. This makes it a fantastic addition to any collection of simple meringue desserts recipes that aim for a tropical twist.
Balancing Sweetness and Tartness in the Filling
Balancing the sweetness and tartness in a Key lime pie filling is crucial for its success. Key limes are inherently tart, and the condensed milk provides significant sweetness. The goal is a harmonious blend where neither the sweetness nor the tartness is overwhelming. Using fresh Key lime juice is paramount; bottled juice often lacks the complexity and aroma of fresh. A common ratio involves one 14-ounce can of sweetened condensed milk, 3-4 egg yolks, and about 1/2 cup of fresh Key lime juice.
The magic happens as the acid from the Key lime juice reacts with the proteins in the condensed milk, causing the mixture to thicken without cooking over heat. This chemical reaction means the filling is essentially 'cooked' by the acid. Whisking the ingredients together until fully combined and slightly thickened is usually sufficient before pouring it into a pre-baked crust. Tasting and adjusting the amount of lime juice slightly before it sets can help achieve the desired balance, though the reaction starts quickly once the juice is added.
Creating a Decorative Meringue Swirl
Creating a decorative meringue swirl on a pie is as much about technique as it is about the meringue's stability. Using a stable meringue, like Swiss or Italian, is often preferred as it holds its shape better than French meringue before baking or torching. Once the meringue is ready (stiff, glossy peaks), it can be applied to the cooled pie filling. For simple swirls, spoon the meringue onto the pie and use the back of a spoon or a spatula to create peaks and valleys by gently pulling the meringue upwards.
For more intricate designs, piping the meringue using a piping bag fitted with a large star tip or a round tip works beautifully. Start from the outer edge and work your way towards the center, or pipe individual swirls and peaks. Ensure the meringue touches the crust all around the edge to prevent shrinkage and weeping during baking or chilling. Whether using a spoon or a piping bag, the key is to create varying heights and textures to catch the light and achieve visually stunning results after browning, making even simple meringue desserts recipes look professionally finished.
Banana Cream Pie with Torched Meringue
Banana cream pie is a beloved classic, and while traditionally topped with whipped cream, adding a torched meringue layer elevates it into a more sophisticated dessert. The creamy, smooth banana filling, often enriched with sliced fresh bananas, benefits from the light, airy sweetness and slightly caramelized notes of torched meringue. This combination offers a delightful textural contrast between the soft filling, tender bananas, and the crisp, slightly chewy meringue peaks.
The use of a torch here is crucial. Unlike baking a meringue topping, which can heat the filling underneath, torching allows you to brown the meringue quickly without warming the delicate banana cream. This preserves the cool, smooth texture of the filling. The slightly caramelized flavor from the torched sugar on the meringue surface complements the sweetness of the bananas and the richness of the cream filling beautifully, creating a complex yet comforting flavor profile in this variation of simple meringue desserts recipes.
Enhancing Banana Flavor with Caramel Notes
Enhancing the banana flavor in a banana cream pie can be achieved through various techniques, and incorporating caramel notes is a particularly effective one. This can be done by making a simple caramel sauce and swirling it into the cream filling, or by lightly caramelizing the banana slices themselves before adding them to the pie. Sautéing banana slices in a little butter and brown sugar until they are slightly softened and caramelized deepens their flavor and adds a wonderful richness that pairs well with cream.
Another approach is to incorporate dulce de leche or a cooked caramel into the pastry cream base of the filling. This adds a layer of caramel complexity that highlights the natural sweetness of the bananas. When topped with torched meringue, which develops its own subtle caramelized flavor on the surface, the overall dessert achieves a depth of flavor that goes beyond a simple banana cream pie. This makes it one of the more rewarding simple meringue desserts recipes to experiment with.
Achieving a Toasted Meringue with a Butane Torch
Achieving a perfectly toasted meringue topping using a butane torch requires a steady hand and attention to detail. First, ensure the meringue is spread or piped evenly over the cooled pie filling, making sure it extends to the edges of the crust. A stable meringue like Swiss or Italian works best for torching as it's less likely to collapse. Hold the torch flame a few inches away from the meringue surface, starting at one edge and moving the flame back and forth steadily.
Work in small sections, allowing the peaks to turn golden brown. Keep the torch moving constantly to avoid burning any single spot. You can achieve varying shades of brown, from light gold to deep amber, depending on your preference. The heat from the torch caramelizes the sugar on the meringue's surface, creating a slightly crisp exterior and a warm, marshmallowy interior. This instant browning technique is ideal for fillings that shouldn't be heated, like banana cream, making it perfect for many simple meringue desserts recipes where a quick finish is desired.
Classic meringue cookies are perhaps the most straightforward application of French meringue, resulting in delightfully crisp, melt-in-your-mouth treats. They are made by slowly baking piped meringue at a very low temperature for an extended period, often between 200°F and 225°F (90°C and 110°C), for 1 to 2 hours, followed by cooling inside the oven. This low heat dries out the meringue rather than cooking it rapidly, ensuring a crisp, non-chewy texture throughout.
The basic recipe is incredibly simple: egg whites and sugar, often with a pinch of cream of tartar or a few drops of lemon juice added to help stabilize the foam. The key to success lies in the whipping process – achieving stiff, glossy peaks and ensuring the sugar is fully dissolved. These simple meringue desserts recipes are incredibly adaptable, easily flavored with extracts, zest, or even cocoa powder before baking.
Mastering Piping Techniques for Uniform Cookies
Mastering piping techniques is essential for creating visually appealing and uniformly sized meringue cookies. Uniformity is important not only for aesthetics but also for ensuring even baking. Start with a sturdy piping bag fitted with your desired tip – a large star tip (like an Ateco 1M or 2D) is popular for classic swirls, while a round tip creates simple dollops or kisses. Fill the bag no more than two-thirds full to make it easier to handle.
Hold the bag perpendicular to the baking sheet (lined with parchment paper or a silicone mat) for swirls or kisses. Apply even pressure to pipe the meringue. For swirls, pipe from the center outwards or outer edge inwards, releasing pressure when you finish. For kisses, simply press down to form a dome and lift straight up. Practice helps achieve consistent size and shape, which is key for baking time. Overcrowding the baking sheet should also be avoided to allow proper air circulation.
Flavor Variations: Espresso, Almond, and Citrus
Classic meringue cookies provide a perfect canvas for various flavorings, turning simple sweetness into something more exciting. Espresso powder can be added to the whipped meringue for a subtle coffee note, or dissolved in a tiny amount of hot water first. For almond flavor, a few drops of almond extract are sufficient, or you can fold in finely ground nuts like almonds or pistachios after whipping.
Citrus zest, such as lemon, lime, or orange, adds a bright, fragrant dimension. The zest should be finely grated and gently folded in at the very end of the whipping process to preserve its volatile oils. Other options include vanilla bean paste for visible flecks and intense vanilla flavor, or a pinch of cinnamon or ginger for warmth. Adding a small amount of cocoa powder (sifted) can create chocolate meringue cookies. Experimenting with these simple additions makes these meringue desserts recipes easy to customize for any occasion.
Pavlova: A Showstopping Meringue Dessert
Pavlova is a truly showstopping dessert that highlights the unique texture achievable with meringue: a crisp, delicate shell giving way to a soft, marshmallowy interior. Named after the Russian ballerina Anna Pavlova, this dessert is essentially a large meringue disk baked at a low temperature (often around 250-300°F or 120-150°C) for about an hour, then left to cool completely in the turned-off oven. The higher temperature initially helps create the crisp exterior, while the residual heat gently cooks the inside to that signature soft texture.
Unlike dense meringue cookies, pavlova is characterized by its slightly chewy center and often irregular, rustic shape formed by swirling the meringue. It serves as a base, traditionally topped with whipped cream and fresh fruit, particularly berries or tropical fruits like passionfruit. The contrast between the sweet, crisp meringue, the cool, creamy whipped cream, and the fresh, often slightly tart fruit is what makes pavlova such a beloved and elegant dessert, a slightly more involved but still accessible option among meringue desserts recipes easy enough for special occasions.
Achieving a Crisp Shell and Marshmallowy Interior
Achieving the perfect pavlova texture – a crisp shell and marshmallowy interior – requires careful control of the baking process. The ratio of sugar to egg white is crucial; generally, about 1/4 cup (50g) of sugar per large egg white is a good starting point. Using superfine sugar helps it dissolve more easily, reducing the risk of a grainy texture.
Adding a small amount of acid, like white vinegar or cream of tartar (about 1/2 teaspoon per 4 egg whites), helps stabilize the meringue and contributes to the marshmallowy center. A bit of cornstarch (about 1 teaspoon per 4 egg whites) also aids in creating that soft interior.
After whipping the meringue to stiff, glossy peaks and shaping it on parchment paper, bake it in a preheated oven at a moderate temperature (e.g., 300°F or 150°C) for about 60-75 minutes, or until the outside is firm and dry to the touch. Then, turn off the oven, prop the door open slightly, and let the pavlova cool completely inside. This slow cooling process prevents the meringue from cracking or collapsing and ensures the center develops that characteristic soft, chewy texture while the outside crisps.
Topping Ideas: Seasonal Fruit and Whipped Cream
The traditional topping for pavlova is generous dollops of lightly sweetened whipped cream and an abundance of fresh fruit. The choice of fruit is where you can really make the dessert shine, using whatever is seasonal and ripe. Berries like strawberries, raspberries, blueberries, and blackberries are classic choices, offering vibrant color and tartness. Tropical fruits such as passionfruit (scooped over the cream), kiwi slices, mango chunks, or pineapple can transport the dessert to a different climate.
Consider combinations of fruits for visual appeal and flavor complexity, like sliced peaches and raspberries in the summer, or roasted pears and figs in the fall. A drizzle of fruit coulis or a light syrup can enhance the flavor and moisture. While whipped cream is standard, you could also experiment with variations like mascarpone cream or even a light pastry cream, keeping in mind that the topping should be added just before serving to prevent the meringue from softening. This versatility makes pavlova a fantastic base for countless simple meringue desserts recipes tailored to taste and season.
Meringue-Based Creations: Cakes and Other Desserts
Baked Alaska: A Culinary Spectacle
Baked Alaska is a true culinary spectacle, a dessert that combines contrasting temperatures and textures in a dramatic presentation. It typically consists of a base layer of cake (often sponge cake or génoise), scoops of ice cream frozen hard on top of the cake, all encased in a thick layer of meringue. The magic happens when the entire structure is briefly baked in a very hot oven or, more commonly, torched, to brown the meringue exterior while the insulating properties of the meringue and the short duration of heat keep the ice cream frozen solid inside.
This dessert showcases the insulating power of meringue's air pockets. A sturdy meringue, usually Italian meringue because of its stability and resistance to weeping, is essential for this application. The contrast between the warm, toasted meringue, the cold, firm ice cream, and the soft cake makes for an exciting sensory experience. While seemingly complex, breaking it down into steps makes it one of the more impressive simple meringue desserts recipes to attempt for a special occasion.
Assembling and Freezing the Baked Alaska Components
Proper assembly and freezing are critical for a successful Baked Alaska. Start with a base of cake, cut to fit the serving dish or plate. Place scoops of firmly frozen ice cream on top of the cake, ensuring they cover the cake layer entirely and form a dome. The ice cream should be as cold and hard as possible, ideally frozen for several hours or even overnight on top of the cake base.
Once the ice cream is arranged, the entire structure needs to be frozen very hard. Place the assembled cake and ice cream in the freezer for at least 2-4 hours, or until the ice cream is rock solid. This hard freeze is the primary defense against melting when the meringue is browned. Before applying the meringue, ensure the ice cream surface is relatively smooth to make spreading easier.
Achieving a Beautifully Browned Meringue Shield
Achieving a beautifully browned meringue shield that protects the ice cream relies on speed and heat. A thick layer of meringue, preferably a stable Italian meringue, is spread over the frozen ice cream and cake, ensuring there are no gaps where the ice cream could be exposed to heat. The meringue should completely encase the ice cream and adhere to the cake base. Aim for a layer at least 1/2 to 1 inch thick for optimal insulation.
To brown the meringue, you can place the assembled dessert in a preheated oven at a very high temperature (around 450-500°F or 230-260°C) for just 2-5 minutes, or until the meringue peaks are golden brown. A more controlled method, and often preferred, is to use a kitchen torch. Systematically move the torch flame over the meringue surface, browning it evenly. The heat from the torch is intense but localized, allowing the meringue to toast rapidly while the ice cream remains frozen underneath its protective, airy layer.
Swiss Meringue Buttercream: A Luxurious Frosting
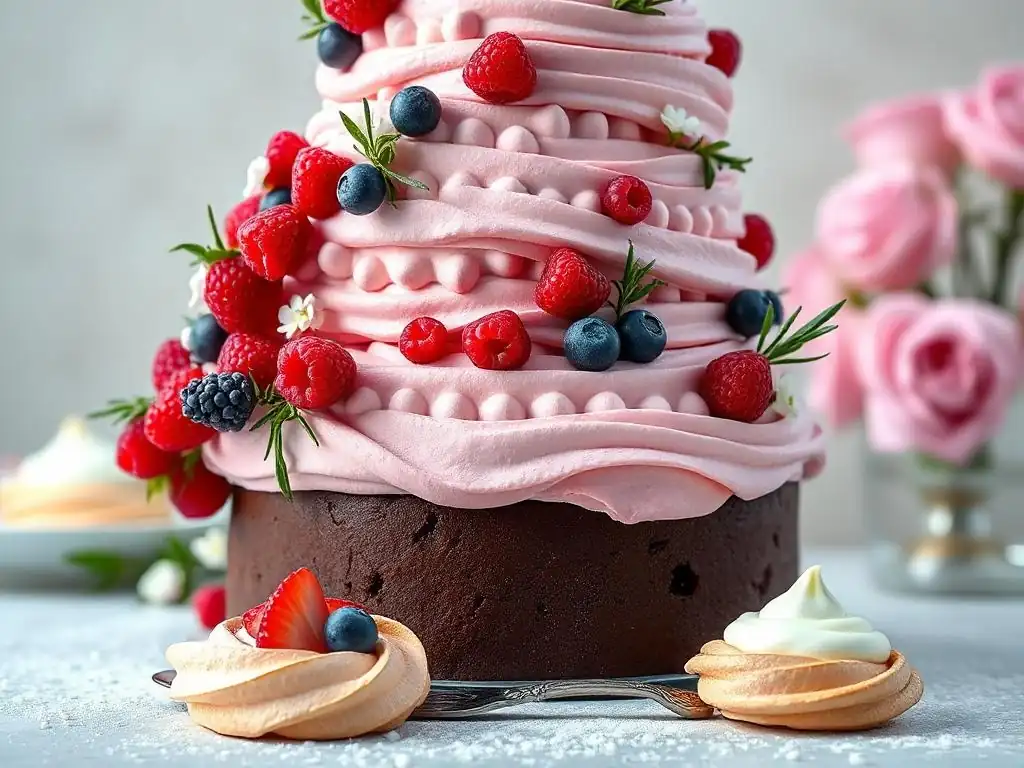
Swiss meringue buttercream is a smooth, stable, and less-sweet alternative to traditional American buttercream, making it a favorite among cake decorators. It's made by whisking warmed egg whites and sugar over a double boiler until the sugar is dissolved and the mixture reaches about 140-160°F (60-70°C), then whipping it into a stiff, glossy meringue. Once the meringue is completely cool, softened butter is gradually whipped in until the mixture emulsifies into a light, fluffy, and incredibly smooth frosting.
This buttercream is less prone to splitting than some other types and holds intricate shapes beautifully, making it ideal for piping elaborate decorations on cakes and cupcakes. Its rich, buttery flavor is balanced by the sweetness of the meringue, resulting in a luxurious frosting that isn't cloyingly sweet. While the process involves a few more steps than a simple powdered sugar frosting, the resulting texture and stability make it worth the effort for many simple meringue desserts recipes where a refined finish is desired.
Mastering the Swiss Meringue Buttercream Technique
Mastering Swiss meringue buttercream involves attention to temperature and technique. Start with clean, dry equipment. Whisk egg whites and sugar in a heatproof bowl set over a pot of simmering water (the bottom of the bowl should not touch the water). Whisk constantly until the sugar is completely dissolved and the mixture is warm to the touch, reaching the target temperature (140-160°F or 60-70°C) to pasteurize the egg whites.
Transfer the mixture to a stand mixer and whisk on high speed until the meringue is thick, glossy, and has cooled completely to room temperature. This can take 10-15 minutes or even longer depending on the mixer and ambient temperature. The bowl should feel cool to the touch.
Only then begin adding softened, but not melted, butter one cube at a time, whipping thoroughly after each addition until it's fully incorporated. The mixture may look curdled or separated at first, but continue whipping; it will emulsify into smooth buttercream. If it remains curdled, gently warm a portion and re-incorporate, or chill slightly and whip again.
Using Meringue Buttercream for Intricate Cake Designs
Swiss meringue buttercream's smooth texture and stability make it perfect for intricate cake designs. Its ability to hold sharp edges and defined piping patterns allows for professional-looking finishes. To achieve sharp edges on a cake, apply a generous layer of buttercream and use a bench scraper or offset spatula to smooth it around the sides, holding the scraper at a 45-degree angle to the cake. Chill the cake briefly between coats for a firmer surface to work against.
For piping, this buttercream can be easily colored with gel food coloring (liquid colors can destabilize it). Use various piping tips – small round tips for dots and bead borders, star tips for rosettes and shells, and petal tips for ruffles and flowers. Its smooth consistency ensures the buttercream flows cleanly through the tip, producing well-defined shapes. Chilling piped elements slightly can help them hold their form, especially for delicate designs, making it a versatile tool for decorating many simple meringue desserts recipes.
Meringue Kisses: A Light and Airy Delight
Meringue kisses are perhaps the simplest and most direct application of French meringue, resulting in delightful, bite-sized cookies that are incredibly light and airy. Made from just egg whites and sugar, often with a touch of vanilla and an acid like cream of tartar, they are piped into small shapes and baked at a very low temperature (typically 200-225°F or 90-110°C) for an hour or more until completely dry and crisp.
These little treats get their name from their typical shape – small, peaked drops. Their charm lies in their simplicity and delicate texture that dissolves on the tongue. They are naturally gluten-free and fat-free (before any additions), making them a lighter sweet option. Their basic nature makes them one of the most accessible simple meringue desserts recipes for beginners looking to practice meringue technique.
Baking Meringue Kisses to Perfection
Baking meringue kisses to perfection is all about low heat and patience. After piping the meringue onto a baking sheet lined with parchment paper or a silicone mat, place them in a preheated oven at a very low temperature, typically between 200°F and 225°F (90°C and 110°C). The exact time will vary depending on the size of the kisses and your oven, but it usually takes at least 1 to 1.5 hours for smaller kisses and longer for larger ones.
The goal is to dry out the meringue completely without browning it significantly (unless a hint of color is desired). The kisses should feel light and lift easily from the parchment when done. To ensure they are crisp all the way through, turn off the oven after the baking time is complete and leave the kisses inside to cool completely, often for several hours or even overnight. This slow cooling in a dry environment prevents them from becoming sticky or chewy.
Serving Suggestions: As a Garnish or Standalone Treat
Meringue kisses are wonderful enjoyed on their own as a light, sweet snack. They are perfect with a cup of tea or coffee. Their delicate nature and small size also make them ideal for use as a garnish. Sprinkle crushed meringue kisses over mousses, puddings, or ice cream for added texture and sweetness. They can also be used to decorate cakes and cupcakes, adding a whimsical touch.
For an elegant presentation, arrange meringue kisses around a larger dessert like a tart or pie. They can also be sandwiched together with ganache, buttercream, or jam to create slightly more substantial cookies. Offering a bowl of flavored meringue kisses (like chocolate, mint, or citrus) is a simple yet delightful way to end a meal or serve at a party. Their versatility makes them a great component in many simple meringue desserts recipes.
Troubleshooting Meringue Challenges
Why is My Meringue Weeping?
Meringue weeping, where droplets of sugary syrup form on the surface or base of the meringue, is a common issue. This often happens when the sugar hasn too dissolved properly in the egg whites, or when the meringue is exposed to excessive humidity. In a French meringue, if the sugar is added too quickly or the meringue isn't whipped long enough for the sugar to dissolve, the undissolved sugar can attract moisture from the air or the filling it's sitting on, causing it to weep.
Overbaking or underbaking can also contribute to weeping. Overbaking can cause the sugar to caramelize and potentially separate, while underbaking leaves too much moisture in the meringue structure. To minimize weeping, ensure your equipment is spotless, use superfine sugar, whip until the sugar is fully dissolved and the meringue is glossy and stiff, and bake at the correct low temperature until thoroughly dried. Serving meringue-topped desserts relatively soon after baking can also help prevent weeping, especially in humid conditions.
Preventing a Soft or Collapsed Meringue
A soft or collapsed meringue is usually a result of insufficient whipping, adding fat or moisture, or incorrect baking/cooling. Egg whites need to be whipped to stiff peaks – meaning the peaks stand straight up when the whisk is lifted – to create a stable structure. Under-whipping doesn't build a strong enough protein network to hold the air. Any trace of fat (from egg yolks, greasy bowls, or utensils) will prevent the egg whites from whipping properly, resulting in a weak, unstable foam that is prone to collapse.
To prevent collapse during baking, ensure the oven temperature is correct and consistent. Opening the oven door frequently can cause temperature fluctuations that shock the meringue and lead to cracking or collapsing. For baked meringues like cookies or pavlovas, cooling them slowly inside the turned-off oven is crucial. Removing them too quickly into a cooler environment can cause a sudden temperature change, leading to shrinkage or collapse. Using an acid (cream of tartar, lemon juice) can also help stabilize the foam.
Achieving a Smooth, Stable Meringue
Achieving a smooth and stable meringue is the foundation for successful meringue desserts recipes easy to work with. This requires clean equipment, room temperature egg whites, and patience during the whipping process. Using a stand mixer is recommended for consistent, powerful whipping. Start whipping egg whites on medium speed until they reach soft peaks, then gradually add sugar, a tablespoon at a time, allowing several seconds between additions for the sugar to begin dissolving.
Increase the speed to high and continue whipping until the meringue is very thick, glossy, and the sugar is completely dissolved. You can test for dissolved sugar by rubbing a small amount of meringue between your fingers; it should feel smooth, not gritty. The meringue should hold stiff, upright peaks. For extra stability, especially for meringues that will be baked or torched, a small amount of cream of tartar or lemon juice added at the soft peak stage helps strengthen the protein structure. Swiss and Italian methods inherently produce more stable meringues due to the heated sugar.
Tips and Tricks for Meringue Mastery
The Importance of Clean Equipment
Clean equipment is perhaps the single most critical factor for successful meringue making. Any trace of fat – whether from residual grease on a bowl, whisk, or even a speck of egg yolk – will prevent egg whites from whipping properly. Fat coats the protein molecules in the egg whites, inhibiting their ability to stretch and trap air. This results in a weak, flat foam that will not hold peaks and will likely collapse.
Before starting, wash your mixing bowl and whisk thoroughly with hot, soapy water, then rinse and dry them completely. Some bakers even wipe down their equipment with lemon juice or vinegar before drying to ensure no greasy residue remains. Using a metal or glass bowl is often preferred over plastic, as plastic can sometimes retain greasy residues even after washing. A clean environment is the first step towards mastering any simple meringue desserts recipes.
Understanding the Role of Sugar and Acid
Sugar plays a dual role in meringue: it sweetens the egg whites and, crucially, stabilizes the foam. As sugar is added and dissolves, it forms a syrup that coats the air bubbles, preventing them from collapsing. It also draws moisture from the egg whites, making the meringue less prone to weeping. However, too much sugar can make the meringue heavy and potentially grainy if not fully dissolved. The type of sugar matters too; superfine (caster) sugar dissolves more readily than granulated sugar.
Acid, such as cream of tartar, lemon juice, or vinegar, helps stabilize the egg white foam by strengthening the protein network. It lowers the pH of the egg whites, allowing them to whip faster and reach full volume, and helps them hold their structure more firmly. A small amount, typically 1/8 to 1/4 teaspoon per two large egg whites, is sufficient. Adding acid at the soft peak stage helps to achieve a more stable, voluminous meringue.
Storage Recommendations for Meringue-Based Desserts
Proper storage is key to maintaining the texture and appearance of meringue-based desserts, as meringue is highly susceptible to moisture. Baked meringues, like cookies or pavlova shells, should be stored in an airtight container at room temperature. Humidity is the enemy; moisture will cause them to soften and become chewy or sticky. Avoid storing them in the refrigerator unless they are part of a larger dessert that requires chilling, as refrigerators are often humid environments.
For meringue-topped pies or desserts like Baked Alaska, it's best to assemble and serve them relatively quickly. If refrigeration is necessary (for the filling or ice cream), the meringue may soften or weep over time due to the moisture and cold temperature. If you must store a meringue-topped pie, cover it loosely and refrigerate, understanding that the meringue's texture will likely degrade. Meringue buttercream, however, stores well in the refrigerator for up to a week and can be frozen for longer, needing only to be brought to room temperature and re-whipped before use.
Conclusion: Unleashing the Potential of Meringue
Embrace the Art of Meringue in Your Baking Repertoire
Embracing the art of meringue opens up a world of possibilities in your baking repertoire. From the simple elegance of a classic meringue cookie to the dramatic flair of a Baked Alaska, mastering the techniques of whipping egg whites and incorporating sugar allows you to create a wide variety of textures and flavors. Understanding the differences between French, Swiss, and Italian meringues empowers you to choose the best type for your specific dessert, whether you need a light and airy base, a stable frosting, or a sturdy topping.
Don't be intimidated by meringue's reputation for being tricky. With attention to detail – particularly regarding clean equipment, egg white temperature, and proper sugar incorporation – you can consistently achieve successful results. Practice makes perfect, and starting with simple meringue desserts recipes like kisses or a basic pie topping is a great way to build confidence. As you become more comfortable, you can explore more complex applications, adding a touch of airy magic to your creations.
Further Exploration: Meringue-Based Macarons and Soufflés.
Once you've mastered the basics of meringue, you can delve into more advanced techniques and explore other exquisite meringue-based desserts. French macarons, those delicate sandwich cookies with the signature "foot," rely on a specific type of meringue (often French or Italian) folded precisely with almond flour and powdered sugar. Achieving the perfect macaron shell requires careful technique in both meringue preparation and the macaronage folding process, followed by specific drying and baking steps.
Soufflés, both sweet and savory, also utilize meringue to achieve their impressive rise and light texture. Egg yolks and flavorings are combined with a base (like a béchamel for savory or pastry cream for sweet), and then a generous amount of meringue is gently folded in just before baking. The air trapped in the meringue expands in the oven's heat, causing the soufflé to puff dramatically. While they require precise timing and handling, successful macarons and soufflés are incredibly rewarding and showcase the true potential of meringue beyond simple meringue desserts recipes.
Frequently Asked Questions
What exactly is meringue, and what makes it so versatile in desserts?
Meringue is a light and airy mixture made from whipped egg whites and sugar. Its versatility stems from its ability to be baked into crispy shells, used as a topping for pies, or incorporated into mousses for added texture and sweetness.
BakeWithEase.com mentions easy meringue dessert recipes. Are these truly beginner-friendly, even for someone new to baking?
Yes, BakeWithEase.com focuses on simplified instructions and readily available ingredients. Many meringue recipes are broken down into easy-to-follow steps, making them accessible for beginners to confidently create stunning desserts.
Can I use different types of sugar when making meringue, and will it affect the final outcome?
While granulated sugar is most common, you can experiment. Using caster sugar (superfine) can result in a smoother meringue, while brown sugar might add a slight caramel flavor, though it may affect the texture and not be suitable for all recipes.
I've heard meringue can be tricky. What are some common mistakes people make, and how can I avoid them when following BakeWithEase.com recipes?
Common mistakes include using eggs that aren't at room temperature, getting yolk in the whites, or over-whipping. Carefully follow BakeWithEase.com's instructions, paying close attention to detail and using clean, grease-free bowls and utensils.
Beyond pies, what are some other "stunning desserts" I can create using meringue based on BakeWithEase.com's resources?
BakeWithEase.com offers recipes for meringue cookies (crisp and delicate treats), pavlovas (a meringue shell filled with cream and fruit), and even meringue-based mousses, providing a wide range of options for showcasing this versatile ingredient.
Final Reflection: The Enduring Allure of the Meringue
The seemingly simple meringue, a cloud of whipped egg whites and sugar, holds a power far beyond its delicate appearance. Its versatility, as explored throughout this article, continues to surprise and delight bakers of all skill levels, making it a cornerstone of modern dessert creation. From the classic French meringue's crisp exterior to the Italian meringue's glossy sheen, the possibilities are truly endless, proving that sometimes, the most elegant creations come from the simplest of ingredients.
The journey through various meringue-based desserts has underscored not only their deliciousness but also their capacity to evoke memories and emotions. The delicate crackle of a pavlova, the creamy richness of a lemon meringue pie, these are sensory experiences that transcend mere culinary satisfaction. They connect us to traditions, celebrations, and the simple joy of sharing something beautiful and delicious. A dessert is a love letter to the soul.
This sentiment perfectly encapsulates the emotional resonance of these meringue masterpieces, reminding us of the power of food to bring people together.
Now, it's your turn. Don't be intimidated by the seemingly fragile nature of the meringue. Experiment! Try your hand at a new recipe, perhaps one you've never considered before. Let the delicate sweetness and airy texture inspire your creativity in the kitchen. Embrace the unexpected, and discover the joy of crafting your own meringue magic. The world of meringue desserts awaits – and it's far more accessible and rewarding than you might think.
Unleash Your Inner Pastry Chef: Meringue Magic Awaits!
Thanks for joining us on this delicious journey into the world of meringue! We hope you've discovered new ways to elevate your baking game. Ready to put your newfound knowledge into practice?
- Master the Perfect Meringue: Try our recommended recipe (find it in the comments section!) and share your results with us! We'd love to see your meringue masterpieces.
- Experiment with Flavors: Think beyond the classic vanilla – add extracts, spices, or even fruit purees to create unique meringue treats. Let your creativity soar!
- Join the BakeWithEase Community: Share your meringue creations and ask questions in the comments below! Let's inspire each other to bake even better.
What incredible meringue creation will you whip up first?