
Basic Sourdough Recipe: Using Different Flours (Simple Swaps)

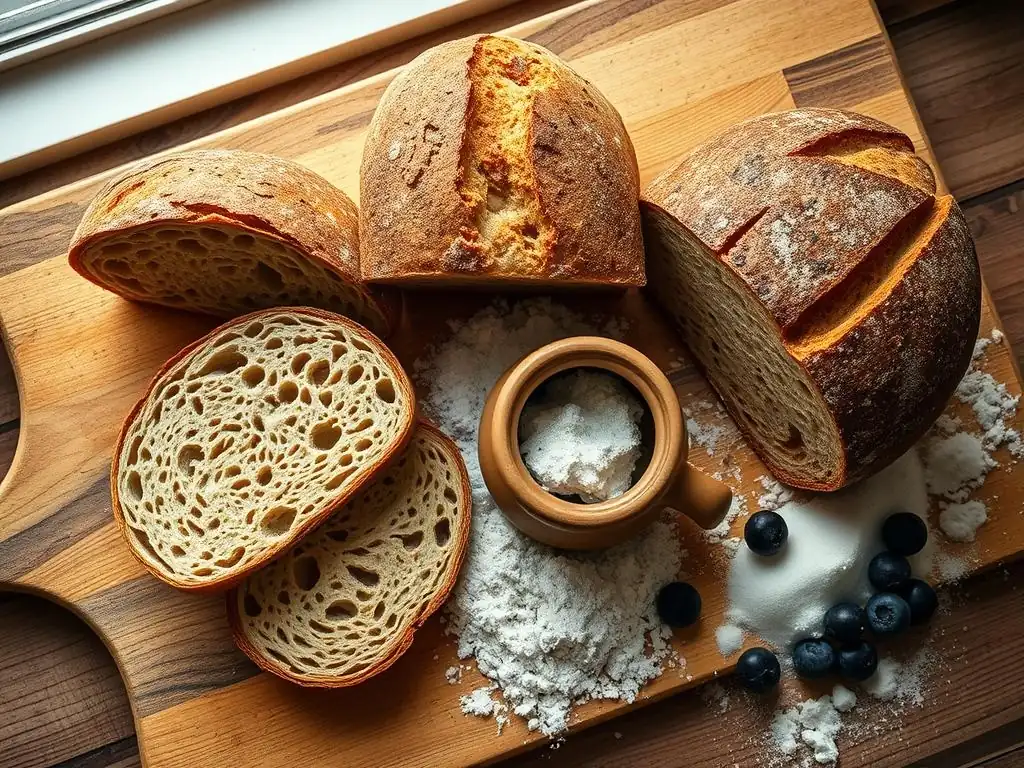
Welcome to BakeWithEase, where baking becomes a delightful journey! Ever wondered how a simple flour swap can completely transform your sourdough bread? Dive into our guide, "Basic Sourdough Recipe: Using Different Flours (Simple Swaps)," and unlock exciting new flavors and textures. Discover the secrets to crafting exceptional sourdough, even with readily available ingredients. Ready to elevate your baking game? Let's get started!
- Mastering Sourdough: Exploring Flour Variations for Flavor and Texture
- Introduction to Sourdough Baking with Diverse Flours
- The Foundation: A Basic White Sourdough Recipe
- Flour Exploration: Beyond White Flour
- Troubleshooting Flour-Specific Sourdough Challenges
- Tips for Consistent Success with Flour Variations
- Recipe Adaptations: Flour-Focused Sourdough Variations
- Conclusion: Cultivating Sourdough Baking Expertise
-
Frequently Asked Questions
- What types of flour can I use to make sourdough bread besides bread flour?
- How does using different flours affect the hydration level needed for my sourdough?
- Will substituting different flours change the proofing time of my sourdough bread?
- Can I use a blend of different flours in my sourdough recipe?
- What adjustments should I make to the recipe when using a new type of flour for sourdough?
- Final Reflection: The Bountiful World of Sourdough and Flour
- Unleash Your Inner Baker: Flour Power Awaits!
Mastering Sourdough: Exploring Flour Variations for Flavor and Texture
Introduction to Sourdough Baking with Diverse Flours
Enhancing Flavor and Texture Through Flour Selection
Exploring different flours is one of the most exciting ways to elevate your sourdough baking. While standard white bread flour provides a reliable structure and a neutral canvas, incorporating other grains like whole wheat, rye, spelt, or even ancient grains introduces a world of new flavors, aromas, and textures to your loaf. Imagine the nutty depth of whole wheat sourdough, the characteristic tang of rye, or the subtle sweetness of spelt.
Each flour brings its unique properties, influencing everything from the crust's crispness to the crumb's openness and the bread's overall keeping quality. Mastering sourdough bread using different flour types allows bakers to customize their loaves to personal preference and explore traditional bread styles from various cultures.
Beyond just flavor, the choice of flour significantly impacts the texture of your sourdough bread. Flours differ in their protein content, which directly affects gluten development – the network that traps gases and gives bread its structure. They also vary in absorption rates and the presence of bran and germ, which can interfere with gluten formation but add nutritional value and complex textures.
For instance, adding whole wheat flour often results in a denser crumb compared to using only white flour, while a percentage of rye can create a slightly gummy texture unless handled correctly. Understanding these characteristics is key to successfully baking sourdough bread using different flour types and achieving desirable results.
Understanding Gluten Development and Flour Properties
Gluten is the protein network formed when gliadin and glutenin in flour are hydrated and kneaded. This network provides the elasticity and extensibility needed for the dough to rise and hold its shape. Different flours have varying amounts and types of these proteins. Strong bread flour, typically around 12-14% protein, develops a robust gluten structure, leading to a well-risen, open crumb. All-purpose flour, usually 10-12% protein, is more versatile but yields a slightly less structured loaf. Using different flours like whole wheat or rye significantly alters this process when making sourdough bread using different flour variations.
Whole wheat flour contains the bran and germ, which make up about 15% of the grain. While it can have a high protein content (often similar to or higher than white bread flour), the sharp edges of the bran and germ particles can cut the developing gluten strands, hindering the formation of a strong network. This is why whole wheat doughs often feel less elastic and can result in a slightly tighter crumb.
Rye flour, on the other hand, is low in gluten-forming proteins and high in pentosans, starches that absorb a lot of water but don't contribute to gluten structure. Rye doughs are often sticky and produce a dense, moist loaf with a characteristic tangy flavor, making it a unique challenge and reward when creating sourdough bread using different flour blends.
The Foundation: A Basic White Sourdough Recipe
Ingredients for a Classic White Sourdough Loaf
A successful basic sourdough loaf starts with a few simple, high-quality ingredients. The core components are active sourdough starter (also known as levain), flour, water, and salt. For a standard loaf weighing around 900-1000 grams, you might typically use about 100-150 grams of active starter, 400-500 grams of strong white bread flour, 300-375 grams of water (hydration level depends on flour and desired crumb), and 8-10 grams of fine sea salt.
The exact quantities can be adjusted based on your starter's activity, the specific flour's absorption, and environmental factors like temperature and humidity. Using a good quality bread flour with a protein content of at least 12% is recommended for beginners, as it provides a strong structure to support the rise.
The water quality can also make a difference. Filtered water is often preferred over tap water, especially if your tap water is heavily chlorinated, as chlorine can potentially inhibit the activity of the wild yeasts and bacteria in your sourdough starter. The salt is crucial not just for flavor but also for controlling the fermentation rate and strengthening the gluten structure.
It's typically added after the initial mixing or autolyse phase to allow the flour and water time to hydrate properly without the salt interfering. These basic ingredients form the canvas upon which you can later explore sourdough bread using different flour types.
Essential Equipment for Sourdough Baking
While sourdough baking can be done with minimal tools, having a few essential pieces of equipment can significantly improve your process and results. A reliable kitchen scale is paramount for accurate measurement, as measuring flour and water by weight (grams) is far more precise than using volume (cups), especially when working with varying flours and hydration levels. You'll also need a large mixing bowl, preferably clear or translucent, to observe the dough's development during bulk fermentation. A dough scraper (bench scraper) is invaluable for handling sticky dough and shaping.
For baking, a Dutch oven or a baking stone with a steam setup is highly recommended. A Dutch oven creates a self-contained steamy environment that helps the loaf achieve maximum oven spring and a beautiful crust. If using a baking stone, you'll need a method to generate steam in your oven, such as a tray of hot water or lava rocks.
Other helpful tools include a proofing basket (banneton) dusted with rice flour to hold the dough's shape during the final rise, parchment paper to transfer the dough safely, and a lame or razor blade for scoring the dough before baking. Having these tools ready sets you up for success, whether you're baking a classic white loaf or experimenting with sourdough bread using different flour combinations.
Step-by-Step Guide to Baking Sourdough
Activating the Levain (Sourdough Starter)
The first step is to ensure your sourdough starter is active and ready to bake. This typically involves feeding your starter 4-12 hours before you plan to mix your dough. Take a small amount of your mature starter (e.g., 20-30 grams) and feed it with equal parts flour and water by weight (e.g., 100g flour, 100g water).
Stir well until combined. Let it sit at room temperature (ideally 24-26°C or 75-78°F) until it has doubled or tripled in volume, is full of bubbles, and passes the float test (a small spoonful floats in water). This active starter, or levain, is the leavening agent for your sourdough bread using different flour types.
The time it takes for your levain to become active depends heavily on the temperature and the starter's health. In warmer conditions, it might be ready in 4-6 hours, while in cooler environments, it could take 8-12 hours. Using your starter at its peak activity ensures good oven spring and a well-fermented loaf. Once the levain has peaked and is just starting to recede slightly, it's at its most potent for leavening your dough.
Autolyse: Hydrating the Flour
Autolyse is a simple but powerful technique that involves mixing only the flour and water for your recipe and letting it rest. This step allows the flour to fully hydrate and enables enzymes (protease) in the flour to start breaking down proteins, which helps with gluten development later. Weigh out your flour and water into your mixing bowl. Mix them together just until no dry flour remains. The mixture will look shaggy and feel stiff.
Cover the bowl and let it rest for 30 minutes to 1 hour. During this rest, the gluten network begins to form naturally without any kneading. This process makes the dough more extensible and easier to handle, especially when working with whole grain flours or when aiming for sourdough bread using different flour blends, as it gives the less conventional flours time to absorb water properly.
Mixing and Initial Development
After the autolyse, it's time to add the active levain and salt. Add the measured amount of active starter to the dough. Dimple it into the surface with wet fingers. Then, sprinkle the salt over the dough. Now, incorporate these into the dough. You can do this by hand using a series of folds (like squeeze and fold) or by mixing in a stand mixer on low speed for a few minutes until everything is evenly distributed.
Once the ingredients are incorporated, perform a series of stretch and folds or kneading to begin developing the gluten structure further. For a white bread flour dough, 4-6 sets of stretch and folds performed over the first 2-3 hours of bulk fermentation are often sufficient. For sourdough bread using different flour types, especially those with lower gluten or high bran content, you might need fewer folds or gentler handling to avoid tearing the delicate gluten network.
Bulk Fermentation: Developing Flavor and Strength
Bulk fermentation (or first rise) is the most crucial stage for developing both the flavor and structure of your sourdough. It begins after the initial mixing and ends when you divide and shape the dough. During this time, the wild yeasts produce carbon dioxide, causing the dough to rise, and the lactic acid bacteria produce organic acids, giving sourdough its characteristic tangy flavor. The duration of bulk fermentation is highly dependent on temperature and starter activity, typically ranging from 4 to 8 hours at room temperature (around 24-26°C or 75-78°F).
During bulk fermentation, you'll perform a series of stretch and folds every 30-60 minutes for the first 2-3 hours. This builds strength in the dough and equalizes the temperature and nutrients throughout. Observe the dough – it should become smoother, more elastic, and increase significantly in volume (often by 50-100%). The dough should also show signs of fermentation, such as bubbles on the surface. Proper bulk fermentation is essential for a well-risen loaf, regardless of whether you're making sourdough bread using different flour types or a standard white loaf.
Shaping Techniques
Once bulk fermentation is complete, gently turn the dough out onto a lightly floured surface. Avoid degassing the dough too much. The goal is to create tension on the surface of the dough to give it structure and help it hold its shape during proofing and baking.
There are various shaping techniques depending on whether you're making a round loaf (boule) or an oval loaf (batard). For a boule, gently preshape the dough into a round and let it rest for 20-30 minutes (bench rest). Then, perform the final shaping by creating tension on the surface, pulling the edges towards the center and then turning the dough to create a smooth, taut skin.
For sourdough bread using different flour types, particularly those with weaker gluten like rye or high bran content like whole wheat, shaping needs to be handled more gently. Overworking these doughs can lead to a tight or dense crumb. Focus on creating just enough surface tension to support the dough without tearing it. Dust your proofing basket generously with rice flour (which doesn't absorb moisture) to prevent the dough from sticking during the final proof.
Proofing: Achieving Optimal Rise
Proofing (or final rise) is the period after shaping and before baking. The dough is placed in a proofing basket and allowed to rise further. This can be done at room temperature for a shorter, tangier proof (1-3 hours) or in the refrigerator for a longer, less tangy proof (8-16 hours or even longer). Cold proofing is popular because it slows down fermentation, allowing for deeper flavor development and making the dough easier to handle and score.
The dough is ready to bake when it has increased in volume (though usually not doubled) and feels light and airy. You can perform the "poke test": gently press your finger into the dough; if the indentation springs back slowly but not completely, it's ready. If it springs back immediately, it needs more time. If it stays completely indented, it might be overproofed. The optimal proofing time will vary depending on your specific sourdough bread using different flour compositions, temperature, and the dough's condition after bulk fermentation.
Baking for Crust and Crumb
Baking sourdough bread typically involves starting at a high temperature in a steamy environment to maximize oven spring before reducing the temperature to finish baking and develop the crust. Preheat your oven with a Dutch oven or baking stone inside to a high temperature, usually 230-260°C (450-500°F). Carefully turn the proofed dough out of the basket onto parchment paper or directly into the hot Dutch oven. Score the dough quickly with a sharp lame or razor blade – this allows the dough to expand predictably during baking.
Bake covered (in a Dutch oven) or with steam (on a stone) for the first 20-25 minutes. This initial steam prevents the crust from setting too quickly, allowing the loaf to expand fully.
Then, remove the lid (Dutch oven) or steam source, reduce the oven temperature slightly (e.g., to 220°C or 425°F), and continue baking for another 20-30 minutes until the crust is deep golden brown and the internal temperature reaches around 96-100°C (205-210°F). The baking time may vary slightly depending on the size of your loaf and the type of sourdough bread using different flour you've made, as some flours brown differently.
Cooling and Enjoying
Once baked, immediately transfer the loaf to a wire rack to cool completely. This is a critical step and often the hardest part for eager bakers! Cooling allows the internal structure of the bread to set and moisture to distribute evenly throughout the crumb. Cutting into a hot loaf can result in a gummy texture.
Allow the bread to cool for at least 2-3 hours before slicing. The waiting is worth it, as a properly cooled loaf will have the best possible texture and flavor profile. Enjoy your homemade sourdough bread, whether it's a classic white loaf or a unique creation using different flours!
Flour Exploration: Beyond White Flour
Whole Wheat Sourdough: Nutty and Robust
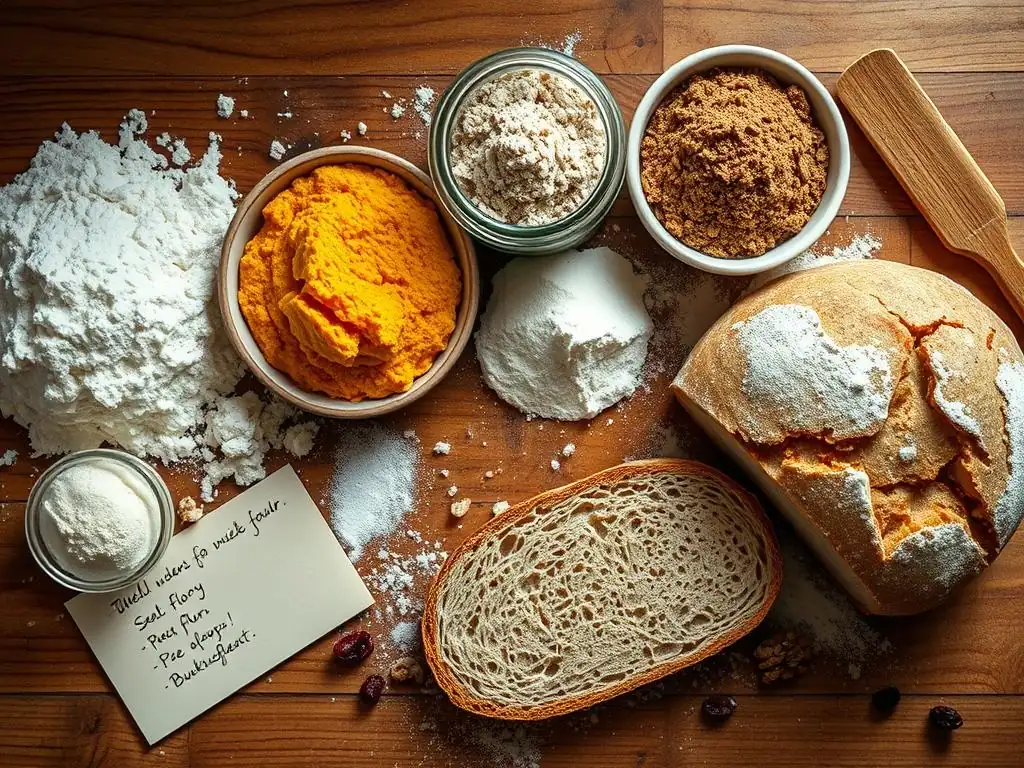
Baking sourdough bread using different flour types often starts with incorporating whole wheat flour. Whole wheat flour adds a wonderful nutty flavor and a robust texture that complements the tang of sourdough beautifully. It also significantly increases the nutritional value of the bread, adding fiber, vitamins, and minerals found in the bran and germ. Many bakers start by substituting a portion of the white flour with whole wheat, perhaps starting with 20-30% of the total flour weight, before working up to loaves that are 50% or even 100% whole wheat.
Working with whole wheat flour requires some adjustments. As mentioned earlier, the bran and germ can impede gluten development, leading to a potentially tighter crumb. Whole wheat flour also tends to absorb more water than white flour due to the presence of the bran. Therefore, you'll often need to increase the hydration level slightly when baking sourdough bread using different flour blends that include whole wheat to achieve a similar dough consistency to a white loaf. The bulk fermentation time might also be slightly shorter, as the increased nutrients in whole wheat can sometimes accelerate fermentation.
Hydration Adjustments for Whole Wheat
When adding whole wheat flour to your sourdough recipe, expect to increase the hydration. If your basic white recipe uses 70-75% hydration (water weight relative to flour weight), a dough with 20-30% whole wheat might require 75-80% hydration.
For loaves with 50% or more whole wheat, hydration could go up to 80-85% or even higher, depending on the specific flour's absorption capacity. A good rule of thumb is to start with the same hydration as your white loaf and add water gradually during the mixing phase until the dough feels appropriately hydrated – it should be moist but still manageable.
The absorption rate of whole wheat flour can vary significantly depending on how finely it is milled. Finely milled whole wheat will absorb water differently than coarsely ground flour. Paying attention to the dough's feel rather than strictly adhering to a percentage is crucial when baking sourdough bread using different flour types, especially whole grains. The dough should feel cohesive and slightly sticky but not soupy. If the dough feels too stiff after adding the initial water, don't hesitate to add a little more, tablespoon by tablespoon, until the desired consistency is reached.
Rye Sourdough: Tangy and Complex
Rye flour is a classic addition to sourdough, known for its distinct tangy flavor profile and dense, moist crumb. It's a staple in many European bread traditions. Adding even a small percentage (10-20%) of rye flour can dramatically change the character of your sourdough bread using different flour combinations, adding depth and complexity that you can't get with wheat alone. Higher percentages of rye (50% or more) result in the dense, dark, and intensely flavored loaves characteristic of traditional rye bread.
Working with rye flour presents unique challenges because it contains very little gluten-forming protein. Instead, it relies on pentosans to provide structure, which results in a sticky, less elastic dough compared to wheat. Rye doughs don't develop a strong gluten network through kneading in the same way wheat doughs do. Therefore, handling rye doughs requires a gentler approach, often relying more on time and fermentation to build structure rather than intensive kneading or stretching. This makes baking sourdough bread using different flour mixes, especially those with rye, a distinct experience.
Incorporating Rye for Depth of Flavor
To incorporate rye flour into your sourdough, you can start by substituting 10-20% of the white flour with medium or dark rye flour in your basic recipe. This percentage adds a noticeable tang and color without drastically changing the dough handling or crumb structure too much. For example, if your recipe uses 500g total flour, try replacing 50-100g with rye. You'll notice the dough will be stickier than an all-wheat dough.
For recipes with higher percentages of rye (50% or more), the dough will be very sticky and may not develop much visible structure through folds. These doughs are often mixed and then simply allowed to ferment without much handling. The flavor development during bulk fermentation is key here. High-rye sourdough bread using different flour ratios often benefits from longer, cooler fermentation periods to deepen the characteristic rye tang. Baking times might also be slightly longer for very dense rye loaves.
Spelt Sourdough: Mild and Slightly Sweet
Spelt is an ancient grain that offers a milder, slightly sweeter flavor compared to modern wheat and can be a delightful addition when baking sourdough bread using different flour types. It has a different gluten structure than modern wheat – the gluten is more fragile and water-soluble. This means spelt doughs can develop gluten quickly but can also become overworked and lose structure easily.
Spelt flour is often used in combination with bread flour, perhaps substituting 25-50% of the total flour weight. Using 100% spelt can be challenging due to its delicate gluten, often resulting in a denser loaf unless handled very carefully. The flavor profile of spelt is often described as nutty and slightly sweet, making it a good choice if you prefer a less intense flavor than whole wheat or rye in your sourdough bread using different flour blends.
Handling Spelt for a Delicate Crumb
When working with spelt flour, be mindful of its delicate gluten. Over-mixing or overly aggressive stretching and folding can break down the gluten network, leading to a dough that lacks strength and results in a flat loaf with a tight crumb. Aim for fewer, gentler folds during bulk fermentation compared to a strong white flour dough. You might find that 2-3 sets of folds are sufficient.
Spelt flour also tends to absorb water differently than wheat. Start with your usual hydration and adjust as needed. The dough might feel a bit different – possibly slightly stickier initially but developing smoothness quickly. Because the gluten is more fragile, spelt doughs can sometimes ferment faster than wheat doughs. Keep a close eye on the dough during bulk fermentation and proofing, using visual cues (volume increase, bubbles) rather than just relying on timing charts designed for wheat. Baking sourdough bread using different flour types like spelt requires patience and observation.
Einkorn Sourdough: Ancient Grain Nuances
Einkorn is one of the oldest cultivated wheat varieties and offers a unique, slightly sweeter flavor profile and a beautiful golden crumb. Like spelt, einkorn has a weaker, more fragile gluten structure compared to modern wheat. This makes baking sourdough bread using different flour compositions, specifically those high in einkorn, a rewarding challenge. It's often used in blends with stronger flours to provide structure, though experienced bakers can achieve lovely loaves with 100% einkorn.
The flavor of einkorn sourdough is distinct, with notes that can range from buttery to slightly tangy, depending on the fermentation. It's also known for its high nutritional value. When using einkorn, expect a dough that feels different – it can be sticky and less extensible than modern wheat doughs. The resulting loaf often has a denser, moister crumb compared to an open-crumbed white sourdough, but it is incredibly flavorful.
Baking with Einkorn: Tips and Techniques
Baking with einkorn requires gentle handling, similar to spelt. Avoid aggressive kneading or stretching. Many bakers find success using a no-knead or minimal-knead approach with einkorn, relying on longer fermentation times to develop structure and flavor. Autolyse is particularly beneficial when using einkorn, allowing the flour to hydrate fully before introducing the starter and salt.
Hydration levels might need adjustment; einkorn can absorb a surprising amount of water, but the dough can become very sticky if over-hydrated for your comfort level. Start with a moderate hydration and feel the dough. Due to its weaker gluten, einkorn dough benefits from good support during proofing (like a well-floured banneton) and baking (like a Dutch oven). Monitoring fermentation is key, as einkorn can ferment relatively quickly. Achieving a successful sourdough bread using different flour, especially ancient grains like einkorn, celebrates the diversity of grains.
Semolina Sourdough: Golden Crust and Chewy Texture
Adding durum semolina flour to your sourdough creates a loaf with a beautiful golden hue, a wonderfully chewy crumb, and a distinct, slightly sweet flavor. Semolina is typically used for pasta, but when milled finely (often called "rimacinata" or "double-milled"), it's excellent for bread baking. It's often used in Italian-style sourdough loaves. While it contains gluten, the structure is different from bread flour, contributing to that characteristic chewiness.
Semolina is often used as a percentage of the total flour, commonly ranging from 20% to 50%. It pairs well with white bread flour. The resulting sourdough bread using different flour types, like semolina blends, boasts a fantastic crust development – it tends to bake up particularly golden and crisp. The crumb will be tighter than a very open white loaf but has a pleasant, substantial chew.
Using Semolina for Enhanced Crust
Incorporating semolina flour is relatively straightforward compared to rye or spelt. You can substitute the desired percentage of white flour with fine semolina flour in your recipe. For instance, use 350g bread flour and 150g fine semolina in a 500g flour recipe. Semolina absorbs water differently than white flour, so you might need to adjust hydration slightly, potentially increasing it by a few percentage points as semolina can be quite thirsty.
Mix and handle the dough as you would a standard white loaf, performing stretch and folds. The dough will feel slightly different, perhaps a bit coarser initially, but should develop good strength. During baking, semolina contributes to a lovely golden-brown crust. Some bakers also like to dust their proofing baskets or the surface of the dough with coarse semolina before baking for added texture and visual appeal on their sourdough bread using different flour creations.
Troubleshooting Flour-Specific Sourdough Challenges
Addressing Common Issues with Alternative Flours
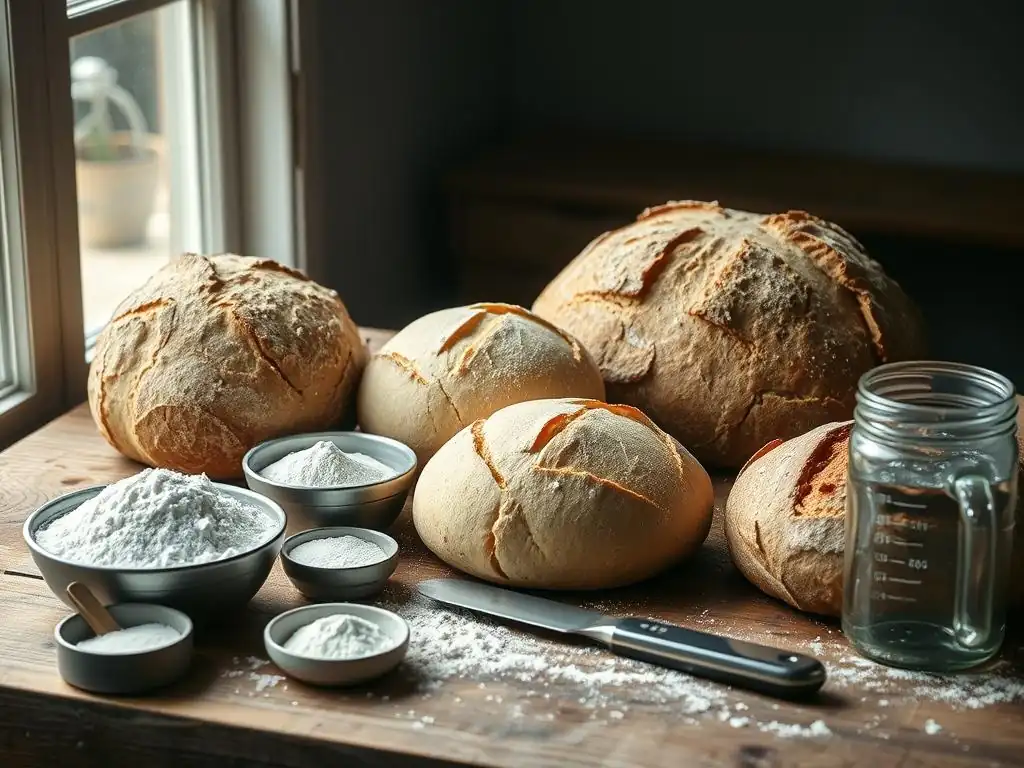
Baking sourdough bread using different flour types introduces variables that can lead to common challenges. It's important to recognize these issues and understand how the specific flour choice contributes to them. For instance, working with low-gluten flours like rye or ancient grains requires adjusting expectations regarding dough handling and final crumb structure. Issues like dense loaves, overly sticky dough, and balancing the sourness can often be traced back to how the chosen flour interacts with the fermentation process and hydration levels.
Successfully navigating these challenges involves careful observation and flexibility. What works for a white flour sourdough might not work for a whole wheat or rye loaf. Pay attention to the dough's feel, how it rises, and how it behaves during shaping. Understanding the inherent properties of each flour type is the first step in troubleshooting and improving your sourdough bread using different flour blends.
Dense Loaves: Causes and Solutions
A dense loaf is a common frustration when baking sourdough bread, especially when using flours other than strong white bread flour. Several factors can contribute to this. One major cause is insufficient gluten development, particularly when using flours with lower protein or fragile gluten (like rye, spelt, or high percentages of whole wheat).
If the gluten network isn't strong enough, it can't trap the gases produced by fermentation, resulting in a heavy, tight crumb. This might happen if the dough wasn't mixed or folded enough (for wheat blends) or if the weaker gluten was overworked and broken down (for spelt or einkorn).
Another significant cause is underproofing or overproofing. Underproofed dough hasn't had enough time for the yeast to produce sufficient gas for a good rise. Overproofed dough, conversely, has exhausted its leavening power, and the gluten structure may have started to collapse, leading to a loaf that rises in the oven but then falls back.
The solution involves understanding your flour: adjust mixing/folding techniques based on gluten strength, ensure adequate bulk fermentation and proofing based on the dough's activity and volume increase (not just time), and adjust hydration levels appropriate for the flour's absorption. For sourdough bread using different flour types, especially whole grains or rye, accept that the crumb may naturally be denser than a white loaf.
Sticky Dough: Management Strategies
Sticky dough is often encountered when working with flours like rye or whole wheat, which absorb water differently or contain high levels of pentosans. While sourdough dough is generally stickier than commercial yeast dough due to higher hydration, excessive stickiness can make handling and shaping difficult. The primary cause is often hydration that is too high for the specific flour being used or the baker's comfort level. Different flours absorb water at different rates, and even the same type of flour can vary by brand or batch.
To manage sticky dough when making sourdough bread using different flour types:
- Start with slightly lower hydration: Begin with less water than you think you need and add more gradually during mixing if necessary.
- Use wet hands and tools: Keep your hands and bench scraper wet (not floured) when handling sticky dough to prevent sticking.
- Develop strength: Ensure sufficient (but not excessive) mixing and folding to build gluten, which makes the dough less sticky and more manageable.
- Use a well-floured surface and banneton: Generously flour your work surface and proofing basket, especially with rice flour, which is non-absorbent.
- Cold proofing: Chilling the dough in the refrigerator makes it much firmer and easier to handle and shape.
Balancing Sourness: Flavor Control
The level of tanginess in sourdough bread is influenced by many factors, including fermentation time, temperature, and the hydration and feeding schedule of your starter. However, the type of flour used can also play a significant role when baking sourdough bread using different flour blends. Rye flour, for instance, tends to promote the activity of lactic acid bacteria, which produce more acetic acid (vinegar-like tang), resulting in a noticeably tangier loaf compared to a pure white loaf fermented under the same conditions. Whole wheat flour can also contribute to tanginess due to the increased nutrients available for the microbes.
If you prefer a less tangy loaf when using these flours, consider adjusting your fermentation process. A shorter, warmer bulk fermentation followed by a long, cold proof in the refrigerator (8-16+ hours) tends to produce a milder tang. Alternatively, if you desire more tang, a longer, warmer bulk fermentation can enhance acetic acid production. You can also adjust your starter's feeding ratio (e.g., a higher ratio of flour to starter can produce a milder starter). Experimenting with these variables alongside your choice of sourdough bread using different flour types will help you achieve your desired flavor profile.
Tips for Consistent Success with Flour Variations
Accurate Flour Measurement Techniques
Precise measurement is fundamental to successful baking, and it becomes even more critical when working with sourdough bread using different flour types, as their absorption rates vary. Measuring flour by volume (cups) is notoriously inaccurate because flour can be packed differently, leading to significant variations in weight. For example, a cup of spooned and leveled all-purpose flour typically weighs about 120 grams, while a cup scooped directly from the bag might weigh 140 grams or more – a difference that can drastically affect your dough's hydration.
Therefore, always measure your flour and water by weight using a digital kitchen scale. This ensures consistency from batch to batch, regardless of the flour type or how densely it's packed. Your recipes should ideally list ingredients in grams. This accuracy is paramount when you begin substituting flours, as you can maintain the intended total flour weight and adjust hydration based on the specific flour's properties, leading to more predictable results when baking sourdough bread using different flour blends.
Hydration Fine-Tuning Based on Flour Type
One of the most important skills in baking sourdough bread using different flour types is learning to fine-tune hydration. There is no single perfect hydration level; it depends on the flour's absorption, the desired crumb structure, and how comfortable you are handling wetter doughs. Whole grain flours like whole wheat, rye, and spelt generally require more water than white flour because the bran and germ absorb additional moisture. However, the rate and way they absorb water differ.
Start with a hydration level that feels comfortable for you and is appropriate for the flour type (e.g., maybe 75% for a white loaf, 78-80% for a loaf with 30% whole wheat). During the mixing phase, assess the dough's feel. Does it seem too stiff? Add a little more water (a tablespoon or two at a time).
Does it seem too wet and difficult to handle? Note it down and reduce the hydration slightly in your next bake with that specific flour. Over time, you'll develop an intuition for how the dough should feel at the correct hydration for various sourdough bread using different flour combinations.
Monitoring Fermentation for Optimal Results
Regardless of the flour type, monitoring the dough's fermentation rather than strictly adhering to time is crucial for success. Temperature significantly impacts fermentation speed – warmer temperatures accelerate it, while cooler temperatures slow it down. Different flours also ferment at slightly different rates; whole grain flours, with more nutrients, can sometimes ferment faster than refined flours.
Look for visual cues: Has the dough increased in volume by the expected amount (e.g., 50-100% during bulk fermentation)? Are there visible bubbles on the surface and along the sides of the container? How does the dough feel – is it airy and puffy? For proofing, use the poke test. Learning to read your dough and adjust fermentation time based on these indicators, rather than just the clock, is key to consistent results when baking sourdough bread using different flour types. Keep a baking journal to track your observations and adjustments.
Recipe Adaptations: Flour-Focused Sourdough Variations
Recipe: Whole Wheat and Honey Sourdough
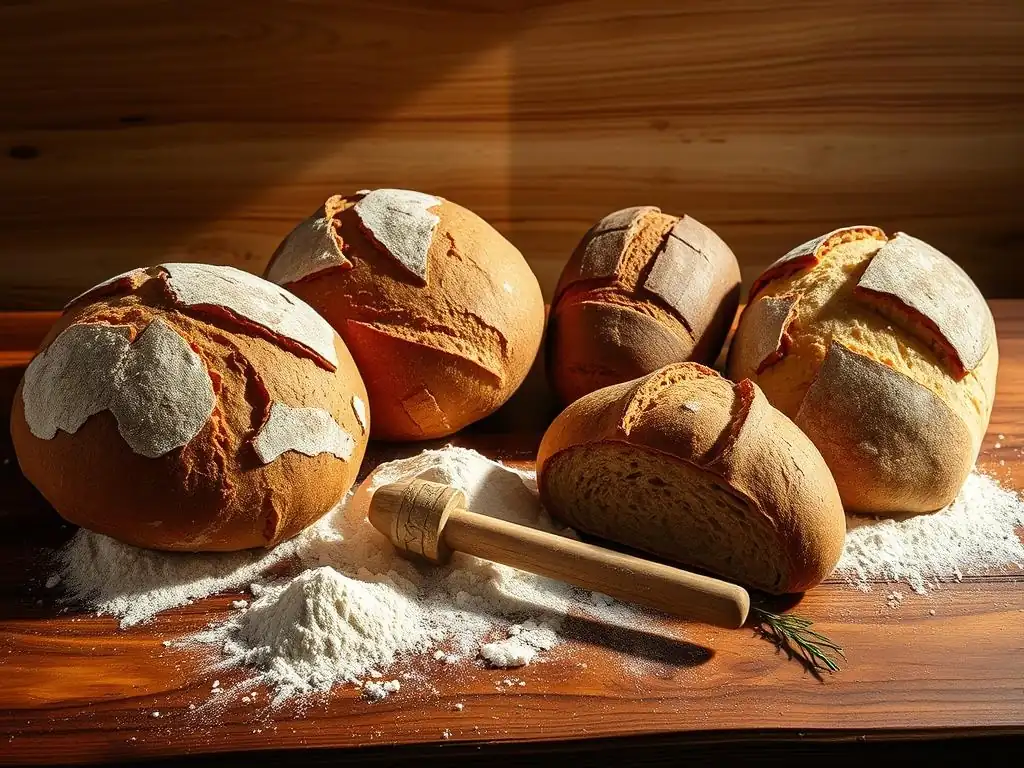
This adaptation focuses on incorporating whole wheat flour and a touch of honey for added flavor and browning.
- Ingredients:
- 100g Active sourdough starter
- 350g Strong white bread flour
- 150g Whole wheat flour
- 375g Water (approx. 75% hydration - adjust as needed)
- 10g Fine sea salt
- 20g Honey
- Method Notes:
- Combine white flour, whole wheat flour, and 375g water for autolyse (30-60 mins).
- Mix in starter, salt, and honey. The dough might feel slightly stickier than pure white dough.
- Perform stretch and folds every 45-60 mins for the first 3 hours, or until dough shows strength. You might need slightly fewer folds than a white loaf.
- Bulk ferment until dough has visibly increased in volume (50-75%) and shows bubbles (approx. 4-6 hours at 24°C/75°F).
- Shape gently, as whole wheat can tear more easily.
- Proof as usual (cold proof recommended for flavor).
- Bake as per the basic recipe instructions. The honey will contribute to a darker crust. This is a popular variation of sourdough bread using different flour types.
Recipe: Light Rye Sourdough with Caraway Seeds
Adding a percentage of rye flour and caraway seeds creates a loaf with classic European flavors and a more closed, moist crumb.
- Ingredients:
- 120g Active sourdough starter
- 400g Strong white bread flour
- 100g Medium or Dark Rye flour
- 360g Water (approx. 72% hydration - rye absorbs less gluten-forming water, so start cautious)
- 10g Fine sea salt
- 5g Caraway seeds (optional, but classic)
- Method Notes:
- Combine white flour, rye flour, and 360g water for autolyse (30-60 mins). Note the dough's stickiness.
- Mix in starter, salt, and caraway seeds. The dough will feel noticeably stickier and less elastic than a white dough.
- Perform gentle stretch and folds every 45-60 mins for the first 2-3 hours. Avoid aggressive handling.
- Bulk ferment until dough shows significant volume increase (50-75%) and bubbles (approx. 5-7 hours at 24°C/75°F). Rye can ferment a bit slower initially but finishes strong.
- Shape gently, focusing on creating surface tension without degassing.
- Proof as usual (cold proof is excellent for developing rye's tang).
- Bake as per the basic recipe instructions. The crumb will be denser and moister than a white loaf. Enjoy this flavorful sourdough bread using different flour and seed combination.
Conclusion: Cultivating Sourdough Baking Expertise
The Art of Experimentation in Sourdough
Mastering sourdough bread using different flour types is an ongoing journey of experimentation and learning. Each flour has its unique personality, influencing everything from how the dough feels in your hands to the final flavor and texture of the loaf. Don't be afraid to start small, substituting just a percentage of your usual flour, and gradually increase the proportion or try new flours as you become more comfortable.
Keep detailed notes on your bakes – the flour types and percentages used, hydration levels, fermentation times and temperatures, and the resulting observations about dough feel, rise, crumb, and flavor. This log will be invaluable as you learn what works best with your starter, your environment, and your preferred flours.
Embrace the variations and imperfections that come with using diverse grains. The beauty of baking sourdough bread using different flour lies in the subtle nuances they bring. Some loaves will be airier, others denser; some tangier, others sweeter. Each bake is an opportunity to deepen your understanding of the fascinating interplay between starter, flour, water, salt, and time. The process is as rewarding as the delicious bread you create.
Resources for Continuous Learning in Sourdough Baking
The world of sourdough baking is vast and constantly evolving, with new techniques and insights being shared regularly. To continue developing your skills in baking sourdough bread using different flour types, seek out reliable resources. Reputable baking books dedicated to sourdough or specific grains can provide in-depth knowledge. Online communities and forums are excellent places to ask questions, share experiences, and learn from other bakers who are also experimenting with diverse flours.
Many experienced bakers and online platforms offer tutorials and videos demonstrating techniques for working with different dough types. Watching how someone handles a high-hydration whole wheat dough or shapes a sticky rye loaf can be incredibly helpful. Remember that every starter and every kitchen environment is unique, so while recipes and guides provide a great starting point, the most valuable learning comes from your own hands-on experience and observation. Keep baking, keep experimenting with sourdough bread using different flour options, and enjoy the delicious results!
Frequently Asked Questions
What types of flour can I use to make sourdough bread besides bread flour?
You can experiment with whole wheat flour, rye flour, or even spelt flour. These flours will affect the texture and flavor of your sourdough.
How does using different flours affect the hydration level needed for my sourdough?
Different flours absorb water differently. Whole wheat flour typically requires more hydration than bread flour, while rye may require less.
Will substituting different flours change the proofing time of my sourdough bread?
Yes, it can. Whole grain flours often ferment faster due to the higher nutrient content, potentially shortening the proofing time.
Can I use a blend of different flours in my sourdough recipe?
Absolutely! Experimenting with flour blends is a great way to create unique flavor profiles and textures in your sourdough bread. Aim for a balanced blend to maintain structure.
What adjustments should I make to the recipe when using a new type of flour for sourdough?
Start by substituting a small percentage (e.g., 20-30%) of the bread flour with the new flour. Monitor the dough's consistency and adjust hydration accordingly. Be prepared to adjust proofing times as well.
Final Reflection: The Bountiful World of Sourdough and Flour
The humble sourdough starter, a living testament to patience and precision, unlocks a world of flavor possibilities far beyond the typical bread flour. This exploration into using different flours in sourdough baking reveals not just a variety of textures and tastes, but a deeper understanding of the fundamental interplay between flour, water, and time. The seemingly simple swap of one flour for another dramatically alters the final product, highlighting the crucial role flour plays in the sourdough journey.
The impact of this exploration extends beyond the kitchen table. It's a reflection of our growing awareness of food sourcing, sustainability, and the unique characteristics of different grains. Bread is the staff of life,
a simple phrase, yet it encapsulates the profound connection between sustenance, culture, and the very earth from which our ingredients spring. Experimenting with different flours allows us to connect more deeply with this process, appreciating the nuances of each grain and its contribution to the final loaf. This journey of discovery fosters a deeper appreciation for the artistry and science behind sourdough baking.
Now, I invite you to embark on your own flour-filled adventure. Don't be afraid to experiment! Try substituting a portion of your usual flour with whole wheat, rye, spelt, or even a blend. Document your results, savor the unique flavors, and share your discoveries with others. The world of sourdough is vast and ever-evolving; your contribution, however small, adds to the rich tapestry of this ancient and enduring craft. The next perfect loaf awaits your creative touch.
Unleash Your Inner Baker: Flour Power Awaits!
Thanks for taking the time to explore the world of sourdough with us! You've just unlocked the secrets to creating delicious loaves using a variety of flours. Now it's time to put your newfound knowledge into practice.
- Bake your own sourdough masterpiece! Experiment with different flours – rye, whole wheat, even spelt – and see how they impact the flavor and texture of your bread. Document your journey and share your results!
- Share your baking adventures with fellow bread enthusiasts on our social media channels (details can be found at bakewithease.com). Let's inspire each other!
- Try a sourdough challenge: Commit to baking a different flour variety each week for a month – and share your favorite results with us in the comments below!
What unique flour blend will you create next? Let’s discuss!