
No Coupler? No Problem! Basic Piping Without Fancy Tools


Welcome to BakeWithEase, where turning baking dreams into delicious realities is our specialty! Ever wondered if you can achieve professional-looking decorations without all the fancy equipment? This week we're diving into a surprisingly simple technique: Easy piping without pastry bags! Discover how to create beautiful designs using everyday kitchen items. Intrigued? Keep reading to unlock the secrets and elevate your baking game.
- Mastering Easy Piping Without Pastry Bags: A Baker's Guide
- Essential Tools for Piping Without a Coupler
- Step-by-Step: Creating a Makeshift Piping Bag
- Attaching Piping Tips (Or Making Your Own!)
- Filling Your Piping Bag: Avoiding Air Pockets
- Basic Piping Techniques Without a Coupler
- Troubleshooting Common Piping Problems
- Creative Piping Ideas Without Special Equipment
- Cleaning Up Your DIY Piping Setup
- Conclusion: Unleash Your Creativity with Easy Piping
-
Frequently Asked Questions
- How can I achieve easy piping without a pastry bag?
- What are some easy piping tips for beginners using a makeshift bag?
- What kind of frosting works best for easy piping without pastry bags?
- Are there any specific techniques to get clean lines when doing easy piping with a ziplock bag?
- Can I use different tips for easy piping with a ziplock bag, and how would I attach them?
- Final Reflection: The Joy of Effortless Piping
- Unleash Your Inner Pastry Chef: Mastering Piping Without the Gadgets!
Mastering Easy Piping Without Pastry Bags: A Baker's Guide
Why Learn to Pipe Without a Coupler?
Learning easy piping without pastry bags or couplers opens up a world of spontaneous decorating possibilities. Imagine deciding last minute to add a decorative touch to cupcakes or a cake, only to realize you don't have the right tools. This skill bypasses that hurdle entirely, allowing you to use simple household materials like parchment paper or even a sturdy Ziploc bag.
It's incredibly practical for home bakers who might not have a full arsenal of professional equipment but still want to achieve beautiful results. Furthermore, mastering easy piping without pastry bags builds fundamental control over frosting consistency and pressure, skills that are valuable even if you eventually transition to using traditional tools.
Beyond practicality, piping without a coupler is a fantastic way to save money. A basic set of couplers and pastry bags can cost anywhere from $10 to $30, depending on the brand and material. By utilizing materials you likely already have in your kitchen, you eliminate this initial investment. This makes baking decoration more accessible to everyone, from students on a budget to families looking for fun, inexpensive activities. The easy piping without pastry bags approach proves that creativity in baking doesn't require expensive gadgets; it just needs a little ingenuity and practice.
Overcoming the Fear of Piping: It's Easier Than You Think!
Many novice bakers feel intimidated by piping, envisioning complex designs that require years of practice. However, basic piping techniques are surprisingly straightforward and forgiving. The key is to start simple – think dots, basic lines, or simple swirls. These foundational techniques build confidence and hand control. Using a makeshift bag can actually feel less daunting than a large, professional pastry bag, making the learning process more approachable. Don't worry about perfection on your first try; even slightly imperfect piping can add charm and a homemade touch to your baked goods.
The fear often stems from the perceived need for intricate details or perfect symmetry. But easy piping without pastry bags is about adding simple flair, not competing in a professional cake decorating competition. Consider adding just a simple dollop of frosting to a cookie or a quick wavy border around a cake. These small touches elevate your baking significantly with minimal effort. Practicing on a piece of parchment paper before applying frosting to your dessert can alleviate anxiety and allow you to get a feel for the pressure needed without the pressure of potentially messing up your final product.
Essential Tools for Piping Without a Coupler
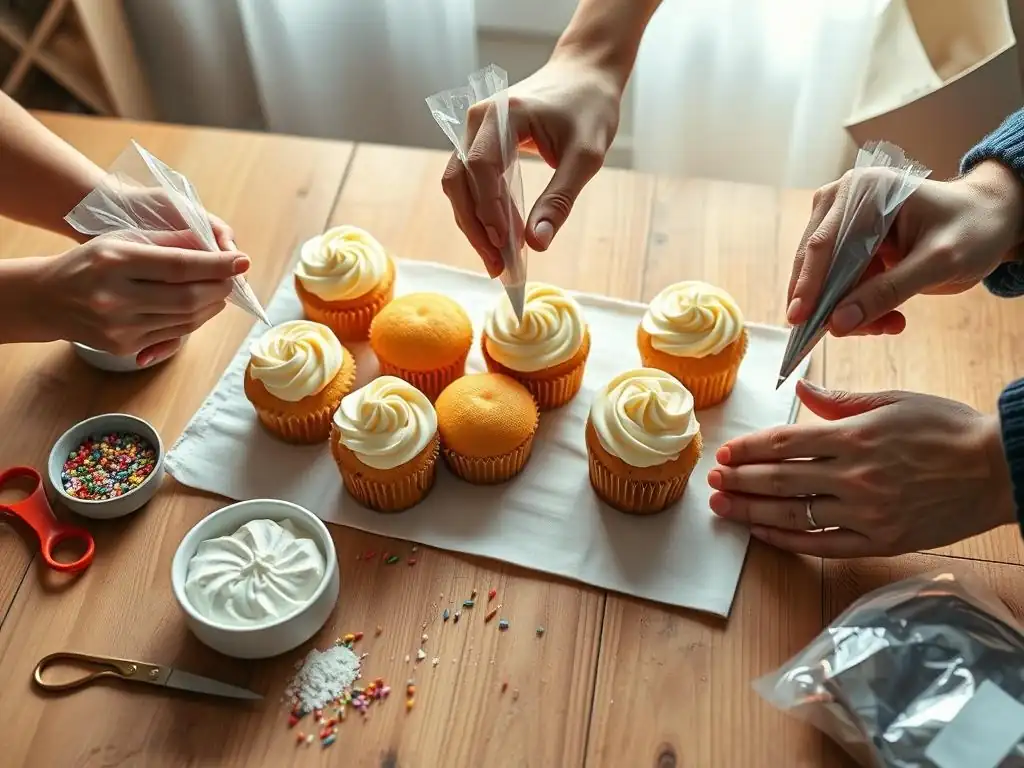
DIY Piping Bags: The Parchment Paper Solution
Parchment paper is the gold standard for creating easy piping without pastry bags. Its non-stick, grease-resistant surface is perfect for handling frosting, preventing it from soaking through and weakening the bag. A standard roll of parchment paper, widely available at grocery stores for around $3-$5, can provide dozens of makeshift piping bags. You simply cut a rectangle, fold it into a cone shape, and secure the seam. This method is incredibly versatile, allowing you to make bags of various sizes depending on your needs, from small cones for fine details to larger ones for filling cupcakes.
The durability of parchment paper cones, when folded correctly, is quite surprising. They hold their shape well under pressure, making them ideal for piping frostings, melted chocolate, or even savory fillings like mashed potatoes. Compared to using a standard plastic sandwich bag, which can stretch and burst easily, parchment paper offers much better control and reliability for easy piping without pastry bags. Plus, cleanup is a breeze – simply discard the used bag.
Alternative Piping Tips: Adapting What You Have
When focusing on easy piping without pastry bags and couplers, the "tip" is often just a shaped cut at the end of your DIY bag. A simple straight snip creates a round opening, perfect for dots, lines, or filling cupcakes. By varying the size of this cut – perhaps 1/4 inch for small dots or 1/2 inch for larger swirls – you can achieve different effects. For example, a 1/2-inch round opening can pipe a lovely, full swirl on a standard cupcake.
Beyond just cutting the bag, you can adapt everyday items. While not standard practice, a small, sturdy plastic bag corner can be cut and manipulated. For a slightly more defined edge, you could, in theory, use a small piece of firm plastic cut into a V-shape and secured inside the tip of your bag (though this requires careful handling and is less common than just cutting the bag). The beauty of easy piping without pastry bags lies in this adaptability; you're limited only by your creativity and the safe materials you have on hand.
Step-by-Step: Creating a Makeshift Piping Bag
Cutting and Folding Parchment Paper for Piping
To create an effective makeshift piping bag from parchment paper for easy piping without pastry bags, start with a rectangle of paper. A good size to begin with is roughly 12 inches by 16 inches. Lay the paper flat on a clean surface.
Pick up one of the longer corners and bring it across the paper towards the opposite long edge, forming a large triangle. The key is to wrap the paper around itself to form a cone shape, with a pointed tip at one end and an open top at the other. Imagine rolling a poster into a cone – you're doing the same with the paper.
As you roll the paper into a cone, adjust the tightness until the tip is pointed and the edges overlap neatly. One corner of the original rectangle will likely extend beyond the open top of the cone; this extra paper helps secure the bag. Ensure the tip is tightly formed, as this will be where you cut the opening for piping. A well-formed cone is the first crucial step for successful easy piping without pastry bags.
Securing the Seam: Ensuring a Leak-Proof Bag
Once you have your parchment paper cone formed, the next critical step for easy piping without pastry bags is securing the seam to prevent leaks. With one hand holding the cone's shape, use the other hand to fold the overlapping paper edges tightly against the cone. The extra paper mentioned in the previous step should be folded down inside or outside the bag to help lock the seam. Think of it like tucking in a sheet – you want a tight, secure fold.
For extra security, especially when working with looser frostings or if you plan to apply significant pressure, you can fold the top edge of the cone down over the secured seam. Alternatively, a small piece of tape can be used on the outside of the cone to hold the seam firmly in place. A leaking bag is frustrating and messy, often ruining your piping work, so taking a moment to ensure the seam is well-secured is vital for successful easy piping without pastry bags.
Testing Your DIY Piping Bag: A Practice Run
Before filling your newly crafted parchment paper bag with precious buttercream, it's wise to conduct a quick practice run. This step, though simple, is invaluable for ensuring your easy piping without pastry bags setup is leak-proof and functional. You can test the bag with a small amount of frosting, or even just by gently blowing air into the open top while holding the tip closed. Check the seam for any signs of air escaping.
If you notice air or a small amount of test material leaking from the seam, reinforce the fold or add tape. This practice also allows you to get a feel for holding the bag and applying pressure. Try snipping a tiny bit off the tip (start small!) and piping a dot or a short line on a piece of scrap paper. This confirms the opening is the size you want and that the bag is holding up under pressure. Taking these few moments to test ensures your easy piping without pastry bags attempt is set up for success.
Attaching Piping Tips (Or Making Your Own!)
Using a Makeshift Piping Tip: Cut and Shape
When performing easy piping without pastry bags and couplers, the bag itself becomes the tip. The most common makeshift tip is created by simply cutting the very end off your parchment cone or plastic bag. A straight cut across the tip creates a round opening, perfect for piping dots, simple lines, or filling cavities. The size of the cut directly determines the size of your piped shape – a 1/4 inch cut yields smaller dots suitable for details, while a 1/2 inch cut is great for cupcake swirls.
For slightly different effects without a traditional tip, you can experiment with the cut. A very small snip at an angle will create a slightly oval opening, useful for piping small, elongated shapes. Cutting a small "V" shape into the tip can mimic a basic leaf tip, producing a simple, textured line or shape. While these makeshift tips won't produce the intricate patterns of specialized metal tips, they are excellent for basic decoration and are key to easy piping without pastry bags.
Securing the Tip to Your Bag: Preventing Pop-Outs
With a DIY bag for easy piping without pastry bags, the "tip" is part of the bag itself (unless you've adapted a reusable tip, which is less common for this method). Therefore, preventing "pop-outs" is less about securing a separate tip and more about ensuring the cut opening maintains its shape and the bag doesn't burst under pressure. For parchment cones, the tight rolling and securing of the seam are what keep the tip opening stable.
If using a plastic bag, ensure the plastic is sturdy (like a freezer bag, not a thin sandwich bag) and don't overfill it. Pushing the frosting firmly down towards the cut tip helps maintain pressure and control. The main issue to prevent is the bag splitting or the cut opening tearing wider than intended. Using a robust material and not forcing overly stiff frosting through a small opening are the best ways to secure your makeshift tip for easy piping without pastry bags.
Filling Your Piping Bag: Avoiding Air Pockets
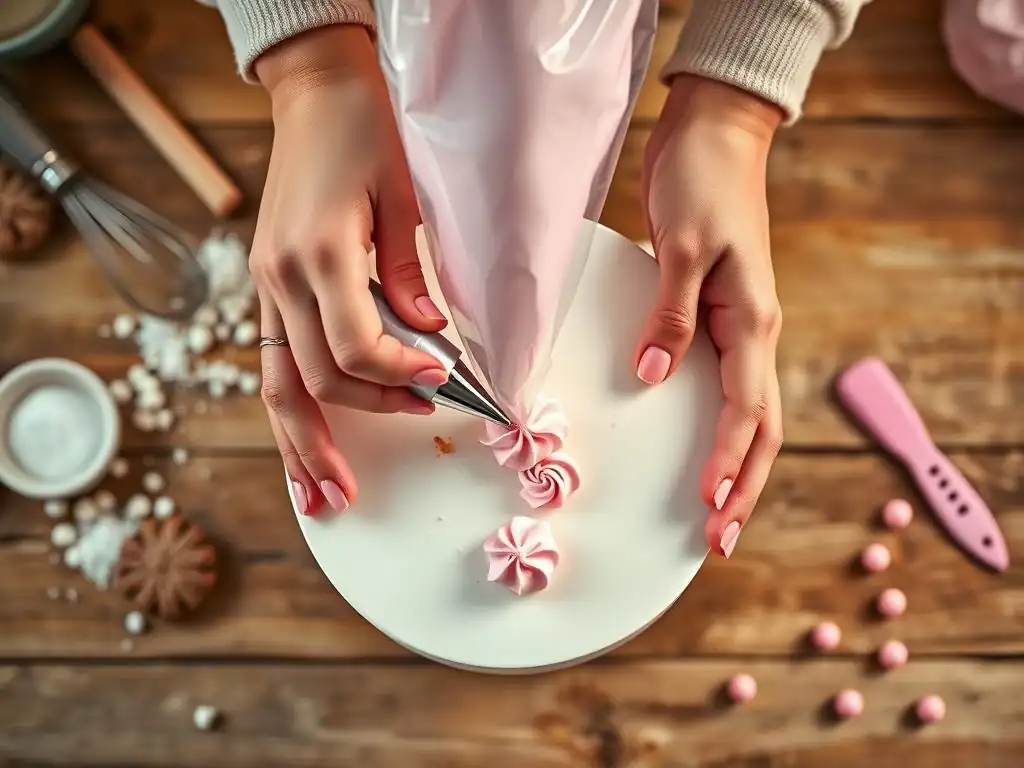
The Correct Way to Fill a Piping Bag: Tips and Tricks
Properly filling your makeshift bag is essential for smooth easy piping without pastry bags. A common and effective method is to place the bag, tip down, into a tall glass or mug. Fold the top edges of the bag down over the rim of the glass, creating a wide opening that's easy to fill cleanly. Use a spatula or spoon to scoop your frosting into the bag, filling it about two-thirds full. Overfilling makes the bag difficult to handle and increases the risk of bursting or frosting squeezing out the wrong end.
Once filled, lift the bag out of the glass. Unfold the top edges. Gently push the frosting down towards the tip, squeezing out any air pockets. Air bubbles in the frosting cause breaks in your piped lines or shapes, making your easy piping without pastry bags efforts frustrating. Twist or gather the open top of the bag firmly to seal it. This twisted end is where you will apply pressure with your dominant hand to push the frosting out.
Choosing the Right Consistency: Buttercream, Frosting, and More
The consistency of your frosting or filling is paramount to successful easy piping without pastry bags. American buttercream, which is typically made from butter, powdered sugar, and a liquid like milk or cream, is a popular choice. It should be smooth and creamy, holding its shape when piped but not so stiff that it's hard to squeeze. A good test is to scoop some frosting with a spoon – it should hold soft peaks but still fall off the spoon with a gentle tap.
If your frosting is too stiff, your easy piping without pastry bags efforts will be difficult, requiring excessive pressure that could burst the bag. Add liquid (milk, cream, or even a touch of water) a teaspoon at a time, mixing well, until it reaches the desired consistency. If it's too soft and doesn't hold its shape, it will melt and spread when piped.
Add powdered sugar a tablespoon at a time, mixing thoroughly, until it stiffens up. Ganache (cooled but still pliable) and cream cheese frosting are also suitable, provided their consistency is adjusted correctly – firm enough to hold a shape, soft enough to pass through the opening easily.
Basic Piping Techniques Without a Coupler
The Dot Technique: Simple and Elegant
The dot technique is one of the most fundamental and useful for easy piping without pastry bags. It's perfect for adding simple decoration to cookies, cupcakes, or even outlining shapes on a cake. To pipe a dot, hold your makeshift bag perpendicular (at a 90-degree angle) to the surface you are decorating. Apply steady, even pressure to the twisted end of the bag, allowing the frosting to flow out and form a dot.
Once the dot is the desired size, stop applying pressure completely. Then, lift the bag straight up and away from the dot. This clean lift prevents tails or messy peaks. Practice varying the size of your dots by applying pressure for longer or shorter durations. Using a round opening cut into your bag, you can pipe dots ranging from tiny accents to large dollops for covering cupcakes, all achievable with easy piping without pastry bags.
The Line Technique: Adding Borders and Details
Piping lines is another essential skill for easy piping without pastry bags. Lines can be used to create borders, write messages, outline shapes, or add details like stripes. To pipe a line, hold the bag at a slight angle (perhaps 45 degrees) to the surface. Apply steady pressure to start the flow of frosting, and then move the bag smoothly along your desired path while maintaining that pressure.
The key to a consistent line when doing easy piping without pastry bags is maintaining even pressure and a steady speed. If your pressure fluctuates, the line will become thick and thin. If your speed varies, the line might look wavy or uneven. Practice piping straight lines and curves on parchment paper to build muscle memory and control. You can create simple borders around cakes or add decorative lines to cookies using just a straight cut opening in your makeshift bag.
The Star Technique: Creating Texture and Volume
While you won't get the sharp, defined points of a traditional star tip when doing easy piping without pastry bags with just a cut bag, you can still create textured shapes that resemble stars or rosettes. This is often achieved using a round cut opening. To pipe a textured dollop, hold the bag perpendicular to the surface and apply pressure. As the frosting comes out, gently swirl the bag in a small circle or just slightly wiggle it as you maintain pressure.
Alternatively, for a simple 'star' or textured effect, you can snip the end of your bag with small, sharp scissors to create a slightly jagged or uneven opening. Then, when you pipe with a consistent pressure, the frosting will emerge with some texture. Piping dollops with a round opening and then creating swirls or textures after piping using a spatula or knife is also an effective way to achieve volume and texture when focusing on easy piping without pastry bags.
Practicing Basic Piping: Simple Swirls and Rosettes
Consistent results in easy piping without pastry bags come with practice. Before decorating your final product, spend 10-15 minutes practicing basic techniques on a sheet of parchment paper. Pipe rows of dots, straight lines, wavy lines, and simple dollops. Scrape the frosting back into the bag (as long as it hasn't gotten too warm or messy) and practice again.
To practice simple swirls, as you would for a cupcake, hold the bag perpendicular to the surface and start piping from the center, moving outwards in a circular motion and building layers. For rosettes, start in the center and pipe outwards in a tight spiral, then stop pressure and pull away. These simple shapes build the hand control and pressure management necessary for confident easy piping without pastry bags on your actual baked goods.
Troubleshooting Common Piping Problems
Bag Bursting: Causes and Prevention
A common frustration when attempting easy piping without pastry bags is the bag bursting, usually at the seam or the tip. The primary causes are using material that is too thin (like a standard sandwich bag instead of parchment or a freezer bag), overfilling the bag, or trying to pipe frosting that is too stiff through a small opening. For example, trying to pipe a very cold, hard buttercream will put immense strain on any bag.
To prevent bursting when using easy piping without pastry bags, ensure you are using sturdy parchment paper and have secured the seam well. If using plastic, opt for a thicker freezer bag. Never fill the bag more than two-thirds full; work in smaller batches if needed. Most importantly, check your frosting consistency – it should be firm enough to hold a shape but pliable enough to pass through the opening with moderate pressure. Warming a very stiff frosting slightly (a few seconds in the microwave or kneading the bag with warm hands) can also help.
Uneven Pressure: Achieving Consistent Results
Uneven pressure is the culprit behind wavy lines, inconsistent dot sizes, and lopsided swirls when doing easy piping without pastry bags. It means you're squeezing the bag harder in some spots than others. This is a common issue for beginners and improves significantly with practice. Your dominant hand should be applying steady pressure to the twisted top of the bag, while your non-dominant hand guides the tip.
To develop consistent pressure for easy piping without pastry bags, practice piping long lines on parchment paper, focusing solely on keeping the thickness uniform from start to finish. Pay attention to how hard you are squeezing. Try piping rows of dots, aiming for each dot to be the exact same size. This conscious effort to maintain steady pressure will build the necessary muscle memory. Remember, it's better to apply slightly lighter, consistent pressure than bursts of hard squeezing.
Frosting Too Soft or Too Stiff: Adjusting Consistency
As mentioned earlier, frosting consistency is key to successful easy piping without pastry bags. If your frosting is too soft, it will spread rather than hold its shape when piped. This can happen if it's too warm (especially with butter-based frostings) or if it has too much liquid. If your frosting is too stiff, it will be difficult to squeeze, potentially causing hand cramps or bursting the bag, and the piped shapes may look jagged or broken.
To adjust consistency for easy piping without pastry bags: If too soft, refrigerate it for 10-15 minutes to firm up butter-based frostings, or beat in 1-2 tablespoons of powdered sugar at a time until it reaches the desired stiffness. If too stiff, beat in 1-2 teaspoons of milk, cream, or even water at a time until it becomes pliable. Always mix thoroughly after each addition and test the consistency before piping.
Creative Piping Ideas Without Special Equipment
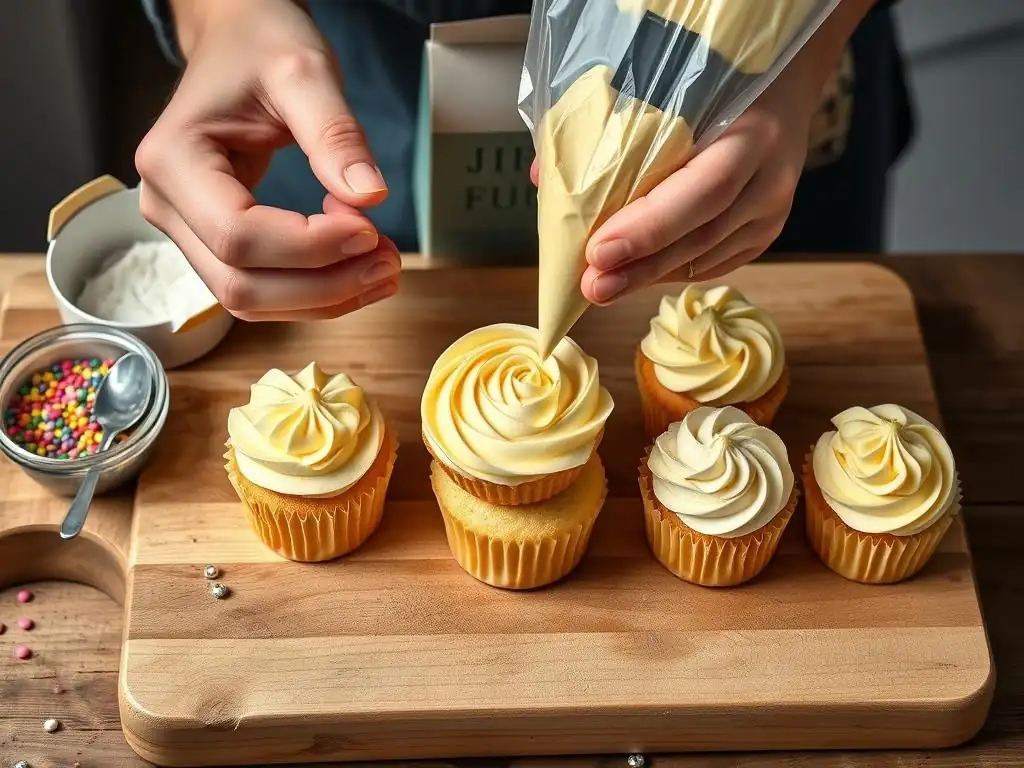
Decorating Cakes with Simple Swirls
You can easily decorate the top of a cake using easy piping without pastry bags and just a round cut opening. A popular technique is to cover the entire top surface with simple swirls or rosettes. Using a bag with a 1/2 to 3/4 inch round opening, start piping from the outer edge of the cake top, moving inwards in a spiral motion, building up the frosting slightly as you go. This creates a lovely, textured surface.
Alternatively, you can pipe individual swirls or dollops arranged neatly or randomly across the cake top. Another idea is to pipe simple lines or waves around the sides of the cake for a rustic, yet decorative border. The simplicity of easy piping without pastry bags allows for quick, effective decoration that adds a professional touch without needing specialized tips or tools.
Adding Borders to Cupcakes Without Fancy Tips
Cupcakes are perfect canvases for easy piping without pastry bags. The simplest decoration is a classic swirl on top, achieved with a round cut opening (about 1/2 inch or larger). Start piping from the center of the cupcake and spiral outwards and upwards, releasing pressure as you reach the top point.
For borders around the edge of a frosted cupcake, use a smaller round opening (1/4 to 1/2 inch). You can pipe a series of dots closely together to form a dotted border. Or, try piping small 'shells' by applying pressure, letting a small amount of frosting build up, then quickly pulling the bag away at an angle to create a tail. Repeating this around the edge creates a simple, textured border, all achievable with easy piping without pastry bags.
Creating Unique Designs with Everyday Objects
Beyond just piping with your makeshift bag, you can use everyday kitchen items to enhance your easy piping without pastry bags designs. After piping simple shapes like dots or lines, use the back of a spoon or a small offset spatula to gently flatten and smooth them into different forms. A skewer or toothpick can be used to swirl colors together on a piped surface or drag through piped lines to create feathered effects.
For textured surfaces, pipe parallel lines or dots and then drag a fork or comb through them. You can even use the edge of a knife or bench scraper to create patterns in a layer of frosting piped onto a cake. These simple tools, combined with basic shapes piped using easy piping without pastry bags, unlock a surprising range of creative possibilities.
Cleaning Up Your DIY Piping Setup
Disposing of Parchment Paper Bags
One of the greatest advantages of using parchment paper for easy piping without pastry bags is the incredibly easy cleanup. Once you are finished piping, simply use a spatula to scrape any excess frosting from the bag back into your frosting bowl (if it's still clean and usable).
Then, the entire parchment paper cone can be simply discarded. There are no fabric bags to wash or small metal tips to scrub. This makes easy piping without pastry bags with parchment paper a very convenient option, especially for quick decorating jobs or when you want to minimize post-baking cleanup.
Cleaning Reusable Makeshift Tips
If you've adapted a reusable item as a makeshift tip or used a sturdy plastic bag that you intend to wash and reuse (like a thicker freezer bag), cleanup is similar to cleaning traditional piping tools. Scrape out as much excess frosting as possible.
Then, wash the item thoroughly with warm, soapy water. Use a small brush if needed to get into any crevices of an adapted tip. Rinse well and allow to air dry completely before storing. While parchment paper is generally disposable, ensuring any reusable components used for easy piping without pastry bags are properly cleaned maintains hygiene for future baking projects.
Conclusion: Unleash Your Creativity with Easy Piping
Frequently Asked Questions
How can I achieve easy piping without a pastry bag?
You can use a ziplock bag as a substitute. Simply fill the bag, seal it, snip a corner, and you're ready to pipe! It’s a cost-effective and readily available alternative.
What are some easy piping tips for beginners using a makeshift bag?
Start with a small amount of frosting or batter to get a feel for the pressure. Practice on parchment paper first to control the flow and refine your technique before decorating your final product.
What kind of frosting works best for easy piping without pastry bags?
A stiffer frosting, like buttercream, is ideal. It holds its shape well and is easier to control than a runny glaze when using a ziplock bag.
Are there any specific techniques to get clean lines when doing easy piping with a ziplock bag?
Apply consistent pressure to the bag and move your hand smoothly. Avoid jerky movements and overlap your piped lines slightly for a professional look.
Can I use different tips for easy piping with a ziplock bag, and how would I attach them?
While you can't directly attach standard piping tips, you can experiment with the size and shape of the snipped corner on your bag to create various effects. Try small, precise cuts for detail work or wider cuts for thicker lines.
Final Reflection: The Joy of Effortless Piping
Mastering the art of piping doesn't require a mountain of expensive tools; it's about embracing simplicity and finding joy in the process. This article has demonstrated that creating beautiful, professional-looking piped decorations is entirely achievable without relying on pastry bags or specialized couplers. The techniques discussed empower bakers of all skill levels to unlock their creativity and elevate their baking game.
The accessibility of easy piping techniques is profoundly impactful, democratizing a skill once perceived as exclusive to professional pastry chefs. It allows home bakers to personalize their creations, adding a touch of elegance and artistry to everyday treats. This resonates deeply with me, as I've witnessed firsthand the transformative power of simple baking techniques in fostering confidence and a sense of accomplishment. The best things in life are simple.
This sentiment perfectly encapsulates the essence of this article – proving that sometimes, less is truly more.
Now, it's your turn. Consider the simple tools you already possess and the creative potential they hold. Experiment with the techniques outlined in this article, and don't be afraid to get messy! Embrace the unexpected, celebrate your unique style, and discover the immense satisfaction of creating beautiful piped designs without the need for fancy equipment. Let your creativity flow, and watch your baking journey blossom.
Unleash Your Inner Pastry Chef: Mastering Piping Without the Gadgets!
Thanks for joining us on this piping adventure! We hope you gained confidence in creating beautiful decorations without relying on expensive tools. Now it's time to put your new skills into action!
- Practice your piping techniques: Grab your bag and some frosting – even simple swirls and dots can look amazing! Experiment with different pressures and angles to find your perfect style. This is the most important step!
- Share your creations: Post a picture of your piping masterpiece on social media and tag us @BakeWithEase! We’d love to see your work.
- Try a new recipe: Challenge yourself with a cake or cookie that requires piping. Browse our recipe section for inspiration!
Ready to transform plain desserts into edible works of art? What's the first treat you’ll decorate using your newfound skills?