
Piping Perfection: Advanced Royal Icing Techniques Explained

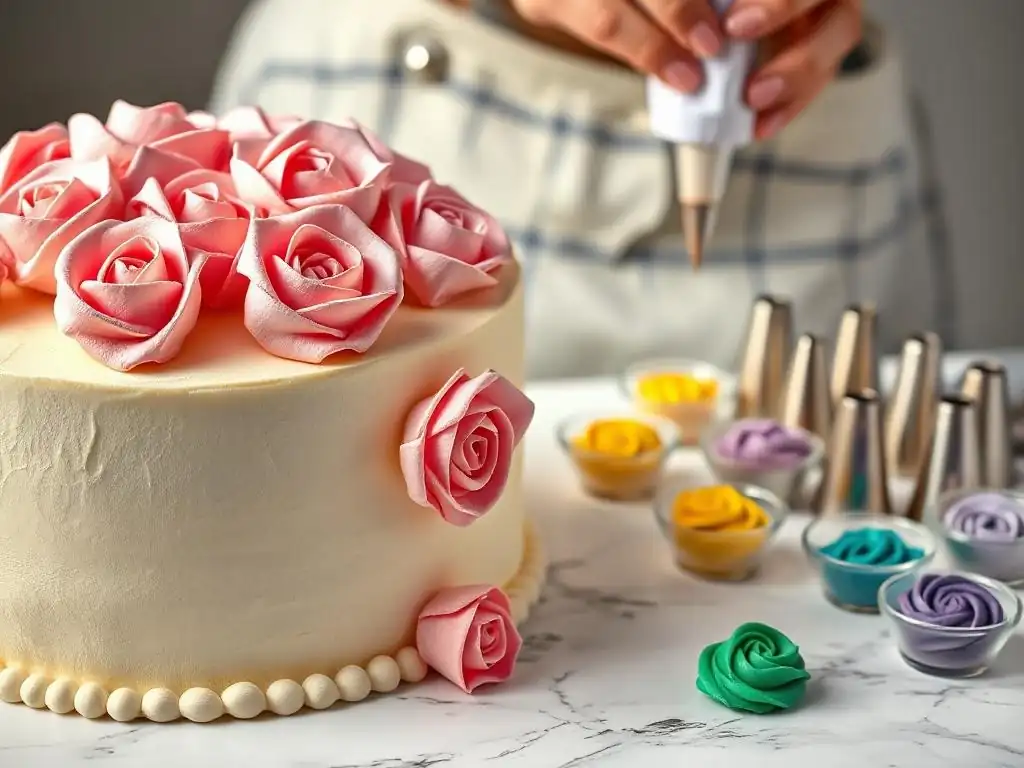
Welcome to BakeWithEase, your secret ingredient to baking brilliance! Ever wondered how to create those breathtakingly intricate designs you see on professionally decorated cookies and cakes? Unleash your inner artist as we delve into the captivating world of royal icing piping techniques. Prepare to discover advanced methods, tips, and tricks that will transform your creations from simple to stunning. Ready to elevate your baking game? Let's get started!
- Mastering Royal Icing Piping Techniques for Exquisite Decorations
- Understanding Royal Icing Consistency for Intricate Piping
- Advanced Royal Icing Piping Techniques: A Step-by-Step Guide
- Exploring Different Piping Tips for Unique Royal Icing Designs
- Troubleshooting Common Royal Icing Piping Problems
- Advanced Royal Icing Projects: Inspiration and Tutorials
- Elevating Your Baking with Exquisite Royal Icing Details
-
Frequently Asked Questions
- How do I achieve a smooth consistency for royal icing, ideal for intricate piping?
- What are some essential tools for mastering royal icing piping techniques?
- How can I prevent air bubbles from ruining my royal icing designs?
- What are some techniques for creating different textures with royal icing?
- How do I store leftover royal icing to prevent it from hardening?
- Final Reflection: Mastering the Art of Royal Icing Piping
- Unleash Your Inner Royal Icing Artist!
Mastering Royal Icing Piping Techniques for Exquisite Decorations
Royal icing is a classic decorator's medium, renowned for its ability to dry hard and smooth, creating stunning, durable designs on cookies, cakes, and gingerbread houses. While mastering the basics of outlining and flooding is a great start, delving into advanced royal icing piping techniques opens up a world of intricate possibilities.
Achieving "piping perfection" requires not only skill but also a deep understanding of the icing itself, the tools you use, and a lot of dedicated practice. Whether you're aiming for delicate lace patterns, realistic floral elements, or sharp geometric designs, refining your royal icing piping skills is key to elevating your baked creations from simple treats to edible works of art.
Taking your royal icing piping techniques to the next level involves learning how to control pressure, understanding different tip shapes and sizes, and mastering specific techniques like stringwork or brush embroidery. It's about developing muscle memory and a steady hand, much like learning to draw or paint. Advanced decorators often spend hours practicing specific motions, like piping consistent dots or uniform lines, on parchment paper before transferring the skill to a finished piece. This foundational practice is crucial for executing complex designs flawlessly and achieving that professional, polished look that makes royal icing so appealing.
Understanding Royal Icing Consistency for Intricate Piping
Achieving the Perfect Royal Icing Consistency: A Guide
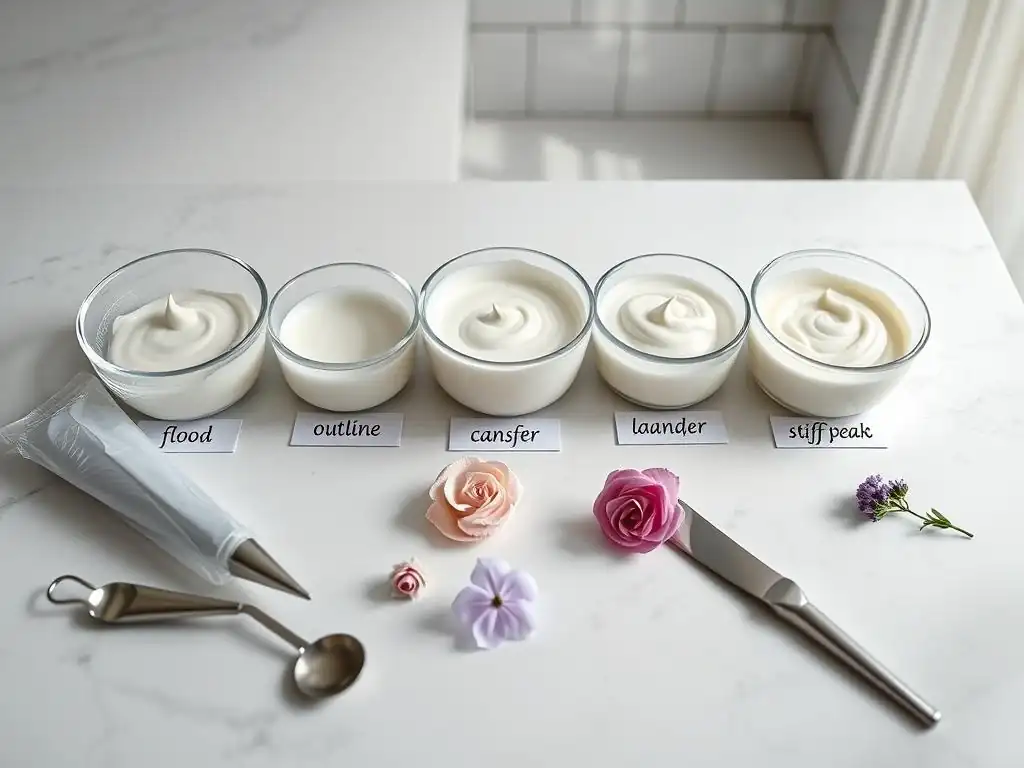
The foundation of successful royal icing piping techniques lies in achieving the correct consistency. Royal icing, typically made from powdered sugar, egg whites (or meringue powder), and liquid (water or lemon juice), is highly sensitive to moisture. A consistency that is too thick will be difficult to pipe smoothly and may break, while icing that is too thin will lose its shape and spread.
The "perfect" consistency isn't a single point but a range, depending entirely on the specific piping technique you intend to use. For example, flooding cookies requires a much runnier consistency than piping delicate outlines or intricate details.
To achieve different consistencies, you primarily adjust the amount of liquid. Starting with a thick, stiff icing (often called "stiff peak" or "piping consistency"), you gradually add liquid, drop by drop or in very small increments, stirring thoroughly after each addition. A common test for consistency is the "drop test."
For a medium consistency suitable for outlining or simple details, a drop of icing lifted with a spoon should disappear back into the main bowl of icing within about 10-15 seconds. For flooding, this time might be 5-10 seconds, while for very fine detail work or stiff elements like roses, the icing might be so thick it barely settles at all. Keeping a small bowl of stiff icing and a small amount of liquid handy allows you to easily adjust consistency as needed while working.
Different Royal Icing Consistencies and Their Uses in Piping
Understanding the different consistencies is fundamental to mastering various royal icing piping techniques. We generally talk about consistencies ranging from very stiff to very thin. Very stiff icing holds sharp peaks and is ideal for piping structural elements like walls on a gingerbread house, intricate roses using a flower nail, or firm borders that need to maintain their shape perfectly. This consistency is often used for techniques requiring body and definition.
Medium consistency, sometimes referred to as "medium peak" or "outline consistency," is slightly thinner than stiff icing. It's pliable enough to flow smoothly through a piping tip but still holds its shape well. This is the go-to consistency for piping outlines on cookies or cakes, writing text, or piping simple dots and lines. It's versatile and forms the basis for many decorative elements.
Thin consistency, also known as "flooding consistency," is much runnier and is used to fill in outlined areas smoothly, creating a flat, solid surface. It spreads easily and self-levels, eliminating brush strokes or piping lines. Finally, there are even thinner consistencies used for techniques like brush embroidery or washes, where the icing needs to be very fluid. Choosing the right consistency is half the battle in achieving professional-looking royal icing piping techniques.
How to Adjust Royal Icing Consistency for Detailed Work
Adjusting royal icing consistency for detailed piping work requires precision and patience. For piping fine lines, intricate lace, or delicate filigree, you need a consistency that is slightly softer than outline consistency but still firm enough to hold a crisp line without breaking. This often falls into the "medium-stiff" range. To achieve this, start with your basic stiff icing and add liquid very gradually. It's often best to transfer a small amount of stiff icing to a separate bowl for adjustment, rather than altering the entire batch.
When aiming for a specific detailed royal icing piping technique, such as pressure piping tiny beads or creating intricate brush embroidery, the required consistency becomes even more nuanced. For pressure piping, a slightly firmer medium consistency works well, allowing the icing to extrude uniformly under steady pressure. For brush embroidery, you need a consistency thin enough to spread and blend with a brush but not so thin that it loses its definition entirely – typically a medium consistency that holds a soft peak.
Always test your adjusted consistency on a piece of parchment paper before applying it to your project. Pipe a few lines or shapes; if the lines break easily or the icing is difficult to push through the tip, it's too stiff.
If it spreads or doesn't hold a clean edge, it's too thin. Add more liquid or more powdered sugar/stiff icing as needed, testing frequently until the consistency is just right for your chosen royal icing piping technique.
Advanced Royal Icing Piping Techniques: A Step-by-Step Guide
The Art of Pressure Control in Royal Icing Piping
Pressure control is perhaps the most critical skill in mastering advanced royal icing piping techniques. It's the ability to apply steady, even pressure to the piping bag to produce consistent, uniform lines, dots, or shapes. Inconsistent pressure leads to wobbly lines, uneven dots, and shapes that vary in size and thickness. Think of it like squeezing toothpaste; a steady squeeze gives a smooth ribbon, while intermittent squeezing results in blobs and gaps. For intricate work, even small variations in pressure are noticeable.
To practice pressure control for royal icing piping, fill a piping bag fitted with a small round tip (like a #1 or #2) with medium-consistency icing. Hold the bag comfortably in your dominant hand, using your other hand to guide the tip. Apply gentle, continuous pressure from the top of the bag, using the palm and fingers to squeeze the icing down. Keep the tip slightly above the surface you're piping on.
Practice piping straight lines, curves, and dots on parchment paper, focusing solely on maintaining consistent pressure. Notice how the thickness of the line or the size of the dot changes with varying pressure. The goal is to be able to pipe a line of uniform thickness or a series of identically sized dots purely by controlling the squeeze.
Creating Fine Lines and Delicate Details with Royal Icing
Creating fine lines and delicate details is a hallmark of advanced royal icing piping techniques, often seen in lace designs, filigree, and detailed outlining. This requires a small piping tip, typically a round tip in sizes #00, #0, #1, or #2, and a medium-stiff consistency of royal icing. The icing needs to be smooth and free of air bubbles (more on that later!) to flow continuously through these tiny openings.
To pipe fine lines, hold the piping bag at about a 45-degree angle to the surface. Apply even pressure and lift the tip slightly as you move, allowing the icing to fall into place rather than dragging the tip along the surface. This "floating" technique helps create smoother lines.
For very delicate details, like connecting points in a lace pattern or adding tiny embellishments, you might use a "pulling" motion where you touch the tip down, apply pressure, and pull away quickly, leaving a small bead or tail. Practice piping grids of fine lines, intricate scrolls, and tiny dots on parchment paper to build the precision and control needed for these delicate royal icing piping techniques.
Mastering the Drop Flower Technique with Royal Icing
The drop flower is a classic royal icing piping technique used to create simple, charming floral elements directly onto your baked goods. While seemingly basic, mastering uniform petal shape and size requires practice. This technique typically uses a star tip (like a #16, #18, or #21) or a specific drop flower tip. The required consistency is usually medium-stiff to stiff, firm enough to hold the petal shape but soft enough to extrude smoothly.
To pipe a drop flower, hold the piping bag perpendicular (90 degrees) to the surface. Touch the tip lightly to the surface, apply steady pressure to force the icing out, and then, while maintaining pressure, give the bag a quick twist or sharp lift straight up. The twist helps to cleanly break the icing flow and form the center of the flower.
The amount of pressure and the duration of the squeeze determine the size of the flower. Practice piping rows of drop flowers on parchment paper, focusing on achieving consistent size and petal definition. Experiment with different star tips to see how they alter the look of the petals, refining your royal icing piping techniques for floral designs.
Extending Your Skills: Stringwork and Overpiping with Royal Icing
Stringwork and overpiping are advanced royal icing piping techniques that add dimension, height, and intricate detail to cakes and cookies. Stringwork involves piping lines of icing that bridge gaps, creating delicate swags or suspended designs. This requires a medium-stiff consistency and steady pressure. To pipe a string, start by anchoring the icing at one point, lift the tip away from the surface, and let the icing fall in an arc as you move to the next anchor point. The key is smooth movement and consistent pressure so the string doesn't break mid-air.
Overpiping, also known as brush embroidery (though brush embroidery is a specific type of overpiping), involves piping lines or patterns and then softening or blending them with a brush or other tool before the icing sets. A common form of overpiping is creating raised designs by piping a shape or line, letting it set slightly, and then piping directly on top of it again, sometimes multiple times, to build height.
This requires a stiff consistency for the base layers and often a slightly softer consistency for the top, detailed layer or for techniques like brush embroidery where you drag a brush through the wet icing. Mastering these layered and dimensional royal icing piping techniques adds significant visual interest and complexity to your decorations.
Exploring Different Piping Tips for Unique Royal Icing Designs

Understanding the Function of Various Piping Tip Shapes
Piping tips are the tools that translate your pressure control and icing consistency into specific shapes and patterns, making them essential to mastering royal icing piping techniques. Tips come in a vast array of shapes and sizes, each designed for a particular purpose. Round tips (#00 to #12 and larger) are used for piping lines, dots, beads, writing, and outlining. The size dictates the thickness of the line or dot. Star tips (open and closed, #13 to #32 and larger) are used for creating stars, shells, rosettes, and borders with ridged textures.
Leaf tips (#65 to #70) are specifically shaped to create realistic leaves with a single squeeze and gentle pressure release. Petal tips (#101 to #104) are curved and used to pipe delicate flower petals (like roses or carnations) and ruffles. Basketweave tips (#44 to #48) have a smooth edge and a serrated edge, used for creating woven patterns. Understanding how each tip shape interacts with the icing consistency and your piping pressure is crucial for executing various royal icing piping techniques effectively and achieving the desired visual effect.
Creating Ruffles and Borders with Royal Icing: Advanced Techniques
Creating beautiful ruffles and borders is a popular application of royal icing piping techniques, adding elegance and finish to cakes and cookies. Ruffles are often achieved using a petal tip (#101-104). With the wider end of the tip against the cake/cookie and the narrower end facing away, apply steady pressure while moving the tip in a slightly wavy or back-and-forth motion.
The speed of your movement and the angle of the tip will determine the tightness and flow of the ruffle. A medium consistency icing works well for softer, flowing ruffles, while a slightly stiffer consistency creates more defined folds.
Borders can range from simple star borders using a star tip to more complex shell borders, rope borders, or even intricate lambeth-style piping. Shell borders are created by piping teardrop shapes that overlap slightly, using a star tip and varying pressure – starting with more pressure and gradually releasing as you pull away. Rope borders involve a specific back-and-forth motion with a round tip to create a twisted effect. Mastering these royal icing piping techniques for borders requires practice to maintain uniform size, spacing, and shape around the entire edge of your project.
Using Specialty Piping Tips for Unique Textures and Effects
Beyond the basic round, star, and petal tips, there are numerous specialty piping tips that allow you to achieve unique textures and effects with royal icing piping techniques. Multi-opening tips (like grass tips #233 or multiple dot tips) create clusters of lines or dots simultaneously, perfect for simulating grass, hair, or creating textured fills. Ribbon tips create flat, ribbon-like strips of icing.
Specific character or shaped tips can pipe specific shapes like hearts or stars directly. Using these specialty tips effectively often requires experimenting with different icing consistencies. For a grass tip, a medium-stiff consistency is usually best to ensure the individual strands hold their shape. For ribbon tips, a slightly softer medium consistency allows the icing to flow smoothly into a flat band. Incorporating specialty tips into your royal icing piping techniques repertoire expands your creative possibilities and allows you to add unique decorative elements to your baked goods.
Troubleshooting Common Royal Icing Piping Problems
Preventing and Fixing Air Bubbles in Royal Icing
Air bubbles are a common frustration when working with royal icing piping techniques, especially when piping fine lines or details. They cause breaks in the flow of icing, resulting in gaps and imperfections in your design. Air bubbles are often introduced during the mixing process, particularly if the icing is whipped vigorously.
To prevent air bubbles, mix your royal icing on a low speed for the minimum time necessary to combine ingredients. After mixing, gently stir the icing with a spatula, pressing it against the sides of the bowl to force out any trapped air. Cover the surface of the icing directly with plastic wrap to prevent a crust from forming, which can also trap air.
Before filling a piping bag, gently knead the bag a few times to help any remaining bubbles rise to the top. If you spot a bubble while piping, try gently tapping the piping bag on your work surface, or if it's in the tip, momentarily stop piping and gently squeeze the bag near the tip to push it out.
For persistent bubbles in fine tips, a clean needle can sometimes be used to prick the bubble as it emerges. Addressing air bubbles is crucial for smooth royal icing piping.
Addressing Royal Icing Cracking and Bleeding Issues
Cracking and bleeding are frustrating problems that can ruin intricate royal icing piping techniques. Cracking occurs when the icing dries too quickly, often due to low humidity or being placed directly under a fan. As the surface dries and hardens, the still-wet interior shrinks, causing the dry crust to crack. Bleeding happens when colors from different sections of icing or the underlying cookie/cake seep into each other. This is often caused by excess moisture, either from the icing being too wet, the surface being damp, or high humidity.
To prevent cracking, allow your royal icing to dry slowly and evenly. If the air is very dry, you can cover your decorated items loosely with a box or place them in a room with a humidifier. Avoiding placing them near vents or fans is essential. To prevent bleeding, ensure your icing is the correct consistency – overly thin icing is more prone to bleeding.
Make sure the surface you're piping on is completely dry (if it's a base layer of royal icing). If piping adjacent colors, allow one color to dry completely before piping the next color right beside it, especially with dark or vibrant colors next to light ones. Using high-quality gel food colors instead of liquid colors also helps reduce excess moisture. Careful drying conditions and proper consistency are key to avoiding these issues when using royal icing piping techniques.
Dealing with Clogged Piping Tips: Solutions and Prevention
Clogged piping tips, especially fine ones, are a common nuisance when performing detailed royal icing piping techniques. Clogging can be caused by several factors: air bubbles getting stuck, small lumps of undissolved powdered sugar, dried bits of icing from the bag or tip, or icing that is too stiff for the tip size.
To prevent clogs, ensure your royal icing is sifted free of lumps before mixing. After mixing, let the icing sit for a few minutes, covered, to allow any trapped air to rise, then stir gently. When filling the piping bag, avoid scooping up dried bits from the edge of the bowl. Twist the top of the piping bag tightly to prevent icing from drying out at the back.
If a tip clogs while you're piping, stop immediately. Try gently squeezing the bag to force the clog out. If that doesn't work, you may need to remove the tip and clear it.
A toothpick or a clean needle can be used to carefully dislodge the blockage from the inside of the tip. For persistent clogging, the icing might be too stiff or contain too many lumps, in which case you may need to thin it slightly or strain it through a sieve before refilling the bag. Keeping tips clean and icing smooth are vital for smooth royal icing piping.
Advanced Royal Icing Projects: Inspiration and Tutorials

Creating Intricate Royal Icing Lace Designs
Intricate royal icing lace is one of the most admired and advanced royal icing piping techniques. It involves piping delicate, interconnected patterns that mimic the look of fabric lace, often on cookies or cakes. This technique requires a very steady hand, excellent pressure control, and a smooth, medium-stiff icing consistency that flows beautifully through a very fine tip (typically #00, #0, or #1).
To create lace, you often start by drawing or tracing a pattern onto the surface or parchment paper. Then, using your fine tip, you carefully pipe the outline of the lace design. Once the outline is set, you fill in the details by piping fine lines, dots, and scrolls to create the open, web-like structure characteristic of lace.
Techniques like pressure piping for tiny beads or creating delicate connecting threads are essential here. Patience is key, as lace designs are time-consuming and require precision for each element to connect seamlessly and create a convincing lace effect using various royal icing piping techniques.
Decorating cookies with advanced royal icing piping techniques, especially geometric patterns, offers a modern and striking aesthetic. This goes beyond simple flooding and involves piping precise lines, shapes, and repeating motifs. Achieving crisp edges and uniform patterns requires careful planning, precise outlining, and often flooding specific sections before moving to the next.
For geometric designs, you might use masking techniques with edible markers or stencils to guide your piping. Using a medium-consistency icing and a small round tip (#1 or #2), pipe straight lines, squares, triangles, or more complex tessellations. Techniques like stringwork can be incorporated to create suspended geometric elements. Allowing sections to dry completely before adding adjacent colors or details is crucial to prevent bleeding and maintain sharp lines. Mastering pressure control and smooth line piping is paramount for executing flawless geometric royal icing piping techniques on cookies.
Royal Icing Piping on Cakes: Creating a Floral Cascade
Applying advanced royal icing piping techniques to cakes, such as creating a stunning floral cascade, transforms a simple cake into a centerpiece. This involves piping various royal icing flowers (like roses, blossoms, and leaves) directly onto the cake or piping them separately on parchment paper and attaching them once dry. Using petal tips, leaf tips, and star tips in various sizes allows you to create a variety of flower types and sizes.
The floral cascade technique involves arranging these piped flowers and leaves down the side or across the top of the cake, creating a natural, flowing effect. Piping vines or delicate stems with a fine round tip (like a #1 or #2) connects the elements. Using different consistencies – stiff for structural flowers, medium-stiff for leaves and vines – is important. Attaching dry elements requires a dab of fresh royal icing as "glue." Creating a cohesive and balanced floral cascade using royal icing piping techniques requires planning the arrangement and skillfully piping each individual component.
Elevating Your Baking with Exquisite Royal Icing Details
Tips for Achieving Professional-Looking Royal Icing Decorations
Achieving a professional look with your royal icing piping techniques comes down to attention to detail, practice, and using the right tools and techniques. Firstly, ensure your icing is perfectly smooth and lump-free; sifting powdered sugar is non-negotiable. Secondly, master consistency control – having the right thickness of icing for each specific technique is vital. Use high-quality piping bags and tips; cheap ones can hinder your efforts.
Thirdly, practice pressure control relentlessly on parchment paper before working on your final piece. Consistency in line thickness, dot size, and shape is a hallmark of professional work. Work in good lighting so you can clearly see what you're doing. Keep your workspace clean and organized. Finally, don't rush the drying process; allowing layers to dry completely before adding the next prevents smudging and bleeding. Implementing these tips will significantly improve the quality of your royal icing piping.
Royal Icing Techniques for Holiday Baking: Gingerbread House Detailing
Royal icing is indispensable for holiday baking, particularly for decorating gingerbread houses. Advanced royal icing piping techniques allow you to create intricate details that bring these edible structures to life. Beyond simply "gluing" the walls together with stiff icing, you can pipe realistic roof tiles using a star tip, create delicate window frames with a fine round tip, or pipe icicles dripping from the eaves using a medium consistency and a pulling motion.
You can pipe festive borders around doors and windows, add intricate snowdrifts with a palette knife and stiff icing, or pipe tiny festive figures or patterns directly onto the gingerbread walls. Using different colors of royal icing and various piping tips allows for immense creativity. The durability of dried royal icing makes it perfect for creating structural details that hold up throughout the holiday season. Mastering these specific royal icing piping techniques enhances the charm and detail of your holiday gingerbread creations.
The Importance of Practice and Patience in Mastering Royal Icing Piping
Mastering advanced royal icing piping techniques is not something that happens overnight. It requires dedication, consistent practice, and a great deal of patience. Don't get discouraged if your first attempts at stringwork are wobbly or your lace patterns aren't perfectly uniform. Every experienced decorator started somewhere, and their skill is a result of hours spent practicing basic motions and refining techniques.
Set aside dedicated time to practice piping lines, dots, scrolls, and specific techniques like drop flowers or shells on parchment paper. This allows you to build muscle memory and control without the pressure of potentially ruining a finished cake or cookie. Learn from your mistakes – analyze what went wrong with a consistency or a technique and adjust for your next attempt.
Patience is crucial, especially with techniques that involve multiple drying stages. Embrace the process, focus on small improvements with each practice session, and celebrate your progress. With consistent effort, you will undoubtedly elevate your royal icing piping techniques and create stunning baked goods.
Frequently Asked Questions
How do I achieve a smooth consistency for royal icing, ideal for intricate piping?
The key is the water ratio. Gradually add water to your royal icing until it reaches a toothpaste-like consistency for outlining and a slightly thinner, "15-second flood" consistency for filling. Use a toothpick to test.
What are some essential tools for mastering royal icing piping techniques?
Besides royal icing and piping bags, invest in various piping tips (round, star, petal), couplers for easy tip switching, and scribe tools for smoothing imperfections and guiding the icing.
How can I prevent air bubbles from ruining my royal icing designs?
To minimize air bubbles, mix the icing gently on low speed. After mixing, "burp" your piping bag by squeezing out any trapped air before you start piping.
What are some techniques for creating different textures with royal icing?
Experiment with different piping tips to achieve various textures. For example, a star tip creates a textured, ruffled effect, while a round tip can be used for smooth lines or dots. You can also use a spatula for textured backgrounds.
How do I store leftover royal icing to prevent it from hardening?
To prevent hardening, store leftover royal icing in an airtight container at room temperature. Cover the surface of the icing with plastic wrap, pressing it directly onto the icing to prevent a skin from forming.
Final Reflection: Mastering the Art of Royal Icing Piping
The intricate beauty of royal icing piping continues to captivate bakers and cake decorators worldwide, transforming ordinary cakes into edible masterpieces. Its enduring popularity speaks to a timeless desire for both precision and artistry in the culinary arts, a desire that transcends fleeting trends and remains deeply rooted in the human appreciation for beauty and craftsmanship. This enduring appeal ensures that mastering royal icing techniques remains a valuable skill for both hobbyists and professionals alike.
The journey of learning royal icing piping is more than just acquiring a new skill; it's a process of cultivating patience, precision, and a deep appreciation for the delicate balance between technique and creativity. The subtle nuances, the seemingly effortless swirls and intricate details, all require dedication and practice. As I've explored these techniques, I've been reminded of the words of renowned pastry chef, Pierre Hermé: Pastry is a science, but it's also an art. It's about precision, but it's also about passion.
This perfectly encapsulates the spirit of mastering royal icing piping – a blend of technical skill and artistic expression.
Now, it's your turn to embark on this rewarding journey. Don't be afraid to experiment, to embrace the inevitable imperfections, and to learn from each attempt. The beauty of royal icing lies not only in the flawless execution but also in the unique personality each creation reflects. Pick up your piping bag, choose your favorite tip, and let your creativity flow. The world of piping perfection awaits you – embrace the challenge, and discover the joy of creating edible art.
Unleash Your Inner Royal Icing Artist!
Thanks for diving deep into the world of royal icing! You've now unlocked advanced techniques to create truly stunning piping designs. Ready to put your newfound skills to the test?
- Craft your masterpiece: Choose your favorite cookie recipe and try out one of the techniques you learned today. Challenge yourself to recreate the rose or perhaps tackle a new design entirely!
- Share your creations: Show us your piping prowess! Post a picture of your finished cookies on social media and tag us – we’d love to see your amazing work.
- Explore new flavors: Experiment with adding different food colorings or even subtle flavor extracts to your royal icing for an extra special touch.
What unique design will you create with your newfound royal icing expertise? Let us know in the comments!