
Creating Textures on Cakes: Beyond Smooth Frosting with Icing & Fondant

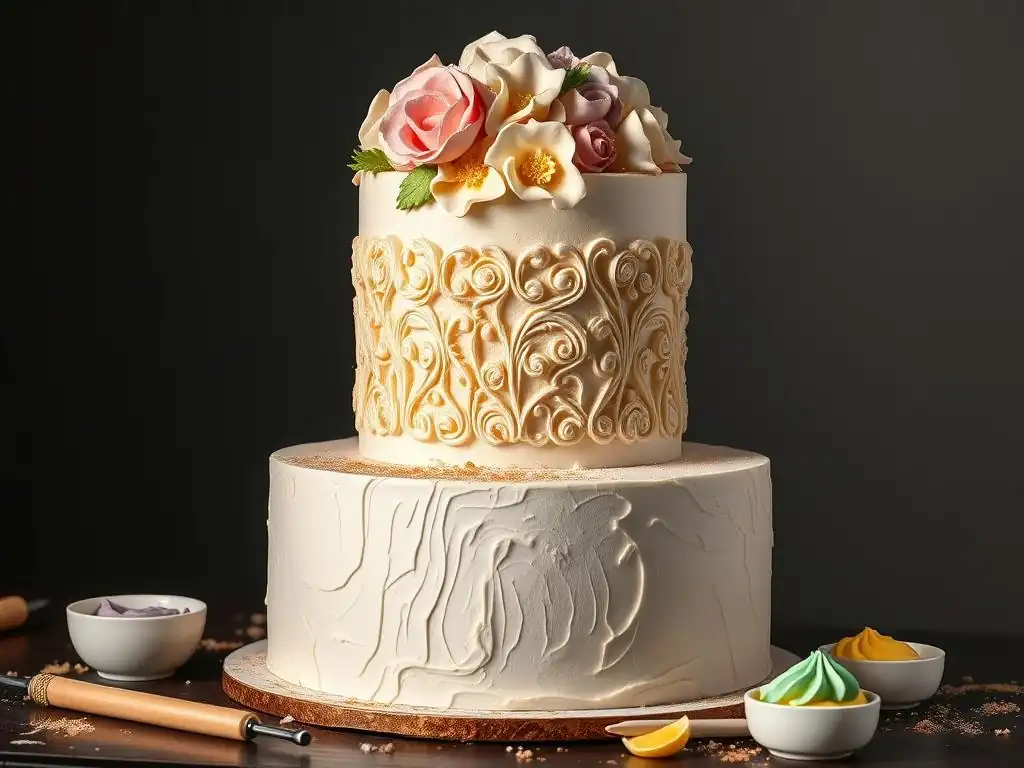
Welcome to BakeWithEase, your partner in creating delicious baked goods! Are you ready to elevate your cake decorating game? This week, we're diving deep into the fascinating world of textured cake frosting techniques. Forget flat and predictable – discover how to transform your cakes with stunning visual effects using icing and fondant. Intrigued? Keep reading to unlock the secrets of creating truly unforgettable cake designs!
- Introduction to Cake Textures
- Essential Tools and Materials for Textured Frosting
- Icing Texture Techniques
- Fondant Texture Techniques
- Advanced Texture Applications
- Troubleshooting Common Texture Issues
- Inspiration and Ideas for Sustainable Garden Designs
- Conclusion: Embracing the Joys of Sustainable Home Gardening
-
Frequently Asked Questions
- What are some simple textured frosting techniques perfect for beginners?
- Can I achieve textured frosting effects using only buttercream?
- What's the difference between using icing and fondant for textured cake designs?
- How can I prevent my textured frosting from melting or losing its shape?
- Are there any tools that are essential for creating textured cake frosting?
- Final Reflection: The Enduring Allure of Textured Cakes
- Unleash Your Inner Cake Artist: Texture Techniques to Try!
Introduction to Cake Textures
Why Explore Textures? Benefits for Presentation and Flavor
Moving beyond a perfectly smooth finish opens up a world of creative possibilities in cake decorating. Textured cake frosting techniques add significant visual interest, transforming a simple frosted cake into a piece of edible art. Different textures catch the light in unique ways, creating depth, contrast, and highlights that can make a design truly pop. A cake covered in sharp, defined grooves will have a completely different presence than one adorned with soft, rustic swirls. These techniques are fundamental in elevating the aesthetic appeal of any cake, from a simple celebration cake to an elaborate tiered masterpiece.
Beyond the visual, texture can also influence the eating experience. While the primary flavor comes from the cake and frosting, the mouthfeel contributes to overall enjoyment. A very stiff buttercream piped into sharp peaks will feel different on the tongue than a smooth, creamy ganache coating or the firm bite of textured fondant. By incorporating textured cake frosting techniques, you can add another layer of sensory experience for those enjoying your baked creation, making each bite slightly varied and more dynamic.
Understanding the Principles: Frosting Consistency, Application Methods, and Layering
Mastering textured cake frosting techniques begins with understanding the foundational principles. First and foremost is frosting consistency. The same buttercream recipe can produce vastly different textures depending on its firmness. A very stiff buttercream (achieved by adding more powdered sugar or less liquid) is ideal for holding sharp peaks and defined piping work, like stars or ruffles.
A medium consistency works well for spreading techniques like swirls or waves, offering some body but still being pliable. A softer consistency is better for achieving a smooth finish or for techniques like brush embroidery. Adjusting consistency often involves adding a tablespoon of liquid (milk, cream, or water) to soften or a few tablespoons of powdered sugar to stiffen, mixing thoroughly each time.
The method of application is equally critical. The tools you use and how you use them directly create the texture. A simple offset spatula can create rustic swirls with sweeping motions, while a textured comb pulled along the side of a cake creates uniform grooves. Piping bags with various tips produce dots, stars, rosettes, or intricate lacework.
Stencils allow for applying precise patterns onto a surface. Layering techniques also play a role; for instance, applying a smooth crumb coat, chilling, and then applying a final textured layer ensures a clean base and prevents crumbs from interfering with the texture. Understanding how each tool and technique interacts with the frosting consistency is key to achieving desired textured cake frosting techniques.
Essential Tools and Materials for Textured Frosting
Icing Types: Buttercream, Ganache, and Royal Icing
Buttercream is perhaps the most versatile medium for textured cake frosting techniques. American buttercream, made from butter and powdered sugar, is relatively firm and holds shape exceptionally well, making it perfect for piping sharp stars, detailed borders, and textured swirls. A typical ratio might be 1 part butter to 2 parts powdered sugar by weight, plus a splash of liquid and flavor.
Meringue-based buttercreams like Swiss, Italian, or French offer a smoother, silkier texture but can still be used for spreading textures and some piping, providing a different mouthfeel. Their stability comes from the meringue base, making them less susceptible to temperature fluctuations than American buttercream, though they might not hold ultra-sharp peaks as readily.
Ganache, a rich mixture of chocolate and cream, offers distinct textural possibilities. When warm, it can be poured for a smooth, glossy coating or used for popular drip effects. The ratio of chocolate to cream dictates its final texture; a dark chocolate ganache for coating might use a 1:1 or 2:1 chocolate-to-cream ratio, while a white chocolate ganache often requires a 3:1 or 4:1 ratio due to less cocoa solids.
As ganache cools, it thickens and can be whipped to a spreadable consistency suitable for frosting cakes and creating softer, less defined textures compared to buttercream. Royal icing, made from powdered sugar and egg whites or meringue powder, dries hard and brittle. It's ideal for fine detail work like brush embroidery, flooding areas for a smooth inlay, or creating raised patterns through stenciling or piping that set firmly, typically drying within 1-2 hours depending on humidity.
Application Tools: Spatulas, Combs, Piping Bags, and Stencils
Spatulas are fundamental for applying and manipulating frosting to create texture. Offset spatulas, available in various sizes (e.g., 4-inch, 8-inch blades), are used to spread frosting onto the cake surface. Small palette knives can be used to create expressive, rustic textures with dabbing or sweeping motions. For achieving smooth sides or specific textured effects like sharp ridges, a bench scraper or a long, straight spatula held perpendicular to the cake side while rotating is indispensable. The angle and pressure applied with a spatula significantly influence the final look of many textured cake frosting techniques.
Texture combs are specifically designed to create uniform patterns on the sides of a frosted cake. These plastic or metal tools have serrated edges with different patterns – fine lines, wide grooves, waves, etc. To use a texture comb, apply a generous, even layer of frosting to the cake sides, then hold the comb lightly against the frosting at a consistent angle while rotating the cake on a turntable.
This scrapes away excess frosting, leaving behind the desired textured pattern. Piping bags fitted with various tips (e.g., star tips like Ateco #21 or Wilton 1M for swirls and shells, round tips like Ateco #805 for dots, petal tips like Wilton #104 for ruffles) are essential for creating piped textures. Stencils, typically made of plastic, can be placed against a chilled cake and frosting scraped over them to transfer the pattern, adding precise textured designs.
Coloring and Flavoring: Enhancing Visual and Taste Appeal
Color plays a significant role in enhancing textured cake frosting techniques. Applying color strategically can highlight the peaks and valleys of a texture, adding depth and dimension. Gel food colors are highly concentrated and are preferred over liquid colors as they minimally affect frosting consistency.
For example, applying a darker shade of frosting into the grooves of a textured comb pattern while the ridges remain lighter can make the texture stand out dramatically. Using edible dusts or paints brushed over a textured surface can also emphasize the pattern by settling into the crevices or highlighting the raised areas. Approximating color usage, start with a small amount, like a toothpick dip or a single drop of gel color for a cup of frosting, and gradually add more to achieve the desired shade, always mixing thoroughly to ensure even distribution.
Flavoring the frosting ensures that the taste experience lives up to the visual appeal created by textured cake frosting techniques. Common flavorings include vanilla extract, almond extract, citrus zest, or cocoa powder. Adding melted and cooled chocolate creates a rich chocolate frosting.
When adding flavorings, be mindful that liquids can soften the frosting, potentially requiring the addition of a small amount of extra powdered sugar to restore the desired texture for specific techniques like piping. For instance, adding a tablespoon of liquid extract to two cups of buttercream might necessitate adding a few extra tablespoons of powdered sugar to maintain stiffness for piping detailed stars. Conversely, adding dry cocoa powder will stiffen buttercream, often requiring a splash more liquid to regain spreadability.
Icing Texture Techniques
Smooth Finishes: Achieving Flawless Surfaces
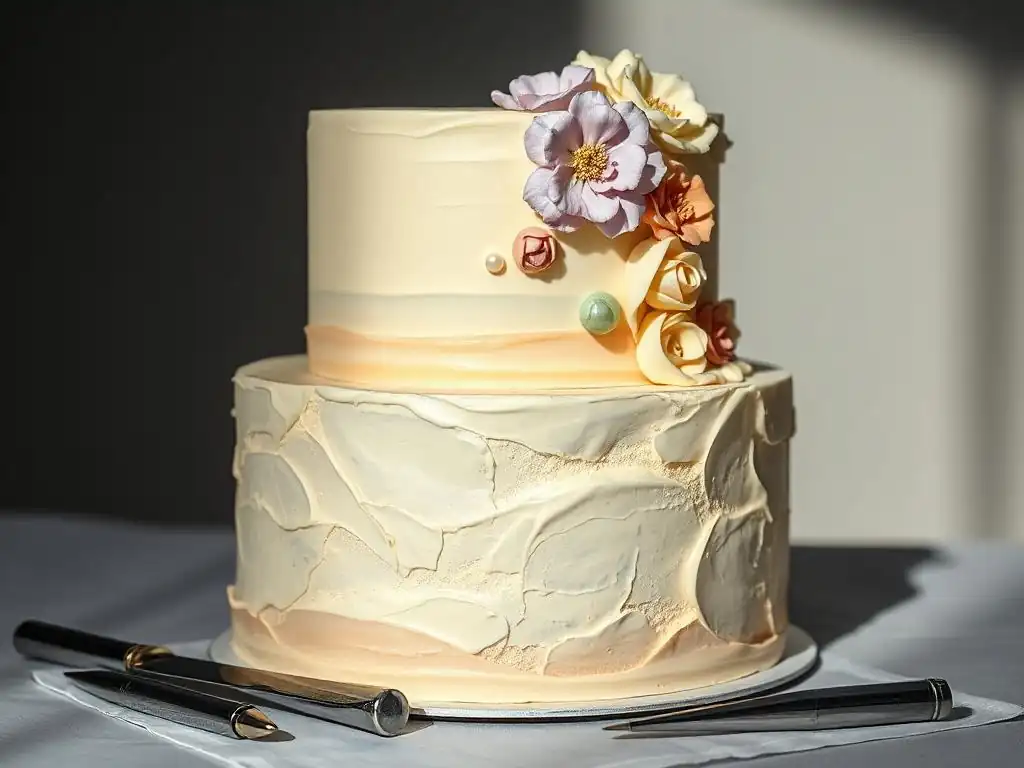
While the focus is on textured cake frosting techniques, achieving a perfectly smooth finish is often a prerequisite or a contrasting element in multi-textured designs. A smooth surface provides a clean canvas for adding textures like stenciling, piping, or adding textured fondant elements. The process typically involves applying a crumb coat – a thin layer of frosting that traps loose crumbs – and chilling the cake until firm, usually for about 15-30 minutes in a refrigerator. This prepares the surface for the final, thicker layer of frosting.
For the final smooth coat, apply a generous amount of frosting to the top and sides of the chilled cake. Use an offset spatula to smooth the top surface, removing excess frosting. Then, using a bench scraper or a long, straight spatula held at a slight angle (around 45 degrees) against the side of the cake, rotate the cake on a turntable while keeping the scraper stationary. This action removes excess frosting and creates a smooth, even side.
Scrape the excess frosting off the tool frequently. For sharp edges, after smoothing the sides, gently pull the excess frosting that accumulates above the top edge towards the center of the cake using an offset spatula. Chilling the cake again before a final pass with a warm spatula can help achieve extra sharp, clean edges.
Rustic Textures: Swirls, Waves, and Peaks
Rustic textured cake frosting techniques are popular for their organic look and forgiving nature. Swirls are perhaps the simplest to create. Using an offset spatula or even the back of a spoon, make sweeping, curved motions across the surface of the frosting.
The size and definition of the swirls depend on the tool size and the pressure applied. For example, using a small palette knife can create tight, defined swirls, while a large offset spatula yields broader, softer ones. This technique works well on both the top and sides of a cake and doesn't require the frosting to be perfectly smooth beforehand.
Waves can be created by dragging a spatula or spoon through the frosting in gentle, undulating lines. This gives the surface a soft, flowing texture. Peaks are achieved by dabbing the frosting with the back of a spoon, spatula, or even a piece of crumpled parchment paper, then pulling it away quickly.
The amount of frosting lifted creates peaks of varying sizes. A classic example is the 'spatula painted' look, where frosting is applied in thick strokes using an offset spatula, creating a textured, artistic finish reminiscent of paint strokes on a canvas. This technique often involves layering different colors of frosting for a more vibrant effect.
Stenciling and Embossing: Adding Patterns and Dimension
Stenciling is a precise way to add repeatable patterns using textured cake frosting techniques. Flexible plastic stencils with various designs (geometric, floral, lace) are commonly used. To stencil onto a buttercream cake, ensure the underlying frosting is firm and chilled. Gently position the stencil against the side of the cake.
Apply a thin, even layer of frosting (sometimes slightly thinned for easier application) over the stencil using a bench scraper or offset spatula, ensuring the frosting is pressed into the stencil openings. Carefully peel the stencil away to reveal the raised pattern on the cake surface. Practice on a dummy cake or flat surface first to get the feel for applying even pressure and peeling cleanly.
Embossing creates indented patterns on the cake surface. This can be done using impression mats or textured rolling pins pressed into rolled fondant before it's applied to the cake. For example, rolling fondant over a brick pattern mat transfers the texture onto the fondant, which is then used to cover the cake.
Alternatively, texture tools can be pressed directly into firmer frosting or ganache on the cake. Pressing a clean piece of textured material, like lace or burlap (ensure it's food-safe or covered in plastic wrap), into slightly soft frosting can also create interesting embossed patterns. These techniques add tactile interest and visual depth to the cake design.
Piping Techniques: Dots, Stars, and Ruffles
Piping is one of the most fundamental and versatile sets of textured cake frosting techniques, allowing for the creation of countless designs using different piping tips. A simple round tip (like #12 or #1A) can create uniform dots or mounds of frosting, varying in size based on the tip and pressure applied.
Star tips (like Wilton 1M or Ateco #21) are incredibly popular for creating swirls, rosettes, shell borders, and defined stars, simply by applying pressure and moving the bag in different patterns. The iconic 1M tip is famous for creating quick and easy swirled rosettes by piping in a circular motion from the center outwards.
Petal tips (like Wilton #104 or #124) are used to create beautiful ruffled textures. By holding the piping bag with the narrow end of the tip facing outwards or upwards and the wide end touching the cake, applying pressure while moving the bag creates delicate or dramatic ruffles, waves, or petals depending on the motion. Building layers of these piped ruffles can cover an entire cake surface, creating a voluminous, highly textured effect. Learning to control pressure and movement with a piping bag is key to achieving consistent and appealing piped textured cake frosting techniques.
Fondant Texture Techniques
Covering Cakes: Achieving a Smooth Base
While fondant is widely known for creating smooth, pristine surfaces on cakes, it also serves as an excellent base for numerous textured cake frosting techniques. Before applying fondant, the cake is typically covered in a thin layer of buttercream or ganache and chilled until firm. This provides a smooth surface for the fondant to adhere to and helps achieve sharp edges. Fondant is kneaded until pliable and then rolled out to a uniform thickness, usually around 1/8 inch (3mm), using powdered sugar or cornstarch to prevent sticking.
To cover the cake, the rolled fondant is carefully draped over the chilled, crumb-coated cake. The top is gently smoothed, and then the sides are smoothed downwards, lifting and easing the fondant as needed to prevent pleats or wrinkles at the base. A fondant smoother tool is used to firmly press the fondant against the buttercream, ensuring it adheres well and removing any trapped air bubbles for a flawless underlying surface. This smooth base is essential before applying textures like impression mats, cut-outs, or sculpting elements, ensuring the final textured design is clean and professional.
Texturing Tools: Impression Mats, Veiners, and Cutters
Impression mats are flexible mats with patterns molded into them, ranging from geometric designs to realistic textures like wood grain, brick, or lace. They are a primary tool for adding texture to fondant. The mat is placed on top of rolled fondant (either before or after covering the cake) and firm, even pressure is applied, often using a rolling pin or a fondant smoother rolled over the mat.
This pressing action transfers the pattern onto the fondant surface, creating a repeatable textured effect. For example, using a wood grain mat can quickly transform a plain fondant cake into a rustic tree stump design.
Veiners are typically silicone molds designed to replicate the natural textures found in leaves, flower petals, or other organic forms. Fondant is pressed into these molds to capture the fine, realistic vein patterns and textures. These veined pieces are then used to create realistic sugar flowers or decorative elements with detailed texture.
While cutters are primarily used for cutting shapes from fondant, some cutters also have internal details that leave impressed lines or textures on the cut pieces, adding a simple textural element to appliques or borders. Using these tools allows for intricate and realistic textured cake frosting techniques using fondant.
Applique and Inlay: Adding Decorative Elements
Applique is a technique where shapes cut from rolled fondant are attached to the surface of a fondant-covered cake, adding a raised, dimensional texture. The cut-out shapes can be plain or textured themselves using tools like impression mats or veiners before being applied. Edible glue, water, or a thin smear of buttercream or royal icing can be used to adhere the applique pieces to the cake.
For instance, cutting out leaf shapes, texturing them with a leaf veiner, and then attaching them to the cake creates a beautiful, layered texture. This method allows for building up intricate patterns and designs on the cake surface.
Inlay is a more advanced textured cake frosting technique involving fondant, where shapes are cut out of the base layer of fondant on the cake, and then contrasting colored or textured pieces of fondant are carefully fitted into the negative spaces. This creates a flush, patterned surface where the texture or color difference defines the design. For example, cutting out geometric shapes from a white fondant base and inlaying black fondant textured with an impression mat creates a striking, graphic texture. This technique requires precision cutting and fitting but results in a sophisticated, smooth-surface texture.
Sculpting and Modeling: Creating Three-Dimensional Textures
Fondant's pliable nature makes it excellent for sculpting and modeling, adding significant three-dimensional texture to a cake. By adding a strengthening agent like CMC powder (carboxymethyl cellulose) or tylose powder to fondant (typically about 1 teaspoon per 4-6 ounces or 113-170g of fondant), it becomes firmer and dries faster, making it suitable for creating freestanding figures, intricate flowers, or structural elements. These sculpted pieces are then attached to the cake, adding prominent textural features that stand out from the surface.
Modeling involves shaping fondant by hand or with modeling tools like ball tools, cone tools, or knives to create decorative elements like draped fabric effects, realistic animal figures, or detailed floral components. These modeled pieces, once dry, add significant volume and texture to the cake design. For example, creating realistic sugar roses petal by petal, each petal textured with a veiner, and then arranging them on the cake adds a complex, multi-layered texture. Sculpting and modeling allow for the creation of unique, bespoke textured cake frosting techniques that can turn a cake into a true work of art.
Advanced Texture Applications
Combining Icing and Fondant: Layered Effects
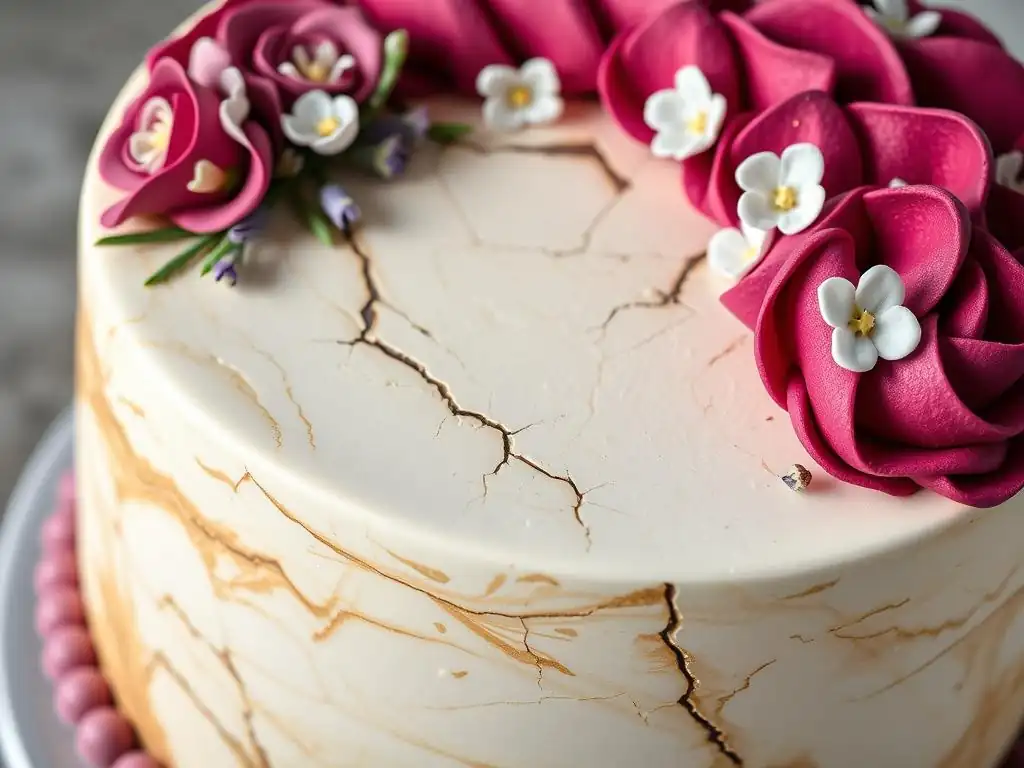
Combining buttercream or ganache with fondant allows for sophisticated and multi-layered textured cake frosting techniques. A common approach is to cover a cake smoothly in fondant and then use buttercream or royal icing to pipe intricate patterns onto the fondant surface. For instance, piping delicate lace designs with royal icing or bold geometric patterns with buttercream onto a smooth fondant background creates a striking contrast between the smooth base and the raised, piped texture.
Conversely, a cake frosted in buttercream can be adorned with textured fondant elements. This could involve cutting out shapes from textured fondant (using impression mats) and attaching them as panels or appliques onto the buttercream. Another technique is creating fondant borders or draped elements and attaching them to a buttercream cake, adding a different texture and visual interest. This combination leverages the strengths of both mediums – the smooth finish and structural integrity of fondant with the soft texture and pipeability of buttercream – to create complex and visually rich textured cake frosting techniques.
Edible Paints and Dusts: Adding Color and Shine to Textures
Edible paints and dusts are excellent for enhancing and highlighting existing textured cake frosting techniques. Edible paints are typically made by mixing gel food colors with a clear alcohol like vodka or lemon extract (which evaporates quickly). Applying a thin wash of paint over a textured surface, such as fondant embossed with a wood grain pattern, allows the paint to settle into the indentations, emphasizing the texture and adding realism. Different colors can be layered or dry-brushed to create weathered or aged effects on textures like stone or brick.
Edible dusts, including pearl, metallic, matte, or luster dusts, add shimmer, color, or depth. Applied dry with a soft brush, pearl or metallic dusts catch the light on raised textures like buttercream swirls, piped details, or textured fondant, making them sparkle and stand out. For instance, dusting the peaks of buttercream rosettes with gold luster dust adds an elegant touch. Matte dusts can be used to add shading or color to textured areas, enhancing their definition. Using dusts and paints allows for adding another dimension of visual appeal to textured cake frosting techniques.
Working with Ganache: Drip Cakes and Smooth Coatings
Ganache offers unique possibilities for textured cake frosting techniques, most notably the ever-popular drip cake. A drip cake involves pouring or carefully spooning warm ganache (the consistency is key, often achieved by adjusting the chocolate-to-cream ratio and temperature) around the top edge of a chilled cake, allowing it to cascade down the sides in controlled drips.
The thickness and length of the drips create a distinct texture, ranging from short, thick drips to long, delicate strands. A typical dark chocolate ganache for dripping might use a 1:1 ratio of chocolate to cream, heated until melted and smooth, then allowed to cool slightly to a pourable consistency.
Beyond drips, ganache can be used to cover cakes for a smooth, rich coating with a different sheen than buttercream. When cooled to a thicker consistency, ganache can be spread onto cakes using spatulas and bench scrapers, similar to buttercream smoothing techniques. Whipped ganache, created by whipping cooled ganache until lighter and fluffier, offers a softer, spreadable texture that can also be used for simple textured effects like swirls or peaks, providing a less defined but equally appealing texture compared to whipped buttercream. These techniques leverage the unique properties of ganache for distinct textured cake frosting techniques.
Creating Realistic Textures: Wood Grain, Stone, Fabric
Creating realistic textures is an advanced application of textured cake frosting techniques, often using fondant. Wood grain can be convincingly replicated using impression mats or by manually creating lines and knots on fondant with veining tools or toothpicks, then enhancing with edible brown dusts brushed into the lines. A common technique involves rolling light brown fondant, pressing a wood grain mat firmly onto it, covering the cake, and then dry brushing darker brown dust into the grooves to enhance the texture's depth.
Stone texture can be simulated by marbling together different shades of gray, black, and white fondant before rolling and applying it to the cake, or by texturing gray fondant unevenly by pressing crumpled aluminum foil or plastic wrap into it. Fabric textures like drapes, pleats, or ruffles are created by manipulating thin sheets of fondant, often with added CMC powder for structure, shaping them into realistic folds and attaching them to the cake.
For instance, creating fondant drapes involves cutting strips of fondant, softening the edges, and arranging them on the cake to mimic fabric, providing a soft, flowing texture. Mastering these techniques requires practice but allows for stunningly realistic textured cake frosting techniques.
Troubleshooting Common Texture Issues
Avoiding Air Bubbles in Frosting
Air bubbles are a common frustration when working with frosting, capable of ruining the smooth surface needed for certain textured cake frosting techniques or appearing unsightly within the texture itself. Air is often incorporated during the mixing process, especially when whipping at high speeds, or trapped when filling piping bags or spreading frosting. To minimize air bubbles, mix buttercream on low speed for several minutes after all ingredients are incorporated. This helps push trapped air out.
Before filling a piping bag, use a spatula to press the frosting firmly against the sides of the mixing bowl; this action forces air pockets to the surface. When filling the bag, push the frosting down firmly to avoid trapping air at the tip. If you spot air bubbles on the cake surface while frosting, gently pop them with a clean pin or the tip of a small offset spatula and lightly smooth the area. For large batches, letting the frosting sit covered at room temperature for a while before use can also help bubbles dissipate.
Preventing Cracking in Fondant
Cracking in fondant can occur for several reasons: if the fondant is rolled too thin, if it's overworked and loses elasticity, or if it dries out too quickly. When covering a cake, ensure the fondant is rolled to an adequate thickness, generally around 1/8 inch (3mm). Knead fondant until it's smooth and pliable, but avoid over-kneading, which can make it tough. If the fondant feels dry or starts cracking while kneading, incorporate a tiny amount of vegetable shortening or vegetable glycerin to restore its elasticity.
Work efficiently when covering a cake with fondant, as it begins to dry and become less pliable once exposed to air. If small cracks appear on the cake surface after covering, they can sometimes be gently rubbed smooth with a fingertip lightly coated in shortening. For more stubborn cracks, a very light application of steam from a steamer (held at a safe distance) can sometimes help, but caution is needed as too much moisture will make fondant sticky. Using a good quality fondant also significantly helps in preventing cracking.
Dealing with Humidity
Humidity is a major challenge when executing textured cake frosting techniques. High moisture in the air can cause buttercream to become greasy and soft, making it difficult to hold sharp shapes or textures. Fondant can become sticky, slack, and prone to sagging or developing condensation. Royal icing may fail to dry properly or take significantly longer to set. Whenever possible, work in a cool, air-conditioned environment, especially during humid weather.
For buttercream affected by humidity, chilling the cake frequently during the decorating process is essential. You might need to slightly adjust your recipe to be firmer by adding a bit more powdered sugar. For fondant, minimize the use of powdered sugar for dusting surfaces, opting instead for cornstarch, which doesn't dissolve in moisture. Keep fondant covered tightly when not in use. Using a dehumidifier in your workspace can make a significant difference. Cakes decorated in humid conditions should ideally be stored and displayed in a cool, dry environment until serving to maintain their texture and shape.
Fixing Uneven Textures
Uneven textures can result from inconsistent application pressure, speed, or frosting consistency. When using tools like texture combs or spatulas, maintaining consistent pressure and speed as you move the tool or rotate the cake is key to creating uniform patterns. For piped textures, uneven pressure on the piping bag or inconsistent tip movement will lead to variations in the size and shape of piped elements like stars or dots.
For techniques like rustic swirls or peaks, some degree of unevenness is part of the aesthetic and often desirable. However, for structured textured cake frosting techniques like uniform grooves from a comb or precise piped borders, noticeable unevenness can detract from the design. If a section of textured frosting is significantly uneven, it may be best to gently scrape off that area and reapply the frosting, taking care to match the consistency and technique used on the rest of the cake. Practice is crucial for developing the muscle memory and control needed for consistent textured cake frosting techniques.
Inspiration and Ideas for Sustainable Garden Designs
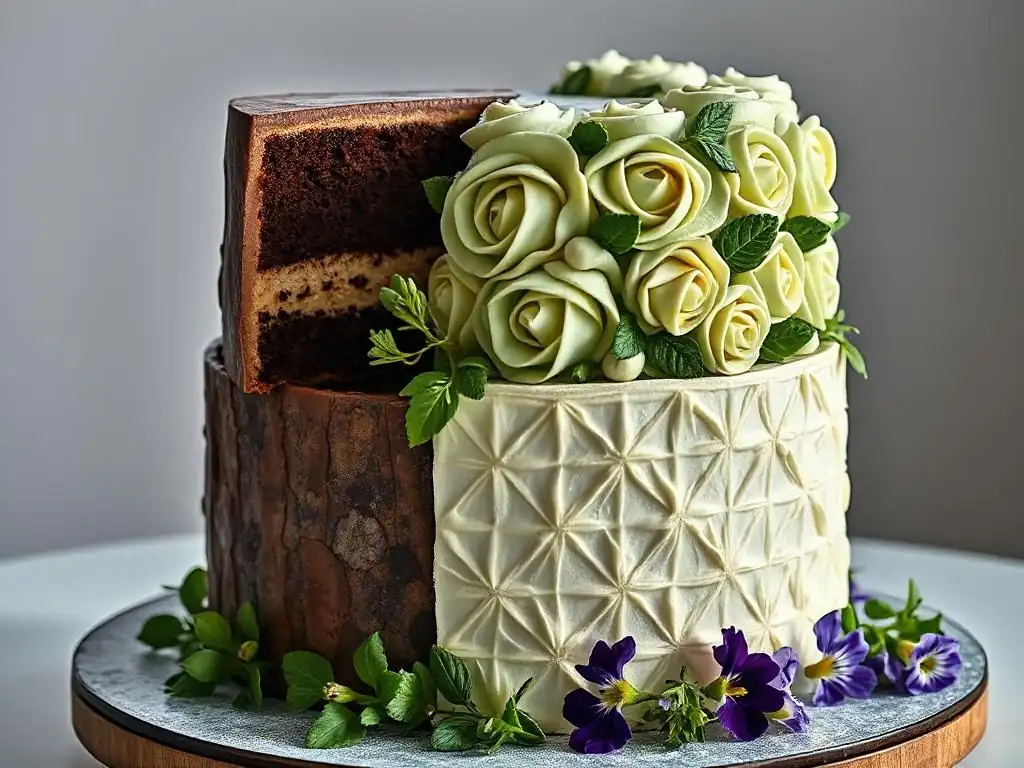
[Image Gallery: Showcase of Different Sustainable Garden Styles]
In this section, you would typically find a gallery of inspiring visuals showcasing various textured cake designs. These images would demonstrate the practical application of the textured cake frosting techniques discussed, offering tangible examples of what can be achieved. You might see close-ups of intricate lace patterns created with stencils on fondant, dramatic ruffles built up with petal tips, sharp geometric grooves from texture combs, or artistic palette knife strokes creating a painted effect.
These visual examples are invaluable for sparking creativity and helping bakers envision how different textures can be combined or used alone to create stunning cakes. The gallery would likely feature diverse styles, from modern minimalist cakes relying on a single, striking texture to elaborate wedding cakes incorporating multiple textured elements like drapes, lace, and sugar flowers. Seeing successful applications of textured cake frosting techniques provides clear goals and inspiration for your own projects.
From Small to Large: Project Ideas for All Skill Levels
Embracing textured cake frosting techniques can start small. For beginners, practicing basic techniques like creating rustic swirls or simple peaks on cupcakes or a small, single-layer cake is an excellent way to build confidence and control. Using a texture comb on the sides of a simple round cake is another accessible starting point that yields impressive results with relatively little effort. These smaller projects allow you to experiment with different consistencies and tools without the pressure of working on a large or important cake.
As your skills develop, you can move on to more complex textured cake frosting techniques and larger projects. Try combining techniques, such as a smooth top with textured sides, or piping a detailed border onto a textured surface. More advanced projects might involve covering a cake in textured fondant using impression mats, executing intricate stenciling, mastering realistic sculpting, or building complex structured piping designs like basketweave. Don't hesitate to experiment on practice boards or dummy cakes before tackling a real project, allowing you to refine your skills and explore new textured cake frosting techniques.
Conclusion: Embracing the Joys of Sustainable Home Gardening
Nourish Yourself and the Planet with Your Own Garden
Just as cultivating a garden nourishes you with fresh produce and connects you to the earth, the process of baking and decorating cakes nourishes the soul and brings joy. Creating something beautiful and delicious from simple ingredients, whether it's a perfectly textured frosting or a homegrown vegetable, offers a deep sense of satisfaction and accomplishment. The act of working with your hands, understanding your materials, and seeing your efforts transform into something tangible is profoundly rewarding.
While cake decorating might not directly impact the planet in the same way as sustainable gardening practices like composting or water conservation, embracing mindful techniques in baking – like minimizing waste by using scraps, choosing ingredients consciously, or opting for reusable tools – aligns with a broader philosophy of care and respect. This care extends not only to your ingredients and tools but also implicitly to the environment that provides them, fostering a sense of stewardship, whether for your pantry or the planet around you.
GardenGreen: Your Resource for Sustainable Gardening Practices
While BakeWithEase.com focuses on mastering baking skills, including textured cake frosting techniques, understanding foundational principles in any craft is key to achieving mastery. Just as GardenGreen would be a valuable resource for learning the principles of sustainable gardening, BakeWithEase.com aims to be your comprehensive resource for baking techniques, guiding you from basic batter mixing and frosting recipes to advanced sugar work and cake decoration.
Exploring techniques like textured cake frosting expands your creative palette and allows you to express your artistry, much like learning different planting methods and garden designs expands a gardener's possibilities. Whether you're cultivating delicious herbs to use in your baking or crafting a stunningly textured cake for a special occasion, the journey of learning, practicing, and creating is inherently rewarding and contributes to a fulfilling life, nurturing both your skills and your spirit.
Frequently Asked Questions
What are some simple textured frosting techniques perfect for beginners?
Beginners can start with the knife painting technique, using an offset spatula to create swirls and peaks. Another easy option is the sponge painting method, which adds a unique stippled effect to the frosting. Finally, explore piping simple rosettes or stars for added dimension.
Can I achieve textured frosting effects using only buttercream?
Absolutely! Buttercream is a versatile frosting that lends itself well to many textures. You can create textures using various tools like spatulas, forks, or even parchment paper. Experimenting with different piping tips can also yield interesting effects on a buttercream base.
What's the difference between using icing and fondant for textured cake designs?
Icing, especially buttercream, allows for more organic and free-flowing textures, easily manipulated with tools. Fondant, on the other hand, offers a smoother, more sculpted look, often requiring specialized tools for intricate designs, but it can be more difficult to work with.
How can I prevent my textured frosting from melting or losing its shape?
Ensure your cake is properly chilled before frosting. Use a stable buttercream recipe that can hold its shape at room temperature. Avoid overworking the frosting, as this can cause it to become too soft and prone to melting.
Are there any tools that are essential for creating textured cake frosting?
While you can use everyday kitchen tools, some helpful items include an offset spatula for smooth application and knife painting, piping bags and tips for creating patterns, and a turntable for easy cake rotation. Texturing combs are also great for creating repeating patterns.
Final Reflection: The Enduring Allure of Textured Cakes
The art of textured cake frosting transcends mere decoration; it's a powerful expression of creativity and a testament to the enduring appeal of handcrafted artistry in a world increasingly dominated by mass production. The techniques explored in this article – from simple piped designs to intricate fondant sculpting – offer a pathway to elevate the humble cake into a truly personalized and memorable experience. This isn't just about frosting; it's about adding a unique touch that speaks volumes.
The exploration of textured cake frosting has profoundly impacted the culinary landscape, moving beyond simple aesthetics to become a significant element of cake design's evolution. The desire for unique, personalized celebrations has fueled this trend, pushing bakers to constantly innovate and explore new techniques. This pursuit of visual and tactile artistry resonates deeply with me, reflecting a broader cultural shift towards valuing handcrafted items and the stories they tell. The details are not the details. They make the design.
– Charles Eames. This quote perfectly encapsulates the importance of texture in creating a truly captivating cake.
Now, it's your turn. Consider the textures you've encountered, both in baking and in life. What unique textures can you create? Don't be afraid to experiment, to push boundaries, and to let your creativity flow. The next time you frost a cake, remember the power of texture to transform a simple dessert into a work of art, a conversation starter, and a lasting memory. Embrace the challenge, and let your cakes tell your story.
Unleash Your Inner Cake Artist: Texture Techniques to Try!
Thanks for taking the time to explore the exciting world of cake textures with us! We hope you've gained some inspiring ideas to elevate your baking game. Ready to put your new skills to the test?
- Master a new texture technique: Choose one of the icing or fondant methods we discussed and give it a try! Even a small detail can make a big difference.
- Share your creation: Snap a picture of your textured masterpiece and share it on social media using #BakeWithEaseTextures – we'd love to see your creations!
- Experiment with flavor pairings: Consider how different textures might complement specific flavors. What unexpected combinations could you create?
What unique texture will you experiment with next, and what flavor profile will you pair it with? Let us know in the comments!