
Bake Classic Eastern European Treats the Easy Way

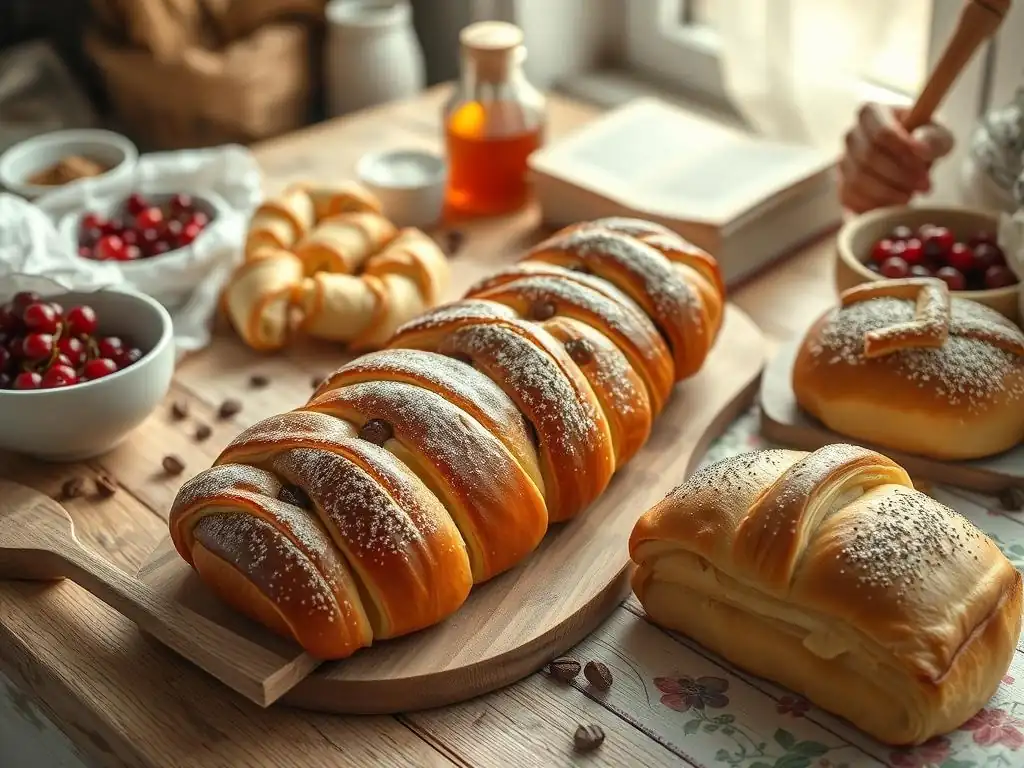
Welcome to BakeWithEase!
Ever dreamt of filling your kitchen with the warm, comforting aromas of Eastern European baking, but felt intimidated by complex recipes? You've come to the right place! Discover our collection of easy Eastern European baking recipes – simplified for the modern home baker. Prepare to be amazed at how effortlessly you can create authentic and delicious treats, and unlock the secrets to centuries-old baking traditions. Ready to embark on a flavorful journey? Let's get baking!
- Bake Classic Eastern European Treats the Easy Way: Easy Eastern European Baking Recipes
- Discover Easy Eastern European Baking Recipes with BakeWithEase
- Why Eastern European Baking is Easier Than You Think
- Our Top 3 Easy Eastern European Baking Recipes
- Essential Baking Tools for Easy Eastern European Baking
- Baking Tips and Tricks for Eastern European Treats
- Adapting Traditional Eastern European Recipes for Modern Kitchens
- Enjoy Delicious and Easy Eastern European Baking at Home
-
Frequently Asked Questions
- ### What makes Eastern European baking recipes "easy" on BakeWithEase.com?
- ### What types of Eastern European baked goods can I find recipes for on the site?
- ### Are the recipes on BakeWithEase.com suitable for beginner bakers?
- ### What are some common ingredients used in Eastern European baking recipes featured on BakeWithEase.com?
- ### Does BakeWithEase.com offer tips and techniques specifically for Eastern European baking?
- Final Reflection: The Sweet Taste of Heritage, Simplified
- Unlock Your Inner Pastry Chef!
Bake Classic Eastern European Treats the Easy Way: Easy Eastern European Baking Recipes
Discover Easy Eastern European Baking Recipes with BakeWithEase
Embarking on the journey of baking is always exciting, and exploring different regional traditions adds a wonderful dimension to your skills. Eastern European baking, often perceived as complex with intricate pastries and layered cakes, can actually be surprisingly accessible and incredibly rewarding. At BakeWithEase, we believe that anyone can master these delightful classics with the right guidance and a focus on simplified techniques. We're here to show you how to create authentic flavors in your own kitchen without the intimidation often associated with these traditional recipes.
Many classic Eastern European baked goods rely on fundamental doughs – often enriched with eggs and butter – and simple, readily available fillings like fruit, cheese, or poppy seeds. By breaking down the processes into manageable steps and highlighting the most straightforward approaches, we unlock the secrets to making these treats truly easy. Our goal is to empower you to confidently bake beautiful and delicious items like fluffy babka, tender pierogi, and sweet kolaches, proving that easy Eastern European baking recipes are well within reach for home bakers of all skill levels.
Why Eastern European Baking is Easier Than You Think
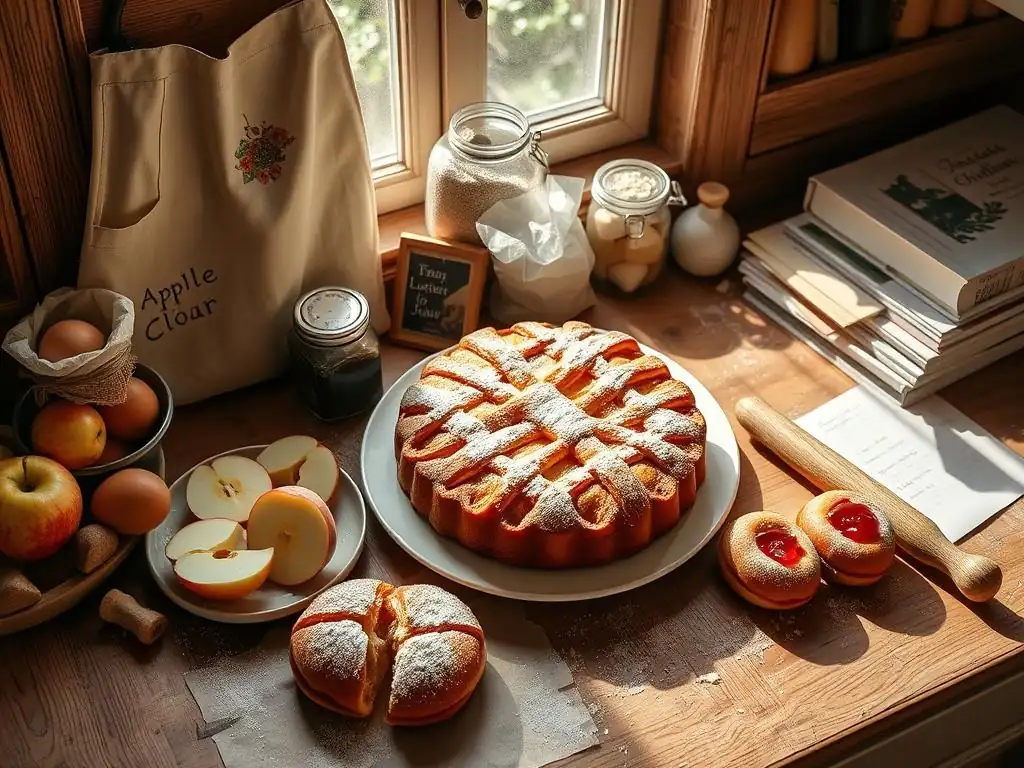
Contrary to popular belief, many beloved Eastern European baked goods are built upon foundational baking principles and use ingredients commonly found in most pantries. The impression of difficulty often stems from the sheer variety or the perceived need for specialized knowledge. However, focusing on core recipes reveals a simplicity that makes them perfect for honing your baking skills. Think of the humble yeast dough – a staple across the region, used for everything from sweet rolls to savory pies. Mastering this basic dough opens the door to countless possibilities, and it's much less daunting than it seems.
Furthermore, the "difficulty" is often in the shaping or presentation, which can be adapted for simpler methods without sacrificing flavor. While intricate braiding or delicate layering exists, many traditional recipes also have rustic, straightforward versions. By focusing on the taste and texture first, and then gradually exploring more complex shaping techniques, you can build confidence. Our approach emphasizes the core baking process, ensuring delicious results even if your first attempt at a babka swirl isn't picture-perfect. Easy Eastern European baking recipes prioritize flavor and accessibility.
Simple Ingredients for Authentic Eastern European Flavors
One of the key reasons why easy Eastern European baking recipes are so approachable is their reliance on everyday ingredients. You won't need to hunt for exotic spices or specialty flours for most foundational recipes. The pantry staples include all-purpose flour, granulated sugar, active dry yeast, eggs, milk (or water), and butter. These form the base for countless doughs, from light, airy brioche-style doughs used for babka to sturdy, pliable doughs perfect for pierogi or savory pastries.
Beyond the basics, common fillings and flavorings include poppy seeds, often ground and cooked into a paste; various fruit preserves (like plum or apricot jam); farmer's cheese or ricotta sweetened with sugar and sometimes flavored with vanilla or lemon zest; and nuts such as walnuts or almonds. These ingredients are widely available in most supermarkets, making it simple and affordable to gather everything you need to start baking these delicious traditional treats right away.
A typical batch of kolaches, for instance, might require just flour, yeast, sugar, butter, eggs, and your favorite fruit jam – a shopping list that's both short and inexpensive.
Time-Saving Techniques for Baking Eastern European Treats
While some traditional Eastern European recipes involve lengthy fermentation or multiple steps, many can be adapted for modern kitchens and busy schedules. One significant time-saver is utilizing a stand mixer with a dough hook. What might take 15-20 minutes of vigorous hand-kneading for a rich yeast dough can often be achieved in 8-10 minutes with a mixer, saving you considerable effort and time. This is particularly useful for doughs like babka, which are enriched and can be sticky.
Another technique is using rapid-rise or instant yeast, which can sometimes cut down on proofing times compared to traditional active dry yeast, though always check the specific recipe requirements. For pastries, chilling dough briefly (say, 30 minutes) before rolling can make it much easier to handle, preventing sticking and tearing, which ultimately speeds up the process compared to struggling with warm, soft dough. While some recipes benefit from slow fermentation for flavor development, focusing on 'easy' versions often means streamlined proofing schedules that still yield excellent results for your easy Eastern European baking recipes.
Our Top 3 Easy Eastern European Baking Recipes
Recipe 1: Easy Babka Recipe - A Sweet Braided Bread
Babka, a sweet braided bread often filled with chocolate or cinnamon, is a beloved classic across Eastern Europe. While traditional methods can involve multiple proofs and steps, our easy approach simplifies the process without sacrificing that signature swirled interior and tender crumb. This recipe focuses on a manageable dough and a straightforward shaping technique, making it perfect for beginners wanting to tackle a slightly more ambitious, yet still accessible, yeast bread.
The key to an easy babka is a reliable enriched dough recipe and a clear method for spreading the filling and rolling the dough. Using softened butter and eggs helps create a rich, pliable dough that is easier to work with than leaner bread doughs. We'll guide you through the mixing and kneading process, followed by a single, effective rise. The magic happens during the shaping, where a simple roll, slice, and twist creates the beautiful visual effect and ensures every slice is packed with delicious filling.
Step-by-Step Guide to Baking a Delicious Babka at Home
Here is a simplified breakdown of the process for making an easy babka:
- Step 1: Prepare the Dough: Combine warm milk (around 105-115°F or 40-46°C), sugar, and yeast in a bowl. Let it sit for 5-10 minutes until foamy.
- Step 2: Mix Ingredients: In a large mixing bowl (or stand mixer), combine flour, a pinch of salt, eggs, and the yeast mixture. Mix until a shaggy dough forms.
- Step 3: Knead the Dough: Add softened butter, one tablespoon at a time, incorporating each piece before adding the next. Knead (by hand or mixer) for 8-10 minutes until the dough is smooth, elastic, and slightly sticky.
- Step 4: First Rise: Place the dough in a lightly oiled bowl, cover, and let rise in a warm place for about 1.5 to 2 hours, or until doubled in size.
- Step 5: Prepare Filling: While the dough rises, prepare your filling (e.g., melted chocolate mixed with sugar and cocoa powder, or cinnamon sugar with melted butter).
- Step 6: Roll and Fill: Punch down the dough, turn it onto a lightly floured surface, and roll it into a large rectangle, roughly 1/4 inch thick. Spread the filling evenly over the dough, leaving a small border.
- Step 7: Shape the Babka: Tightly roll the dough from the long side into a log. Using a sharp knife, slice the log lengthwise down the center. Twist the two halves together, keeping the cut sides facing up. Gently transfer the twisted loaf into a greased loaf pan.
- Step 8: Second Rise: Cover the loaf pan and let the babka rise for another 30-45 minutes, or until visibly puffy.
- Step 9: Bake: Preheat oven to 350°F (175°C). Bake for 30-40 minutes, or until golden brown and a wooden skewer inserted into the center comes out clean. If the top browns too quickly, tent loosely with foil.
- Step 10: Cool and Glaze (Optional): Let the babka cool in the pan for 10-15 minutes before transferring to a wire rack. Brush with a simple sugar syrup while warm for extra shine and moisture.
Tips for Achieving the Perfect Babka Texture and Swirl
Getting that beautiful swirl and tender texture in your babka is easier than it looks with a few simple pointers. Firstly, don't rush the kneading process; properly developed gluten is key to a soft, elastic dough that rises well and is easy to roll without tearing. If using a stand mixer, scrape down the sides occasionally to ensure all the butter is incorporated. The dough should be smooth and pass the "windowpane test" – you should be able to stretch a small piece thin enough to see light through it without it breaking.
For the swirl, ensure your filling is spread evenly to the edges (except for that small border mentioned). When rolling the log, roll it tightly and evenly to avoid air pockets. When slicing the log lengthwise, use a very sharp knife or even dental floss (slide it under the log, cross the ends over the top, and pull) for a clean cut that helps the layers stand out when twisted.
Twist the two halves with the cut sides facing upwards as much as possible to showcase the filling layers. Don't overbake; check for doneness with a skewer, as an overbaked babka can be dry. These steps help make easy Eastern European baking recipes like babka truly successful.
Recipe 2: Quick and Easy Pierogi Dough Recipe
Pierogi, those delightful filled dumplings, are a staple of Eastern European cuisine. While the filling possibilities are endless (savory potato and cheese, sweet fruit, meat), the foundation is always a simple, tender dough. Many traditional recipes use just flour, water, and sometimes an egg, but adding a touch of fat (like butter or sour cream) can make the dough even more pliable and easier to work with, especially for beginners. This recipe focuses on a dough that comes together quickly and is forgiving to roll and shape.
Our easy pierogi dough requires minimal ingredients and comes together in minutes using a food processor or by hand. The key is not to overwork the dough, which can make the pierogi tough. We aim for a dough that is smooth, elastic, and easy to roll thin without snapping back excessively. This straightforward approach demystifies the process of making pierogi from scratch, proving that these comforting dumplings are well within the realm of easy Eastern European baking recipes.
Mastering the Art of Pierogi: From Dough to Filling
Here’s how to make quick and easy pierogi:
- Step 1: Make the Dough: In a food processor, combine flour, salt, and a tablespoon of softened butter or oil. Pulse a few times. Add an egg and gradually add warm water (about 1/2 to 3/4 cup) while pulsing until the dough just comes together into a ball. Alternatively, mix by hand in a bowl, adding water gradually until a dough forms, then knead briefly on a floured surface for 3-5 minutes until smooth.
- Step 2: Rest the Dough: Wrap the dough tightly in plastic wrap and let it rest at room temperature for at least 20-30 minutes. This allows the gluten to relax, making the dough easier to roll.
- Step 3: Prepare Filling: While the dough rests, prepare your desired filling (see ideas below). Ensure it's cool and not too wet.
- Step 4: Roll and Cut: Divide the dough in half. On a lightly floured surface, roll one half of the dough thinly, about 1/16 inch thick. Use a round cutter (about 3-4 inches in diameter) to cut out circles. Gather scraps, knead briefly, and re-roll.
- Step 5: Fill and Shape: Place a small spoonful of filling (about 1-2 teaspoons, depending on circle size) in the center of each dough circle. Moisten the edge of the dough with water using your finger. Fold the dough circle in half over the filling, creating a semi-circle. Press the edges firmly to seal, ensuring no filling is near the edge. You can crimp the edges with a fork for a decorative finish and extra seal.
- Step 6: Cook the Pierogi: Bring a large pot of salted water to a rolling boil. Gently drop the pierogi into the boiling water, being careful not to overcrowd the pot (cook in batches).
- Step 7: Finish Cooking: Pierogi will sink initially, then float to the surface after a few minutes (usually 3-5 minutes, depending on size and filling). Once they float, cook for another 2-3 minutes to ensure the dough is cooked through.
- Step 8: Serve: Remove pierogi from the water using a slotted spoon. Serve immediately with melted butter, sour cream, fried onions, or other desired toppings.
Delicious Pierogi Filling Ideas for Every Palate
The versatility of pierogi fillings is one of their most appealing aspects, offering options for sweet or savory preferences. The most classic savory filling is Ruskie Pierogi, a simple mix of mashed potatoes, farmer's cheese (or ricotta), and often sautéed onions, seasoned with salt and pepper. Another popular savory choice is ground meat (like pork or beef), often pre-cooked and mixed with onions and seasonings. For a vegetarian option, sauerkraut and mushrooms, sautéed until tender, make a flavorful filling.
On the sweeter side, fresh or frozen fruits are excellent choices. Cherries, blueberries, plums, or sweetened farmer's cheese (mixed with sugar, vanilla, and sometimes an egg yolk) are traditional sweet fillings. When using fruit, particularly juicy ones, you might add a tiny pinch of cornstarch or flour to the filling to absorb excess moisture and prevent the pierogi from bursting during cooking. Experimenting with fillings is part of the fun of making easy Eastern European baking recipes like pierogi!
Recipe 3: Simplified Kolaches Recipe - Fruit-Filled Pastries
Kolaches (or Kołacze in Polish, Koláče in Czech/Slovak) are delightful, often fruit-filled, pastries that are simpler to make than they appear. They typically feature a slightly sweet, enriched yeast dough with an indentation in the center filled with various sweet fillings. Our simplified kolaches recipe uses a straightforward dough that's easy to handle and shape, making this traditional treat accessible for even novice bakers.
This recipe focuses on a dough that's forgiving and simple to mix, followed by a minimal number of steps for shaping. The beauty of kolaches lies in their rustic charm, so perfect uniformity isn't necessary. The open-faced nature of the pastry means the delicious filling is on full display, inviting you in. By breaking down the process into easy steps, we turn what might seem like a complex pastry into a delightful and manageable baking project, perfect for anyone exploring easy Eastern European baking recipes.
Baking Kolaches: A Beginner's Guide to This Classic Pastry
Follow these steps for easy kolaches:
- Step 1: Activate Yeast: In a small bowl, combine warm milk (around 105-115°F or 40-46°C), a pinch of sugar, and yeast. Let stand for 5-10 minutes until foamy.
- Step 2: Prepare Dough: In a large bowl, whisk together flour, sugar, and a pinch of salt. Add the yeast mixture, melted butter, and an egg. Mix with a wooden spoon or in a stand mixer until a soft dough forms.
- Step 3: Knead: Knead the dough on a lightly floured surface for 5-7 minutes (or 4-5 minutes in a mixer) until smooth and elastic.
- Step 4: First Rise: Place the dough in a lightly oiled bowl, cover, and let rise in a warm place for about 1 hour, or until doubled in size.
- Step 5: Shape Kolaches: Punch down the dough and turn it onto a lightly floured surface. Divide the dough into equal portions (e.g., 12-16 pieces, depending on desired size). Roll each piece into a ball. Place the balls on baking sheets lined with parchment paper, spaced a few inches apart.
- Step 6: Create Indentation: Using the bottom of a glass or your fingers, gently press an indentation in the center of each dough ball, leaving a raised border around the edge.
- Step 7: Fill and Second Rise: Spoon your desired filling (fruit jam, cheese filling, poppy seed paste) into the indentation of each kolache. Cover the baking sheets loosely with plastic wrap or a clean kitchen towel and let the kolaches rise for another 20-30 minutes, or until slightly puffy.
- Step 8: Bake: Preheat oven to 375°F (190°C). Bake for 12-18 minutes, or until the edges are golden brown and the filling is slightly set.
- Step 9: Cool: Let the kolaches cool slightly on the baking sheet before transferring to a wire rack. Dust with powdered sugar if desired.
Variations and Toppings to Elevate Your Kolaches
Kolaches offer wonderful flexibility when it comes to fillings and finishes. Beyond the classic fruit jams like apricot, plum, or cherry, you can use a simple farmer's cheese filling (farmer's cheese mixed with sugar, vanilla, and an egg yolk) or a rich poppy seed paste (ground poppy seeds cooked with milk, sugar, and sometimes honey or nuts). For a quick option, canned pie filling can even be used in a pinch, though homemade or quality preserves offer the best flavor.
Toppings can add an extra layer of texture and sweetness. A streusel topping (made from flour, sugar, and butter rubbed together until crumbly) sprinkled around the filling before baking is traditional and delicious. A simple glaze made from powdered sugar and milk or lemon juice drizzled over the cooled kolaches is another popular finish. Don't forget a dusting of powdered sugar, a simple yet elegant touch that finishes off these easy Eastern European baking recipes beautifully.
Essential Baking Tools for Easy Eastern European Baking
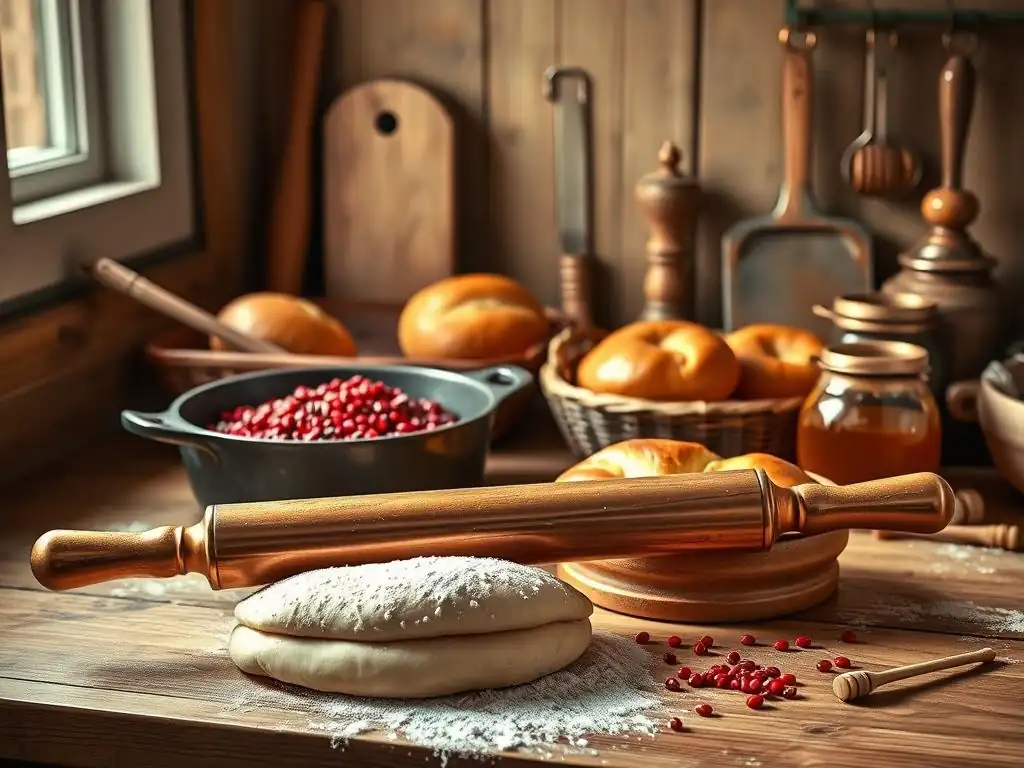
Having the right tools can significantly streamline your baking process and make creating easy Eastern European baking recipes even more enjoyable. You don't need a professional kitchen setup, but a few key pieces of equipment will make a big difference. Standard items like mixing bowls in various sizes, measuring cups and spoons for accurate ingredient amounts, and a sturdy whisk are fundamental for preparing doughs and fillings.
Beyond the basics, reliable baking sheets lined with parchment paper are essential for baking items like kolaches and babka. A rolling pin is crucial for flattening doughs like pierogi or babka. While not strictly essential, a stand mixer with a dough hook attachment can be a game-changer for kneading enriched doughs quickly and efficiently, saving you considerable manual effort and time, solidifying the 'easy' aspect of these recipes.
Must-Have Equipment for Baking Like a Pro
To bake easy Eastern European treats with confidence, consider these essential tools. A good quality set of stainless steel or glass mixing bowls provides stability and won't react with ingredients. Digital kitchen scales are highly recommended for accuracy, as measuring by weight (grams) is often more precise than volume (cups), leading to more consistent results, especially in baking. For kneading, a stand mixer is invaluable if you plan on baking frequently; look for models with a powerful motor and a dough hook attachment.
Other useful items include a bench scraper for dividing dough and cleaning surfaces, a pastry brush for applying egg washes or glazes, and a cooling rack to ensure your baked goods cool properly and don't become soggy on the bottom. For pierogi, a round cutter of your preferred size (3-4 inches is common) makes shaping quick and uniform. Investing in these tools means you're well-equipped to tackle a wide range of easy Eastern European baking recipes.
Affordable Alternatives for Budget-Friendly Baking
You don't need to break the bank to start baking delicious easy Eastern European treats. Many essential tools have affordable alternatives. Instead of a stand mixer, you can achieve well-kneaded dough using just your hands and a sturdy surface – it takes a little longer (add about 10-15 minutes to kneading time) but is perfectly effective. Standard glass or plastic mixing bowls are readily available and inexpensive.
For measuring, standard cup and spoon sets work well, though weighing ingredients is ideal. A clean, empty wine bottle can serve as a makeshift rolling pin in a pinch, though a basic wooden rolling pin is quite affordable. Instead of parchment paper, you can grease and flour your baking sheets, though parchment does make cleanup significantly easier. These budget-friendly options ensure that access to tools isn't a barrier to enjoying easy Eastern European baking recipes.
Baking Tips and Tricks for Eastern European Treats
Mastering easy Eastern European baking recipes involves understanding a few fundamental principles, particularly when working with yeast doughs and pastries. Paying attention to ingredient temperatures, proper mixing techniques, and proofing conditions can dramatically improve your results. Don't be discouraged if your first attempt isn't perfect; baking is a skill that improves with practice. Each time you bake, you learn more about how your oven, your ingredients, and even the weather affect the outcome.
Consistency is key, especially when dealing with dough hydration and yeast activity. Using lukewarm liquids for activating yeast (around 105-115°F) is crucial, while ensuring your kitchen isn't too cold or drafty during the rising process will help your dough achieve its full potential. Learning to recognize what a properly proofed dough looks and feels like is a skill that comes with experience, but generally, it should look significantly increased in volume and feel light and airy.
Achieving the Perfect Rise in Your Eastern European Breads
A successful rise is paramount for light and airy Eastern European yeast breads and pastries like babka or kolaches. The most common reason for a poor rise is inactive yeast. Always check the expiration date on your yeast and proof it first in warm liquid with a pinch of sugar to ensure it's alive and active – it should become foamy within 5-10 minutes. If it doesn't foam, your yeast is likely dead, and you need a new packet.
Temperature plays a significant role. Warm liquids (not hot!) activate yeast, and a warm environment (around 75-80°F or 24-27°C) is ideal for rising. If your kitchen is cool, you can create a warm spot by placing the covered dough in a turned-off oven with the light on, or near a warm (but not hot) appliance. Avoid drafts, which can inhibit rising. Ensure you give the dough enough time for each rise according to the recipe; under-proofing is a common mistake that results in dense baked goods. Proper rising is key to truly easy Eastern European baking recipes.
Mastering the Art of Eastern European Pastry Dough
Working with pastry doughs, whether for pierogi or kolaches, requires a gentle touch to prevent toughness. The goal is to develop just enough gluten for structure but not so much that the dough becomes elastic and difficult to roll thinly. For pierogi dough, minimal kneading (just until smooth) is often sufficient after the ingredients are combined. Resting the dough after mixing and again after rolling helps relax the gluten, making it much easier to work with and less likely to snap back.
When rolling doughs, use a lightly floured surface and rolling pin. Add just enough flour to prevent sticking – too much flour will make the dough dry and tough. Roll from the center outwards, rotating the dough occasionally to ensure even thickness. For kolaches, the enriched yeast dough is quite forgiving; the main technique is creating the indentation without tearing the bottom. Practice with smaller batches can help you get the feel for different doughs, making all your easy Eastern European baking recipes more successful.
Storing and Freezing Your Baked Eastern European Creations
Proper storage is essential to keep your delicious easy Eastern European baking recipes fresh. Most yeast breads and pastries like babka and kolaches are best stored at room temperature for 2-3 days. Once completely cooled, wrap them tightly in plastic wrap or aluminum foil, or place them in an airtight container to prevent them from drying out. Refrigeration can actually make yeast breads stale faster, so it's generally not recommended unless the filling is perishable (like fresh cheese).
Many Eastern European baked goods freeze exceptionally well, allowing you to enjoy your efforts for weeks or months. Fully baked and cooled items like babka or kolaches can be wrapped tightly in plastic wrap, then again in aluminum foil or placed in a freezer-safe bag. They can typically be frozen for up to 2-3 months. Pierogi can be frozen raw or cooked.
To freeze raw pierogi, place them in a single layer on a parchment-lined baking sheet until firm, then transfer to a freezer bag. Cooked pierogi should be cooled completely before freezing in a single layer. Frozen pierogi (raw or cooked) can be boiled directly from frozen, adding a few extra minutes to the cooking time.
Adapting Traditional Eastern European Recipes for Modern Kitchens
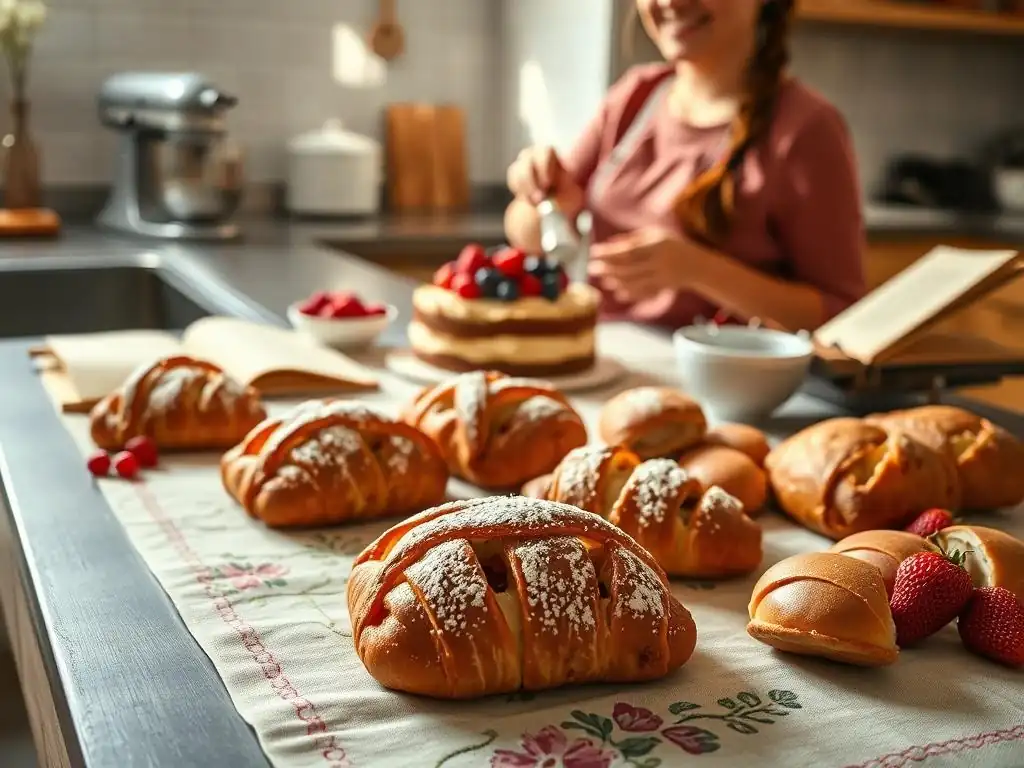
Traditional Eastern European recipes often come from a time before standardized measurements and modern appliances. Adapting these recipes for contemporary kitchens is part of making them easy and accessible today. This might involve converting historical measurements (like "a teacup of flour") into grams or cups, adjusting baking temperatures and times for modern ovens, and simplifying techniques that might have been done by hand for hours.
Furthermore, dietary needs and preferences mean that adapting ingredients is often necessary. Whether you're looking to bake gluten-free, dairy-free, or reduce sugar, many traditional recipes can be modified with successful substitutions. The key is understanding the role each ingredient plays in the original recipe and finding a suitable replacement that performs a similar function, ensuring that easy Eastern European baking recipes can be enjoyed by everyone.
Converting Measurements for Easy Baking
Many older or traditional Eastern European recipes might use volume measurements that are less precise than modern standards or simply list ingredients without exact quantities. For consistent results with easy Eastern European baking recipes, it's best to convert these to standard cup/spoon measures or, ideally, metric weights (grams). A common conversion for all-purpose flour is roughly 120-130 grams per cup, granulated sugar is about 200 grams per cup, and butter is typically 227 grams per cup (or one standard stick is about 113 grams).
Using a digital scale makes measurement incredibly accurate and is particularly beneficial for baking, where ratios are important. If you encounter a recipe with vague instructions, consult reliable modern recipes for similar items to get a sense of typical ingredient ratios and baking times/temperatures. Websites like BakeWithEase provide recipes already converted and tested for modern kitchens, taking the guesswork out of adaptation and making easy Eastern European baking recipes truly easy.
Substituting Ingredients for Dietary Restrictions
Adapting easy Eastern European baking recipes for dietary restrictions is often possible with careful substitutions. For dairy-free baking, replace milk with unsweetened plant-based milks (like almond, soy, or oat) and butter with plant-based butter sticks or oil. Keep in mind that these substitutions can slightly affect texture and flavor, especially in enriched doughs. For egg-free baking, common egg substitutes include applesauce, mashed banana, flax eggs (1 tbsp flax meal + 3 tbsp water), or commercial egg replacers, depending on the recipe. These work best in recipes where the egg isn't the primary leavening agent.
Gluten-free baking is more complex, as gluten provides structure. Using a good quality all-purpose gluten-free flour blend that contains xanthan gum is usually the most straightforward approach for yeast-based recipes like babka or kolaches, although the rise and texture may differ from wheat-based versions. For pierogi dough, a gluten-free blend can work well, though it might be slightly less elastic. Always look for specific tips or recipes designed for gluten-free baking if you're making significant substitutions, ensuring your easy Eastern European baking recipes meet your needs.
Enjoy Delicious and Easy Eastern European Baking at Home
Baking easy Eastern European treats is a wonderful way to connect with rich culinary traditions and create comforting, delicious food. From the sweet swirls of a chocolate babka to the tender bite of a potato and cheese pierogi, these recipes offer a taste of history that is both satisfying to make and delightful to eat. With simple ingredients, manageable techniques, and a little practice, you can confidently bring these classics into your own kitchen.
Whether you're baking for a special occasion or simply want to enjoy a homemade treat with your afternoon tea, these easy Eastern European baking recipes provide a fantastic starting point. Don't be afraid to experiment with different fillings for your pierogi or kolaches, or try a new braiding technique for your babka once you've mastered the basics. The world of Eastern European baking is vast and full of delicious possibilities, and we hope this guide inspires you to start exploring it the easy way.
One of the greatest joys of baking easy Eastern European baking recipes (or any baking!) is sharing the results with others. There's something incredibly special about offering a slice of homemade babka or a plate of warm pierogi to friends and family. These treats often evoke feelings of nostalgia and comfort, making them perfect for gatherings, holidays, or simply brightening someone's day.
Bringing a batch of freshly baked kolaches to a potluck or serving homemade pierogi for dinner provides a unique and personal touch. Sharing your baking journey can also inspire others to try their hand at these easy Eastern European baking recipes. Don't hesitate to snap photos of your creations and share them online – you might just encourage another aspiring baker!
Explore More Easy Baking Recipes with BakeWithEase
This exploration of easy Eastern European baking recipes is just the beginning! BakeWithEase is dedicated to making baking accessible and enjoyable for everyone, regardless of experience level. Our website is packed with simple, step-by-step recipes covering a wide range of categories, from classic cakes and cookies to various types of bread and pastries.
We constantly add new recipes and tips designed to simplify techniques and ensure successful results. Whether you want to master sourdough, bake your first perfect pie, or explore other regional baking traditions, BakeWithEase is your trusted resource. Keep practicing the skills you've learned with these Eastern European classics, and then dive into our extensive collection to discover your next favorite easy baking project. Happy baking!
Frequently Asked Questions
### What makes Eastern European baking recipes "easy" on BakeWithEase.com?
BakeWithEase.com focuses on simplified methods and easy-to-find ingredients to make traditionally complex Eastern European recipes accessible to all skill levels. We provide step-by-step guides to ensure success.
### What types of Eastern European baked goods can I find recipes for on the site?
You'll find recipes for a wide variety of treats including pastries like kolaches, sweet breads like babka, and cakes often featuring flavors like poppy seed and walnuts. We aim to cover a broad range of classic Eastern European recipes.
### Are the recipes on BakeWithEase.com suitable for beginner bakers?
Yes! Many of our Eastern European baking recipes are designed with beginners in mind, offering clear instructions and tips to guide you through each step. We emphasize easy techniques for foolproof results.
### What are some common ingredients used in Eastern European baking recipes featured on BakeWithEase.com?
Common ingredients include flour, yeast, sugar, butter, eggs, milk, and often ingredients like poppy seeds, walnuts, and various fruit fillings. We prioritize recipes that use easily accessible ingredients.
### Does BakeWithEase.com offer tips and techniques specifically for Eastern European baking?
Absolutely! We provide tips and techniques tailored to the nuances of Eastern European baking, such as proper proofing for breads and achieving the right consistency for specific doughs. We aim to help you master the techniques for authentic results.
Final Reflection: The Sweet Taste of Heritage, Simplified
The enduring appeal of Eastern European baking lies not just in its rich flavors, but in its ability to connect us to history and family. These recipes, often passed down through generations, represent a tangible link to our cultural roots, a comforting tradition in a rapidly changing world. Yet, the perceived complexity of these treats often acts as a barrier to entry, preventing many from experiencing their unique charm.
This article aimed to bridge that gap, demonstrating that the magic of these classic recipes doesn't require hours of painstaking work or specialized ingredients. The joy of baking these treats should be accessible to everyone, regardless of their skill level. Food is symbolic of love when words are inadequate.
– Alan D. Wolfelt. This sentiment perfectly encapsulates the emotional connection we forge through the act of baking and sharing these cherished recipes. The simplicity of the adapted recipes presented here allows for a deeper appreciation of the cultural heritage embedded within each bite.
Now, I invite you to roll up your sleeves and embark on your own culinary journey. Choose a recipe that speaks to you, gather your ingredients, and let the comforting aroma of baking fill your kitchen. Don't be afraid to experiment, to adapt, and to share your creations with loved ones. Each baked good is a testament to your connection to a rich culinary history, a delicious story waiting to be told, and a delightful way to connect with your heritage – or discover a new one.
Unlock Your Inner Pastry Chef!
Thanks for joining us on this delicious journey through classic Eastern European baking! We hope you've gained some new skills and inspiration to create sweet treats that will impress your friends and family.
Ready to take the next step? Here’s how you can continue your baking adventure:
- Try out one of the recipes today! Pick your favorite and let us know how it goes – we'd love to see your creations!
- Share this article with fellow baking enthusiasts who might appreciate these amazing recipes.
- Explore our other regional baking guides on the BakeWithEase website for even more culinary inspiration.
What's your favorite Eastern European treat, and what makes it so special to you? Let's chat in the comments below!