
Troubleshooting Lack of Oven Spring in Baguettes

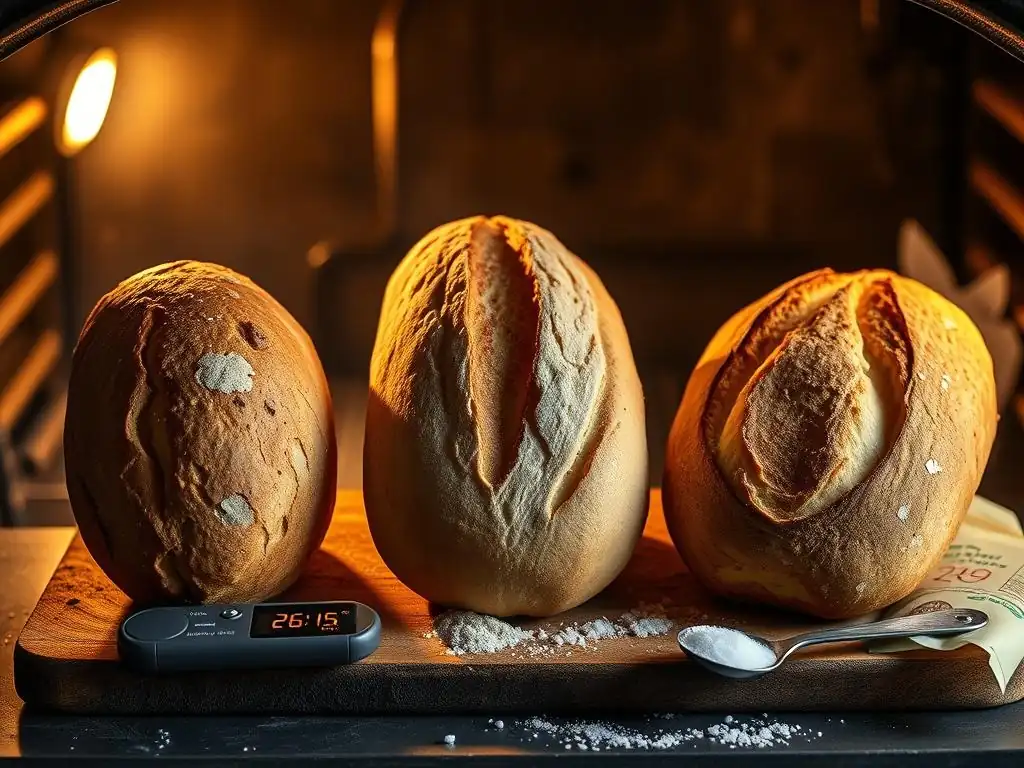
Welcome to BakeWithEase, your trusted guide to confident baking! Are your baguettes falling flat? Discover the secrets to achieving that coveted oven spring in our latest article. We'll delve into common pitfalls and provide essential baguette oven spring troubleshooting tips to help you achieve bakery-worthy results. Get ready to unlock the secrets to a perfectly risen, crusty baguette – let's get baking!
- Baguette Oven Spring Troubleshooting Tips: Achieve the Perfect Rise with BakeWithEase
-
Common Reasons for Lack of Oven Spring in Baguettes and How to Fix Them
- Dough Hydration Issues: Too Wet or Too Dry?
- Gluten Development Problems: Weak Gluten Structure
- Proofing Issues: Over-Proofing vs. Under-Proofing
- Scoring Technique: The Key to Controlled Expansion
- Oven Temperature and Steam: Creating the Ideal Baking Environment
- Yeast Activity: Ensuring a Strong and Active Starter or Yeast
- Advanced Techniques for Improving Baguette Oven Spring
- Preventing Future Oven Spring Problems in Your Baguettes
-
Frequently Asked Questions
- What is oven spring and why is it important for baguettes?
- What are some common causes of poor oven spring in baguettes?
- How does scoring the baguette dough affect oven spring?
- What temperature should my oven be for baking baguettes to ensure good oven spring?
- What are some techniques to improve humidity in my oven when baking baguettes?
- Final Reflection: The Pursuit of Perfect Baguette Oven Spring
- Unleash Your Inner Boulanger: Perfect Baguette Spring Awaits!
Baguette Oven Spring Troubleshooting Tips: Achieve the Perfect Rise with BakeWithEase
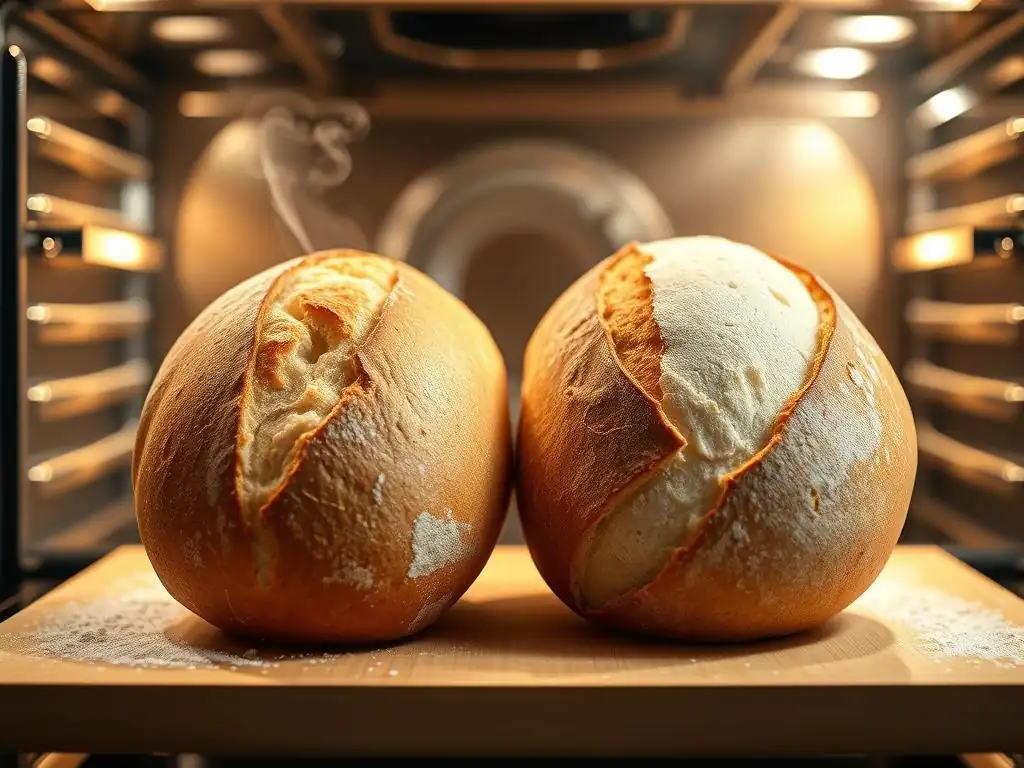
What is Oven Spring and Why is it Important for Baguettes?
Oven spring, or le coup de four in French, is the rapid expansion of dough that occurs during the first 10 to 15 minutes of baking. This phenomenon is critical for baguettes because it determines much of the final volume, shape, and internal crumb structure.
As the dough enters the hot oven, residual yeast activity creates a final burst of carbon dioxide gas, while trapped water turns into steam, causing the dough to inflate dramatically before the crust sets. A strong oven spring is the hallmark of a well-made baguette, resulting in a light, airy crumb and a beautifully split crust (the grigne).
Achieving good oven spring is a primary goal for bakers mastering baguette techniques. Without adequate oven spring, baguettes tend to be dense, flat, and lack the characteristic open crumb structure. Troubleshooting lack of oven spring in baguettes often involves examining every step of the process, from ingredient mixing to baking environment, as multiple factors contribute to this crucial rise. Understanding what oven spring is and why it matters provides the foundation for effectively identifying and fixing issues preventing your baguettes from reaching their full potential.
Factors Affecting Baguette Oven Spring: A Comprehensive Overview
Several interconnected factors influence the degree of oven spring a baguette dough will achieve. These include the dough's hydration level, the strength and development of the gluten network, the extent and timing of proofing, the effectiveness of scoring, and the conditions within the oven, particularly temperature and the presence of steam. Each of these elements plays a vital role, and a deficiency in any one can significantly limit the dough's ability to expand rapidly in the heat.
For instance, insufficient gluten development means the dough lacks the elastic structure needed to contain the expanding gases and steam, resulting in a weak rise. Similarly, incorrect proofing can either deplete the yeast's energy too early (over-proofing) or leave the gluten too tight (under-proofing), both detrimental to oven spring. Even the simple act of scoring, when done improperly, can restrict the dough's ability to expand freely and directionally. Mastering these variables is key to consistent baguette oven spring troubleshooting tips and achieving that sought-after airy texture.
Common Reasons for Lack of Oven Spring in Baguettes and How to Fix Them
Dough Hydration Issues: Too Wet or Too Dry?
The hydration level of your baguette dough – the ratio of water to flour – profoundly impacts its handling and oven spring. Baguette doughs typically range from around 65% to 75% hydration. If the dough is too dry (e.g., below 65% for typical bread flour), it can be stiff and less extensible, making it harder for gases to expand freely during baking.
This restricts oven spring and often results in a denser crumb. On the other hand, excessively wet dough (e.g., above 75% for a beginner, or without proper technique) can be difficult to handle and shape, potentially leading to a collapsed structure that cannot support significant expansion in the oven.
Finding the right hydration for your flour and skill level is crucial. Different flours absorb water differently; high-protein flours can often handle higher hydration. A dough that feels overly sticky and slack might be too wet, while one that feels stiff and tears easily might be too dry. Adjusting hydration is a key baguette oven spring troubleshooting tip.
Troubleshooting: Adjusting Hydration Levels for Optimal Oven Spring
To troubleshoot hydration issues, start with a recipe's recommended hydration but be prepared to adjust based on your flour. If your dough consistently feels too dry, try increasing the water by 1-2% in your next batch. If it's too wet and unmanageable, decrease the water by a similar amount. Measuring by weight is absolutely essential for accurate hydration; volume measurements for flour are notoriously inconsistent.
Consider your technique as well. Higher hydration doughs require gentler handling during shaping to maintain structure and trapped gases. Techniques like stretch and folds during bulk fermentation can help build strength in wetter doughs. If you're struggling with very high hydration, slightly reducing it to a more manageable level (e.g., 70%) can improve handling and shaping, which in turn supports better oven spring. Remember, even a seemingly small adjustment of 1% hydration can make a noticeable difference in the final dough consistency and rise.
Gluten Development Problems: Weak Gluten Structure
A robust, elastic gluten network is fundamental for good oven spring. Gluten, formed by the proteins glutenin and gliadin when flour is mixed with water and kneaded, acts like a balloon, trapping the carbon dioxide produced by the yeast. If the gluten structure is weak, it cannot hold the gases effectively, leading to a lack of expansion during both proofing and baking. Signs of weak gluten include dough that tears easily when stretched, feels slack and doesn't hold its shape, or fails the "windowpane test" – where a small piece of dough can be stretched thinly without tearing.
Insufficient kneading or using flour with low protein content are common culprits for weak gluten. Proper gluten development is a non-negotiable step in effective baguette oven spring troubleshooting tips. Without it, even perfect proofing and baking conditions won't yield a light, airy baguette.
Kneading Techniques for Strong Gluten in Baguette Dough
Effective kneading is how you build that essential gluten structure. For baguette dough, which often uses relatively high hydration, traditional vigorous kneading might be messy. Techniques like the stretch and fold method are excellent alternatives. After mixing the dough, let it rest for 20-30 minutes (autolyse, which we'll discuss next), then perform a series of stretch and folds every 20-30 minutes during the first 1-2 hours of bulk fermentation. This gentle action aligns the gluten strands and builds strength without rough handling.
Alternatively, using a stand mixer with a dough hook can quickly develop gluten. Knead on low to medium speed for 8-12 minutes, or until the dough is smooth, elastic, and passes the windowpane test. You should be able to stretch a small piece of dough thin enough to see light through it without it tearing. If your dough consistently lacks strength, consider increasing kneading time slightly or incorporating more stretch and folds.
Autolyse: Enhancing Gluten Development for Better Rise
The autolyse technique is a simple yet powerful way to boost gluten development with minimal effort. It involves mixing just the flour and water from your recipe and letting the mixture rest for 20 minutes to several hours before adding the salt and yeast. During this rest period, the flour absorbs the water fully, and enzymatic activity begins to break down starches and start gluten formation.
Incorporating an autolyse of even 30 minutes can make the dough significantly more extensible and easier to knead or stretch and fold. It allows gluten to start developing without the restrictive presence of salt or the disruptive action of yeast fermentation. This leads to a stronger, more pliable dough structure capable of better gas retention and, consequently, improved oven spring. It's a highly recommended step for anyone serious about mastering baguette oven spring troubleshooting tips.
Proofing Issues: Over-Proofing vs. Under-Proofing
Proofing, the final rise before baking, is a delicate balance. Both over-proofing and under-proofing can severely hinder oven spring. Under-proofed dough hasn't had enough time for the yeast to produce sufficient gas, and the gluten structure is often still tight and resistant to expansion. When it hits the oven, it might split wildly in unpredictable places or achieve minimal spring.
Over-proofed dough, on the other hand, has exhausted its yeast activity and the gluten structure may have begun to degrade. It might look puffy initially but will feel fragile and may even collapse slightly when handled. When placed in the hot oven, there's little energy left for that final push of oven spring, resulting in a flat, dense loaf. Identifying the correct proofing stage is a critical baguette oven spring troubleshooting tip.
Identifying Over-Proofed Baguette Dough
An over-proofed baguette dough will often look very inflated and airy. When you gently poke it with a floured finger (the "poke test"), the indentation will remain without springing back much, or at all. The surface might appear dull and potentially have small bubbles that are about to pop. The dough may also feel extremely light and fragile.
If you attempt to score an over-proofed dough, the cuts might not open cleanly; they might just stay as slits or the dough might deflate slightly. The smell can also be an indicator – sometimes a strong, overly yeasty or even slightly alcoholic smell can suggest over-proofing, particularly in warmer conditions.
Recognizing Under-Proofed Baguette Dough
Under-proofed baguette dough will typically look dense and feel firm. When you perform the poke test, the indentation will spring back very quickly and completely. The surface will look smooth and tight. The dough might feel heavy for its size.
Scoring an under-proofed dough can be difficult; the surface tension is high, and the dough might resist the blade or tear rather than slicing cleanly. In the oven, under-proofed baguettes often exhibit explosive and uncontrolled oven spring, leading to wild, jagged tears in places other than your score marks, or a very rounded, tight shape without the desired flat bottom and open grigne.
Achieving the Perfect Proof: Time and Temperature Considerations
The ideal proofing time is less about a specific duration and more about the dough's readiness. It depends heavily on factors like ambient temperature, dough temperature, and yeast activity. As a general guideline for room temperature proofing (around 70-75°F or 21-24°C), baguettes might proof for 60-90 minutes after shaping. In warmer kitchens (above 75°F/24°C), this time will be shorter; in cooler conditions, it will be longer.
The poke test is your best friend here. Aim for a dough where a gentle poke leaves an indentation that slowly springs back about halfway. This indicates the dough has enough gas for expansion but still has structural integrity. Using a proofing box or a consistent spot in your kitchen helps manage temperature. When in doubt, slightly under-proofing is often better than over-proofing for achieving good oven spring, as there's more yeast energy left for the oven's heat.
Scoring Technique: The Key to Controlled Expansion
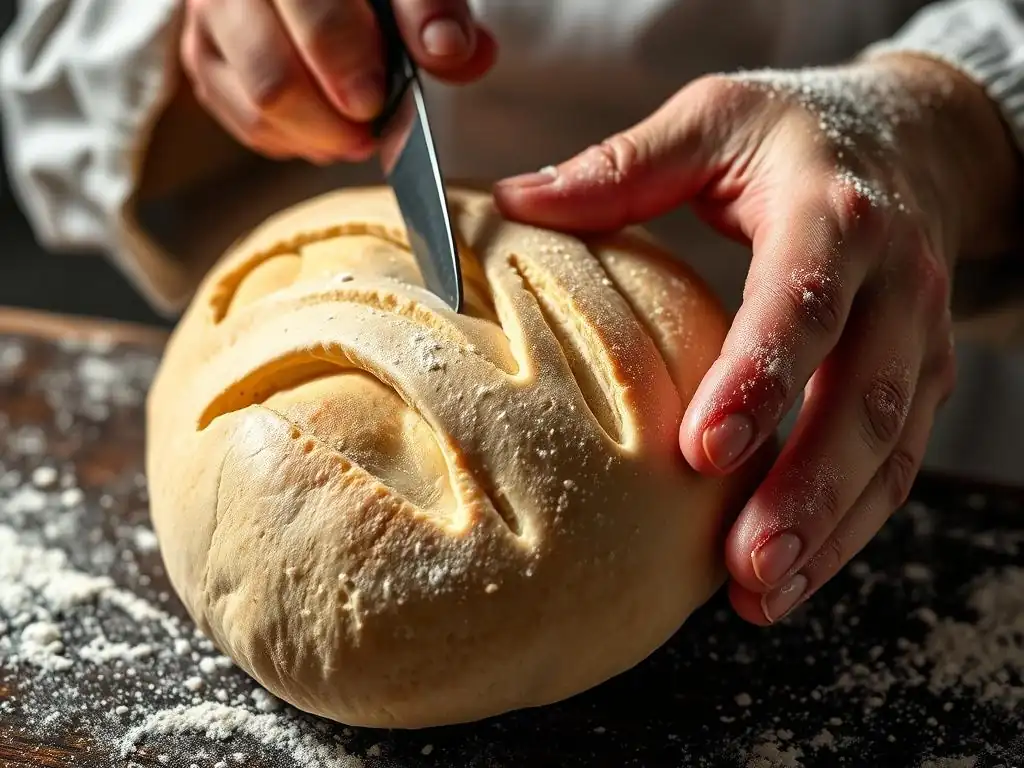
Scoring, or making cuts on the surface of the shaped dough just before baking, is not just for looks; it's a critical function that dictates where the dough will expand during oven spring. Without scores, the crust will set rapidly in the hot oven, and the expanding gases will find the weakest points to burst through, resulting in uncontrolled, often unsightly cracks instead of a beautiful, controlled grigne. Proper scoring allows the dough to expand predictably along the cuts, maximizing volume and contributing significantly to the final shape and crumb.
Incorrect scoring – cuts that are too shallow, too deep, at the wrong angle, or in the wrong location – is a common reason for poor baguette oven spring or irregular shape. Mastering this technique is a vital part of any baguette oven spring troubleshooting tips repertoire.
Mastering the Art of Scoring Baguettes: Angle, Depth, and Speed
The ideal score for a baguette is made with a very sharp blade (like a lame or razor blade) held at a shallow angle, typically around 20-30 degrees to the surface of the dough. This angle is crucial because it creates a flap of dough that lifts during oven spring, forming the grigne. Cuts should overlap by about one-third to one-half of their length.
The depth of the cut is also important. Aim for a depth of about 1/4 to 1/2 inch (around 0.5 to 1 cm). Too shallow, and the cut won't provide enough relief for expansion. Too deep, and you risk collapsing the structure or causing the dough to spread sideways rather than springing upwards. Make the cuts confidently and quickly to avoid dragging the dough. Practice is key to achieving smooth, effective scores.
Different Scoring Patterns and Their Impact on Oven Spring
While the classic baguette scoring pattern involves several overlapping diagonal cuts along the length of the loaf, variations exist. The number and placement of scores depend on the length of the baguette; typically, a standard baguette might have 3 to 5 cuts. Each cut provides a potential avenue for expansion.
A single, long score down the middle can sometimes result in a very tall, narrow loaf, while multiple overlapping scores encourage a broader, more classic baguette shape with multiple 'ears' or grignes. Experimenting with scoring patterns can help you understand how they direct oven spring and influence the final form. Consistent, well-executed diagonal scores are usually the most effective pattern for maximizing controlled oven spring in classic baguettes.
Troubleshooting: Score Placement and Its Effect on Baguette Shape
If your baguettes are bursting unpredictably or have lopsided oven spring, your scoring placement or execution might be the issue. Ensure your scores are consistently spaced and overlap correctly. If using overlapping diagonal scores, make sure they are all on the same side of the center line of the loaf, creating a single 'zipper' effect.
If the dough is tearing elsewhere, it indicates that your scores were not sufficient to relieve the internal pressure. Try making your scores slightly deeper or ensuring your blade is exceptionally sharp. If the dough collapses or spreads when you score, it might be over-proofed or lack sufficient gluten strength, indicating you need to revisit earlier baguette oven spring troubleshooting tips related to proofing or kneading.
Oven Temperature and Steam: Creating the Ideal Baking Environment
High heat and steam are non-negotiable for achieving maximum oven spring in baguettes. Baguettes need to be baked in a very hot oven, typically between 450°F and 500°F (230°C to 260°C). This intense initial heat is what triggers the rapid conversion of water to steam inside the dough and the final burst of yeast activity, driving the oven spring.
Equally important is the presence of steam during the first part of the bake (usually the first 10-15 minutes). Steam keeps the surface of the dough moist and flexible, preventing the crust from hardening prematurely. If the crust sets too early, it acts like a straitjacket, severely restricting oven spring. A dry oven environment is a major culprit for poor baguette rise, making steam generation a critical baguette oven spring troubleshooting tip.
Importance of High Oven Temperature for Baguette Oven Spring
Baking at a high temperature is crucial for several reasons. Firstly, it provides the necessary thermal shock to initiate maximum yeast activity and steam production within the dough. Secondly, the intense heat rapidly sets the structure after the initial expansion phase is complete, ensuring the baguette holds its shape and height.
Baking at too low a temperature will result in a slower, weaker spring, a denser crumb, and potentially a pale, soft crust. Ensure your oven is fully preheated to the correct temperature. Using an oven thermometer is highly recommended, as built-in oven thermostats can be inaccurate by as much as 25-50°F (15-30°C). Preheating for at least 30-60 minutes after reaching temperature is often necessary to ensure everything inside the oven (baking stone, walls, etc.) is uniformly hot.
Generating Steam in Your Oven: Essential Techniques
There are several effective ways to create steam in a home oven. One common method is placing a cast iron pan or tray on the bottom rack while the oven preheats. Just before loading the baguettes, carefully pour about a cup of hot water or a handful of ice cubes into the hot pan. Close the oven door quickly to trap the steam.
Another popular method, especially for maximizing oven spring, involves using a Dutch oven or combo cooker (discussed further in advanced techniques). Baking inside a preheated lidded pot traps the moisture released by the dough itself, creating a perfect steamy environment around the loaf. Some bakers also mist the oven walls with water or use lava rocks in a tray for steam generation. The goal is to create a visibly steamy environment for the first 10-15 minutes of baking.
Troubleshooting: Achieving Consistent Oven Temperature and Steam
If your oven spring is inconsistent, verify your oven temperature with a reliable thermometer. Uneven heating can cause problems; some ovens have hot or cool spots. Rotating your baking surface or loaf halfway through can help.
For steam issues, ensure your steam source is producing enough vapor for the critical initial baking period. If using a water pan, make sure it's large enough and placed correctly. Avoid opening the oven door unnecessarily during the first 10-15 minutes, as this lets the steam escape. If using ice cubes, ensure the pan is hot enough to instantly vaporize them. If you're still struggling with steam and oven spring, investing in a baking stone/steel and experimenting with different steam methods (like the Dutch oven) might be necessary baguette oven spring troubleshooting tips.
Yeast Activity: Ensuring a Strong and Active Starter or Yeast
The yeast (or sourdough starter) is the engine driving fermentation and gas production in your dough. If the yeast is inactive, weak, or dead, it won't produce enough carbon dioxide to leaven the dough properly, resulting in little to no oven spring. Using fresh, active yeast is fundamental for successful baguette baking.
Factors like the age of your yeast, storage conditions, and the temperature of your water can all affect yeast activity. Similarly, the health and feeding schedule of a sourdough starter are critical for its leavening power. Ensuring your leavening agent is vigorous is a foundational step in baguette oven spring troubleshooting tips.
Testing Yeast Activity: A Simple Guide
You can easily test the activity of commercial active dry yeast or instant yeast. For active dry yeast, dissolve 1 teaspoon of yeast and 1 teaspoon of sugar or honey in 1/4 cup of warm water (around 105-115°F or 40-46°C). Let it sit for 5-10 minutes. If the mixture becomes foamy and bubbly, the yeast is active. If nothing happens, the yeast is likely dead or inactive.
Instant yeast can often be added directly to flour, but you can test it similarly with warm water to confirm its vitality. For sourdough starter, a simple test is the "float test": drop a small spoonful of starter into a glass of water. If it floats, it's active and ready to use. If it sinks, it likely needs another feeding to become vigorous enough for baking.
Troubleshooting: Reviving Inactive Yeast
If your commercial yeast test shows inactivity, it's best to discard it and buy fresh yeast. Store yeast properly: active dry and instant yeast last longest in an airtight container in the refrigerator or freezer. Always check the expiration date.
If your sourdough starter fails the float test or isn't showing significant bubbling and doubling after feeding, it needs to be strengthened. This usually involves more frequent feedings with the correct ratio of flour and water, at a suitable temperature, until it becomes consistently active. Sometimes, discarding a portion of the starter and feeding the remainder can help refresh it. Patience and consistent feeding are key to a vigorous starter capable of providing excellent oven spring.
Using Sourdough Starter for Enhanced Baguette Oven Spring
Sourdough starters often contribute to excellent oven spring due to the combination of wild yeast and lactic acid bacteria. The bacteria produce organic acids that strengthen the gluten structure, allowing it to expand further and hold its shape better during baking. The wild yeast in a healthy starter can also be quite vigorous.
While commercial yeast provides a reliable, rapid rise, sourdough fermentation develops complex flavors and can lead to a more open, airy crumb if managed correctly. If you're troubleshooting lack of oven spring with sourdough baguettes, focus on maintaining a strong, active starter and understanding its fermentation patterns, which are often slower than commercial yeast. Adjusting bulk fermentation and proofing times based on your starter's activity and ambient temperature is crucial.
Advanced Techniques for Improving Baguette Oven Spring

Pre-heating Your Baking Stone or Steel
Using a preheated baking stone or steel is one of the most effective baguette oven spring troubleshooting tips, particularly when baking directly on a surface rather than in a pot. A stone or steel absorbs and retains a significant amount of heat. When the cold dough is placed directly onto this hot surface, it receives a powerful thermal shock from the bottom.
This intense heat transfer from the stone/steel rapidly accelerates gas expansion within the dough base and helps set the bottom crust quickly while the top remains pliable due to steam. This bottom heat surge contributes substantially to the initial lift or oven spring. For best results, preheat your stone or steel in a hot oven (450-500°F or 230-260°C) for at least 30-60 minutes to ensure it is fully saturated with heat.
Baking Baguettes with a Dutch Oven or Combo Cooker
Baking baguettes inside a preheated lidded Dutch oven or a combo cooker (a shallow pan with a lid that doubles as a deeper pan) is a highly recommended technique for maximizing oven spring, especially in home ovens where generating sufficient steam can be challenging. The sealed environment created by the lid traps all the moisture evaporating from the dough as it bakes.
This trapped steam creates the perfect humid microclimate around the dough, keeping the crust soft and allowing for maximum expansion before the lid is removed (typically after 15-20 minutes), at which point the heat finishes setting the crust. This method simplifies steam generation and provides consistent, excellent oven spring. Preheat the Dutch oven with the lid on in your hot oven before carefully transferring the shaped, scored dough into it.
Using a Banneton for Shaping and Supporting Dough
While not directly causing oven spring, using a banneton (a proofing basket, often made of rattan or cane) for the final proof can indirectly support better oven spring by helping the dough maintain its shape and tension. Baguette dough, especially higher hydration dough, can easily spread during proofing if not supported.
Proofing seam-side up in a floured banneton helps the dough hold a tight structure and prevents it from flattening out. This strong shape and surface tension translate to better controlled expansion when the dough is inverted onto your baking surface and scored. It ensures the energy of the oven spring is directed upwards and outwards along the scores, rather than simply spreading sideways.
Preventing Future Oven Spring Problems in Your Baguettes
Consistent Recipe Adherence: The Foundation for Success
One of the most fundamental baguette oven spring troubleshooting tips is consistency. Once you find a recipe that works for you, stick to it precisely. Varying ingredients, ratios, or steps from batch to batch makes it difficult to identify what might be causing issues. Keep detailed notes if you make modifications.
- Use the same type of flour.
- Maintain consistent hydration ratios.
- Follow mixing and kneading times closely.
- Adhere to fermentation and proofing schedules as closely as possible, adjusting only for temperature.
Building a successful routine based on a consistent recipe is the best way to establish a baseline and systematically troubleshoot when problems arise.
Accurate Measurements: Using a Kitchen Scale for Precision
Baking is a science, and precision in measurements is paramount, particularly for finicky loaves like baguettes. Using volume measurements (cups, spoons) for ingredients like flour and water can lead to significant variations that impact hydration and overall dough balance. For example, a cup of flour can weigh anywhere from 120g to 150g depending on how it's scooped and packed.
Investing in a digital kitchen scale and measuring all ingredients by weight (grams are standard in professional baking) ensures accuracy and reproducibility. This eliminates a major variable in baguette oven spring troubleshooting tips and helps you achieve consistent results batch after batch. Most reliable bread recipes provide measurements in grams for this very reason.
Maintaining a Baking Journal: Tracking Your Results and Improvements
A baking journal is an invaluable tool for any baker looking to improve, especially when troubleshooting specific issues like lack of oven spring in baguettes. For each bake, record details such as:
- Date and time
- Ambient temperature and humidity
- Exact ingredient weights
- Flour type and brand
- Yeast/starter details (age, activity level)
- Mixing/kneading times
- Bulk fermentation start/end times and dough temperature
- Proofing start/end times and conditions
- Oven temperature (measured with a thermometer)
- Steaming method and duration
- Baking time and temperature adjustments
- Scoring pattern
Also, include notes on the dough's look and feel at each stage, and critique the final result – crust color, crumb structure, and most importantly, oven spring. Over time, this journal will reveal patterns, helping you pinpoint what worked (or didn't) and make informed adjustments, making your baguette oven spring troubleshooting tips much more effective.
Frequently Asked Questions
What is oven spring and why is it important for baguettes?
Oven spring refers to the rapid expansion of bread dough in the initial stages of baking. It's crucial for baguettes because it contributes to their light, airy texture and characteristic shape.
What are some common causes of poor oven spring in baguettes?
Several factors can hinder oven spring, including under-proofing or over-proofing the dough, using old or inactive yeast, or a too-low oven temperature.
How does scoring the baguette dough affect oven spring?
Proper scoring allows the baguette to expand predictably during baking. Insufficient or poorly executed scoring can restrict oven spring and lead to uneven expansion or bursting.
What temperature should my oven be for baking baguettes to ensure good oven spring?
A high oven temperature is essential for optimal oven spring. Bake baguettes at around 450-475°F (232-246°C) to achieve the best results.
What are some techniques to improve humidity in my oven when baking baguettes?
Creating steam in the oven is crucial for oven spring. Techniques include using a Dutch oven, placing a pan of hot water on the oven floor, or spraying the oven with water immediately after loading the baguettes.
Final Reflection: The Pursuit of Perfect Baguette Oven Spring
The quest for that perfect baguette, with its airy crumb and dramatic oven spring, remains a constant challenge for even the most experienced bakers. Mastering this seemingly simple bread requires a deep understanding of hydration, fermentation, and the delicate dance between dough and oven. The subtle nuances explored in this article highlight just how much can impact the final rise, proving that even a small detail can make or break a perfect loaf.
The journey to understanding oven spring is more than just a technical pursuit; it's a reflection of our relationship with food, craft, and the satisfaction derived from creating something beautiful and delicious from simple ingredients. The most beautiful thing we can experience is the mysterious. It is the source of all true art and science.
- Albert Einstein. This quote, while not directly about baking, speaks to the inherent mystery and artistry involved in achieving that perfect spring. The process itself, with its trial and error, its successes and failures, mirrors the larger human experience of striving for mastery in any field.
Now, consider your own baking journey. What have you learned from this exploration of baguette oven spring? Don't be discouraged by imperfect loaves; instead, view each bake as an opportunity to refine your technique and deepen your understanding. Experiment with the tips provided, adjust your methods based on your observations, and most importantly, enjoy the process. The pursuit of the perfect baguette is a rewarding one, filled with learning, growth, and the undeniable pleasure of sharing delicious bread with those you love.
Unleash Your Inner Boulanger: Perfect Baguette Spring Awaits!
Thanks for taking the time to delve into the world of baguette baking! We hope you gained valuable insights into troubleshooting that elusive oven spring. Ready to put your newfound knowledge to the test?
- Bake a test baguette today! Use what you’ve learned to adjust your technique and see the immediate improvement in your loaves. (Remember to photograph your results!)
- Share your baking triumphs (and even your flops!) in the comments section below. Let's learn from each other's experiences.
- Explore our other resources on sourdough starters and shaping techniques to further elevate your baking skills.
What unique ingredient or technique are you most excited to try in your next baguette attempt?