
Basic Sourdough with Just 4 Ingredients: The Simplest Recipe

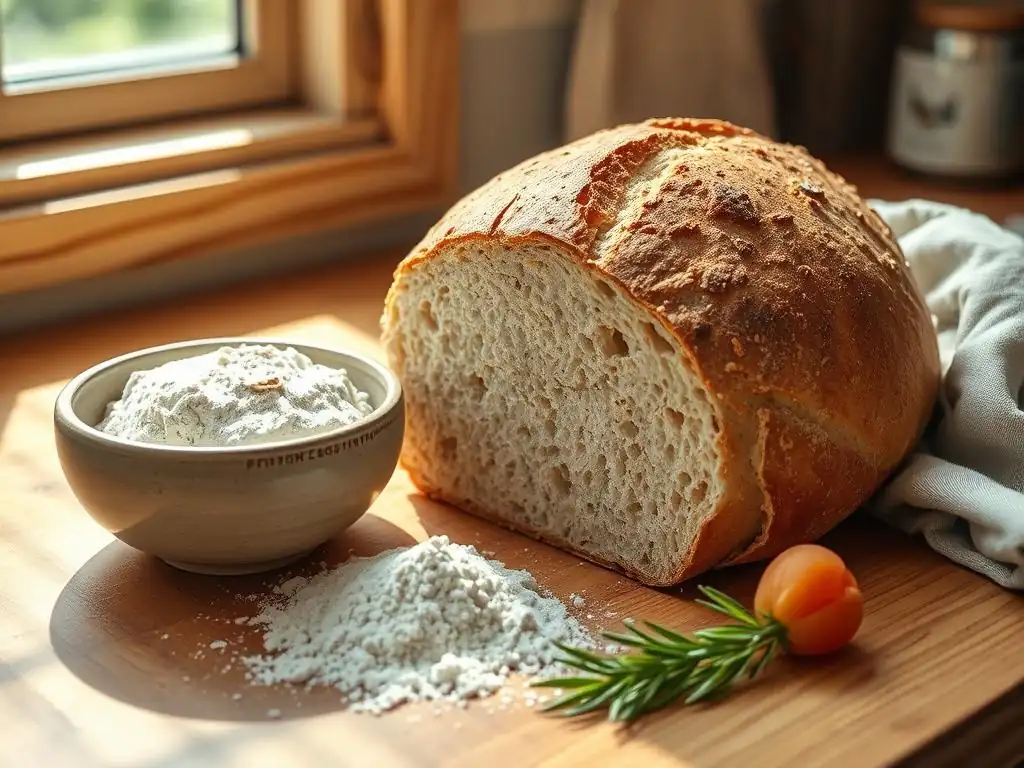
Welcome to BakeWithEase, your companion in the delightful world of baking! Ever dreamt of achieving that perfect sourdough tang without the fuss? You're in the right place. Dive into our guide on crafting an Easy 4 Ingredient Sourdough – seemingly impossible, yet wonderfully achievable. Discover the secrets to a simplified sourdough process, even if you're just venturing beyond beginner baking. What's the magic behind these minimal ingredients? Let's find out!
- Classic Sourdough Bread: A Simple Recipe
- A Beginner's Guide to Baking Sourdough at Home
- Why Bake Sourdough?
- The Essential Ingredients for Sourdough
-
Baking Sourdough: A Step-by-Step Guide
- Step 1: Activating Your Sourdough Starter
- Step 2: Mixing the Dough: The Initial Mix
- Step 3: Bulk Fermentation: Developing Flavor and Strength
- Step 4: Shaping the Loaf: Creating Tension and Form
- Step 5: Proofing: Final Rise Before Baking
- Step 6: Baking: Achieving a Golden Crust
- Step 7: Cooling and Slicing: Enjoying Your Bread
- Troubleshooting Common Sourdough Issues
- Storing Sourdough Bread for Optimal Freshness
- Expanding Your Sourdough Repertoire
-
Frequently Asked Questions
- What are the 4 ingredients needed for this sourdough recipe?
- How active does my sourdough starter need to be for this recipe to work?
- What kind of flour is best for making this easy sourdough?
- How long does it take to bake the sourdough loaf?
- Can I add other ingredients to this basic sourdough recipe?
- Final Reflection: The Humble Power of Four Ingredients
- Unleash Your Inner Baker: Start Baking Today!
Classic Sourdough Bread: A Simple Recipe
A Beginner's Guide to Baking Sourdough at Home
Baking sourdough bread might seem intimidating at first, but at its heart, it's a remarkably simple process relying on just a few core ingredients and a bit of time. This guide focuses on an easy 4 ingredient sourdough recipe, stripping away complexity to reveal the fundamental joy of creating a naturally leavened loaf in your own kitchen. Whether you're new to baking or looking for a straightforward introduction to wild yeast leavening, mastering this basic sourdough recipe is a rewarding step.
This article will walk you through each stage, from understanding the role of the essential ingredients to the step-by-step process of mixing, fermenting, shaping, and baking your first loaf. We'll demystify the process, making a classic, tangy sourdough accessible to everyone. Get ready to discover how simple ingredients can transform into a satisfyingly crusty and flavorful bread.
Why Bake Sourdough?
The Flavor of Fermentation: A Tangy and Complex Bread
The distinctive tangy flavor of sourdough comes from the metabolic activity of lactic acid bacteria (LAB) and wild yeasts present in the starter. These microorganisms consume sugars in the flour, producing organic acids, primarily lactic acid and acetic acid, alongside carbon dioxide and ethanol. The ratio of these acids, influenced by fermentation time and temperature, dictates the final bread's tanginess – a longer, cooler fermentation often results in a more pronounced sourness.
Beyond just tang, fermentation breaks down complex carbohydrates and proteins in the flour, creating a more complex flavor profile than commercially yeasted bread. This enzymatic activity also contributes to the bread's aroma and texture. For instance, a long, slow bulk fermentation at around 75°F (24°C) for 4-6 hours can develop subtle notes of caramel and nuts, while a cold proofing period of 12-24 hours in the refrigerator intensifies the acetic acid production, leading to a sharper tang characteristic of many classic sourdoughs.
A Naturally Leavened Loaf: No Commercial Yeast Required
One of the defining features of sourdough is its reliance on a natural leavening agent – the sourdough starter – rather than commercial baker's yeast. This starter, a living culture of flour and water, contains wild yeasts that produce carbon dioxide gas, causing the dough to rise. This reliance on natural leavening is central to an easy 4 ingredient sourdough, highlighting the power of simple, cultivated ingredients.
The absence of commercial yeast means the rising process is typically slower and more nuanced. This extended fermentation time allows for greater development of flavor compounds and can lead to a bread that is often considered easier to digest for some people compared to fast-fermented loaves. Furthermore, bread made with a strong, active starter tends to have better keeping qualities, staying fresh and flavorful for several days after baking.
From Simple Ingredients to a Satisfying Bake
The beauty of an easy 4 ingredient sourdough lies in its minimalist nature. With just flour, water, salt, and a healthy sourdough starter, you can create a loaf of incredible depth and character. This simplicity challenges the notion that complex breads require numerous components or additives, proving that quality often stems from the interaction of fundamental elements and the power of natural processes like fermentation.
Witnessing the transformation from a shaggy mix of these simple ingredients into a beautifully risen, golden-crusted loaf is immensely satisfying. It connects the baker to a centuries-old tradition of bread making, relying on time, temperature, and the invisible work of microorganisms. This basic sourdough recipe serves as a perfect entry point into the world of natural leavening, demonstrating that delicious, authentic bread is achievable with minimal fuss.
The Essential Ingredients for Sourdough
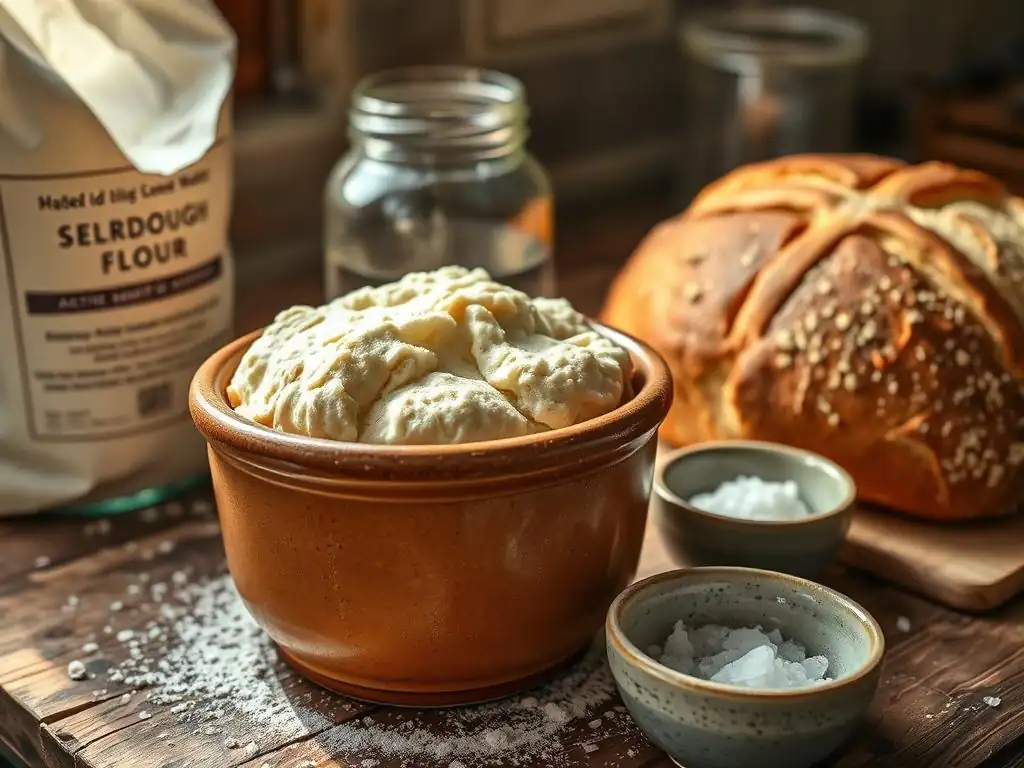
Sourdough Starter: The Heart of Sourdough Bread
A sourdough starter is a living ecosystem, a fermented culture of flour and water teeming with wild yeasts and lactic acid bacteria. Its primary role is to leaven the bread by producing carbon dioxide, which creates the airy crumb structure. A robust and active starter is crucial for a successful bake, acting as both the leavening agent and a significant contributor to the bread's signature tangy flavor profile.
Maintaining a healthy starter requires regular feeding (typically with equal parts flour and water, though ratios vary) to keep the microbial population active and vigorous. An active starter, ready for baking, should show significant signs of life: doubling or tripling in volume within 4-8 hours after feeding, exhibiting numerous bubbles throughout the culture, and having a pleasant, slightly tangy aroma. Using a peak-activity starter ensures sufficient leavening power for your easy 4 ingredient sourdough.
Bread Flour: Providing Structure and Strength
Bread flour is the preferred choice for sourdough baking due to its higher protein content compared to all-purpose flour, typically ranging from 12% to 14%. This higher protein level is essential for developing strong gluten networks. Gluten, formed when the proteins glutenin and gliadin in flour combine with water and are worked, provides the dough with elasticity and extensibility, allowing it to trap the gases produced by the starter.
The strength provided by high-protein bread flour is critical for supporting the long fermentation periods characteristic of sourdough. It helps the dough maintain its structure as it rises and develops flavor. While it's possible to use other flours or blends, starting with a good quality bread flour provides a reliable foundation for developing the structure needed for a well-risen, open-crumbed loaf in your basic sourdough recipe.
Water: Hydrating the Flour and Activating the Starter
Water plays multiple critical roles in sourdough bread making. It hydrates the flour, allowing the gluten proteins to form their network, and it activates the wild yeasts and bacteria in the sourdough starter, enabling them to ferment the dough. The amount of water relative to flour (hydration level) significantly impacts the dough's handling characteristics and the final bread's texture – higher hydration typically results in a more open crumb but a stickier dough.
The temperature of the water also matters, especially during the initial mix. Using lukewarm water (around 80-85°F or 27-30°C) can help kickstart fermentation more quickly, which can be beneficial depending on your desired fermentation schedule and ambient temperature. However, room temperature water works perfectly well and is often simpler, contributing to a more standard fermentation rate for an easy 4 ingredient sourdough. Avoid using chlorinated water if possible, as chlorine can potentially inhibit microbial activity in the starter.
Salt: Enhancing Flavor and Controlling Yeast Activity
Salt is a non-negotiable ingredient in bread making, serving two primary functions. Firstly, and most noticeably to the eater, it significantly enhances the flavor of the bread, balancing the tanginess from fermentation and bringing out the inherent sweetness of the flour. Without salt, bread can taste bland and one-dimensional.
Secondly, salt plays a crucial role in controlling the rate of fermentation and enzyme activity. It slows down the activity of both wild yeasts and bacteria, preventing the dough from rising too quickly and allowing for more controlled gluten development. Salt also strengthens the gluten network, contributing to better dough structure and oven spring. Typically, salt is added after the initial mixing stage (autolyse, if used) or incorporated during the main mixing phase, usually making up about 1.8% to 2.2% of the total flour weight in a standard recipe.
Baking Sourdough: A Step-by-Step Guide
Step 1: Activating Your Sourdough Starter
Before you begin mixing your easy 4 ingredient sourdough dough, ensure your sourdough starter is active and ready. This usually involves feeding a small amount of your mature starter with fresh flour and water, typically in a 1:1:1 ratio by weight (e.g., 20g starter, 20g water, 20g flour). Leave the fed starter at room temperature (around 70-75°F or 21-24°C) until it shows peak activity, which can take anywhere from 4 to 8 hours depending on the starter's health and ambient temperature.
An active starter, ready for baking, should be visibly bubbly throughout, have doubled or even tripled in volume, and pass the "float test" – a small spoonful dropped gently into water should float. This indicates that the starter is producing enough carbon dioxide to leaven your dough effectively. Using a starter that has peaked or is just slightly past its peak ensures maximum leavening power for your basic sourdough recipe.
Observing Starter Activity: Signs of a Healthy Starter
To determine if your starter is ready, look for several key indicators. Visual cues include the starter visibly increasing in volume, often doubling or tripling from its original height in the jar. You'll also notice numerous bubbles on the surface and throughout the culture, indicating active gas production by the yeast and bacteria.
A healthy, active starter will also have a pleasant, tangy aroma, not overly acidic or vinegary. The texture should be light and airy, not dense or paste-like. The float test is a reliable check: take a small amount (about half a teaspoon) of your starter and gently drop it into a glass of room-temperature water. If it floats, it's sufficiently active and ready to be used in your easy 4 ingredient sourdough recipe.
Feeding and Refreshing Your Starter
Regular feeding keeps your sourdough starter healthy and active. The most common feeding ratio is 1:1:1 by weight (starter:water:flour). For example, if you want 50g of active starter for a recipe, you might take 10g of your mature starter, add 20g of water, and 20g of flour, discarding the rest of the mature starter (or using it in other recipes). This ratio ensures the starter is fed efficiently and reaches peak activity within a predictable timeframe.
The frequency of feeding depends on how you store your starter. If kept at room temperature, it needs daily feeding. If stored in the refrigerator, it only needs feeding typically once a week, but it will require a couple of feedings at room temperature to become fully active before baking. Using filtered water and the same type of flour you intend to use in your easy 4 ingredient sourdough bread helps maintain consistency in your starter's performance.
Step 2: Mixing the Dough: The Initial Mix
The initial mixing phase for your easy 4 ingredient sourdough involves combining the active sourdough starter, water, and flour. In a large mixing bowl, first whisk together the active starter and the measured water until the starter is mostly dissolved. Then, add the flour. For this simple recipe, you can often mix everything together at once, though some bakers prefer a short "autolyse" phase where flour and water are mixed and rested before adding the starter and salt.
Mix the ingredients by hand or with a stand mixer until a shaggy, cohesive dough forms and there are no dry pockets of flour. This initial mix doesn't require extensive kneading; the goal is simply to bring the ingredients together. Cover the bowl and let the dough rest for 20-30 minutes. This rest period, sometimes called the "fermentolyse" when the starter is included, allows the flour to fully hydrate and gluten development to begin, making the dough easier to handle in subsequent steps.
Combining Flour, Water, and Starter
Start by weighing your ingredients accurately. Precision is key in baking, especially with hydration levels. In a large sturdy bowl, whisk together the specified amount of lukewarm water and your active sourdough starter until it's well dispersed – you shouldn't see large clumps of starter floating. This ensures the starter is evenly distributed throughout the dough, leading to consistent fermentation and rise.
Next, add the weighed bread flour to the wet mixture. Using a Danish dough whisk, spatula, or your hands, begin incorporating the flour into the liquid. Mix until all the flour is hydrated and you have a rough, shaggy dough. Avoid overmixing at this stage; the subsequent folding steps during bulk fermentation will develop the gluten structure further. Ensure there are no pockets of dry flour left at the bottom of the bowl.
Achieving the Right Dough Consistency
After the initial mix, the dough for your easy 4 ingredient sourdough should feel somewhat sticky but cohesive. The exact consistency will depend on the hydration level of the recipe and the specific flour used, but it should hold together when squeezed gently. It won't be smooth or elastic yet; that comes later with bulk fermentation and folds.
If the dough feels excessively dry and shaggy, you might need to add a tiny splash more water (a teaspoon at a time), keeping in mind that too much water can make the dough unmanageable for beginners. Conversely, if it feels like a liquid batter, double-check your measurements – perhaps too much water or not enough flour was added. The ideal consistency at this stage is just past the point where dry flour is visible, forming a rough mass that will rest before the salt is incorporated.
Step 3: Bulk Fermentation: Developing Flavor and Strength
Bulk fermentation, also known as the first rise, is the period after mixing the dough and before shaping. This is where the magic happens: the sourdough starter gets to work, producing gas to leaven the dough and developing the complex flavors characteristic of sourdough. The duration of bulk fermentation is highly dependent on temperature – at a warm room temperature of 75-80°F (24-27°C), it might take 4-6 hours, while in a cooler environment (around 70°F or 21°C), it could take 8 hours or longer.
During bulk fermentation, you'll also perform a series of "folds" or "stretch and folds." These brief manipulations, done typically every 30-60 minutes for the first 2-3 hours of bulk fermentation, help to strengthen the gluten network, build structure, and equalize the dough's temperature. By the end of bulk fermentation, the dough should have increased significantly in volume (typically 50-100%), feel airy and bubbly, and show signs of strength when gently stretched.
Monitoring Dough Rise and Temperature
Monitoring the dough's temperature during bulk fermentation is crucial for predictable results. Wild yeast and bacteria activity are highly sensitive to temperature. An ideal dough temperature range is often cited as 75-80°F (24-27°C). You can measure this with an instant-read thermometer. If your kitchen is cool, you might need to find a warmer spot, like in an oven with the light on (check the temp first! ), or use a proofing box.
Equally important is observing the dough's physical changes. It should gradually increase in volume, become more aerated with visible bubbles (especially around the edges), and feel lighter. A good indicator of readiness for shaping is when the dough has increased by roughly 50-75% in volume, looks pillowy, and passes the "windowpane test" (a small piece can be stretched thin enough to see light through without tearing). Over-proofing at this stage can lead to a slack, hard-to-shape dough.
Performing Folds to Strengthen the Dough
Stretch and folds are a simple yet effective technique used during bulk fermentation to develop gluten structure and build strength in the dough without intensive kneading. Typically, you perform 3-5 sets of folds within the first 2-3 hours of bulk fermentation, with 30-60 minutes rest time between sets. To perform a fold, wet your hands slightly, grab one edge of the dough, gently stretch it upwards, and fold it over onto the opposite side of the dough. Repeat this process for all four sides (North, South, East, West).
As you perform the sets of folds, you'll notice the dough becoming progressively smoother, stronger, and more elastic. It will resist stretching initially but become more pliable with each set. These folds redistribute the yeast and bacteria, ensuring even fermentation, and help build the tension needed for good oven spring later. For a basic sourdough recipe, completing 3-4 sets is usually sufficient to develop adequate strength.
Step 4: Shaping the Loaf: Creating Tension and Form
After bulk fermentation, the dough needs to be shaped into a cohesive loaf. This process involves gently degassing the dough slightly (not completely) and creating surface tension. Tension is vital because it helps the loaf hold its shape during proofing and baking and contributes significantly to achieving good oven spring – the final burst of rising in the oven.
There are various shaping techniques depending on whether you want a round loaf (boule) or an oblong one (batard). Both methods focus on folding and tucking the dough to create a tight, smooth surface. Properly shaping your easy 4 ingredient sourdough ensures it maintains its form and doesn't spread excessively during the final rise and baking, leading to a well-structured crumb and an attractive crust.
Shaping Techniques for Round and Oblong Loaves
For a round loaf (boule), gently pre-shape the dough into a loose ball and let it rest for 15-20 minutes. Then, for the final shape, gently flatten the dough into a rough circle. Fold the top edge down towards the center, then the bottom edge up over the top. Fold in the sides, then gather the edges and pull them underneath the dough while rotating it, using the surface of your counter to create tension. You should end up with a tight, smooth ball.
For an oblong loaf (batard), after the rest, flatten the dough into a rough rectangle. Fold the top third down, then the bottom third up over the top, like folding a letter. Then, starting from one end, roll the dough tightly towards the other end, sealing the seam with your fingers. Gently cup your hands around the loaf and pull it towards you slightly to increase tension. Place the shaped loaf seam-side up in your prepared banneton.
Preparing Your Banneton Basket
A banneton, or proofing basket, is used to support the shaped dough during its final rise (proofing) and helps it maintain its shape. They are typically made of rattan, cane, or wood pulp. Before placing the dough inside, the banneton needs to be well-floured to prevent sticking. Rice flour is highly recommended for this purpose as it is less likely to be absorbed by the dough compared to wheat flour.
To prepare, generously dust the inside of the banneton liner (if using one) or the basket itself with rice flour. Ensure the flour gets into all the crevices. If you don't have a banneton, you can use a bowl lined with a clean linen or cotton towel heavily dusted with flour. Place the shaped dough seam-side up (for a boule) or seam-side up (for a batard, if scoring the top later) into the prepared banneton.
Step 5: Proofing: Final Rise Before Baking
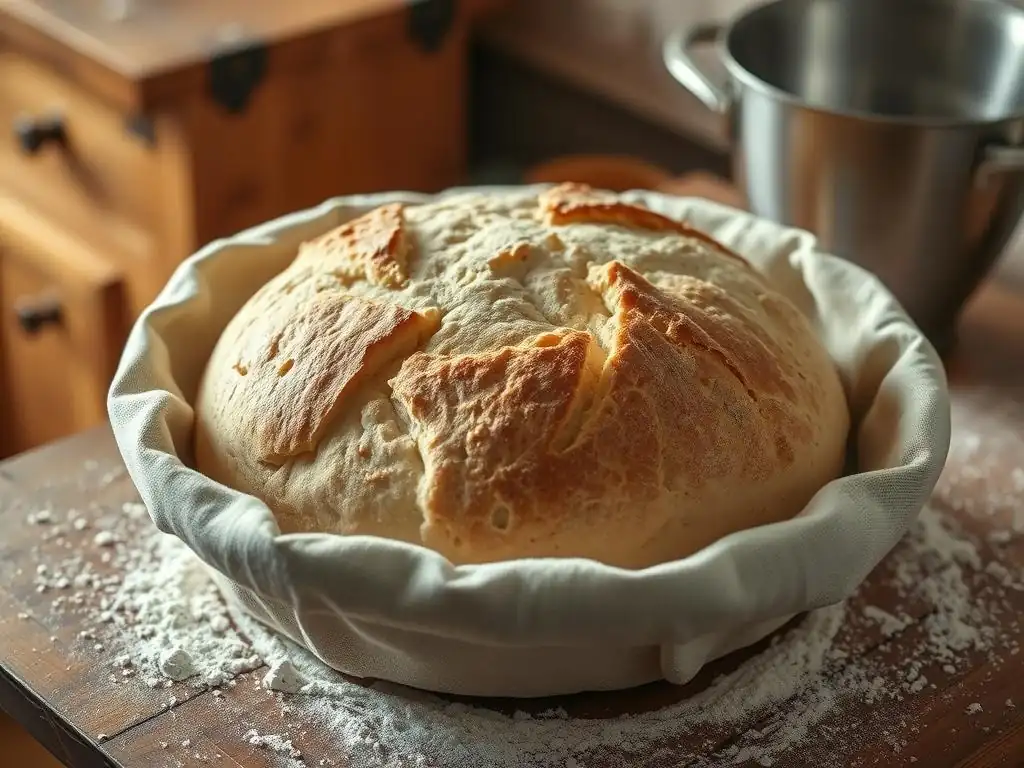
Proofing is the final rise the shaped dough undergoes before being baked. This is when the dough expands further, becoming light and airy. The most common method for sourdough, especially for achieving good oven spring and a manageable dough for scoring, is cold proofing in the refrigerator. This slows down fermentation dramatically, allowing for flavor development over a longer period and firming up the dough.
Cold proofing typically lasts anywhere from 8 to 24 hours in a refrigerator set at around 38-40°F (3-4°C). This extended proofing time deepens the tangy flavor profile of your easy 4 ingredient sourdough. Alternatively, you can proof at room temperature, which is much faster (1-3 hours depending on temperature), but requires careful monitoring to avoid over-proofing, which can result in a loaf that spreads rather than rises in the oven.
Cold Proofing in the Refrigerator
Cold proofing is a popular technique in sourdough baking for several reasons. Placing the shaped loaf in a banneton inside the refrigerator (at around 38-40°F or 3-4°C) significantly slows down the yeast activity but allows the lactic acid bacteria to continue producing organic acids, enhancing flavor development. A typical cold proof can last from 8 to 24 hours, giving you flexibility in your baking schedule.
Beyond flavor, cold proofing makes the dough much easier to handle and score just before baking. The chilled dough holds its shape better, allowing for cleaner cuts with a lame or razor blade. This controlled environment also reduces the risk of over-proofing compared to room temperature proofing, contributing to better oven spring.
Room Temperature Proofing Considerations
If you opt for room temperature proofing for your basic sourdough recipe, the process will be much quicker, typically taking only 1 to 3 hours depending on your kitchen's temperature (around 70-75°F or 21-24°C). This method is useful if you need to bake the same day you mix the dough. However, it requires vigilant monitoring to determine when the dough is ready.
To check for readiness during room temperature proofing, perform the "poke test." Gently press a floured finger into the side of the dough. If the indentation springs back immediately, it needs more time. If it springs back slowly but not completely, it's likely ready. If the indentation remains completely, the dough is likely over-proofed. Over-proofed dough can be difficult to score and may result in a flat loaf.
Step 6: Baking: Achieving a Golden Crust
Baking sourdough bread requires a high initial temperature and often a steamy environment to achieve maximum oven spring and a beautiful, crisp crust. The most common method for home bakers is using a Dutch oven or a cloche. Preheating the Dutch oven in a hot oven creates the necessary initial burst of heat, and baking with the lid on for the first portion traps the moisture released by the dough, creating steam around the loaf.
A typical baking temperature for sourdough is high, often between 450°F and 500°F (230°C to 260°C). The loaf is usually baked with the lid on for 20-25 minutes, then with the lid off for another 20-25 minutes to allow the crust to brown and crisp up. This two-stage baking process is key to getting that desirable golden, crackly crust on your easy 4 ingredient sourdough.
Preheating Your Oven and Baking Vessel
Proper preheating is essential for a successful sourdough bake. Place your Dutch oven or baking vessel (like a cloche or even a baking steel/stone with a steam setup) into your oven before you turn it on. Preheat the oven to a high temperature, typically 450-500°F (230-260°C). Allow the oven and the vessel to preheat for at least 30-60 minutes after it reaches the set temperature. This ensures the vessel is uniformly hot, providing the necessary thermal mass for good oven spring.
A high initial temperature is crucial because it provides the "oven spring" – the rapid expansion of the dough in the first 10-15 minutes of baking. This expansion is driven by the final burst of activity from the yeast and the conversion of water in the dough to steam. A well-preheated vessel transfers heat efficiently to the dough, maximizing this effect.
Scoring the Loaf: Controlling Oven Spring
Scoring the top of your shaped loaf just before baking is not just for aesthetics; it serves a vital functional purpose. As the dough experiences oven spring in the hot oven, it needs a place to expand. The scores you make provide controlled weak points in the dough's surface, allowing it to burst open predictably instead of tearing haphazardly.
Use a very sharp blade, like a razor blade (lame) or a sharp knife, to make quick, clean cuts about 1/2 inch deep. The type and pattern of scoring can influence the final shape of the loaf. A single deep score down the length often encourages a dramatic opening, while multiple parallel or angled scores can create different visual effects. For an easy 4 ingredient sourdough, simple scores are perfectly effective.
Baking Time and Temperature Guidelines
A common baking method for sourdough involves baking in a preheated Dutch oven. Place the scored loaf carefully into the hot Dutch oven (on parchment paper for easy transfer), cover with the lid, and bake at a high temperature, such as 475°F (245°C), for the first 20-25 minutes. This traps steam released from the dough, keeping the crust pliable and allowing maximum expansion.
After the initial covered bake, remove the lid and reduce the oven temperature slightly, often to 450°F (230°C). Continue baking for another 20-25 minutes uncovered, or until the crust is deeply golden brown and the internal temperature of the loaf reaches 205-210°F (96-99°C). This second stage allows the crust to fully develop color and crispness.
Step 7: Cooling and Slicing: Enjoying Your Bread
Once your easy 4 ingredient sourdough loaf emerges from the oven with a beautiful golden crust, the hardest part is waiting! It is absolutely crucial to let the bread cool completely on a wire rack before slicing into it. This step is not just about preventing burnt fingers; it's essential for the internal structure and texture of the bread.
As the bread cools, residual heat continues to cook the interior, and steam escapes, allowing the crumb to set properly. Slicing into a hot loaf will result in a gummy, dense interior because the starches haven't finished their transformation. While the aroma is tempting, waiting at least 1-2 hours, or even longer for larger loaves, will ensure you experience the full glory of your homemade basic sourdough recipe.
Allowing the Loaf to Cool Completely
Cooling bread on a wire rack allows air circulation around the entire loaf, preventing the bottom crust from becoming soggy due to trapped steam. The internal temperature of the bread remains high for a significant time after it's removed from the oven, and during this cooling period, moisture redistributes throughout the loaf, and the crumb structure stabilizes.
Attempting to slice too early disrupts this crucial setting process, leading to a gummy or doughy texture inside, even if the crust looks perfect. For a standard-sized boule or batard from an easy 4 ingredient sourdough recipe, a minimum cooling time of 1.5 to 2 hours is recommended. For larger loaves, it might require 3-4 hours. Patience here is truly rewarded with the optimal crumb texture.
Slicing and Serving Suggestions
Once your sourdough loaf is completely cool, it's ready to be sliced and enjoyed. Use a sharp serrated bread knife for the cleanest cuts, minimizing crushing of the crust and crumb. Slice the bread to your desired thickness, whether thick slices for toast or thinner ones for sandwiches.
Basic sourdough bread is incredibly versatile. It's perfect simply slathered with butter, topped with avocado, or used as a base for open-faced sandwiches. Its sturdy structure also makes it ideal for dipping into soups or stews. The tangy flavor pairs wonderfully with cheeses, cured meats, and fresh vegetables. Enjoy the fruits of your labor from this simple sourdough recipe!
Troubleshooting Common Sourdough Issues
Addressing Common Baking Challenges
Even with a straightforward easy 4 ingredient sourdough recipe, bakers sometimes encounter challenges. Understanding the potential causes behind common issues like a dense crumb or a flat loaf can help you diagnose problems and improve your technique for future bakes. Sourdough baking is a journey of learning and adjustment, as factors like ambient temperature, starter activity, and flour type can all influence the outcome.
Common problems often relate back to the fermentation process – either under-proofing, over-proofing, or using an insufficiently active starter. Issues with shaping or baking temperature can also play a role in the final appearance and texture. By carefully observing your dough at each stage and understanding the principles behind the process, you can troubleshoot effectively and consistently produce delicious basic sourdough bread.
Dense and Gummy Crumb
A dense and gummy crumb is a common frustration and can be caused by several factors. One primary culprit is under-proofing, meaning the dough did not ferment long enough during bulk fermentation or final proofing to develop sufficient gas and structure. This leaves the dough heavy and without enough internal aeration. Using a weak or insufficiently active sourdough starter will also lead to poor leavening and a dense result.
Another cause can be insufficient gluten development; if the dough wasn't given enough time or folds during bulk fermentation, it won't have the structure to hold the gas produced. Finally, slicing the bread before it has completely cooled will almost always result in a gummy texture, as the internal structure hasn't finished setting. Ensure your starter is active, allow adequate fermentation time, perform sufficient folds, and always cool completely.
Flat and Spreading Loaf
A loaf that spreads out rather than holding its shape and rising upwards during baking is often a sign of over-proofing. If the dough ferments for too long, the gluten structure weakens, and the dough loses its tension and ability to hold gas. By the time it hits the oven, it lacks the strength to support itself and collapses or spreads. A weak starter can also contribute to this, as it might not have the power for a strong oven spring.
Insufficient shaping tension is another major factor. If you don't create a tight surface during shaping, the loaf won't have the external structure needed to rise upwards. Baking at too low a temperature or not using a hot baking vessel (like a preheated Dutch oven) can also hinder oven spring, causing the loaf to spread before the crust sets. Ensure your dough isn't over-proofed, shape with good tension, and bake in a screaming hot oven.
Overly Sour or Under-Developed Flavor
The tanginess of sourdough comes from the lactic acid bacteria, and its intensity is influenced by fermentation time and temperature. An overly sour loaf often results from a very long or warm fermentation, which favors the production of acetic acid (the sharp, vinegary tang). Conversely, an under-developed, bland flavor typically indicates that the dough did not ferment long enough or at a sufficient temperature to allow the bacteria to produce enough flavor compounds.
To adjust the flavor, consider modifying your fermentation schedule. If it's too sour, try a shorter bulk fermentation or a shorter cold proof, or use a starter fed at a higher ratio (e.g., 1:2:2 or 1:3:3) which can produce a milder starter. If the flavor is too mild, try extending the bulk fermentation slightly or incorporating a longer cold proofing period (e.g., 18-24 hours) to allow more time for acid development in your basic sourdough recipe.
Storing Sourdough Bread for Optimal Freshness
Maintaining Crust Crispness and Flavor
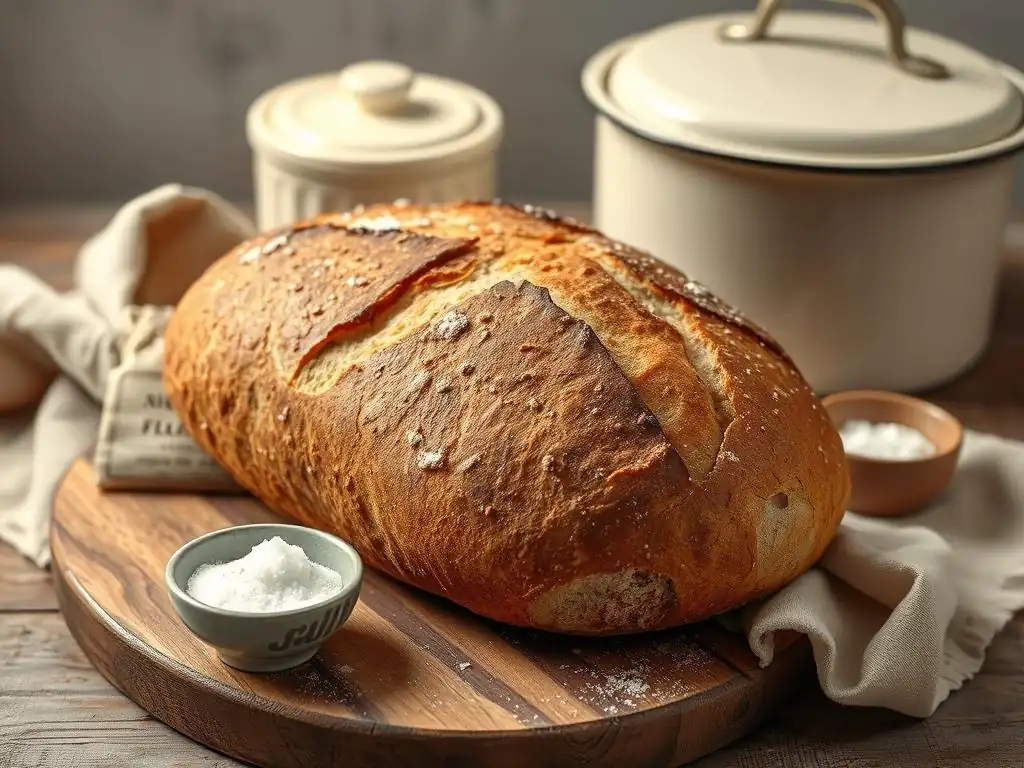
Proper storage is key to keeping your easy 4 ingredient sourdough tasting great and maintaining its signature crust. Unlike commercially yeasted breads that often contain preservatives, sourdough is a living product (at least initially) and will stale more quickly if not stored correctly. The goal is often to preserve the crust's crispness while preventing the interior from drying out too fast.
Storing the loaf cut-side down on a clean cutting board is a simple and effective method for short-term storage (1-2 days), as it protects the exposed crumb while allowing the crust to breathe. Alternatively, wrapping the loaf loosely in a linen or cotton bread bag achieves a similar balance. Avoid wrapping the entire loaf tightly in plastic wrap right away, as this traps moisture and will soften the crust quickly, although it can help keep the interior soft for longer.
Freezing and Thawing Sourdough
For longer-term storage, freezing is the best option for sourdough bread. To freeze, ensure the loaf is completely cooled. You can freeze the entire loaf, half a loaf, or even individual slices. Wrap the bread tightly in plastic wrap, ensuring no air pockets, then add a layer of aluminum foil or place it in a freezer-safe bag. This double layer helps prevent freezer burn. Properly wrapped, sourdough can be frozen for up to 3-6 months.
To thaw, simply remove the bread from the freezer wrapping and let it sit at room temperature. A whole loaf will take several hours to thaw. For best results, especially to revive the crust, you can reheat the thawed loaf (or slices) in a preheated oven at around 350°F (175°C) for 10-15 minutes for slices or 20-30 minutes for a whole loaf.
Expanding Your Sourdough Repertoire
Incorporating Whole Wheat Flour
Once you've mastered the basic easy 4 ingredient sourdough recipe, you might want to experiment with different flours. Incorporating whole wheat flour (or other whole grain flours like rye or spelt) adds flavor, nutrients, and complexity to your loaf. Start by substituting a small percentage of the bread flour, perhaps 10-20% whole wheat, in your recipe.
Whole wheat flour absorbs more water than white bread flour, so you may need to slightly increase the hydration (add a little more water) when adding it to your mix. Doughs with whole grains can also ferment a bit faster due to the nutrients present in the bran and germ, so keep a closer eye on your bulk fermentation and proofing times. The resulting loaf will have a deeper color, a more robust flavor, and a slightly denser crumb depending on the percentage used.
Adding Herbs and Spices
Adding herbs, spices, cheese, seeds, or other inclusions is a fantastic way to customize your basic sourdough recipe. Common additions include fresh rosemary, dried herbs like thyme or oregano, garlic powder, toasted seeds (sesame, poppy, sunflower), olives, or grated cheese (like cheddar or Gruyere). These additions can transform the flavor profile of your simple sourdough dramatically.
Inclusions are typically mixed into the dough during the initial mixing phase or during the first set of stretch and folds during bulk fermentation. Be mindful that some inclusions, like cheese or olives, can affect the dough's hydration and handling. Start with small amounts (e.g., 5-10% of the total flour weight for seeds or cheese) and adjust in future bakes. Ensure they are evenly distributed throughout the dough for consistent flavor in every slice.
[Other Sourdough Baking Techniques]
Exploring other sourdough baking techniques can further enhance your skills and the quality of your loaves. Consider experimenting with different hydration levels; increasing hydration (adding more water) can lead to a more open, airy crumb, though it makes the dough stickier and harder to handle. Conversely, lower hydration creates a denser crumb but a more manageable dough.
Trying different baking vessels beyond a Dutch oven, such as baking on a preheated stone or steel with added steam (using a tray of hot water or ice cubes), can produce excellent results and a very crisp crust. You can also explore advanced techniques like autolyse (resting flour and water before adding starter and salt) or bassinage (adding a portion of the water later in the mixing process) to influence dough development and hydration management in your easy 4 ingredient sourdough journey.
Frequently Asked Questions
What are the 4 ingredients needed for this sourdough recipe?
This easy sourdough recipe requires only four ingredients: sourdough starter, unbleached flour, water, and salt. That's it! No complicated additives or hard-to-find items.
How active does my sourdough starter need to be for this recipe to work?
Your sourdough starter should be very active and bubbly. It should have at least doubled in size after feeding, indicating it's ready to leaven the dough. If it's not active, your bread may not rise properly.
What kind of flour is best for making this easy sourdough?
Unbleached bread flour is highly recommended for this recipe. It has a higher protein content which helps develop the gluten, resulting in a chewier, more structured loaf. All-purpose flour can be used, but the results may vary.
How long does it take to bake the sourdough loaf?
The baking time can vary, but typically it takes around 45-50 minutes at 450°F (232°C). Check for an internal temperature of 200-210°F (93-99°C) to ensure it's fully baked.
Can I add other ingredients to this basic sourdough recipe?
While this is a basic recipe, you can certainly experiment! Consider adding herbs, seeds, or dried fruits after the initial mixing and bulk fermentation. Remember that added ingredients may affect the proofing time and overall texture.
Final Reflection: The Humble Power of Four Ingredients
The simplicity of four ingredients belies the profound satisfaction of baking your own sourdough. This seemingly straightforward recipe unlocks a world of flavor and texture, proving that sometimes, less is truly more. In a world obsessed with complexity and convenience, rediscovering the joy of crafting something delicious from basic elements is a powerful act of self-sufficiency and connection to the ancient art of bread making.
The enduring appeal of sourdough lies not just in its taste, but in its process. It's a journey of patience and observation, a dance with wild yeasts that fosters a deep appreciation for the natural world. This simple recipe acts as a gateway, demystifying the process and making it accessible to everyone. It's a reminder that even the most complex creations can spring from humble beginnings. Bread is the staff of life,
a phrase often heard, speaks to its fundamental importance, but this recipe elevates it to an experience of mindful creation.
Now, consider your own kitchen. Imagine the aroma of freshly baked sourdough filling your home, the satisfying crust giving way to a tender crumb. This isn't just about baking bread; it's about reclaiming a connection to food, to process, and to the simple pleasures that enrich our lives. Try this recipe. Embrace the simplicity. Discover the joy. You might be surprised at what you create, and even more surprised at what you discover within yourself.
Unleash Your Inner Baker: Start Baking Today!
Thanks for taking the time to explore the world of sourdough with us! We hope you gained valuable insights into creating delicious bread with just four simple ingredients. Now it's time to put your new knowledge into practice.
- Dive straight in and bake: Try our 4-ingredient sourdough recipe today! The results are incredibly rewarding.
- Share your sourdough journey: Snap a picture of your creation and share it on social media using #BakeWithEaseSourdough – we'd love to see your masterpiece!
- Experiment with flavor: Once you've mastered the basics, try adding different flours or incorporating herbs and spices for unique flavor combinations.
What unexpected flavor will you add to your first loaf?