
The History and Technique of the French Baguette

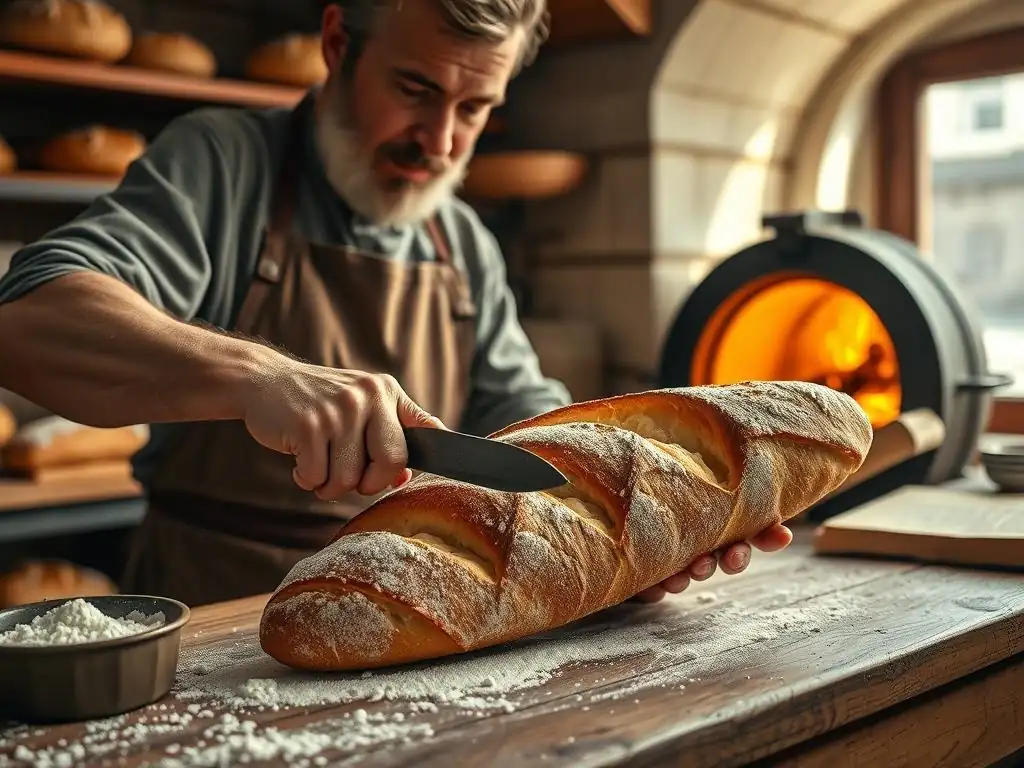
Welcome to BakeWithEase, your haven for all things baking! Ever wondered about the secrets behind that perfectly crisp crust and airy interior of a classic French baguette? This article unveils the history and French baguette baking techniques that will empower you to create this iconic bread in your own kitchen. Discover the time-honored methods and simple tweaks that elevate your loaves from ordinary to extraordinary. Ready to unlock the secrets to baguette perfection? Let's get baking!
- The History and Technique of the French Baguette: A BakeWithEase Guide
- A Journey Through Time: The Rich History of the French Baguette
-
Mastering French Baguette Baking Techniques: A Step-by-Step Guide
- Understanding the Key Ingredients for Authentic Baguettes
- The Art of Baguette Dough Preparation: Achieving the Perfect Consistency
- Shaping the Baguette: A Crucial Step for the Classic Form
- Proofing the Baguettes: Patience and Observation
- Scoring the Baguettes: Creating Beautiful and Functional Cuts
- Baking the Baguettes: Achieving a Crispy Crust and Open Crumb
- Cooling and Storing Your Homemade Baguettes
- Troubleshooting Common Baguette Baking Problems
- Advanced Baguette Baking Techniques: Elevating Your Skills
- Enjoying Your Freshly Baked Baguette: Serving Suggestions and Recipes
-
Frequently Asked Questions
- What makes a French baguette uniquely French?
- Why is mastering French baguette baking techniques considered difficult?
- What are the most crucial techniques for achieving a perfect baguette crust?
- Where can I find simple recipes for learning French baguette baking techniques?
- What type of flour is traditionally used in a French baguette, and why is it important?
- Final Reflection: The Enduring Legacy of the French Baguette
- Unleash Your Inner Boulanger: Bake a Perfect Baguette!
The History and Technique of the French Baguette: A BakeWithEase Guide
A Journey Through Time: The Rich History of the French Baguette
Origins and Evolution of the Iconic Baguette
The story of the French baguette is steeped in myth and legend, with several competing theories about its true origin. One popular account links its emergence to the early 19th century, possibly during the Napoleonic era, suggesting that longer, thinner loaves were easier for soldiers to carry.
Another theory ties the baguette's rise to the construction of the Paris Métro in the late 19th century; bakers supposedly created this shape so workers of different origins wouldn't need knives to cut their bread, making it easier to break apart. While the exact birthdate is debated, the baguette shape, or something similar, certainly became more prevalent in Parisian bakeries by the early 20th century.
Before the baguette became ubiquitous, French bread was often baked in round or oval shapes, often quite large. The development of steam ovens in the mid-19th century is considered a crucial technological advancement that facilitated the creation of the baguette's signature crispy crust and airy interior. These ovens allowed bakers to introduce steam during the initial baking phase, which keeps the dough surface pliable, allowing it to expand fully before the crust hardens. This innovation was key to perfecting the specific structure and texture that defines the modern French baguette.
The Baguette's Rise to National Symbol Status
The baguette quickly transitioned from a practical bread shape to a deeply ingrained part of French identity and daily life. Its popularity surged throughout the 20th century, becoming the default bread choice for millions. The simple act of walking to the local boulangerie to pick up a fresh baguette, often still warm and crispy, is an iconic French ritual. This daily interaction with the baker and the fresh bread fosters a strong connection to tradition and community.
In recognition of its cultural significance, the traditional French baguette was inscribed on UNESCO's list of Intangible Cultural Heritage in 2022. This designation highlights the social practices and knowledge surrounding the making and consumption of the baguette. It underscores the importance of the traditional French baguette baking techniques – focusing on basic ingredients (flour, water, salt, yeast) and a specific process – as a cultural treasure to be preserved. This official recognition solidified its status not just as food, but as a symbol of French heritage and culinary artistry.
Baguette Baking in Modern France: Preserving Tradition
Despite the pressures of industrialization and changing lifestyles, traditional baguette baking remains a vibrant craft in France. Artisanal bakeries, or boulangeries artisanales, continue to thrive, upholding time-honored French baguette baking techniques. These bakers often use longer fermentation times, employ natural leavens in addition to or instead of commercial yeast, and focus on high-quality ingredients to produce baguettes with complex flavors and textures that distinguish them from mass-produced versions.
However, challenges exist. Rising costs, the demanding nature of the baker's work (often starting in the early hours), and competition from supermarkets can make it difficult for small bakeries to survive. Initiatives like the UNESCO listing aim to support and protect these traditional methods and the bakers who practice them. Preserving the authentic French baguette baking techniques is crucial not only for maintaining culinary quality but also for safeguarding a significant piece of French cultural heritage.
Mastering French Baguette Baking Techniques: A Step-by-Step Guide
Understanding the Key Ingredients for Authentic Baguettes
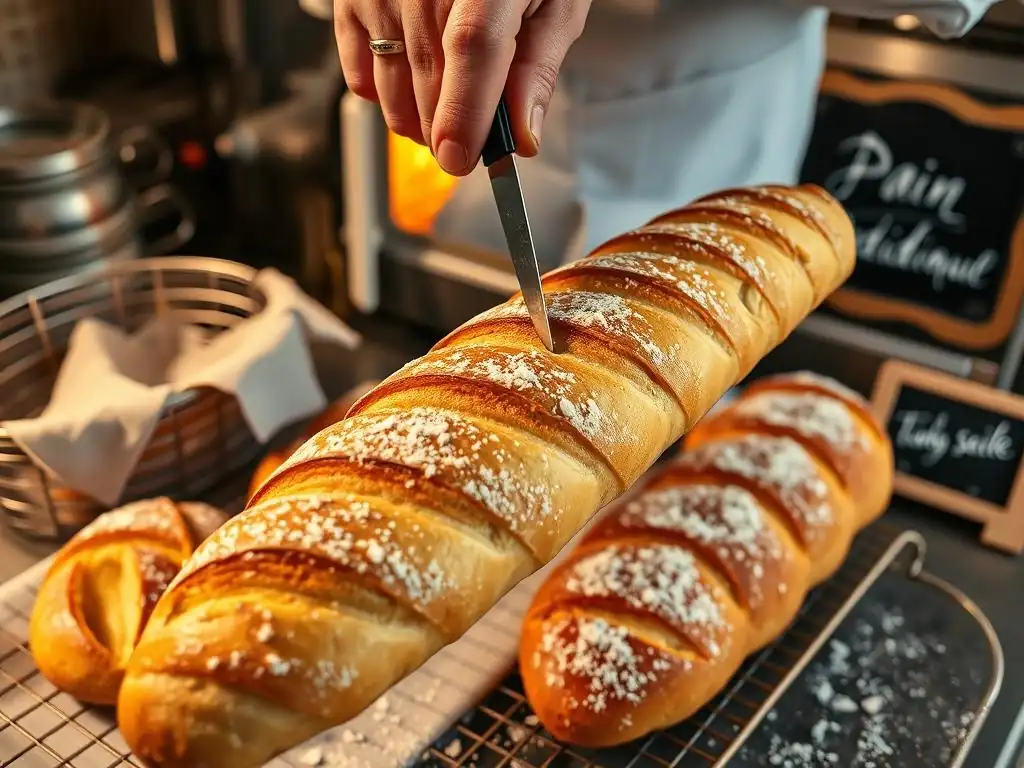
Creating an authentic French baguette with that perfect crispy crust and open, airy interior starts with understanding the fundamental ingredients. Unlike richer breads, baguettes rely on a very simple palette: flour, water, yeast, and salt. Each component plays a critical role in the final outcome, and selecting and handling them correctly is the first step in mastering French baguette baking techniques.
The purity and quality of these four ingredients are paramount. There are no eggs, milk, or fats typically added to a traditional baguette dough. This simplicity means that the flavor and texture are derived almost entirely from the fermentation process and the interaction of these basic elements. Paying close attention to the type of flour, the temperature of the water, the activity of the yeast, and the amount of salt used will significantly impact the success of your homemade baguettes.
Flour Selection: Choosing Type 55 Flour for Baguette Perfection
For authentic French baguettes, the preferred flour is often labeled as Type 55 (T55) flour in France. This classification refers to the mineral content (ash content) left after burning a sample of flour, expressed as a percentage.
T55 flour typically has an ash content between 0.50% and 0.60%. In practical terms, this is a medium-protein, white wheat flour, similar to unbleached all-purpose flour in the US, though T55 is milled from soft wheat varieties and often has a slightly lower protein content (around 10-12%) than some US all-purpose flours, making it ideal for producing a tender crumb while still allowing for good gluten development for structure.
Using T55 or a suitable equivalent is crucial for achieving the desired characteristics of a baguette. Flours with higher protein content (like bread flour) can result in a chewier crumb, while lower protein flours might not develop enough structure to support the open crumb. While standard unbleached all-purpose can work, seeking out a flour specifically milled for European-style breads or labeled as T55 (if available) will bring you closer to the authentic texture and flavor profile associated with traditional French baguette baking techniques.
Water Temperature: Its Impact on Dough Development
Water temperature is a surprisingly critical factor in French baguette baking techniques, primarily because it directly influences the dough's temperature and thus the rate of yeast activity. Yeast thrives within a specific temperature range, typically between 70°F and 80°F (21°C to 27°C) for optimal fermentation speed in many standard recipes. Using water that is too cold will slow down yeast activity significantly, leading to a sluggish rise and potentially underdeveloped flavor. Conversely, water that is too hot can kill the yeast, preventing the dough from rising at all.
Many bakers use a simple formula to calculate the ideal water temperature, taking into account the ambient room temperature and the flour temperature to achieve a target dough temperature (often called the "desired dough temperature" or DDT). A common DDT for baguette dough might be around 75°F (24°C). Achieving this consistent dough temperature ensures that the fermentation proceeds predictably, which is essential for developing both the structure and the complex flavors characteristic of well-executed French baguette baking techniques.
Yeast: Fresh vs. Instant Dry Yeast for Baguettes
Yeast is the leavening agent responsible for making the baguette dough rise and contributing significantly to its flavor profile. Bakers have two primary types to choose from: fresh yeast (also known as compressed or cake yeast) and dry yeast (either active dry or instant dry). Fresh yeast is preferred by many traditionalists for its subtle flavor nuances and consistent performance when fresh, but it is more perishable and requires dissolving in water before use. A general rule of thumb is to use about 2-3 times the amount of fresh yeast compared to instant dry yeast by weight.
Instant dry yeast is a popular and convenient option for home bakers mastering French baguette baking techniques. It is more stable, has a longer shelf life, and can often be added directly to the dry ingredients without rehydration. While some purists argue that fresh yeast yields a slightly better flavor, modern instant dry yeasts are very effective and produce excellent results. Whichever type you choose, ensuring it is active and correctly measured is vital for a successful rise.
Salt: Enhancing Flavor and Controlling Fermentation
Salt is far more than just a seasoning in French baguette baking techniques; it's a fundamental component that plays multiple crucial roles. Firstly, salt enhances the overall flavor of the bread, making the subtle notes developed during fermentation more prominent. Without salt, bread can taste bland and flat. Secondly, salt strengthens the gluten network in the dough by tightening the protein structure, which contributes to the baguette's desirable chewy crumb and allows it to hold its shape during baking.
Furthermore, salt acts as a fermentation regulator. It slows down yeast activity, which is a positive effect in bread making. This slower fermentation allows for a longer period during which complex flavors can develop in the dough, leading to a more nuanced and satisfying final product. The typical salt percentage in baguette dough is around 1.8% to 2.2% of the flour weight. Adding too little salt can lead to overly rapid fermentation and a weak dough, while too much can inhibit yeast activity excessively and result in a dense loaf.
The Art of Baguette Dough Preparation: Achieving the Perfect Consistency
Preparing the dough is where the magic of French baguette baking techniques truly begins. It's not just about mixing ingredients; it's about developing the gluten structure, initiating fermentation, and building flavor. The process involves several stages, each contributing to the final texture and volume of the baked baguette. Patience and attention to detail during this phase are key to success.
From the initial mixing to the subsequent folds, the baker is actively working the dough to transform a shaggy mass into a smooth, elastic foundation for the baguette. Understanding how gluten develops and how fermentation proceeds at different temperatures is fundamental. This stage sets the stage for the characteristic open crumb structure that is the hallmark of a well-made French baguette.
Autolyse: Enhancing Flavor and Gluten Development
Autolyse is a simple yet powerful technique in French baguette baking techniques that involves mixing just the flour and water (and sometimes a small amount of levain or yeast) and letting it rest for a period, typically 20 to 60 minutes, before adding the salt and the rest of the yeast. During this rest period, the flour absorbs the water fully, and enzymatic activity begins to break down starches into sugars, which are food for the yeast later. Crucially, the gluten network starts to form on its own without mechanical mixing.
This resting phase has several benefits. It makes the dough easier to mix and develop later, reduces mixing time (which can prevent oxidation and preserve flavor), and significantly improves the dough's extensibility and elasticity. This leads to better volume and a more open crumb structure in the final baguette. Implementing an autolyse phase is a technique often used by artisanal bakers to improve the texture and handling of the dough.
Mixing the Dough: Techniques for Optimal Gluten Formation
After the autolyse (if used), the remaining ingredients (salt and yeast, if not added earlier) are incorporated, and the dough is mixed. The goal of mixing is to fully hydrate the flour and develop the gluten network sufficiently. Gluten is formed when two proteins in wheat flour, glutenin and gliadin, combine in the presence of water and are worked together through kneading or mixing. The level of gluten development needed for baguettes is moderate; you want enough strength to hold the shape and trap gases but not so much that the crumb becomes overly dense or tough.
Mixing can be done by hand or with a stand mixer. Hand kneading involves folding and stretching the dough until it becomes smooth and elastic, typically taking 10-15 minutes. Using a stand mixer with a dough hook is faster, usually 5-10 minutes on medium speed, but care must be taken not to overmix, which can damage the gluten structure. A well-mixed dough should pass the "windowpane test," where a small piece can be gently stretched thin enough to see light through it without tearing.
Bulk Fermentation: Developing Flavor and Structure
Bulk fermentation, also known as the first rise, is a critical stage in French baguette baking techniques where the dough is allowed to ferment as a single mass. This process allows the yeast to produce carbon dioxide gas, which makes the dough rise, and more importantly, allows enzymes and yeast byproducts to develop complex flavors and aromas.
The temperature and duration of bulk fermentation significantly impact the final bread. A typical bulk fermentation might last 1.5 to 3 hours at room temperature (around 70-75°F or 21-24°C), or longer if done in a cooler environment (e.g., overnight in the refrigerator for enhanced flavor development).
During bulk fermentation, the dough should roughly double in size. However, relying solely on visual cues can be misleading. It's also important to feel the dough; it should become airy and slightly jiggly. The duration will depend on the amount of yeast used and the ambient temperature. Under-fermented dough will result in a dense crumb, while over-fermented dough can collapse during shaping or baking.
Folding the Dough: Strengthening the Gluten Network
Folding the dough during bulk fermentation is a technique used to strengthen the gluten network, equalize the dough's temperature, and redistribute the yeast and gases. This process involves gently stretching and folding the dough onto itself several times at intervals during the bulk ferment. Common schedules might involve folding every 30-45 minutes for the first 1.5 to 2 hours of fermentation.
Each fold builds tension in the dough, making it stronger and more capable of holding the gas produced by the yeast. This increased strength is essential for achieving the characteristic open crumb structure and good oven spring (the final burst of rising in the oven) of a baguette. The number and frequency of folds can be adjusted based on the dough's strength and the desired outcome, making it a flexible part of French baguette baking techniques.
Shaping the Baguette: A Crucial Step for the Classic Form
Shaping is perhaps the most visually defining part of French baguette baking techniques. Transforming a mass of dough into the long, slender, tapered form of a baguette requires practice and a gentle touch. Proper shaping creates the tension necessary for the loaf to hold its shape during proofing and baking and contributes to the final crumb structure.
A well-shaped baguette will have a taut surface, which helps control the expansion during baking and allows for clean scoring. Rushing this step or handling the dough too roughly can degas it excessively, resulting in a dense crumb. Mastering the shaping technique is key to achieving that iconic baguette appearance.
Dividing the Dough: Precision and Consistency
After bulk fermentation, the dough is gently turned out onto a lightly floured surface. The first step in shaping is dividing the large mass into individual portions for each baguette. Consistency in weight is important to ensure even baking and uniform loaf sizes. Using a scale to weigh each portion (e.g., 250-350 grams per baguette is common) helps achieve this uniformity.
The dough should be handled as gently as possible during division to avoid degassing it. A bench scraper or knife can be used to cut the dough. The edges where the dough was cut should be tucked underneath slightly to create a neater portion before pre-shaping.
Pre-Shaping: Preparing for the Final Shape
Pre-shaping is an intermediate step in French baguette baking techniques that prepares the dough for its final form. Each divided portion is gently shaped into a rough log or cylinder. This step creates initial surface tension and makes the final shaping much easier. The goal is not to create a tight shape yet, but simply to organize the dough and give it a preliminary structure.
After pre-shaping, the dough pieces are typically allowed to rest for 15-20 minutes, covered, on the counter. This rest period, often called the "bench rest," allows the gluten to relax. If you try to shape the dough into its final form immediately after dividing, the gluten will be too tight and resist stretching, making it difficult to achieve the desired length and taper.
Final Shaping: Achieving the Tapered Baguette Form
The final shaping is where the baguette gets its distinctive elongated and tapered form. Working with one pre-shaped log at a time, the dough is gently flattened slightly into a rectangle. Then, the rectangle is folded lengthwise, pressing the seam to seal it. This process is repeated, folding the dough again lengthwise and sealing the seam tightly. Finally, the log is gently rolled and stretched on the counter using the palms of your hands, working from the center outwards, to lengthen it and create the characteristic tapering ends.
The key to successful final shaping is to create sufficient surface tension without tearing the dough or degassing it too much. The sealed seam should be on the bottom. The shaped baguettes are then carefully transferred to a couche (a piece of linen cloth) or a proofing basket, seam-side up, with folds of the cloth separating them to prevent sticking during proofing. Mastering this technique is a vital part of achieving the classic look and feel associated with French baguette baking techniques.
Proofing the Baguettes: Patience and Observation
Proofing, or the final rise, is the stage where the shaped baguettes are given time to increase in volume before baking. This is when the yeast produces the majority of the gas that will give the baguette its airy crumb. Proofing is a delicate balance; under-proofed baguettes won't achieve full volume and may burst unpredictably when baked, while over-proofed baguettes can collapse or spread out flat, lacking structure.
The duration of proofing depends heavily on the temperature and the amount of yeast used. It typically lasts anywhere from 45 minutes to 1.5 hours at room temperature. Observing the dough and using tactile tests are more reliable indicators of readiness than strictly following a time guideline.
Optimal Proofing Conditions: Temperature and Humidity
Ideal proofing conditions for baguettes involve a relatively warm and humid environment. Temperatures between 75°F and 80°F (24°C and 27°C) are often recommended for room-temperature proofing. This temperature range encourages consistent yeast activity. Humidity is also important to prevent the surface of the dough from drying out and forming a skin, which would inhibit oven spring and make scoring difficult.
If your kitchen is cool or dry, you can create a suitable proofing environment. One simple method is to place the shaped baguettes (on their couche or proofing tray) inside a large plastic bag or cover them loosely with plastic wrap, ensuring the plastic doesn't stick to the dough. Some bakers also use a proofing box or a slightly warm oven (turned off) with a pan of hot water placed inside to create warmth and steam.
Testing for Readiness: The Finger Poke Test
A reliable way to determine if your baguettes are properly proofed is the "finger poke test." Gently and lightly press the surface of a baguette with a floured finger. If the indentation springs back immediately, the dough is under-proofed and needs more time. If the indentation remains completely without springing back, the dough is likely over-proofed.
A perfectly proofed baguette will show an indentation that springs back slowly and only partially. This indicates that the gluten structure is developed enough to hold the gas but relaxed enough to allow for significant oven spring. Learning to read this test is a fundamental skill in mastering French baguette baking techniques.
Scoring the Baguettes: Creating Beautiful and Functional Cuts
Scoring, or making cuts on the surface of the dough just before baking, is a non-negotiable step in French baguette baking techniques. These cuts serve both functional and aesthetic purposes. Functionally, they act as controlled vents, allowing the gases inside the dough to expand during oven spring. Without scoring, the expanding gases would find the weakest point in the crust and burst open unpredictably, often resulting in an undesirable, jagged split.
Aesthetically, well-executed scoring contributes significantly to the baguette's visual appeal, creating beautiful patterns and allowing the crust to peel back into the characteristic "ear." The depth, angle, and overlap of the scores all influence the final look and how the bread expands.
The Importance of Scoring: Controlling Expansion and Preventing Cracks
As the shaped and proofed baguette enters the hot oven, the sudden heat causes a rapid expansion of gases within the dough, a phenomenon known as oven spring. This is the final push of rising that gives the baguette its volume and airy crumb. Scoring provides designated weak points on the surface where this expansion can occur in a controlled manner.
By guiding the expansion, scoring prevents the crust from tearing haphazardly. The cuts allow the dough to open up predictably along the scored lines, resulting in a more uniform shape and a beautiful, open "ear" or flap of crust along the cuts. This controlled expansion is crucial for achieving the desired shape and internal structure, making scoring a fundamental step in French baguette baking techniques.
Scoring Patterns: Classic and Creative Designs
The classic scoring pattern for a French baguette involves a series of overlapping diagonal cuts along the length of the loaf. These cuts are typically made at an angle of about 30-45 degrees to the surface, with each cut overlapping the previous one by about one-third to one-half of its length. For a standard-sized baguette, you might make anywhere from 5 to 7 such cuts.
While the overlapping diagonal pattern is traditional and most functional for maximizing oven spring and creating a good "ear," bakers can experiment with other patterns. A single long slash down the middle, or multiple perpendicular cuts, can also be used, though they may result in a slightly different shape and crust development. Mastering the classic overlapping pattern is a key milestone in learning French baguette baking techniques.
Using a Lame: Achieving Clean and Precise Cuts
To achieve clean, sharp cuts necessary for good oven spring and a beautiful "ear," bakers use a specialized tool called a lame (pronounced "lahm"). A lame is essentially a razor blade mounted on a handle, often curved. The sharpness of the blade is crucial; a dull blade will drag and tear the dough surface, resulting in jagged cuts that don't open cleanly.
The curved blade of many lames is designed to make it easier to hold the blade at a low angle to the dough's surface, which is necessary for the crust to peel back properly during baking. While a very sharp knife or even a razor blade held carefully can work, a proper lame is the preferred tool for professional-looking scoring in French baguette baking techniques. The cuts should be made confidently and swiftly, about 1/2 inch (1-1.5 cm) deep.
Baking the Baguettes: Achieving a Crispy Crust and Open Crumb
Baking is the culmination of all the previous steps in French baguette baking techniques. The goal is to transform the proofed dough into a loaf with a thin, crispy crust, a light and airy interior (the miette), and a delicious flavor. Achieving this requires high heat and, critically, steam during the initial phase of baking.
The combination of high temperature and steam is what creates the signature baguette crust. The steam keeps the surface of the dough moist, allowing the loaf to expand fully during oven spring before the crust sets. Once the crust hardens, the high heat continues to bake the interior and caramelize the crust, developing its color and crispness.
Oven Temperature and Steam: Creating the Ideal Baking Environment
Baguettes are typically baked at high temperatures, often between 450°F and 480°F (230°C to 250°C). Preheating your oven thoroughly at this temperature is essential, often for 30-60 minutes, to ensure the oven walls and any baking surface (like a baking stone or steel) are sufficiently hot. This initial blast of heat contributes significantly to oven spring.
Introducing steam into the oven for the first 10-15 minutes of baking is perhaps the most critical element for developing the classic baguette crust. Steam prevents the surface from drying out and forming a hard crust too early, allowing the loaf to expand fully through the scored cuts. Methods for creating steam in a home oven vary; common techniques include placing a tray of hot water on the oven rack below the baking surface, or using a Dutch oven or cloche to trap the dough's own steam.
Loading the Baguettes: Techniques for a Perfect Bake
Getting the proofed baguettes from their couche or proofing basket into the hot oven without deflating them is a step that requires care. If proofed on a couche, you'll need a peel or a thin cutting board dusted with cornmeal or semolina to slide the baguettes onto the hot baking stone or steel. Gently rolling them off the couche and onto the peel, then transferring them quickly to the oven, minimizes handling.
If using a baking tray, the baguettes can be proofed directly on parchment paper on the tray, which is then slid into the oven. For baking in a Dutch oven or cloche, the shaped baguette is typically placed inside the preheated vessel. Whichever method you use, minimizing the time the oven door is open helps maintain the high temperature and steam levels, which are vital for successful French baguette baking techniques.
Monitoring the Baking Process: Achieving the Desired Color and Texture
Baguettes typically bake for 20 to 30 minutes, depending on their size and your oven. The first phase (with steam) usually lasts 10-15 minutes. After this, the steam source is removed (or the lid of the Dutch oven/cloche is taken off), and the baking continues in a dry, hot environment to crisp the crust and finish baking the interior.
Monitor the baguettes closely during the second phase. They should develop a deep golden-brown color. The crust should feel firm and crispy. To check for doneness, you can tap the bottom of a loaf; it should sound hollow. If they are browning too quickly, you can reduce the oven temperature slightly. Consistent monitoring is key to achieving the perfect balance of crust color, crispness, and a fully baked interior when using French baguette baking techniques.
Cooling and Storing Your Homemade Baguettes
The process of creating perfect French baguettes doesn't end when they come out of the oven. Proper cooling is essential for the crust to remain crispy and for the internal structure to set. How you store the baguette will also significantly impact its freshness and texture over time.
Handling the freshly baked baguettes correctly in these final steps ensures that all your efforts in mastering French baguette baking techniques result in a truly enjoyable loaf. Impatience here can lead to a less-than-perfect outcome.
Cooling on a Wire Rack: Preventing Soggy Crust
Immediately upon removing the baguettes from the oven, they should be transferred to a wire cooling rack. This allows air to circulate freely around the entire loaf, preventing steam from accumulating on the bottom crust. If you cool a hot baguette on a solid surface, the trapped steam will make the bottom crust soggy, ruining the crisp texture you worked so hard to achieve.
Allow the baguettes to cool completely on the rack, which can take at least 30-60 minutes, depending on their size. While it's tempting to slice into a warm baguette, the internal structure (the crumb) is still setting as it cools. Slicing too early can compress the crumb and make it seem denser than it actually is.
Storing Baguettes: Maintaining Freshness and Flavor
Baguettes are best enjoyed on the same day they are baked, ideally within a few hours, when their crust is at its crispiest and the interior is still soft and fresh. However, if you need to store them, the goal is to protect the crust while minimizing staling. Storing a baguette in a sealed plastic bag is detrimental to the crust; it will trap moisture and make the crust soft and chewy.
The best way to store a baguette for short periods (a day or two) is at room temperature in a paper bag or wrapped loosely in a linen cloth. This allows the crust to breathe while offering some protection. For longer storage, baguettes freeze exceptionally well. Let them cool completely, then wrap tightly in plastic wrap and then foil or place in a freezer bag. To reheat, remove from the freezer, unwrap, mist lightly with water, and bake in a preheated 350°F (175°C) oven for 10-15 minutes until the crust is revived.
Troubleshooting Common Baguette Baking Problems
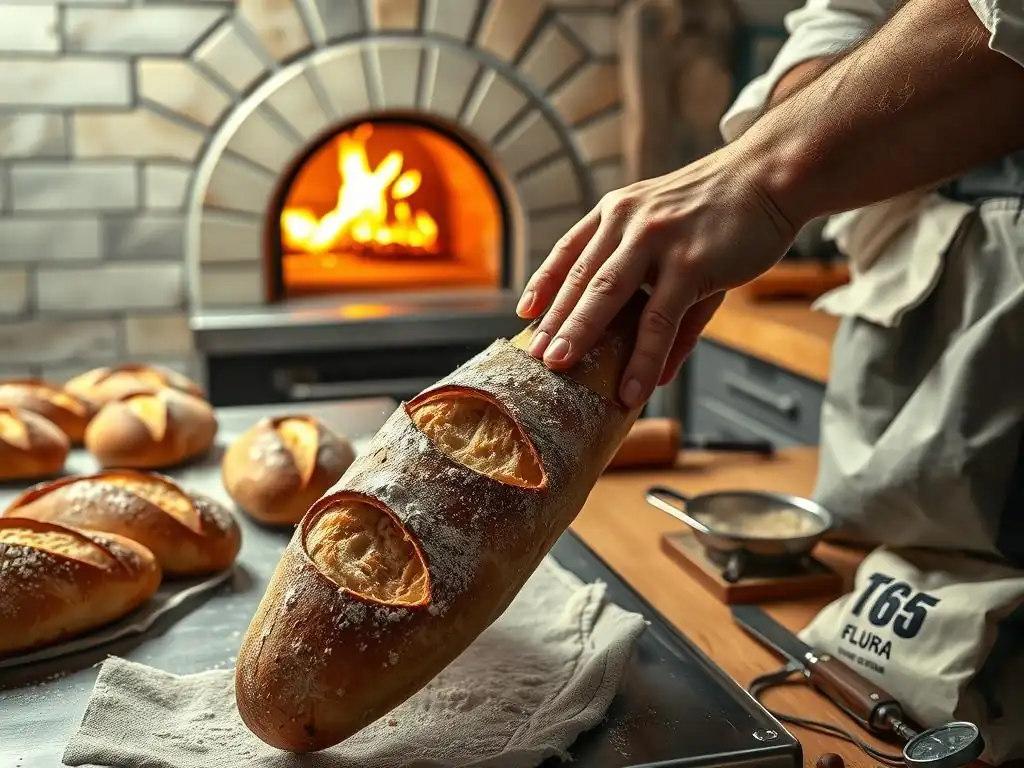
Even with careful attention to French baguette baking techniques, bakers occasionally encounter issues. Understanding the common problems and their likely causes can help you diagnose what went wrong and improve your results on subsequent bakes. Don's be discouraged by setbacks; they are part of the learning process.
Troubleshooting is an essential skill for any baker. By analyzing the characteristics of your finished baguette – its shape, crust, and crumb – you can often pinpoint the stage in the process where an adjustment is needed.
Dense Baguettes: Identifying and Correcting the Causes
A dense crumb in a baguette, lacking the characteristic open, airy structure, is a common frustration. This usually indicates that the dough did not rise sufficiently at some point. Potential causes include using inactive yeast, insufficient kneading or gluten development, an under-proofed dough (not enough time for the final rise), or insufficient steam and oven temperature during baking, which inhibits oven spring.
To correct dense baguettes, ensure your yeast is fresh and active. Spend adequate time mixing and folding the dough to build gluten strength. Pay close attention during proofing, using the finger poke test to confirm readiness. Finally, ensure your oven is fully preheated to a high temperature and that you introduce sufficient steam at the beginning of the bake to maximize oven spring.
Flat Baguettes: Addressing Proofing and Shaping Issues
Flat, wide baguettes that lack height and structure are often the result of issues during shaping or proofing. Over-proofing is a frequent culprit; if the dough rises too much before baking, the gluten structure can weaken and collapse when it hits the heat of the oven. Insufficient surface tension during shaping can also cause the dough to spread out rather than hold its elongated form.
To prevent flat baguettes, ensure you don't over-proof the dough – aim for the partial spring-back with the finger poke test. Practice your final shaping technique to create a taut surface with a well-sealed seam. Placing the shaped baguettes seam-side up on a well-floured couche with good folds between them helps support their shape during proofing.
Tough Crust: Understanding Oven Temperature and Steam
While a crispy crust is desired, a crust that is excessively thick and tough can detract from the baguette experience. This is often related to the baking process, specifically issues with steam and oven temperature. Insufficient steam during the initial baking phase can cause the crust to set too early and become thick. Baking at too low a temperature or for too long can also contribute to a tough crust.
Ensure you are generating sufficient steam in your oven for the first 10-15 minutes of baking. Bake at the recommended high temperature. If using a baking stone or steel, ensure it is fully preheated. Removing the steam source after the initial phase allows the crust to crisp up properly without becoming overly thick or tough.
Uneven Baking: Ensuring Consistent Heat Distribution
Unevenly baked baguettes, where one part is darker than another or the shape is distorted, typically point to inconsistencies in oven temperature or heat distribution. Hot spots in the oven can cause parts of the baguette to bake faster than others. Placing baguettes too close together on the baking surface can also hinder even heat circulation.
To promote even baking, ensure your oven is accurately calibrated and fully preheated. If your oven has known hot spots, rotate the baguettes halfway through the baking process. Avoid overcrowding the baking surface; leave adequate space between loaves for heat to circulate. Baking stones or steels can help provide more consistent heat from below.
Advanced Baguette Baking Techniques: Elevating Your Skills
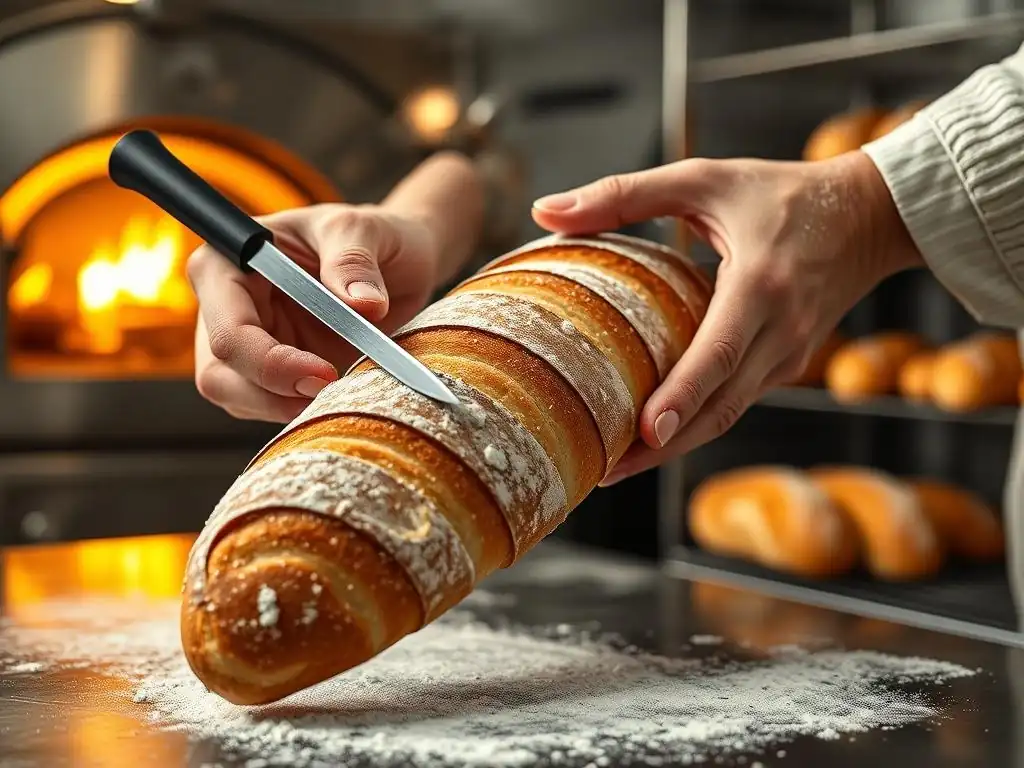
Once you've mastered the fundamental French baguette baking techniques, you might want to explore ways to add complexity and depth to your loaves. Advanced techniques like using preferments, experimenting with different flours, or adding inclusions can take your homemade baguettes to the next level, allowing you to customize flavor and texture.
These techniques require a deeper understanding of fermentation and dough handling but offer rewarding results, producing baguettes with more nuanced flavors and potentially different crumb characteristics. They are steps towards truly artisan-level French baguette baking techniques.
Using a Poolish or Biga: Enhancing Flavor and Complexity
Using a preferment, such as a poolish or a biga, is a common advanced technique in French baguette baking. A preferment is a portion of the dough's flour and water (and a small amount of yeast) that is mixed and allowed to ferment for several hours (or overnight) before being added to the final dough. A poolish is typically liquid (equal weights of flour and water), while a biga is stiffer.
The extended fermentation time in a preferment allows for the development of more complex flavors and organic acids, which contribute to the characteristic tang and aroma of artisan bread. Using a preferment also adds strength to the dough and can improve the crumb structure. While adding an extra step to the process, the flavor payoff is significant.
Experimenting with Different Flour Blends: Creating Unique Baguette Variations
While T55 flour is traditional, experimenting with blends of different flours can create unique baguette variations. For example, adding a small percentage of whole wheat flour (perhaps 5-10%) can introduce nutty flavors and a slightly denser crumb, while still maintaining the overall character of a baguette. Using specialty flours like spelt or rye in small quantities can also add distinct flavor notes.
When experimenting with flour blends, keep in mind that different flours absorb water differently and have varying protein levels. This will impact the dough's hydration and gluten development. Start with small percentages of non-wheat flours and adjust your water accordingly. This exploration allows you to put your French baguette baking techniques to use in creative ways.
Incorporating Seeds and Grains: Adding Texture and Flavor
Adding seeds or grains to your baguette dough can introduce interesting textures and flavors. Sesame seeds, poppy seeds, flax seeds, or a mix of grains can be incorporated into the dough during the final mixing stage or sprinkled on the surface before baking. Soaking tougher grains or seeds (like flax or whole grains) before adding them can prevent them from absorbing moisture from the dough during fermentation.
Incorporating additions changes the dough's handling characteristics slightly and can affect oven spring. However, the added texture and nutty, earthy, or seedy flavors can create a delightful variation on the classic baguette. This allows you to adapt French baguette baking techniques to create personalized loaves.
Enjoying Your Freshly Baked Baguette: Serving Suggestions and Recipes
The ultimate reward for mastering French baguette baking techniques is the simple pleasure of enjoying a freshly baked loaf. The warm, crispy crust and soft, airy interior are perfect on their own, but a baguette is also an incredibly versatile base for countless dishes.
Whether served simply with butter or used as the foundation for a meal, the homemade baguette elevates the experience. Its structure and flavor make it ideal for absorbing sauces or holding together hearty fillings.
Classic Pairings: Cheese, Charcuterie, and Wine
One of the simplest and most classic ways to enjoy a fresh baguette is alongside cheese, charcuterie, and wine. The neutral, slightly sweet flavor of the bread provides a perfect counterpoint to the richness of cured meats and the varied textures and flavors of different cheeses.
Setting out a platter with slices of your homemade baguette, a selection of French cheeses (like Brie, Comté, or Roquefort), some cured ham or sausage, and a glass of wine creates a quintessential French experience. The crusty texture is ideal for scooping up soft cheeses or serving as a base for small bites.
Baguette Sandwiches: Creating Delicious and Satisfying Meals
The elongated shape and sturdy crust of a baguette make it the ideal bread for sandwiches, known as casse-croûte or sandwichs in France. The crust holds up well to fillings, and the soft interior provides a pleasant contrast. From simple ham and butter ( jambon-beurre) to more elaborate creations, the possibilities are endless.
Consider filling your homemade baguette with grilled vegetables and goat cheese, tuna salad and olives, or classic steak frites leftovers. Slicing the baguette lengthwise or into individual portions allows for both long, hero-style sandwiches or smaller, appetizer-sized bites. Mastering French baguette baking techniques means you're always ready to make an exceptional sandwich.
Pain au Chocolat Recipe Using Baguette Dough
While traditionally made with a laminated croissant dough, a simplified version of pain au chocolat can be made using enriched baguette dough. This involves adding a small amount of butter and sugar to a standard baguette dough recipe. Once the dough is mixed and has undergone bulk fermentation, it is rolled out, chocolate batons are placed on top, and the dough is rolled up to enclose the chocolate, similar to shaping a small log.
These chocolate-filled rolls are then proofed and baked until golden brown. While not identical to the classic pastry, this method provides a delicious way to use your baguette dough skills to create a sweet treat with a familiar shape. It's a fun variation that demonstrates the versatility of a good bread dough base.
Frequently Asked Questions
What makes a French baguette uniquely French?
The unique qualities come from the specific French flour used, the traditional fermentation processes, and the baking environment which creates the signature crust and crumb.
Why is mastering French baguette baking techniques considered difficult?
It requires a precise understanding of dough hydration, a well-developed gluten structure, and the ability to control the baking temperature and humidity perfectly.
What are the most crucial techniques for achieving a perfect baguette crust?
Achieving the perfect crust relies on proper scoring (the cuts on top), creating steam in the oven during the initial baking phase, and using a high baking temperature.
Where can I find simple recipes for learning French baguette baking techniques?
BakeWithEase.com offers step-by-step guides and easy-to-find ingredients for bakers of all levels, including those new to French baguette baking.
What type of flour is traditionally used in a French baguette, and why is it important?
Traditionally, a specific type of French wheat flour (often Type 55) is used. Its protein content and milling contribute to the baguette's characteristic texture and flavor.
Final Reflection: The Enduring Legacy of the French Baguette
The art of crafting the perfect French baguette transcends mere baking; it's a testament to tradition, precision, and the enduring power of simple ingredients. From ancient Egyptian flatbreads to the iconic Parisian loaf we know today, the baguette's journey reflects humanity's ongoing pursuit of culinary excellence. Its enduring popularity speaks volumes about our collective appreciation for quality craftsmanship and the simple pleasure of a perfectly crisp crust and airy crumb.
The baguette's influence extends far beyond the bakery; it's a symbol of French culture, a staple in daily life, and a source of national pride. Its very existence is a testament to the dedication and skill of generations of bakers. Bread is the staff of life,
a simple phrase, yet it encapsulates the profound significance of this humble yet extraordinary food. The meticulous techniques, passed down through apprenticeships and family recipes, ensure the continued existence of this culinary masterpiece, a living link to the past that shapes our present-day culinary landscape. The subtle variations in technique across regions only serve to enrich the narrative, highlighting the adaptability and enduring appeal of the baguette.
Now, consider your own relationship with bread. Think about the simple act of breaking a warm, crusty baguette, the aroma filling the air. I encourage you to explore the techniques discussed in this article, to experiment in your own kitchen, and to appreciate the artistry involved in creating this iconic loaf. Perhaps you'll discover a newfound respect for the process, a deeper connection to the food you consume, and a renewed appreciation for the enduring legacy of the French baguette. The journey of a thousand baguettes begins with a single step – so, let's bake!
Unleash Your Inner Boulanger: Bake a Perfect Baguette!
Thanks for taking the time to explore the wonderful world of French baguettes with us! We hope you now feel inspired and equipped to tackle this classic bread. Ready to put your new knowledge to the test?
- Bake your own baguette! This is the ultimate test of your newfound skills. Don't be afraid to experiment with different flours and techniques.
- Share your baking journey! Post pictures of your creations on social media and tag us – we'd love to see your results!
- Explore other BakeWithEase recipes: Discover more amazing bread recipes and expand your baking repertoire.
What unique ingredient will you try in your next baguette attempt? Let’s hear your ideas in the comments below!