
Simple Steps to Decorating Classic French Eclairs

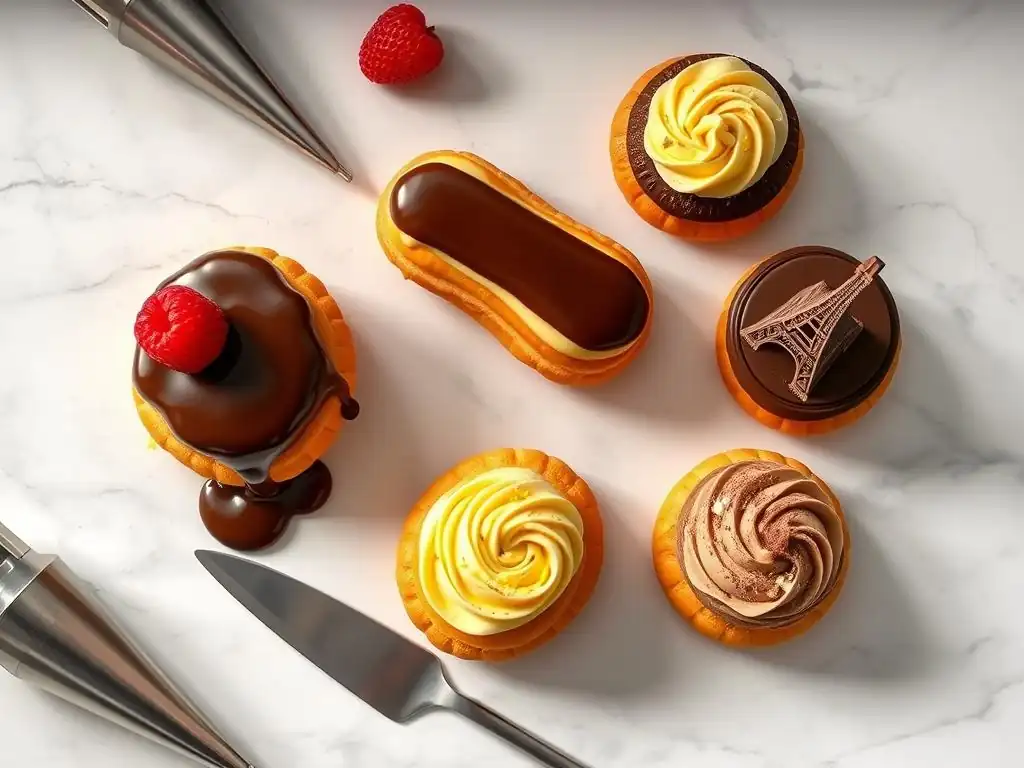
Welcome to BakeWithEase, your haven for all things baking! Ever dreamt of crafting those elegant pastries you see in Parisian patisseries? This week, we unlock the secrets to transforming humble choux pastry into show-stopping treats. Get ready to dive into our French éclair decorating tutorial, where we'll guide you through simple steps to create classic éclairs that are as beautiful as they are delicious. Curious to discover how to achieve that perfect glaze and those intricate decorations? Let's get baking!
- Introduction: Mastering Eclair Decoration
- Preparing Your Eclairs for Decoration: The Foundation for Success
- Step-by-Step French Eclair Decorating Tutorial
- Advanced Eclair Decorating Techniques: Level Up Your Skills
- Tips and Tricks for Professional-Looking Eclairs
- Troubleshooting Common Eclair Decorating Problems
- French Eclair Decorating Ideas and Inspiration
- Conclusion: Impress Your Friends and Family with Beautifully Decorated Eclairs
-
Frequently Asked Questions
- What are the essential ingredients for decorating French eclairs from BakeWithEase?
- Where can I find a reliable recipe for choux pastry, as referenced in the BakeWithEase French eclair decorating tutorial?
- What are some simple techniques for applying the chocolate glaze evenly to eclairs, according to BakeWithEase?
- What are some alternative decorating ideas for French eclairs beyond the classic chocolate glaze, as featured on BakeWithEase?
- How does the BakeWithEase tutorial cater to beginner bakers who are new to decorating French eclairs?
- Final Reflection: The Enduring Elegance of the Éclair
- Unleash Your Inner Pâtissier: Decorate Dreamy Eclairs!
Introduction: Mastering Eclair Decoration
Elevate Your Baking: Decorating Eclairs Like a Pro
So, you've successfully baked a batch of perfect pâte à choux shells, golden brown and hollow, just waiting to be filled and adorned. Baking the eclair shell is a fantastic achievement, but transforming it into the elegant pastry we all know and love requires mastering the art of decoration. This goes beyond just slathering on some chocolate; it involves techniques that enhance both the visual appeal and the flavor profile of this classic French treat. A well-decorated eclair is a feast for the eyes before it even reaches the palate, making your baking efforts truly shine.
Taking the time to learn proper eclair decoration techniques can significantly elevate your home baking. Think about the difference between a plain shell and one finished with a smooth, glossy chocolate glaze, perhaps topped with delicate swirls of cream or a sprinkle of toasted nuts. This level of detail not only makes your eclairs look professional but also shows a dedication to the craft. Whether you're aiming for simple elegance or intricate designs, this French eclair decorating tutorial will guide you through the essential steps to achieve stunning results every time.
Guide to Perfect Eclair Presentation
Achieving perfect eclair presentation relies on a combination of careful preparation, the right tools, and precise execution. The goal is a finish that is smooth, even, and visually appealing, enticing anyone who sees your beautiful pastries. From preparing the surfaces to handling delicate glazes and adding final touches, each step contributes to the overall success of your eclair decoration.
This comprehensive guide provides a structured approach to decorating your eclairs, breaking down the process into manageable steps. We'll cover everything from preparing the shells after baking to applying glazes, adding decorative elements, and even troubleshooting common issues. Following this French eclair decorating tutorial will equip you with the knowledge and confidence to create eclairs that not only taste incredible but also look like they came straight from a Parisian patisserie.
Preparing Your Eclairs for Decoration: The Foundation for Success
Baking the Perfect Eclairs: A Quick Recap
Before you can decorate, you need a solid foundation: perfectly baked eclair shells. Remember that achieving the ideal shell involves making a smooth pâte à choux dough, piping uniform shapes, and baking them until they are golden, puffed, and firm. Undercooked eclairs can collapse, making them difficult to fill and impossible to glaze smoothly. A typical baking time is around 25-35 minutes at temperatures often starting around 425°F (220°C) before dropping to 375°F (190°C) to dry them out.
Once baked, it's crucial to pierce the eclairs to allow steam to escape, which helps prevent them from becoming soggy. This can be done carefully with a skewer or knife tip shortly after they come out of the oven. Ensure they are completely cool and dry before you even think about filling or decorating them. A moist or warm shell will cause your glaze to melt or become uneven.
Cooling and Filling Your Eclairs: Ready for the Creative Touch
After baking and piercing, the eclair shells must cool completely on a wire rack. This allows air circulation around them, preventing condensation and ensuring the shells remain crisp. Rushing this step is a common mistake that can ruin your decorating efforts. Allow at least 30-60 minutes for proper cooling, depending on the humidity in your kitchen.
Once cool, the eclairs are ready for filling. The traditional filling is pastry cream (crème pâtissière), but you can use whipped cream, diplomat cream (pastry cream mixed with whipped cream), or even flavored mousses. Fill the eclairs from the bottom or side using a piping bag fitted with a small tip.
Make two or three small holes along the bottom or side of the eclair and pipe the filling in until you feel the shell become slightly heavy and full. Avoid overfilling, which can cause the shell to split. Now your filled eclairs are a blank canvas, ready for the decorative touch that will transform them.
Essential Tools and Ingredients for Eclair Decoration: A Checklist
Having the right tools and ingredients readily available simplifies the eclair decorating process and ensures better results. Preparation is key to a smooth workflow.
Here is a checklist of essentials:
- Ingredients:
- Chocolate (couverture or good quality bar for ganache/glaze)
- Heavy cream (for ganache)
- Powdered sugar (for simple glaze)
- Flavorings (vanilla extract, coffee extract, etc.)
- Optional: Cocoa powder, butter, corn syrup (for gloss)
- Fillings (pastry cream ingredients, whipped cream, etc.)
- Decorations (sprinkles, nuts, fresh fruit, edible flowers, etc.)
- Tools:
- Wire cooling rack
- Small saucepan
- Heatproof bowl
- Whisk or spatula
- Sieve (for powdered sugar)
- Piping bags (disposable or reusable)
- Piping tips (small round tip for filling, larger tips for decoration)
- Offset palette knife or small spatula
- Shallow dish or tray (for dipping)
- Parchment paper or silicone mat (to place decorated eclairs on)
Having these items ready before you start your French eclair decorating tutorial will make the process much more enjoyable and efficient.
Step-by-Step French Eclair Decorating Tutorial
Step 1: Preparing Your Chocolate Ganache or Glaze
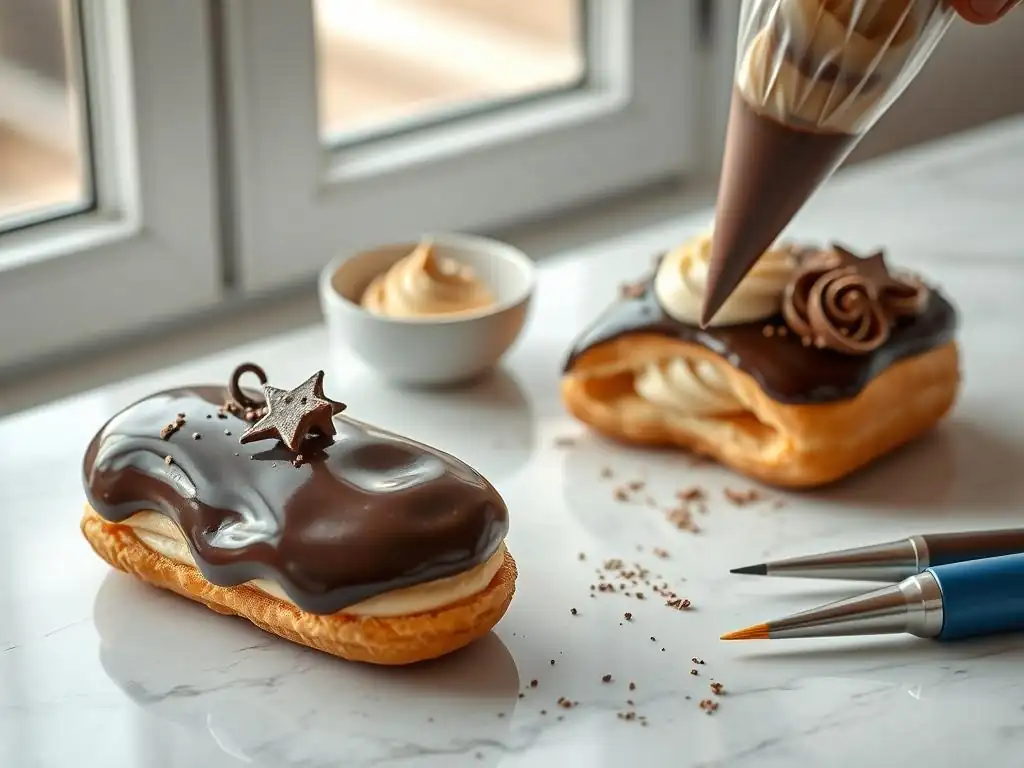
The most classic finish for a French eclair is a rich chocolate ganache or a smooth glaze. The type you choose affects the final texture and appearance. Ganache, made from chocolate and cream, offers a richer, slightly softer finish, while a simple glaze, often made with powdered sugar and liquid, can be thinner and set firmer. For a classic look, dark or milk chocolate ganache is popular, typically using a 1:1 ratio of chocolate to cream by weight for dipping consistency, though this can be adjusted.
To make a standard dipping ganache, finely chop your chocolate. Heat the heavy cream in a saucepan just until it simmers, then pour it over the chopped chocolate in a heatproof bowl. Let it sit for a few minutes to allow the chocolate to melt, then gently whisk or stir from the center outwards until smooth and emulsified.
For a glossier finish, a tiny bit of butter or corn syrup can be whisked in at the end. Allow the ganache to cool slightly to the right consistency for dipping – it should be warm and fluid enough to coat smoothly but not so hot that it runs off completely.
Achieving the Perfect Ganache Consistency for Eclair Topping
The ideal consistency for ganache used in this French eclair decorating tutorial is crucial for a smooth, professional finish. If the ganache is too warm and thin, it will run off the eclair, leaving a very thin, almost transparent layer. If it's too cool and thick, it will be difficult to dip or spread evenly, resulting in a lumpy surface.
The perfect dipping consistency is typically achieved when the ganache has cooled to around 85-90°F (29-32°C). It should flow easily but coat the back of a spoon thickly enough that you can draw a line through it with your finger. You can test this by dipping the back of a spoon; the ganache should cling to it. If it's too thick, warm it gently over a double boiler or in the microwave in short bursts, stirring frequently. If too thin, let it cool longer, stirring occasionally.
Alternative Glazes for Eclairs: Exploring Flavor Profiles
While chocolate ganache is traditional, exploring alternative glazes allows for creative flavor combinations. A simple powdered sugar glaze (fondant glaze) is another classic option, made by mixing powdered sugar with a small amount of liquid like milk, water, or lemon juice until smooth. This glaze sets firm and opaque.
Other popular glaze alternatives include coffee glaze (powdered sugar mixed with strong coffee), caramel glaze, or even fruit-based glazes using purées and powdered sugar. For a shiny mirror glaze effect, a gelatin-based glaze can be used, though this requires more technical skill. Each glaze offers a different texture, sweetness level, and flavor, allowing you to perfectly complement the filling inside your eclair.
Step 2: Dipping or Coating Your Eclairs
Applying the glaze or ganache is a critical step in this French eclair decorating tutorial. The goal is a smooth, even layer that covers the top surface of the eclair beautifully.
The Dipping Technique: Achieving a Smooth, Even Coating
The dipping technique is perhaps the quickest way to get a smooth, classic finish. Hold the filled eclair by the bottom, ensuring the top is level. Dip the top surface of the eclair into the prepared ganache or glaze, ensuring it's deep enough to cover the entire top.
Lift the eclair straight up and gently shake off any excess glaze by tilting it slightly and allowing the extra to drip back into the bowl. Avoid vigorous shaking, which can create bubbles or an uneven edge. Place the dipped eclair carefully glaze-side up onto a parchment-lined baking sheet or wire rack.
Applying Glaze with a Spoon or Palette Knife: Precision and Control
For a slightly more controlled application, or if your glaze consistency isn't perfect for dipping, you can use a spoon or small offset palette knife. Place the eclair on your work surface. Spoon the ganache or glaze onto the top surface of the eclair, starting from the center and spreading it gently towards the edges using the back of the spoon or the palette knife.
Work quickly as some glazes set fast. This method allows you to control the thickness of the layer and is useful for thicker glazes or when you want to create a slightly textured surface. Ensure the glaze goes right to the edges for a clean look.
Step 3: Adding Decorative Touches: Unleashing Your Creativity
Once the main glaze or ganache is applied, you can add decorative elements to enhance the visual appeal and flavor. This is where you can truly personalize your eclairs.
Sprinkles, Chocolate Shavings, and Nuts: Simple Elegance
Adding sprinkles, chocolate shavings, or chopped nuts is a simple yet effective way to decorate eclairs. Apply these immediately after dipping or glazing, while the surface is still wet and slightly tacky.
For chocolate shavings, you can use a vegetable peeler on a block of chocolate. Toasted chopped almonds, pistachios, or hazelnuts add a nice crunch and nutty flavor that pairs well with chocolate or coffee glazes. Colorful sprinkles can add a festive touch. A light dusting of cocoa powder or powdered sugar can also provide a simple, elegant finish once the glaze has set slightly.
Piping Cream or Ganache: Creating Intricate Designs
Piping additional cream or ganache onto the set glaze allows for more intricate designs. Use a piping bag fitted with a small round or star tip. You can pipe swirls, lines, or dots along the top of the eclair.
For example, pipe small rosettes of whipped cream along the top of a chocolate-glazed eclair. Or, use a contrasting color of ganache (like white chocolate ganache on dark chocolate) to pipe zigzags or patterns. Ensure the base glaze is set enough so the piping doesn't sink into it.
Fruit and Edible Flowers: Adding a Touch of Freshness
For a fresh and vibrant look, consider using fresh fruit or edible flowers. Small berries like raspberries or sliced strawberries can be placed on top of the glaze. A thin slice of kiwi or a segment of orange can also add color and a burst of flavor.
Edible flowers like pansies or violas add a delicate, elegant touch. These are best placed just before serving, especially fruit, to ensure they look their freshest. This method works particularly well with lighter glazes or pastry cream fillings.
Advanced Eclair Decorating Techniques: Level Up Your Skills
Marbling Effect: Creating Stunning Swirls
Creating a marbling effect on your eclairs adds a sophisticated visual dimension. This technique involves working with two colors or types of glaze simultaneously.
One common method is to prepare a base glaze (e.g., white chocolate or fondant glaze) and a contrasting glaze (e.g., dark chocolate ganache or colored glaze). Dip the eclair into the base glaze, then immediately drizzle lines or dots of the contrasting glaze onto the wet surface. Using a skewer or toothpick, gently swirl through the contrasting glaze to create a marbled pattern.
Work quickly before the base glaze sets. Another approach is to swirl the two glazes together briefly in the dipping dish before dipping the eclair. This requires practice to get the swirls just right, aiming for distinct lines rather than muddied colors.
Using Gold Leaf or Edible Glitter: Adding a Touch of Luxury
For truly show-stopping eclairs, consider adding gold leaf or edible glitter. These elements instantly elevate the pastry to a level of luxury often seen in high-end patisseries.
Edible gold leaf is extremely delicate and is best applied with tweezers onto a slightly tacky glaze surface. Small flakes or larger pieces can be used depending on the desired effect. Edible glitter can be sprinkled onto wet glaze or applied with a small brush to specific areas once the glaze is dry.
These touches are perfect for special occasions and add a sparkle that standard decorations can't match. While a small amount of gold leaf can be relatively inexpensive, decorating a full batch of eclairs can cost upwards of $10-$20 just for the gold, so use it sparingly for maximum impact.
Creating Custom Eclair Designs: Stencils and Templates
Stencils and templates allow for precise, repeatable designs on your eclairs. This technique is useful for creating logos, patterns, or specific shapes using powdered sugar, cocoa powder, or airbrushed food coloring.
You can purchase stencils online or create your own from food-safe plastic or paper. Place the stencil carefully over the set eclair glaze. Lightly dust over the stencil with powdered sugar or cocoa powder using a fine sieve or brush. Carefully lift the stencil straight up to reveal the design. For more complex patterns, multiple stencils or layers might be needed. This technique is excellent for themed eclairs or when you need consistency across a large batch.
Tips and Tricks for Professional-Looking Eclairs
Ensuring a Smooth and Glossy Finish: Secret Techniques
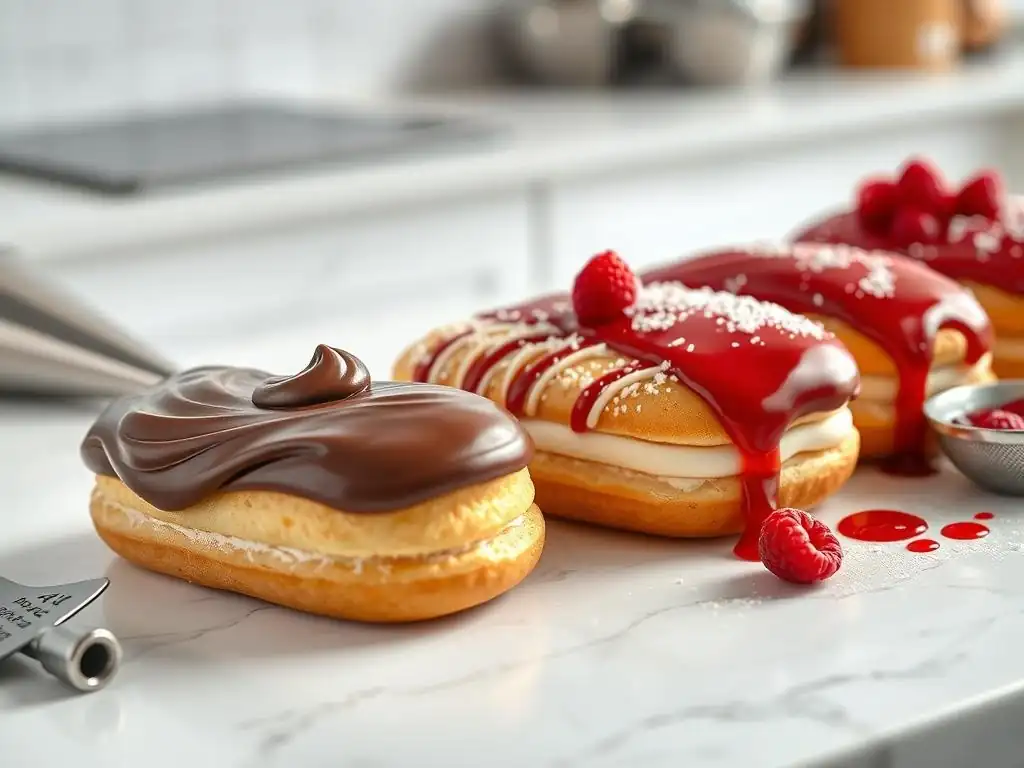
Achieving a smooth and glossy finish on your eclair glaze is a hallmark of professional pastry. One key is the temperature and consistency of your glaze or ganache – as discussed, not too hot, not too cold.
For chocolate ganache, adding a small amount of butter (about 1 tablespoon per cup of chocolate) at the end can significantly increase glossiness. Corn syrup also helps create a shiny, stable glaze. Ensure the surface of the eclair shell is perfectly smooth and free of crumbs before dipping. Allowing excess glaze to drip off completely helps prevent pooling and unevenness. Working in a cool, non-humid environment also aids in achieving a perfect set.
Preventing Cracks and Imperfections in Your Eclair Glaze
Cracks and imperfections can detract from the beauty of your decorated eclairs. These are often caused by the glaze setting too quickly or the eclair shell not being completely cool.
Ensure the eclair shells are at room temperature before glazing. If you're using a fondant glaze, warming it gently can make it more pliable and less prone to cracking upon setting. For ganache, ensure it's not too thick; a thinner ganache is less likely to crack. Avoid moving the eclairs excessively while the glaze is setting. Storing them in a cool, stable environment helps the glaze set smoothly without stress.
Storing Decorated Eclairs: Maintaining Freshness and Appearance
Proper storage is essential to keep your decorated eclairs looking and tasting their best. Eclairs filled with pastry cream or whipped cream are perishable and should be refrigerated.
Store decorated eclairs in a single layer in an airtight container in the refrigerator. If stacking is necessary, place parchment paper between layers to prevent the glaze from sticking or getting damaged. Glazes like ganache will firm up in the fridge, but should remain glossy. Fondant glazes can become slightly sticky in humid conditions. Eclairs are best enjoyed within 1-2 days of being filled and decorated for optimal freshness and texture.
Troubleshooting Common Eclair Decorating Problems
Ganache Too Thick or Thin: Adjusting the Consistency
Encountering ganache that's not the right consistency is a common issue in any French eclair decorating tutorial.
If your ganache is too thick, it's likely too cool. Gently warm it over a double boiler or in the microwave in very short intervals (5-10 seconds), stirring well after each heating, until it reaches the desired fluid consistency. Be careful not to overheat, which can cause the chocolate to seize or the ganache to split.
If it's fundamentally too much chocolate for the cream ratio, you can stir in a tiny amount more warm cream, a teaspoon at a time, until it's right. If your ganache is too thin, it's either too warm or has too much liquid.
Allow it to cool at room temperature, stirring occasionally, until it thickens. If it still doesn't thicken enough, you can try stirring in a few more finely chopped chocolate pieces and letting them melt in the warm ganache, or gently chilling it in the fridge for a few minutes, stirring frequently, until it reaches the correct consistency.
Glaze Not Adhering Properly: Solutions and Prevention
If your glaze isn't sticking well to the eclair shell, there are a few potential culprits.
The most common reason is that the eclair shell is too moist or greasy. Ensure your shells are completely cool and dry before attempting to glaze them. If you filled them from the top, make sure any residual cream around the hole is wiped clean.
Sometimes, residual butter on the surface from baking can hinder adhesion; lightly dusting the tops with a tiny amount of powdered sugar (and brushing off excess) before glazing can sometimes help, though this is less common with well-baked pâte à choux. Ensure your glaze is at the correct temperature and consistency – too hot or too thin and it might just slide off.
Eclairs Looking Messy or Uneven: Refining Your Technique
If your decorated eclairs look messy or uneven, it's often a matter of refining your technique and practicing patience.
Ensure your dipping or spreading motion is smooth and confident. When dipping, a single, clean dip and lift is better than multiple attempts. Allow excess glaze to drip off properly. If spreading with a knife, aim for smooth, even strokes.
Make sure you have enough glaze prepared so you're not scraping the bottom of the bowl, which can incorporate air bubbles. Practice on a few 'test' eclairs if you're trying a new technique. Taking your time and focusing on precision will yield much better results. Remember, even professional bakers have days when things don't go perfectly – practice makes progress!
French Eclair Decorating Ideas and Inspiration
Classic Chocolate Eclairs: A Timeless Favorite
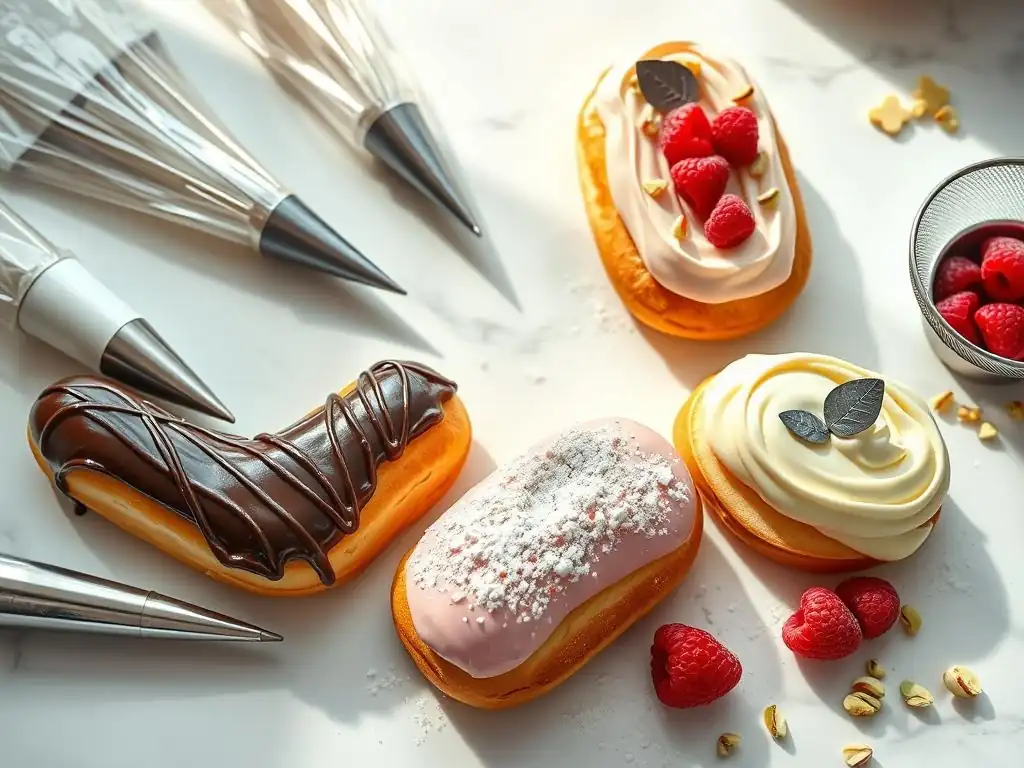
The classic chocolate eclair remains a beloved pastry for a reason. Typically filled with vanilla pastry cream and topped with a glossy dark chocolate ganache, its simplicity highlights the quality of its components.
For this classic, ensure your ganache is perfectly smooth and shiny. You can finish with a simple flourish, like a few piped swirls of leftover pastry cream or a scattering of toasted slivered almonds on one end. This elegant look focuses on the beauty of the ganache itself, requiring a flawless finish.
Coffee Eclairs: A Rich and Aromatic Variation
Coffee eclairs offer a sophisticated twist on the classic, pairing beautifully with the richness of the pastry and cream.
Fill your eclairs with a coffee-flavored pastry cream (made by infusing the milk with coffee beans or adding espresso powder). Top them with a coffee glaze (powdered sugar mixed with strong coffee or espresso) or a coffee-infused chocolate ganache. You can decorate these with chocolate-covered coffee beans or a simple dusting of cocoa powder.
Pistachio Eclairs: A Vibrant and Nutty Delight
Pistachio eclairs are visually striking and offer a delightful nutty flavor profile.
Fill the eclairs with pistachio pastry cream (made with pistachio paste). Top with a vibrant green pistachio glaze (using white chocolate and pistachio paste or green food coloring) or a simple white chocolate glaze. Decorate with chopped toasted pistachios sprinkled over the glaze while it's still wet. The combination of the green glaze and nuts creates a beautiful and appetizing look.
Pumpkin Spice Eclairs: A Fall-Inspired Delight
Embrace seasonal flavors with pumpkin spice eclairs, perfect for autumn.
Fill the eclairs with pumpkin spice pastry cream or a cream cheese filling flavored with pumpkin purée and spices. Top with a cinnamon glaze (powdered sugar mixed with milk and ground cinnamon) or a maple-flavored glaze. Decorate with a sprinkle of extra cinnamon, nutmeg, or small candied pumpkin seeds. This variation brings warmth and comfort to the classic French pastry.
Conclusion: Impress Your Friends and Family with Beautifully Decorated Eclairs
Celebrate Your Baking Success
You've made it through the entire French eclair decorating tutorial! From perfecting the pâte à choux shell to mastering glazes and adding creative touches, you've gained the skills to transform simple baked goods into exquisite pastries. Take a moment to appreciate your accomplishment. Baking and decorating eclairs is a process that requires patience and attention to detail, and successfully creating a batch of beautiful, delicious eclairs is something to be proud of.
Each eclair you decorate is a testament to your growing baking expertise. Don't worry if your first attempts aren't absolutely perfect; the key is to practice and learn from each batch. With the knowledge gained from this guide, you are well-equipped to continue refining your techniques and exploring new decorating possibilities.
Now that you've created these stunning classic French eclairs, the best part is sharing them! Plate them beautifully on a serving dish and present them to your friends and family. Watch their faces light up when they see your homemade, professionally-looking pastries.
Sharing your eclairs allows you to receive feedback, celebrate the joy of baking together, and perhaps even inspire others to try their hand at this rewarding craft. Whether you stuck to the classic chocolate or experimented with vibrant flavors like pistachio or coffee, your beautifully decorated eclairs are sure to impress. Happy baking and decorating!
Frequently Asked Questions
What are the essential ingredients for decorating French eclairs from BakeWithEase?
The essential ingredients typically include choux pastry, pastry cream filling, and a chocolate glaze. Variations may include different flavors of pastry cream or decorative toppings.
Where can I find a reliable recipe for choux pastry, as referenced in the BakeWithEase French eclair decorating tutorial?
BakeWithEase.com provides easy-to-follow choux pastry recipes specifically designed for eclairs. Look under the "Pastries" section or search for "choux pastry" on the website.
What are some simple techniques for applying the chocolate glaze evenly to eclairs, according to BakeWithEase?
The BakeWithEase tutorial suggests dipping the eclairs upside down into the melted chocolate glaze, or using a piping bag for a controlled application. Ensure the glaze is at the right consistency.
What are some alternative decorating ideas for French eclairs beyond the classic chocolate glaze, as featured on BakeWithEase?
The tutorial might suggest different flavored glazes, such as coffee or caramel, or toppings like chopped nuts, sprinkles, or fruit slices.
How does the BakeWithEase tutorial cater to beginner bakers who are new to decorating French eclairs?
The tutorial offers step-by-step instructions, clear visuals, and easy-to-find ingredients, making the process accessible even for those with limited baking experience.
Final Reflection: The Enduring Elegance of the Éclair
The art of decorating classic French éclairs transcends mere confectionery; it's a celebration of precision, artistry, and the enduring appeal of simple elegance. In a world saturated with overly complicated desserts, the seemingly simple éclair offers a refreshing counterpoint – a testament to the power of refined technique and beautiful simplicity. This tutorial aimed to demystify the process, showing that even the most exquisite pastries can be within reach of the home baker.
The enduring popularity of the éclair speaks volumes about our collective desire for both beauty and deliciousness. It's a dessert that effortlessly bridges generations, evoking memories of Parisian patisseries and cherished family traditions. As we explored the various techniques, from the smooth application of ganache to the delicate placement of piped decorations, I was reminded of the profound connection between food and memory. The simplest things are often the most beautiful,
a sentiment that perfectly encapsulates the essence of the classic éclair.
Now, I invite you to take what you've learned and embark on your own éclair decorating journey. Don't be afraid to experiment, to personalize your creations, and to find joy in the process. Each perfectly piped swirl, each carefully placed fruit, tells a story – a story of your dedication, your creativity, and your appreciation for the timeless beauty of this iconic pastry. Let the elegance of the éclair inspire you, not just in the kitchen, but in all aspects of your life.
Unleash Your Inner Pâtissier: Decorate Dreamy Eclairs!
Thanks for joining us on this delicious journey into the world of classic French éclairs! We hope you've gained some valuable tips and inspiration to elevate your baking game. Now it's time to put your newfound skills into action.
- Master the Art of Piping: Practice your piping techniques with different tips and create your own unique éclair designs. This is the perfect next step to personalize your éclairs. Remember those swirling patterns we showed you? Try them out!
- Share Your Creations: Snap a picture of your beautiful, decorated éclairs and share them on social media using #BakeWithEaseEclairs. Let’s inspire each other!
- Explore Flavor Combinations: Don't be afraid to experiment! Try different fillings, glazes, and toppings to discover your favorite flavor combinations. What unexpected pairing will you try first?
Ready to transform plain éclairs into edible masterpieces? What unique decorating technique will you master next?