
Easy Recipe for French Chocolate Tart (Tarte au Chocolat)

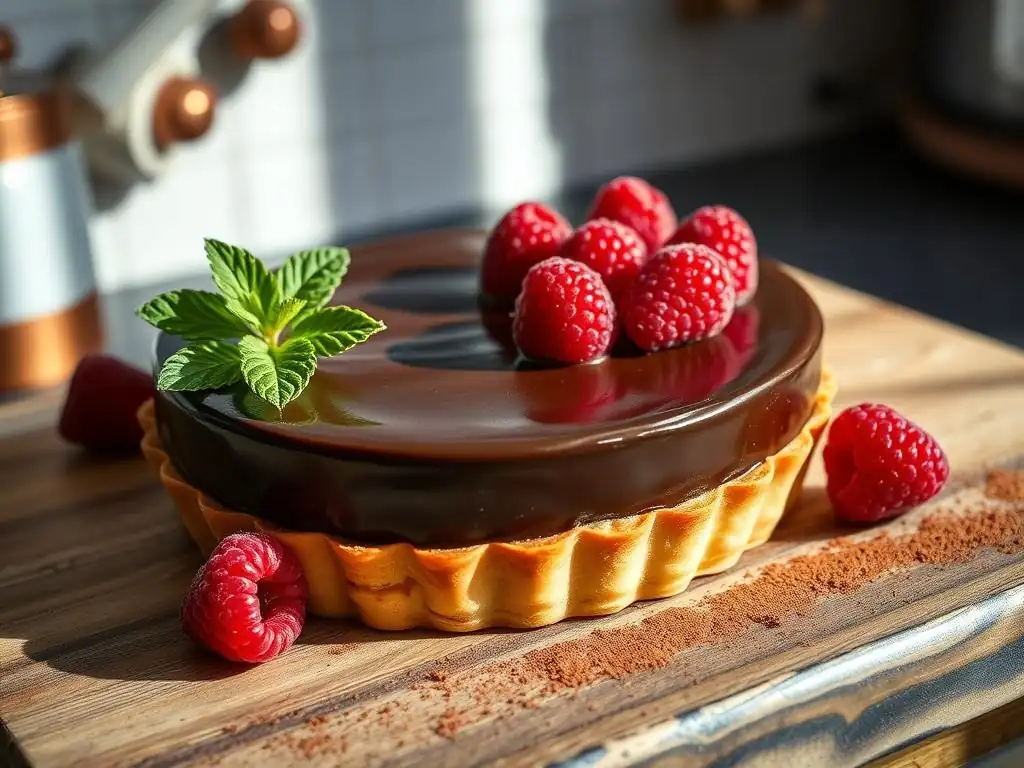
Welcome to BakeWithEase, your trusted guide to baking brilliance! Ever dreamt of creating a decadent French masterpiece in your own kitchen? Our Easy French Chocolate Tart Recipe (Tarte au Chocolat) is your passport to Parisian patisserie perfection. Intrigued? Discover the secrets behind this surprisingly simple, yet utterly irresistible dessert and unlock a world of regional baking delights. Let's get started!
- Easy French Chocolate Tart Recipe (Tarte au Chocolat) - BakeWithEase.com
- Introduction to Tarte au Chocolat: A French Baking Classic
- BakeWithEase' Step-by-Step Guide to a Perfect Chocolate Tart
- Making the Sweet Shortcrust Pastry (Pâte Sucrée)
- Preparing the Decadent Chocolate Filling
- Assembling and Baking Your French Chocolate Tart
- Cooling and Serving Your Homemade Tarte au Chocolat
- Tips and Tricks for the Best French Chocolate Tart
- Troubleshooting Your Chocolate Tart
- Storing Your Tarte au Chocolat
- Mastering French Baking Classics with BakeWithEase
- Frequently Asked Questions
- Final Reflection: The Enduring Allure of a Simple French Tart
- Unlock Your Inner Pâtissier: Master the Art of the French Chocolate Tart!
Easy French Chocolate Tart Recipe (Tarte au Chocolat) - BakeWithEase.com
Introduction to Tarte au Chocolat: A French Baking Classic
Discover the Elegance of a Simple Chocolate Tart
The Tarte au Chocolat is a quintessential French dessert, beloved for its rich, decadent filling nestled within a delicate, buttery crust. It's a pastry that speaks of simple elegance, requiring just a few core ingredients to create something truly luxurious. Unlike more complex multi-layered cakes or intricate patisserie, the beauty of a classic French chocolate tart lies in its straightforward composition, allowing the quality of the chocolate and butter to shine through. This simplicity makes it an ideal candidate for home bakers looking to explore French baking classics without feeling overwhelmed.
Despite its sophisticated reputation, mastering a delicious Tarte au Chocolat is well within reach for bakers of all levels. The combination of a crisp, sweet shortcrust pastry (pâte sucrée) and a smooth, ganache-like filling offers a delightful contrast in textures. While professional versions might involve precise temperature controls and specific chocolate tempering techniques, a home kitchen version can achieve stunning results with careful attention to basic steps and ingredient quality. Our goal with this easy French chocolate tart recipe is to demystify this classic, bringing the taste of a Parisian patisserie right into your home.
Why This Easy French Chocolate Tart Recipe Works
This easy French chocolate tart recipe is designed for success by focusing on reliable techniques and common ingredients. We use a simple pâte sucrée recipe that's forgiving and less prone to shrinking than traditional pie dough, ensuring a sturdy yet tender base for your tart.
The chocolate filling is essentially a rich ganache, made foolproof by melting chocolate and butter together before whisking in cream and eggs, which provides structure and prevents separation. This method eliminates the need for a double boiler if you're careful, and the ratios are balanced to give a firm, sliceable tart that still melts in your mouth.
The steps are broken down logically, starting with the pastry, moving to the filling, and finally assembling and baking. We've included specific timings and visual cues to help you gauge progress, such as chilling the dough for at least 30 minutes (ideally an hour) to make it easier to roll, or baking the tart until the edges of the filling are set but the center has a slight wobble, indicating it will firm up perfectly upon cooling.
This approach significantly reduces the chances of common tart mishaps like a soggy bottom or cracked filling, making it a genuinely easy French chocolate tart recipe suitable for your first attempt or your hundredth.
BakeWithEase' Step-by-Step Guide to a Perfect Chocolate Tart
Ingredients for Your Homemade French Chocolate Tart
Gathering your ingredients before you begin is key to a smooth baking process. Ensure all dairy ingredients like butter and cream are at room temperature for the pastry, and the eggs are also at room temperature for both the pastry and the filling. Using high-quality chocolate is paramount for the filling's flavor and texture; opt for a good bittersweet or dark chocolate with a cocoa content of around 60-70% for the best results in this easy French chocolate tart recipe.
Here's what you'll need:
For the Sweet Shortcrust Pastry (Pâte Sucrée)
- [ ] 200 grams (about 1 ½ cups) all-purpose flour
- [ ] 50 grams (about ¼ cup) granulated sugar
- [ ] ¼ teaspoon salt
- [ ] 100 grams (about 7 tablespoons) cold unsalted butter, cut into small cubes
- [ ] 1 large egg, lightly beaten
For the Rich Chocolate Filling
- [ ] 200 grams (about 7 ounces) good quality bittersweet or dark chocolate (60-70% cocoa), finely chopped
- [ ] 100 grams (about 7 tablespoons) unsalted butter, cut into small cubes
- [ ] 2 large eggs
- [ ] 50 grams (about ¼ cup) granulated sugar
- [ ] 200 ml (about ¾ cup + 1 tablespoon) heavy cream (double cream)
Equipment You'll Need
Having the right tools makes baking this easy French chocolate tart recipe a breeze. You don't need highly specialized equipment, just standard kitchen items. A tart pan with a removable bottom is highly recommended for easy serving and a clean presentation.
- [ ] Large mixing bowl
- [ ] Pastry blender or fork (optional, for cutting in butter)
- [ ] Whisk
- [ ] Rolling pin
- [ ] 9 or 10-inch (approx. 23-25 cm) tart pan with removable bottom
- [ ] Baking sheet (to place the tart pan on)
- [ ] Measuring cups and spoons or a kitchen scale (highly recommended for accuracy)
- [ ] Small saucepan or microwave-safe bowl (for melting chocolate)
- [ ] Oven
- [ ] Wire rack for cooling
Making the Sweet Shortcrust Pastry (Pâte Sucrée)
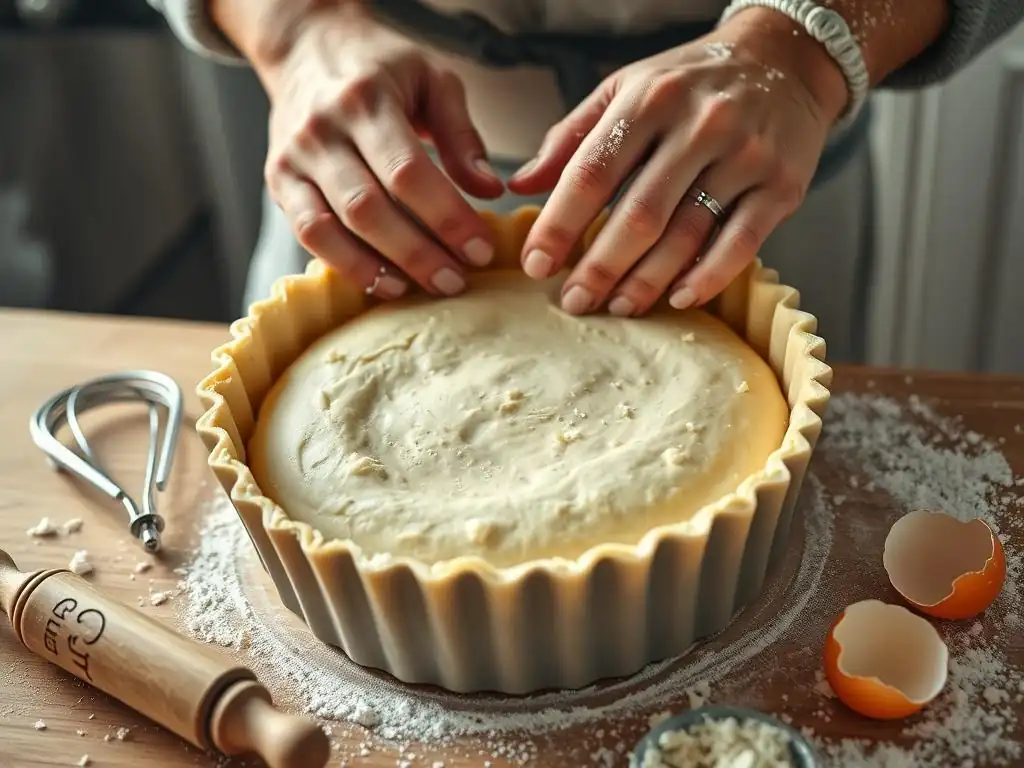
Crafting the perfect crust is the first step to a successful homemade French chocolate tart. Pâte sucrée is a sweet, tender dough that's less likely to shrink during baking compared to traditional pie dough, making it ideal for tarts. The key is to keep the ingredients cold and handle the dough minimally to prevent gluten development, which can result in a tough crust.
Step 1: Combining Dry Ingredients
In a large mixing bowl, whisk together the 200 grams of all-purpose flour, 50 grams of granulated sugar, and ¼ teaspoon of salt. This ensures the dry ingredients are evenly distributed before adding the fat. Using a whisk helps to aerate the flour slightly and distribute the sugar and salt thoroughly, preventing pockets of unmixed ingredients in your final dough. Make sure there are no lumps of flour or sugar before proceeding.
This initial step is simple but crucial for the overall flavor and texture of the pastry. The sugar adds sweetness and contributes to the tenderness of the crust by interfering with gluten formation, while the salt balances the sweetness and enhances the overall flavor profile. Taking a moment to properly combine these dry elements sets a good foundation for the dough.
Step 2: Adding the Butter and Creating a Crumble
Add the 100 grams of cold unsalted butter, cut into small cubes, to the dry ingredients. Using your fingertips, a pastry blender, or a fork, cut the butter into the flour mixture until it resembles coarse crumbs, with some pieces of butter still visible, roughly the size of small peas. The cold butter pieces are essential; as they melt in the oven, they create steam, which forms flaky layers within the crust. Avoid overworking the mixture at this stage.
Working quickly is helpful here to prevent the butter from melting from the heat of your hands. If using your fingertips, use a light rubbing motion. The goal is to coat the flour particles with fat, inhibiting gluten development and resulting in a tender, crumbly texture once baked. This "cutting in" method is fundamental to many pastry doughs and is key to achieving the desired texture for your easy French chocolate tart's crust.
Step 3: Incorporating the Egg and Forming the Dough
Create a well in the center of the butter-flour mixture and add the 1 large, lightly beaten egg. Using a fork or your hands, gently mix the egg into the dry ingredients until the dough just comes together. Be careful not to overmix. The dough should be cohesive but not sticky. If it seems too dry, you can add a very small amount of cold water (about ½ teaspoon at a time), but this is usually unnecessary with this recipe's proportions.
Once the dough forms a shaggy ball, turn it out onto a lightly floured surface and gently bring it together into a flat disc. Do not knead the dough, as this will develop gluten and make the crust tough. Patting it into a disc shape prepares it for easier rolling later. This step requires a delicate touch; remember, less handling is more for a tender pastry crust.
Step 4: Chilling the Dough for Optimal Results
Wrap the dough disc tightly in plastic wrap and refrigerate for at least 30 minutes, or preferably for 1 hour. Chilling allows the butter to firm up again, making the dough much easier to roll without sticking. It also gives the gluten a chance to relax, which helps prevent the crust from shrinking excessively during baking. This rest period is non-negotiable for a successful tart shell.
A well-chilled dough is less sticky and maintains its shape better when rolled and transferred to the tart pan. If you are making the dough ahead of time, it can be refrigerated for up to 2 days or frozen for several months. If frozen, thaw it in the refrigerator overnight before use. This chilling step is a simple but critical part of creating a flaky, tender crust for your easy French chocolate tart.
Preparing the Decadent Chocolate Filling
While the pastry dough chills, you can prepare the rich and smooth chocolate filling. This filling is essentially a simple ganache enriched with eggs and a touch of sugar, creating a texture that is firm enough to slice but wonderfully soft and melting in the mouth. Using good quality chocolate significantly impacts the final flavor, so choose wisely.
Step 1: Melting the Chocolate and Butter
Finely chop the 200 grams of bittersweet or dark chocolate and the 100 grams of unsalted butter. Place them in a heatproof bowl. You can melt them gently over a double boiler (a bowl set over a pot of simmering water, ensuring the bottom of the bowl doesn't touch the water) or carefully in the microwave in 30-second intervals, stirring between each, until completely smooth. Be careful not to overheat the chocolate, as this can cause it to seize or burn.
Melting the chocolate and butter together creates the luxurious, rich base for the filling. The butter adds silkiness and helps the chocolate set with a beautiful sheen. Ensuring the mixture is completely smooth and free of any solid chocolate pieces at this stage is important for a velvety final texture in your easy French chocolate tart.
Step 2: Whisking in the Eggs and Sugar
Once the chocolate and butter mixture is smooth and slightly cooled (it should be warm, not hot enough to cook the eggs), whisk in the 2 large eggs and the 50 grams of granulated sugar. Whisk until the mixture is fully combined and glossy. The eggs help to set the filling during baking, giving it a more structured consistency than a simple ganache, while the sugar adds necessary sweetness to balance the bitterness of the dark chocolate.
Properly incorporating the eggs ensures the filling sets correctly without curdling. Whisking until glossy indicates that the sugar has started to dissolve and the mixture is emulsifying properly. This step is crucial for achieving the smooth, uniform texture that is characteristic of a classic Tarte au Chocolat filling.
Step 3: Adding Cream for a Smooth Texture
Finally, whisk in the 200 ml of heavy cream until the filling is smooth and homogenous. The cream adds richness and contributes to the filling's silky texture. Ensure there are no streaks of cream and that the mixture is a uniform color. The filling should now be a pourable consistency, ready to be added to your prepared tart shell.
Adding the cream completes the ganache-like base, creating a filling that is both rich and smooth. The ratio of chocolate, butter, and cream is balanced to ensure the filling sets firmly enough to slice after cooling but remains soft and luscious. This step is the last before assembling the tart, bringing together all the elements of this decadent filling for your easy French chocolate tart recipe.
Assembling and Baking Your French Chocolate Tart
With the pastry chilled and the filling ready, it's time to assemble and bake your beautiful Tarte au Chocolat. Precision in rolling the dough and careful handling are key at this stage. Baking at the correct temperature and for the right amount of time ensures both the crust and the filling are perfectly cooked.
Step 1: Rolling Out the Dough and Lining the Tart Pan
Remove the chilled dough from the refrigerator and let it sit at room temperature for just a few minutes to soften slightly (about 5-10 minutes). Lightly flour a clean surface and your rolling pin. Roll the dough evenly from the center outwards, rotating it occasionally and adding more flour as needed to prevent sticking, until it is about ⅛ inch (approx.
3 mm) thick and large enough to fit your 9 or 10-inch tart pan with some overhang (usually about 12-13 inches in diameter). Carefully transfer the rolled dough to the tart pan. The easiest way is to gently roll the dough around your rolling pin and then unroll it over the pan.
Press the dough gently into the bottom and up the sides of the pan, ensuring it fits snugly into the fluted edges. Trim the excess dough by rolling the rolling pin over the top of the pan or by using your fingers to press the dough against the rim.
Lining the pan properly ensures a neat and professional-looking crust. Pressing the dough firmly into the corners and flutes prevents gaps. Don't worry if the dough tears; you can patch it easily with scraps. For an extra neat edge, you can leave about ½ inch overhang and tuck it down the outside of the pan before trimming, which helps prevent shrinkage. Place the lined tart shell back in the refrigerator for at least 15-20 minutes to firm up again before baking. This chilling step helps the crust hold its shape during baking.
Step 2: Docking the Crust to Prevent Bubbling
While the tart shell is chilling, preheat your oven to 350°F (175°C). Once chilled, remove the tart shell from the refrigerator. Use a fork to gently prick the bottom of the crust all over, about every half inch. This process is called "docking," and it allows steam to escape from the dough during baking, preventing the bottom from puffing up unevenly. Be careful not to pierce all the way through the dough if you want to avoid a soggy bottom, though for a baked custard-style filling like this, a few small holes are fine.
Docking is a simple yet effective technique that contributes significantly to a flat, even crust base, providing a stable foundation for your rich chocolate filling. It's a small step in this easy French chocolate tart recipe that makes a big difference in the final presentation and texture.
Step 3: Pouring in the Chocolate Filling
Place the chilled, docked tart shell on a baking sheet (this makes it easier to handle and catches any potential drips). Give the prepared chocolate filling a final quick whisk to ensure it's smooth. Carefully pour the filling into the prepared tart shell, filling it almost to the top. The filling should be smooth and relatively thick, pouring easily into the shell. Gently tap the baking sheet on the counter a few times to help the filling settle and release any air bubbles.
Pouring the filling while the crust is cold helps prevent the crust from absorbing the liquid too quickly before baking, reducing the risk of a soggy bottom. Ensure the filling is evenly distributed. The baking sheet provides stability and is particularly useful if you are using a tart pan with a loose bottom, preventing spills.
Step 4: Baking to Perfection: Time and Temperature
Carefully transfer the baking sheet with the assembled tart to the preheated oven (350°F / 175°C). Bake for 25-35 minutes. The baking time can vary depending on your oven and the exact size of your tart pan. You'll know the tart is ready when the edges of the filling appear set and slightly puffed, but the center still has a slight wobble when gently nudged. The surface should look matte, not wet. Be careful not to overbake, as this can result in a dry or cracked filling.
A slight wobble in the center is key; the residual heat will continue to cook the filling as it cools, resulting in a perfectly set, creamy texture. If the crust edges start browning too quickly, you can loosely cover them with strips of aluminum foil. Using a baking sheet underneath also helps regulate the bottom crust's temperature, contributing to an evenly baked shell for your easy French chocolate tart.
Cooling and Serving Your Homemade Tarte au Chocolat
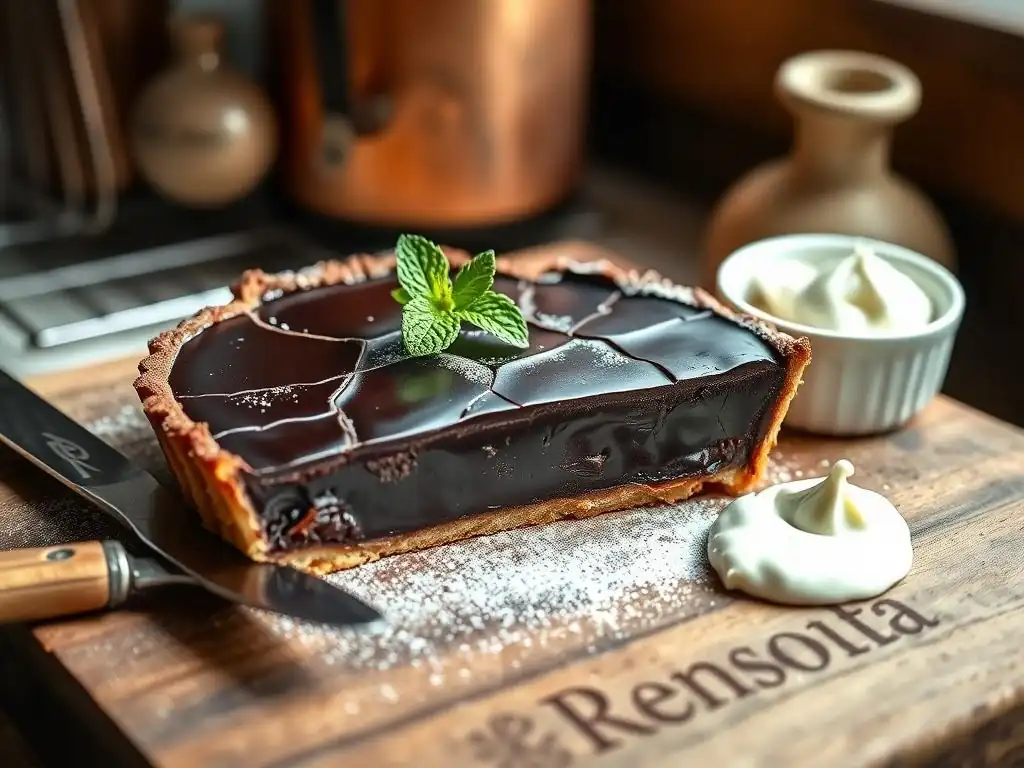
Patience is required once your beautiful French chocolate tart comes out of the oven. Proper cooling is essential for the filling to set completely and for the flavors to meld. Rushing this step is the most common reason for a runny filling.
Cooling Properly for a Firm Set
Once baked, carefully remove the tart from the oven and place it on a wire rack to cool completely. This will take at least 2-3 hours at room temperature, and ideally, the tart should be chilled in the refrigerator for another 1-2 hours before serving. Cooling allows the chocolate filling to transition from its wobbly, semi-liquid state to a firm, sliceable consistency. Attempting to slice the tart before it is fully set will result in a messy, unset center.
The wire rack allows air to circulate around the tart, promoting even cooling and preventing condensation, which could make the bottom crust soggy. Chilling the tart after it has cooled to room temperature ensures the filling is perfectly firm for clean slicing. This patient cooling process is vital for achieving the ideal texture in your easy French chocolate tart.
Garnishing Ideas for an Elegant Presentation
While a classic French chocolate tart is elegant in its simplicity, adding a garnish can elevate its presentation. Simple options include a dusting of high-quality unsweetened cocoa powder or powdered sugar just before serving. For a touch of color and freshness, consider fresh raspberries or strawberries, which pair wonderfully with chocolate.
Other popular garnishes include chocolate shavings or curls, a dollop of freshly whipped cream, or a sprinkle of flaky sea salt (especially if using bittersweet chocolate). Choose a garnish that complements the rich chocolate flavor without overpowering it. A beautifully garnished tart is a feast for the eyes as well as the palate.
Serving Suggestions: Enjoying Your French Chocolate Tart
To serve, carefully remove the outer ring of the tart pan. Use a sharp knife dipped in hot water and wiped clean between slices for the cleanest cuts. Serve the tart slightly chilled or at room temperature. The texture is best when it's not straight from the fridge, allowing the filling to soften slightly.
This easy French chocolate tart is delicious on its own, but it pairs wonderfully with a variety of accompaniments. A scoop of vanilla bean ice cream, a dollop of Chantilly cream (sweetened whipped cream with vanilla), or a simple berry coulis are classic choices. A strong espresso or a glass of dessert wine also makes a perfect pairing. Enjoy savoring each rich, chocolatey bite!
Tips and Tricks for the Best French Chocolate Tart
Achieving perfection with your homemade French chocolate tart is easier than you think with a few helpful tips. From ensuring a smooth filling to preventing a soggy crust, these pointers will help you master this easy French chocolate tart recipe.
Achieving a Perfectly Smooth Chocolate Filling
A smooth, glossy filling is the hallmark of a great Tarte au Chocolat. The key is to melt the chocolate and butter gently and ensure they are fully combined before adding the eggs and cream. Overheating the chocolate can make it grainy. If using a microwave, stir every 30 seconds; if using a double boiler, ensure the water is simmering gently, not boiling vigorously, and that the bowl doesn't touch the water.
Once the eggs and cream are added, whisk until the mixture is completely homogenous and no streaks remain. If your filling appears slightly lumpy after adding the liquid ingredients, you can carefully pass it through a fine-mesh sieve before pouring it into the tart shell. This extra step ensures a silky smooth texture, elevating your easy French chocolate tart.
Preventing a Soggy Crust
A soggy bottom is a common pitfall in tart making. Several steps in this easy French chocolate tart recipe are designed to prevent this. First, chilling the dough thoroughly before rolling and lining the pan helps create a sturdier shell. Second, chilling the lined tart shell again before adding the filling is crucial; this helps the butter solidify, which then "waterproofs" the crust slightly during baking.
Finally, baking the tart on a preheated baking sheet can provide a burst of heat to the bottom of the pan, helping the crust set quickly. While some recipes call for blind baking the crust first, this easy French chocolate tart recipe bypasses that step by carefully balancing the baking time and temperature to cook the crust simultaneously with the filling. Ensure your oven is accurately calibrated to the correct temperature for optimal results.
Variations: Adding Flavors to Your Chocolate Tart
While the classic French chocolate tart is divine, you can easily introduce other flavors to create delicious variations. These simple additions can transform the basic easy French chocolate tart recipe into something new and exciting.
Coffee Chocolate Tart
Add 1-2 teaspoons of instant espresso powder (or a tablespoon of very strong brewed coffee) to the warm chocolate-butter mixture before adding the eggs and cream. Coffee enhances the flavor of chocolate beautifully. Ensure the coffee is fully dissolved if using powder or well-incorporated if using liquid.
Orange Chocolate Tart
Finely grate the zest of one organic orange directly into the warm chocolate-butter mixture. The oils in the zest infuse the chocolate with a bright, citrusy aroma and flavor. You can also add a tablespoon of orange liqueur (like Grand Marnier or Cointreau) at the same stage for a more intense orange kick.
Salted Caramel Chocolate Tart
Swirl a generous amount (about ½ cup) of thick, homemade or store-bought salted caramel sauce into the chocolate filling just before pouring it into the tart shell. Do not fully mix it in; leave swirls for a marbled effect. Alternatively, pour the caramel over the baked and cooled tart before chilling. The combination of sweet caramel and salty notes with the rich chocolate is absolutely divine.
Troubleshooting Your Chocolate Tart
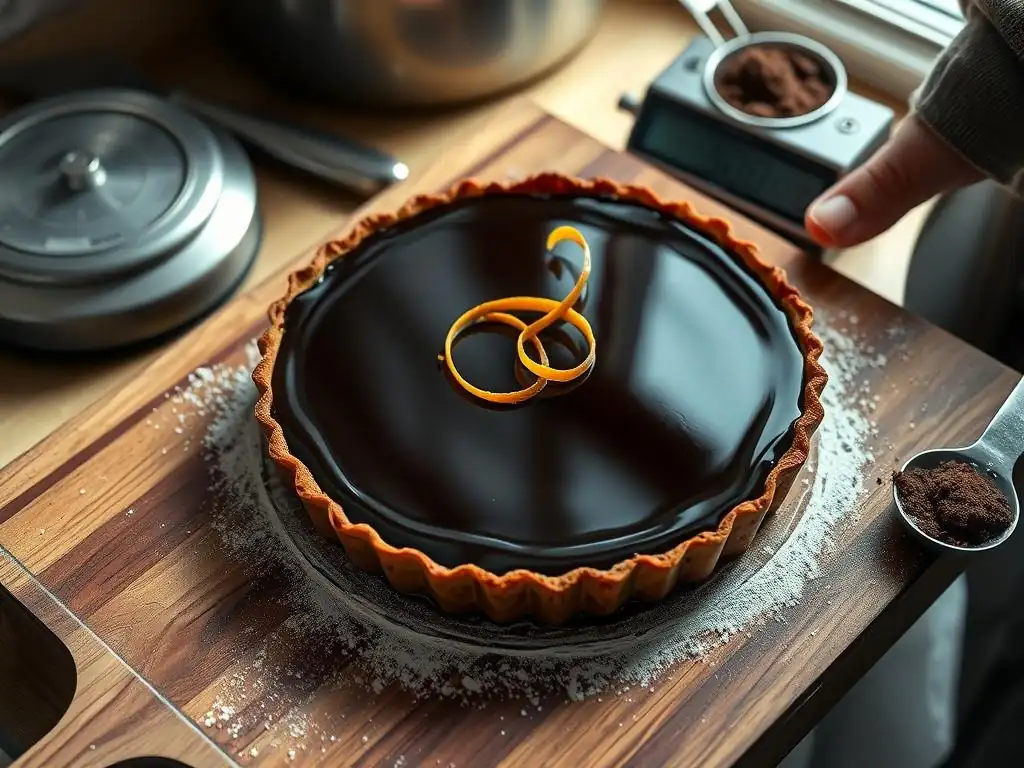
Even with a simple recipe, things can occasionally go wrong. Don's despair! Here are solutions to some common issues you might encounter when making your easy French chocolate tart.
Dealing with a Cracked Filling
A cracked filling usually indicates that the tart was slightly overbaked or cooled too quickly. The filling expanded during baking and then contracted too rapidly. While a crack doesn't affect the taste, it impacts appearance. To prevent this, bake until the edges are just set and the center still wobbles slightly. Avoid moving the tart too much immediately after removing it from the oven.
If your tart does crack, you can easily disguise it! A generous dusting of powdered sugar or cocoa powder, a layer of whipped cream, or arranging fresh berries over the top are excellent ways to hide imperfections and make your beautiful homemade French chocolate tart look perfect for serving.
Solving a Soggy Crust Issue
As mentioned before, a soggy crust is often due to insufficient chilling of the dough or not baking it properly. Ensure your dough is well-chilled (at least 30-60 minutes) before rolling and again after lining the pan (15-20 minutes). Make sure your oven is at the correct temperature (350°F / 175°C) and consider using a preheated baking sheet underneath the tart pan to give the bottom crust a head start in setting.
If you consistently struggle with a soggy crust using this method, you can try blind baking the crust partially before adding the filling. Line the chilled, docked tart shell with parchment paper, fill with pie weights or dried beans, and bake for 15-20 minutes at 350°F (175°C) until the edges are set. Remove weights and parchment, then pour in the filling and continue baking as directed.
Adjusting Sweetness Levels
This easy French chocolate tart recipe uses bittersweet or dark chocolate (60-70% cocoa) and a specific amount of sugar balanced for that level of bitterness. If you prefer a sweeter tart, you can use chocolate with a lower cocoa percentage (e.g., 50-55%) or increase the granulated sugar in the filling by a tablespoon or two (up to 75g total), though be mindful that too much sugar can affect the texture.
Conversely, if you prefer a less sweet, more intense chocolate flavor, use chocolate with a higher cocoa percentage (e.g., 75-80%) and potentially reduce the sugar slightly (down to 30-40g), though the original amount is usually balanced well even for higher cocoa percentages. Taste the filling mixture before adding the eggs (as you can't taste raw egg!) to get a sense of the sweetness level, keeping in mind it will taste slightly less sweet once baked and cooled.
Storing Your Tarte au Chocolat
Proper storage ensures your delicious homemade French chocolate tart remains fresh and maintains its perfect texture for as long as possible.
Proper Storage for Freshness
Once completely cooled and set, cover the tart loosely with plastic wrap or aluminum foil. It can be stored at room temperature for up to 1-2 days if your kitchen is cool (below 70°F/21°C). For longer storage or in warmer environments, it's best to store the tart in the refrigerator.
When storing in the refrigerator, place the covered tart in an airtight container if possible to prevent it from absorbing odors from other foods. The tart will keep well in the refrigerator for 3-4 days. For the best texture and flavor, allow refrigerated tart slices to sit at room temperature for 15-20 minutes before serving.
Can You Freeze French Chocolate Tart?
Yes, you can freeze a baked French chocolate tart! Ensure the tart is completely cooled. You can freeze the whole tart or individual slices. For a whole tart, place it on a baking sheet and freeze until firm, then wrap it tightly in several layers of plastic wrap followed by a layer of aluminum foil or place it in a freezer-safe container.
Individual slices can be wrapped individually before placing them in a container. Frozen tart is best consumed within 1-2 months for optimal quality. To thaw, unwrap the tart (or slices) and let it thaw in the refrigerator overnight, or at room temperature for a few hours for slices. Avoid thawing at room temperature for extended periods, especially in warm conditions.
Mastering French Baking Classics with BakeWithEase
Baking a French chocolate tart is a rewarding experience that introduces you to the elegance and precision of French patisserie. This easy French chocolate tart recipe is just one example of how you can bring classic European flavors into your home kitchen with straightforward techniques and accessible ingredients.
Explore More Easy Baking Recipes
If you enjoyed making this Tarte au Chocolat, we encourage you to explore other easy French baking classics on BakeWithEase.com. From simple Madeleines and financiers to classic croissants (yes, we have an easier method!) and fruit tarts, there's a world of delicious pastries waiting for you to discover. Our step-by-step guides and helpful tips are designed to build your confidence and skills, one delicious bake at a time.
Mastering foundational doughs like pâte sucrée opens up possibilities for countless other tart variations. Understanding how to create a simple ganache-based filling is also a versatile skill applicable to many other desserts. Keep practicing, experimenting, and most importantly, have fun baking!
We love seeing what our community bakes! If you make this easy French chocolate tart recipe, please share a photo of your finished creation. Tag us on social media or use our designated hashtag. Sharing your successes, and even your learning experiences, inspires others and helps us all grow as bakers.
Did you try one of the flavor variations? Did you come up with your own unique garnish? We can't wait to see your beautiful homemade French chocolate tart and hear about your baking journey. Your feedback and shared experiences are invaluable to the BakeWithEase community. Happy Baking!
Frequently Asked Questions
What makes this French Chocolate Tart recipe "easy"?
This recipe focuses on simple ingredients and straightforward techniques, minimizing complicated steps often found in traditional French pastry. The goal is to create a delicious tart accessible to home bakers of all skill levels.
What kind of chocolate is best to use for this tart?
We recommend using high-quality dark chocolate (around 70% cacao) for the best flavor and texture. This ensures a rich, decadent filling that isn't overly sweet.
Can I use a pre-made crust for this Easy French Chocolate Tart recipe?
Yes, using a pre-made shortcrust pastry is perfectly acceptable to save time and effort. Just be sure it's a good quality crust for the best results.
How long will the French Chocolate Tart last in the refrigerator?
Properly stored in an airtight container, this tart can last for up to 3 days in the refrigerator. The flavor may even improve slightly after a day or two!
Can I freeze the French Chocolate Tart?
While possible, freezing is not ideal. The texture of the tart filling can change slightly after thawing. If you must freeze it, wrap it very well in plastic wrap and then foil for up to 1 month.
Final Reflection: The Enduring Allure of a Simple French Tart
The seemingly simple act of baking a French chocolate tart transcends mere culinary creation; it's a journey into a rich history of flavor and tradition, readily accessible to anyone today. This recipe, designed for ease and accessibility, proves that crafting a truly delicious and impressive dessert doesn't require years of culinary school or a pantry stocked with obscure ingredients. The ease of the recipe itself allows the focus to remain on the joy of the process and the satisfaction of sharing the final product.
The enduring appeal of the tarte au chocolat lies not only in its decadent taste but also in its ability to connect us to a larger culinary heritage. It's a testament to the power of simple, quality ingredients transformed into something extraordinary. The recipe, while simplified, still honors the essence of classic French pastry-making. The simplest things are often the most beautiful,
a sentiment that perfectly encapsulates the elegance and satisfaction derived from this seemingly uncomplicated dessert. This simple recipe allows us to experience a piece of French culture, regardless of our location or baking experience.
Now, I invite you to consider the possibilities. Don't just bake this tart; experience it. Embrace the meditative process of measuring, mixing, and creating. Share the finished product with loved ones, savoring the moment of connection as much as the deliciousness itself. Let this easy recipe be your gateway to exploring the world of baking, proving that even the most sophisticated desserts can be within your reach. The journey of a thousand tarts begins with a single, delicious bite.
Here's a CTA tailored for the provided article details:
Unlock Your Inner Pâtissier: Master the Art of the French Chocolate Tart!
Thanks for joining us on this delicious journey into the world of French patisserie! We hope you've gained the confidence to tackle this classic dessert. Now it's time to put your newfound skills to the test.
- Bake your own Tarte au Chocolat: Use our recipe as a starting point, but don't be afraid to experiment with different chocolate types or add your own personal touch! Share your creation with us using #BakeWithEaseTart.
- Explore more chocolate recipes: Dive deeper into our recipe collection for other decadent chocolate treats, from brownies to mousse – guaranteed to satisfy your sweet tooth!
- Challenge a friend to a baking duel: See who can create the most elegant and delicious Tarte au Chocolat. Tag your rival (and us!) on social media.
What unique ingredient will you add to elevate your French Chocolate Tart to the next level?