
Elevate Your Desserts: Using French Pastry Techniques

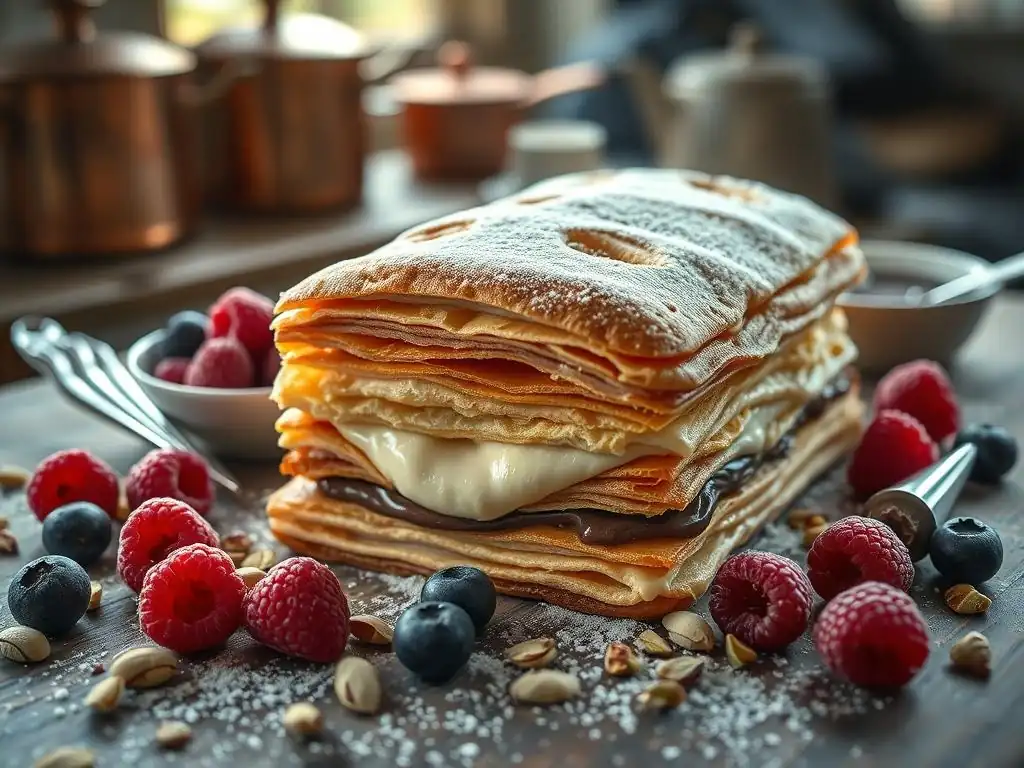
Welcome to BakeWithEase, your passport to the delightful world of baking! Ever dreamt of creating elegant desserts with that undeniable French flair, but felt intimidated by the complexity? This is where your journey begins. Discover how to unlock the secrets of French pastry techniques, making seemingly intricate desserts surprisingly accessible, even for beginners. Curious how you can elevate your everyday baking into something truly extraordinary? Let's explore!
- Elevate Your Desserts: Using French Pastry Techniques for Easy Desserts
- Introduction to Easy French Pastry Techniques for Home Bakers
- Essential French Pastry Techniques for Beginners
- Applying French Pastry Techniques to Simple Dessert Recipes
- Troubleshooting Common French Pastry Problems
- Essential Tools and Ingredients for French Pastry Baking
- Beyond the Basics: Exploring More Advanced French Pastry Techniques
- Conclusion: Enjoying the Art of French Pastry Baking at Home
-
Frequently Asked Questions
- What are some beginner-friendly French pastry techniques for easy desserts?
- How can French pastry techniques help me create impressive yet easy desserts?
- Where can I find easy-to-follow recipes using French pastry techniques?
- What are some common mistakes to avoid when first learning French pastry techniques?
- Are French pastry techniques suitable for everyday baking, or are they reserved for special occasions?
- Final Reflection: The Sweet Art of Simplicity
- Unleash Your Inner Pâtissier: Master French Dessert Techniques!
Elevate Your Desserts: Using French Pastry Techniques for Easy Desserts
Introduction to Easy French Pastry Techniques for Home Bakers
French pastry often conjures images of intricate, complex creations found in Parisian patisseries. While the art can indeed be sophisticated, many fundamental French pastry techniques are surprisingly accessible to the home baker. Mastering these core skills can dramatically elevate the quality and presentation of even the simplest desserts, transforming everyday treats into something truly special.
This article is designed to demystify these techniques, showing you how applying them can make your baking more rewarding and your desserts more delicious. We'll explore foundational elements like creamy fillings, flaky crusts, and airy meringues, providing a pathway for anyone to start incorporating a touch of French elegance into their kitchen.
Embracing French pastry techniques doesn't mean spending hours on a single dessert. It's about understanding the principles behind classic preparations – the science of a perfect custard, the structure of a delicate dough, or the stability of a meringue. By focusing on these building blocks, you can unlock a world of possibilities for creating beautiful and flavorful easy desserts right in your own home.
Whether you dream of baking picture-perfect tarts, delightful éclairs, or light-as-air macarons, the journey begins with mastering these essential techniques. Let's embark on this delicious adventure together and see how French pastry techniques can make your easy desserts truly shine.
Why Learn French Pastry Techniques? (Even for Simple Desserts)
Learning French pastry techniques offers a distinct advantage in the kitchen, even if your goal is simply to make better easy desserts. These techniques are the foundation of countless beloved pastries and provide a deep understanding of how ingredients interact. For instance, mastering the emulsification process in a ganache ensures a silky-smooth texture, far superior to one that is grainy or split.
Similarly, understanding how to properly handle dough for a tart crust guarantees a tender, flaky result rather than a tough or crumbly one. These skills build confidence and improve consistency across all your baking endeavors, not just French-inspired ones.
Furthermore, French pastry techniques emphasize precision and quality ingredients, which inherently lead to better results. Imagine the difference between a simple chocolate pudding and a rich, velvety chocolate pot de crème made with high-quality chocolate and a properly tempered custard base. While both are chocolate desserts, the latter, using foundational French techniques, offers a far more refined and satisfying experience. Applying these methods, even in a simplified form, allows you to achieve professional-level flavors and textures in your home kitchen, making your easy desserts stand out. It's about applying centuries of culinary wisdom to enhance your everyday baking repertoire.
BakeWithEase: Your Guide to Mastering French Pastry at Home
At BakeWithEase, we believe that mastering French pastry techniques should be an enjoyable and achievable goal for everyone, regardless of their current skill level. Our resources are specifically designed to break down complex processes into manageable steps, focusing on clarity and practical application for easy desserts. We provide detailed guides, helpful tips, and simplified recipes that allow you to build your skills gradually, from mastering a basic custard to tackling more ambitious projects like macarons. Our aim is to empower you with the knowledge and confidence needed to explore the world of French baking without feeling intimidated.
Our approach centers on understanding the 'why' behind each step. For example, when making a custard, we explain why tempering eggs is crucial to prevent scrambling. When working with dough, we detail how different mixing methods affect the final texture. This deeper understanding not only helps you follow recipes more effectively but also enables you to troubleshoot common issues and adapt techniques to your own creations. With BakeWithEase, you'll find that incorporating French pastry techniques into your repertoire is not just possible, but surprisingly straightforward and incredibly rewarding, leading to truly spectacular easy desserts.
Essential French Pastry Techniques for Beginners
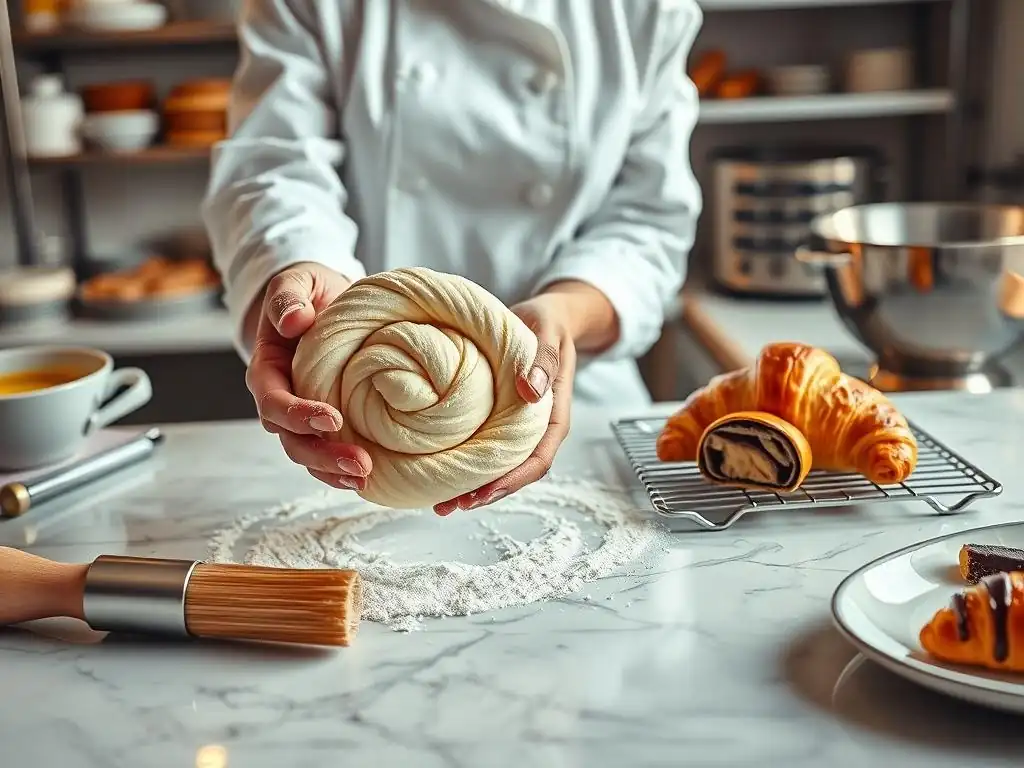
Mastering the Crème Pâtissière: The Foundation of Many French Desserts
Crème Pâtissière, or pastry cream, is a cornerstone of French baking. This rich, thick custard is the base for fillings in éclairs, tarts, mille-feuille, and countless other pastries. While it might seem daunting, mastering it is a key step towards making many delicious French pastry techniques easy desserts.
The basic components are simple: milk, sugar, egg yolks, and a starch (usually cornstarch or flour). The magic lies in the careful cooking process, which transforms these ingredients into a smooth, stable cream that holds its shape. Getting the texture right is crucial – too thin and it won't fill properly; too thick and it can be gummy.
The process typically involves heating the milk, whisking egg yolks with sugar and starch, tempering the hot milk into the egg mixture, and then cooking the mixture gently until it thickens considerably. Patience is key during the thickening stage; it needs to reach a rolling boil for about 30 seconds to ensure the starch is fully cooked and the cream won't thin out later.
Cooling it properly, often by spreading it onto a baking sheet or placing plastic wrap directly on the surface to prevent a skin from forming, is also vital for a smooth final product. Once you can make a perfect batch of crème pâtissière, a whole world of French pastry techniques easy desserts opens up.
Crème Pâtissière Recipe and Tips for Success
Here is a basic recipe framework for Crème Pâtissière, perfect for getting started with French pastry techniques easy desserts:
Ingredients:
- 500 ml (approx. 2 cups) whole milk
- 120g (approx. 1/2 cup + 2 tbsp) granulated sugar
- 4 large egg yolks
- 40g (approx. 1/4 cup) cornstarch (or a mix of cornstarch and flour)
- 1 tsp vanilla extract or 1 vanilla bean, scraped
Instructions:
- Heat milk in a saucepan until just simmering.
- In a bowl, whisk egg yolks and sugar until pale and slightly thickened. Whisk in the cornstarch until no lumps remain.
- Slowly pour about half of the hot milk into the egg mixture while whisking constantly (this is tempering).
- Pour the tempered mixture back into the saucepan with the remaining milk.
- Cook over medium heat, whisking constantly, until the mixture thickens and comes to a boil. Continue whisking and boiling for 30-60 seconds.
- Remove from heat, stir in vanilla.
- Strain through a fine-mesh sieve into a clean bowl. Cover the surface directly with plastic wrap and chill completely in the refrigerator (at least 2-3 hours).
Tips for Success:
- Use whole milk for richness.
- Whisk constantly while cooking to prevent scorching on the bottom.
- Ensure it boils for the required time to activate the starch fully.
- Chill thoroughly before using; it will thicken further as it cools.
- Whisk well before using after chilling to restore a smooth texture.
Tip: If your crème pâtissière seems too thick after chilling, you can whisk in a tablespoon or two of cold milk or cream to loosen it to the desired consistency.
Perfecting Pâte Sucrée: The Secret to Delicious Tart Crusts
Pâte Sucrée, or sweet shortcrust pastry, is the ideal base for fruit tarts, chocolate tarts, and many other French desserts. Unlike flaky puff pastry or pâte brisée, pâte sucrée is rich, tender, and slightly crumbly, with a delightful sweetness that complements fruit and cream fillings beautifully. Mastering this dough is another fundamental French pastry technique that makes easy desserts like fruit tarts achievable. It typically contains flour, butter, sugar, and egg, and is often made using the creaming method, where butter and sugar are creamed together before adding the egg and flour.
The key to a perfect pâte sucrée is to avoid overworking the dough, which can develop the gluten and result in a tough crust. The creaming method helps minimize gluten development by coating the flour particles in fat. Chilling the dough after mixing is essential; it firms up the butter, making the dough easier to roll and handle, and prevents excessive spreading during baking. Blind baking is often required for tart shells to ensure the bottom is fully cooked and crisp before adding a filling that doesn't require further baking, like crème pâtissière or fresh fruit.
Pâte Sucrée Recipe and Tips for a Flaky Crust
While pâte sucrée is primarily known for its tenderness, achieving a pleasant structure is also important. Here is a basic recipe framework often used for French pastry techniques easy desserts like tarts:
Ingredients:
- 250g (approx. 2 cups) all-purpose flour
- 125g (approx. 1/2 cup + 1 tbsp) unsalted butter, cold and cut into small cubes
- 100g (approx. 1/2 cup) confectioners' sugar
- 1 large egg
- Pinch of salt
- Optional: 1 tsp vanilla extract or almond extract
Instructions:
- In a large bowl, whisk together flour, confectioners' sugar, and salt.
- Cut in the cold butter using a pastry blender or your fingertips until the mixture resembles coarse crumbs with some pea-sized pieces of butter remaining. Alternatively, you can use a food processor and pulse until crumbly.
- In a small bowl, whisk the egg (and extract, if using). Add the egg to the dry ingredients.
- Mix gently with a fork or your hands just until the dough comes together. Do not overmix.
- Turn the dough out onto a lightly floured surface and gently bring it together into a disk.
- Wrap the disk tightly in plastic wrap and chill for at least 1 hour (or up to 2 days).
- Roll out the chilled dough on a lightly floured surface to fit your tart pan.
- Carefully transfer the dough to the pan, pressing it gently into the sides and bottom. Trim excess dough.
- Prick the bottom of the crust with a fork. Chill the lined tart shell for another 30 minutes.
- Blind bake: Line the tart shell with parchment paper and fill with pie weights or dried beans. Bake in a preheated oven at 180°C (350°F) for 15-20 minutes, or until the edges are lightly golden. Remove weights and parchment, and bake for another 5-10 minutes until the bottom is dry and lightly colored. Cool completely before filling.
Tips for a Great Crust:
- Keep ingredients, especially butter, cold. This creates steam pockets during baking, contributing to tenderness.
- Do not overwork the dough; mix only until it just comes together.
- Chill the dough sufficiently before rolling and lining the pan.
- Chill the lined pan again before blind baking to prevent shrinkage.
- Blind baking ensures a crisp bottom crust, crucial for moist fillings.
Understanding Meringue: From Basic to Breathtaking
Meringue is a delicate, airy confection made by whipping egg whites with sugar. It's a versatile component in French pastry, used for everything from light cookies and tart toppings to the base of complex desserts like vacherins and macarons. Mastering meringue opens up a range of French pastry techniques easy desserts. There are three main types of meringue, differentiated by how the sugar is incorporated and the resulting stability: French, Swiss, and Italian. Each has its unique characteristics and applications.
The key to any successful meringue lies in the proper whipping of egg whites. They must be whipped in a clean, grease-free bowl (copper or glass bowls are ideal) until they reach the desired peak consistency. The sugar is then added gradually, helping to stabilize the whipped egg whites and create a glossy, stable foam. Understanding the nuances of adding sugar and applying heat is fundamental to achieving the desired texture and stability for different meringue applications, from soft peaks for a topping to stiff peaks for piping.
French Meringue, Italian Meringue, and Swiss Meringue Explained
Let's break down the three main types of meringue, crucial for various French pastry techniques easy desserts:
- French Meringue: This is the simplest type, made by whipping egg whites until soft peaks form, then gradually adding granulated or superfine sugar while continuing to whip until stiff, glossy peaks are achieved.
- Characteristics: Least stable of the three, prone to weeping (sugar syrup separating). Lightest and most airy texture.
- Uses: Best for things that will be baked for a long time at a low temperature, like meringue cookies (pavlova base), or folded into mousses to lighten them. Not ideal for uncooked applications or toppings that need to hold shape firmly. A typical ratio might be 50g sugar per large egg white (approx. 30g).
- Swiss Meringue: Made by gently heating egg whites and sugar together over a double boiler (bain-marie) while whisking, until the sugar dissolves and the mixture reaches a temperature of around 60-65°C (140-150°F). The mixture is then removed from the heat and whipped until cool, thick, and glossy.
- Characteristics: More stable and denser than French meringue. Smooth and silky texture. Safer as the egg whites are heated.
- Uses: Excellent for buttercream (Swiss meringue buttercream is very popular), tart toppings (like lemon meringue pie), and piping decorations that need to hold shape. A common ratio is 100g sugar per large egg white.
- Italian Meringue: Considered the most stable meringue. Made by whipping egg whites until soft peaks form. Simultaneously, a sugar syrup is heated to the soft ball stage (118-120°C / 244-248°F). The hot sugar syrup is then slowly poured in a thin stream into the whipping egg whites while the mixer runs on high speed. The mixture is whipped until it is completely cool, stiff, and very glossy.
- Characteristics: Most stable and dense. Very smooth and glossy. The heat from the syrup cooks the egg whites, making it safe to eat raw. Holds piped shapes beautifully.
- Uses: Ideal for decorating cakes, making stable mousses, folding into batters (like génoise), and is the traditional base for macarons. A typical ratio might be 120-150g sugar per large egg white, plus a small amount of water for the syrup.
// Basic structure for Italian Meringue
function makeItalianMeringue(eggWhites, sugar, water) {
  // Whip egg whites to soft peaks
  // Boil sugar and water to 118-120°C
  // Slowly pour hot syrup into whipping egg whites
  // Continue whipping until cool and stiff
}
Applying French Pastry Techniques to Simple Dessert Recipes
Easy Éclairs: A Classic French Pastry Made Simple
Éclairs are a quintessential French pastry, characterized by their light choux pastry shell, rich crème pâtissière filling, and glossy chocolate glaze. While they might look complex, applying basic French pastry techniques makes easy desserts like these surprisingly accessible. The key components are choux pastry (pâte à choux), which is relatively simple to make, and the crème pâtissière we discussed earlier. Once you've mastered these two elements, assembling and glazing the éclairs is a straightforward process.
Making choux pastry involves cooking flour, water (or milk), and butter together to form a paste, then beating in eggs one at a time. This paste is then piped into elongated shapes and baked. The high moisture content in the dough turns to steam during baking, creating hollow cavities perfect for filling. Once baked and cooled, the éclairs are filled with luscious crème pâtissière using a piping bag and then dipped or drizzled with a simple chocolate ganache or glaze. It's a perfect example of how combining fundamental French pastry techniques results in an elegant and delicious treat.
Éclair Recipe Using Crème Pâtissière and Chocolate Glaze
Here's a simplified approach to making éclairs, demonstrating how French pastry techniques easy desserts come together:
Ingredients:
- For the Choux Pastry:
- 125 ml (approx. 1/2 cup) water
- 125 ml (approx. 1/2 cup) milk
- 100g (approx. 7 tbsp) unsalted butter, cut into cubes
- 1 tsp sugar
- Pinch of salt
- 150g (approx. 1 1/4 cups) all-purpose flour
- 3-4 large eggs, beaten
- For the Crème Pâtissière: (Use recipe from above)
- For the Chocolate Glaze:
- 100g (approx. 3.5 oz) dark chocolate, finely chopped
- 100 ml (approx. 1/2 cup) heavy cream
Instructions:
- Make Choux Pastry: In a saucepan, combine water, milk, butter, sugar, and salt. Bring to a rolling boil. Remove from heat, add flour all at once, and stir vigorously with a wooden spoon until a smooth ball of dough forms. Return to low heat and cook, stirring constantly, for 1-2 minutes to dry out the dough slightly.
- Transfer dough to a mixing bowl. Let cool for a few minutes. Beat in the eggs one at a time, ensuring each egg is fully incorporated before adding the next. You may not need all of the egg; the dough should be smooth and glossy, falling from the spoon in a thick ribbon (the "bird's beak" consistency).
- Preheat oven to 200°C (400°F). Line baking sheets with parchment paper.
- Fit a piping bag with a large plain or star tip (about 1cm/1/2 inch). Fill with choux pastry. Pipe 10-12cm (4-5 inch) long éclairs onto the prepared sheets, leaving space between them.
- Bake for 15 minutes, then reduce oven temperature to 180°C (350°F) and bake for another 15-20 minutes, or until puffed, golden brown, and firm. Do not open the oven door during the first 20 minutes of baking.
- Remove from oven and immediately pierce the side of each éclair with a small knife or skewer to release steam. Let cool completely on a wire rack.
- Make Glaze: Place chopped chocolate in a bowl. Heat cream until just simmering, then pour over chocolate. Let sit for a minute, then stir gently until smooth and glossy.
- Assemble: Fill a piping bag fitted with a long, thin tip with chilled crème pâtissière. Insert the tip into the bottom or side of each éclair shell and pipe in the filling until the éclair feels heavy. Dip the top of each filled éclair into the chocolate glaze.
Tarte Tatin: Upside-Down Apple Tart Perfection
Tarte Tatin is a classic French "accident" that became a beloved dessert. It's an upside-down tart where apples (or other fruit) are caramelized in butter and sugar in a pan, then covered with a layer of pastry (traditionally puff pastry, but pâte sucrée works wonderfully for a simpler version) and baked. When inverted, the caramelized fruit forms the top of the tart. This dessert beautifully showcases the French pastry technique of caramelization combined with a simple pastry crust, making it a perfect example of easy desserts with elegant results.
Using pâte sucrée, as previously discussed, provides a tender, cookie-like base that contrasts nicely with the soft, sticky apples. The key to a successful Tarte Tatin lies in achieving a rich, deep caramel without burning it and ensuring the apples are tender but still hold their shape. The inversion process is the dramatic finale, revealing the beautiful mosaic of caramelized fruit. It's a rustic yet sophisticated dessert that proves French pastry techniques can be applied to seemingly simple concepts with stunning results.
Tarte Tatin Recipe Using Pâte Sucrée and Caramelized Apples
Here’s how to make a Tarte Tatin using a simple pâte sucrée, illustrating French pastry techniques easy desserts:
Ingredients:
- For the Pâte Sucrée: (Use recipe from above, chilled)
- For the Filling:
- 6-8 medium apples (such as Gala, Fuji, or Golden Delicious), peeled, cored, and quartered or cut into thick wedges
- 100g (approx. 7 tbsp) unsalted butter
- 150g (approx. 3/4 cup) granulated sugar
- Optional: 1 tsp vanilla extract, pinch of cinnamon
Instructions:
- Prepare the pâte sucrée dough and chill as per the earlier recipe.
- In an oven-safe skillet (about 24-26cm / 9-10 inches in diameter) with a heatproof handle, melt the butter over medium heat.
- Add the sugar and stir occasionally as it melts and turns into a caramel. This can take 5-10 minutes. Be patient and watch carefully to prevent burning. The caramel should be a rich amber color.
- Remove the skillet from the heat. If using, stir in vanilla and cinnamon.
- Arrange the apple pieces tightly in a single layer over the caramel in the skillet. Try to pack them snugly as they will shrink slightly.
- Preheat oven to 180°C (350°F).
- Roll out the chilled pâte sucrée dough into a circle slightly larger than your skillet.
- Carefully place the dough circle over the apples, tucking the edges down around the fruit and inside the rim of the skillet. Prick the dough in a few places with a fork.
- Bake for 30-40 minutes, or until the crust is golden brown and the caramel is bubbling around the edges.
- Let the tart cool in the skillet for 5-10 minutes before inverting.
- Place a serving plate over the skillet. Using oven mitts, carefully and confidently flip the skillet and plate together to invert the tart. If any apples stick, gently rearrange them on top.
- Serve warm, perhaps with a dollop of crème fraîche or vanilla ice cream.
*   Task: Make Pâte Sucrée
    *   [x] Mix dry ingredients
    *   [x] Cut in cold butter
    *   [x] Add egg
    *   [x] Form disk and chill
*   Task: Make Tarte Tatin Filling
    *   [x] Melt butter and sugar
    *   [x] Make caramel
    *   [x] Arrange apples
*   Task: Assemble and Bake
    *   [x] Roll out and place dough over apples
    *   [x] Bake until golden
    *   [x] Cool slightly and invert
Simple Macarons: Mastering the Basics
Macarons are perhaps the most iconic, and often perceived as the most challenging, French pastry. These delicate almond meringue cookies, sandwiched with a creamy filling, require precision, but they are achievable at home, making them a rewarding project for those learning French pastry techniques easy desserts. While there are three main methods for the meringue (French, Swiss, Italian), the French method is often introduced first as it doesn't require cooking sugar syrup, though it is arguably less stable and more prone to failure for beginners.
The basic components are ground almonds (almond flour), confectioners' sugar, egg whites, and granulated sugar for the meringue. The process involves making a meringue, sifting and folding the dry ingredients (almond flour and confectioners' sugar) into the meringue (this mixing stage is called "macaronage"), piping the batter, allowing the piped shells to rest to form a skin, and then baking them at a precise temperature. The goal is to achieve smooth shells with ruffled "feet" at the base. The filling, often ganache, buttercream, or fruit curd, is then sandwiched between two cooled shells.
Macaron Recipe with French Meringue Method
Here is a framework for French method macarons, a delightful challenge among French pastry techniques easy desserts:
Ingredients:
- 100g (approx. 1 cup) almond flour, finely ground and sifted
- 100g (approx. 1 cup) confectioners' sugar, sifted
- 80g (approx. 1/3 cup) aged egg whites (from about 2-3 large eggs), at room temperature
- 100g (approx. 1/2 cup) granulated sugar
- Optional: Gel food coloring
Instructions:
- Process almond flour and confectioners' sugar together briefly in a food processor (optional, helps with fineness), then sift together into a bowl. Discard any large pieces that don't pass through the sieve. This is your TPT (tant pour tant - equal parts) mixture.
- In a clean, grease-free bowl, whisk egg whites on medium speed until foamy.
- Gradually add the granulated sugar, a tablespoon at a time, while continuing to whisk on medium-high speed.
- Increase speed to high and whip until stiff, glossy peaks form. If using, add food coloring during the last minute of whipping. The meringue should be very stable and hold its shape when the whisk is lifted.
- Add about one-third of the TPT mixture to the meringue. Fold gently with a spatula until just combined.
- Add the remaining TPT mixture in two additions, folding carefully. The "macaronage" stage is crucial: continue to fold and scrape the sides of the bowl until the batter flows like lava or a thick ribbon from the spatula. When you lift the spatula, the batter should fall back into the bowl and slowly disappear within 10-15 seconds. Do not overmix.
- Fit a piping bag with a round tip (about 1cm / 1/2 inch). Fill the bag with batter.
- Pipe small, round circles (about 3-4cm / 1.5 inches in diameter) onto baking sheets lined with parchment paper or a silicone mat. Leave space between them.
- Tap the baking sheet firmly on the counter 2-3 times to release air bubbles. Use a toothpick to pop any visible bubbles on the surface.
- Let the piped macarons rest at room temperature for 30-60 minutes (or longer, depending on humidity) until a skin forms. You should be able to gently touch the surface without it sticking to your finger.
- Preheat oven to 150°C (300°F).
- Bake for 12-15 minutes, or until the shells are firm and have developed "feet" at the base.
- Let cool completely on the baking sheet before carefully peeling them off.
- Once cooled, match shells of similar size. Pipe or spoon your chosen filling onto one shell and sandwich with another.
- Store macarons in an airtight container in the refrigerator for at least 24 hours before serving; this allows the flavors to meld and the shells to soften slightly.
Caution: Macaron success is highly dependent on oven calibration, humidity, and technique. Don't be discouraged by initial failures! Practice is key.
Troubleshooting Common French Pastry Problems
Even with careful attention to French pastry techniques easy desserts, challenges can arise. Knowing how to identify and fix common issues is a vital part of the learning process. Let's look at some frequent problems and how to address them.
Avoiding Common Mistakes When Making Crème Pâtissière
Crème Pâtissière is generally forgiving, but a few common mistakes can ruin its texture or flavor. One frequent issue is a lumpy or grainy texture. This usually occurs if the starch isn't fully incorporated before heating, if the mixture isn't whisked constantly while cooking, or if it isn't cooked long enough to fully activate the starch.
To avoid this, ensure your egg/sugar/starch mixture is smooth before adding hot milk, whisk continuously over medium heat, and let it boil gently for the required time (around 30-60 seconds). If you end up with lumps, straining the finished cream through a fine-mesh sieve while it's still hot can often rescue it.
Another problem is crème pâtissière that is too thin. This is almost always due to not cooking it long enough or not reaching a full boil. The starch needs heat and time to thicken the liquid properly. If your cream is too thin after chilling, you can gently reheat it, whisking constantly, and bring it back to a boil for a minute or two to thicken it further.
Be careful not to scorch the bottom. Conversely, if it's too thick, whisking in a little cold milk or cream after chilling will loosen it to the desired consistency. Finally, preventing a skin from forming while cooling is crucial for a smooth texture; pressing plastic wrap directly onto the surface is the most effective method.
Preventing a Soggy Bottom: Tips for Perfect Pâte Sucrée
A soggy bottom crust is a common frustration when making tarts, particularly with moist fillings. This undermines the crisp texture that makes pâte sucrée so appealing in French pastry techniques easy desserts like fruit tarts. The primary cause is moisture from the filling or the dough itself seeping into the crust before it has fully set during baking. Proper blind baking is the most effective way to prevent this.
Ensure you bake the crust with pie weights or dried beans for the initial phase (15-20 minutes at 180°C / 350°F) until the edges are set and lightly colored. Then, remove the weights and parchment and continue baking for another 5-10 minutes until the bottom surface looks dry and is lightly golden. This two-stage blind bake cooks the bottom thoroughly before any filling is added.
Additionally, chilling the lined tart shell before blind baking helps the butter stay cold, promoting a tender structure, and reduces shrinkage. For very wet fillings, brushing the blind-baked crust with a thin layer of egg wash or melted chocolate and letting it set before adding the filling can create a moisture barrier.
Achieving Perfect Meringue Peaks: Troubleshooting Guide
Trouble with meringue can range from it refusing to whip up to becoming watery or collapsing. When making meringue using French pastry techniques easy desserts, ensure your equipment is scrupulously clean and free of any grease, as fat prevents egg whites from whipping properly. Use room temperature egg whites, as they whip to a greater volume than cold ones. Start whipping on medium speed until foamy before gradually adding sugar; adding sugar too quickly can deflate the whites.
If your meringue is weeping (sugar syrup separating), it's often because the sugar wasn't fully dissolved or the meringue was underbaked. For French meringue, superfine sugar dissolves more easily. For Swiss and Italian meringues, ensuring the sugar syrup reaches the correct temperature is vital for stability. Overwhipping meringue can also cause it to become granular or collapse.
Whip only until the desired peaks are reached – soft, firm, or stiff, depending on the recipe. If your meringue collapses after piping or baking, it might be due to oven temperature fluctuations or opening the oven door too early. Ensure your oven is accurately calibrated and resist the urge to check on baking meringues too soon.
Essential Tools and Ingredients for French Pastry Baking
You don't need a professional kitchen to practice French pastry techniques easy desserts. Many essential tools are likely already in your kitchen, while a few specific items can greatly improve your results. Similarly, while French pastry emphasizes quality, the core ingredients are pantry staples.
Must-Have Tools for French Pastry Success
Having the right tools makes practicing French pastry techniques easy desserts much more manageable and yields better results. Here are some key items:
- Digital Scale: Precision is paramount in French baking. Measuring ingredients by weight (grams) is significantly more accurate than using volume (cups) and is highly recommended for consistent results, especially for finicky recipes like macarons.
- Stand Mixer or Hand Mixer: Essential for whipping egg whites for meringue and often used for creaming butter and sugar for doughs. A stand mixer provides consistent speed and allows you to add ingredients gradually.
- Whisks: Both balloon whisks (for whipping air into liquids like egg whites and cream) and flat whisks (for stirring custards and sauces smoothly) are useful.
- Rubber Spatulas: For folding, scraping bowls, and handling batters and doughs gently. Heatproof spatulas are necessary for cooking custards and choux pastry.
- Piping Bags and Tips: Crucial for piping choux pastry, macarons, meringue decorations, and filling pastries neatly with crème pâtissière. A set with various sizes and shapes (round, star) is helpful.
- Fine-Mesh Sieve: For sifting dry ingredients like flour, confectioners' sugar, and almond flour to remove lumps and ensure a smooth texture.
- Saucepans: Heavy-bottomed saucepans are best for cooking custards, choux pastry, and sugar syrups, as they distribute heat evenly and reduce the risk of scorching.
- Rolling Pin: For rolling out doughs like pâte sucrée.
- Tart Pans: Pans with removable bottoms are ideal for making tarts, allowing for easy removal without damaging the crust.
- Parchment Paper or Silicone Baking Mats: Essential for lining baking sheets, preventing sticking, and ensuring even baking, particularly for delicate items like macarons and choux.
*   Essential Tools Checklist:
    *   [ ] Digital Scale
    *   [ ] Stand Mixer or Hand Mixer
    *   [ ] Whisks (Balloon & Flat)
    *   [ ] Rubber Spatulas (including heatproof)
    *   [ ] Piping Bags & Tips
    *   [ ] Fine-Mesh Sieve
    *   [ ] Heavy-Bottomed Saucepan
    *   [ ] Rolling Pin
    *   [ ] Tart Pan with Removable Bottom
    *   [ ] Parchment Paper or Silicone Mats
Key Ingredients for Authentic French Pastry Flavors
While the techniques are key, the quality of your ingredients also significantly impacts the final flavor and texture of your French pastry techniques easy desserts. Using fresh, high-quality ingredients will elevate your results.
- Butter: Unsalted butter is standard in baking as it allows you to control the salt level. French-style butter, with a higher fat content (around 82% compared to 80% in many other regions), is preferred by many for its flavor and texture benefits, particularly in pastries where butter is prominent, like pâte sucrée.
- Eggs: Use large eggs, preferably free-range, as their size and freshness affect the outcome, especially in meringues and custards. Ensure egg whites are aged (separated a day or two in advance and stored covered in the fridge) and at room temperature for best whipping results in meringues.
- Flour: All-purpose flour is suitable for most recipes like choux pastry and pâte sucrée. Ensure it's fresh.
- Sugar: Granulated sugar is used for meringues and caramel. Confectioners' sugar is essential for pâte sucrée and macarons due to its fine texture.
- Milk and Cream: Use whole milk for rich custards. Heavy cream (with a high fat content, typically 35% or more) is needed for ganaches and whipping cream.
- Vanilla: Pure vanilla extract or, even better, vanilla beans provide authentic flavor. Avoid imitation vanilla.
- Chocolate: Use good quality chocolate (couverture chocolate is ideal) for glazes and ganaches. The percentage of cocoa solids matters depending on the recipe. For a basic glaze, a good quality dark chocolate (50-70% cocoa) works well.
- Almond Flour: Crucial for macarons. Ensure it's finely ground and made from blanched almonds.
Using fresh, high-quality versions of these basic ingredients, combined with honed French pastry techniques, will make your easy desserts taste truly authentic and delightful.
Beyond the Basics: Exploring More Advanced French Pastry Techniques
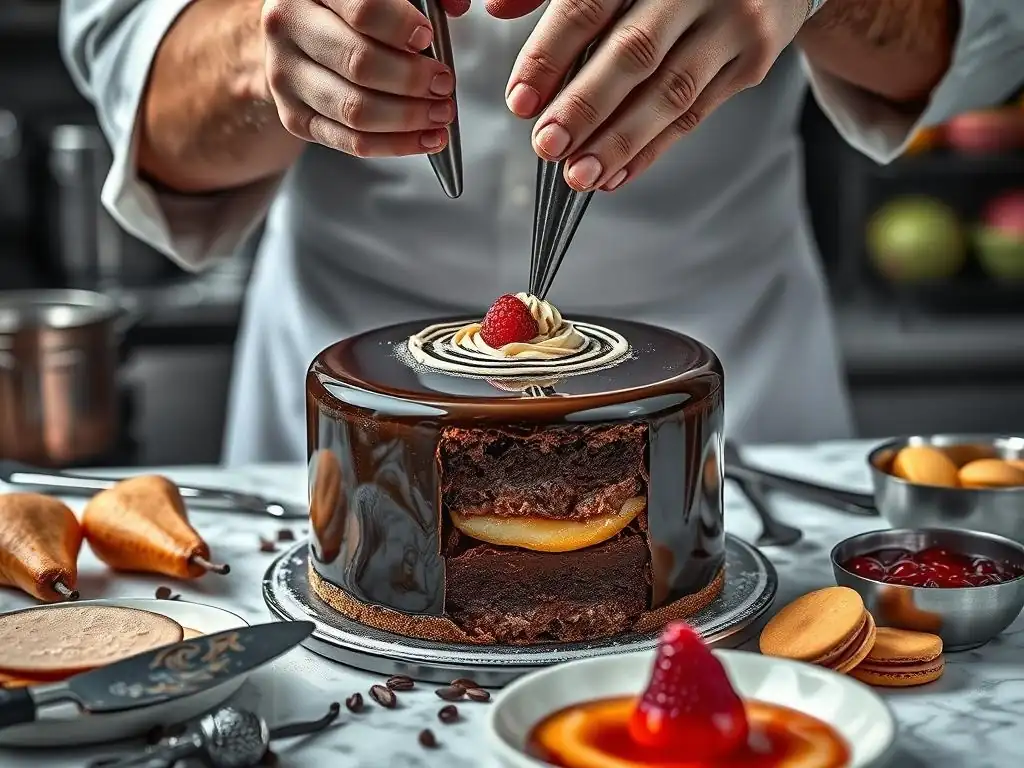
Once you've built confidence with foundational French pastry techniques easy desserts like custards, doughs, and meringues, you might feel ready to explore more complex preparations. French pastry offers a wealth of advanced techniques that build upon the basics, leading to stunning and intricate creations.
Introduction to Choux Pastry: Advanced Techniques
While we used a basic choux pastry for éclairs, there's more to explore. Mastering choux involves understanding the perfect consistency of the cooked paste before adding eggs, ensuring proper hydration, and achieving the right "bird's beak" stage after adding eggs. Advanced techniques include incorporating flavorings into the dough itself, applying craquelin (a sugary crust) on top for added crunch and uniform puffing (used in Chouquettes and Paris-Brest), or shaping the dough into rings (for Paris-Brest) or puffs (for Profiteroles).
Working with choux pastry also involves learning precise baking temperatures and times to ensure the shells are fully dried out inside, preventing them from collapsing after baking. Techniques for filling choux pastry can also become more refined, involving multiple fillings or layering different textures inside the shell. Mastering choux pastry is a rewarding step for those looking to expand their French pastry techniques beyond easy desserts.
Puff pastry (Pâte Feuilletée) is a hallmark of French baking, known for its incredible layers and flaky texture. It's made by repeatedly folding a butter block within a dough layer, creating hundreds of alternating layers of butter and dough. When baked, the water in the butter turns to steam, separating the layers and causing the pastry to puff dramatically. Making puff pastry from scratch is a labor-intensive process involving multiple "turns" (folding and rolling cycles) and chilling periods.
Advanced puff pastry techniques include mastering the laminating process (incorporating the butter block correctly), executing precise turns (like the single or double turn), and handling the dough to maintain its layers without tearing or warming the butter too much. Puff pastry is used in classic French pastries like croissants, pain au chocolat, mille-feuille (Napoleon), and vol-au-vents. While store-bought puff pastry makes many recipes easier, mastering the homemade version is a significant achievement in French pastry techniques.
Conclusion: Enjoying the Art of French Pastry Baking at Home
Embarking on the journey of learning French pastry techniques is a delightful way to elevate your baking skills and bring a touch of Parisian elegance into your home kitchen. We've explored foundational elements like making perfect crème pâtissière, crafting tender pâte sucrée, and understanding the nuances of different meringues. By applying these skills to recipes like easy éclairs, Tarte Tatin, and simple macarons, you can create impressive and delicious desserts that are far more accessible than you might have imagined.
Remember that baking, especially French pastry, is both an art and a science. Precision matters, but so does practice and patience. Don't be discouraged by initial challenges; view them as learning opportunities. Each attempt refines your understanding of the ingredients and techniques. With the guidance from BakeWithEase and a willingness to learn, you can confidently explore these French pastry techniques and transform your easy desserts into extraordinary culinary creations.
Embrace the Journey of Learning French Pastry Techniques
Learning French pastry techniques is a continuous journey of discovery. Start with the basics we've covered – mastering a smooth custard, a tender tart dough, and a stable meringue. As you gain confidence, gradually introduce more complex steps or try variations on classic recipes. Read about the science behind the techniques; understanding why you perform each step helps you troubleshoot and adapt. Experiment with different flavor combinations, fillings, and decorations. The process itself can be incredibly rewarding, offering a sense of accomplishment with each successful bake.
The beauty of French pastry techniques is how they build upon one another. A perfect crème pâtissière can fill choux pastry or a tart shell. A stable meringue can become macarons or a cake decoration. As you master each fundamental, more advanced recipes become within reach. Embrace the precision, enjoy the process, and savor the delicious results. This journey will not only improve your baking skills but also deepen your appreciation for the artistry of French desserts.
We love seeing what our community creates! As you practice your French pastry techniques and make these easy desserts (or more advanced ones! ), we encourage you to share your successes and learning experiences. Connect with us and other home bakers. What was your favorite technique to learn? Which recipe surprised you with its ease or challenge? Your journey can inspire others who are just starting out.
BakeWithEase is here to support you every step of the way, whether you're perfecting your first batch of crème pâtissière or tackling a complex layered cake. Keep baking, keep learning, and keep sharing the joy of delicious homemade French pastry techniques easy desserts! Happy baking!
Frequently Asked Questions
What are some beginner-friendly French pastry techniques for easy desserts?
Some easy French techniques include making a simple crème anglaise or mastering a basic pâte à choux for éclairs. These are great building blocks.
How can French pastry techniques help me create impressive yet easy desserts?
French techniques emphasize precision and layering, leading to visually stunning and delicious results. Even simple ingredients can be elevated with these methods.
Where can I find easy-to-follow recipes using French pastry techniques?
BakeWithEase.com offers step-by-step guides and recipes specifically designed for bakers of all levels, focusing on French techniques.
What are some common mistakes to avoid when first learning French pastry techniques?
Avoid overmixing doughs, ensure accurate measurements, and pay attention to temperature control for optimal results. Patience is key!
Are French pastry techniques suitable for everyday baking, or are they reserved for special occasions?
While some techniques are complex, many are adaptable for everyday desserts, adding a touch of elegance to simple treats. Think French butter cookies or quick tarts.
Final Reflection: The Sweet Art of Simplicity
Mastering French pastry techniques doesn't require a professional kitchen; it simply requires a willingness to learn and a touch of patience. The elegance and sophistication often associated with French desserts are surprisingly accessible, as this article has demonstrated. From the foundational techniques of making perfect pâte à choux to the delicate art of creating a flawless crème pâtissière, the journey is rewarding and the results are undeniably delicious.
The influence of French pastry on the global culinary landscape is undeniable. Its enduring appeal lies not just in its exquisite taste, but in the stories and traditions woven into each recipe. The simplest things are often the most beautiful,
a sentiment perfectly encapsulating the beauty of mastering fundamental techniques to create extraordinary desserts. This pursuit of simplicity, while seemingly straightforward, allows for endless creativity and personal expression, making it a continually evolving and inspiring art form.
Now, it's your turn. Don't be intimidated by the perceived complexity. Choose one technique from this article – perhaps the perfect macaron shell or a flawlessly smooth ganache – and try it. Embrace the process, celebrate the small victories, and savor the sweet rewards. You might surprise yourself with the delicious results and the newfound confidence in your own culinary abilities. The world of French pastry awaits your exploration.
Unleash Your Inner Pâtissier: Master French Dessert Techniques!
Thanks for diving into the world of French pastry techniques! We hope you've gained valuable insights and inspiration to elevate your baking game. Ready to put your new knowledge into action?
- Bake your masterpiece: Choose your favorite recipe from the article (or find a new challenge!) and try out a new technique. This is your chance to experiment and see the difference firsthand!
- Share your creation: Post a picture of your delicious creation on social media and tag #BakeWithEase – let’s inspire other bakers!
- Join the conversation: What French pastry technique are you most excited to try next, and why? Share your thoughts in the comments below!
What delicious French treat will you be baking first?