
The Science Behind the Snap: Mastering Chocolate Tempering.

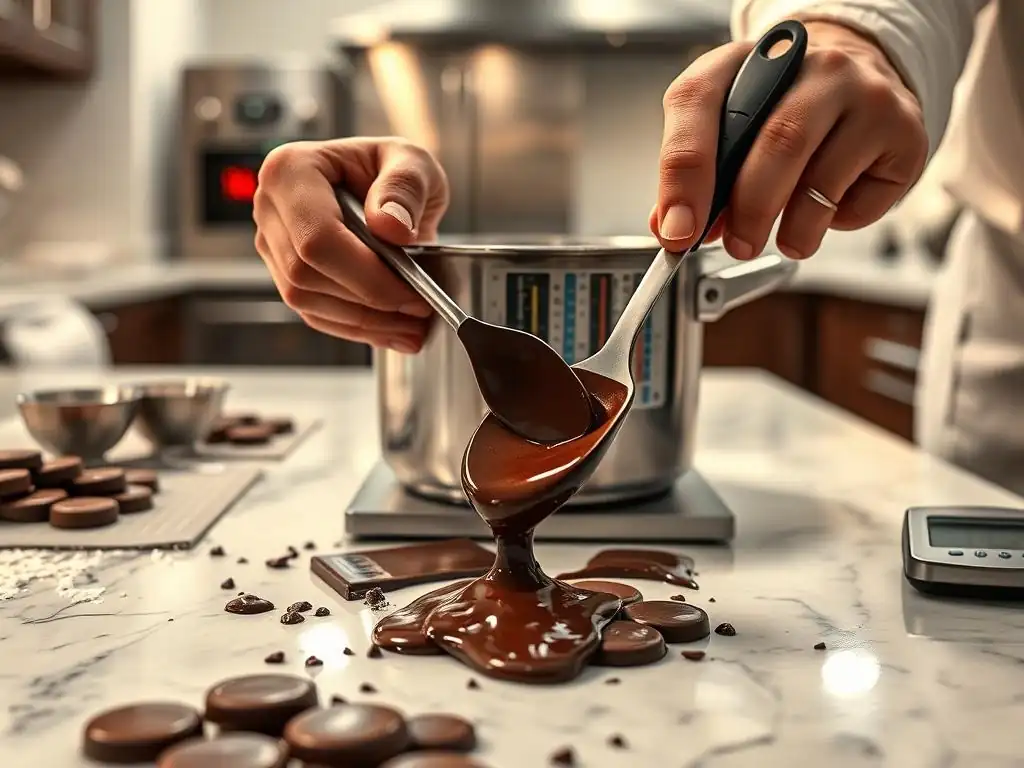
Welcome to BakeWithEase, your guide to unlocking baking brilliance! Ever wondered how to achieve that perfect, glossy snap in your chocolate creations? Dive into our latest article, The Science Behind the Snap: Mastering Chocolate Tempering, and discover the secrets of this essential technique. Whether you're a novice or a seasoned baker, this chocolate tempering guide for beginners will equip you with the knowledge to elevate your desserts. Ready to unlock the secrets to perfectly tempered chocolate? Let's get started!
- Introduction to Chocolate Tempering: A Beginner's Guide
- The Science of Chocolate: Understanding Cocoa Butter Polymorphism
- Chocolate Tempering Methods: A Comprehensive Comparison
- Step-by-Step Guide to Tempering Chocolate using the Seed Method
- Troubleshooting Common Chocolate Tempering Problems
- Tempering Chocolate for Different Applications
- Tips and Tricks for Perfect Chocolate Tempering Every Time
- Beyond the Basics: Advanced Chocolate Tempering Techniques
- Conclusion: Enjoy the Rewards of Perfectly Tempered Chocolate
-
Frequently Asked Questions
- How crucial is temperature control when tempering chocolate?
- What's the best way for beginners to temper chocolate?
- Why does chocolate sometimes turn white after tempering?
- What are the different types of chocolate that can be tempered?
- Can I re-temper chocolate if it doesn't set properly the first time?
- Final Reflection: The Enduring Allure of the Perfect Snap
- Unlock Your Chocolate Mastery: Perfect Tempering, Every Time!
Introduction to Chocolate Tempering: A Beginner's Guide
What is Chocolate Tempering and Why is it Important?
Chocolate tempering is a crucial process in baking and confectionery that involves carefully heating and cooling chocolate to stabilize its cocoa butter crystals. This controlled temperature manipulation ensures that the chocolate hardens correctly, resulting in a smooth, glossy finish and that characteristic satisfying snap when broken. For anyone starting out, understanding chocolate tempering is a fundamental step towards creating professional-looking treats. It's not just about melting chocolate; it's about guiding its structure.
Without proper tempering, melted chocolate will cool into a dull, streaky, and soft mass that melts too easily at room temperature. Think of dipping strawberries or making chocolate bark – if the chocolate isn't tempered, it will look messy, feel greasy, and lack that delightful firmness. This guide is designed to be a comprehensive chocolate tempering guide for beginners, breaking down the science and techniques into easy-to-follow steps.
The Importance of Snap and Shine in Tempered Chocolate
The "snap" and "shine" are the hallmarks of successfully tempered chocolate. The snap refers to the clean, sharp break you get when you snap a piece of solid chocolate. This is a direct result of the stable beta (Form V) crystals of cocoa butter aligning properly during the cooling process. If your chocolate bends or crumbles rather than snapping, it's a sign it wasn't tempered correctly.
The shine, or gloss, is equally important for aesthetic appeal. Tempered chocolate sets with a smooth, reflective surface because the stable crystal structure prevents fat and sugar from migrating to the surface. A dull or streaky appearance, often called bloom, indicates an issue with the tempering process. Achieving both the snap and shine is the primary goal of tempering chocolate, transforming simple melted chocolate into a professional-grade ingredient for dipping, molding, and decorating.
Untempered Chocolate vs. Tempered Chocolate: Understanding the Difference for Baking
The contrast between untempered and tempered chocolate is stark, especially in baking applications like coating pastries or making chocolate decorations. Untempered chocolate, simply melted and cooled, will typically set slowly, remain slightly soft or sticky, and often develop unattractive white or grey streaks (fat bloom) on its surface. It lacks firmness and melts readily when handled, making it unsuitable for applications requiring structure or a clean finish.
Tempered chocolate, on the other hand, sets quickly and firmly at room temperature (around 20°C or 68°F). It has a beautiful, glossy sheen, a solid structure that holds its shape, and breaks with a clean snap. This stability makes it ideal for creating chocolate shells for truffles, dipping candies or fruits, molding figures, or making chocolate shavings that won't melt instantly in your hands. Mastering this technique is a key skill in any chocolate tempering guide for beginners.
The Science of Chocolate: Understanding Cocoa Butter Polymorphism
Cocoa Butter Crystals: The Key to Tempering Success
At the heart of chocolate tempering lies the unique property of cocoa butter: polymorphism. This means cocoa butter can solidify into different crystal structures depending on how it is heated and cooled. There are six known crystal forms, each with a different melting point and stability. The goal of tempering is to encourage the formation of the most stable and desirable crystal form, which is known as the Beta crystal, specifically Form V.
These different crystal structures determine the physical properties of the solid chocolate, including its hardness, melting point, shrinkage (important for molding), and appearance. By controlling the temperature precisely, we can selectively melt the unstable crystals while preserving or encouraging the formation of the stable ones. This delicate balance is what gives tempered chocolate its desirable characteristics.
The Six Crystal Forms of Cocoa Butter (I-VI): A Deep Dive
Cocoa butter can crystallize into six different forms, each denoted by Roman numerals and having distinct melting points:
- Form I (Alpha): Melts around 17°C (62.6°F). Very unstable, soft, crumbly.
- Form II (Beta Prime): Melts around 21-24°C (69.8-75.2°F). Unstable, slightly firmer than Form I.
- Form III (Intermediate): Melts around 25.5°C (77.9°F). Still unstable.
- Form IV (Intermediate): Melts around 27.5°C (81.5°F). Relatively unstable.
- Form V (Beta): Melts around 30-34°C (86-93.2°F). This is the desired form! It is stable, hard, contracts well (good for molding), and provides the snap and shine.
- Form VI (Beta Prime): Melts around 34-36°C (93.2-96.8°F). Very stable, but forms over a long time (months) in solid chocolate, leading to fat bloom.
The tempering process aims to melt crystals I through IV, encourage the growth of Form V crystals, and prevent the formation of Form VI in the short term. Achieving a high proportion of Form V crystals is essential for a successful chocolate tempering guide beginners can follow.
Achieving the Ideal Beta Crystal (Form V) for Perfect Temper
To achieve the desired Beta (Form V) crystals, chocolate must be taken through a specific temperature curve. First, it's melted completely to erase the memory of any existing crystal forms. The target temperature for complete melting depends on the type of chocolate: dark chocolate typically melts around 45-50°C (113-122°F), milk chocolate around 40-45°C (104-113°F), and white chocolate around 35-40°C (95-104°F).
Next, the chocolate is cooled down to a working temperature range where Form V crystals can form and proliferate. This crucial step is where "seeding" or agitation helps. The ideal working temperatures are approximately 31-32°C (88-90°F) for dark chocolate, 29-30°C (84-86°F) for milk chocolate, and 28-29°C (82-84°F) for white chocolate. Holding the chocolate within this range, while stirring, allows the stable Form V crystals to align and grow, preparing the chocolate for dipping or molding. This precise temperature control is paramount in any effective chocolate tempering guide for beginners.
Chocolate Tempering Methods: A Comprehensive Comparison
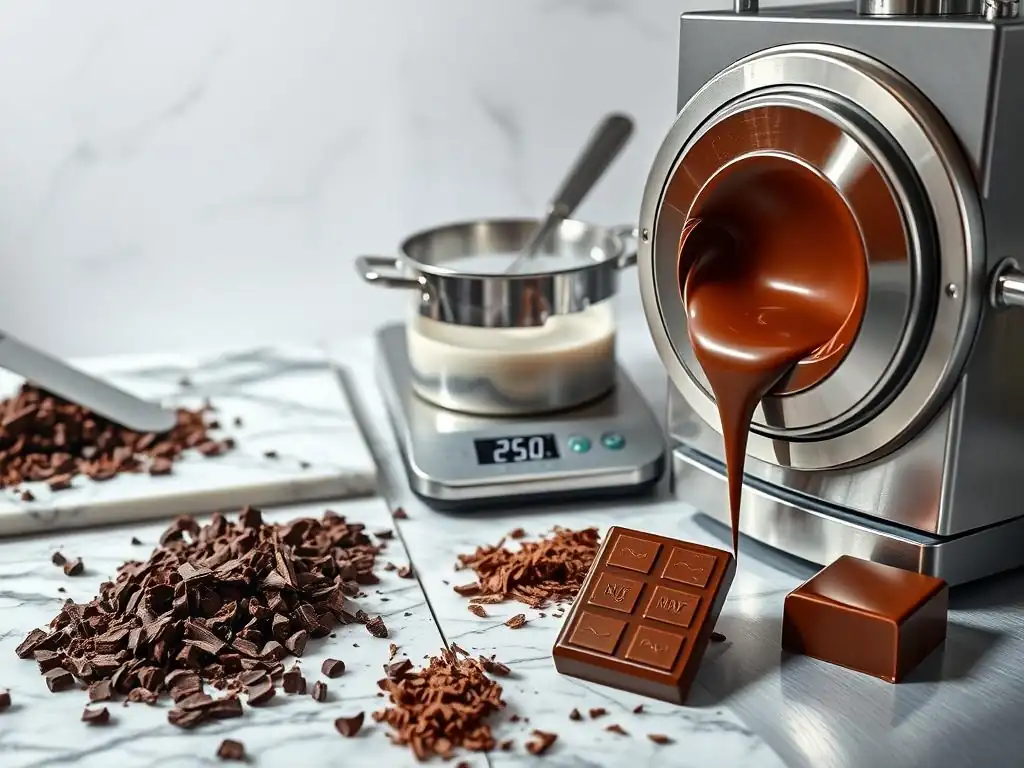
Seed Method for Chocolate Tempering: A Step-by-Step Guide
The seed method is one of the most popular and accessible tempering techniques, making it perfect for a chocolate tempering guide beginners can easily follow. It relies on adding finely chopped, already-tempered chocolate (the "seed") to melted, untempered chocolate. The stable Form V crystals in the seed chocolate act as templates, encouraging the melted cocoa butter to crystallize into the desired structure as it cools.
This method is relatively simple and requires minimal specialized equipment – primarily a bowl, a heat source (like a double boiler or microwave), and a thermometer. It offers good control over the process, allowing bakers to achieve a consistent temper. The key is using good quality seed chocolate that is already in temper and stirring continuously as the melted chocolate cools and the seed melts in.
Tabliering Method (Marble Slab Tempering): Techniques and Tips
The tabliering method, also known as marble slab tempering, is a traditional technique favored by professional chocolatiers for its effectiveness and visual appeal. It involves pouring about two-thirds of the melted chocolate onto a cool, smooth surface like a marble or granite slab. The chocolate is then worked back and forth with a scraper or palette knife, rapidly cooling and agitating it to encourage crystal formation.
As the chocolate cools and thickens slightly (reaching roughly 26-28°C or 79-82°F), it is scraped back into the bowl with the remaining one-third of warm, melted chocolate. The warmth from the reserved chocolate gently raises the temperature of the cooled chocolate to the ideal working temperature (31-32°C for dark, etc. ), melting any unstable crystals while leaving the stable Form V crystals intact. This method requires practice but offers excellent results and is fascinating to watch.
Microwave Tempering Method: A Quick and Easy Approach
For home bakers looking for a fast and convenient way to temper small amounts of chocolate, the microwave method is often recommended in a chocolate tempering guide beginners will appreciate. This technique relies on carefully controlled heating to melt the chocolate just enough while leaving some stable crystals unmelted.
Finely chopped chocolate is heated in short bursts (e.g., 30 seconds), stirred thoroughly after each burst, and checked for remaining solid pieces. The goal is to heat it until almost fully melted, with just a few small pieces visible. Continuous stirring after heating helps distribute the heat and melt the remaining pieces using residual warmth, ideally bringing the chocolate to the correct working temperature (around 31-32°C for dark). This method is faster but requires careful attention to avoid overheating and destroying all the stable crystals.
Using a Chocolate Tempering Machine: Pros and Cons
A chocolate tempering machine is a specialized appliance designed to automate the tempering process, maintaining precise temperatures and often providing gentle agitation. These machines vary in size from small countertop units suitable for home use to large industrial models. They typically work by melting the chocolate, cooling it down to the crystallization temperature, holding it there to form crystals, and then raising it slightly to the working temperature.
The primary advantage of a tempering machine is consistency and ease of use, especially when working with larger quantities of chocolate or needing to keep chocolate in temper for extended periods. They significantly reduce the manual effort and guesswork involved. However, they can be expensive and require cleaning, which might be a deterrent for casual home bakers. For those frequently working with chocolate, a tempering machine can be a worthwhile investment, simplifying the process outlined in any chocolate tempering guide for beginners seeking automation.
Step-by-Step Guide to Tempering Chocolate using the Seed Method
Gathering Your Equipment: What You'll Need
Before you begin tempering chocolate using the seed method, ensure you have all the necessary tools ready. Having everything at hand makes the process smoother and helps maintain the correct temperatures. You will need:
- High-quality chocolate (couverture chocolate is recommended due to its higher cocoa butter content, typically 32-39%)
- A heatproof bowl (glass or stainless steel)
- A double boiler setup (a saucepan with a few inches of simmering water and the bowl sitting snugly on top, not touching the water) or a microwave
- A rubber spatula or spoon for stirring
- An accurate digital thermometer (crucial for monitoring temperatures precisely)
- A clean, dry surface or tray for testing the temper
- Finely chopped, already-tempered chocolate (the "seed" chocolate), roughly 20-30% of the weight of the chocolate you plan to melt.
Ensuring all your equipment, especially bowls and spatulas, is completely dry is paramount. Even a tiny drop of water can cause the chocolate to seize, ruining the batch.
Melting the Chocolate: Achieving the Correct Temperature
Start by finely chopping about 70-80% of your chocolate. Place this chopped chocolate in your heatproof bowl. If using a double boiler, place the bowl over the simmering water, ensuring the bottom of the bowl does not touch the water. The steam from the water will gently heat the bowl. If using a microwave, place the chocolate in a microwave-safe bowl and heat in 30-second intervals, stirring thoroughly after each interval.
Heat the chocolate slowly and stir constantly until it is completely melted and smooth. The target temperature for melting depends on the chocolate type: around 45-50°C (113-122°F) for dark chocolate, 40-45°C (104-113°F) for milk chocolate, and 35-40°C (95-104°F) for white chocolate. Do not let the chocolate exceed these temperatures, as overheating can burn it or make tempering more difficult. Once fully melted, remove the bowl from the heat (or microwave).
Adding the Seed Chocolate: Introducing Beta Crystals
Now, add the remaining 20-30% of your finely chopped, already-tempered chocolate (the seed) to the melted chocolate. Stir continuously and gently with your spatula. The goal is for the warmth of the melted chocolate to melt the seed chocolate while simultaneously cooling the overall mixture. As the mixture cools, the stable Form V crystals in the seed chocolate will encourage the melted cocoa butter to crystallize correctly.
Keep stirring until all the seed chocolate has melted and the temperature of the mixture drops to the desired working temperature: 31-32°C (88-90°F) for dark chocolate, 29-30°C (84-86°F) for milk chocolate, and 28-29°C (82-84°F) for white chocolate. This cooling and stirring phase is critical for developing the proper crystal structure. It might take several minutes of continuous stirring.
Checking the Temper: The Visual and Snap Tests
Once your chocolate reaches the correct working temperature, it's time to test if it's properly tempered before you start using it. The most common tests are the visual test and the snap test. For the visual test, dip a clean, dry knife, spatula, or piece of parchment paper into the chocolate. Scrape off the excess and observe it.
A properly tempered chocolate sample should start to set within 2-3 minutes at room temperature (around 20-22°C or 68-72°F). It should set evenly, look smooth and glossy, and show no streaks. Once hardened, break the chocolate sample. A successful temper will result in a clean, audible snap. If the chocolate remains soft, sticky, or streaky, or if it bends instead of snapping, it is not in temper, and you will need to reheat and re-temper it.
Maintaining the Temper: Keeping Your Chocolate Ready for Use
Once your chocolate is properly tempered and passes the tests, you need to maintain its temperature while you work with it. The goal is to keep it within its specific working temperature range (e.g., 31-32°C for dark chocolate). If the chocolate cools below this range, it will become too thick to work with and may start to set; if it gets too hot, the stable crystals will melt, and you'll lose the temper.
You can maintain the temperature by placing the bowl back over the warm (but not simmering) double boiler water briefly or using a heat lamp or heating pad set on a low setting. Stir the chocolate occasionally to ensure even temperature distribution. If the chocolate thickens as you work, gently warm it back up a degree or two while stirring until it reaches the correct fluidity. If it loses temper completely (becomes dull or sets incorrectly), you'll need to start the tempering process over.
Troubleshooting Common Chocolate Tempering Problems
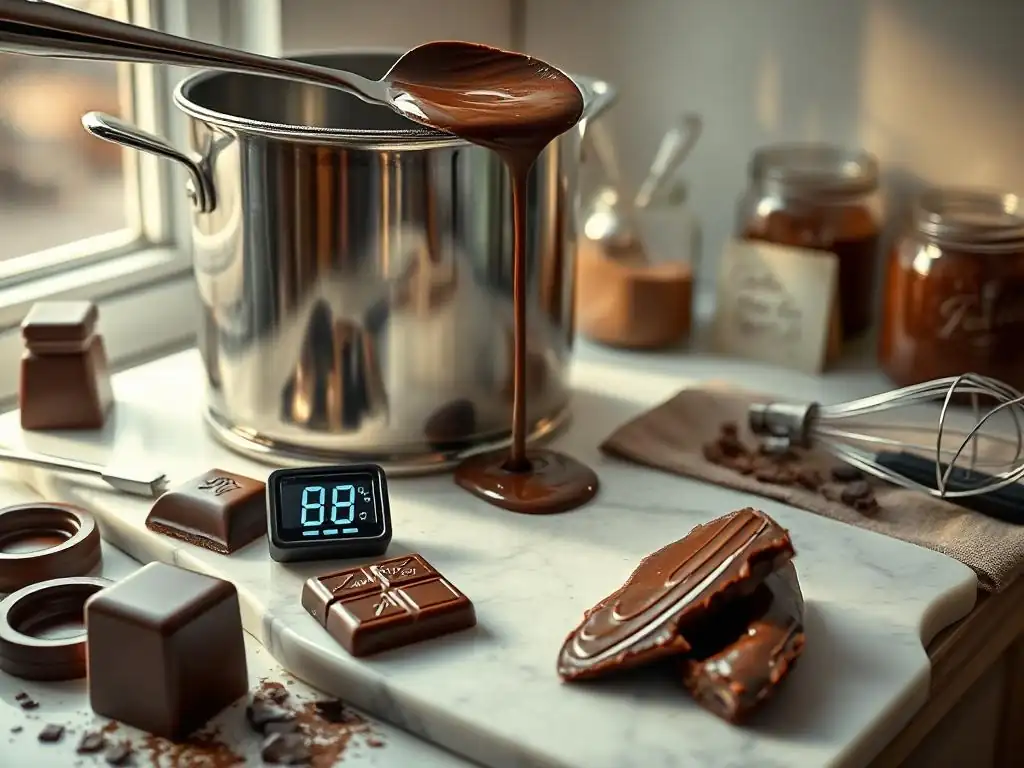
Chocolate Seizing: Causes and Solutions
Chocolate seizing is a common and frustrating problem where melted chocolate suddenly turns into a thick, lumpy, and unworkable mass. This typically happens when a small amount of liquid, often water, comes into contact with the melted chocolate. Chocolate is an emulsion of cocoa solids, sugar, and cocoa butter (fat). When water is introduced, it causes the sugar particles to clump together, disrupting the smooth emulsion. High heat can also sometimes cause seizing by burning the cocoa solids.
If your chocolate seizes due to water, you might be able to rescue it by whisking in a tablespoon or two of hot, not boiling, liquid fat, such as melted cocoa butter, vegetable oil, or clarified butter. This can help re-emulsify the mixture. However, the texture and flavor may be slightly altered, and it won't be suitable for tempering applications requiring snap and shine. Prevention is key: ensure all your equipment is bone-dry and avoid introducing steam directly into the chocolate.
Bloom on Chocolate: Understanding Fat and Sugar Bloom
Bloom refers to the unattractive grey or white streaks or patches that can appear on the surface of chocolate. There are two main types: fat bloom and sugar bloom. Fat bloom is much more common and occurs when the cocoa butter separates from the chocolate solids and crystallizes on the surface. This is often caused by improper tempering (allowing unstable crystals to form) or storing chocolate at fluctuating or warm temperatures (above 25°C or 77°F).
Sugar bloom appears as a dry, powdery, or gritty white layer. It occurs when moisture condenses on the surface of the chocolate (e.g., moving cold chocolate into a warm, humid room). The moisture dissolves surface sugar crystals, and when the moisture evaporates, the sugar recrystallizes on the surface in an irregular pattern. While bloomed chocolate is generally safe to eat, its texture and appearance are compromised. Properly tempering and storing chocolate in a cool, dry place (15-18°C or 59-64°F) are the best ways to prevent bloom, a critical point in any chocolate tempering guide beginners should heed.
Over-Tempering Chocolate: How to Fix It
Over-tempering usually refers to cooling the chocolate too much during the tempering process or adding too much seed chocolate, causing it to become too thick or set prematurely. If your chocolate cools below its working temperature range (e.g., below 28°C or 82°F for dark chocolate) and becomes too viscous to work with but hasn't fully set, it may contain too many crystals, some of which might be unstable Form IV crystals.
To fix over-tempered chocolate, gently reheat it while stirring. If it's just a little too cool and thick, a brief warming over a double boiler or in the microwave for a few seconds (stirring well) might bring it back to the correct working temperature and fluidity. If it's significantly over-cooled and thickened, you may need to gently raise its temperature back up to the initial melting point (e.g., 45-50°C for dark) to melt all crystals and then re-temper from scratch using the seed method or your preferred technique.
Under-Tempering Chocolate: What to Do
Under-tempering is when the chocolate doesn't develop enough stable Form V crystals, or it contains too many unstable crystals. This usually happens if the chocolate isn't cooled sufficiently during the tempering process, the seed chocolate wasn't properly incorporated, or the working temperature was too high. Under-tempered chocolate will not set correctly, will likely develop bloom, and won't have a snap or shine.
If you've finished the tempering process and your chocolate test sample doesn't set with a snap and shine, it's under-tempered. The solution is to re-temper the chocolate. Gently reheat the entire batch back up to the initial melting temperature (e.g., 45-50°C for dark) to ensure all existing crystals are melted. Then, go through the tempering process again, paying close attention to the cooling phase and ensuring you reach and maintain the correct working temperature while stirring. Patience and accurate temperature monitoring are key here.
Tempering Chocolate for Different Applications
Tempering Chocolate for Dipping and Coating
Tempered chocolate is essential for dipping and coating items like strawberries, pretzels, cookies, or cake pops. The proper temper ensures a thin, even coating that sets quickly, is not sticky, and has a beautiful glossy finish. For dipping, the chocolate needs to be at the correct working temperature and fluid enough to coat smoothly but not so thin that it runs off excessively.
Maintain the chocolate within its working temperature range (e.g., 31-32°C for dark) throughout the dipping process. If it starts to thicken, gently warm it a degree or two while stirring. Dip items quickly and allow excess chocolate to drip off before placing them on parchment paper to set. Because tempered chocolate sets relatively fast, you can often dip many items in one session without waiting hours for them to harden.
Tempering Chocolate for Molds and Decorations
Using tempered chocolate is crucial for working with chocolate molds or creating delicate chocolate decorations like curls or shapes. The correct temper ensures the chocolate contracts slightly as it cools, making it easy to release from molds with a clean, sharp edge. It also provides the necessary structure for decorations to hold their shape without melting easily.
When filling molds, tap them gently after filling to remove air bubbles. Tempered chocolate should set firmly in molds within 15-30 minutes at room temperature or slightly cooler (around 18-20°C or 64-68°F). For decorations, spread tempered chocolate thinly onto parchment or acetate, allow it to set partially, and then cut or shape as desired. The resulting decorations will be firm and glossy, perfect for garnishing cakes and desserts.
Tempering Chocolate for Ganache and Truffles
While ganache itself doesn't always require tempered chocolate for its structure (as it's an emulsion of chocolate and cream), tempering is absolutely necessary if you plan to dip your ganache truffles in chocolate. Dipping untempered truffles in untempered chocolate would result in a soft, sticky, and dull coating prone to blooming.
To create professional-looking dipped truffles, make your ganache as usual (this uses untempered chocolate). Once the ganache is set and rolled into balls, temper a fresh batch of chocolate using one of the methods described. Dip the truffles individually into the tempered chocolate, ensuring they are fully coated. Lift them out, let excess drip, and place them on parchment paper to set. The tempered coating will harden quickly, providing a firm, glossy shell that protects the soft ganache center and gives that satisfying bite.
Tips and Tricks for Perfect Chocolate Tempering Every Time
Choosing the Right Chocolate for Tempering
The quality of your chocolate significantly impacts tempering success. Couverture chocolate is highly recommended for tempering, especially for a chocolate tempering guide beginners are using. Couverture chocolate contains a higher percentage of cocoa butter (typically 32-39%) compared to standard baking chocolate or chocolate chips. This higher cocoa butter content provides the necessary fluidity and stability for creating the desirable crystal structure during tempering.
While it is possible to temper some high-quality baking chocolates, those with lower cocoa butter content or added stabilizers (like chocolate chips) are much more challenging to temper successfully. Look for chocolate specifically labeled "couverture" or with a cocoa butter percentage listed. Using a good starting material sets you up for the best results.
Controlling Temperature: The Importance of Accuracy
Precise temperature control is the single most critical factor in successful chocolate tempering. Melting the chocolate to the correct initial temperature, cooling it to the precise crystallization temperature, and maintaining it within the narrow working temperature range are all crucial steps. Even a few degrees off can mean the difference between perfectly tempered chocolate and a failed batch.
Using an accurate digital thermometer is non-negotiable. Candy thermometers can work, but digital thermometers provide faster, more precise readings, often to a tenth of a degree, which is incredibly helpful. Constantly monitor the temperature throughout the process, especially during the cooling phase. Don't rush the cooling; stir continuously to ensure even temperature distribution and crystal formation.
Working Environment: Optimizing for Success
The environment in which you temper chocolate also plays a significant role. Ideal conditions are a cool, dry room with a consistent temperature, ideally around 20-22°C (68-72°F). Avoid tempering chocolate in warm, humid conditions, as this can interfere with cooling and increase the risk of sugar bloom.
Keep drafts and sudden temperature changes to a minimum. A cool marble or granite surface is naturally beneficial for methods like tabliering because it helps draw heat away quickly. For the seed method, a cooler room helps the chocolate cool down faster to the working temperature. If your kitchen is warm, consider using an air-conditioned room or working near an open window (if the outside air is cool and dry) to facilitate cooling.
Use a Digital Thermometer for Accurate Readings
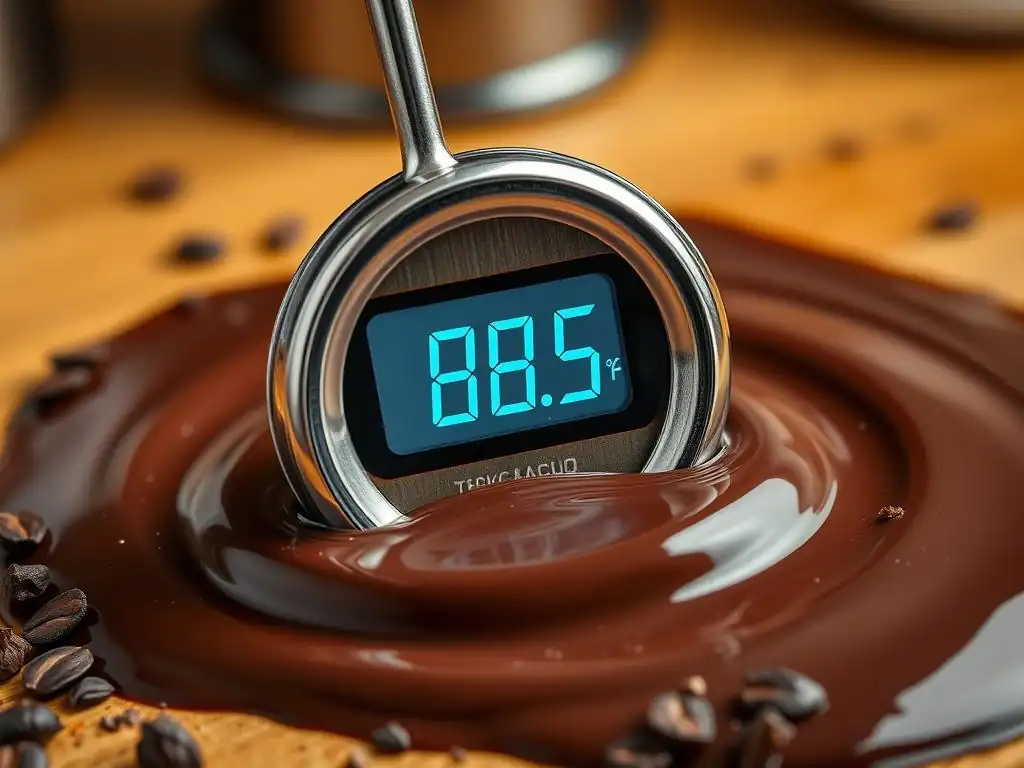
As mentioned, an accurate digital thermometer is an indispensable tool for tempering chocolate. Unlike older dial-type thermometers, digital versions provide quick and precise temperature readouts, often within a degree or less. This level of accuracy is vital when working within the narrow temperature ranges required for successful tempering.
Insert the thermometer probe directly into the chocolate, stirring gently to get an accurate reading of the overall mass, not just the surface or edge. Monitor the temperature frequently, especially as the chocolate cools after melting and when you are trying to maintain the working temperature. Relying on guesswork or imprecise thermometers is a common reason for failed tempering attempts for beginners.
Ensure Utensils and Bowls are Completely Dry
This tip might seem simple, but it's worth repeating because it's a frequent cause of failure. Water is the enemy of melted chocolate. Even a tiny drop of water or condensation introduced into melted chocolate can cause it to seize instantly, turning it into a thick, unusable paste.
Before you start, thoroughly dry your bowl, spatula, thermometer probe, and any other utensils that will come into contact with the chocolate. If using a double boiler, be careful that no steam or condensation from the simmering water gets into the chocolate bowl. Work in a dry environment if possible. If you need to clean a utensil during the process, dry it completely before putting it back into the chocolate.
Beyond the Basics: Advanced Chocolate Tempering Techniques
Tempering Dark Chocolate vs. Milk Chocolate vs. White Chocolate
While the fundamental principles of tempering apply to all types of chocolate, the specific target temperatures vary slightly due to their differing compositions, particularly their cocoa butter and milk solid content. Dark chocolate, with the highest percentage of cocoa solids and often cocoa butter, requires the highest melting and working temperatures. Milk chocolate contains milk solids and less cocoa butter than dark, requiring slightly lower temperatures. White chocolate, containing only cocoa butter, sugar, and milk solids (no cocoa solids), has the lowest melting and working temperatures.
Approximate temperatures:
- Dark Chocolate: Melt to 45-50°C (113-122°F), cool to 31-32°C (88-90°F) working temp.
- Milk Chocolate: Melt to 40-45°C (104-113°F), cool to 29-30°C (84-86°F) working temp.
- White Chocolate: Melt to 35-40°C (95-104°F), cool to 28-29°C (82-84°F) working temp.
Understanding these specific ranges is key to successfully tempering different chocolate types, building upon the foundation of a chocolate tempering guide beginners have learned.
Adding Flavors and Colors to Tempered Chocolate
Adding flavors and colors to tempered chocolate requires care to avoid disrupting the temper or causing the chocolate to seize. For flavors, use oil-based flavorings specifically designed for chocolate, not water-based extracts. Water-based extracts will cause the chocolate to seize. Add flavorings sparingly to the melted chocolate before or during the cooling phase of tempering.
For coloring, use oil-based or cocoa butter-based colors designed for chocolate. Standard food coloring is water-based and will cause seizing. Add colors to the melted chocolate while it's warm, blending thoroughly before proceeding with the cooling and tempering steps. Be aware that adding significant amounts of other ingredients can slightly affect the crystallization process and require minor temperature adjustments or extra stirring.
Working with Different Types of Chocolate: Couverture vs. Compound
It's important to distinguish between couverture chocolate and compound chocolate when discussing tempering. As mentioned earlier, couverture chocolate is high-quality chocolate containing a significant percentage of cocoa butter (typically 32% or more). It requires tempering to achieve a stable structure because of the way cocoa butter crystallizes.
Compound chocolate, on the other hand, is a product that uses vegetable fats (like palm kernel oil or hydrogenated oils) instead of cocoa butter. Compound chocolate does not contain polymorphic cocoa butter crystals that require tempering. You simply melt compound chocolate (usually around 35-40°C or 95-104°F) and let it cool.
It will harden and appear glossy because the vegetable fats have different solidification properties. While easier to work with, compound chocolate lacks the flavor complexity and mouthfeel of real chocolate made with cocoa butter and is not suitable for techniques that specifically rely on cocoa butter tempering. This guide focuses on tempering real chocolate (couverture).
Conclusion: Enjoy the Rewards of Perfectly Tempered Chocolate
The Satisfaction of a Perfect Snap and Shine
Mastering chocolate tempering, even as a beginner, unlocks a new level of skill in your baking repertoire. There's immense satisfaction in seeing a piece of chocolate snap cleanly with an audible sound and gleam with a beautiful, professional-looking shine. This indicates that you've successfully navigated the science of cocoa butter crystals and achieved the desired Form V structure.
This achievement goes beyond aesthetics; it means your chocolate creations will have the correct texture, melt properly in the mouth, and be stable at room temperature. Dipped treats won't be sticky, molded chocolates will release cleanly, and decorations will hold their shape. It's a tangible reward for your efforts in learning this essential technique from this chocolate tempering guide beginners can trust.
Expanding Your Baking Skills with Chocolate Tempering
Learning to temper chocolate opens up a world of possibilities in baking and confectionery. You can move beyond simple chocolate chips and start working with high-quality couverture chocolate to create impressive desserts. Imagine crafting your own chocolate bars with inclusions, making professional-looking truffles, dipping fruits and candies with a flawless finish, or piping intricate chocolate decorations for cakes and pastries.
This skill elevates the quality and presentation of your baked goods, allowing you to replicate techniques used by professional chocolatiers. It transforms chocolate from a simple ingredient into a medium for artistry, significantly expanding your capabilities in the kitchen. This chocolate tempering guide beginners have followed provides the foundation for these exciting new ventures.
Embrace Imperfection and Learn from Each Attempt
Like any baking technique, tempering chocolate takes practice. Your first few attempts might not be perfect, and that's completely normal! You might encounter seizing, bloom, or chocolate that just won't set correctly. Don't get discouraged. Each attempt is a learning opportunity.
Pay close attention to your temperatures, note what went wrong, and adjust your technique next time. Was the room too warm? Did the chocolate get too hot during melting? Was there a drop of water? Review the steps in this chocolate tempering guide beginners can reference, troubleshoot common issues, and try again. Patience and persistence are key. With practice, you'll develop a feel for the chocolate and gain confidence in achieving that perfect snap and shine consistently. Enjoy the process and the delicious results!
Frequently Asked Questions
How crucial is temperature control when tempering chocolate?
Temperature control is absolutely critical for successful tempering. It ensures the correct crystal structure forms, leading to that desired snap and shine. Deviations can result in dull, streaky chocolate.
What's the best way for beginners to temper chocolate?
For beginners, the seeding method is often recommended. It involves melting chocolate and then adding untempered chocolate pieces to encourage the correct crystal formation during cooling.
Why does chocolate sometimes turn white after tempering?
This "bloom" is often caused by fat bloom, where cocoa butter separates and rises to the surface. It typically results from improper tempering or temperature fluctuations during storage.
What are the different types of chocolate that can be tempered?
All types of real chocolate – dark, milk, and white – can be tempered. Each type has a specific temperature range that needs to be followed for optimal results.
Can I re-temper chocolate if it doesn't set properly the first time?
Yes, you can re-temper chocolate if it doesn't set correctly. You'll need to gently re-melt it, being careful not to overheat, and then restart the tempering process from the beginning.
Final Reflection: The Enduring Allure of the Perfect Snap
The science of chocolate tempering, once a closely guarded secret of chocolatiers, is now accessible to anyone with a passion for creating exquisite confections. Mastering this technique isn't just about achieving that satisfying "snap"—it's about unlocking the potential for truly exceptional chocolate, elevating your creations from ordinary to extraordinary.
The journey into the world of chocolate tempering has been a fascinating exploration of both art and science. It's a testament to the power of understanding fundamental principles to achieve remarkable results. The best things in life are simple, but not easy.
This quote perfectly encapsulates the process of tempering; while the underlying science might seem complex, the reward of a perfectly tempered chocolate—smooth, glossy, and with that unforgettable snap—is undeniably worth the effort. The impact of this knowledge extends beyond the individual; sharing this skill fosters a deeper appreciation for the artistry and dedication involved in chocolate making, enriching our collective culinary experience.
Now, it's your turn. Don't be intimidated by the initial steps. Embrace the process, experiment with different techniques, and savor the journey of transforming simple cocoa beans into works of edible art. The satisfying snap of your perfectly tempered chocolate will be a testament to your dedication and a delicious reward for your efforts. So, gather your ingredients, follow your passion, and unlock the secrets of the perfect snap. The world of chocolate awaits!
Unlock Your Chocolate Mastery: Perfect Tempering, Every Time!
Thanks for diving into the science of chocolate tempering with us! You've now got the knowledge to create flawlessly smooth, glossy chocolate – a true game-changer for your baking. Ready to put your newfound expertise to the test?
- Master the Snap Test: Practice your tempering technique immediately! Try making a small batch of chocolate and perform the snap test to see if you achieved perfect tempering.
- Share Your Success (or Challenges!): Post a picture of your perfectly tempered chocolate creation on social media using #BakeWithEaseTempering. Let's learn from each other!
- Explore Advanced Techniques: Dive deeper into our blog for more recipes and tips on using tempered chocolate in various desserts.
What's your favorite thing to make with perfectly tempered chocolate? Let's hear it in the comments!