
Butter and Fat Weighing Hacks: Handling RoomTemp vs. Frozen Fats Accurately

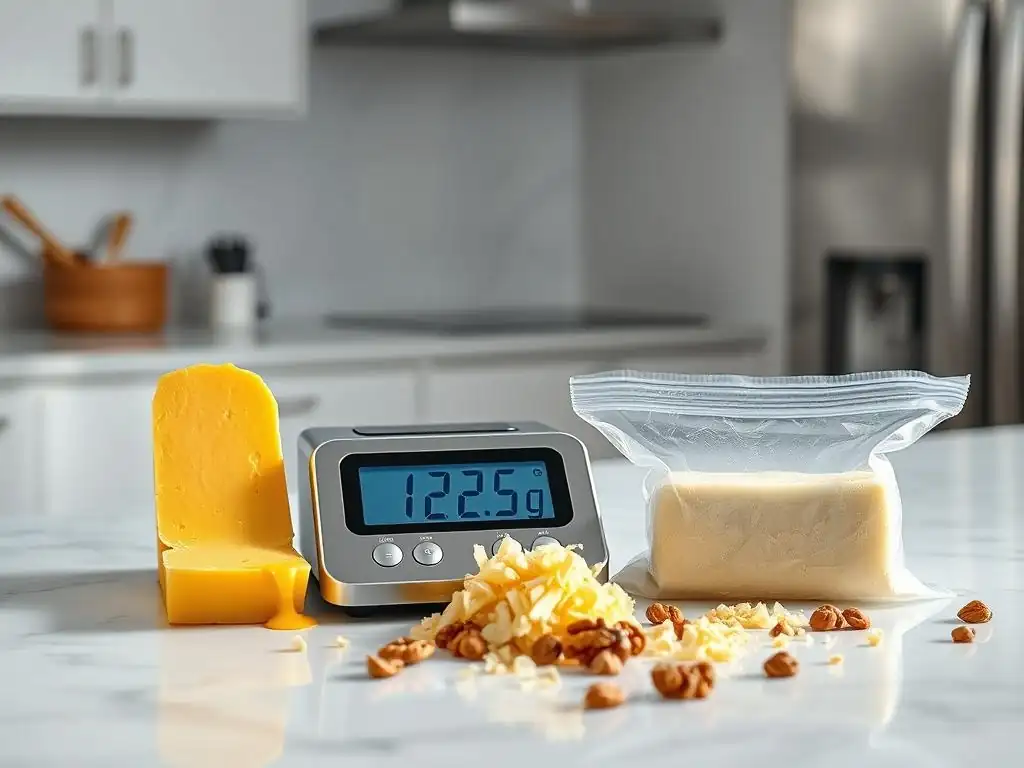
Welcome to BakeWithEase, your trusted companion in the exciting world of baking! Ever struggled with precisely measuring fats, especially when dealing with different temperatures? This time, we're diving deep into a crucial, yet often overlooked aspect of baking: frozen fat weighing techniques. Discover the secrets to achieving consistent, professional-quality results, no matter the texture of your butter or shortening. Intrigued? Let's unlock the secrets to perfectly weighed fats and elevate your baking game!
- Baking with Precision: Mastering the Art of Weighing Fats
- Introduction: Why Accurate Fat Measurement is Crucial in Baking
- The Importance of Accurate Fat Measurement in Baking
- Weighing Softened Butter: Techniques for Consistent Results
- Weighing Cold Butter: A Detailed Guide for Precision
- Step-by-Step: Precisely Weighing Cold Butter
- Weighing Different Fats: Butter, Lard, and Vegetable Shortening
- Troubleshooting Common Fat Weighing Issues
- Advanced Techniques for Accurate Fat Measurement
- Maintaining Accuracy: Cleaning and Storing Measuring Tools
- Conclusion: Elevating Your Baking Through Accurate Fat Measurement
-
Frequently Asked Questions
- How does freezing fat affect its weight when measuring?
- What are the best practices for accurately weighing frozen fat?
- Why is accurate fat weighing so important in baking?
- What are some tips for weighing room-temperature fat versus frozen fat?
- What happens if I don't accurately weigh fat in my baking recipes?
- Final Reflection: Mastering the Art of Fat Measurement
- Unlock Your Baking Potential: Master Fat Measurement!
Baking with Precision: Mastering the Art of Weighing Fats
Introduction: Why Accurate Fat Measurement is Crucial in Baking
Baking is often described as a science, and like any science, precision is paramount. While some recipes might seem forgiving, the truth is that the ratios of ingredients, especially fats, can dramatically impact the final outcome. Whether you're aiming for a flaky pie crust, a tender cake, or perfectly chewy cookies, getting your fat measurements right is the foundation of success. This is particularly true when dealing with fats at different temperatures, such as softened butter versus cold or even frozen fats. Understanding the nuances of weighing these ingredients accurately can elevate your baking from good to consistently great.
This article will guide you through the essential techniques for accurately weighing various fats, with a special focus on the challenges and effective frozen fat weighing techniques. We'll explore why precision matters, how to handle fats at different temperatures, and provide practical tips to ensure your measurements are spot-on every time. By mastering these fundamental skills, you'll gain confidence in the kitchen and achieve the desired textures and flavors in all your baked goods. Let's dive into the details that make a real difference in your baking journey.
The Importance of Accurate Fat Measurement in Baking
Getting the amount of fat just right in a recipe is far more critical than many home bakers realize. Fat plays multiple roles: it tenderizes baked goods by interfering with gluten development, adds richness and flavor, helps create flaky layers in pastries, and contributes to the structure and moisture of cakes and cookies.
Too much or too little fat can completely alter the intended texture and taste, turning a potentially perfect bake into a disappointment. For instance, adding just 10-15 grams too much butter to a standard cookie recipe designed for 200 grams can result in cookies that spread excessively thin and greasy, rather than maintaining a pleasant chewiness and shape.
Beyond simple volume versus weight debates, the physical state of the fat—whether it's melted, softened, cold, or frozen—also significantly impacts how it interacts with other ingredients and, consequently, the final product. Using cold butter cut into small pieces for biscuits or scones is essential for creating steam pockets during baking, which results in a light, flaky texture. Conversely, using softened butter creamed with sugar is necessary for incorporating air into cake batter, leading to a tender crumb.
Accurate weighing, especially with techniques like frozen fat weighing techniques, ensures you are adding the exact amount needed for the specific role the fat plays in that particular recipe. This precision is the secret behind consistently excellent results.
Impact on Texture, Flavor, and Overall Recipe Success
The amount and state of fat profoundly influence the texture of baked goods. In pastries like puff pastry or croissants, layers of cold or frozen butter are folded into dough; as the butter melts and creates steam during baking, it separates the dough layers, resulting in that characteristic flakiness. If you use too little butter, the layers won't separate properly, leading to a dense, tough pastry.
Conversely, too much butter can make the dough greasy and difficult to handle, potentially causing it to leak out during baking. For example, a standard recipe for rough puff pastry might call for 250 grams of cold butter to 250 grams of flour. Being off by even 20-30 grams can noticeably affect the lift and flakiness, potentially reducing the rise by 15-20%.
Fat also carries and enhances flavors, contributing to the richness and overall taste profile of baked goods. Butter, with its complex dairy notes, imparts a distinct flavor that vegetable oil or shortening cannot replicate. The amount of fat influences how moist or dry a product feels; it coats flour particles, preventing excessive gluten development and contributing to a tender crumb.
For instance, in a classic pound cake, the high ratio of butter (often equal in weight to flour and sugar) is crucial for its dense, moist texture and rich flavor. Accurate measurement, especially when dealing with different fat types and temperatures, is non-negotiable for achieving the intended outcome and flavor balance in your recipes.
Common Weighing Mistakes and How to Prevent Them
One of the most frequent errors in baking measurement is confusing volume with weight, especially for fats like butter. A cup of melted butter weighs differently than a cup of solid, packed butter, and both differ significantly from a cup of liquid oil. Recipes that specify weight (grams or ounces) are inherently more accurate than those using volume (cups).
For example, 1 cup of all-purpose flour weighs approximately 120-130 grams, but this can vary depending on how densely it's packed. Butter, however, is denser; 1 cup of butter weighs about 227 grams. Relying on volume measurements for butter, particularly when it's softened or melted, can easily lead to errors of 10-20% or more, significantly impacting the recipe's success.
Another common mistake, particularly relevant to frozen fat weighing techniques, is attempting to weigh fats that are not in the state specified by the recipe or not properly prepared. Trying to weigh a large, irregular block of cold butter can be less accurate than weighing smaller, consistent pieces. Similarly, attempting to weigh softened butter that is unevenly soft (some parts still firm, others almost melted) will result in an inaccurate total weight due to density variations.
To prevent these errors, always use a digital kitchen scale, weigh ingredients directly into the mixing bowl (using the tare function), and ensure fats are at the correct temperature and consistency before measuring. For cold or frozen fats, cutting them into uniform pieces before weighing is a simple yet effective technique to improve accuracy.
Weighing Softened Butter: Techniques for Consistent Results
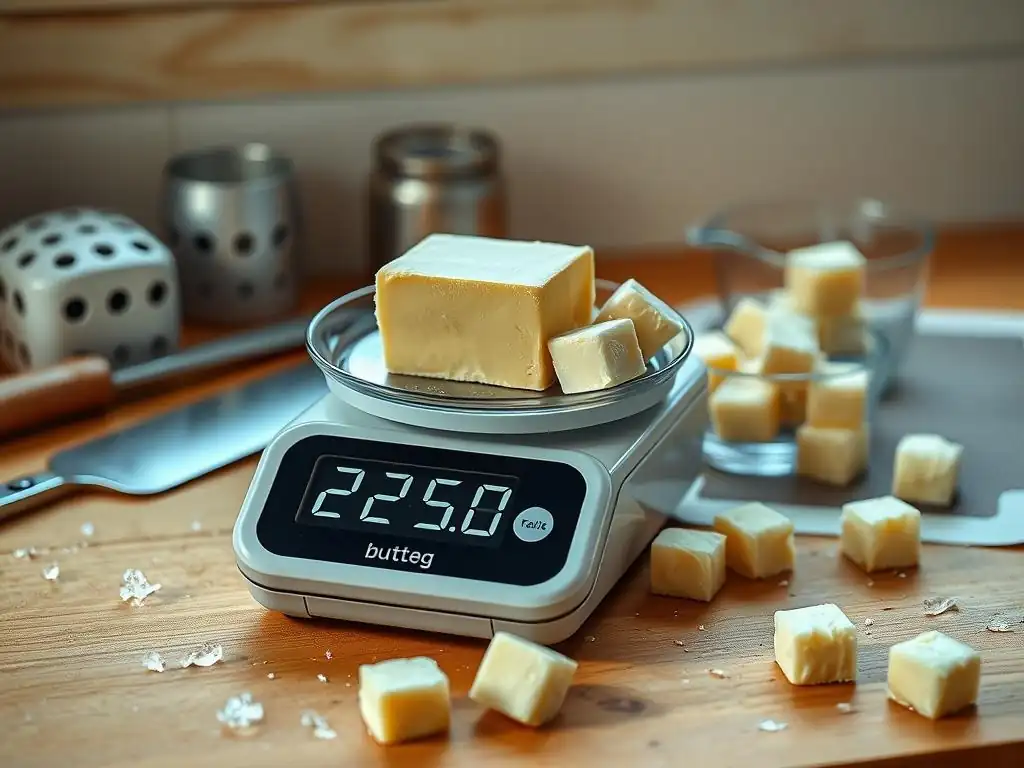
Many cookie, cake, and some bread recipes call for softened butter, often to be creamed with sugar. Softened butter should be pliable enough to indent easily with a finger but still hold its shape, not be greasy or melted. Achieving this precise consistency is key for accurate weighing and proper aeration when creaming.
Butter that is too cold won't cream properly, resulting in a dense product, while butter that is too warm can cause the mixture to separate. The ideal temperature for softened butter is typically between 65°F and 70°F (18°C to 21°C). Bringing butter to this temperature evenly is crucial; leaving a whole stick on the counter might result in a soft exterior but a cold, hard core.
To achieve uniform softness, cut the butter into smaller pieces (about 1-inch cubes) before letting it sit at room temperature. This increases the surface area exposed to the air, allowing it to soften more quickly and evenly throughout. Depending on the ambient temperature, this can take anywhere from 30 minutes to an hour.
Avoid shortcuts like microwaving, which often melts butter unevenly and can compromise the texture required for creaming. Once uniformly softened, the butter is ready for weighing. Using a digital scale is the most accurate method; place your mixing bowl or a piece of parchment paper on the scale, tare it to zero, and add the softened butter until you reach the target weight specified in the recipe.
Achieving Uniform Softness for Accurate Weighing
As mentioned, the secret to accurately weighing softened butter lies in its consistent texture. If one part is significantly colder or warmer than another, the density will vary slightly, leading to less precise measurement, especially for larger quantities. Cutting a standard 4-ounce (113-gram) stick of butter into 8-10 smaller pieces before softening helps immensely. This allows the internal temperature to equalize with the external temperature much faster. In a typical kitchen environment around 70°F (21°C), these smaller cubes will usually soften uniformly within 45-60 minutes.
Another technique to speed up softening without melting is to place the cut butter pieces between two sheets of parchment paper and gently roll over them with a rolling pin. This flattens the butter, increasing surface area even more, and can bring it to a softened state in about 15-20 minutes. However, be careful not to overwork or warm the butter too much with your hands or the rolling pin.
The goal is pliable, not greasy or melted. Uniformly softened butter ensures that when you weigh out, say, 150 grams for a cake batter, you are getting the correct amount of fat with the proper structure needed for creaming and aeration, directly impacting the final volume and texture of the cake.
Tips for Cutting and Weighing Softened Butter
Once your butter is uniformly softened, cutting it into manageable pieces before weighing makes the process cleaner and more accurate. Use a clean, sharp knife to cut the softened stick or block into smaller chunks or slices.
While precision in cutting isn't as critical as with cold butter for flakiness, cutting into roughly equal pieces helps when adding to the scale, allowing you to add incrementally until the desired weight is reached. For example, if you need 200 grams, you might cut a 227-gram stick into four roughly equal pieces (about 55-60 grams each), then add them to the tared scale, and shave off small amounts from one piece until you hit exactly 200 grams.
Weighing softened butter directly into your mixing bowl saves you from transferring a sticky ingredient. Place the mixing bowl on your digital scale, turn it on, and press the tare button to zero it out. Then, add the softened butter pieces using a spatula or knife until the display shows the target weight.
Because softened butter is pliable, it's easy to add or remove small amounts to get an exact measurement. Avoid pressing or packing the butter down on the scale, as this can slightly compress it and affect the reading if you're not careful, though the effect is minimal compared to volume measurement. The key is adding pieces until the scale registers the precise weight required.
Minimizing Mess: Preventing Butter from Sticking
Working with softened butter can be inherently messy, but a few simple tricks can help keep your workspace cleaner and ensure you don't lose precious grams stuck to your tools. When cutting softened butter, dipping your knife in hot water and drying it quickly before each cut can help it slice through cleanly without excessive sticking. Alternatively, using a knife or bench scraper that has been lightly greased with a neutral oil or cooking spray can also reduce adhesion.
When transferring softened butter to the scale or mixing bowl, use a rubber spatula. A good quality, flexible spatula can scrape the butter cleanly off your knife, cutting board, or scale pan with minimal residue. If you are weighing directly into your mixing bowl, the mess is largely contained.
If weighing on a separate piece of parchment paper or a small dish on the scale, use the spatula to transfer the butter to your main mixing bowl, scraping the parchment or dish thoroughly to ensure all the weighed butter makes it into the recipe. A slight film will always remain, but these techniques minimize loss to a negligible amount, ensuring your 200 grams weighed is indeed 200 grams added to your mix.
Weighing Cold Butter: A Detailed Guide for Precision
Weighing cold butter accurately is crucial for recipes where its solid state is essential for structure, such as flaky pastries like pie crusts, biscuits, or croissants, or for cut-out cookies where the cold fat helps maintain shape. Cold butter, typically straight from the refrigerator (around 35°F to 40°F or 2°C to 4°C), is firm and easier to handle cleanly than softened butter. However, its hardness presents different weighing challenges.
Unlike softened butter, you can't easily add or remove small amounts by scraping; you need to cut precise pieces. This is where frozen fat weighing techniques and cold butter methods overlap, as both require working with a solid, often hard, block.
The primary challenge with weighing cold butter is ensuring that the pieces you cut are representative of the whole block's density and that you can accurately sum their weight to the recipe requirement. Cutting a large block into roughly equal pieces before weighing allows you to add them incrementally to the scale. If you need, say, 150 grams, you might cut a 227-gram stick into 10-12 pieces and then place them on the tared scale one by one until you reach 150 grams.
If you slightly overshoot, you'll need to remove a piece and trim a smaller amount from it to get the precise weight. This process requires a sharp knife and a steady hand to ensure the pieces are clean cuts, not smushed or irregular.
Challenges of Weighing Cold Butter and How to Overcome Them
The main difficulty when weighing cold butter is cutting it into precise amounts. Cold butter is hard, and attempting to shave off tiny increments to hit an exact weight can be challenging, often resulting in irregular pieces or frustratingly slow adjustments. If a recipe calls for 175 grams and you've added pieces totaling 178 grams, removing 3 grams precisely from a cold block with a knife is tricky without melting it slightly from handling or making a messy cut. This challenge is even more pronounced with frozen fat weighing techniques, where the butter is rock hard.
To overcome this, the best approach is to cut the cold butter into pieces that are smaller than the smallest adjustment you anticipate needing. For example, instead of cutting a stick into four pieces, cut it into 16 pieces. If a stick is 113 grams, each piece is about 7 grams.
If you need 150 grams, you can add pieces totaling close to that (e.g., 21 pieces = 147 grams) and then add one more piece and trim off just a small sliver to reach 150 grams exactly. For frozen fat weighing techniques, using a sturdy chef's knife and cutting the frozen block into small cubes (say, 1 cm or ½ inch) before weighing is essential. Wear gloves if needed to keep the butter cold and your hands warm.
Preparing Cold Butter for Accurate Measurement
Proper preparation of cold butter involves ensuring it is uniformly chilled and then cutting it into manageable pieces before weighing. Take the butter directly from the refrigerator just before you are ready to cut and weigh it. Do not let it sit out at room temperature first if the recipe specifies "cold" butter. For frozen fat weighing techniques, take the butter from the freezer just before cutting. It should be hard throughout.
Use a sharp knife on a stable cutting board. For cold butter, cutting it into cubes or slices is effective. A common technique for pie crust or biscuits is to cut the stick lengthwise, then cut across to create small cubes (e.g., ½-inch or 1 cm cubes). For frozen fat weighing techniques, cutting into small cubes is even more important because the butter is so hard.
Aim for cubes no larger than 1-2 cm (½-1 inch). This pre-cutting step is crucial because it allows you to add pieces to the scale incrementally until you hit the target weight. You can then make small adjustments by trimming a piece if slightly over, or adding a small sliver if slightly under. Work quickly to keep the butter cold.
Recommended Tools for Weighing Cold Butter
The most essential tool for accurate cold butter measurement, and particularly for frozen fat weighing techniques, is a reliable digital kitchen scale. Digital scales provide precise readings, often down to the gram or tenth of an ounce, which is far more accurate than volume measurements for solid fats. Look for a scale with a tare function, which allows you to zero out the weight of your container (like a bowl or piece of parchment paper) before adding the butter. This ensures you are only measuring the weight of the butter itself.
Beyond the scale, a sharp chef's knife or utility knife and a sturdy cutting board are necessary for cutting the cold or frozen butter into pieces. For frozen fat weighing techniques, a heavy-duty knife is recommended, and caution should be exercised when cutting hard frozen blocks. Some bakers also find a bench scraper helpful for gathering the cut pieces of butter.
A small, offset spatula can be useful for transferring small pieces to the scale. While not strictly necessary, using a piece of parchment paper on the scale pan makes cleanup easier and helps prevent the cold butter from warming up too much through contact with a room-temperature surface.
Step-by-Step: Precisely Weighing Cold Butter
Achieving precise cold butter measurements, essential for flaky pastries and many cookies, requires a systematic approach. This method is also directly applicable to frozen fat weighing techniques, with the added consideration of the butter's extreme hardness. Following these steps ensures accuracy and maintains the desired cold temperature of the fat throughout the process.
The key is to work efficiently and minimize handling, as the warmth from your hands can quickly soften the butter, especially if your kitchen is warm. Having your digital scale ready, cutting board and knife prepared, and your recipe's required weight clearly in mind before you even take the butter out of the refrigerator or freezer will streamline the process. This preparation helps ensure the butter stays cold and firm, which is critical for recipes relying on solid fat for texture.
Step 1: Ensuring Butter is Properly Chilled
The first and most critical step for accurate cold butter measurement is ensuring the butter is genuinely cold, or even frozen if the recipe dictates frozen fat weighing techniques. Take the stick or block of butter directly from the refrigerator or freezer just before you plan to cut and weigh it. Do not leave it sitting on the counter while you gather other ingredients or tools, as it will begin to warm up, especially around the edges.
Cold butter should be firm to the touch and difficult to dent with a finger. For frozen fat weighing techniques, the butter should be rock hard and require significant effort to cut. If you're unsure if your refrigerator butter is cold enough, place it in the freezer for 10-15 minutes before cutting. This ensures it's firm and holds its shape, which is necessary for clean cuts and accurate weighing of individual pieces. The colder the butter, the less likely it is to stick to your knife and the more accurately you can cut consistent pieces.
Step 2: Cutting Butter into Consistent Pieces
Once the butter is properly chilled (or frozen), the next step is to cut it into smaller, manageable pieces before placing them on the scale. The size of the pieces depends on the total amount needed and how precise you need to be with adjustments. For a standard recipe requiring 100-200 grams of cold butter, cutting a 113-gram (4 oz) stick into 16-20 pieces is a good starting point.
This yields pieces roughly between 5-7 grams each. For frozen fat weighing techniques, aim for even smaller cubes, perhaps 1 cm (½ inch) or less, as cutting larger frozen pieces precisely is difficult.
Use a sharp, heavy knife and cut straight down firmly to make clean cuts. Avoid sawing motions, which can warm the butter and create irregular shapes. Cut the entire amount of cold butter you think you might need (or the whole stick/block if it's close to the recipe requirement) into these smaller pieces.
This allows you to add pieces to the scale incrementally until you hit the exact weight, making the final adjustment much easier than trying to cut from a large block. Place the cut pieces on a cold plate or piece of parchment paper to keep them separate and cold while you prepare the scale.
Step 3: Calibrating and Zeroing Your Kitchen Scale
Before weighing any ingredient, especially for precise tasks like frozen fat weighing techniques, it's good practice to ensure your digital kitchen scale is calibrated and properly zeroed. Most home scales are pre-calibrated and maintain accuracy well, but occasionally checking with a known weight (like a coin or a calibration weight if you have one) can't hurt if you suspect issues. Ensure the scale is on a flat, stable surface, away from drafts or vibrations that could affect the reading.
Turn on your digital scale. Place the container you will weigh the butter in (your mixing bowl, a small dish, or a piece of parchment paper) onto the scale platform before adding any butter. Once the container is stable on the scale, press the "Tare" or "Zero" button. The display should now read 0.0. This step is crucial as it subtracts the weight of the container, ensuring that the scale only measures the weight of the butter you add. Always zero the scale with the container on it before adding any ingredient.
Step 4: Weighing and Adjusting for Recipe Requirements
With the scale tared and the cold or frozen butter cut into pieces, begin adding the pieces to the container on the scale. Add several pieces at once, watching the weight increase on the display. Continue adding pieces until the weight shown is just below or very close to the target weight specified in your recipe. For instance, if you need 150 grams, you might add pieces until the scale reads 145-148 grams.
For the final adjustment, add one piece at a time. If adding a full piece puts you over the required weight (e.g., you need 150 grams and adding one piece makes it 152 grams), remove that piece and carefully trim a small amount from it with your knife. Place the trimmed piece back on the scale and see the new total.
Repeat trimming tiny slivers as needed until the scale displays the exact weight required (e.g., 150.0 grams). Work quickly to minimize the time the butter is out of the cold. This incremental addition and precise trimming using a sharp knife are key to accurate cold and frozen fat weighing techniques.
Weighing Different Fats: Butter, Lard, and Vegetable Shortening
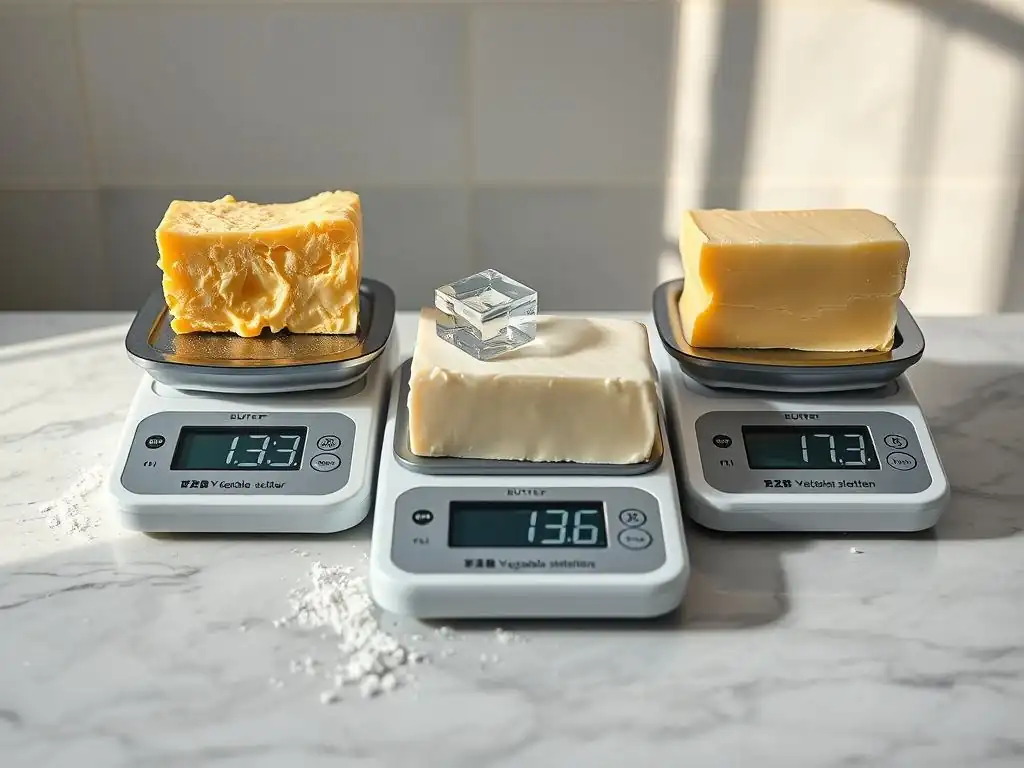
While butter is perhaps the most common fat in baking, recipes also frequently call for lard or vegetable shortening. Each of these fats has unique properties and handling characteristics that affect how they should be weighed for optimal results. Understanding these differences is important for applying accurate weighing techniques across various recipes.
Butter, whether salted or unsalted, contains about 80-82% fat, 16-18% water, and 1-2% milk solids. Lard (rendered pork fat) and vegetable shortening (hydrogenated vegetable oil) are typically 100% fat. This difference in composition means they behave differently in recipes and cannot always be substituted directly in equal weights without recipe adjustment, though weight is still the most accurate way to measure them individually.
Butter: Considerations for Salted vs. Unsalted
Most baking recipes specify unsalted butter. This is because the salt content in salted butter varies between brands (typically 1-2% by weight), making it difficult to control the overall salt level in the baked good. Using unsalted butter allows the baker to add a precise amount of salt separately, ensuring consistency.
When weighing butter, whether salted or unsalted, the method remains the same: use a digital scale to measure the required weight in grams or ounces. A standard stick of butter in the US is 113 grams (or 4 ounces), a useful reference point for quick calculations if a recipe provides volume measurements you need to convert to weight (though direct weight in the recipe is always preferred).
If a recipe calls for unsalted butter and you only have salted, you can often make a substitution by slightly reducing the added salt in the recipe. A common guideline is to reduce the added salt by about ¼ teaspoon per 113 grams (½ cup or 1 stick) of salted butter used. However, for best results and precise flavor control, stick to unsalted butter when the recipe specifies it and weigh it accurately using a digital scale, whether it's softened or cold butter using appropriate techniques.
Lard: Techniques for Weighing Rendering Fat
Lard, particularly high-quality leaf lard, is prized in pastry making for its ability to create exceptionally flaky and tender crusts. Unlike butter, which has a melting point around 90-95°F (32-35°C), pure lard melts at a slightly higher temperature, around 105-115°F (40-46°C), and is 100% fat. This higher melting point helps it stay solid longer during baking, contributing to better layer separation. Lard can be purchased in solid blocks or tubs.
When weighing lard, especially if it's rendered at home, it's usually in a solid or semi-solid state at room temperature. Use a digital scale and weigh it just like you would cold butter. Cut the solid lard into pieces using a knife or scoop it from a tub with a spoon or spatula, adding it to your tared scale until you reach the desired weight.
Because it's 100% fat, its density is slightly different than butter, but weighing by weight (grams/ounces) remains the most accurate approach. For recipes requiring cold lard for flakiness, ensure the lard is well-chilled before cutting and weighing, applying the same frozen fat weighing techniques principles as for cold butter, working quickly to keep it firm.
Vegetable Shortening: Tips for Handling and Weighing
Vegetable shortening, like Crisco or similar brands, is another 100% fat product often used in baking, particularly for cookies (for chewiness and stability) and some pie crusts. It's typically sold in solid form in tubs or sticks. Shortening has a higher melting point than butter, contributing to tender textures and preventing excessive spread in cookies. It also has a neutral flavor, which can be an advantage in some recipes.
Weighing vegetable shortening is similar to weighing softened butter or scooping lard from a tub. It's usually soft enough at room temperature to be easily scooped or cut. Use a digital scale, place your container on it, tare to zero, and then add shortening by the spoonful or by cutting pieces from a block until the desired weight is reached.
Because it's often softer and more cohesive than butter, it can be easier to scoop and level for weighing. However, packing it into a cup measure (volume) can lead to significant over-measurement, making weight measurement crucial for accuracy. A cup of shortening weighs approximately 205 grams, compared to 227 grams for butter – highlighting why weight is key for accurate substitution or use.
Troubleshooting Common Fat Weighing Issues
Even with careful technique, sometimes issues arise when weighing fats. Maybe your cold butter pieces aren't perfectly uniform, or you need to adapt a recipe that uses volume measurements. Knowing how to troubleshoot these common problems ensures your baking stays on track.
Accuracy in weighing is a skill that improves with practice. Don't get discouraged if your first attempt isn't perfect. The goal is to minimize variability as much as possible. Addressing issues like uneven cuts or needing to convert measurements helps build confidence and consistency in your baking process, especially when dealing with sensitive techniques like frozen fat weighing techniques.
Correcting for Unevenly Cut Pieces
When weighing cold or frozen butter, especially when applying frozen fat weighing techniques, your pre-cut pieces might not be perfectly uniform. This is normal. The key is that you cut them into pieces small enough to allow for fine adjustments on the scale.
If you've added pieces to the scale and you're slightly over the target weight (e.g., 5 grams over), don't try to cut a perfect 5-gram piece from the remaining block. Instead, remove one of the pieces you've already weighed and trim off the excess amount needed (e.g., trim 5 grams from a 7-gram piece, leaving 2 grams to add back).
Use your digital scale to guide your trimming. Place the piece you are trimming on the scale separately (or hold it carefully over the scale) as you shave off small amounts with a sharp knife until the piece is reduced by the required weight. Then, add the trimmed piece back to your main container on the tared scale. This method allows for very precise adjustments, ensuring your final weight is spot-on, even if your initial cuts weren't perfect cubes.
Adjusting Recipes for Different Fat Types
While this article focuses on accurate weighing, it's worth noting that simply weighing equal amounts of different fats doesn't guarantee a successful substitution. As mentioned, butter contains water and milk solids, while lard and shortening are 100% fat. Substituting 100 grams of butter with 100 grams of shortening will result in a recipe with slightly more fat and no water or milk solids from the butter, which can affect hydration, texture, and flavor.
If a recipe is designed for butter and you want to use shortening or lard, you might need to make minor adjustments. For example, for flaky crusts, some bakers substitute a portion of the butter weight with an equal weight of lard (e.g., using 150g butter and 100g lard instead of 250g butter). For cookies, substituting shortening for butter might require slightly less flour or a touch more liquid to balance the lack of water in the shortening.
Always consult reliable resources or tested recipes when making substitutions. Accurate weighing of the chosen fat is the first step, but understanding its properties is key to successful substitution.
Converting Between Volume and Weight: A Practical Guide
Many older or less precise recipes still use volume measurements (cups, tablespoons) for fats. While weighing is always preferred, you may need to convert. For butter, the conversion is relatively standard: 1 US stick = ½ cup = 4 oz = 113 grams. So, if a recipe calls for 1 cup of butter, you need 2 sticks or 226 grams. For shortening, 1 cup is approximately 205 grams. For lard, 1 cup is roughly 200-205 grams, depending on how densely it's packed.
To convert accurately, use a reliable conversion chart or calculator specific to baking ingredients. Better yet, if a recipe gives volume, search for a version of that recipe that provides weight measurements. When forced to convert, use your digital scale and weigh out the converted amount by weight.
For example, if a recipe calls for ½ cup of shortening, convert that to approximately 102-103 grams and weigh out that amount using your scale. Do not rely on packing solid fats into a volume measuring cup; this introduces significant variability. Weighing is the only way to be sure you have the correct amount.
Advanced Techniques for Accurate Fat Measurement
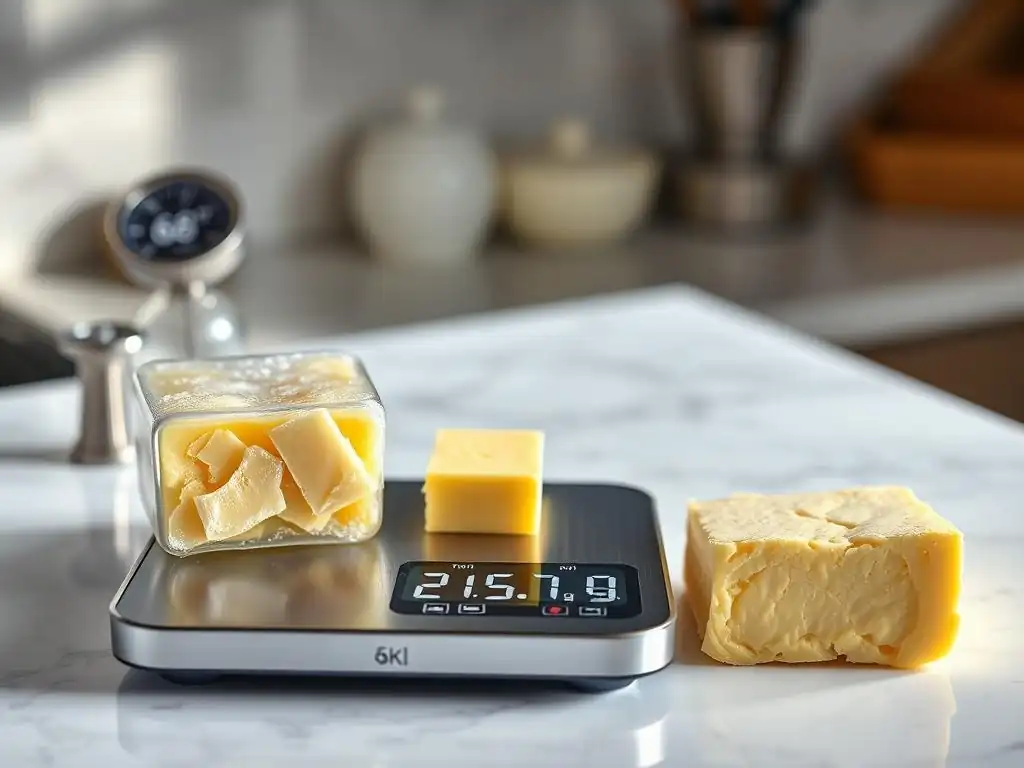
Beyond the basic steps, a few more advanced considerations can help you achieve the highest level of accuracy in fat measurement, particularly crucial for professional-level results or when developing your own recipes. These techniques ensure your scale is functioning optimally and that external factors don't interfere with your readings.
While these might seem like minor details, they contribute to the overall consistency of your baking. For sensitive recipes like French pastries that rely heavily on precise fat laminating using frozen fat weighing techniques, these small accuracies add up to a significant difference in the final product's quality and repeatability.
The Role of Scale Calibration in Consistent Baking
While most home digital scales are designed to be relatively maintenance-free, their accuracy can drift over time due to factors like temperature fluctuations, physical shock, or simply wear and tear. For the most consistent results, especially if you bake frequently or are working on complex recipes requiring high precision (like those using frozen fat weighing techniques for puff pastry), occasional scale calibration is advisable.
Many digital scales have a built-in calibration mode that requires a specific calibration weight (often purchased separately). Follow your scale's manual for instructions on how to calibrate it.
If your scale doesn't have a calibration function or you don't have a calibration weight, you can perform a simple accuracy check using items of known weight, such as standard US coins (a US nickel weighs exactly 5.00 grams, a US quarter weighs 5.67 grams) or a pre-packaged item with a precisely stated net weight. If your scale consistently reads these known weights incorrectly, it might be time for calibration or a new scale.
Optimizing Kitchen Scale Placement for Accurate Readings
The surface your digital scale sits on can affect its accuracy. For consistent and correct readings, always place your scale on a flat, stable, level surface. Avoid placing it on uneven countertops, wobbly tables, or near sources of vibration (like a running mixer or dishwasher).
Ensure the scale's feet are all firmly touching the surface. Any tilt or instability can lead to slight variations in the weight displayed, especially when measuring smaller amounts or making fine adjustments to reach an exact weight. This is particularly important when using frozen fat weighing techniques, as the act of adding hard pieces to the scale might cause minor vibrations that could temporarily affect the reading on an unstable surface. A solid, non-slip surface away from drafts is ideal for reliable measurements.
Accounting for Tare Weight of Packaging
While less common for stick butter which is usually removed from its wrapper, some fats like lard or shortening might be weighed in their original packaging in industrial settings. In home baking, you will almost always remove the fat from its packaging before weighing. However, it's crucial to understand the concept of tare weight, which your scale's tare function handles automatically when you zero it with your container on the platform.
The tare weight is the weight of the container or packaging itself. By taring the scale with your bowl or parchment paper before adding the fat, you are ensuring that the scale only measures the net weight of the fat ingredient. Never place a full stick of butter with its wrapper onto the scale and assume the weight displayed is the butter alone, unless the recipe specifically accounts for wrapper weight (which is highly unlikely in home recipes). Always remove packaging and use the tare function for accurate net weight measurement of your fats.
Maintaining Accuracy: Cleaning and Storing Measuring Tools
Proper care of your measuring tools, especially your digital scale and knives, is essential for maintaining their accuracy and longevity. Residue from fats can build up, affecting readings or making tools less effective for cutting.
A well-maintained kitchen scale and sharp knives are your allies in precise baking, whether you're weighing flour, sugar, or mastering frozen fat weighing techniques. Taking a few moments for cleaning and proper storage after each use will ensure your tools are ready and accurate the next time you need them.
Best Practices for Cleaning Measuring Tools
After weighing fats, particularly sticky softened butter or greasy lard/shortening, clean your tools promptly. For your digital scale, if you used a container or parchment paper, simply remove and clean that. If any fat touched the scale platform directly, wipe it clean immediately with a damp cloth and a little mild dish soap if necessary. Avoid getting water into the scale's electronics. Dry the scale platform thoroughly before storing.
Knives and cutting boards used for cutting cold or frozen fats should be washed in hot, soapy water to remove all grease residue. Leftover fat can dull knife blades and become rancid on surfaces. Rubber spatulas and other tools used to handle softened fats should also be washed thoroughly. Ensuring tools are clean prevents cross-contamination of flavors and maintains their performance. A clean scale platform ensures nothing interferes with the weight sensor.
Proper Storage to Preserve Fat Quality and Weighing Accuracy
Storing your fats correctly is just as important as weighing them accurately. Butter should be stored in the refrigerator, ideally in its original packaging or an airtight container, to prevent it from absorbing odors and to maintain its freshness and firmness for when you need cold butter or require frozen fat weighing techniques. For longer storage (several months), butter can be frozen.
Lard and shortening should also be stored in airtight containers in a cool, dark place. Refrigeration is recommended for lard, especially after opening, to extend its shelf life. Proper storage prevents rancidity, which can ruin the flavor of your baked goods. Storing your digital scale in a dry place where it won't be exposed to extreme temperatures or physical shocks will help maintain its calibration and accuracy over time.
Regular Scale Calibration for Longevity
While cleaning and storage are important for immediate accuracy and tool lifespan, periodic calibration (or checking calibration) is key to ensuring your digital scale remains accurate over the long term. Even if your scale seems to be working fine, its internal calibration can drift.
Make it a habit to check your scale's accuracy every few months, or before undertaking particularly sensitive baking projects that rely heavily on precise measurements, such as delicate French pastries requiring exact frozen fat weighing techniques. Use a known weight, like a calibration weight or accurate coin set, to test if your scale is reading correctly.
If it's off by more than a gram or two for a significant weight (e.g., 100g or more), recalibrating or replacing the scale might be necessary. Investing this small amount of time ensures that all your careful weighing techniques translate into consistently successful baking results.
Conclusion: Elevating Your Baking Through Accurate Fat Measurement
Mastering the accurate measurement of fats, whether softened butter for a tender cake or cold/frozen butter for a flaky pastry using precise frozen fat weighing techniques, is a fundamental skill that will significantly improve your baking results. Fat plays a crucial role in texture, flavor, and structure, and getting the amount right is non-negotiable for consistent success. Relying on volume measurements for fats is inherently less precise than using a digital kitchen scale, which allows you to measure in grams or ounces with much greater accuracy.
We've explored techniques for handling softened butter, emphasizing uniform temperature and careful weighing, and delved into the specifics of weighing cold and frozen fats, highlighting the importance of proper chilling, pre-cutting into small pieces, and using a tared digital scale for precision. We also touched upon the nuances of weighing different fat types like lard and shortening and offered troubleshooting tips for common issues. By implementing these strategies and maintaining your tools, you'll be well-equipped to tackle any recipe with confidence, ensuring your baked goods have the perfect texture and flavor every time. Happy baking!
Frequently Asked Questions
How does freezing fat affect its weight when measuring?
Freezing fat doesn't change its actual weight. However, frozen fat can be more difficult to measure accurately due to its rigid structure and potential for air pockets.
What are the best practices for accurately weighing frozen fat?
Ensure your frozen fat is evenly frozen and cut into manageable pieces. Use a digital kitchen scale for precise measurements, and avoid guessing the weight based on volume.
Why is accurate fat weighing so important in baking?
Accurate fat weighing is crucial for recipe consistency and achieving the desired texture. Incorrect amounts of fat can significantly impact the final product's flavor and structure.
What are some tips for weighing room-temperature fat versus frozen fat?
For room-temperature fat, ensure it's properly softened but not melted. For frozen fat, consider briefly thawing just enough to make it easier to cut and weigh accurately, while still maintaining its cold temperature.
What happens if I don't accurately weigh fat in my baking recipes?
Inaccurate fat measurements can result in a variety of issues, including dry or greasy textures, altered flavors, and structural instability in your baked goods.
Final Reflection: Mastering the Art of Fat Measurement
The precise measurement of fats, whether room-temperature butter or frozen lard, is not merely a detail; it's the cornerstone of successful baking and cooking. Inaccurate measurements can lead to disastrous results, transforming a potential masterpiece into a culinary catastrophe. This article has explored various techniques to ensure accuracy, highlighting the crucial differences between handling fats at varying temperatures and the impact this has on final product consistency.
The journey from haphazard guesswork to precise fat measurement is a testament to the evolving nature of culinary practices. We've moved beyond relying solely on imprecise volume measurements, embracing the accuracy of weight-based methods. This shift reflects a broader trend towards scientific precision in cooking, a pursuit of perfection that elevates the craft beyond simple recipe following. The difference between something good and something great is attention to detail.
This quote, while often applied to other fields, perfectly encapsulates the importance of mastering techniques like those discussed here.
Now, consider your own kitchen. Think about the recipes you cherish, the moments of culinary triumph, and perhaps even those less-than-successful attempts. What role did the accuracy of your fat measurements play? I invite you to experiment with the techniques outlined in this article, to embrace the precision, and to experience the transformative power of accurate fat measurement in your own cooking. The reward? Consistently delicious results, a deeper understanding of your craft, and the satisfaction of mastering a fundamental skill that elevates every dish.
Unlock Your Baking Potential: Master Fat Measurement!
Thanks for diving into the world of precise fat measurement! We hope you now feel more confident in handling both room-temperature and frozen fats in your baking. Ready to put your new skills to the test?
- Bake something amazing! Try out a recipe you've been eyeing, focusing on accurately measuring your fats using the techniques you've learned. This is the best way to truly solidify your new knowledge.
- Share your baking triumphs (and challenges!). Tell us about your experience in the comments below – we love hearing from our baking community!
- Explore our other baking guides. We have tons of resources to help you master every aspect of baking, from ingredient substitutions to advanced techniques. Check out the navigation bar at the top of the page!
What delicious creation will you be whipping up next, and what fat will you be using? Let's chat!