
Fixing Soggy Bottoms in Filled Sandwich Cookies


Welcome to BakeWithEase, your kitchen companion for all things baking! Ever wondered how to banish that dreaded soggy bottom in your sandwich cookies? We've all been there. Dive into our guide on the "Soggy Sandwich Cookie Filling Fix" and discover the secrets to perfectly crisp cookies and fillings that stay put. Ready to achieve sandwich cookie perfection? Let's get baking!
- Fixing Soggy Bottoms in Filled Sandwich Cookies: A BakeWithEase Guide
- Introduction: Why Are My Sandwich Cookies Soggy?
- Identifying the Culprit: What Causes Soggy Sandwich Cookie Bottoms?
- Solution 1: Choosing the Right Sandwich Cookie Filling
- Solution 2: Strengthening Your Cookie Base
- Solution 3: Creating a Moisture Barrier
- Solution 4: Optimizing Sandwich Cookie Storage
- Solution 5: Assembly Techniques for Avoiding Soggy Cookies
- Preventing Soggy Sandwich Cookies: A Summary of Best Practices
- Conclusion: Enjoy Perfectly Filled Sandwich Cookies with BakeWithEase
-
Frequently Asked Questions
- How can I prevent my sandwich cookie filling from making the cookies soggy?
- What types of fillings are most likely to cause soggy sandwich cookies?
- What ingredients can I add to my cookie dough to make them more resistant to becoming soggy?
- Can storing my sandwich cookies in a specific way help prevent them from becoming soggy?
- Is there a way to create a barrier between the filling and the cookie to prevent sogginess?
- Final Reflection: The Enduring Quest for the Perfect, Crisp Cookie
- Conquer Soggy Bottoms: Your Sandwich Cookie Upgrade Awaits!
There's little joy in biting into a beautifully crafted sandwich cookie only to discover a disappointing soggy bottom. It's a common frustration for home bakers, turning a potentially crisp, delightful treat into something less appealing. This issue often arises after the cookies have been filled and allowed to sit for a while, particularly affecting the bottom cookie that's in direct contact with the filling. Understanding the science behind this soggy problem is the first step towards achieving perfectly textured sandwich cookies every time.
The phenomenon of a soggy sandwich cookie bottom is primarily a moisture migration issue. Fillings, especially those with high water content like jams, fruit curds, or some cream cheese-based mixtures, naturally contain moisture. This moisture is drawn into the porous structure of the cookie over time, causing it to soften and lose its desirable crispness. The speed and severity of this process depend on various factors, including the type of filling, the cookie's initial texture, and how the cookies are stored. Addressing this requires a multi-faceted approach, tackling both the moisture source and the cookie's vulnerability.
The core of the soggy sandwich cookie problem lies in the interaction between the filling and the cookie base. Cookies are typically baked to reduce their moisture content significantly, giving them their characteristic crisp or chewy texture. However, this dry, porous structure acts like a sponge when placed in contact with a moist filling. Water molecules from the filling migrate into the cookie through osmosis and capillary action, rehydrating the starch and gluten structure within the cookie.
This moisture migration isn't instantaneous but occurs over time. A cookie filled immediately and eaten might remain crisp, but one stored for a day or two, especially in humid conditions, is much more likely to develop a soggy bottom. The rate of moisture transfer is influenced by the difference in water activity between the filling and the cookie, the contact surface area, and the ambient humidity. High humidity in the storage environment can also contribute, as the cookie can absorb moisture directly from the air.
At BakeWithEase, we believe every home baker deserves perfectly textured treats. Our approach to fixing the soggy sandwich cookie filling fix is comprehensive, addressing the issue from multiple angles: selecting the right filling, optimizing your cookie recipe and baking method, creating barriers, and mastering storage techniques. This guide will walk you through each step, providing practical tips and explanations.
By implementing the strategies outlined in this guide, you can significantly reduce or eliminate the issue of soggy sandwich cookie bottoms. We'll explore how different filling types behave, how slight modifications to your cookie dough or baking time can make a difference, simple tricks like using chocolate as a barrier, and the best ways to store your filled cookies to maintain their texture. Getting the ultimate soggy sandwich cookie filling fix is achievable with the right knowledge and techniques.
Pinpointing the exact cause of a soggy sandwich cookie bottom is crucial for finding the right solution. Often, it's not just one factor but a combination of elements working together to compromise your cookie's texture. Understanding these root causes allows you to proactively prevent the problem rather than just reacting to it. The primary culprits are typically the filling itself, the cookie's inherent properties, and the storage environment.
Consider a classic sandwich cookie like a Linzer cookie filled with raspberry jam. Raspberry jam typically has a high water content, often exceeding 40-50%. The shortbread-style cookie base, while buttery, is also porous due to its fat content and crumb structure. When these two meet, moisture from the jam inevitably begins to seep into the cookie, especially the bottom layer supporting the weight of the filling and the top cookie. This moisture migration is the direct cause of the softening and loss of crispness.
High-Moisture Fillings
Fillings with a significant amount of water are the most common offenders when it comes to creating soggy sandwich cookie bottoms. Examples include fruit jams, jellies, fruit curds (like lemon curd), some custards, and fillings made primarily with water or milk and minimal fat. These fillings have a high water activity level, meaning the water is readily available to migrate into drier components like cookies.
A filling like a simple syrup-based glaze or a water-reduced fruit puree might have a water activity level of 0.85 or higher. A typical baked cookie, conversely, might have a water activity level below 0.3. This significant difference creates a strong gradient, driving moisture from the filling into the cookie until equilibrium is reached, which unfortunately results in a soggy texture for the cookie. Even seemingly stable fillings like cream cheese frostings can cause issues if they contain a high proportion of liquid ingredients or aren't properly stabilized.
The texture and structure of the cookie base play a significant role in how susceptible it is to becoming soggy. Cookies that are naturally softer, more porous, or less dense absorb moisture more quickly than those that are crisp, dense, or have a tighter crumb structure. For instance, a delicate, porous sugar cookie will absorb moisture faster than a dense, crisp shortbread or biscotti.
The ingredients and baking method heavily influence cookie texture. Cookies with a higher ratio of leavening agents (like baking soda or powder) tend to be more porous. Cookies with a higher proportion of moisture in the dough itself (before baking) might remain slightly softer even after baking, making them more vulnerable. Conversely, cookies baked longer at a slightly lower temperature to dry them out thoroughly, or those with a higher fat content like shortbread, which creates a more impermeable structure, tend to resist sogginess better.
Storage Conditions
How you store your filled sandwich cookies can dramatically impact whether they develop soggy bottoms. Humidity is the primary environmental factor. Storing cookies in a humid environment allows moisture from the air to be absorbed directly into the cookies, compounding the issue caused by the filling. An open container or a non-airtight container in a humid kitchen is a recipe for disaster for crisp cookies.
Furthermore, temperature fluctuations can also play a role. Storing cookies in the refrigerator, while sometimes necessary for certain fillings, can also introduce moisture. Condensation can form when cold cookies are brought out into warmer air, and this surface moisture can then be absorbed. The best storage conditions involve using airtight containers and keeping them in a cool, dry place away from direct heat or humidity sources.

One of the most effective strategies for preventing a soggy sandwich cookie filling fix is to start with a filling that is inherently less likely to cause the problem. This means opting for fillings with low moisture content or those where the moisture is bound up in fats or sugars, making it less available to migrate into the cookie. Think about the composition of your filling before you even start mixing.
Consider the difference between a jam (high water) and a firm chocolate ganache (low water, high fat). The ganache is far less likely to transfer moisture to the cookie. By consciously selecting or adapting recipes to use low-moisture fillings, you tackle the primary source of the sogginess issue head-on. This might involve thickening fillings, reducing liquid ingredients, or focusing on fat-based options.
Low-Moisture Filling Recipes
Prioritizing low-moisture ingredients is key when formulating or selecting filling recipes. Instead of using fruit purees directly, consider reducing them significantly on the stovetop to evaporate excess water, essentially making a thick fruit paste or jam. When using ingredients like cream cheese, ensure it's well-drained or use a recipe that incorporates enough fat (like butter) and powdered sugar to create a stable, less watery structure.
For instance, a traditional American buttercream, made from butter and powdered sugar, has a very low water content compared to a meringue-based buttercream or a custard filling. The high sugar content in powdered sugar also helps bind any minimal moisture present. When making fillings, aim for a thick, paste-like or firm consistency rather than a runny or soft one, as excess liquidity is a direct indicator of high available moisture.
Using Fat-Based Fillings
Fat acts as a natural barrier and also has a very low water content. Fillings that are primarily fat-based are excellent choices for preventing soggy sandwich cookie bottoms. The fat molecules do not readily transfer moisture to the cookie, and the fat itself can even create a slight barrier on the cookie surface it touches.
Examples of effective fat-based fillings include classic buttercreams, chocolate ganache (made with chocolate and cream, where the fat in the chocolate and cream dominates), peanut butter cream (peanut butter mixed with powdered sugar and butter), and even dense nut butter fillings. A firm chocolate ganache, for example, contains a high percentage of cocoa butter and milk fat, which are solids at room temperature and contain virtually no free water, making it an ideal soggy sandwich cookie filling fix.
Let's look at a few reliable options that serve as a good soggy sandwich cookie filling fix.
- Buttercream: A classic American buttercream (butter, powdered sugar, vanilla, a splash of milk/cream) is a fantastic choice. The high ratio of fat (butter) and the ability of powdered sugar to absorb moisture make it very stable. A typical recipe might use a 1:2 ratio of butter to powdered sugar by weight, resulting in a firm, low-moisture filling.
- Ganache: A firm ganache, made with a higher ratio of chocolate to cream (e.g., 2:1 or 2.5:1 chocolate to cream by weight for dark chocolate), sets up firm and contains significant fat from the chocolate and cream. Once cooled and set, it forms a stable, delicious layer that resists moisture migration.
- Peanut Butter Cream: A simple mix of smooth peanut butter, softened butter, and powdered sugar creates a delicious and stable filling. The natural oils in peanut butter, combined with the added butter, provide a high-fat, low-moisture environment. A common ratio is equal parts peanut butter, butter, and powdered sugar, adjusted for desired consistency.
These examples showcase how focusing on fat and sugar content can lead to fillings that are less likely to cause a soggy sandwich cookie filling fix problem.
While the filling is a major factor, the cookie itself plays a vital role in resisting sogginess. A cookie that is baked to the right texture and dryness is far more resilient. Think of it like building a strong foundation – a sturdy cookie base is less likely to crumble or absorb unwanted moisture. This involves considering your recipe ingredients and your baking technique.
Some cookie recipes are inherently better suited for sandwich cookies than others. A very soft or delicate cookie might be delicious on its own but won't stand up well to being filled and stored. Aim for recipes that produce a slightly firmer, perhaps even slightly drier cookie than you might bake for eating plain.
The primary way to make a cookie more resistant to moisture absorption is to reduce its initial moisture content through proper baking. Baking longer and/or at a slightly lower temperature than specified in a recipe intended for softer cookies can help dry them out more thoroughly. The goal isn't a burnt cookie, but one that is uniformly baked through and has a firmer texture.
For example, if a recipe calls for baking at 350°F (175°C) for 10-12 minutes until edges are golden, you might consider baking at 325°F (160°C) for 14-16 minutes, or until the entire cookie looks set and slightly golden, not just the edges. Pay attention to the center of the cookie; if it still looks pale or soft, it retains too much moisture. A crisper cookie will have a lower water activity level, reducing the moisture gradient between it and the filling, thus providing a better soggy sandwich cookie filling fix.
Sometimes, minor adjustments to your cookie dough recipe can help. Reducing the amount of liquid ingredients (milk, water, sometimes eggs) slightly, or increasing the proportion of flour or fat, can lead to a dough that bakes into a firmer, less porous cookie. For instance, a dough with a slightly higher flour-to-liquid ratio will typically yield a sturdier cookie.
Consider a sugar cookie recipe. If it calls for a large egg and a splash of milk, you might try using just the egg yolk (which contains more fat and less water than the white) and omitting the milk, or substituting a portion of the liquid with melted butter or oil. Increasing the fat content, as in a shortbread, creates a crumb structure that is less prone to absorbing moisture. However, be cautious with adjustments; too many changes can negatively affect the cookie's spread, flavor, and overall texture.
Beyond temperature and time, ensuring your cookies are properly and evenly baked is essential. Crowding the baking sheet can lead to uneven heat distribution, resulting in some cookies being underbaked and thus more prone to sogginess. Use parchment paper or silicone mats to prevent sticking and promote even browning.
Allow cookies to cool completely on the baking sheet for a few minutes before transferring them to a wire rack to finish cooling. This allows them to set up properly. Ensure they are completely cool – room temperature throughout – before even thinking about filling them. Filling warm cookies is a guaranteed way to introduce condensation and moisture, leading directly to a soggy sandwich cookie filling fix nightmare.
Solution 3: Creating a Moisture Barrier
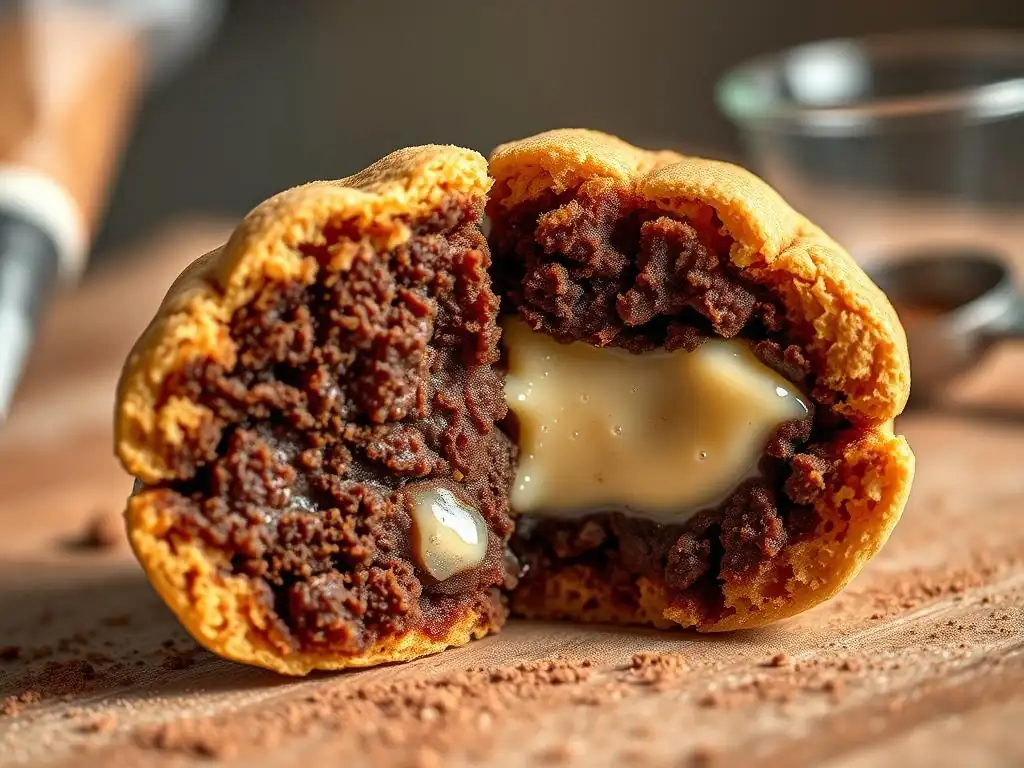
Even with low-moisture fillings and sturdy cookies, an extra layer of protection can provide an excellent soggy sandwich cookie filling fix, especially if you plan to store the cookies for more than a day or two, or if your filling is slightly more moist than ideal. A moisture barrier is a thin layer applied to the inside surface of the cookie that will be in contact with the filling.
This barrier physically separates the cookie's porous structure from the moisture in the filling, preventing or significantly slowing down the migration process. The barrier itself should ideally be something that is solid or semi-solid at room temperature and doesn't contain free water.
Chocolate Coating
One of the most popular and effective moisture barriers is a thin layer of melted chocolate or compound coating. Chocolate is primarily fat and cocoa solids, with very low water content. When melted and applied to the cookie surface, it hardens into a solid, impermeable layer.
Simply melt some chocolate chips or chopped chocolate gently (in a microwave on low power or over a double boiler). Dip or spread a thin layer of melted chocolate onto the flat underside of one cookie half that will be in contact with the filling. Let the chocolate set completely before adding the filling. White, milk, or dark chocolate can be used, depending on the flavor profile of your cookie and filling. This creates a robust defense against a soggy sandwich cookie filling fix.
Using Wafer Paper
Another clever technique involves using edible wafer paper. Wafer paper is essentially made from potato starch, water, and oil, but when dry, it's a very thin, stiff sheet that doesn't readily absorb moisture like a cookie. Small shapes cut from wafer paper can be placed on the cookie surface under the filling.
While wafer paper itself isn't completely impermeable in the long term, it can act as a buffer, absorbing some initial moisture from the filling before it reaches the cookie, or simply slowing down the migration process significantly. It's a subtle barrier that doesn't add much flavor or texture, making it suitable for delicate cookies where chocolate might be too dominant. Cut small circles or squares slightly smaller than your cookie diameter and place one on the bottom cookie half before adding the filling.
Applying a Thin Layer of Melted Chocolate
Let's elaborate on the chocolate barrier, as it's arguably the most effective for a strong soggy sandwich cookie filling fix. Choose a good quality chocolate or confectionery coating. Tempering real chocolate will give a snappier, more stable finish, but simply melting and allowing compound coating (which contains vegetable oil instead of cocoa butter) to set works well as a barrier.
Melt about 1/2 cup of chocolate chips or chopped chocolate. Using a small offset spatula or the back of a spoon, spread a very thin, even layer over the entire flat surface of the cookie half that will touch the filling. Aim for just enough to coat it opaque, not a thick layer. Place the coated cookies on parchment paper and let them sit at room temperature or in the refrigerator for 10-15 minutes until the chocolate is completely firm to the touch. This hard shield is highly effective against moisture.
Even if you've chosen the right filling, baked your cookies perfectly, and used a barrier, improper storage can still lead to soggy bottoms. The environment where you keep your filled cookies is just as important as how you made them. Controlling moisture in the storage container is paramount for maintaining texture.
Humidity is the enemy of crisp cookies. Air contains moisture, and if that moist air is trapped with your cookies and filling, the cookies will eventually absorb it, leading to sogginess. Proper storage minimizes exposure to both the filling's moisture and ambient humidity.
Airtight Containers
The single most important step in storing filled sandwich cookies to prevent sogginess is using an airtight container. A container with a tight-fitting lid prevents external humidity from reaching the cookies. It also helps to contain any minimal moisture vapor released by the filling, although this is less of an issue with low-moisture fillings.
Choose a container that is just large enough to hold your cookies in a single layer or stacked with parchment paper in between layers, minimizing the amount of air trapped inside. Ensure the lid seals completely. Avoid using plastic wrap alone or containers with loose lids, as these will not provide an effective barrier against ambient moisture, undermining your efforts towards a soggy sandwich cookie filling fix.
Using Desiccants
For extra protection, especially in very humid climates or when storing cookies for several days, you can include a food-safe desiccant packet in the airtight container. Desiccants, like silica gel packets (ensure they are marked as food-safe), absorb moisture from the air within the container, creating a drier microenvironment around the cookies.
Place one or two small desiccant packets in the bottom of the container before adding your cookies. Do not let the desiccants directly touch the cookies. These packets are excellent at scavenging stray moisture, helping to keep the cookies crisp over a longer period. You can often find food-safe desiccant packets online or in specialty baking stores.
Proper Storage Temperature
Where you store the airtight container also matters. A cool, dry place is ideal. Avoid storing filled cookies near sources of heat or in areas prone to humidity, like directly above a dishwasher or oven. A pantry shelf or a cool countertop away from direct sunlight is usually suitable for most filled cookies.
If your filling requires refrigeration for food safety (e.g., some dairy-based fillings), be mindful of condensation. When taking refrigerated cookies out, condensation will form on the cold surface as they warm up in room temperature air. This surface moisture can lead to sogginess. If possible, let the unfilled cookies come to room temperature before filling, and if refrigeration is necessary, try to minimize the time they are stored cold, or plan to consume them shortly after removing them from the fridge.

Even with the best ingredients and storage, how you assemble your sandwich cookies can influence their texture longevity. The timing of assembly and the amount of filling used are key factors. Careful assembly can be the final touch in your soggy sandwich cookie filling fix strategy.
Think about the interaction happening the moment the filling meets the cookie. Minimizing this interaction time or the potential for excessive moisture transfer during assembly is beneficial.
This step cannot be stressed enough. Ensure your cookies are fully cooled to room temperature before adding any filling. A warm cookie will create steam or condensation when it comes into contact with a cooler filling, instantly introducing moisture. Furthermore, warm cookies are softer and more prone to breaking, but also more susceptible to absorbing moisture because their structure hasn't fully set.
Allow cookies to cool on the baking sheet for a few minutes until they are firm enough to handle, then transfer them to a wire rack to cool completely. This typically takes at least 20-30 minutes, possibly longer for larger or thicker cookies. They should feel cool to the touch all the way through before proceeding with filling.
Applying Fillings Sparingly
While it's tempting to pile on a generous amount of delicious filling, using too much can increase the likelihood of sogginess. A thick layer of filling means more potential moisture in contact with the cookie surface over a larger area.
Apply just enough filling to create a pleasant ratio with the cookie, ensuring it doesn't squish out excessively when the top cookie is added. A thinner, even layer of filling is less likely to overwhelm the cookie structure than a thick dollop. This is particularly important for fillings that are inherently more moist, even if they are low-moisture relative to others.
This is the ultimate soggy sandwich cookie filling fix, if feasible. If you want absolutely guaranteed crisp cookies, fill them as close to the time of serving as possible. This minimizes the contact time between the filling and the cookie, drastically reducing the opportunity for moisture migration.
You can bake the cookies ahead of time and store them unfilled in an airtight container. Prepare the filling separately and store it appropriately (some fillings can be stored at room temperature, others need refrigeration). Then, assemble the sandwich cookies just an hour or two, or even minutes, before you plan to serve them. This ensures the cookies retain their maximum crispness.
Achieving the perfect sandwich cookie texture is a combination of several factors. By being mindful of each stage, from ingredient selection to storage, you can effectively prevent soggy bottoms and enjoy your creations as intended. Here's a quick rundown of the best practices for a reliable soggy sandwich cookie filling fix.
It's not about doing one thing perfectly, but about implementing several layers of prevention. By combining a few of these strategies, you create a much more resilient cookie that stands up to its filling over time. This integrated approach is the most successful way to tackle the soggy sandwich cookie filling fix challenge.
Recipe Selection
Choose cookie recipes that naturally bake up crisp and sturdy. Shortbreads, certain sugar cookies designed for cutouts, or cookies with a higher fat-to-flour ratio are often good candidates. Avoid recipes that yield very soft, cakey, or highly porous cookies if longevity and crispness are your goals for a filled cookie.
Pair your chosen cookie recipe with a suitable filling. Prioritize fillings known for their low moisture content, such as buttercreams, firm ganaches, or nut butter-based creams. If using a potentially more moist filling like jam, ensure it is a very thick, reduced version.
Baking Techniques
Bake your cookies thoroughly to reduce their internal moisture. This might mean baking them slightly longer or at a slightly lower temperature than a recipe intended for softer cookies. Look for even coloring across the cookie, not just the edges, as an indicator of doneness.
Ensure cookies are completely cooled to room temperature on a wire rack before filling. Warm cookies + cool filling = condensation = sogginess. Patience during the cooling phase is critical for preventing a soggy sandwich cookie filling fix.
Filling Choices
Opt for fillings that are primarily fat and sugar-based rather than water-based. Buttercreams, ganaches, and peanut butter fillings are excellent examples of low-moisture options. If using jams or curds, ensure they are thick and reduced.
Consider using a moisture barrier on the cookie surface that touches the filling. A thin layer of melted and set chocolate or a piece of wafer paper can effectively block moisture migration, providing a reliable soggy sandwich cookie filling fix.
Storage Strategies
Store filled sandwich cookies in a truly airtight container to protect them from ambient humidity. Minimize the amount of air in the container. For added protection, especially in humid climates, include a food-safe desiccant packet in the container.
Keep the storage container in a cool, dry place away from heat sources or areas of high humidity. If refrigeration is necessary for the filling, be mindful of condensation when removing the cookies and consider filling them closer to serving time.
Say goodbye to disappointing soggy bottoms! By understanding the causes of moisture migration and implementing the strategies outlined in this guide – choosing the right filling, baking a sturdy cookie, using barriers, optimizing storage, and assembling carefully – you can confidently create sandwich cookies that remain delightfully crisp. The ultimate soggy sandwich cookie filling fix is within your reach with these practical tips from BakeWithEase.
Remember that practice makes perfect. Experiment with different cookie and filling combinations, pay attention to baking times and temperatures, and observe how your cookies fare in different storage conditions. With a little care and attention to detail, you'll be baking perfect, non-soggy sandwich cookies that impress everyone.
Baking sandwich cookies is a rewarding endeavor, combining the joy of baking a delicious cookie with the creativity of crafting a complementary filling. Mastering the art involves not just following a recipe but understanding the science behind the ingredients and techniques. Preventing a soggy sandwich cookie filling fix is a key milestone in this mastery.
This guide provides a solid foundation for tackling the soggy bottom problem. By focusing on controlling moisture at every stage – from the ingredients you choose to how you store the finished product – you gain control over the final texture. Your journey to perfectly crisp, delicious sandwich cookies continues with every batch you bake!
Further Baking Troubleshooting Resources on BakeWithEase
Encountering baking challenges is part of the learning process, and BakeWithEase is here to help you troubleshoot common issues. Whether you're dealing with cookies that spread too much, cakes that sink, or bread that won't rise, our extensive collection of articles and guides offers practical solutions and expert advice.
Explore our "Troubleshooting Common Cookie Problems" section for more tips on achieving cookie perfection, or dive into other categories for help with cakes, breads, pastries, and more. We provide step-by-step instructions and clear explanations to empower you in your baking journey. Don't let a soggy sandwich cookie filling fix be your last challenge; keep baking and keep learning with BakeWithEase!
Frequently Asked Questions
The key is to reduce the moisture that the filling transfers to the cookies. Try using a less wet filling recipe or adding a barrier between the filling and the cookie.
Fillings with high moisture content, like those made with fresh fruit or a lot of liquid ingredients, are more prone to soaking into the cookies. Cream cheese based fillings can also be problematic.
Consider adding dry milk powder or cornstarch to your cookie dough recipe. These ingredients help to absorb excess moisture and create a sturdier cookie.
Yes! Store your assembled sandwich cookies in an airtight container at room temperature. Avoid storing them in the refrigerator, as this can increase moisture and lead to sogginess.
Absolutely! You can brush the inside of the cookies with melted chocolate or a thin layer of jam before adding the filling. This creates a waterproof barrier that helps prevent moisture transfer.
The fight against soggy sandwich cookie bottoms is far from over, but the battle for deliciousness is one worth fighting. This article has explored various techniques to prevent that dreaded moisture migration, from carefully selecting ingredients to mastering the art of the perfect cookie-to-filling ratio. The solutions presented aren't just about avoiding a textural disappointment; they're about preserving the integrity of a beloved treat and ensuring every bite is a moment of pure joy.
The impact of a perfectly crisp cookie extends beyond the simple pleasure of eating it. It's a testament to the power of precision and attention to detail in baking, a craft that has been passed down through generations. Baking is a labor of love, and the reward is a taste of happiness.
This simple truth underscores the importance of understanding the science behind our baking, allowing us to troubleshoot common problems and achieve consistent, delightful results. The quest for the perfect, crisp cookie is a microcosm of our broader pursuit of excellence in all aspects of life.
Now, consider your own baking experiences. Have you encountered the soggy bottom dilemma? What techniques have you found successful? I encourage you to experiment with the methods discussed in this article, adapt them to your own style, and most importantly, to share your successes (and failures!) with others. The journey to the perfect cookie is a continuous one, and by sharing our knowledge and experiences, we can all contribute to a world of crispier, more satisfying sandwich cookies.
Thanks for joining us on this delicious journey to perfect sandwich cookies! You've learned valuable tips to avoid that dreaded soggy bottom – now let's put them into action.
Here's how you can take your cookie game to the next level:
- Bake a batch of your favorite sandwich cookies using our anti-sog techniques! (Use the recipe you just learned about, or adapt your own!)
- Share your successes (and any lingering questions!) in the comments below. Let's build a supportive community of cookie connoisseurs!
- Try a surprising twist: experiment with different fillings and cookie flavors to find your ultimate combination.
Ready to create the crispiest, most delightful sandwich cookies you've ever tasted? What innovative filling will you try first?