
Fixing Uneven Baking in Your Bread Loaves

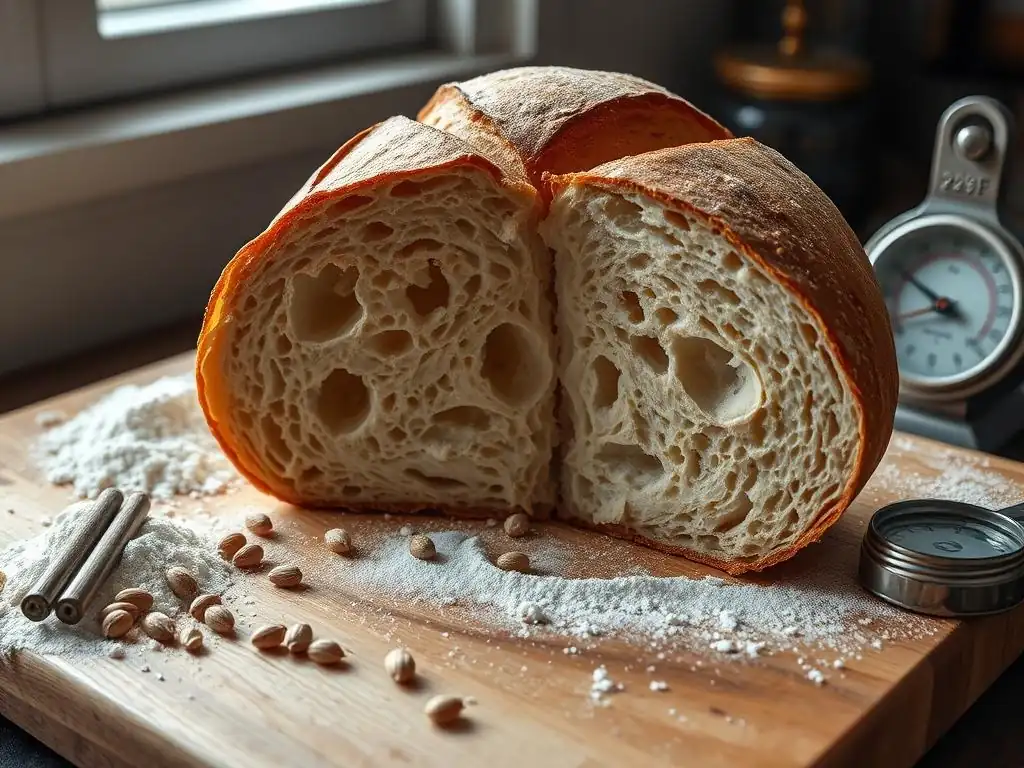
Welcome to BakeWithEase, your trusted companion on your baking journey! Ever wondered why your homemade bread sometimes emerges from the oven with a lopsided appearance? Dive into our latest article, "Fixing Uneven Baking in Your Bread Loaves," where we unravel the secrets to achieving perfectly uniform results. Discover the simple adjustments that can transform your baking and say goodbye to frustrating unevenness. Curious to know the common culprits and the surprisingly easy solutions? Let's get baking!
- Troubleshooting Crust Issues in Bread Baking: BakeWithEase Guide
- Introduction: Why is My Bread Crust Imperfect?
- Diagnosing the Root Cause of Bread Crust Problems
-
Bread Crust Solutions: Practical Tips & Techniques
- Solution 1: Adjusting Oven Temperature for Optimal Crust
- Solution 2: Manipulating Oven Humidity for Crust Control
- Solution 3: Adjusting Dough Hydration for Desired Crust
- Solution 4: Optimizing Baking Time for Perfect Crust
- Solution 5: Adjusting Sugar Content for Crust Color and Texture
- Solution 6: Utilizing Egg Washes and Milk Washes
- Solution 7: Scoring Bread Properly for Crust Development
- Preventing Crust Problems: Proactive Measures
- Troubleshooting Specific Crust Scenarios
- Advanced Techniques for Achieving Perfect Crust
- Conclusion: Achieving Crust Perfection
-
Frequently Asked Questions
- What are the most common causes of uneven bread baking?
- How can I ensure my oven temperature is accurate for bread baking?
- What's the best way to position my bread loaf in the oven for even baking?
- How does kneading affect even baking in bread?
- What if I've tried everything, and my bread still bakes unevenly?
- Final Reflection: The Pursuit of Perfectly Even Bread
- Unlock Perfectly Even Bread: Your Baking Transformation Starts Now!
Troubleshooting Crust Issues in Bread Baking: BakeWithEase Guide
Introduction: Why is My Bread Crust Imperfect?
Achieving that perfect bread crust – golden brown, delightfully crisp, and full of character – is often the hallmark of a successful bake. But what happens when your crust is too pale, too dark, too thick, or just plain uneven? These issues are incredibly common for home bakers and can leave you wondering where things went wrong.
Understanding the science behind crust formation is the first step to mastering it. The crust is essentially the outer layer of the dough that undergoes intense heat and dehydration during baking, leading to complex chemical reactions like the Maillard reaction and caramelization, which give it its color, flavor, and texture.
A less-than-ideal crust isn't just a cosmetic issue; it impacts the entire bread-eating experience. A crust that's too hard can be difficult to chew, while one that's too soft or pale lacks flavor and structure. Sometimes, crust problems manifest as part of larger uneven bread baking solutions needed for a loaf that didn't bake consistently. Identifying the specific crust issue you're facing is crucial for implementing the right fixes. Whether it's a result of oven settings, dough composition, or baking technique, most crust problems are solvable with a little troubleshooting and practice.
Common Causes of Poor Bread Crust
Poor bread crust can stem from a variety of factors, often working in combination. One frequent culprit is incorrect oven temperature. If your oven thermostat is inaccurate, your bread might be baking hotter or colder than intended, drastically affecting crust development. For example, an oven running 50°F (approx.
10°C) cooler than set can result in a pale, soft crust, while one that's 50°F hotter might produce a crust that browns too quickly and becomes excessively thick or burnt before the interior is fully baked. Another major factor is humidity, or lack thereof, in the oven during the initial phase of baking. Steam helps keep the crust pliable, allowing the loaf to expand fully and resulting in a thinner, crisper crust. Without adequate steam, the crust sets too early, restricting oven spring and leading to a thicker, tougher texture.
Dough composition also plays a significant role. The hydration level – the ratio of water to flour – directly influences crust thickness and crispness. Higher hydration doughs generally yield thinner, more delicate crusts, while lower hydration doughs tend to produce thicker, chewier ones.
Sugar content, even in small amounts in lean doughs, accelerates browning through caramelization and the Maillard reaction, impacting both color and flavor. Finally, baking time and technique are critical; pulling bread too early means the crust hasn't had enough time to fully develop its color and structure, while baking too long can lead to excessive darkening and hardness. Issues like these often contribute to the need for uneven bread baking solutions, as the crust might develop differently on various parts of the loaf.
Understanding the Impact of Crust on Bread Quality
The crust is far more than just the outer layer; it's integral to the overall quality and sensory experience of the bread. A well-developed crust provides structural integrity, holding the shape of the loaf and protecting the soft interior crumb. Think of a baguette: its iconic shape and texture rely heavily on a crisp, substantial crust. Without it, the loaf would be flat and unappealing.
The crust also contributes significantly to the flavor profile. The intense heat and chemical reactions during baking unlock complex aromas and tastes not present in the raw dough or the interior crumb. These flavors, ranging from nutty and roasted notes to slightly sweet or caramelized tones, are a key part of what makes bread so satisfying.
Furthermore, the crust provides a crucial textural contrast to the soft, airy crumb inside. The interplay between the crisp exterior and the tender interior is a defining characteristic of many bread types. A balanced crust-to-crumb ratio is essential for a pleasant mouthfeel. When the crust is flawed – too thick, too thin, too hard, or too soft – it disrupts this balance, diminishing the overall quality of the bread. Addressing crust issues is therefore a vital part of achieving effective uneven bread baking solutions and ensuring your loaves are enjoyable from the first bite to the last.
Diagnosing the Root Cause of Bread Crust Problems
Identifying exactly why your bread crust isn't turning out as expected requires a bit of detective work. Several factors interact during the baking process, and pinpointing the primary culprit is key to finding the right fix. Start by observing your crust: Is it too pale? Too dark?
Is it hard and thick, or thin and delicate? Does the issue appear uniformly across the loaf, or is it uneven? For instance, if one side of your loaf has a perfect crust while the other is pale or soft, this strongly suggests an issue with heat distribution or oven hot spots, a common reason home bakers seek uneven bread baking solutions.
Consider the conditions under which you baked. What was the oven temperature set to, and how did you measure it? Did you use steam, and if so, how? What was the hydration of your dough? Did it contain sugar or enrichments? How long did you bake it, and how did you determine it was done? Systematically reviewing these variables against the appearance of your problematic crust will help you narrow down the potential causes.
Oven Temperature: A Primary Suspect
Inaccurate oven temperature is arguably the most common reason for crust issues and a frequent contributor to the need for uneven bread baking solutions. Most home ovens can fluctuate significantly, often by 25-50°F (approx. 10-30°C) or more from the set temperature.
If your oven runs consistently cold, your crust may fail to brown adequately, remaining pale and soft even after the interior is cooked. Conversely, an oven that runs too hot can cause the crust to set and darken too quickly, potentially burning before the inside is properly baked, or resulting in an excessively thick, hard crust. Hot spots within the oven can lead to uneven browning, where parts of the crust are perfectly colored while others are too light or too dark.
Using an independent oven thermometer is essential for accurate temperature assessment. Place it in the center of your oven and check the temperature after it has preheated for at least 20-30 minutes. You might be surprised to find it differs significantly from the thermostat setting. If your oven fluctuates widely or has noticeable hot spots, this directly impacts how the crust develops on different parts of the loaf, making it a key area to address when seeking uneven bread baking solutions. Understanding your oven's true temperature profile is fundamental to controlling crust development.
Identifying Humidity Levels in Your Oven
Humidity, specifically steam, in the oven during the initial phase of baking is critical for achieving a desirable crust. Steam keeps the surface of the dough moist and elastic, preventing the crust from setting too early. This allows the loaf to achieve maximum oven spring – the rapid expansion that occurs in the first 10-15 minutes of baking as gases inside the dough expand. When the crust remains pliable due to steam, the loaf can expand fully before the crust hardens. This results in a thinner, crisper crust with better volume and structure.
Without adequate steam, the crust quickly dries out and hardens. This restricts oven spring, leading to denser loaves with a thicker, tougher crust that may even tear unevenly as the loaf attempts to expand. The difference can be dramatic.
Baking a baguette with steam versus without will yield vastly different results in both volume and crust texture. While some breads benefit from a drier bake later on, the initial steam phase is crucial for many types of bread, especially those with higher hydration and open crumb structures like sourdough or artisan loaves. Uneven steam distribution in the oven can also contribute to uneven crust development, highlighting its importance in uneven bread baking solutions.
Dough Hydration and Its Effect on Crust Formation
The hydration level of your dough – the percentage of water relative to the flour weight – is a fundamental factor influencing the characteristics of your bread, including the crust. Higher hydration doughs (typically 70% water or more) tend to produce loaves with a more open, airy crumb and a thinner, crispier crust.
The increased moisture in the dough contributes to more steam production during baking, which helps keep the crust pliable longer, allowing for greater expansion and a delicate finish. For example, a ciabatta dough at 80% hydration will naturally develop a much thinner, glassier crust than a standard sandwich loaf dough at 65% hydration.
Conversely, lower hydration doughs (below 65%) are easier to handle and typically result in a denser crumb and a thicker, chewier crust. The reduced moisture content means less internal steam is generated, and the crust sets more quickly. While still delicious, the crust texture will be noticeably different. Understanding the relationship between hydration and crust is vital for choosing the right dough formula for your desired outcome and is a key element in mastering uneven bread baking solutions by predicting and controlling crust behavior.
Sugar Content and Crust Color
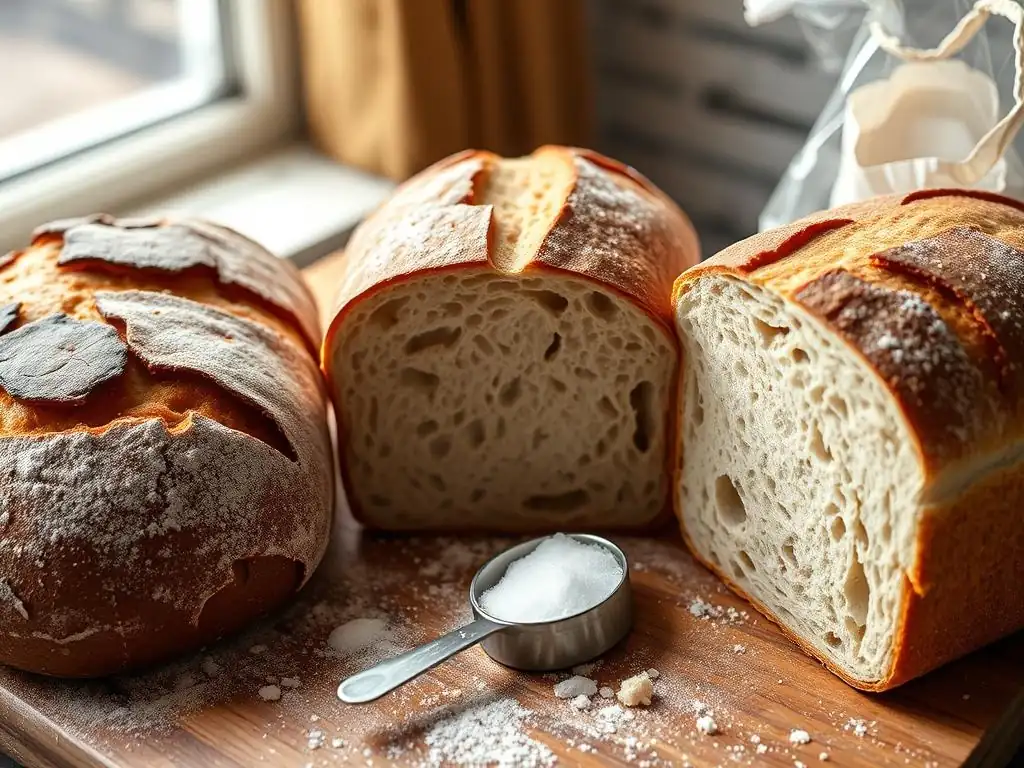
Sugar, even in small quantities, plays a significant role in crust development, primarily influencing its color and flavor through two chemical processes: the Maillard reaction and caramelization. The Maillard reaction, which occurs between amino acids and reducing sugars at temperatures above approximately 300°F (150°C), is responsible for the complex browning and savory flavors in the crust. Caramelization, the browning of sugars themselves, happens at slightly higher temperatures (around 320°F or 160°C for sucrose) and contributes sweet, often nutty notes.
Lean doughs, made only from flour, water, yeast, and salt, contain natural sugars from the flour, which contribute to browning. However, adding even a small percentage of sugar (e.g., 2-5% of flour weight) to enriched doughs accelerates these reactions, resulting in a darker, more intensely flavored crust. For instance, a brioche dough containing sugar and butter will brown much more readily and achieve a deeper color than a lean sourdough baked at the same temperature. Controlling sugar content is therefore a direct way to manage crust color and contributes to achieving consistent, even bread baking solutions.
Issues with Baking Time & Crust Development
Baking time is the final variable that locks in the crust's characteristics. Pulling a loaf from the oven too early means the crust hasn't had sufficient time at high temperatures to fully develop its color, flavor, and texture. It might be pale, soft, and lack the desired crispness.
The Maillard reaction and caramelization need time to complete, especially in the later stages of baking when the internal temperature of the bread rises significantly. A common sign of underbaking is a pale crust, particularly on the sides or bottom of the loaf, often indicating a need for uneven bread baking solutions focused on ensuring thorough heat penetration.
Conversely, baking for too long can lead to an excessively dark, hard, or even burnt crust. While some breads benefit from a longer bake to achieve a deep color and robust flavor, overbaking can make the crust unpleasantly thick and tough. Relying solely on a timer can be misleading; ovens vary, and loaf sizes differ.
The best indicators of doneness are often a combination of crust color (a deep golden brown for most loaves), the sound the bottom of the loaf makes when tapped (a hollow sound), and, most reliably, the internal temperature of the crumb (typically 190-210°F or 88-99°C for most bread types). Adjusting baking time based on these cues is crucial for achieving the perfect crust and contributes significantly to effective uneven bread baking solutions.
Bread Crust Solutions: Practical Tips & Techniques
Okay, let's get practical! Now that we've explored the common causes of crust problems, it's time to dive into actionable solutions. Many crust issues can be fixed or significantly improved with simple adjustments to your baking process. Addressing these can pave the way for excellent uneven bread baking solutions, ensuring your loaves are beautiful and delicious from edge to edge.
We'll cover everything from tweaking oven settings to modifying your dough and using specific techniques to encourage optimal crust development. Remember, baking is often about experimentation. Don't be discouraged if the first attempt isn't perfect; keep track of what you change and how it affects the outcome.
Solution 1: Adjusting Oven Temperature for Optimal Crust
If your oven temperature is off, it's one of the most impactful things you can fix for better crust development. As mentioned, an oven thermometer is your best friend here. Once you know how much your oven deviates, you can adjust the setting accordingly. If your oven runs 25°F (approx. 14°C) cold, set it 25°F higher than the recipe calls for. If it runs hot, set it lower. This simple adjustment can dramatically improve crust color and texture.
Furthermore, consider potential hot spots. If you notice one side of your bread always browns faster or darker, it's likely a hot spot. Rotating your loaf halfway through the baking time can help promote more even browning across the crust. For instance, if baking at 450°F (230°C), after 20 minutes, carefully open the oven and turn the loaf 180 degrees. This simple maneuver is a classic technique used in many uneven bread baking solutions to compensate for inconsistent oven heat distribution and ensure uniform crust development.
How to Test and Adjust Oven Temperature
Testing your oven temperature accurately is straightforward but requires patience. Place a reliable oven thermometer on the middle rack. Preheat your oven to a standard baking temperature, say 350°F (175°C). Let it preheat for at least 20-30 minutes after the preheat indicator light turns off, as the element often cycles on and off to maintain temperature. Note the temperature displayed on the thermometer. Then, check it again after another 10-15 minutes to see if it fluctuates. Repeat this process at a higher temperature, like 450°F (230°C). Document the difference between your oven's setting and the actual temperature.
Based on your findings, you can then adjust your oven dial for future bakes. If your oven reads 425°F (220°C) when set to 450°F (230°C), you know you need to set it 25°F (approx. 14°C) higher than the recipe specifies to achieve the target temperature. Consistent temperature control is a cornerstone of effective uneven bread baking solutions, ensuring the crust develops predictably across the entire loaf.
The Impact of High and Low Temperatures on Crust
Baking temperature has a profound, direct impact on crust formation. At too low a temperature, the crust develops slowly. The Maillard reaction and caramelization proceed sluggishly, resulting in a pale, thin, and often soft crust that lacks robust flavor. The loaf may also spread more horizontally before the crust sets, leading to a flatter profile. For example, baking a rustic loaf at 350°F (175°C) might give you a crust that's barely golden, even if the interior is cooked.
Conversely, baking at too high a temperature accelerates crust formation. The surface dries out and sets very quickly, which can restrict oven spring, leading to a denser crumb. The browning reactions happen rapidly, potentially causing the crust to darken excessively or even burn before the interior reaches its target temperature of around 200°F (93°C).
A loaf baked at 500°F (260°C) without protection might develop a hard, thick, and potentially charred crust within minutes. Finding the sweet spot, often between 400-475°F (200-245°C) for many artisan loaves, is crucial for balanced crust development and a key component of achieving comprehensive uneven bread baking solutions.
Solution 2: Manipulating Oven Humidity for Crust Control
Controlling humidity in your oven, especially during the first 10-15 minutes of baking, is essential for achieving a thin, crisp crust and good oven spring. The most common method is to create steam. This keeps the surface of the dough moist and flexible, allowing it to stretch as the loaf expands. Without steam, the crust sets prematurely, resulting in a thicker, tougher texture and potentially uneven tearing.
There are several ways to introduce steam into a home oven. One effective method is to place a cast iron pan or other oven-safe container on the bottom rack while the oven preheats. Just before loading your bread, carefully pour hot water (about 1 cup or 240ml) into the hot pan. This will generate a burst of steam. Another popular method, often used with baking stones, involves placing a pan of ice cubes on a rack below the bread right as it goes in. The melting ice creates steam as it heats up.
Creating Steam in Your Oven
To create steam, ensure your oven is fully preheated, including the steam pan if you're using one. A common setup involves a baking stone or steel on an upper rack and a heavy-duty pan (like cast iron) on the lowest rack. Once the oven reaches temperature (e.g., 450°F or 230°C), carefully slide your loaf onto the hot stone/steel. Immediately and carefully pour about 1 cup (240ml) of hot water into the hot pan on the bottom rack. Quickly close the oven door to trap the steam. Be extremely cautious of the steam release when opening the oven!
Alternatively, you can place a broiler pan or shallow baking sheet on the bottom rack during preheating. Just before loading the bread, fill the pan with about 1-2 cups (240-480ml) of ice cubes and immediately close the oven door. The ice will slowly melt and turn to steam. Maintain this steam environment for the first 10-20 minutes of baking, depending on the recipe and desired crust. This initial steam phase is vital for effective uneven bread baking solutions focused on achieving a consistently thin and crispy crust across the loaf.
Controlling Humidity Levels for Different Crust Types
The duration and intensity of steam affect the final crust. For very thin, crisp crusts typical of baguettes or some sourdoughs, you want a significant amount of steam for the first 15-20 minutes. This allows maximum expansion and keeps the crust pliable for a long time before it starts to set and brown. Using a Dutch oven (covered pot) is an excellent way to trap steam naturally released by the dough itself, creating a perfect humid environment for the initial bake.
For loaves where you desire a slightly thicker or softer crust, you might use less steam or vent the oven sooner. Some recipes call for steam only for the first 10 minutes, followed by baking in a dry oven. For enriched loaves like challah or brioche, steam is often not used at all, resulting in a softer, tender crust that relies more on egg or milk washes for color and shine. Understanding how different steam techniques impact crust allows you to tailor your approach for specific bread types and is key to implementing effective uneven bread baking solutions.
Solution 3: Adjusting Dough Hydration for Desired Crust
As we discussed, dough hydration significantly impacts crust texture. If your crust is consistently too thick and chewy, and you're baking at an appropriate temperature with steam, you might consider increasing the hydration of your dough in future bakes. For instance, if you're working with a recipe at 65% hydration, try increasing the water to 68% or 70% in your next batch. A higher water content leads to more internal steam during baking, promoting a thinner, more delicate crust.
Conversely, if your crust is too thin and fragile, perhaps you could slightly decrease the hydration. Reducing the water content by a few percentage points (e.g., from 75% to 72%) will result in a dough that's easier to handle and will produce a slightly thicker, chewier crust. Keep in mind that changing hydration often requires adjustments to kneading time and technique, as wetter doughs can be stickier. Experimenting with hydration levels is a fundamental technique for achieving specific crust characteristics and contributes to personalized uneven bread baking solutions.
Understanding the Role of Water in Crust Formation
Water plays two primary roles in crust formation. Firstly, it is essential for developing gluten, the protein network that gives bread its structure. Proper gluten development is necessary for the dough to hold its shape and expand during proofing and baking. Secondly, water in the dough turns to steam inside the oven. This internal steam pushes outwards, helping the loaf rise and expand. Crucially, this steam also condenses on the cooler surface of the dough, keeping it moist and flexible during the initial high-heat phase.
This moist, pliable surface allows the dough to stretch and expand significantly during oven spring. If the surface dries out too quickly, it forms a hard shell that restricts this expansion, leading to less volume and a thicker crust. The amount of water in the dough directly influences how much internal steam is generated, thereby impacting how long the crust remains pliable and how thin or thick it ultimately becomes. This mechanism is central to achieving a desirable crust texture and is a key consideration in uneven bread baking solutions.
Modifying Hydration Levels for Different Crusts
Tailoring hydration is a powerful way to control crust outcomes. For a light, airy loaf with a thin, shatteringly crisp crust, like a ciabatta or a rustic artisan loaf, aim for higher hydration, often 75% or more. This requires developing good dough handling skills as wetter doughs are stickier, but the result is a beautiful open crumb and a delicate crust.
For a sturdier loaf with a more substantial, chewy crust, such as a classic sandwich loaf or a bagel, lower hydration levels (typically 55-65%) are more appropriate. These doughs are easier to knead and shape and produce a denser crumb and a thicker crust that holds up well. Adjusting hydration by just 2-5% can make a noticeable difference in the final crust texture. This fine-tuning is an advanced technique in uneven bread baking solutions, allowing bakers to customize their results.
Solution 4: Optimizing Baking Time for Perfect Crust
Baking time is the final determinant of crust color and structure. If your crust is consistently too pale, even with correct temperature and steam, it likely needs more time in the oven to allow the browning reactions to fully occur. If the interior is cooked but the crust is still pale, you can often extend the baking time by 5-10 minutes, potentially at a slightly lower temperature to prevent burning the interior, or by carefully tenting the loaf with foil if the top is browning faster than the sides.
Conversely, if your crust is too dark or hard, you might be baking too long, or perhaps your oven temperature is too high. Shorten the baking time slightly in your next attempt. Always rely on internal temperature (aiming for 190-210°F / 88-99°C) as the primary indicator of doneness for the crumb, and then use visual cues and crust tapping to judge the crust's readiness. Adjusting baking time based on these indicators is a fundamental step in achieving reliable uneven bread baking solutions.
Finding the Ideal Baking Time
Determining the ideal baking time for your loaf involves considering several factors: the size and shape of the loaf, the dough hydration, the oven temperature, and the desired crust outcome. A small roll will bake much faster than a large boule. A wetter dough may take slightly longer to bake through. While recipes provide a guideline (e.g., "bake for 30-40 minutes"), these are often estimates.
The most accurate way to judge if your bread is done is by checking its internal temperature using an instant-read thermometer. Insert the thermometer into the thickest part of the loaf. For most lean bread, a temperature between 190°F (88°C) and 210°F (99°C) indicates it is fully baked. Once the internal temperature is reached, assess the crust visually and by tapping the bottom. If the internal temp is good but the crust isn't, slight adjustments to time or temperature might be needed in subsequent bakes. This methodical approach is key to effective uneven bread baking solutions.
Using Visual Cues to Determine Doneness
Beyond internal temperature, visual and auditory cues are invaluable for judging crust doneness. A well-baked crust should have a deep golden-brown color across the entire surface. The exact shade depends on the dough composition (sugar content, enrichments) and baking temperature, but it should look rich and caramelized, not pale or dull. The color should ideally be relatively even, although artisanal loaves often have variations.
Another classic test is tapping the bottom of the loaf. If it sounds hollow, it's generally considered done. This indicates that the interior crumb has set and released moisture. While not as precise as a thermometer, the hollow sound test is a reliable traditional method. Look for a crust that appears firm and crisp, not soft or yielding. These visual and auditory checks, combined with temperature, provide a comprehensive assessment for perfecting your crust and implementing robust uneven bread baking solutions.
Solution 5: Adjusting Sugar Content for Crust Color and Texture
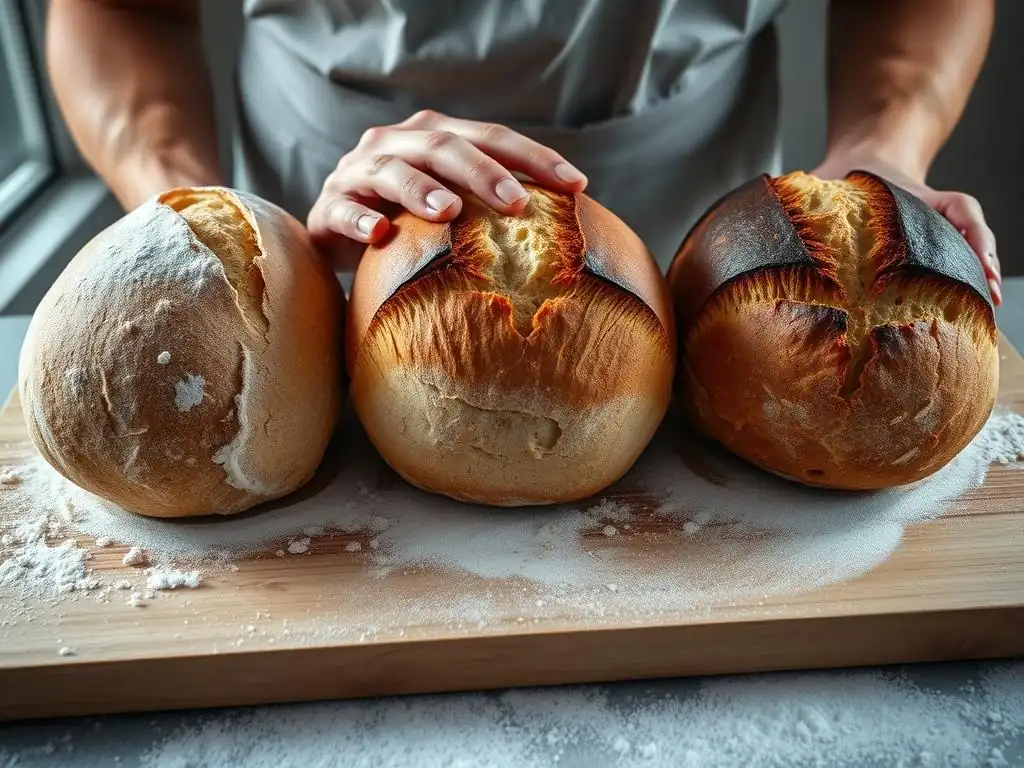
If your lean bread crust is consistently too pale, and you've ruled out temperature and time issues, consider adding a small amount of sugar to your dough formula. Even adding 1-2% sugar (based on flour weight) can significantly boost browning and contribute to a more appealing golden color through accelerated caramelization and Maillard reactions. For example, if you're using 500g of flour, adding 5-10g of sugar can make a noticeable difference in crust color.
For enriched doughs that already contain sugar but are still too pale, ensure you are baking at a high enough temperature to trigger the browning reactions effectively. If the crust is too dark or burns easily, you might need to reduce the sugar content slightly in your recipe or lower the baking temperature, potentially extending the baking time at the lower temperature to ensure the interior cooks properly. Adjusting sugar content is a targeted way to control crust color and flavor, forming a piece of the puzzle for uneven bread baking solutions.
The Impact of Sugar on Caramelization
Sugar's primary impact on the crust comes from caramelization. When sugars are heated above a certain temperature (around 320°F or 160°C), they undergo a complex process of chemical breakdown and rearrangement, resulting in the formation of hundreds of new compounds. These compounds are responsible for the characteristic brown color and rich, slightly sweet, and often nutty or buttery flavors associated with caramelized sugar.
In bread dough, the natural sugars present in flour, along with any added sugars, participate in caramelization on the crust surface. Higher baking temperatures and longer baking times encourage more extensive caramelization, leading to a darker, more intensely flavored crust. This process is distinct from the Maillard reaction but often occurs simultaneously, contributing to the overall complexity of crust color and flavor. Understanding caramelization helps in predicting how changes in sugar content or baking temperature will affect your crust and is useful for implementing uneven bread baking solutions.
Using Different Sugars for Varying Crust Effects
Different types of sugar can have slightly different effects on crust color and flavor due to variations in their chemical structure and caramelization points. Granulated sugar (sucrose) is the most common addition and provides reliable browning. Brown sugar, which contains molasses, will contribute more moisture and a deeper, richer color and flavor to the crust. Honey and maple syrup, both liquid sugars containing fructose and glucose, tend to accelerate browning even more than sucrose due to the presence of reducing sugars, often resulting in a darker crust at lower temperatures.
Using malt powder or diastatic malt (which contains enzymes that break down starch into sugars) is another technique, particularly in lean doughs, to increase the available sugars for browning and improve crust color and flavor. Non-diastatic malt adds flavor and color without enzymes. Experimenting with different sweeteners allows bakers to fine-tune the crust's appearance and taste, providing another tool in the uneven bread baking solutions arsenal.
Solution 6: Utilizing Egg Washes and Milk Washes
Egg washes and milk washes are applied to the surface of the dough just before baking and are powerful tools for controlling crust appearance, particularly color and shine. An egg wash typically consists of a whole egg, egg yolk, or egg white mixed with a small amount of water or milk. Applying an egg wash results in a glossy, golden-brown crust with a slightly firmer texture. A wash made with whole egg or yolk will produce a richer color and more shine than one made with just egg white.
Milk washes, usually milk or cream, provide a softer, matte finish and encourage browning, though typically less intensely than an egg wash. They are often used on softer rolls and enriched breads. These washes work by providing a layer of protein and sugar (lactose in milk) on the surface, which brown beautifully during baking. Uneven application of a wash can lead to uneven browning, so applying it evenly is key to using this technique as part of uneven bread baking solutions.
How Washes Affect Crust Color and Shine
Egg washes are rich in protein and fats, which contribute to both browning and shine. The proteins coagulate and form a smooth surface, while the fats and sugars promote the Maillard reaction and caramelization, resulting in a deep golden or even reddish-brown hue and a distinct gloss. The type of egg wash matters: a whole egg wash gives good color and shine; an egg yolk wash provides maximum richness and shine; an egg white wash gives less color but can provide a delicate crispness and some shine.
Milk washes contain lactose (milk sugar) and proteins, which also brown during baking but typically produce a softer, less glossy crust than egg washes. Cream washes, with higher fat content, will contribute more richness and aid browning. These washes are excellent for achieving a soft, tender crust on enriched breads and rolls. Using washes allows bakers to achieve specific aesthetic qualities in their crusts, adding another layer to uneven bread baking solutions.
Applying Washes for Desired Crust Characteristics
To apply a wash, lightly brush the surface of the proofed dough using a pastry brush. Use gentle strokes to avoid deflating the dough. Ensure even coverage for uniform color. For a very glossy finish, some bakers apply two thin coats, allowing the first to dry slightly before applying the second. For different effects:
- High Shine, Deep Color: Egg yolk + splash of water/milk.
- Good Shine, Golden Color: Whole egg + splash of water/milk.
- Matte Finish, Soft Crust, Golden-Brown: Milk or cream.
- Delicate Shine, Crispness: Egg white + splash of water.
Consider applying washes only to the top surface if you want the sides to have a different finish. Washes are particularly effective on enriched doughs that might not develop as dark a crust from sugar content alone. Mastering wash application is a simple yet effective technique for refining your crust and contributing to effective uneven bread baking solutions.
Solution 7: Scoring Bread Properly for Crust Development
Scoring, or slashing, the surface of your bread dough just before baking is not just for aesthetics; it's a crucial technique for controlling oven spring and influencing crust development. As the dough bakes, gases inside expand rapidly. If the surface crust sets before this expansion is complete, the loaf will rupture unpredictably, often along the sides, resulting in an uneven, uncontrolled tear and a thick, undesirable crust in those areas.
Scoring provides controlled weak points on the surface, allowing the dough to expand predictably during oven spring. The cuts open up cleanly, creating beautiful "ears" (the crispy edges along the cuts) and ensuring that the loaf achieves its maximum volume without bursting irregularly. Proper scoring encourages even expansion and contributes to a thinner, more desirable crust along the score lines. Uneven or insufficient scoring is a common reason for uncontrolled tears and uneven crust development, highlighting its importance in uneven bread baking solutions.
Understanding the Purpose of Scoring
The primary purpose of scoring is to guide the expansion of the dough during the intense heat of the initial baking phase (oven spring). Before the crust sets, the dough is rapidly expanding due to the production and expansion of carbon dioxide gas and the vaporization of water into steam. If the surface tension of the dough is too great, or if the crust sets too early, the pressure inside the loaf will cause it to burst at the weakest point.
Scoring relieves this surface tension by creating intentional openings. As the loaf expands, these cuts widen, allowing the dough to expand upwards and outwards in a controlled manner. This directed expansion results in a loaf with better volume and shape. The edges of the cuts, exposed directly to the heat, become crispy "ears," a desirable characteristic of many artisan loaves. Scoring is fundamental to achieving a well-shaped loaf with a properly developed crust and is a key technique in uneven bread baking solutions.
Different Scoring Techniques for Different Bread Types
The scoring pattern you choose depends on the type and shape of bread you are baking and the desired aesthetic. For long loaves like baguettes, a series of overlapping diagonal slashes is common. For round loaves (boules), a single deep slash (like a cross or a square) is often used, or multiple shallow slashes can create a decorative pattern.
- Single Slash/Cross: Suitable for boules, encourages expansion upwards.
- Diagonal Sloshes: Classic for baguettes and bâtards, allows for lengthways expansion and creates "ears".
- Grignette (Lame): A very sharp blade (often a razor blade on a handle) is essential for making clean, decisive cuts that open up beautifully. Dull blades can drag the dough, resulting in messy tears.
- Depth and Angle: The depth and angle of your cuts affect how they open. Deeper cuts encourage more expansion. An angled cut (holding the blade almost parallel to the surface) helps create a pronounced "ear."
Practice makes perfect with scoring. Using a sharp blade on a well-proofed loaf is key to achieving clean cuts that contribute to a beautiful, evenly developed crust. Mastery of scoring is a vital part of achieving effective uneven bread baking solutions.
Preventing Crust Problems: Proactive Measures
While troubleshooting is essential, preventing crust problems before they happen is even better! Many common issues can be avoided by focusing on key aspects of your baking process from the start. This involves paying attention to your ingredients, understanding your equipment, and mastering fundamental techniques like proofing. Thinking proactively about these elements is a core part of effective uneven bread baking solutions.
By consistently applying good practices, you can significantly reduce the likelihood of ending up with a pale, burnt, or uneven crust. Let's look at some proactive steps you can take.
Choosing the Right Flour for Desired Crust
The type of flour you use has a direct impact on gluten development and, consequently, crust texture and structure. High-protein bread flour (typically 12-14% protein) develops strong gluten networks, which are essential for trapping gases and providing structure for a good rise and a sturdy crust. This is ideal for chewy, rustic loaves where a substantial crust is desired.
All-purpose flour (typically 10-12% protein) has less protein and will result in a softer crumb and a less robust crust compared to bread flour. It's suitable for softer sandwich loaves or rolls.
Using whole wheat flour (around 13-14% protein, but bran interferes with gluten) or rye flour (lower protein, different gluten structure) will also result in different crust characteristics – often thicker and denser for whole wheat, and softer for rye. Selecting the appropriate flour for the type of bread you want to bake is the first step in setting yourself up for successful crust development and is foundational to implementing uneven bread baking solutions.
Maintaining Oven Temperature Consistency
As highlighted earlier, oven temperature accuracy and consistency are paramount for even crust development. Beyond using an oven thermometer, there are steps you can take to help your oven maintain a steady temperature. Avoid opening the oven door unnecessarily during baking, especially during the first 15-20 minutes. Each time you open the door, a significant amount of heat escapes, causing the temperature to drop and potentially interrupting the crucial initial phase of crust setting and oven spring.
Using a baking stone or steel can also help stabilize oven temperature and provide a consistent heat source from below, promoting better oven spring and bottom crust development. These items absorb and retain heat, radiating it steadily into the loaf. Preheating your oven for a sufficient time (30-60 minutes, including the stone/steel/steam pan) ensures the entire oven cavity and any baking surfaces are up to temperature. Consistent heat management is a cornerstone of uneven bread baking solutions.
Mastering Proofing Techniques for Optimal Crust
Proper proofing (fermentation) is essential for a good crust. Dough that is underproofed will be dense and may burst unpredictably in the oven, leading to uneven crust thickness and tearing. The crust might also be pale because there haven't been enough sugars produced during fermentation for optimal browning.
Overproofed dough, on the other hand, may collapse in the oven, resulting in a flat loaf with a pale, thin crust that lacks structure. The dough has exhausted its fermentable sugars and its gluten structure is weakened. Knowing when your dough is perfectly proofed – often indicated by the "poke test" (gently poke the dough; if the indentation springs back slowly, it's likely ready) – is crucial for achieving optimal oven spring and a beautifully developed crust. Correct proofing is a fundamental aspect of achieving effective uneven bread baking solutions.
Troubleshooting Specific Crust Scenarios
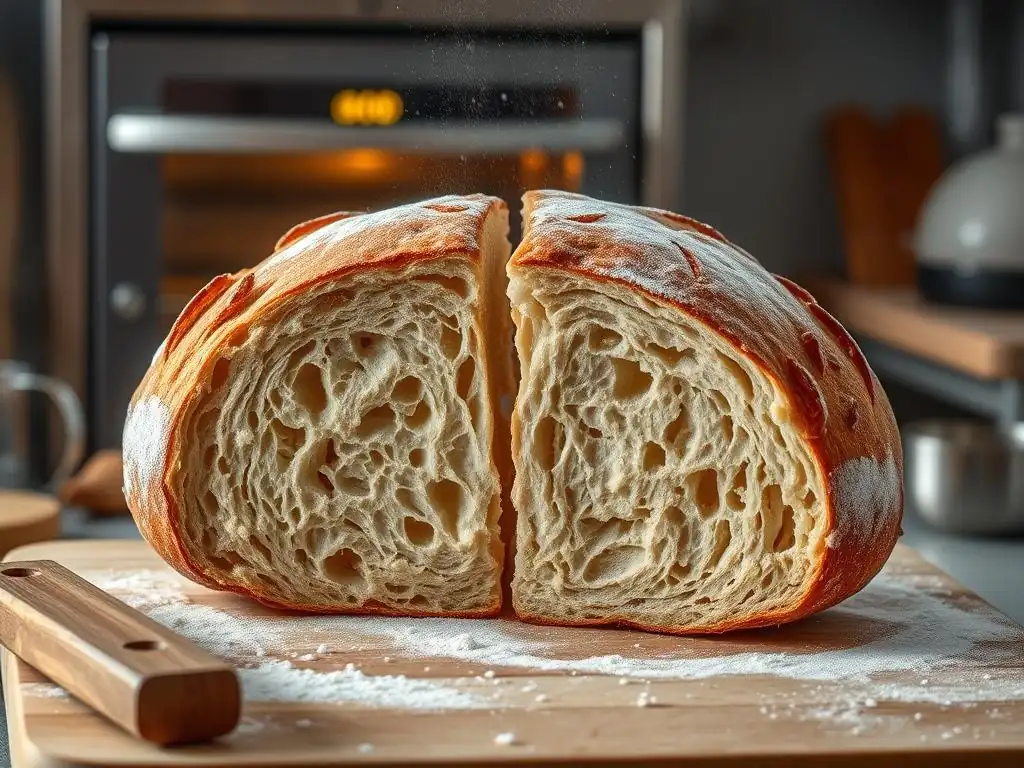
Sometimes, the problem isn't just a generally poor crust, but a specific issue. Let's look at how to tackle the most common crust complaints. These targeted fixes can help you hone in on the specific uneven bread baking solutions your loaf needs.
Crust Too Thick
If your crust is consistently too thick and hard, several factors could be at play. Insufficient steam in the oven during the initial bake is a primary cause. Without steam, the crust sets too quickly, restricting expansion and resulting in a dense, thick outer layer. Ensure you are generating adequate steam for the first 10-15 minutes. Another reason could be baking at too low a temperature for too long; while a longer bake is needed for doneness, a lower temperature can dry out the crust excessively before it has a chance to thin out with oven spring.
Consider your dough hydration. Lower hydration doughs naturally produce thicker crusts. If you're aiming for a thinner crust, try increasing the hydration by a few percentage points in your next bake. Also, ensure your dough isn't underproofed, which can lead to uncontrolled tearing and thicker crust in those areas. Addressing these points provides direct uneven bread baking solutions for thick crusts.
Crust Too Thin
A crust that is too thin or delicate might be desirable for some breads, but if you're aiming for a more substantial crust and ending up with a thin one, consider your dough hydration. Very high hydration doughs tend to produce thinner crusts. If you want a thicker crust, slightly reduce the water content in your recipe.
Over-proofing can also lead to a thin, fragile crust because the dough's structure is weakened, and it lacks the energy for significant oven spring. Ensure your dough is proofed correctly. Baking at too high a temperature can cause the crust to set and brown too rapidly, potentially leading to a thin, brittle crust. Try slightly lowering the temperature and extending the bake time if necessary to achieve the desired internal temperature. Fine-tuning these elements offers targeted uneven bread baking solutions for thin crusts.
Crust Too Pale
A pale crust is often a sign of insufficient browning reactions. The most common culprits are:
- Too low oven temperature: Ensure your oven is calibrated and set to the correct temperature, typically 400-475°F (200-245°C) for many rustic loaves. Use an oven thermometer.
- Insufficient baking time: The crust needs adequate time at high heat to brown. Check internal temperature for doneness, but allow sufficient time for crust color to develop.
- Lack of steam: While steam promotes a thin crust, a complete absence of steam can sometimes lead to a dull, pale finish if the surface dries out too much before browning begins.
- Low sugar content: Lean doughs brown less readily than enriched ones. Consider adding a small amount of sugar or malt to boost browning.
- Under-proofing: Dough that hasn't fermented long enough may not have developed enough sugars for good browning.
Address these potential causes to achieve a richer, golden-brown crust, a key aspect of uneven bread baking solutions.
Crust Too Dark
A crust that is too dark or even burnt indicates excessive browning. This is typically caused by:
- Too high oven temperature: Your oven might be running hotter than you think. Use an oven thermometer and adjust accordingly.
- Too long baking time: The crust has spent too much time at high heat after the interior is cooked. Reduce baking time or lower the temperature for the final part of the bake.
- Too much sugar: Excessive sugar content in the dough will accelerate browning. Reduce the amount of sugar in your recipe if possible.
- Baking too close to a heating element or hot spot: Rotate your loaf or move it to a different rack if one part is consistently burning.
- Using parchment paper for too long: While useful initially, parchment can trap heat and cause the bottom crust to over-darken or burn. Remove it partway through the bake if needed.
Adjusting these factors provides specific uneven bread baking solutions for overly dark crusts.
Advanced Techniques for Achieving Perfect Crust
Beyond the basics, there are some techniques that experienced bakers use to elevate their crust game. These methods often involve managing heat transfer and creating the ideal baking environment, contributing to advanced uneven bread baking solutions.
Using a Baking Stone or Dutch Oven
Baking stones (made of ceramic or cordierite) and baking steels are highly recommended for achieving a great crust, especially on the bottom. They absorb and retain a large amount of heat and transfer it efficiently to the base of the loaf, promoting excellent oven spring and a well-browned bottom crust. Preheat your stone or steel for at least 30-60 minutes at your baking temperature before loading the bread.
Baking in a Dutch oven (a heavy lidded pot, usually cast iron) is another fantastic method, particularly for rustic boules. The lidded pot traps the steam released by the dough itself, creating a perfect humid environment for the first half of the bake. This promotes excellent oven spring and a thin, crisp crust. After 20-30 minutes, the lid is removed, allowing the crust to dry out and brown beautifully. This technique is a go-to for many seeking reliable uneven bread baking solutions for consistently great crusts.
Cold Fermentation for Enhanced Crust Flavor
Cold fermentation, which involves refrigerating the dough for an extended period (from 12 hours up to several days) during its bulk fermentation or proofing stage, offers several benefits, including enhanced flavor and improved crust development. The slow, cold fermentation allows enzymes to break down complex carbohydrates into simpler sugars, providing more fuel for yeast activity and, importantly for crust, increasing the amount of fermentable sugars available for the Maillard reaction and caramelization during baking.
Dough that has been cold-fermented often develops a deeper, more complex flavor and browns more readily in the oven, resulting in a richer colored crust. The cold temperature also makes high-hydration doughs easier to handle and score. This technique is a powerful tool for both flavor and crust enhancement and is often incorporated into comprehensive uneven bread baking solutions by artisan bakers.
Utilizing a Pre-heated Baking Sheet
While a baking stone or Dutch oven is ideal, simply preheating a regular baking sheet in your oven can also help improve the bottom crust compared to starting on a cold surface. Place a sturdy metal baking sheet in the oven while it preheats. Carefully slide your loaf (on parchment paper or dusted with cornmeal) onto the hot sheet.
The preheated sheet provides a more immediate and consistent heat transfer to the bottom of the loaf than a cold one, encouraging better oven spring from below and ensuring the bottom crust develops properly. This can help prevent a pale or soft bottom crust and is a simple yet effective step towards achieving more uniform uneven bread baking solutions.
Conclusion: Achieving Crust Perfection
Mastering the bread crust is a journey that involves understanding the interplay of temperature, humidity, ingredients, and technique. It requires attention to detail and a willingness to experiment and learn from each bake. Whether you're dealing with a crust that's too pale, too dark, too thick, or uneven, there are practical steps you can take to diagnose and solve the problem.
Recap of Crust Troubleshooting Solutions
We've covered a range of solutions, from the foundational importance of accurate oven temperature and controlling humidity with steam, to adjusting dough hydration and sugar content, optimizing baking time, and using external aids like washes or proper scoring. Remember to use an oven thermometer, generate steam for rustic loaves, understand how hydration impacts texture, use visual cues and internal temperature for doneness, and utilize techniques like baking stones or Dutch ovens. Addressing these elements systematically is key to implementing effective uneven bread baking solutions for your crust.
Encouragement for Continued Baking Exploration on BakeWithEase.com
Don't be discouraged by imperfect crusts! Every bake is a learning opportunity. Pay attention to what happens, adjust one variable at a time, and celebrate your successes. The pursuit of the perfect crust is part of the joy of baking. Keep exploring new techniques and recipes on BakeWithEase.com. We have a wealth of resources, from beginner guides to advanced methods, to help you on your baking journey. With practice and patience, you'll be achieving beautiful, delicious crusts consistently. Happy baking!
Frequently Asked Questions
What are the most common causes of uneven bread baking?
Uneven baking often stems from oven temperature inconsistencies or improper loaf placement within the oven. It can also be related to inadequate kneading.
How can I ensure my oven temperature is accurate for bread baking?
Use an oven thermometer to verify the accuracy. If it's off, consider getting your oven professionally calibrated or adjusting baking times accordingly.
What's the best way to position my bread loaf in the oven for even baking?
Place the loaf in the center rack to ensure consistent heat distribution. If your oven has hot spots, rotate the loaf halfway through the baking process.
How does kneading affect even baking in bread?
Proper kneading develops the gluten, creating an even structure. Under-kneading can lead to uneven rising and baking.
What if I've tried everything, and my bread still bakes unevenly?
Consider baking stones or Dutch ovens which can help regulate heat. You might also explore adjusting your recipe slightly to compensate for oven quirks.
Final Reflection: The Pursuit of Perfectly Even Bread
The quest for a flawlessly even loaf transcends mere aesthetics; it's a testament to understanding the fundamental principles of baking. A consistently baked loaf signifies mastery over heat distribution, dough consistency, and the subtle interplay of ingredients. This understanding, once achieved, unlocks a world of baking possibilities, moving beyond simple recipes to truly personalized creations.
The journey to even baking has profoundly shaped my own approach to bread making. It's not just about following instructions; it's about developing an intuitive sense of the process, learning to read the subtle cues of the dough and oven. This journey mirrors life itself, where challenges require patience, observation, and a willingness to adapt. The best bread is made with love, and a little bit of science.
- (A quote you can adapt or replace with a relevant quote).
Now, it's your turn. Take the knowledge gained here, experiment with different techniques, and don't be afraid to fail. Each uneven loaf is a lesson learned, a step closer to that perfect, golden-brown masterpiece. Embrace the process, savor the journey, and remember that the most rewarding bakes are often the ones that teach us the most. The pursuit of even baking is a metaphor for life's own journey – a constant striving for improvement, fueled by passion and a touch of patience.
Unlock Perfectly Even Bread: Your Baking Transformation Starts Now!
Thanks for taking the time to learn about achieving perfectly even bread loaves! You've now got the knowledge to conquer uneven baking – let's put it into practice. Ready to elevate your baking game?
- Master the art of even baking: Try out the techniques discussed today – focus on one or two you feel will make the biggest difference in your next loaf. Notice the improvement!
- Share your baking triumphs (and challenges!): Post a picture of your perfectly even loaf (or your progress) on social media and tag us @BakeWithEase – we'd love to see it!
- Experiment with different flours: Try substituting a portion of your usual flour with a different type and observe how this affects the oven spring and evenness of your loaves.
What small tweak will you make to your next bread recipe to achieve that picture-perfect loaf?