
Troubleshooting Flat Cakes? Rethink Your Measurement Methods for Better Rise

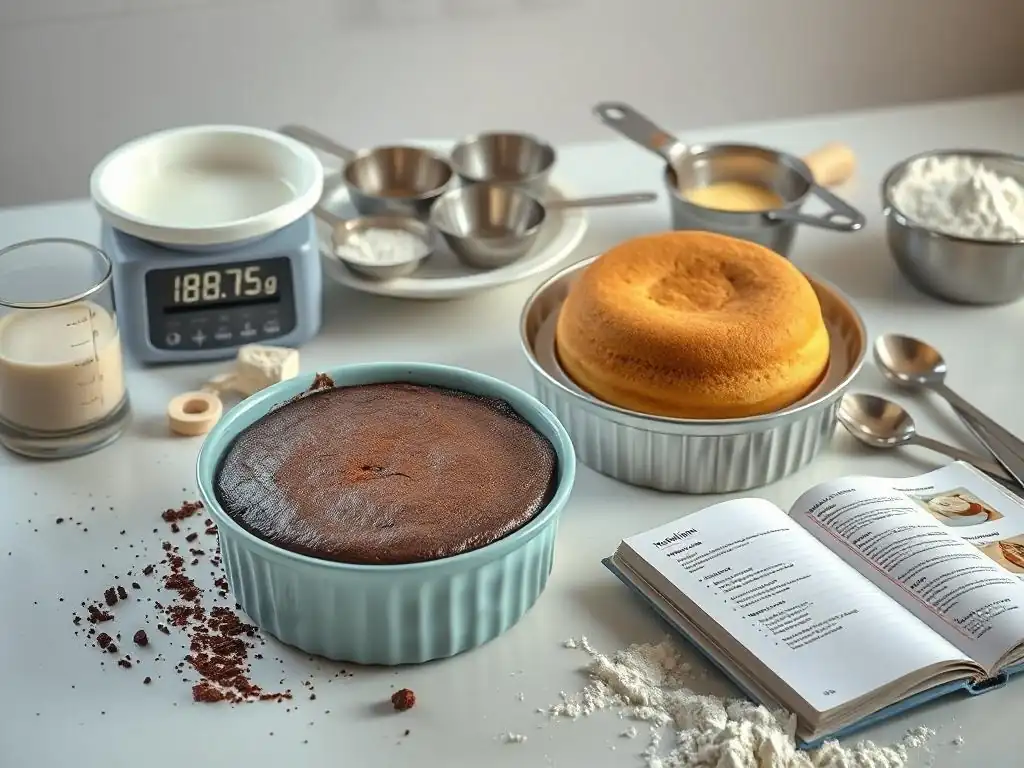
Welcome to BakeWithEase, your kitchen companion for turning baking dreams into delicious realities! Are flat cakes dampening your baking spirit? It might not be your oven, but your measuring methods. Dive into our guide on Accurate Cake Measuring Techniques to unlock the secrets to perfectly risen cakes. Discover the common pitfalls and simple adjustments that can transform your bakes. Ready to say goodbye to baking woes and hello to sky-high cakes? Let's get started!
- The Importance of Accurate Cake Measuring Techniques for Baking Success
- Common Cake Measuring Mistakes That Lead to Flat Cakes
- Mastering Accurate Cake Measuring Techniques: A Step-by-Step Guide
- Tools for Accurate Cake Ingredient Measurement
- How Ingredient Temperature Affects Accurate Measurement
- Beyond Measurement: Other Factors Affecting Cake Rise
- Troubleshooting Cake Problems: A Measurement Checklist
- BakeWithEase's Tips for Perfect Cake Rise Every Time
- Conclusion: Achieving Cake Baking Success Through Precise Measurement
-
Frequently Asked Questions
- What role do accurate measurements play in cake baking?
- Why might my cake be flat even if I followed the recipe?
- What are some common measuring mistakes that can cause a flat cake?
- How can I ensure accuracy when measuring dry ingredients like flour?
- What type of measuring tools are recommended for accurate cake baking?
- Final Reflection: The Sweet Science of Accurate Measurement
- Unlock Fluffy Perfection: Master Baking Measurements Today!
The Importance of Accurate Cake Measuring Techniques for Baking Success
Why Precise Measurements Matter in Baking
Baking is often described as a science, and like any science, precision is paramount. Unlike cooking, where you can often adjust seasonings or ingredients on the fly, baking relies on a delicate balance of chemical reactions. The ratios of flour, sugar, fat, and leavening agents are carefully calculated to achieve the desired texture, structure, and rise.
Even small deviations in these amounts can significantly alter the outcome, leading to cakes that are flat, dense, dry, or crumbly instead of light and airy. For instance, a recipe might call for 200 grams of flour; using 220 grams can dramatically change the hydration level of the batter, impacting gluten development and ultimately, the cake's structure and ability to rise properly in the oven.
Think of a standard yellow cake recipe designed for a 9-inch round pan. The proportions are specifically calibrated for that volume and surface area. If you consistently use inaccurate cake measuring techniques, you disrupt this balance.
For example, too much sugar can weaken the cake's structure, causing it to collapse, while too little can result in a tough texture. Similarly, the exact amount of liquid is crucial for activating leavening agents and creating a smooth batter that bakes evenly. Mastering accurate cake measuring techniques is the foundational step towards consistent baking success and achieving that perfect, impressive rise every time.
Understanding the Impact of Inaccurate Measurements on Cake Rise
The rise of a cake is primarily driven by leavening agents like baking powder and baking soda, which produce gas (carbon dioxide) when activated by moisture and heat (and sometimes acid). These gases get trapped within the batter's structure, expanding as the cake bakes and causing it to rise. Inaccurate cake measuring techniques directly interfere with this process.
If you under-measure baking powder, for example, you simply won't generate enough gas to lift the batter, resulting in a flat cake. Conversely, too much baking soda without enough acid to neutralize it can leave a soapy taste and cause the cake to rise too quickly, then collapse.
Furthermore, the consistency of the batter, heavily influenced by accurate ingredient measurement, plays a crucial role. A batter that is too thick due to over-measured flour will be too heavy for the leavening agents to lift effectively. A batter that is too thin from excess liquid might not have enough structure to hold the gas produced, leading to a dense or sunken cake.
Studies in baking science labs have shown that a deviation of just 5-10% in key ingredients like flour or leavening can reduce cake volume by 15-20% or more. This highlights why accurate cake measuring techniques are non-negotiable for achieving optimal cake rise and texture.
Common Cake Measuring Mistakes That Lead to Flat Cakes
Over-Measuring Flour: A Recipe for Disaster
One of the most frequent errors in cake baking is over-measuring flour. Many home bakers use the "scoop and pack" method, plunging their measuring cup directly into the flour container and scooping out a packed mound. This method can add up to 20-30% more flour by weight than intended. For instance, a standard cup of all-purpose flour is typically considered to weigh around 120-125 grams when measured correctly using the scoop and level method or by weight. However, a packed cup can easily weigh 140-150 grams or even more.
Excess flour results in a batter that is too dry and dense. This extra weight and reduced moisture make it significantly harder for leavening agents to lift the cake. The finished product is often heavy, tough, and significantly flatter than it should be. Imagine a recipe calling for 2 cups of flour (approximately 240-250g). Accidentally adding 280-300g due to improper measuring will fundamentally change the flour-to-liquid ratio, leading to a cake that struggles to rise and has a crumbly, unpleasant texture. Implementing accurate cake measuring techniques, particularly for flour, is vital to avoid this common pitfall.
Under-Measuring Leavening Agents: The Rise That Never Was
Leavening agents, such as baking powder and baking soda, are the engine of cake rise. They produce the gases that expand the batter in the oven. Under-measuring these crucial ingredients directly reduces the amount of gas produced, limiting the cake's ability to expand and rise. A recipe might call for 2 teaspoons of baking powder (roughly 8-10 grams), but if you only measure 1 teaspoon (4-5 grams) due to a faulty spoon or simply not being careful, you've cut the potential rise in half.
This mistake is particularly impactful because leavening agents are used in relatively small quantities compared to flour or sugar, meaning even a slight error represents a significant percentage difference. For example, if a recipe requires 1 teaspoon of baking soda (about 4-5 grams) and you only measure 3 grams, you've shorted the recipe by 20-40% of a critical rising agent. The result is almost certainly a flat, heavy cake that didn't get the lift it needed. Accurate cake measuring techniques, especially for these powerful small-quantity ingredients, are critical for achieving a light and airy texture.
Inconsistent Liquid Measurements: Affecting Cake Batter Consistency
Liquids in a cake recipe – milk, buttermilk, water, oil, eggs – serve multiple purposes: they hydrate the flour, activate leavening agents, dissolve sugar, and create the necessary batter consistency. Inaccurate measurement of liquids can lead to a batter that is either too thick or too thin, both of which negatively impact cake rise.
Too little liquid, often paired with over-measured flour, results in a stiff batter that is difficult to mix properly and too heavy to rise well. Conversely, too much liquid creates a very thin batter that may rise initially but lacks the structural integrity to hold its shape, often sinking in the center.
Using the wrong type of measuring cup for liquids is a common error. Dry measuring cups are designed to be filled to the brim and leveled, while liquid measuring cups have a spout and markings on the side, designed to be read at eye level on a flat surface.
Using a dry measuring cup for liquids can easily lead to over- or under-measurement by several tablespoons, which can be a significant percentage error for ingredients used in smaller volumes, like a quarter cup of milk. Consistent and accurate cake measuring techniques for liquids ensure the batter has the optimal viscosity for proper gluten development and gas expansion during baking.
Mastering Accurate Cake Measuring Techniques: A Step-by-Step Guide
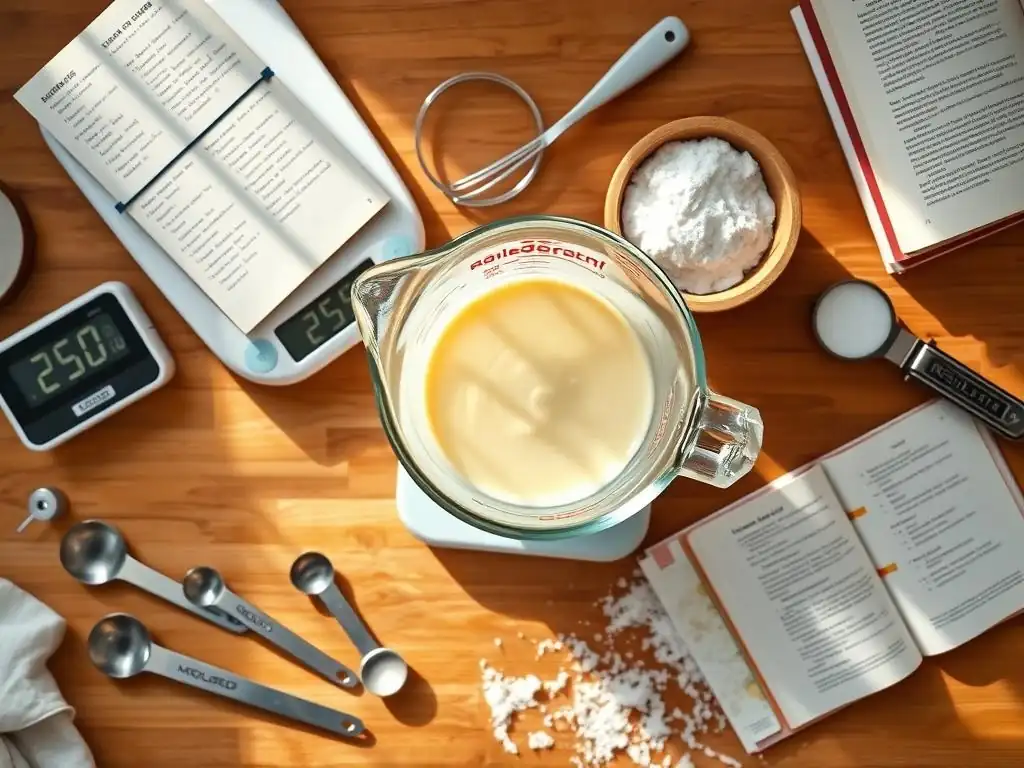
Measuring Flour Correctly: The Scoop and Level Method vs. Weighing
Accurate flour measurement is perhaps the most critical step in preventing flat cakes. There are two primary methods: the traditional scoop and level method using dry measuring cups, and the more precise method of weighing using a kitchen scale. The scoop and level method involves gently spooning the flour into the dry measuring cup until it overflows, then sweeping a straight edge (like the back of a knife) across the top to level it off. Never pack the flour down or scoop directly from the bag, as this adds too much flour.
While the scoop and level method is widely taught, it can still result in variations of 10-15% depending on how lightly the flour is spooned. Weighing ingredients, especially flour, offers the highest level of accuracy. A recipe might specify "2 cups (240g) all-purpose flour." Using a digital scale to measure exactly 240 grams eliminates the variability inherent in volume measurements. Many professional bakers and serious home bakers exclusively use scales for dry ingredients like flour, sugar, and leavening agents because it guarantees consistent results every time, making it a core component of accurate cake measuring techniques.
Using a Kitchen Scale for Precise Flour Measurement
Using a kitchen scale for flour measurement is straightforward and highly recommended for accurate cake measuring techniques. Place your mixing bowl or a separate container onto the scale and press the "tare" or "zero" button to reset the weight to zero. Then, carefully spoon or pour flour into the container until the scale displays the exact weight required by the recipe (e.g., 240 grams for 2 cups).
Weighing eliminates the variables of how densely the flour is packed in the bag, how much it settles, or the user's technique with a measuring cup. It provides a consistent, repeatable measurement regardless of external factors. For recipes that provide both volume and weight measurements, always default to weight for the best accuracy, especially for flour. This simple switch from volume to weight can dramatically improve the consistency of your baking results and is a hallmark of professional-level accurate cake measuring techniques.
The Right Way to Scoop and Level Flour
If you don't have a kitchen scale, the scoop and level method is the standard for volume measurement of flour. Start by fluffing the flour in its container with a fork or spoon to aerate it. This prevents it from being compacted. Then, gently spoon the fluffed flour into your dry measuring cup. Don't scoop directly from the bag; this compacts the flour. Fill the cup until it overflows slightly.
Finally, use a straight edge, such as the back of a butter knife or a straight spatula, to sweep across the top of the cup, leveling off the excess flour. Do not shake the cup or tap it on the counter, as this will cause the flour to settle and compact, leading to over-measurement. Following these steps precisely ensures you get as close as possible to the intended amount of flour when using volume measurements, making it a key part of accurate cake measuring techniques when a scale isn't available.
Accurately Measuring Liquids for Cake Baking
Measuring liquids requires a different approach than dry ingredients, utilizing liquid measuring cups with spouts and volume markings on the side. To accurately measure liquids, place the liquid measuring cup on a flat, level surface. Pour the liquid into the cup until it reaches the desired mark. Then, bend down so your eyes are level with the marking on the cup. Read the measurement at the bottom of the meniscus (the slight curve on the surface of the liquid).
Reading the measurement at eye level prevents parallax error, which occurs when you view the liquid level from an angle, making it appear higher or lower than it actually is. This simple step is crucial for accurate cake measuring techniques when dealing with liquids like milk, water, or oil. Ensuring liquids are measured precisely guarantees the correct hydration level for your batter, essential for activating leavening and achieving the right consistency.
Using Measuring Cups and Spoons for Liquids
Liquid measuring cups are designed for volumes typically a quarter cup and larger, featuring a spout for easy pouring and markings on the side. For smaller liquid volumes, like teaspoons or tablespoons of extracts, vanilla, or food coloring, use standard measuring spoons. Just like with dry measuring spoons, fill the spoon to the brim without letting it spill over.
It's important to note that while measuring spoons are used for both dry and liquid ingredients in small quantities, liquid measuring cups are specifically for liquids. Using a dry measuring cup for liquids, or vice versa, can lead to inaccuracies. Using the correct tools and techniques for each type of ingredient is fundamental to accurate cake measuring techniques and ensures your recipe proportions are correct.
Understanding Volume vs. Weight in Liquid Measurements
While volume measurement is standard for liquids in most home baking recipes (e.g., cups, tablespoons), liquids can also be measured by weight, which is even more accurate. Water, for example, has a density where 1 milliliter weighs approximately 1 gram, meaning 1 cup (237ml) of water weighs about 237 grams. Milk is slightly denser, about 1.03 grams per milliliter, so 1 cup (237ml) weighs around 244 grams.
Some professional recipes specify liquids by weight for ultimate precision. While not as common in everyday recipes as weighing flour, using a scale for liquids like milk or eggs (which can vary slightly in size) provides the most accurate measurement. For instance, a large egg weighs approximately 50-55 grams without the shell. If a recipe calls for '2 large eggs' but specifies a weight like '100-110g eggs', weighing ensures you use the exact amount, contributing significantly to accurate cake measuring techniques.
Measuring Butter and Fats Accurately
Measuring fats like butter, shortening, or oil also requires specific techniques depending on their state (solid or melted). Butter and shortening are often measured using different methods depending on the recipe – sometimes by weight, sometimes by volume using measuring cups, and sometimes using the markings on the butter wrapper itself.
Accuracy in fat measurement is important because fats contribute to tenderness, moisture, and richness in cakes. Too much fat can make a cake greasy and heavy; too little can result in a dry, tough texture. Applying accurate cake measuring techniques to fats ensures the correct balance is maintained for a tender, moist crumb.
Measuring Solid Fats Like Butter and Shortening
Solid fats like butter and shortening are often measured by weight using a scale, which is the most accurate method. For example, if a recipe calls for 113 grams of butter, weighing it ensures precision. When using volume, shortening can be measured using the dry measuring cup method: pack it into the cup and level it off. Butter sticks in many regions have tablespoon and cup markings on the wrapper, which provide a convenient (though slightly less precise than weighing) way to measure solid butter.
It's crucial to use the method specified by the recipe or be consistent in your chosen accurate cake measuring techniques. If a recipe calls for "1 cup shortening," packing it into a dry measuring cup is the intended method. If it calls for "8 tablespoons butter," using the markings on the wrapper is acceptable. However, for guaranteed accuracy, especially in finicky recipes, weighing solid fats is the superior method.
Measuring Melted Butter or Oil
When a recipe calls for melted butter or oil, these are measured using liquid measuring cups. As with other liquids, place the cup on a level surface, pour the melted fat to the desired line, and read at eye level. It's important to measure melted butter after melting it, as the volume of solid butter changes significantly when melted.
Ensure the melted butter isn't excessively hot when adding it to other ingredients, as this can curdle eggs or melt sugar prematurely. Using the correct liquid measuring cup and technique for melted fats is another key aspect of accurate cake measuring techniques, ensuring the fat is incorporated correctly into the batter.
Tools for Accurate Cake Ingredient Measurement
The Best Kitchen Scales for Baking
A digital kitchen scale is arguably the single most important tool for achieving accurate cake measuring techniques consistently. Scales measure ingredients by weight (grams, ounces, pounds), which is unaffected by how densely an ingredient is packed or its physical state (solid vs. liquid, though liquid density varies). A good digital scale should have a capacity of at least 5 kg (about 11 lbs), measure in both grams and ounces, and have a tare function to zero out the weight of the container.
Look for a scale with a clear, easy-to-read display and a platform large enough to hold your mixing bowl. Prices for reliable digital scales range from about $20 to $50. While an initial investment, a scale quickly pays for itself in reduced baking failures and consistent, delicious results. Using a scale for key ingredients like flour, sugar, and fats elevates your accurate cake measuring techniques significantly.
Reliable Measuring Cups and Spoons
While weighing is preferred for accuracy, reliable sets of dry measuring cups and liquid measuring cups, along with measuring spoons, are still essential for recipes that provide only volume measurements. Dry measuring cups should come in standard sizes (1/4, 1/3, 1/2, and 1 cup) and be designed for leveling. Metal or sturdy plastic cups are durable.
Liquid measuring cups should have clear markings for cups, ounces, and milliliters, ideally with a little extra space above the top marking to prevent spills. Glass or clear plastic cups are best for visibility. Measuring spoons should include standard sizes (1/4, 1/2, 1 teaspoon, and 1 tablespoon). Look for sets where the sizes are clearly labeled and easy to read. While less precise than weighing, using a good quality, accurate set of measuring cups and spoons correctly is fundamental to accurate cake measuring techniques when following volume-based recipes.
Digital Scales vs. Analog Scales: Which is Best?
For accurate cake measuring techniques, digital scales are generally superior to analog scales. Analog scales use a spring mechanism and a dial to indicate weight. They are often less precise, harder to read exact measurements (especially small amounts), and can lose calibration over time. They might be sufficient for rough measurements in cooking but lack the precision needed for baking.
Digital scales, on the other hand, use electronic sensors to provide a precise numerical readout, often to the nearest gram or tenth of an ounce. They are easier to tare (reset to zero) and maintain their accuracy better over time. For the consistent results required in baking, investing in a digital scale is highly recommended as it provides the most reliable foundation for accurate cake measuring techniques.
How Ingredient Temperature Affects Accurate Measurement
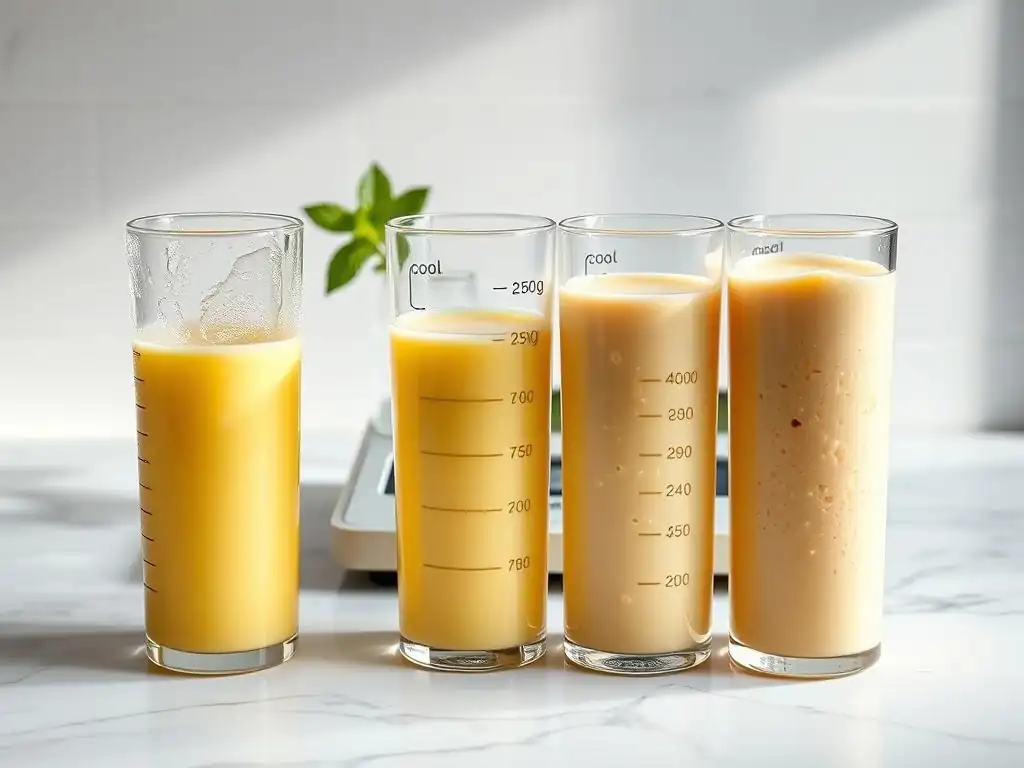
Ingredient temperature plays a significant role in how ingredients interact and measure, impacting the final cake texture and rise. Recipes often specify "room temperature" ingredients for a reason. Ingredients like butter, eggs, and milk emulsify better when they are at a similar temperature, creating a smoother, more homogenous batter. This uniform batter allows leavening agents to distribute evenly and gas bubbles to form and expand consistently, leading to a better rise and finer crumb structure.
Measuring ingredients at the wrong temperature can also lead to inaccurate measurements, even if using the correct tools. For example, cold butter is hard and difficult to measure accurately by volume (packing it into a cup). Melted butter is liquid and measured differently. Cold eggs are denser than room temperature eggs. Ensuring ingredients are at the temperature specified by the recipe is a crucial, often overlooked, aspect of accurate cake measuring techniques and overall baking success.
The Impact of Cold vs. Room Temperature Ingredients
When butter is at room temperature (around 68-70°F or 20-21°C), it is soft but not melted. This state allows it to be creamed with sugar, a process that incorporates air bubbles essential for structure and rise in many cake recipes. Cold butter, straight from the fridge, is too hard to cream properly and won't incorporate air effectively. Using cold butter when the recipe calls for room temperature can result in a dense cake with less rise.
Similarly, cold eggs don't emulsify as well into the batter as room temperature eggs. They can also firm up the butter if added directly to a creamed mixture, causing it to curdle. While the weight of an egg doesn't change with temperature, its behavior in the batter does. Allowing ingredients to come to room temperature (typically takes 30-60 minutes for eggs and milk, longer for butter depending on the size) is a simple yet effective step that complements accurate cake measuring techniques by ensuring the ingredients perform as intended in the recipe.
Measuring Frozen or Very Cold Ingredients
Some recipes, particularly those for pastries or certain types of cakes like pound cake, might call for very cold or even frozen butter (often for cutting into dry ingredients). In these cases, accurate measurement is still vital. Weighing is the most reliable method for cold or frozen solid fats. Trying to measure hard, frozen butter by volume using measuring cups is highly inaccurate.
If a recipe specifically requires frozen butter cut into pieces, measure the butter by weight first while solid and cold, then freeze it if necessary before cutting. For liquids that need to be very cold, measure them using a liquid measuring cup or by weight just before use. Adhering to the recipe's temperature specifications after performing accurate cake measuring techniques ensures the ingredients are in the correct state for the intended mixing method and final texture.
Beyond Measurement: Other Factors Affecting Cake Rise
While accurate cake measuring techniques are fundamental, they are just one piece of the puzzle when it comes to achieving a perfect cake rise. Several other factors in the baking process can influence how high and evenly your cake rises. Understanding and controlling these elements, in conjunction with precise measurement, will significantly improve your baking success.
These factors include the accuracy of your oven temperature, how you mix the batter, the quality and freshness of your ingredients, and even the preparation of your cake pan. Addressing these points alongside refining your accurate cake measuring techniques provides a holistic approach to troubleshooting flat cakes and achieving consistent, beautiful results.
Oven Temperature and Calibration
An oven that isn't calibrated correctly is a common culprit for baking failures, including flat cakes. If your oven runs cooler than the setting, the cake won't receive enough heat to activate the leavening agents properly and set its structure before the gases dissipate. If it runs too hot, the outside might set too quickly, preventing the inside from rising fully, or the cake might rise too fast and then collapse.
Using an inexpensive oven thermometer is a simple way to check your oven's actual temperature. Many ovens are off by 25-50°F (around 15-30°C). Knowing the true temperature allows you to adjust your oven setting accordingly. For example, if your oven thermometer reads 325°F when set to 350°F, you know to set it to 375°F for a recipe calling for 350°F. Accurate oven temperature is just as important as accurate cake measuring techniques for successful baking.
Mixing Techniques and Gluten Development
The way you mix your cake batter significantly impacts its structure and rise. Overmixing can lead to excessive gluten development, especially in recipes using all-purpose flour. Gluten provides structure, but too much makes the cake tough and can inhibit proper rising. The goal is typically to mix just until the ingredients are combined and no dry streaks remain.
Creaming butter and sugar, however, is a step where thorough mixing is desired, as this incorporates air. Understanding the purpose of each mixing step and avoiding over- or under-mixing ensures the batter has the right consistency and structure to support the rise initiated by the leavening agents. This works hand-in-hand with accurate cake measuring techniques to build a solid foundation for your cake.
Ingredient Quality and Freshness
Even with perfect accurate cake measuring techniques and an accurately calibrated oven, stale or poor-quality ingredients can lead to a flat cake. Leavening agents like baking powder and baking soda lose their potency over time. Using expired or old baking powder can result in insufficient gas production and a cake that doesn't rise. Flour can also go stale, affecting its performance.
Ensure your baking powder and baking soda are fresh (you can test baking powder by adding a teaspoon to hot water; it should bubble vigorously. Test baking soda by adding a teaspoon to vinegar; it should fizz immediately). Use fresh eggs and high-quality fats. Ingredients are the building blocks of your cake; using fresh, good-quality ingredients alongside accurate cake measuring techniques gives your cake the best chance to rise beautifully.
Troubleshooting Cake Problems: A Measurement Checklist
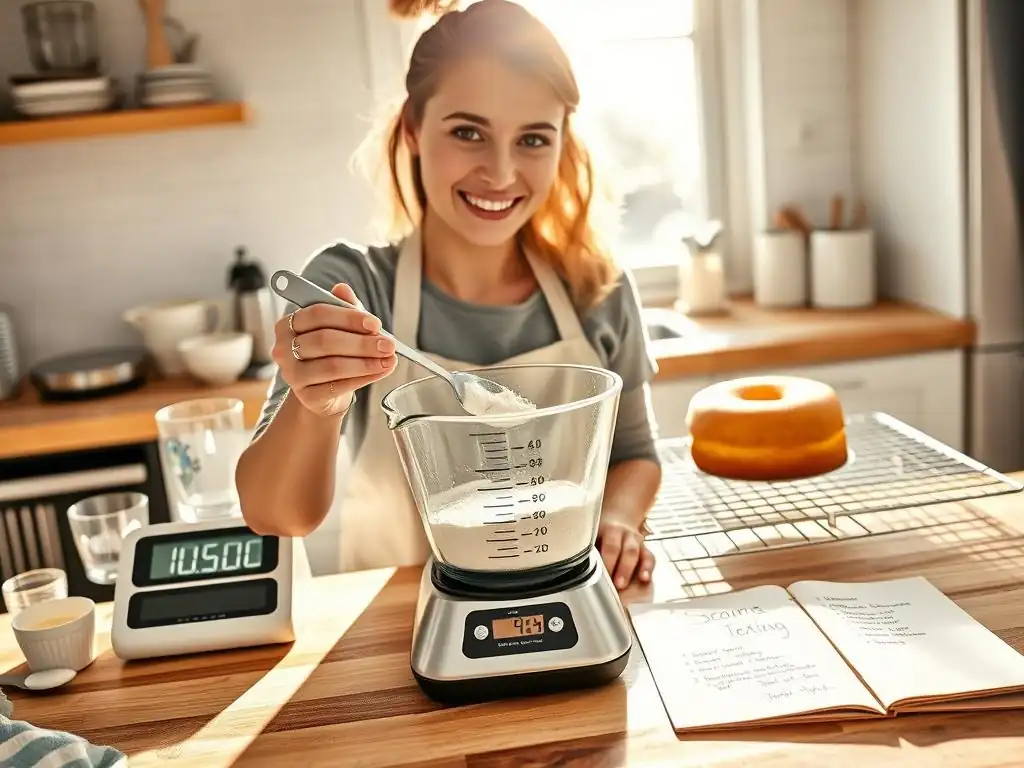
When a cake doesn't turn out as expected, especially if it's flat, reviewing your process with a focus on accurate cake measuring techniques is the first step. Did you use the right tools? Did you measure correctly? Going through a checklist can help pinpoint potential errors related to measurement that might have caused the issue.
This checklist isn't exhaustive of all baking problems, but it specifically targets issues where inaccurate measurement is a common cause. By systematically reviewing how you measured each ingredient, you can identify potential culprits behind your cake's failure to rise properly.
Cake is Flat and Dense: Measurement Review
If your cake is flat and has a heavy, dense texture, inaccurate measurement is a likely cause. Review your measurements, focusing particularly on flour and leavening agents.
- Did you over-measure the flour? (e.g., by scooping and packing instead of spooning and leveling or weighing). Adding too much flour is a primary cause of dense cakes.
- Did you under-measure the baking powder or baking soda? Insufficient leavening prevents the cake from getting enough lift.
- Were liquids measured accurately at eye level? Too little liquid can also contribute to a stiff, dense batter.
- Were fats measured correctly? Too little fat can make the cake tough.
By carefully reviewing how you applied accurate cake measuring techniques for each ingredient, you can often identify the source of the density and lack of rise.
Cake Rose Initially but Collapsed: Measurement Analysis
A cake that rises beautifully in the oven but then sinks in the center often indicates a structural issue or too much moisture. While oven door opening or incorrect temperature can be causes, measurement can also play a role.
- Did you use too much sugar? Excess sugar can weaken the cake's structure, making it prone to collapse.
- Was there too much liquid? An overly wet batter can struggle to set before the gas bubbles pop, leading to a sinkhole.
- Was there too much leavening? While under-measuring prevents rise, excessive leavening can cause the cake to rise too quickly and then collapse due to lack of structure.
Analyzing your accurate cake measuring techniques for sugar, liquids, and leavening agents can help determine if the proportions were correct for the cake's structure to hold its rise.
Cake is Unevenly Risen: Measurement Considerations
An unevenly risen cake, perhaps higher on one side or with a peaked top, can sometimes be related to measurement, though other factors like uneven oven heat or improper pan preparation are more common.
- Was the batter mixed evenly after adding ingredients? Clumps of dry ingredients (like flour or leavening) could lead to uneven rising. While not strictly a measurement error, it's related to how measured ingredients are incorporated.
- Were ingredients added gradually and mixed properly as specified? Dumping all ingredients in at once can sometimes lead to uneven distribution.
While less directly tied to the initial scoop/weighing, considering how accurately measured ingredients were integrated into the batter is part of the overall picture of accurate cake measuring techniques and execution.
BakeWithEase's Tips for Perfect Cake Rise Every Time
Achieving consistent, beautiful cake rise is a goal for every baker. Beyond mastering accurate cake measuring techniques, incorporating a few best practices can significantly improve your results and reduce the frequency of flat cakes. These tips are simple but effective ways to support the leavening process and ensure your cake batter behaves as it should in the oven.
Implementing these tips alongside your commitment to accurate cake measuring techniques will elevate your baking from hit-or-miss to consistently successful. They address common pitfalls that can undermine even perfectly measured ingredients.
Tip 1: Always Sift Dry Ingredients for Even Distribution
Sifting dry ingredients – flour, baking powder, baking soda, salt, cocoa powder – serves multiple purposes. It aerates the ingredients, breaking up any clumps and ensuring they are light and fluffy for measuring (especially important if you are using the scoop and level method). More importantly, sifting helps to evenly distribute the leavening agents and salt throughout the flour.
An uneven distribution of baking powder, for example, can lead to an uneven rise. Sifting ensures that when these ingredients are combined with the wet ingredients, the leavening action is spread uniformly throughout the batter. While some argue against sifting if weighing ingredients, sifting after weighing can still help with aeration and even distribution. This step complements accurate cake measuring techniques by preparing the dry ingredients for optimal performance.
Tip 2: Use Room Temperature Ingredients for Better Emulsification
As discussed earlier, the temperature of ingredients like butter, eggs, and milk significantly impacts the batter's consistency and ability to emulsify. Room temperature ingredients combine more easily and create a smoother, more stable batter. This smooth batter allows air pockets to form and expand more uniformly during baking, resulting in a lighter texture and better rise.
Plan ahead and take your butter, eggs, and milk out of the refrigerator 30-60 minutes before you plan to start baking. For quicker room-temperature eggs, place them in a bowl of warm water for 5-10 minutes. For butter, cut it into smaller pieces to speed up the process. Using ingredients at the correct temperature is a vital step that supports accurate cake measuring techniques by ensuring the ingredients interact correctly.
Tip 3: Double-Check Expiration Dates on Leavening Agents
Baking powder and baking soda are perishable, losing their effectiveness over time. Using expired leavening agents is a very common reason for flat cakes, even when all accurate cake measuring techniques are followed perfectly. The chemical reaction that produces the gas simply won't occur sufficiently if the leavening agent is old.
Check the expiration dates on your baking powder and baking soda. If there's no date, or if you suspect they are old, perform the freshness tests mentioned earlier (baking powder in hot water, baking soda in vinegar). Replace them if they don't react vigorously. Fresh leavening agents are crucial; even the most accurate cake measuring techniques are useless if the ingredients themselves aren't potent enough to do their job.
Conclusion: Achieving Cake Baking Success Through Precise Measurement
Baking a cake that rises beautifully is a deeply satisfying experience. While many factors contribute to a successful bake, the foundation of consistently good results lies in mastering accurate cake measuring techniques. Errors in measuring ingredients, particularly flour and leavening agents, are among the most common reasons for flat, dense, or poorly risen cakes.
By understanding the impact of precise measurements, avoiding common mistakes like over-scooping flour, and utilizing the right tools such as a kitchen scale, you can dramatically improve your baking accuracy. Combining precise measurement with best practices like using room temperature ingredients, sifting, and ensuring fresh leavening agents empowers you to troubleshoot issues and bake with greater confidence. Embrace accurate cake measuring techniques as your secret weapon, and you'll be well on your way to baking light, airy, and perfectly risen cakes every time you step into the kitchen.
Frequently Asked Questions
What role do accurate measurements play in cake baking?
Accurate measurements are absolutely crucial for cake baking. They ensure the correct ratio of ingredients, which directly impacts the cake's texture, rise, and overall structural integrity.
Why might my cake be flat even if I followed the recipe?
Even with a recipe, variations in measuring methods can lead to a flat cake. Inconsistent measurements, especially with leavening agents like baking powder or soda, can affect the rise.
What are some common measuring mistakes that can cause a flat cake?
Common mistakes include scooping flour directly from the bag (which compacts it) and using the wrong size measuring cups or spoons. Always use leveling techniques for dry ingredients and proper liquid measuring cups.
How can I ensure accuracy when measuring dry ingredients like flour?
The best way to measure flour is by using the spoon and level method. Spoon the flour into the measuring cup until it is overfilled, and then level it off with the back of a knife.
What type of measuring tools are recommended for accurate cake baking?
Investing in a good set of dry and liquid measuring cups and spoons is essential. A kitchen scale is even better for precise measurements, especially when dealing with sensitive ingredients.
Final Reflection: The Sweet Science of Accurate Measurement
The quest for the perfect cake is, ultimately, a quest for precision. A seemingly minor detail like inaccurate measuring can transform a fluffy masterpiece into a dense, disappointing flat cake. This article has explored the subtle yet significant differences between various measuring methods, highlighting how seemingly insignificant variations can dramatically impact the final product. The impact of this knowledge extends far beyond just baking; it underscores the importance of meticulousness in any endeavor where precise measurements are crucial.
The journey of mastering accurate cake measuring techniques is a deeply personal one. It's about understanding the "why" behind the "how," moving beyond rote recipes to a place of genuine culinary understanding. The best bakers are not just following recipes; they are understanding the science behind them.
This quote resonates deeply, as mastering accurate measurement isn't just about getting the right numbers; it's about gaining a deeper appreciation for the delicate balance of ingredients and their interaction. This understanding empowers bakers to troubleshoot effectively, adapt recipes, and ultimately, create truly exceptional cakes.
Now, I invite you to consider your own baking practices. Are you ready to elevate your skills by embracing the principles of precise measurement? Take a moment to reflect on your current methods. Are you using the right tools? Do you understand the nuances of volume versus weight measurements? By incorporating these techniques into your baking routine, you'll not only improve your baking results but also cultivate a deeper appreciation for the artistry and science behind this beloved culinary tradition. The journey to the perfect cake begins with a single, accurate measurement.
Unlock Fluffy Perfection: Master Baking Measurements Today!
Thanks for joining us on this baking journey! We hope you gained valuable insights into achieving the perfect rise with your cakes. Ready to put your new knowledge into practice?
- Dive into our comprehensive baking measurement guide: This detailed resource will walk you through every step, helping you avoid common pitfalls. It's time to banish flat cakes for good!
- Share your baking triumphs (and challenges!) on our BakeWithEase community forum. Let's learn and grow together!
- Experiment with a new recipe using your newfound precision – and tell us about the results!
What unique baking measurement tip will you try first to elevate your baking game?