
Baking Rolls Without Special Equipment: Your Guide

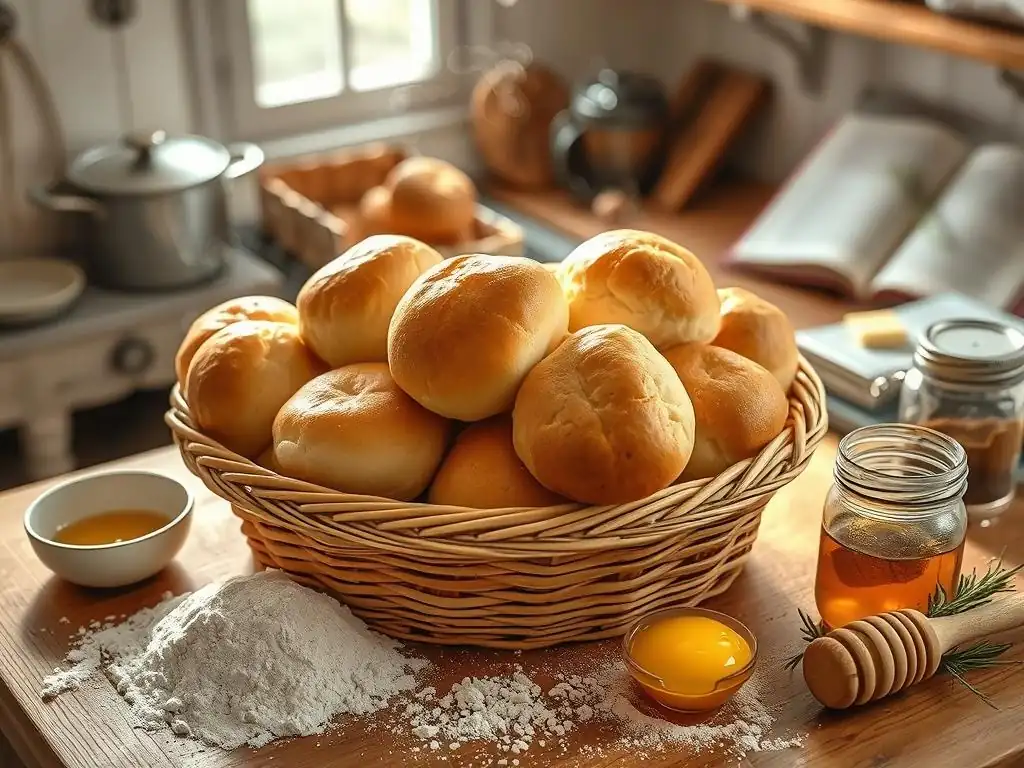
Welcome to BakeWithEase, where baking becomes a joyful journey! Ever dreamt of warm, perfectly golden rolls straight from your own oven, but felt intimidated by complicated techniques? Well, dream no more! Discover our Easy homemade baking rolls recipe and unlock the secret to fluffy, delicious rolls without any fancy equipment. Intrigued? Let's get baking and unveil the surprisingly simple steps to bread-baking bliss...
- BakeWithEase' Guide to Easy Homemade Baking Rolls
- Why Bake Your Own Rolls? The Joy of Homemade Bread
- Essential Ingredients for Your Easy Homemade Baking Rolls Recipe
- Tools You Already Have: Baking Rolls Without Special Equipment
-
Step-by-Step: Easy Homemade Baking Rolls Recipe for Beginners
- Step 1: Activating the Yeast for Baking Rolls
- Step 2: Mixing the Dough for Your Homemade Rolls
- Step 3: Kneading the Dough: Developing Gluten for Soft Rolls
- Step 4: First Rise: Letting the Dough Rise for Light and Airy Rolls
- Step 5: Shaping the Rolls: Creating Beautiful Homemade Rolls
- Step 6: Second Rise: Proofing the Shaped Rolls
- Step 7: Baking the Rolls: Achieving Golden-Brown Perfection
- Step 8: Cooling and Enjoying Your Freshly Baked Rolls
- Baking Rolls Recipe Variations: Customize Your Homemade Rolls
- Troubleshooting Common Baking Rolls Problems
- Storing Your Homemade Baking Rolls
- Mastering the Easy Homemade Baking Rolls Recipe: Next Steps
-
Frequently Asked Questions
- How difficult is the Easy Homemade Baking Rolls Recipe on BakeWithEase.com?
- What kind of equipment do I need for the Easy Homemade Baking Rolls Recipe?
- Can I substitute ingredients in the Easy Homemade Baking Rolls Recipe?
- How long does it take to make these Easy Homemade Baking Rolls?
- What types of rolls can I make using this Easy Homemade Baking Rolls Recipe as a base?
- Final Reflection: The Humble Roll, A Testament to Simple Baking
- Unleash Your Inner Baker: Roll into Action!
BakeWithEase' Guide to Easy Homemade Baking Rolls
Welcome to the wonderful world of baking rolls right in your own kitchen! Forget about needing fancy gadgets or specialized equipment. Our goal at BakeWithEase is to show you just how simple and rewarding it is to create delicious, fluffy rolls using tools you likely already own. This guide is designed specifically for beginners, offering an easy homemade baking rolls recipe that demystifies the process and builds your confidence.
Embarking on the journey of baking bread, especially rolls, can feel daunting, but it doesn't have to be. With a few basic ingredients, a standard oven, and some everyday kitchen items, you can achieve results that rival your favorite bakery. We'll walk you through each step, from understanding the ingredients to troubleshooting common issues, ensuring your first attempt at an easy homemade baking rolls recipe is a success. Get ready to fill your home with the irresistible aroma of freshly baked bread!
Why Bake Your Own Rolls? The Joy of Homemade Bread
There's a unique satisfaction that comes from baking bread from scratch. Holding a warm roll, still slightly steaming, knowing you created it with your own hands is an incomparable feeling. Beyond the personal reward, baking your own rolls allows you to control the quality of ingredients, avoid preservatives, and customize flavors to your preference. It's a wholesome activity that connects you to age-old traditions and provides nourishing food for yourself and your loved ones.
The process itself can be incredibly therapeutic. The rhythmic kneading of dough, the patient waiting as it rises, and the final moment of pulling golden-brown rolls from the oven offer a sense of accomplishment and calm. Plus, having a batch of easy homemade baking rolls ready means you're always prepared for dinner, sandwiches, or just a comforting snack. It's a practical skill that brings joy and deliciousness into your everyday life.
The Benefits of Baking Rolls at Home
Baking rolls at home offers significant advantages, chief among them being cost-effectiveness. A bag of flour, yeast, and a few other pantry staples can produce dozens of rolls for a fraction of the price you'd pay at a store or bakery. For example, a 5-pound bag of all-purpose flour might cost around $3-5 and can yield enough dough for approximately 40-50 medium-sized rolls, depending on the recipe. Comparing this to buying a pack of eight rolls for $3-4 demonstrates the clear savings over time.
Furthermore, baking your own means you know exactly what goes into your food. You can choose organic flours, control salt and sugar levels, and avoid artificial additives or preservatives often found in mass-produced bread. This transparency is invaluable for health-conscious individuals or those with dietary restrictions. The freshness is unparalleled; rolls baked minutes ago simply taste better and have a superior texture compared to those that have traveled from a factory to a store shelf.
Mastering the Art of Baking Rolls: A Skill for Life
Learning to bake rolls without special equipment is an accessible way to develop fundamental baking skills that transfer to many other areas of bread making. The easy homemade baking rolls recipe provides a foundation for understanding yeast activation, dough development, proofing, and baking techniques. Once you've successfully made simple rolls, you'll have the confidence to tackle more complex loaves, enriched doughs, or even pastries. It's a gateway skill that opens up a world of culinary possibilities.
The process of baking, particularly bread, teaches patience and observation. You learn to read the dough – how it feels when properly kneaded, how it looks when it's risen sufficiently, and how it sounds when it's perfectly baked. These sensory cues are far more important than any piece of equipment. By mastering an easy homemade baking rolls recipe, you're not just learning to follow instructions; you're developing an intuition for baking that will serve you for a lifetime, allowing you to adapt recipes and troubleshoot issues confidently.
Essential Ingredients for Your Easy Homemade Baking Rolls Recipe
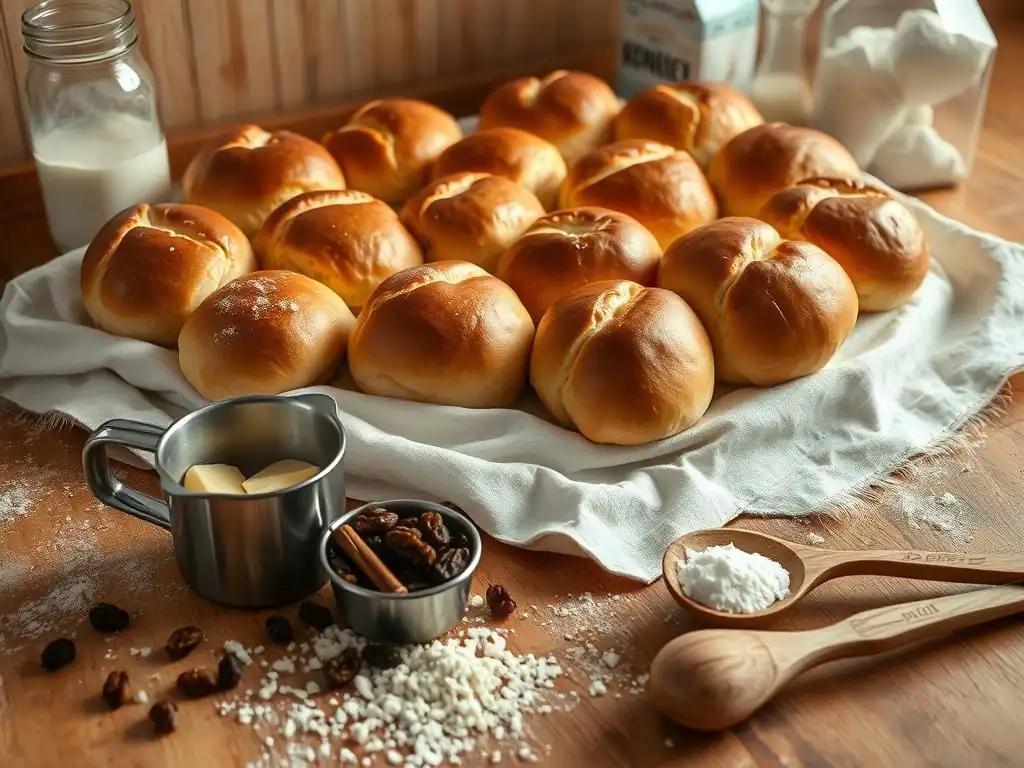
Creating delicious, fluffy rolls starts with understanding the role of each ingredient. For an easy homemade baking rolls recipe, you only need a handful of staples that work together synergistically to create that wonderful texture and flavor. Think of these ingredients as the building blocks – flour provides structure, yeast makes it rise, liquid binds everything, and sugar and salt enhance the flavor and control the yeast.
Using fresh, good-quality ingredients is key, especially when you're just starting out. Stale yeast, for instance, can lead to rolls that don't rise, while rancid flour can impart off-flavors. While this guide focuses on baking rolls without special equipment, it's important to pay attention to the quality of what goes into your dough. Let's break down the essential components you'll need for your easy homemade baking rolls recipe.
Flour Power: Choosing the Right Flour for Baking Rolls
For most easy homemade baking rolls recipes, all-purpose flour is your best friend. It has a moderate protein content, typically ranging from 10% to 12%, which is sufficient to develop enough gluten for a good crumb structure without making the dough too tough. Gluten is the protein network that forms when flour is mixed with liquid and kneaded; it provides the elasticity and structure that allows the dough to trap gases produced by the yeast, resulting in light and airy rolls.
While bread flour, with its higher protein content (12-14%), can produce chewier rolls, it often requires more kneading to develop the stronger gluten network. For an easy recipe focusing on baking rolls without special equipment, all-purpose flour is forgiving and yields consistently soft results. Always measure flour accurately, ideally by weight (around 120-130 grams per cup is a common approximation), as scooping directly can pack it down and result in too much flour, leading to dense rolls.
The Importance of Yeast in Homemade Rolls
Yeast is the magical ingredient that makes your rolls rise. It's a living microorganism that feeds on sugars in the dough and produces carbon dioxide gas and alcohol as byproducts. The gas gets trapped by the gluten network, causing the dough to expand. For an easy homemade baking rolls recipe, active dry yeast or instant yeast are the most common and reliable choices. Active dry yeast usually needs to be dissolved in warm liquid first (activated), while instant yeast can often be mixed directly into the dry ingredients.
Using yeast that is fresh and active is crucial. If your yeast is old or improperly stored (it's best kept in an airtight container in the refrigerator or freezer), it may be dead or dormant and won't produce enough gas to make your rolls rise. A simple test for active dry yeast is to mix it with warm water (around 105-115°F or 40-46°C) and a pinch of sugar; if it's active, it should become foamy within 5-10 minutes. Instant yeast is generally more robust but still benefits from proper storage.
Sweetness and Flavor: Sugar and Salt in Roll Baking
Sugar plays a dual role in your easy homemade baking rolls recipe. Firstly, it provides food for the yeast, helping it to activate and become productive. A small amount is usually sufficient for this purpose. Secondly, sugar contributes to the browning of the crust during baking through caramelization, giving your rolls that appealing golden color. It also adds a subtle sweetness that balances the flavors in the bread. Too much sugar, however, can inhibit yeast activity, so moderation is key.
Salt is equally important, although it might seem counterintuitive to add it to bread. Salt enhances the flavor of the flour and yeast, preventing the rolls from tasting bland. Crucially, salt also helps to control the rate of yeast fermentation. Without salt, the yeast would work too quickly, potentially leading to an uneven rise and a less flavorful dough. It also strengthens the gluten structure, contributing to better dough handling and a finer crumb. Just a teaspoon or two for a standard recipe makes a significant difference.
Liquid Assets: Milk vs. Water for the Best Roll Texture
The liquid in your easy homemade baking rolls recipe serves to hydrate the flour, allowing gluten to develop, and provides the medium for yeast activity. The choice between milk and water affects the final texture and richness of the rolls. Water is the simplest option and yields a more classic, slightly chewier bread texture. It's readily available and works perfectly for a basic, easy homemade baking rolls recipe.
Milk, on the other hand, adds richness, tenderness, and a softer crumb to the rolls due to its fat content and proteins. It also contributes to a more golden-brown crust. Using warm milk (around 105-115°F or 40-46°C) is ideal for activating yeast, just like warm water. Some recipes even use melted butter or an egg mixed into the liquid for extra richness and softness. For a truly easy approach to baking rolls without special equipment, starting with water or milk provides excellent results.
Tools You Already Have: Baking Rolls Without Special Equipment
One of the best things about baking rolls at home is that you don't need a kitchen full of specialized gadgets. An easy homemade baking rolls recipe relies on fundamental techniques and tools that are common in most kitchens. You don't need a stand mixer, a proofing box, or a bread lame to make delicious rolls. Let's look at the essential items you likely already have on hand.
Focusing on baking rolls without special equipment means embracing simplicity. These basic tools are all you need to measure, mix, knead (by hand! ), shape, and bake your dough. They are reliable, easy to clean, and prove that baking from scratch is accessible to everyone, regardless of their kitchen setup.
Mixing Bowls and Spoons: The Basics of Roll Dough Preparation
You'll need at least one large mixing bowl for your easy homemade baking rolls recipe. A bowl made of glass, ceramic, or plastic works well. It should be large enough to accommodate the dough as it doubles (or even triples) in size during rising. A capacity of at least 3-4 quarts is usually sufficient for a standard recipe using 3-4 cups of flour. Having a second smaller bowl is helpful for activating active dry yeast if your recipe requires it.
A sturdy spoon, such as a wooden spoon or a strong metal spoon, is essential for initially mixing the wet and dry ingredients together until a shaggy dough forms. While you'll transition to using your hands for kneading, the spoon helps bring everything together cleanly in the early stages. Using a rubber spatula can also be useful for scraping down the sides of the bowl to ensure all ingredients are incorporated.
Measuring Cups and Spoons: Accurate Measurements for Perfect Rolls
Precision in measuring ingredients is important in baking, especially for an easy homemade baking rolls recipe where ratios matter. You'll need a set of dry measuring cups (for flour, sugar, etc.) and measuring spoons (for salt, yeast, etc.). For liquids, a clear liquid measuring cup with markings on the side is ideal. While weighing ingredients provides the most accuracy, volumetric measuring cups and spoons are perfectly adequate for a beginner-friendly recipe.
Remember the difference between dry and liquid measuring cups. Dry ingredients like flour should be spooned lightly into the cup and leveled off with a straight edge, rather than scooped directly from the bag, which can compact the flour. Liquid measuring cups should be placed on a flat surface, and you should read the measurement at eye level. Using standard measuring tools ensures consistency in your baking results every time you make your easy homemade baking rolls recipe.
Baking Sheets and Parchment Paper: Preventing Sticking
To bake your shaped rolls, you'll need one or two baking sheets. Standard metal baking sheets are widely available and work perfectly. They provide a flat surface for the rolls to sit on as they proof for a second time and bake evenly in the oven. The size of the sheet will determine how many rolls you can bake at once, usually between 8 and 12 rolls per standard half-sheet pan, spaced a couple of inches apart to allow for expansion.
To prevent your beautiful homemade rolls from sticking to the pan, parchment paper is an absolute lifesaver. It creates a non-stick surface, makes cleanup a breeze, and ensures your rolls can be easily removed after baking. Simply line your baking sheet with a sheet of parchment paper before placing the shaped rolls on it. Wax paper is not a substitute for baking as it can melt or smoke in the oven.
The Oven: Your Most Important Baking Tool
Your standard kitchen oven is the final and most crucial piece of equipment for baking your easy homemade baking rolls recipe. Whether it's gas or electric, most ovens are capable of baking excellent rolls. Consistency in temperature is important, so it's helpful to know if your oven runs hot or cool. An inexpensive oven thermometer placed inside can give you an accurate reading of the actual temperature inside.
Preheating your oven properly is essential. Allow it at least 15-20 minutes after it indicates it has reached the target temperature to ensure the entire oven cavity, including the walls and racks, is heated evenly. Baking rolls at the correct temperature (typically between 375°F and 400°F or 190°C and 200°C) ensures they cook through, develop a golden crust, and achieve the right texture. Position the baking sheet in the center of the oven for the most even heat distribution.
Step-by-Step: Easy Homemade Baking Rolls Recipe for Beginners
Ready to get your hands doughy? This simple guide walks you through a basic easy homemade baking rolls recipe designed for baking rolls without special equipment. We'll break it down into manageable steps, focusing on the techniques rather than relying on machines. Follow along, and you'll be enjoying warm, homemade rolls in no time!
This recipe is a classic direct dough method, meaning the dough is mixed, kneaded, and shaped relatively quickly, without long fermentation periods in the refrigerator. It's perfect for beginners learning the fundamentals and wanting results within a few hours.
- Ingredients Check:
- All-purpose flour
- Yeast (Active Dry or Instant)
- Sugar
- Salt
- Warm liquid (Water or Milk)
- Butter or oil (optional, for richness and greasing)
Step 1: Activating the Yeast for Baking Rolls
If using active dry yeast, you'll need to activate it first. In a small bowl, combine the warm liquid (about 1/2 cup, warmed to 105-115°F / 40-46°C) with about 1 teaspoon of sugar. Sprinkle the yeast (usually 2 1/4 teaspoons, or one standard packet) over the top and stir gently. Let it sit for 5-10 minutes. You should see a foamy layer develop on the surface, indicating the yeast is alive and ready to work its magic on your easy homemade baking rolls recipe dough.
If using instant yeast, you can often skip this step and mix the yeast directly with the dry ingredients. However, proofing it first as described above is a good way to verify its freshness before committing to the whole batch of dough. If the yeast doesn't foam, it's likely dead, and you'll need to get new yeast before proceeding with your easy homemade baking rolls recipe.
Step 2: Mixing the Dough for Your Homemade Rolls
In your large mixing bowl, whisk together the rest of the dry ingredients: the remaining flour (start with about 2 1/2 cups, reserving some for kneading), the remaining sugar, and the salt. Make a well in the center of the dry ingredients. Pour in the activated yeast mixture (or the warm liquid if using instant yeast) and any other wet ingredients like melted butter or oil.
Using your sturdy spoon or a rubber spatula, start mixing from the center outwards, gradually incorporating the flour into the wet ingredients. Continue mixing until a shaggy, sticky dough forms. At this point, you can switch to using your hands to bring the dough together further in the bowl. Scrape down the sides to ensure all the flour is incorporated. The dough will be quite sticky at this stage, which is normal for an easy homemade baking rolls recipe.
Step 3: Kneading the Dough: Developing Gluten for Soft Rolls
Turn the shaggy dough out onto a lightly floured surface. This is where the "without special equipment" part really comes in! Kneading by hand is a fantastic way to develop the gluten in the dough, which is essential for creating soft, airy rolls. Push the dough away from you with the heels of your hands, fold it back towards you, and rotate it slightly. Repeat this push-fold-rotate motion.
Knead the dough for about 8-10 minutes. Initially, it will be sticky and perhaps a bit lumpy. As you knead, the gluten will develop, and the dough will become smoother, more elastic, and less sticky. It should feel supple and spring back slowly when gently poked. Use minimal additional flour on your surface as needed to prevent sticking; too much flour can make the rolls dense. You'll know the dough is ready when it passes the "windowpane test": stretch a small piece of dough thinly; if you can see light through it without it tearing, the gluten is well-developed.
Step 4: First Rise: Letting the Dough Rise for Light and Airy Rolls
After kneading, the dough needs time to rise – this is called the first fermentation or bulk proof. Lightly grease your large mixing bowl with a little oil or butter. Place the kneaded dough in the bowl, turning it to coat all sides with the grease. This prevents a dry skin from forming. Cover the bowl tightly with plastic wrap or a clean kitchen towel.
Place the covered bowl in a warm, draft-free place. An oven with the light on (but the oven off) is a perfect spot, usually providing a temperature around 75-85°F (24-30°C). The dough should rise until it has doubled in size. This typically takes 1 to 1.5 hours, but the time can vary significantly depending on the temperature of your room and the activity of your yeast. Don't rush this step; a proper first rise contributes greatly to the texture and flavor of your easy homemade baking rolls recipe.
Step 5: Shaping the Rolls: Creating Beautiful Homemade Rolls
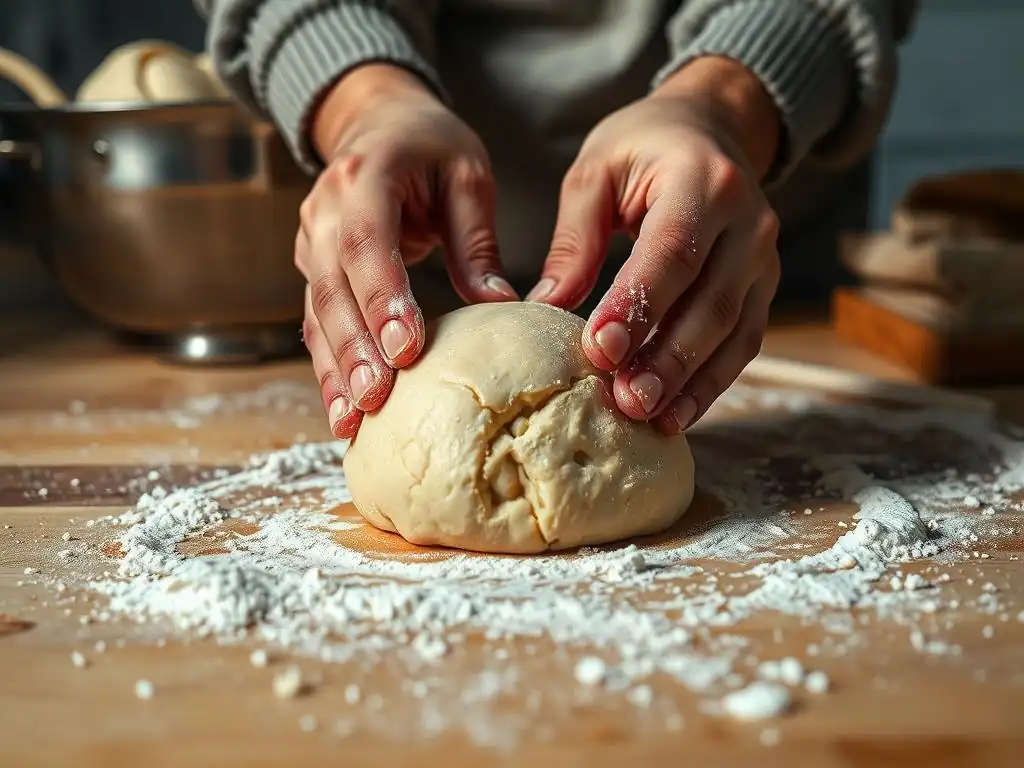
Once the dough has doubled, gently punch it down to release the gases. Turn the dough out onto a lightly floured surface. Divide the dough into equal portions. For standard dinner rolls, portions weighing about 2-3 ounces (around 55-85 grams) are common, yielding about 12-16 rolls from a typical recipe using 3-4 cups of flour. You can eyeball it or use a kitchen scale for more uniformity.
Shape each portion into a round roll. The easiest way is to cup your hand around the dough portion on the surface and move your hand in a circular motion, applying gentle pressure to create tension on the surface of the dough and form a smooth ball. Alternatively, you can flatten the dough portion slightly, fold the edges into the center, pinch the seam closed, and then roll it seam-side down to create a smooth top. Place the shaped rolls seam-side down on your prepared baking sheet lined with parchment paper, leaving about 1-2 inches of space between them.
Step 6: Second Rise: Proofing the Shaped Rolls
After shaping, the rolls need another period of rising, known as the second fermentation or proofing. This allows the rolls to become light and airy before baking. Cover the baking sheet loosely with plastic wrap or a clean kitchen towel. Avoid letting the cover touch the rolls directly, or they might stick.
Place the covered baking sheet back in your warm, draft-free spot. The rolls should rise until they are visibly puffy and have nearly doubled in size. This second rise usually takes about 30-45 minutes, often less time than the first rise. To test if they are ready, gently press a finger into a roll; if the indentation springs back slowly and only partially, they are properly proofed. If it springs back immediately, they need more time. If it stays indented, they might be over-proofed.
Step 7: Baking the Rolls: Achieving Golden-Brown Perfection
While the rolls are completing their second rise, preheat your oven. For most easy homemade baking rolls recipes, a temperature of 375-400°F (190-200°C) is ideal. Make sure the oven has preheated fully for at least 15-20 minutes to ensure the temperature is stable.
Once the oven is hot and the rolls are proofed, place the baking sheet on the center rack. Bake for 15-25 minutes, depending on the size of the rolls and your oven. The rolls are done when they are golden brown on top and sound hollow when tapped on the bottom. An internal temperature of around 190-200°F (88-93°C) indicates they are fully baked. You can brush the tops with melted butter right after they come out of the oven for a soft crust and extra flavor.
Step 8: Cooling and Enjoying Your Freshly Baked Rolls
The hardest part might be waiting, but allowing your freshly baked homemade rolls to cool slightly is important. Transfer the rolls from the baking sheet to a wire rack immediately after removing them from the oven. Cooling on a wire rack allows air to circulate around the rolls, preventing the bottoms from getting soggy from trapped steam.
Let the rolls cool for at least 10-15 minutes before tearing into them. This cooling period allows the internal structure to set and the steam to dissipate. Enjoy your warm, soft, easy homemade baking rolls with butter, jam, or alongside your favorite meal. The satisfaction of biting into a roll you made yourself, without any special equipment, is truly wonderful!
Baking Rolls Recipe Variations: Customize Your Homemade Rolls
Once you've mastered the basic easy homemade baking rolls recipe, you can start experimenting! The beauty of baking rolls without special equipment is that the simple dough is a perfect canvas for adding various flavors and ingredients. Here are a few ideas to customize your homemade rolls and make them your own.
These variations are simple additions or substitutions that don't require new techniques or tools, keeping within the spirit of an easy homemade baking rolls recipe. Have fun playing with different combinations!
Adding Herbs and Spices for Flavorful Rolls
Incorporating dried herbs or spices into your dough is an effortless way to add a burst of flavor. For instance, adding a teaspoon or two of dried rosemary or thyme to the dry ingredients before mixing creates savory rolls perfect for accompanying soups or stews. Garlic powder (about 1/2 to 1 teaspoon) is another great option for a subtle savory note.
Consider spices like black pepper, onion powder, or even a pinch of cayenne for a little heat. You can also add seeds like poppy seeds or sesame seeds to the dough or sprinkle them on top before baking for added texture and flavor. A classic combination is everything bagel seasoning sprinkled generously on top of the shaped rolls just before the second rise or baking.
Sweet Rolls: Adding Sugar and Cinnamon
To turn your easy homemade baking rolls recipe into a sweet treat, slightly increase the sugar in the dough (perhaps up to 1/4 cup for a standard batch) and add warm spices like cinnamon, nutmeg, or cardamom. You could also swirl a cinnamon-sugar mixture into the dough after the first rise before shaping.
After baking, these sweet rolls are delicious simply glazed with a mixture of powdered sugar and a little milk or water. For extra decadence, brush them with melted butter and roll them in cinnamon sugar while still warm. These sweet variations are perfect for breakfast, brunch, or dessert.
Cheesy Rolls: Incorporating Cheese into Your Roll Recipe
Cheese makes everything better, and rolls are no exception! Add about 1/2 to 1 cup of shredded cheese (like cheddar, Parmesan, or a blend) to the dough during the last minute or two of kneading. This evenly distributes the cheese throughout the dough.
Alternatively, you can flatten each portion of dough during shaping, place a small amount of cheese in the center, and then wrap the dough around it before shaping into a ball. Sprinkle a little extra cheese on top of the rolls before baking for a crispy cheese crust. These cheesy variations pair wonderfully with savory meals.
Whole Wheat Rolls: A Healthier Option for Homemade Bread
For a more wholesome option, you can substitute a portion of the all-purpose flour with whole wheat flour. Start by replacing about 25-50% of the all-purpose flour (e.g., use 1 cup whole wheat flour and 2 cups all-purpose flour). Whole wheat flour absorbs more liquid and has more bran and germ, which can inhibit gluten development, so your dough might feel a bit different and potentially require a little more liquid.
Rolls made with whole wheat flour tend to be denser than those made with 100% all-purpose flour, but they offer more fiber and nutrients. You might find they need a slightly longer kneading time to help develop sufficient gluten. This adaptation still fits within the scope of baking rolls without special equipment and provides a nutritious twist on your easy homemade baking rolls recipe.
Troubleshooting Common Baking Rolls Problems
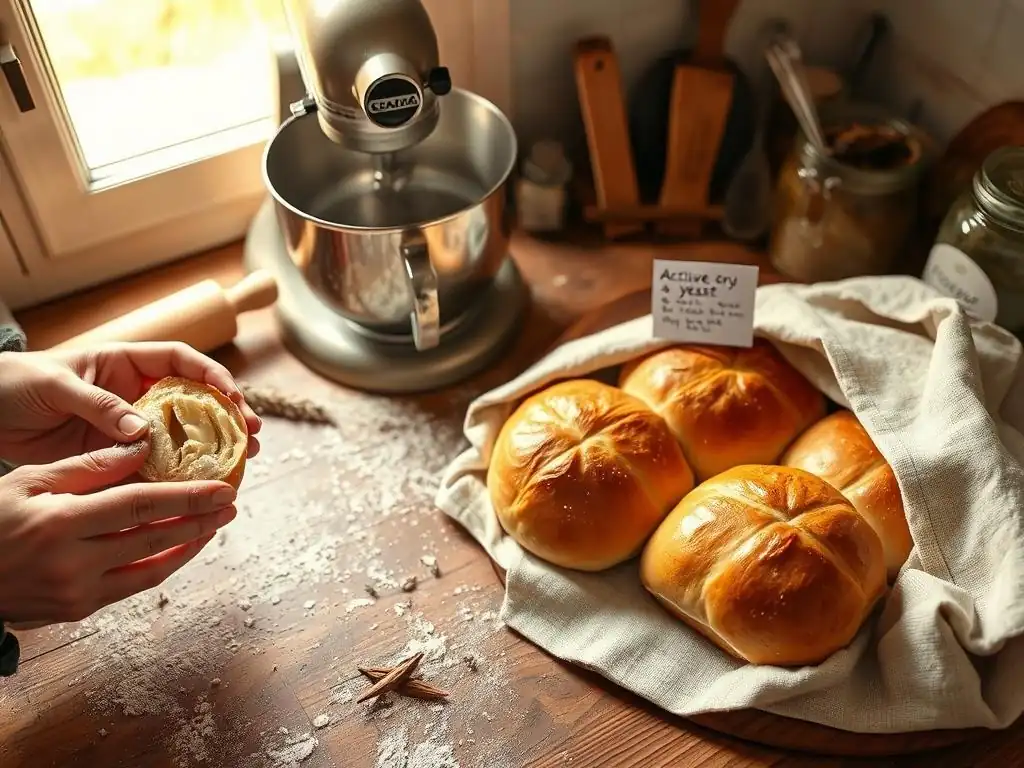
Even with an easy homemade baking rolls recipe, sometimes things don't go exactly as planned. Don't worry, baking is a learning process! Most common issues with homemade rolls have simple explanations and solutions. Let's look at some typical problems and how to address them.
Understanding why a problem occurred is the first step to fixing it next time. These tips will help you diagnose issues and improve your results when baking rolls without special equipment.
Rolls Not Rising: What Went Wrong?
The most common reason rolls don't rise is inactive or dead yeast. Ensure your yeast is fresh and properly stored. Proofing active dry yeast in warm, sugary water before adding it to the dough is a good preventative measure. Make sure your liquid isn't too hot (above 130°F / 54°C can kill yeast) or too cold (below 70°F / 21°C can make it sluggish).
Another factor is the environment for rising. If your room is too cold or drafty, the yeast activity will be slow. Find a warm spot, like a turned-off oven with the light on, or place the covered bowl/tray in a slightly warmer room. Ensure the dough is properly covered to prevent a dry skin from forming, which can restrict rising. Finally, ensure you kneaded the dough enough to develop gluten, which is necessary to trap the gas produced by the yeast.
Rolls Too Dense: Tips for Light and Fluffy Rolls
Dense rolls can result from several factors. One major culprit is adding too much flour during mixing or kneading. Stick to the recipe's measurements and use minimal extra flour on your work surface. Over-kneading or under-kneading can also affect texture; aim for dough that is smooth and elastic, passing the windowpane test.
Insufficient rising time is another common cause of density. Ensure the dough has doubled in size during the first rise and is significantly puffy during the second rise. Rushing these steps means the yeast hasn't had enough time to produce sufficient gas. Baking at too low a temperature can also lead to dense rolls because the yeast dies before the dough has fully expanded in the oven ("oven spring"). Ensure your oven is properly preheated to the correct temperature.
Rolls Burning on the Bottom: Solutions for Even Baking
If the bottoms of your rolls are burning while the tops are still pale, the heat source in your oven might be too strong from below. Placing your baking sheet directly on the bottom rack is often the cause. Always bake rolls on the middle rack of your oven for the most even heat distribution.
Using parchment paper is also crucial, as it provides a layer of insulation between the metal baking sheet and the dough, helping to prevent the bottoms from scorching. If this is a persistent issue with your oven, you can try placing an empty baking sheet or a pizza stone on the rack below your rolls to help shield them from direct bottom heat. Lowering the oven temperature slightly and baking for a few extra minutes can also help.
Dry Rolls: Maintaining Moisture in Your Homemade Bread
Dry rolls can be caused by too much flour in the dough, baking for too long, or baking at too high a temperature. Ensure you measure flour accurately and don't add excessive amounts during kneading. Baking time is often an approximation; rely on visual cues (golden brown color) and the hollow tap test, or an internal temperature reading (190-200°F / 88-93°C), rather than strictly adhering to the time given in a recipe, as ovens vary.
Over-baking evaporates too much moisture from the rolls. If you notice your rolls are consistently dry, try reducing the baking time by 2-3 minutes or slightly lowering the oven temperature next time. Brushing the tops of the warm rolls with melted butter after they come out of the oven adds moisture and creates a softer crust, which can also help mitigate dryness. Storing the rolls properly once cooled (see next section) is also key to maintaining moisture.
Storing Your Homemade Baking Rolls
You've successfully baked a batch of delicious easy homemade baking rolls without special equipment – congratulations! Now, how do you keep them fresh and delicious? Proper storage is essential to maintain their texture and prevent them from becoming stale too quickly.
Whether you plan to eat them within a day or save some for later, these simple storage tips will help you preserve your baking efforts and enjoy your homemade rolls for as long as possible.
Keeping Rolls Fresh: Proper Storage Techniques
Once your rolls have cooled completely on a wire rack, store them in an airtight container or a resealable plastic bag at room temperature. Removing all the air from the bag before sealing helps slow down the staling process. A bread box can also work, provided it's clean and the rolls are enclosed in a bag or container inside it.
Avoid storing freshly baked rolls in the refrigerator. While it might seem logical to refrigerate bread, the temperature range in a refrigerator actually accelerates the staling process (starch retrogradation). Rolls stored properly at room temperature will typically stay fresh for 2-3 days. If you won't eat them within that timeframe, consider freezing them.
Freezing Rolls for Later: Preserving Your Baking Efforts
Freezing is an excellent way to preserve your easy homemade baking rolls for longer enjoyment. Once the rolls are completely cooled, place them in a single layer on a baking sheet and pop them into the freezer for about an hour until they are firm. This prevents them from sticking together.
Once firm, transfer the rolls to a freezer-safe bag or airtight container. Remove as much air as possible before sealing. Label the container with the date. Frozen rolls can maintain their quality for up to 2-3 months. Freezing individual rolls allows you to thaw only what you need, minimizing waste.
Reheating Rolls: Restoring Freshness and Flavor
To enjoy frozen rolls, you can thaw them at room temperature for a few hours or overnight. For best results and to restore that "freshly baked" warmth and softness, it's best to reheat them slightly before serving.
Place the rolls on a baking sheet and warm them in a preheated oven at 300-325°F (150-160°C) for about 5-10 minutes, or until heated through. Alternatively, you can wrap individual rolls in a damp paper towel and microwave them for 20-30 seconds, though the oven method generally yields a better texture. This reheating step brings back some of the moisture and softness, making them taste almost as good as when they first came out of the oven.
Mastering the Easy Homemade Baking Rolls Recipe: Next Steps
You've successfully baked your first batch of easy homemade baking rolls without special equipment! This is just the beginning of your baking adventure. Building on this fundamental recipe, you can explore more techniques, experiment with different ingredients, and continue to refine your skills.
Baking is a journey of continuous learning and delicious discovery. By practicing your easy homemade baking rolls recipe, you've gained valuable experience that will serve you well as you explore other bread and baking projects.
Experimenting with Different Flours and Flavors
Now that you're comfortable with the basic process, try substituting small amounts of other flours, like rye, spelt, or even a touch of cornmeal, into your easy homemade baking rolls recipe dough. Each flour will impart a unique flavor and texture. Continue experimenting with the herb, spice, and cheese variations discussed earlier, or invent your own combinations.
Consider adding inclusions like roasted garlic, sun-dried tomatoes, olives, or chopped herbs directly into the dough during the kneading phase. The possibilities are endless! Keep notes on what you try and what you like so you can replicate your successes.
Perfecting Your Kneading Technique
Kneading by hand is a skill that improves with practice. Pay attention to how the dough feels as you knead – its stickiness, elasticity, and smoothness. The more you bake, the better you'll become at recognizing when the dough is perfectly kneaded, even without relying solely on the clock or the windowpane test.
Watch videos of hand kneading techniques online and try different methods to see what feels most comfortable and effective for you. Consistent, effective kneading is key to developing the gluten structure needed for light and airy rolls.
Achieving the Perfect Golden-Brown Crust
The color of your crust affects not only appearance but also flavor and texture. If your rolls are too pale, try baking them for a few extra minutes, or consider brushing them with an egg wash (one egg whisked with a tablespoon of water or milk) before baking for a richer, glossier, golden finish.
If they are browning too quickly on top, you can loosely tent the rolls with aluminum foil during the last 5-10 minutes of baking. Understanding how your specific oven bakes and making minor adjustments to temperature or time will help you achieve your desired crust color consistently.
Enjoying the Satisfaction of Homemade Bread
Ultimately, the best next step is simply to keep baking and enjoying the fruits of your labor. Share your easy homemade baking rolls with friends and family, bask in the compliments, and appreciate the simple pleasure of providing delicious, nourishing bread made with your own hands.
Baking rolls without special equipment proves that you don't need fancy tools to create something wonderful. The satisfaction of pulling a warm batch of homemade rolls from the oven is a reward in itself and will likely inspire you to keep baking and learning. Happy baking!
Frequently Asked Questions
How difficult is the Easy Homemade Baking Rolls Recipe on BakeWithEase.com?
The recipe is designed for all skill levels, emphasizing simple techniques and easy-to-find ingredients. BakeWithEase specifically aims to make baking accessible, even without specialized equipment.
What kind of equipment do I need for the Easy Homemade Baking Rolls Recipe?
The article, "Baking Rolls Without Special Equipment: Your Guide," focuses on baking rolls without requiring specialized tools. You'll primarily need standard kitchen items like a mixing bowl, measuring cups, and a baking sheet.
Can I substitute ingredients in the Easy Homemade Baking Rolls Recipe?
While the recipe is designed for optimal results, BakeWithEase often provides suggestions for substitutions to accommodate dietary needs or ingredient availability. Always check the specific recipe notes for recommended alternatives.
How long does it take to make these Easy Homemade Baking Rolls?
The total time will vary depending on proofing times, but the BakeWithEase recipe is designed to be relatively quick. Expect a few hours from start to finish, including proofing, shaping, and baking.
What types of rolls can I make using this Easy Homemade Baking Rolls Recipe as a base?
The BakeWithEase recipe provides a versatile base for various roll types. You can adapt it to make dinner rolls, sandwich rolls, or even add flavors like herbs or cheese for unique variations.
Final Reflection: The Humble Roll, A Testament to Simple Baking
The accessibility of homemade goodness is more relevant than ever. In a world of fast food and pre-packaged convenience, the ability to create something delicious and comforting from scratch offers a powerful antidote to the pressures of modern life. This simple act of baking rolls, without specialized equipment, becomes a symbol of self-sufficiency and connection to a richer, more fulfilling culinary experience.
The enduring appeal of freshly baked bread, particularly the soft, yielding texture of a homemade roll, transcends mere sustenance. It's a sensory experience that evokes memories of family gatherings, warm kitchens, and the simple pleasure of sharing something lovingly made. Bread is the staff of life,
a common saying, but it's more than just sustenance; it's a symbol of comfort, community, and the enduring power of simple things. This article aimed to demystify the process, proving that even the most seemingly complex baking tasks can be achieved with readily available tools and a little patience.
Now, I invite you to roll up your sleeves (pun intended! ), gather your ingredients, and embark on your own baking journey. Don't be intimidated by the prospect of homemade rolls; embrace the challenge, savor the process, and experience the profound satisfaction of creating something delicious and meaningful with your own two hands. The reward? Not just warm, fluffy rolls, but a deeper connection to the art of baking and the simple joys of life.
Unleash Your Inner Baker: Roll into Action!
Thanks for joining us on this baking adventure! You’ve just learned how easy it is to create delicious rolls without any fancy equipment. Now it’s time to put your newfound skills to the test.
- Bake your first batch of homemade rolls today! Use the recipe and tips from the article to create your own delicious rolls. Experiment with different flours or fillings for a truly unique experience.
- Share your baking triumph! Post a picture of your freshly baked rolls on social media and tag BakeWithEase – we'd love to see your creations!
- Consider exploring other simple bread recipes on our site; we have many more no-equipment-needed wonders waiting for you!
What unique twist will you add to your homemade rolls to make them your own?