
Baking Whole Wheat Pita Bread: Puffy & Delicious

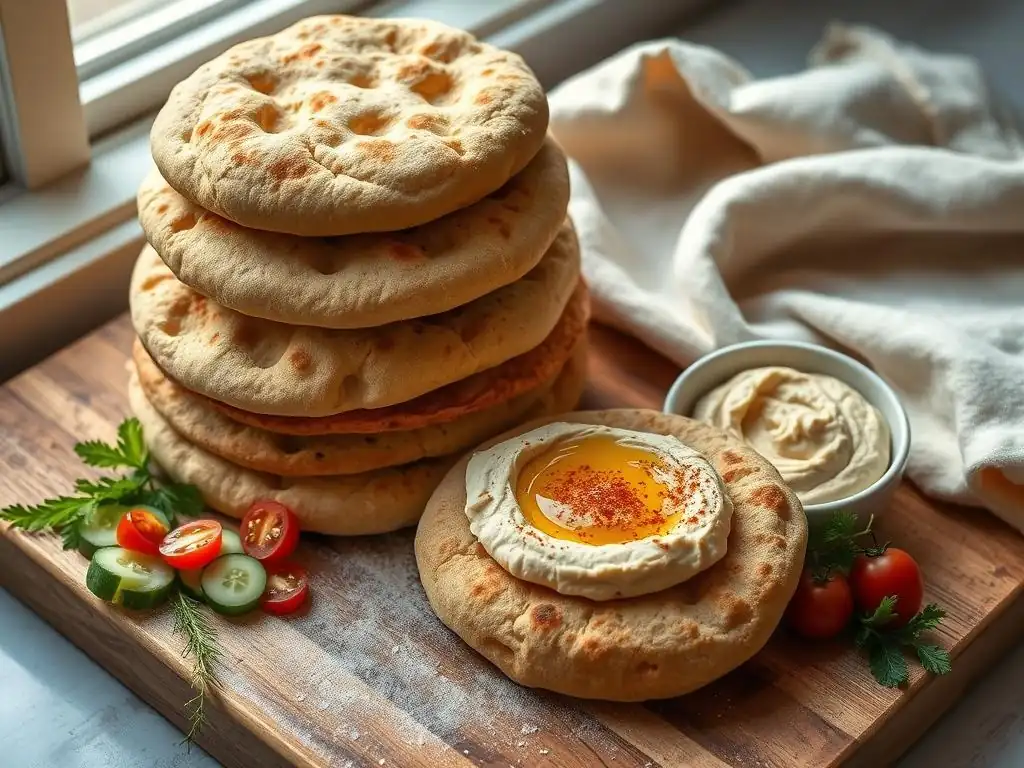
Welcome to BakeWithEase, where the joy of baking meets effortless execution! Ever dream of creating perfectly puffed, delicious pita bread right in your own kitchen? Our step-by-step guide makes it easier than you think. Discover the secrets to our Whole Wheat Pita Bread Recipe and unlock the satisfaction of fresh, homemade bread. Intrigued? Keep reading to learn how to bake pita bread that's both healthy and unbelievably tasty!
- Introduction to Homemade Whole Wheat Pita Bread
- Mastering the Whole Wheat Pita Bread Recipe
- Step-by-Step Guide: Baking the Perfect Whole Wheat Pita
- Tips and Tricks for Perfect Whole Wheat Pita Bread
- Serving Suggestions for Whole Wheat Pita Bread
- Variations on the Whole Wheat Pita Bread Recipe
- Conclusion: Enjoying the Fruits (or Pitas) of Your Labor
-
Frequently Asked Questions
- What makes this whole wheat pita bread recipe different from others?
- Is this pita bread recipe suitable for beginners?
- Can I substitute all-purpose flour for whole wheat flour in this recipe?
- How do I ensure the pita bread puffs up during baking?
- What are some serving suggestions for this whole wheat pita bread?
- Final Reflection: The Humble Pita, A Testament to Simple Baking
- Unleash Your Inner Baker: Craft Perfect Pita!
Introduction to Homemade Whole Wheat Pita Bread
Why Bake Your Own Whole Wheat Pita?
Baking your own whole wheat pita bread is a truly rewarding experience that elevates simple meals into something special. There's an unparalleled freshness and aroma that fills your kitchen when warm pita comes straight from the oven, something store-bought versions simply can't replicate. Beyond the sensory pleasure, taking on a whole wheat pita bread recipe yourself gives you complete control over the ingredients. You can choose high-quality whole wheat flour, avoid preservatives often found in commercial bread, and tailor the salt or sweetener levels to your preference.
Moreover, baking at home can be surprisingly cost-effective. While initial investment in ingredients might seem small, comparing the price of a loaf of store-bought whole wheat pita to the minimal cost of flour, yeast, water, and salt for multiple batches reveals significant savings over time. Plus, the satisfaction of mastering a new baking skill and sharing your homemade creation with friends and family is priceless. It's a simple project that yields delicious results, making the whole wheat pita bread recipe a fantastic addition to any home baker's repertoire.
The Health Benefits of Whole Wheat Pita Bread
Incorporating whole wheat pita bread into your diet offers notable health advantages compared to pita made with refined white flour. Whole wheat flour retains the bran and germ of the wheat kernel, which are rich in dietary fiber, vitamins, and minerals. A single serving of whole wheat pita can contribute significantly to your daily fiber intake, which is crucial for digestive health, helping to regulate blood sugar levels, and promoting a feeling of fullness that can aid in weight management.
For instance, while a typical refined white pita might contain around 1-2 grams of fiber, a comparable whole wheat version often boasts 4-5 grams or more. This higher fiber content can also lead to a lower glycemic index, meaning it causes a slower, more gradual rise in blood sugar after eating. Whole wheat also provides essential nutrients like B vitamins, iron, magnesium, and selenium. By choosing a whole wheat pita bread recipe, you're not just baking something delicious; you're making a healthier choice that supports overall well-being.
Mastering the Whole Wheat Pita Bread Recipe
Gathering Your Ingredients for Whole Wheat Pita Success
Embarking on a whole wheat pita bread recipe requires just a few basic ingredients, each playing a crucial role in achieving that perfect puff. You'll need good quality whole wheat flour; look for stone-ground or finely milled varieties if possible, as they can yield a softer crumb. Active dry yeast or instant yeast is essential for leavening, providing the lift needed for the pita pockets. Warm water activates the yeast and hydrates the flour, forming the dough's structure.
Salt is vital for flavor and also helps control the yeast activity and strengthen the gluten network. Many recipes also include a touch of sweetener, like honey or sugar, which feeds the yeast and adds a subtle sweetness and helps with browning. A little olive oil or another neutral oil can improve the dough's texture and pliability. Having these simple components measured out and ready before you begin mixing is the first step to a successful whole wheat pita bread recipe.
Essential Equipment for Baking Puffy Pita Bread at Home
While you don't need a professional bakery setup to make excellent whole wheat pita bread, having a few key pieces of equipment will make the process smoother and significantly improve your results. A large mixing bowl is necessary for combining ingredients and allowing the dough to rise. If you have a stand mixer with a dough hook attachment, it can make the kneading process much easier and more efficient, typically requiring about 8-10 minutes of mixing time compared to 10-15 minutes of hand kneading.
The most critical piece of equipment for achieving that characteristic pita puff is something that retains and radiates intense heat in the oven. A pizza stone, baking steel, or even an inverted heavy-duty baking sheet preheated in a very hot oven (around 450-500°F or 230-260°C) is ideal. This super-hot surface provides a burst of heat to the bottom of the dough, instantly turning the internal moisture into steam and causing the pita to inflate. Parchment paper can be helpful for transferring the shaped pita rounds safely onto the hot surface.
Step-by-Step Guide: Baking the Perfect Whole Wheat Pita

Step 1: Preparing the Whole Wheat Dough
The foundation of any great whole wheat pita bread recipe is the dough. Begin by activating your yeast if using active dry; dissolve it in the warm water (around 105-115°F or 40-46°C) with the sweetener, and let it sit for 5-10 minutes until foamy. If using instant yeast, you can often mix it directly with the dry ingredients. Combine the whole wheat flour and salt in your mixing bowl.
Gradually add the yeast mixture and oil (if using) to the dry ingredients, mixing until a shaggy dough forms. Turn the dough out onto a lightly floured surface and knead for about 10-15 minutes by hand, or use a stand mixer with a dough hook for 8-10 minutes, until the dough is smooth and elastic. Whole wheat dough can be a bit sticky, so resist the urge to add too much extra flour; a bench scraper can be helpful. Proper kneading is essential for developing the gluten structure needed for the pita to puff.
Mixing the Dough for Optimal Gluten Development
Developing a strong gluten network is crucial for achieving a light texture and that signature pocket in your whole wheat pita bread. Gluten, formed when proteins in the flour combine with water and are worked through kneading, creates an elastic structure that traps the gases produced by the yeast. When you mix the dough, ensure all the flour is hydrated and incorporated.
Kneading continues this process, aligning the gluten strands. You'll know the dough is sufficiently kneaded when it feels smooth, elastic, and springs back slowly when gently poked. For a whole wheat pita bread recipe, adequate kneading is especially important because the bran particles in whole wheat flour can interfere with gluten development; sufficient working helps overcome this.
The Importance of Whole Wheat Flour Hydration
Hydration level, the ratio of water to flour, significantly impacts the texture of your whole wheat pita bread. Whole wheat flour typically absorbs more water than white flour due to the presence of the bran and germ. A hydration level often around 65-75% is common for pita dough, meaning for every 100 grams of flour, you use 65-75 grams of water.
Using enough water ensures the dough isn't too stiff, which can result in dense pita that struggles to puff. A slightly wetter dough, while potentially stickier to handle, promotes better gluten development and a softer final product. Pay attention to the dough's feel rather than strictly adhering to a number; adjust the water slightly based on the specific whole wheat flour you are using and the humidity in your kitchen.
Step 2: First Rise - Proofing the Whole Wheat Pita Dough
After kneading, the dough needs time to undergo its first rise, also known as bulk fermentation. This is when the yeast gets to work, consuming sugars and producing carbon dioxide gas, which causes the dough to expand and develop flavor. Place the kneaded whole wheat dough in a lightly oiled bowl, turning to coat the surface.
Cover the bowl tightly with plastic wrap or a clean kitchen towel to prevent the surface from drying out and forming a skin. The duration of the first rise depends heavily on the temperature of your proofing environment and the amount of yeast used, but it typically takes 1 to 1.5 hours at room temperature (around 70-75°F or 21-24°C), or until the dough has visibly doubled in size.
Creating the Ideal Environment for Dough Proofing
Providing a warm, draft-free environment is key to successful dough proofing for your whole wheat pita bread recipe. Yeast is most active in temperatures between 75-85°F (24-30°C). If your kitchen is cool, you can create a proofing box by turning your oven off but leaving the light on (this usually creates a warm environment), or placing the bowl in a microwave or oven that is turned off with a cup of hot water alongside it.
Consistency is more important than extreme heat; avoid temperatures that are too hot, as this can kill the yeast. The dough should approximately double in volume during this first rise. This stage allows the gluten to relax and the flavors to deepen, setting the stage for light and airy whole wheat pita bread.
Step 3: Dividing and Shaping the Pita Rounds
Once the first rise is complete, gently punch down the whole wheat dough to deflate it. Turn the dough out onto a lightly floured surface. Divide the dough into equal portions; the size depends on how large you want your pita, but typically pieces weighing between 60 and 80 grams yield standard-sized pita bread.
Shape each portion into a smooth ball by tucking the edges underneath. Allow the dough balls to rest for about 10-15 minutes, covered, to allow the gluten to relax. This resting period is crucial as it makes the dough much easier to roll out without springing back excessively.
Achieving Uniform Pita Bread Size and Shape
Uniformity in size and thickness is important for your whole wheat pita bread recipe because it ensures consistent baking and puffing. After the dough balls have rested, take one ball and place it on a lightly floured surface. Use a rolling pin to roll it out into a circle about 6-8 inches (15-20 cm) in diameter and approximately 1/8 inch (3-4 mm) thick.
Try to roll evenly to maintain consistent thickness across the entire round. If the dough springs back, let it rest for a few more minutes before continuing to roll. Aim for circles that are as round as possible, as this helps them puff evenly in the oven. Place the shaped rounds on parchment paper or a lightly floured tray, ensuring they don't touch, and cover them lightly while you shape the remaining dough.
Step 4: Second Rise - The Key to Puffy Pitas
After shaping the pita rounds, they need a short second rise, often called proofing or resting. This rest period is shorter than the first rise, typically 20-30 minutes. During this time, the yeast produces a final burst of gas, lightly leavening the shaped rounds and further relaxing the gluten.
This secondary proofing is critical for achieving that signature puff when baking your whole wheat pita bread. The dough rounds should look slightly puffy but should not have doubled in size like in the first rise. Over-proofing at this stage can lead to collapsed pita, while under-proofing might result in pita that doesn't fully puff.
Ensuring a Light and Airy Texture
The second rise contributes directly to the light and airy texture of the finished whole wheat pita bread. As the dough rests after shaping, the yeast continues its work, creating small gas bubbles throughout the dough. These bubbles are trapped within the gluten network you developed during kneading and the first rise.
When the shaped pita hits the intense heat of the oven, the water in the dough rapidly turns to steam. This steam, combined with the trapped gases, expands dramatically, forcing the top and bottom layers of the pita apart to form the pocket. A proper second rise ensures there are enough internal gases and a relaxed dough structure to support this rapid expansion, resulting in a beautifully puffed and airy pita.
Step 5: Baking Your Whole Wheat Pita Bread
This is the most exciting part of the whole wheat pita bread recipe – watching them puff! While the dough is undergoing its second rise, preheat your oven to a very high temperature, ideally between 450°F and 500°F (230°C to 260°C). Place your baking stone, steel, or inverted baking sheet in the oven during preheating to ensure it gets incredibly hot.
Carefully transfer 1-2 shaped pita rounds onto the preheated hot surface using parchment paper or a peel. Close the oven door quickly to maintain the high temperature. Within 1-2 minutes, you should see the pita begin to inflate like a balloon.
Oven Temperature and Baking Time for Perfect Puffing
Achieving the perfect puff in your whole wheat pita bread is highly dependent on using a very high oven temperature. The intense heat is what causes the water in the dough to instantly convert to steam, expanding and creating the pocket. Temperatures between 450°F and 500°F (230°C to 260°C) are typically required.
Baking time is surprisingly short at these temperatures. Once the pita has fully puffed (usually within 1-2 minutes), flip it over using tongs and bake for another 1-2 minutes to lightly brown the other side and ensure it's cooked through. The total baking time per pita is usually only 2-4 minutes. Baking too long at this high heat can make the pita brittle or tough.
Baking on a Hot Baking Stone or Sheet
Using a preheated baking stone, baking steel, or even a heavy inverted baking sheet is crucial for the puffing success of your whole wheat pita bread. These surfaces absorb and retain heat exceptionally well. When the shaped dough round is placed directly onto this hot surface, the immediate transfer of intense heat to the bottom of the dough is what triggers the rapid steam conversion and subsequent inflation.
Without a super-hot surface, the bottom of the pita might cook and set before enough steam is generated internally to force the layers apart. Ensure your chosen baking surface has preheated in the oven for at least 30-60 minutes at the target temperature before you start baking. This ensures it's hot enough to provide that essential thermal shock to the dough.
Tips and Tricks for Perfect Whole Wheat Pita Bread

Troubleshooting Common Pita Baking Problems
Even with a great whole wheat pita bread recipe, you might encounter issues. One of the most common frustrations is when the pita doesn't puff. This can happen for several reasons, including the oven not being hot enough, the baking surface not being sufficiently preheated, or the dough being rolled too thick or too thin.
Another issue can be tough or dense pita. This is often a result of insufficient kneading, which means the gluten hasn't developed properly, or using too much flour during mixing or shaping, leading to a dry dough. Paying close attention to dough hydration and kneading time is key to avoiding dense results.
Why Your Pita Isn't Puffing (And How to Fix It)
If your whole wheat pita bread isn't puffing up like a balloon, the most likely culprit is insufficient heat. Ensure your oven is truly preheated to a very high temperature (450-500°F or 230-260°C) and that your baking stone or steel has been in there for at least 30-60 minutes. An instant-read oven thermometer can verify your oven's actual temperature.
Other factors include rolling the dough too thick (the steam can't build enough pressure to separate the layers) or too thin (the layers fuse before puffing). The dough also needs proper proofing; under-proofed dough lacks the internal gas needed, while over-proofed dough can collapse. Make sure your yeast is active and that the dough has had sufficient, but not excessive, rise time.
Preventing Tough or Dense Whole Wheat Pita
To avoid tough or dense whole wheat pita bread, focus on hydration and kneading. Whole wheat flour requires adequate water; a slightly sticky dough is better than a stiff one. Don't be afraid of a hydration level around 70% for a soft result.
Ensure you knead the dough long enough to develop the gluten – until it's smooth and elastic, typically 8-15 minutes depending on the method. Avoid adding excessive flour while kneading or shaping; use just enough to prevent sticking. Also, make sure you don't overbake the pita; at high temperatures, they cook very quickly, and prolonged baking will dry them out and make them tough.
Achieving the Perfect Pita Pocket
The coveted pita pocket is formed by the rapid conversion of internal moisture to steam when the shaped dough hits a very hot surface. This steam inflates the pita, separating the top and bottom layers. To maximize your chances of getting a great pocket with your whole wheat pita bread recipe, consistency is key.
Ensure the dough is rolled to a uniform thickness (about 1/8 inch or 3-4 mm). The oven and baking surface must be intensely hot (450-500°F or 230-260°C). Place the pita directly onto the hot surface and close the oven door quickly. Bake just until fully puffed and lightly browned, then remove promptly. Proper hydration and sufficient gluten development also contribute by creating a dough structure strong enough to hold the steam.
Storing Your Freshly Baked Whole Wheat Pita Bread
Once your whole wheat pita bread is baked and slightly cooled (they are best enjoyed warm! ), proper storage will keep them fresh. Allow the pita to cool completely on a wire rack before storing. Stacking them while warm can cause them to become soggy.
Once cool, place the pita bread in an airtight container or a resealable plastic bag. They will keep well at room temperature for 2-3 days. For longer storage, whole wheat pita freezes beautifully. Simply place them in a freezer-safe bag or wrap them tightly and freeze for up to 3 months. Thaw at room temperature or gently warm in the oven or microwave before serving.
Serving Suggestions for Whole Wheat Pita Bread
Delicious Ways to Enjoy Your Homemade Pita
Homemade whole wheat pita bread is incredibly versatile and can be enjoyed in countless ways. Its soft, pliable texture and natural pocket make it perfect for stuffing, dipping, or using as a base. Serve it warm alongside dips like hummus, baba ghanoush, or tzatziki.
Use it to scoop up stews, curries, or salads. Cut it into wedges, brush with olive oil, sprinkle with herbs, and bake until crisp for delicious pita chips. Or simply enjoy a warm piece torn into chunks, savoring the fresh, nutty flavor of the whole wheat. The possibilities are truly endless for enjoying your freshly baked whole wheat pita.
Whole Wheat Pita Bread Recipes: Gyro, Falafel, Hummus & Veggie Pockets
The classic use for whole wheat pita bread is as a vessel for delicious fillings. For a taste of the Mediterranean, stuff warm pita pockets with sliced gyro meat, tomatoes, onions, and a generous dollop of tzatziki sauce. Another popular option is filling them with crispy falafel, chopped salad, pickles, and a drizzle of tahini sauce – a staple of Middle Eastern cuisine.
Of course, a simple yet satisfying option is filling the pocket with your favorite hummus and fresh vegetables like cucumber, bell peppers, and lettuce for a healthy and quick meal. You can also load them up with grilled vegetables, roasted chickpeas, or any combination of fillings you desire. The sturdy structure of the whole wheat pita bread makes it ideal for holding substantial fillings without falling apart.
Variations on the Whole Wheat Pita Bread Recipe

Adding Flavor: Experimenting with Herbs and Spices
Elevate your whole wheat pita bread recipe by incorporating herbs and spices into the dough. You can knead in dried herbs like oregano, thyme, or rosemary for an aromatic loaf. Spices such as cumin, coriander, or za'atar can add a distinct Middle Eastern or Mediterranean flavor profile.
Simply mix 1-2 teaspoons of your desired dried herbs or spices into the dry flour before adding the wet ingredients. You can also sprinkle seeds like sesame seeds or nigella seeds onto the shaped rounds just before baking for added texture and flavor. These small additions can dramatically change the character of your whole wheat pita.
Making Whole Wheat and White Flour Pita Bread
If you're new to baking with 100% whole wheat flour or prefer a lighter texture, you can modify the whole wheat pita bread recipe to include a portion of white bread flour or all-purpose flour. A common ratio is 50% whole wheat flour and 50% white flour.
Using a blend often results in a dough that is easier to handle and yields a pita that is slightly softer and more familiar in texture to those used to white pita, while still retaining some of the nutritional benefits and nutty flavor of whole wheat. Experiment with different ratios, like 75% whole wheat and 25% white, to find your preferred balance.
Vegan Whole Wheat Pita Bread: Substituting Honey with Maple Syrup
Most standard whole wheat pita bread recipes are naturally vegan, typically using only flour, water, yeast, and salt. However, some recipes might include a small amount of honey as a sweetener to help the yeast and improve browning. If you are making vegan whole wheat pita, simply substitute the honey with an equal amount of maple syrup, agave nectar, or another liquid vegan sweetener.
Alternatively, you can omit the sweetener entirely, though it might slightly affect the yeast's initial activity and the final browning. The core components of this whole wheat pita bread recipe are inherently plant-based, making it easy to adapt for a vegan diet with minimal changes.
Conclusion: Enjoying the Fruits (or Pitas) of Your Labor
Baking your own whole wheat pita bread is a rewarding journey, culminating in warm, puffy pockets ready to be filled or dipped. From understanding the role of whole wheat flour hydration to mastering the high-heat bake, each step in this whole wheat pita bread recipe contributes to the final delicious result.
The satisfaction of pulling a perfectly puffed pita from your oven, smelling the nutty aroma of the whole wheat, and knowing you created it from scratch is immense. Whether you fill them with savory delights or simply enjoy them warm with a drizzle of olive oil, these homemade pitas offer a taste of authentic flavor and texture that's hard to beat. So gather your ingredients, preheat that oven, and get ready to enjoy the delicious fruits of your labor with this fantastic whole wheat pita bread recipe.
Frequently Asked Questions
What makes this whole wheat pita bread recipe different from others?
This recipe focuses on ease of baking and uses readily available ingredients. It also provides tips for achieving a perfectly puffed pita every time, even with whole wheat flour.
Is this pita bread recipe suitable for beginners?
Yes! The recipe includes step-by-step instructions and clear explanations, making it ideal for beginners looking to bake their own whole wheat pita bread.
Can I substitute all-purpose flour for whole wheat flour in this recipe?
While possible, it's not recommended for the best results. Using all-purpose flour will change the texture and flavor. For a lighter bread, try a blend of both flours.
How do I ensure the pita bread puffs up during baking?
The high oven temperature and a preheated baking stone or sheet are critical. Also, ensure the dough is properly proofed and rolled to the correct thickness.
What are some serving suggestions for this whole wheat pita bread?
This pita bread is versatile! Enjoy it with hummus, falafel, or your favorite fillings. It's also great for dipping in soups or stews, or simply toasted with butter.
Final Reflection: The Humble Pita, A Testament to Simple Baking
The pursuit of the perfect whole wheat pita bread transcends mere recipe following; it's a journey into the heart of mindful baking and the appreciation of wholesome ingredients. This article explored the nuances of creating fluffy, delicious whole wheat pita bread, highlighting techniques that ensure a satisfying outcome, from the careful selection of flour to the precise control of hydration and baking time. The demand for healthy, flavorful alternatives continues to rise, making this recipe more relevant than ever.
The enduring appeal of pita bread, a staple across numerous cultures, lies in its versatility and simplicity. It's a blank canvas for countless culinary creations, a testament to how a few basic ingredients, when handled with care and understanding, can yield extraordinary results. The simplest things are often the most beautiful,
a sentiment perfectly encapsulating the magic of baking this humble bread. This recipe, I hope, has not only provided a practical guide but also sparked a deeper appreciation for the process of transforming simple flour and water into something so delicious and satisfying.
Now, I invite you to embrace the challenge. Don't be intimidated by the seemingly intricate steps; rather, see them as opportunities for learning and experimentation. Try this recipe, adapt it to your preferences, and savor the journey. The satisfaction of creating your own perfectly puffed whole wheat pita bread, warm from the oven, is a reward in itself. Let the aroma fill your kitchen, and share the delicious results with loved ones. The experience, I believe, will be as rewarding as the bread itself.
Unleash Your Inner Baker: Craft Perfect Pita!
Thanks for joining us on this whole wheat pita bread adventure! You've just unlocked the secrets to fluffy, delicious pita – perfect for any meal. Now it's time to put your newfound knowledge into action!
- Bake your own batch of pita bread today! Use the recipe from the article as your guide, and don't be afraid to experiment with different flours or herbs.
- Share your pita-baking journey on social media using #BakeWithEasePita and tag us! Let's inspire others to bake delicious bread.
- Challenge yourself: Try adapting the recipe to create other flatbreads, like naan or tortillas. What unique flavors will you create?
What creative fillings will you explore for your homemade pita masterpieces? Let us know in the comments below!