
Mastering High Hydration International Doughs: Tips and Tricks

Welcome to BakeWithEase, your haven for baking brilliance! Are you ready to unlock the secrets to truly extraordinary bread? Dive into the world of high hydration sourdough and discover how to achieve that coveted open crumb and tangy flavor. We'll guide you through the process, demystifying the art of mastering high hydration sourdough bread recipes and empowering you to create bakery-worthy loaves at home. Intrigued? Let's get baking!
- Mastering High Hydration Doughs: Tips and Tricks for BakeWithEase
- Understanding High Hydration Doughs for International Breads
- Key Ingredients for High Hydration Dough Recipe Success
- Techniques for Handling High Hydration Dough: A Step-by-Step Guide
- Baking High Hydration Dough: Achieving the Perfect Crust and Crumb
- Troubleshooting Common Issues with High Hydration Doughs
- Adapting Your High Hydration Dough Recipe for Different International Flavors
- High Hydration Dough Recipe: A BakeWithEase Exclusive
- Advanced Techniques for High Hydration Baking
-
Frequently Asked Questions
- How does high hydration affect sourdough bread?
- What are the key challenges of working with high hydration sourdough?
- What hydration level is considered "high hydration" for sourdough?
- What essential tools or ingredients can aid in baking high hydration sourdough?
- Can a beginner successfully bake a high hydration sourdough bread recipe?
- Final Reflection: The Transformative Power of High Hydration Doughs
- Unleash Your Inner Artisan: Bake the Perfect High-Hydration Dough!
Mastering High Hydration Doughs: Tips and Tricks for BakeWithEase
Understanding High Hydration Doughs for International Breads
What is High Hydration Dough and Why Bake With It?
High hydration dough refers to a dough recipe where the weight of the water significantly exceeds 60% of the weight of the flour. For example, a dough made with 500 grams of flour and 400 grams of water would have 80% hydration (400g / 500g = 0.8, or 80%). These doughs are often quite wet and sticky, which can be intimidating at first glance. However, mastering a high hydration sourdough bread recipe unlocks a world of superior bread characteristics, highly sought after by bakers.
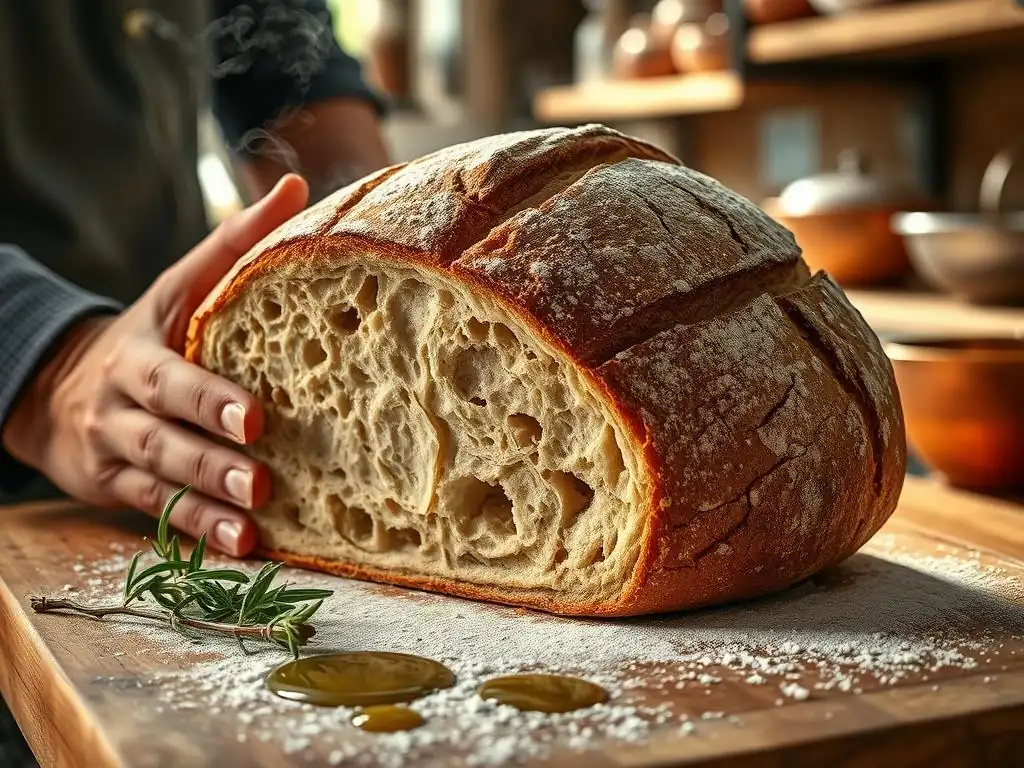
Baking with high hydration dough offers several key advantages. The increased water content allows for a more open, airy crumb structure, often with beautiful, irregular holes characteristic of artisanal loaves like ciabatta or high hydration sourdough. It also contributes to a thinner, crispier crust because there is more water available to convert into steam during baking, promoting better oven spring and crust development. Furthermore, the extended fermentation times often associated with high hydration doughs, particularly when using a sourdough starter, lead to deeper, more complex flavors. It's a technique that truly elevates your baking game.
The Science Behind High Hydration: Gluten Development and Water Absorption
At its core, the success of high hydration doughs relies on the interaction between water and the proteins in flour, primarily glutenin and gliadin, which together form gluten. When flour is mixed with water, these proteins begin to link up, forming a complex network. In a high hydration dough, the abundance of water allows these proteins to move more freely and hydrate more thoroughly. This leads to a more flexible and extensible gluten network, capable of trapping the gases produced during fermentation more effectively than a drier dough.
The high water content also influences enzymatic activity within the dough. Enzymes like amylase break down starches into simpler sugars, which feed the yeast (or sourdough starter). More water means these enzymes can work more efficiently, contributing to fermentation and flavor development. However, managing this wet environment requires specific techniques to build sufficient strength in the gluten network to support the dough's structure. Simply adding more water without adapting your methods will result in a slack, unmanageable dough that fails to hold its shape or achieve good oven spring.
Exploring International Breads That Utilize High Hydration Techniques
Many iconic international breads owe their distinctive textures and appearances to high hydration techniques. Italian ciabatta, meaning "slipper," is famous for its incredibly open, holey crumb and rustic crust, typically made with hydration levels ranging from 75% to over 85%. The classic French baguette, while often not as extremely hydrated as ciabatta, still benefits greatly from hydration levels often between 70% and 75%, contributing to its signature crispy crust and moderately open interior.
Beyond these well-known examples, variations of high hydration sourdough bread are popular globally. Certain styles of Pugliese bread from Southern Italy, some rustic German Bauernbrot variations (especially those with a high proportion of wheat), and even some artisan whole wheat loaves around the world utilize elevated hydration to achieve specific textures and flavors. Exploring these different styles allows bakers to see how varying hydration levels and techniques can produce a wide spectrum of delicious results, each with its own cultural significance and unique characteristics.
Key Ingredients for High Hydration Dough Recipe Success
Choosing the Right Flour for Optimal Water Absorption
The type of flour you choose is paramount when working with a high hydration sourdough bread recipe or any wet dough. Flours with higher protein content, typically labeled as "bread flour" or "strong flour," are generally preferred. These flours contain more gluten-forming proteins (often 12-14% protein) which are essential for developing the strong, elastic gluten network needed to support a high hydration dough. All-purpose flour (around 10-11.5% protein) can be used, but it will absorb less water and require more careful handling to build sufficient strength.
Some bakers also incorporate a percentage of whole wheat or rye flour into their high hydration doughs for added flavor and nutrition. While these flours can add complexity, they also contain bran and germ particles that can interfere with gluten development and absorb water differently. Whole wheat flour typically absorbs more water than white flour but can make the dough feel weaker because the sharp bran particles cut the gluten strands.
Rye flour contains different proteins that don't form gluten in the same way, resulting in a denser crumb if used in large quantities. Balancing these different flour types is key to achieving the desired texture and manageability in your high hydration sourdough bread recipe.
The Importance of Water Quality and Temperature in High Hydration Baking
Water is not just a passive ingredient in a high hydration dough; its quality and temperature play active roles. Ideally, use filtered or non-chlorinated water. Chlorine, often found in tap water, can negatively impact the activity of your sourdough starter and potentially weaken the gluten structure. While small amounts are usually fine, using purified water removes this variable and helps ensure consistent results, especially in sensitive high hydration sourdough bread recipes.
Water temperature is also crucial. For doughs mixed at room temperature, using water around 75-80°F (24-27°C) can help bring the final dough temperature into the ideal range for fermentation (typically 75-78°F or 24-26°C). This is particularly important in sourdough baking where temperature significantly influences starter activity and fermentation speed.
In warmer environments, you might use cooler water (even iced water) to slow fermentation, while in colder kitchens, warmer water can help kickstart the process. Using a thermometer to check your water temperature before mixing is a simple step that can have a big impact on your high hydration dough's fermentation timeline.
Sourdough Starter Management for High Hydration Loaves
A vibrant, active sourdough starter is absolutely critical for success with a high hydration sourdough bread recipe. Because high hydration doughs are wet and often rely solely on the starter for leavening, the starter needs to be strong enough to produce sufficient gas to lift the dough and provide structure. Using a starter that is recently fed, bubbly, and has roughly doubled or tripled in volume within 4-8 hours (depending on temperature and feeding ratio) is ideal. A weak or sluggish starter will struggle to leaven a wet dough, resulting in a dense loaf.
Maintaining a consistent feeding schedule for your starter is the best way to ensure its strength. Many bakers feed their starter daily if kept at room temperature, or once or twice a week if stored in the refrigerator. For high hydration baking, try feeding your starter with a ratio of flour and water that matches or slightly exceeds the hydration of your main dough (e.g., a 100% or 110% hydration starter for an 80% hydration dough).
This helps the starter culture adapt to the wet environment it will be working in. Using your starter at its peak activity, just after it has peaked in volume and before it starts to fall, will give your high hydration dough the best chance for a strong rise.
Techniques for Handling High Hydration Dough: A Step-by-Step Guide
Mixing Methods: Autolyse and Intensive Mixing for High Hydration
Handling high hydration dough starts with effective mixing. One of the most beneficial techniques is the autolyse. This involves mixing only the flour and water from your recipe (excluding salt and starter/yeast) and letting it rest for 20 minutes to several hours. During the autolyse, the flour absorbs the water fully, and enzymatic activity begins to break down proteins, making gluten development easier. This step is particularly effective in high hydration doughs as it allows the gluten network to start forming without the interference of salt (which tightens gluten) or starter (which starts fermentation).
After the autolyse, you incorporate the salt and starter. For high hydration doughs, instead of traditional kneading, many bakers use a technique called intensive mixing or slap and fold. This involves repeatedly picking up the dough, slapping it onto the counter, and folding it over itself.
While messy at first, this method is highly effective at developing gluten quickly in wet doughs by stretching and aligning the protein strands. Alternatively, a stand mixer with a dough hook can be used for 10-15 minutes on medium speed, stopping periodically to scrape down the sides. The goal is to transform the shaggy, sticky mass into a smoother, more cohesive dough that can hold some tension.
Mastering the Stretch and Fold Technique for Strength Building
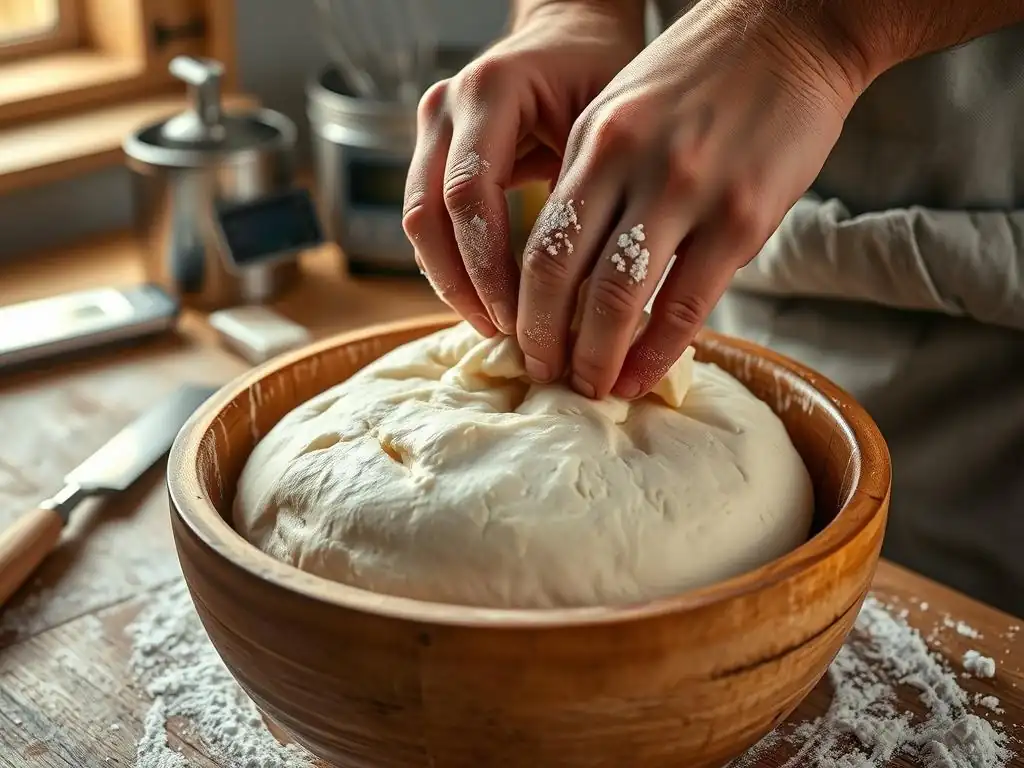
Once the initial mixing is complete, the stretch and fold technique is indispensable for building strength and structure in high hydration doughs during the bulk fermentation phase. This gentle method involves wetting your hands slightly, grabbing one side of the dough (which is usually in a bowl or proofing container), stretching it upwards, and folding it over the center of the dough. You rotate the bowl and repeat this process 3-4 times to complete one set of folds.
Performing sets of stretch and folds at regular intervals (e.g., every 30-60 minutes) during the first 2-3 hours of bulk fermentation helps develop the gluten network progressively without tearing it. The rest time between sets allows the gluten to relax and align. As you perform the folds, you will notice the dough becoming less sticky, more elastic, and holding its shape better.
This gradual strengthening is crucial for a high hydration sourdough bread recipe to develop the tension needed for shaping and achieving a good oven spring. Aim for 3-5 sets of folds depending on your dough's strength and hydration level.
Shaping High Hydration Dough: Preventing Sticking and Maintaining Structure
Shaping high hydration dough can be challenging due to its stickiness, but it's a critical step for building tension and ensuring a good final structure. The key is to work on a lightly floured surface or, preferably, a surface misted lightly with water, and to keep your hands slightly wet or floured. Excessive flour on the surface will prevent the dough from sticking to itself and developing tension.
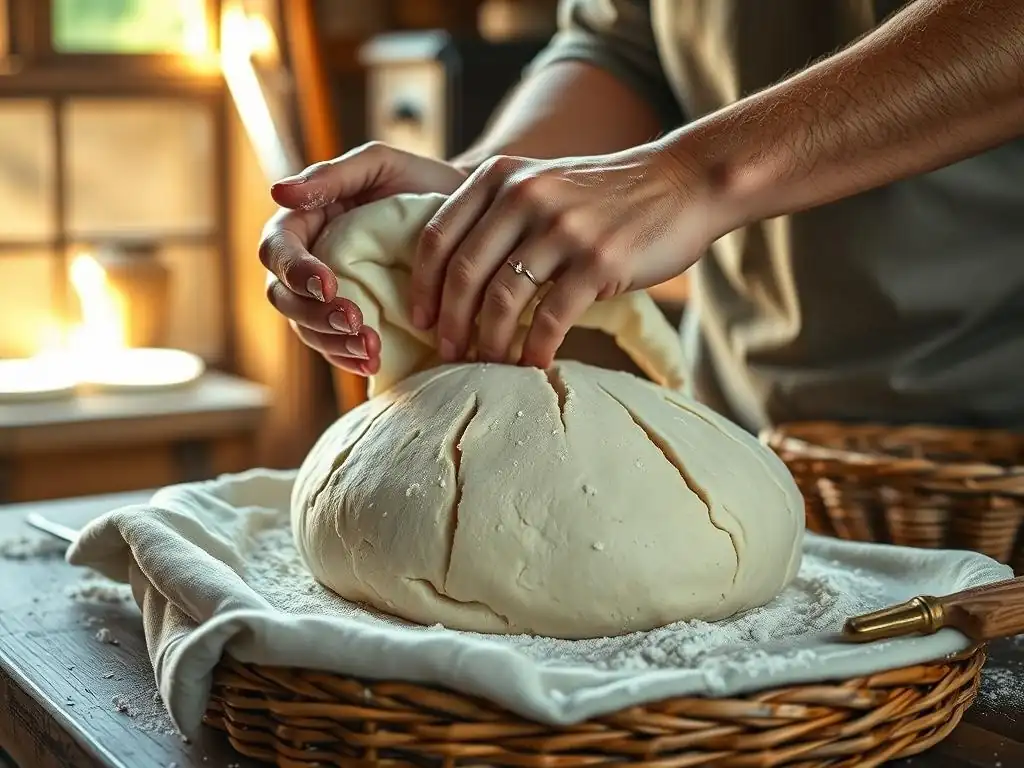
Techniques like the envelope fold or variations of preshape are used to create initial tension. After a brief rest (bench rest) of 20-30 minutes, the final shaping involves gently coaxing the dough into its final form (e.g., a boule or batard) while building surface tension. This is often done by using a bench scraper or your hands to gently pull the dough towards you across the surface, creating a taught "skin" on top.
Minimizing handling and working relatively quickly helps prevent the dough from relaxing too much. Transferring the shaped dough into a well-floured proofing basket (banneton) is essential to support its structure during the final proof, especially for a wet high hydration sourdough bread recipe.
Baking High Hydration Dough: Achieving the Perfect Crust and Crumb
Oven Setup and Temperature Control for Optimal Rise and Crust Development
Baking high hydration dough requires intense heat and controlled conditions to achieve maximum oven spring and the desired crust. Preheating your oven thoroughly is non-negotiable. If using a baking stone or steel, allow it to preheat for at least 45-60 minutes, often at the maximum temperature your oven can reach (e.g., 500°F or 260°C). Baking in a preheated Dutch oven is another excellent method, as it creates a contained environment for steam. Preheat the Dutch oven inside the oven for the same duration.
When the dough is ready to bake, carefully transfer it to the preheated baking surface or Dutch oven. The high initial temperature provides a powerful burst of heat that causes the dough to expand rapidly – this is the oven spring. After the initial intense heat (typically the first 15-20 minutes), reducing the oven temperature (e.g., to 450°F or 230°C) allows the inside of the bread to cook through without the crust burning. Precise temperature control is vital for balancing oven spring, crust development, and even cooking of the crumb.
Steam Injection Techniques for a Shiny, Crackly Crust
Creating a steamy environment in the oven during the first part of the bake is crucial for developing a thin, crispy, and shiny crust on high hydration doughs. The steam keeps the surface of the dough moist, preventing it from setting too quickly. This allows the bread to expand fully during oven spring. Without sufficient steam, the crust forms prematurely, restricting the dough's rise and potentially leading to blowouts.
If baking on a stone or steel, you can create steam by placing a tray of hot water on a rack below the baking surface or by carefully pouring hot water into a preheated pan placed on the lowest rack just before loading the bread. Some ovens have steam injection features.
If using a Dutch oven, the lid traps the moisture released by the dough itself, effectively creating a perfect steamy environment within the pot. After the initial 15-20 minutes of baking with steam (or with the Dutch oven lid on), remove the steam source (or lid) to allow the crust to dry out and brown beautifully.
Cooling and Slicing Your High Hydration Loaf
Patience is key after baking a high hydration loaf. As tempting as it is to slice into that beautiful, crackly crust right away, the bread needs time to cool completely on a wire rack. During cooling, moisture from the interior of the loaf redistributes, the crumb structure sets, and flavors continue to develop. Slicing too early can result in a gummy or dense crumb, even if the bake was perfect.
Allow your high hydration sourdough bread to cool for at least 2-3 hours, and ideally longer for very large loaves. The internal temperature needs to drop significantly. Once fully cooled, use a sharp serrated knife to slice the loaf. You'll be rewarded with the open, airy crumb and satisfyingly crisp crust that are the hallmarks of a well-executed high hydration bake. Proper cooling is the final, essential step in your high hydration sourdough bread recipe journey.
Troubleshooting Common Issues with High Hydration Doughs
Dough is Too Sticky: Causes and Solutions
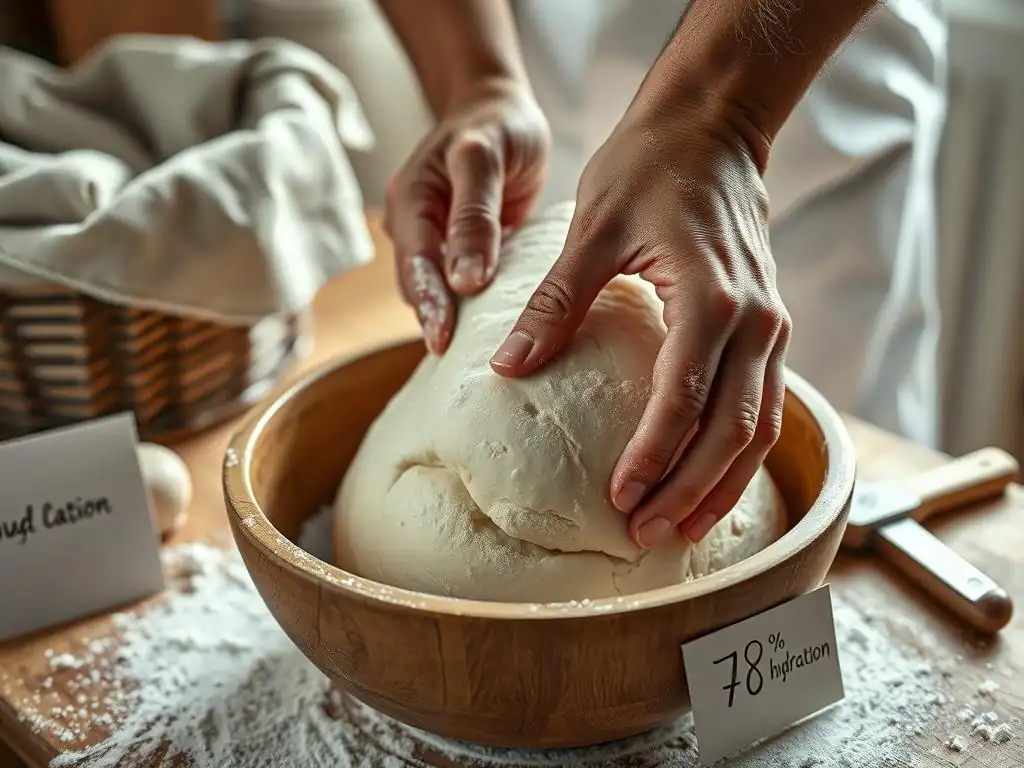
One of the most common frustrations when starting with a high hydration sourdough bread recipe is dealing with overly sticky dough. While high hydration doughs are inherently wet, they shouldn't be completely unmanageable. Excessive stickiness can stem from several factors: the hydration level might be too high for the flour's protein content, the gluten network may not be sufficiently developed, or the dough might be over-proofed.
If the dough is too sticky immediately after mixing, it could be a flour issue – try reducing the hydration slightly in your next batch or using a higher protein flour. If it becomes excessively sticky during bulk fermentation, it often indicates insufficient gluten development; focus on performing more effective stretch and fold sets. If the dough is sticky and seems to be losing structure and becoming very slack towards the end of bulk fermentation or during shaping, it might be over-proofed.
Solutions include reducing fermentation time, lowering the dough temperature, or adjusting your starter amount. Working with slightly wet hands or using a minimal amount of flour on the surface during handling can also help manage stickiness.
Lack of Oven Spring: Identifying and Correcting the Problem
A disappointing lack of oven spring in a high hydration sourdough bread recipe means the loaf didn't expand much in the oven. This usually points to insufficient gas production or a weak structure unable to hold the gas. Common causes include a weak or inactive sourdough starter, under-proofing (not enough fermentation time to build gas), or over-proofing (the gluten network has collapsed and can no longer hold the gas). Insufficient gluten development is also a major culprit, as a weak network can't support the rise.
To improve oven spring, ensure your sourdough starter is active and used at its peak. Pay close attention to bulk fermentation: the dough should increase significantly in volume (typically 50-100%, depending on hydration and desired crumb) and show signs of fermentation like bubbles. Master your stretch and folds to build strength.
If you suspect over-proofing, shorten your final proofing time or use cold fermentation to slow things down. Proper shaping to build surface tension is also key; a well-shaped loaf has the best chance of a good spring. Finally, ensure your oven is fully preheated and you are using effective steam techniques.
Uneven Crumb Structure: Tips for Achieving Openness
An uneven crumb, characterized by dense spots alongside large holes, can be frustrating after working with a high hydration sourdough bread recipe. This often results from inconsistent gluten development, improper shaping, or uneven fermentation. If parts of the dough are stronger than others, gas pockets can form unevenly. Dough that isn't shaped correctly may lack uniform tension, leading to irregular expansion.
To achieve a more consistent, open crumb, ensure your initial mixing develops the gluten uniformly. Pay attention during stretch and folds to ensure the entire dough is being worked. When shaping, aim to build even tension across the surface of the loaf without degassing it too much. Gentle handling is key. Ensure your fermentation is consistent throughout the dough, perhaps by maintaining a steady dough temperature. Sometimes, incorporating a slightly longer autolyse can help with even hydration and gluten development, contributing to a more uniform, airy structure.
Adapting Your High Hydration Dough Recipe for Different International Flavors
Incorporating Grains and Seeds for Added Texture and Flavor
Adding grains and seeds is a fantastic way to adapt a basic high hydration sourdough bread recipe and introduce diverse international flavors and textures. Ingredients like poppy seeds, sesame seeds, sunflower seeds, flax seeds, or even cooked grains such as cracked wheat or rye berries can be incorporated. These additions provide a delightful crunch and nutty flavors, reminiscent of various European bread styles.
When adding seeds or grains, especially larger ones, it's often beneficial to soak them in water (or even a hot infusion like tea for extra flavor) beforehand. This is called a soaker. Soaking prevents the dry ingredients from absorbing water from the dough itself, which could negatively impact your carefully calculated hydration level and result in a drier loaf.
Incorporate the soaked (and drained) seeds or grains during the final stages of mixing or during the first set of stretch and folds. A common ratio is to add seeds/grains equivalent to 10-20% of the flour weight, but feel free to experiment!
Adding Herbs and Spices to Complement Your High Hydration Bread
Herbs and spices can transform a simple high hydration sourdough into a bread with regional character. Mediterranean flavors often feature prominently: fresh or dried rosemary, thyme, or oregano can be added to doughs destined for focaccia or a rustic high hydration sourdough bread recipe. Imagine a high hydration loaf studded with olives and rosemary, perfect for dipping in olive oil.
Spices like caraway seeds are classic in rye breads, and while true high-hydration rye is a different beast, a high hydration wheat dough with a portion of rye and caraway can evoke similar feelings. Garlic, either roasted or in powder form, is another popular addition. Incorporate dried herbs and spices during the initial mixing phase.
If using fresh herbs, chop them finely and add them during the last set of stretch and folds or gently fold them in just before shaping to preserve their aroma. The high hydration environment can sometimes mellow strong flavors, so don't be afraid to be relatively generous.
Exploring Regional Variations: Ciabatta, Baguette, and Focaccia
Understanding the techniques behind specific international high hydration breads can inspire your own high hydration sourdough bread recipe. Ciabatta, for example, is known for its extremely wet dough (often 80%+ hydration) that is minimally handled after the initial mix and relies heavily on long fermentation and gentle shaping to achieve its signature open crumb. It's often baked freeform or with minimal support.
The French Baguette, while slightly lower in hydration (70-75%), requires precise mixing, multiple folds, and careful shaping to develop its elongated form and achieve a thin, crackly crust through high heat and steam. Focaccia, another Italian classic, is typically a high hydration dough that is dimpled and baked in a pan, often topped with olive oil, herbs, and other ingredients. Its wetness contributes to its soft, airy interior. Studying these regional variations provides valuable insights into how different handling techniques, hydration levels, and baking methods contribute to unique bread characteristics, enriching your understanding of high hydration baking.
High Hydration Dough Recipe: A BakeWithEase Exclusive
Ingredients List for the Perfect High Hydration Dough
Here is a foundational recipe for a high hydration sourdough bread recipe, designed to be adaptable. This recipe yields one large loaf, perfect for practicing your high hydration techniques.
- Strong Bread Flour: 500 grams (Look for 12-14% protein content)
- Water: 375 - 400 grams (75-80% hydration relative to flour) - Use filtered or non-chlorinated water around 78°F (26°C)
- Active Sourdough Starter: 100 grams (Fed and active, 100% hydration)
- Fine Sea Salt: 10 grams (2% relative to flour weight)
This ingredient list provides a solid starting point. The hydration is set between 75% and 80% to make it manageable for those new to very wet doughs, while still providing the benefits of high hydration. Adjust the water amount based on your flour's absorption and your comfort level. Using a scale for precise measurements is essential for consistent results in any high hydration sourdough bread recipe.
Detailed Instructions for Mixing, Fermenting, and Baking
Let's get baking! Follow these steps carefully to transform your ingredients into a beautiful high hydration loaf.
- Autolyse (Optional but Recommended): In a large bowl, combine the flour and water. Mix just until no dry flour remains. The mixture will be shaggy. Cover and let rest for 30 minutes to 2 hours at room temperature.
- Add Starter and Salt: Add the active sourdough starter and salt to the autolysed dough. Mix by hand using the "pincer" method (pinching the dough between your fingers) or in a stand mixer on low speed for 5-10 minutes until the ingredients are incorporated. The dough will still be very wet.
- Initial Mixing/Development: Perform slap and folds on a clean surface for 5-10 minutes until the dough starts to show some elasticity and can hold a slightly more cohesive shape. Alternatively, use a stand mixer on medium speed for 10-15 minutes until the dough pulls away from the sides of the bowl.
- Bulk Fermentation with Stretch and Folds: Place the dough in a lightly oiled clear container. Over the next 3-4 hours (at around 75-78°F or 24-26°C room temperature), perform 3-5 sets of stretch and folds every 30-45 minutes. Wet your hands slightly before each set. You will notice the dough gaining strength and becoming less sticky. The dough should increase in volume by roughly 50-75% and appear bubbly.
- Pre-shaping: Gently turn the dough out onto a lightly floured surface. Using a bench scraper, gently shape the dough into a loose round or rectangle, depending on your final shape. Avoid degassing the dough. Let it rest, uncovered, for 20-30 minutes (bench rest).
- Final Shaping: Lightly flour your hands and the surface if needed (or mist with water). Gently shape the dough into your desired final shape (boule or batard), building tension on the surface.
- Final Proofing: Place the shaped dough seam-side up into a well-floured proofing basket (banneton). Cover with a plastic bag or damp towel and proof at room temperature for 30-60 minutes, or refrigerate for 12-18 hours for cold fermentation (recommended for flavor development and easier handling). The dough should feel light and airy but still have some resistance when gently poked.
- Preheat Oven: 30-45 minutes before baking, preheat your oven to 475°F (245°C) with your Dutch oven or baking stone/steel inside.
- Baking: Carefully invert the dough onto a piece of parchment paper or directly into the hot Dutch oven. Score the top of the loaf with a sharp razor blade or knife. If using a Dutch oven, cover with the lid. If using a stone/steel, create steam (see 'Steam Injection Techniques' section). Bake for 20 minutes with steam/lid on.
- Finish Baking: Remove the lid or steam source. Reduce oven temperature to 450°F (230°C) and bake for another 20-25 minutes, or until the crust is deep golden brown and the internal temperature reaches 205-210°F (96-99°C).
- Cooling: Transfer the baked loaf to a wire rack and cool completely for at least 2 hours before slicing.
[ ] Use scale for all measurements.
[ ] Ensure water is filtered/non-chlorinated.
[ ] Perform autolyse step.
[ ] Complete all sets of stretch and folds during bulk fermentation.
[ ] Pay attention to dough volume increase during bulk fermentation.
[ ] Master gentle pre-shaping and tension-building final shaping.
[ ] Properly flour banneton.
[ ] Allow sufficient preheat time for oven and baking vessel.
[ ] Use steam during initial bake phase.
[ ] Cool loaf completely before slicing.
Tips for Success: Ensuring a Beautiful and Delicious Loaf
Mastering a high hydration sourdough bread recipe takes practice, but a few tips can significantly increase your chances of success. First, observe your dough more than just following times strictly. Room temperature, flour type, and starter activity all influence fermentation speed. Learn to recognize the signs of a properly proofed dough – it should be bubbly and light, but not so fragile that it collapses.
Second, don't be afraid to handle sticky dough. Use wet hands or a minimal amount of flour on your surface during shaping, and trust that the gluten development you've built will hold the structure. Third, invest in a good quality bread flour; it makes a noticeable difference in dough strength and manageability at high hydration levels.
Finally, cold fermentation (refrigerating the dough overnight for the final proof) is a game-changer. It not only develops incredible flavor but also makes the wet dough much easier to handle and score when cold. Embrace the learning process, and soon you'll be baking stunning high hydration loaves!
Advanced Techniques for High Hydration Baking
Using Pre-Ferments for Enhanced Flavor and Texture
Taking your high hydration sourdough bread recipe to the next level often involves incorporating pre-ferments. A pre-ferment is a portion of the dough ingredients (flour, water, sometimes a tiny amount of yeast or starter) that is mixed and allowed to ferment for a period before being added to the final dough mix. Common types include poolish (equal parts flour and water, often with a tiny amount of commercial yeast, fermented at room temperature for 12-16 hours) and biga (lower hydration than poolish, often a stiff dough, fermented for a longer period).
Using a pre-ferment adds significant depth of flavor to the final loaf due to the longer fermentation time of a portion of the flour. It can also contribute to a more open crumb structure and improved crust development. For a high hydration sourdough, you could incorporate a portion of the total flour and water into a sourdough 'levain' built 8-12 hours before mixing the main dough, or even use a small amount of commercial yeast in a poolish alongside your starter. This technique requires planning but is highly rewarding in the complexity it brings to your high hydration baking.
Experimenting with Different Hydration Levels
Once you're comfortable with a standard 75-80% hydration high hydration sourdough bread recipe, you can begin experimenting with pushing the boundaries. Increasing hydration to 85%, 90%, or even higher presents new challenges in handling but can result in even more dramatically open and airy crumbs, especially in breads like ciabatta or specific artisanal loaves. Each incremental increase in water requires more developed gluten and gentler handling techniques.
Conversely, slightly reducing hydration (say, to 70%) while still considered high hydration, makes the dough much easier to manage and shape, while still yielding a bread with better characteristics than a standard lower-hydration loaf. Experimenting allows you to understand how hydration directly impacts dough feel, handling, and the final crumb and crust. Keep careful notes about your hydration level and the resulting texture and structure to guide your future bakes.
Mastering Cold Fermentation for Complex Flavor Development
Cold fermentation, or retarding the final proof in the refrigerator (typically at 38-40°F or 3-4°C), is arguably one of the most impactful advanced techniques for high hydration sourdough bread recipe development. After shaping, placing the dough in the fridge for 12 to 48 hours dramatically slows down fermentation. While yeast activity slows, the enzymatic activity continues, breaking down starches and proteins into simpler compounds that contribute significantly to the bread's flavor complexity and aroma.
Beyond flavor, cold fermentation makes high hydration dough much easier to handle and score. The cold stiffens the dough, making it less sticky and allowing for cleaner cuts with your scoring lame. Baking a cold loaf directly from the fridge into a hot oven also contributes to excellent oven spring. The cold exterior takes longer to set, allowing the interior to expand fully. Mastering cold fermentation is a key step in consistently producing professional-quality high hydration sourdough loaves with deep flavor and beautiful structure.
Frequently Asked Questions
How does high hydration affect sourdough bread?
High hydration doughs create a lighter, airier crumb and a crispier crust due to increased steam during baking. They are also more challenging to handle.
What are the key challenges of working with high hydration sourdough?
The main challenges are stickiness, requiring specific techniques for handling, and maintaining structure during proofing and baking. Proper gluten development is crucial.
What hydration level is considered "high hydration" for sourdough?
Generally, sourdough dough with a hydration level of 75% or higher is considered high hydration. This means the water content is at least 75% of the flour weight.
What essential tools or ingredients can aid in baking high hydration sourdough?
Using a banneton basket helps maintain shape, and high-quality flour with strong gluten is essential. A Dutch oven is also beneficial for creating steam.
Can a beginner successfully bake a high hydration sourdough bread recipe?
While challenging, beginners can succeed with patience, practice, and by following precise instructions. Starting with slightly lower hydration levels can be a good approach.
Final Reflection: The Transformative Power of High Hydration Doughs
Mastering high hydration doughs isn't just about baking a beautiful loaf; it's about unlocking a deeper understanding of flour, water, and the magic of fermentation. The techniques explored in this article—from precise hydration measurements to the nuances of gluten development—are crucial for achieving that ethereal, open crumb structure so many bakers crave. This isn't just a recipe; it's a journey into the heart of bread making.
The journey of working with high hydration doughs has profoundly impacted my own baking practice, shifting my perspective from a focus on precise measurements to a more intuitive understanding of dough behavior. It's a process that demands patience and observation, rewarding the baker with a unique connection to the craft. The best bread is made with love, and a little bit of science.
– This anonymous quote perfectly encapsulates the balance required in high hydration baking. The science lies in understanding the interplay of ingredients, while the love comes from the dedication and patience invested in the process.
Now, it's your turn. Don't be intimidated by the seemingly complex nature of high hydration doughs. Embrace the challenge, experiment with different flours and techniques, and allow yourself to be surprised by the results. The rewards – a loaf of bread with unparalleled texture, flavor, and a story to tell – are well worth the effort. Take the knowledge you've gained here, and let it inspire you to create your own masterpiece. The journey of mastering high hydration sourdough is a continuous one, filled with learning, growth, and the delicious aroma of freshly baked bread.
Unleash Your Inner Artisan: Bake the Perfect High-Hydration Dough!
Thanks for joining us on this journey into the world of high-hydration doughs! We hope you gained valuable insights and newfound confidence in your baking abilities. Now it's time to put your knowledge into practice.
- Bake your own masterpiece: Try the recipe we outlined, experimenting with different flours and hydration levels to discover your perfect balance. Don't be afraid to adjust!
- Share your creations: Post a picture of your high-hydration bread on social media and tag us – we’d love to see your results!
- Dive deeper: Explore our other articles on sourdough techniques and advanced bread baking for even more tips and tricks.
What unique twist will you add to your next high-hydration loaf? Let's hear your ideas in the comments below!