
Essential Starter Care: Daily, Weekly, and LongTerm Tips


Welcome to BakeWithEase, your trusted companion on your baking journey! Are you ready to elevate your sourdough game? This week, we're diving deep into the heart of a thriving loaf: sourdough starter maintenance tips. But beyond the daily feeding, what does it really take to keep your starter happy, healthy, and ready to create incredible bread? Uncover the secrets to daily care, weekly routines, and even long-term storage, ensuring your starter is always at its peak. Intrigued? Let's get baking!
- Essential Sourdough Starter Care: Daily, Weekly, and Long-Term Tips
- Introduction to Sourdough Starter Maintenance: A Beginner's Guide
- Daily Sourdough Starter Care Routine
- Weekly Sourdough Starter Maintenance Schedule
- Long-Term Sourdough Starter Care and Storage
- Troubleshooting Common Sourdough Starter Problems: Maintenance FAQs
- Advanced Sourdough Starter Management Techniques
- Conclusion: Mastering Sourdough Starter Maintenance for Baking Confidence
- Frequently Asked Questions
- Final Reflection: Nurturing the Living Legacy of Your Sourdough Starter
- Unlock Your Baking Potential: Start Baking Today!
Essential Sourdough Starter Care: Daily, Weekly, and Long-Term Tips
Introduction to Sourdough Starter Maintenance: A Beginner's Guide
Embarking on the sourdough journey is incredibly rewarding, leading to loaves with complex flavors and beautiful crusts. At the heart of every great sourdough bake is a healthy, active starter – a living culture of wild yeast and bacteria. Think of it as a pet that needs regular nourishment and attention. Mastering sourdough starter maintenance tips is the fundamental step to unlocking consistently successful baking results. It might seem daunting at first, but with a little knowledge and routine, caring for your starter becomes second nature.
This guide provides comprehensive sourdough starter maintenance tips, breaking down the process into simple daily, weekly, and long-term practices. We'll cover everything from daily feeding rituals to long-term storage methods like refrigeration and even dehydration. By understanding the needs of your starter, you'll be equipped to handle common issues and ensure your culture thrives, ready to leaven your next batch of bread.
Why Consistent Sourdough Starter Care is Crucial for Baking Success
A sourdough starter is a dynamic ecosystem where yeast and lactic acid bacteria work together. The yeast produces carbon dioxide, which makes your bread rise, while the bacteria produce organic acids that contribute to the characteristic sourdough flavor and also help strengthen the dough structure. Consistent care ensures a balanced and vigorous population of these microbes. Irregular feeding or improper storage can lead to a weak starter, resulting in flat, dense loaves or off-flavors.
Effective sourdough starter maintenance tips are the foundation for predictable and powerful leavening. A well-maintained starter will reliably double or triple in size after feeding, indicating its activity level is high enough to lift a heavy dough. Neglecting your starter, even for a few days during its active phase, can shift the microbial balance, potentially favoring undesirable bacteria or weakening the yeast population, making it less effective for baking.
Simplified Sourdough Starter Management
Managing a sourdough starter doesn't have to be complicated. The core principle is simple: feed it regularly with fresh flour and water to keep the microbial population happy and active. The frequency of feeding depends largely on the temperature of its environment – warmer temperatures require more frequent feeding as the microbes are more active. Understanding this relationship is key to developing a manageable routine.
Implementing practical sourdough starter maintenance tips involves setting up a feeding schedule that fits your baking habits and lifestyle. For instance, if you bake frequently, keeping your starter at room temperature with daily or twice-daily feedings might be ideal. If you bake less often, storing your starter in the refrigerator significantly slows down its activity, reducing the need for frequent feeding to perhaps once a week or less. This adaptability makes sourdough starter care accessible for everyone.
Daily Sourdough Starter Care Routine

For those who bake frequently or keep their starter at room temperature, a daily routine is essential. This daily engagement allows you to observe your starter's behavior and ensure it's healthy and active. It's a small commitment that pays dividends in baking performance.
The Importance of Daily Observation: Recognizing Signs of Activity
Observing your sourdough starter daily is one of the most important sourdough starter maintenance tips. Look for signs of fermentation: bubbles forming throughout the culture and on the surface, a pleasant tangy aroma (not overly pungent or yeasty), and a noticeable increase in volume after feeding. A healthy starter should typically expand significantly within a few hours of being fed at room temperature, often doubling or tripling in size before slowly deflating.
Pay attention to the texture and consistency as well. A well-hydrated starter should be thick but pourable, like a very thick batter. If it becomes too liquidy or separates quickly after feeding (beyond normal hooch formation), it might indicate it's hungry and needs more frequent feeding or a different feeding ratio. Daily observation helps you catch potential issues early and adjust your sourdough starter maintenance tips accordingly.
Feeding Your Sourdough Starter: The Daily Refresh
Daily feeding is the cornerstone of maintaining a vigorous sourdough starter at room temperature. This process involves discarding a portion of the old starter and feeding the remainder with fresh flour and water. The 'discard' step is crucial because it removes waste products accumulated during fermentation and ensures the starter doesn't become too acidic, which can weaken the yeast. It also keeps the volume of your starter manageable.
The standard daily feeding ratio is often 1:1:1 by weight (starter:flour:water), but this can be adjusted. For example, if you keep a small amount of starter (say, 25g), you would feed it with 25g of fresh flour and 25g of water. This provides ample food for the microbes to consume over 24 hours until the next feeding. Consistency in your feeding schedule helps regulate the starter's activity cycle.
Ideal Flour and Water Ratio for Daily Feeding
A common and effective ratio for daily feeding is 1:1:1 by weight (starter:flour:water). For example, feeding 50 grams of active starter with 50 grams of flour and 50 grams of water results in a total of 150 grams of starter.
This ratio provides enough nutrients for the starter to thrive for about 12-24 hours at typical room temperatures (around 70-75°F or 21-24°C) and maintains a standard hydration level (usually 100% hydration relative to the flour weight). Using a mix of flours, like all-purpose and whole wheat or rye, can also contribute to a more robust culture due to the varying nutrients available.
While 1:1:1 is a great starting point, variations exist. A 1:2:2 or even 1:5:5 ratio (starter:flour:water) can be used if you need to feed less frequently (e.g., every 24 hours in warmer temperatures) or want to build up a larger quantity of starter for baking. The key is providing enough new food relative to the amount of existing starter so that the culture doesn't run out of food too quickly and become overly acidic. Adjusting the ratio is a key aspect of fine-tuning your sourdough starter maintenance tips.
Recognizing Signs Your Starter Needs More Frequent Feeding
Your starter will tell you when it's hungry. One common sign is collapsing significantly before its scheduled feeding time. If your starter doubles or triples in size but then falls back down dramatically within just a few hours (say, less than 12 hours at room temperature), it's consuming its food very quickly. This indicates it might benefit from being fed more often, perhaps twice a day, especially in warmer environments where fermentation accelerates.
Another sign is the rapid formation of a layer of liquid on top, known as "hooch," shortly after feeding or well before the next scheduled feeding. While some hooch is normal in a hungry starter, its rapid appearance suggests the yeast has consumed most of the available carbohydrates and needs a fresh supply sooner. If you notice these signs consistently, consider switching to a twice-daily feeding schedule (roughly every 12 hours) using your standard ratio, or try increasing the feeding ratio to 1:2:2 or 1:3:3 to provide more food per feeding.
Maintaining Optimal Temperature for Your Sourdough Starter
Temperature plays a critical role in the activity level of your sourdough starter. The wild yeasts and bacteria are most active within a specific temperature range, typically between 70°F and 80°F (21°C to 27°C). Maintaining a consistent temperature within this range is one of the most effective sourdough starter maintenance tips for predictable fermentation and rise. Temperatures significantly below this range will slow activity, while temperatures too high can stress the culture and potentially favor less desirable microbes.
If your kitchen temperature fluctuates, finding a warm, stable spot is important. Options include placing the starter in a slightly-warm (but off) oven with the light on, near a warm appliance (but not directly on top), or in a proofing box if you have one. Using a thermometer to check the ambient temperature around your starter can be helpful. Consistent temperature helps ensure your starter peaks around the same time each day, making your feeding and baking schedule more predictable.
Weekly Sourdough Starter Maintenance Schedule
Even if you keep your starter in the refrigerator most of the time, or if you maintain a daily routine, incorporating some weekly practices can enhance its health and your overall sourdough starter maintenance tips. These tasks include assessing health, managing discard, and keeping equipment clean.
The Weekly Weigh-In: Assessing Starter Health and Activity
Setting aside one feeding per week to perform a 'test bake' or simply observe peak activity can be beneficial. Weigh out a small, consistent amount of starter (e.g., 25g or 50g) and feed it with a standard ratio (like 1:1:1 or 1:2:2) in a clean jar. Mark the starting level on the jar. Observe how much it rises and how long it takes to reach its peak (usually doubling or tripling). A healthy starter should show significant activity within 4-8 hours at optimal room temperature (around 75°F or 24°C) and ideally at least double in volume.
If your starter consistently fails to double within a reasonable timeframe under optimal conditions, it might indicate it's weak or the microbial balance is off. This weekly check serves as a performance review for your starter. If activity is low, consider adjusting your feeding routine, trying different flours, or ensuring the temperature is optimal. Consistent assessment is a key part of effective sourdough starter maintenance tips.
Discarding vs. Using Excess Starter: Minimizing Waste
Regular feeding, especially daily feeding, inevitably generates excess starter, often called 'discard'. This is the portion removed before adding fresh flour and water. While it might feel wasteful to discard it, this step is necessary to maintain a healthy culture and prevent it from becoming too large or overly acidic. However, 'discard' doesn't mean 'waste'.
The excess starter, even if it hasn't been fed recently, is still a valuable ingredient in many recipes. Unlike active starter used for leavening bread, discard is often used for flavor and moisture, and its leavening power is minimal or non-existent depending on its age since the last feeding. Finding creative ways to use your discard is a practical and enjoyable aspect of sourdough starter maintenance tips.
Creative Ways to Use Sourdough Discard
Sourdough discard is incredibly versatile and can be incorporated into a wide range of baked goods that don't rely solely on its leavening power. Think of it as a fermented flour-and-water mixture that adds a pleasant tang and moistness. Popular uses include sourdough pancakes, waffles, crackers, muffins, scones, and even pasta or pizza dough where commercial yeast is also used for rise.
Many recipes specifically call for sourdough discard, providing measurements based on its typical consistency. For instance, a recipe for discard crackers might use 100g of discard, flour, salt, and fat. Keeping a container of discard in your refrigerator allows you to accumulate enough for these recipes throughout the week, turning a necessary step in sourdough starter maintenance tips into a delicious opportunity.
Cleaning Your Sourdough Starter Jar: Preventing Mold and Bacteria
Over time, residue can build up on the sides and lid of your starter jar. While a little buildup is normal, excessive crusting can harbor undesirable bacteria or mold spores. Cleaning the jar regularly is an important, albeit often overlooked, aspect of sourdough starter maintenance tips. A good practice is to transfer your starter to a clean jar at least once a week, or whenever you notice significant buildup.
To clean your jar, simply scoop out your starter (leaving a small amount behind if you plan to feed it again immediately in the same jar, or transferring it all to a temporary container). Wash the jar with hot, soapy water, rinse thoroughly to remove all soap residue, and dry it completely before returning the starter. This simple step helps maintain a clean environment for your culture, reducing the risk of contamination.
Long-Term Sourdough Starter Care and Storage
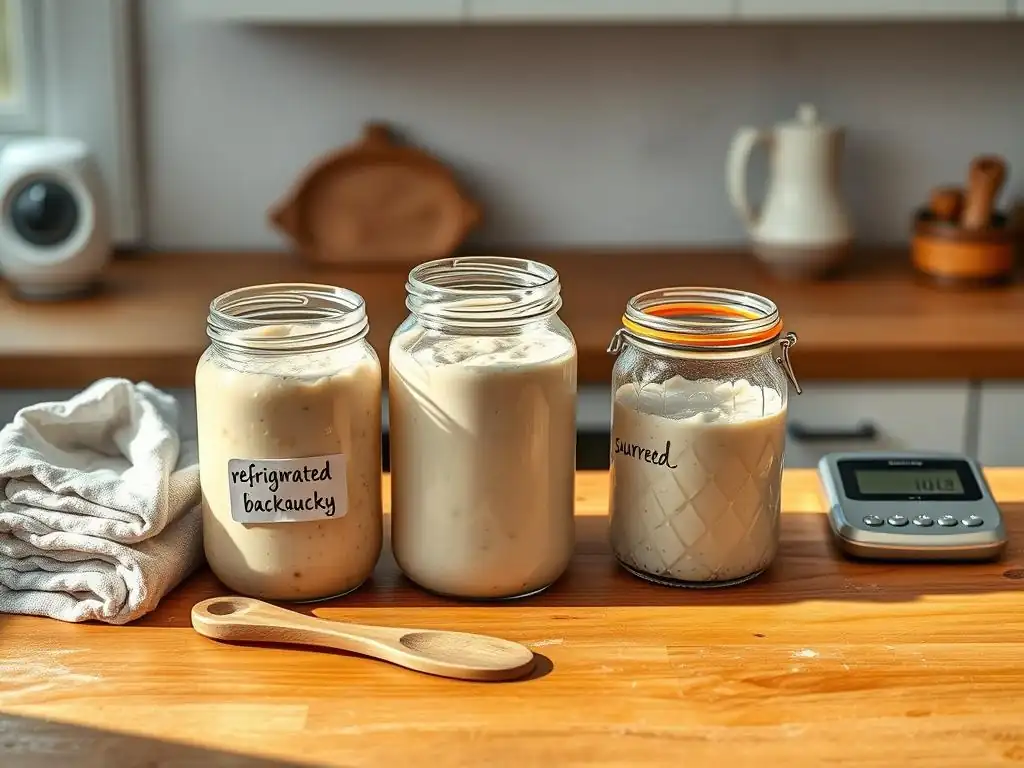
Not everyone bakes every day or even every week. For less frequent bakers, or when you need a break, long-term storage methods are essential sourdough starter maintenance tips to keep your culture viable without daily commitment. Refrigeration and dehydration are the most common methods.
Refrigerating Your Sourdough Starter: Slowing Down Fermentation
Storing your sourdough starter in the refrigerator is the most common method for infrequent bakers. The cold temperature significantly slows down the metabolic activity of the yeast and bacteria, meaning they consume food much more slowly. This allows you to reduce feeding frequency from daily to typically once a week or even less, depending on how cold your fridge is and the starter's vigor.
Refrigeration doesn't stop activity entirely, just slows it to a crawl. Your starter will still produce some acids, and you might see some hooch form over time. It's important to remember that a refrigerated starter will need several feedings at room temperature to regain its full vigor before being used for baking.
Preparing Your Starter for Refrigeration
Before placing your starter in the refrigerator, it's best to feed it first and let it become active for a couple of hours at room temperature. This ensures it has a fresh supply of food before entering its dormant state. Use your standard feeding ratio (e.g., 1:1:1 or 1:2:2). Once fed and showing some initial signs of activity (like small bubbles forming), place the lid loosely on the jar (to allow gases to escape) and put it in the fridge.
Some bakers prefer to feed their starter with a higher ratio, like 1:3:3 or even 1:5:5, before refrigeration. This provides a larger food supply relative to the starter volume, potentially allowing it to last longer in the fridge without becoming overly acidic or starving. Experiment to see what works best for your starter and your refrigerator's temperature. Proper preparation is a key element of effective sourdough starter maintenance tips for storage.
How Long Can Sourdough Starter Last in the Fridge?
A healthy, well-fed sourdough starter can typically last in the refrigerator for 1 to 4 weeks between feedings. The exact duration depends on several factors: the activity level of your starter when it went into the fridge, the feeding ratio used before storage, and the temperature of your refrigerator (colder is better for longer storage). Some robust starters can even survive longer, but feeding within 2-4 weeks is generally recommended to maintain optimal health.
If you plan to leave your starter in the fridge for several weeks, using a higher feeding ratio (more flour and water relative to starter) before storing it will give it more food to consume slowly over that period. For example, feeding 20g starter with 100g flour and 100g water (a 1:5:5 ratio) provides a much larger food reserve than a 1:1:1 feeding. Monitoring its appearance – presence of hooch, smell, and any signs of mold (rare in the fridge but possible) – will give you clues about its condition.
Reviving Refrigerated Sourdough Starter: Awakening the Dormant Culture
When you're ready to bake after storing your starter in the fridge, it needs to be revived and become active again. This process usually takes 1-3 days of regular feeding at room temperature. The first feeding after refrigeration might not show much activity, as the microbes are waking up and consuming accumulated waste products.
To revive, take your starter out of the fridge, discard most of it (leaving a small amount, say 20-30g), and feed it with your standard ratio (e.g., 1:1:1) using fresh flour and water. Let it sit at room temperature. Feed it again 12 or 24 hours later, discarding a portion before each feeding.
You should notice increasing activity with each subsequent feeding – more bubbles, a stronger rise, and a pleasant aroma. Continue feeding until it consistently doubles or triples within 4-8 hours, indicating it's ready to leaven bread. Patience is key during this revival phase of sourdough starter maintenance tips.
Dehydrating Sourdough Starter: A Long-Term Preservation Method
Dehydrating your sourdough starter is an excellent way to preserve it for very long periods, offering a backup in case something happens to your active starter or if you need to transport it easily. It essentially puts the microbes into a state of suspended animation by removing moisture. This method can keep your starter viable for months or even years when stored properly.
The process involves spreading a thin layer of active starter onto a non-stick surface and allowing it to dry completely until it's brittle and easily breaks into flakes or powder. Once fully dry, it can be stored in an airtight container away from light and moisture. This provides peace of mind knowing you have a resilient backup of your precious culture, a valuable trick among advanced sourdough starter maintenance tips.
Step-by-Step Guide to Dehydrating Sourdough Starter
- Ensure your starter is active and recently fed: Use a starter that has peaked or is close to peaking after a feeding. This ensures the microbes are vigorous.
- Spread thinly: Line a baking sheet or large plate with parchment paper, a silicone mat, or plastic wrap. Pour or spread a very thin layer of active starter onto the surface using an offset spatula or spoon. Aim for a thickness of about 1/16 to 1/8 inch (1-2 mm). Thinner layers dry faster.
- Allow to dry completely: Leave the spread starter in a warm, dry place away from direct sunlight. A slightly warm oven with just the light on or a dehydrator set to its lowest temperature (below 100°F or 38°C) works well. Drying can take 12-48 hours depending on humidity and thickness. The starter is fully dry when it's brittle and snaps easily.
- Break into pieces and store: Once completely dry, peel the starter off the surface. Break it into small flakes or grind it into a powder. Store the dried starter in an airtight container (like a jar or zip-top bag) in a cool, dark, dry place.
Rehydrating Dehydrated Sourdough Starter: Bringing it Back to Life
Rehydrating dried sourdough starter requires patience, as the microbes need time to rehydrate and become active again. Start with a small amount of dried starter, perhaps 10-20 grams. Place the dried starter in a clean jar.
Add an equal weight of warm water (around 80-90°F or 27-32°C) to the dried starter. Stir well to dissolve the flakes or powder. Let this mixture sit at room temperature for several hours (4-12 hours) until it becomes a paste.
Then, begin feeding it like a regular starter, discarding a portion and feeding with equal parts flour and water by weight. It may take 2-4 days of regular feeding (once or twice daily) at room temperature before the starter shows consistent doubling, indicating it's ready for baking. This rehydration process is a testament to the resilience of the sourdough culture, proving the value of these sourdough starter maintenance tips.
Troubleshooting Common Sourdough Starter Problems: Maintenance FAQs
Even with diligent sourdough starter maintenance tips, you might occasionally encounter issues. Knowing how to identify and address common problems like a lack of rise, hooch formation, or mold is crucial for keeping your starter healthy and avoiding panic.
My Sourdough Starter Isn't Rising: Identifying Potential Issues
A lack of significant rise is one of the most common concerns for sourdough bakers. If your starter isn't doubling or tripling after feeding, several factors could be at play. The most frequent culprits include insufficient time since feeding (it might just be slow), a suboptimal temperature (too cold slows activity), or using the starter too soon after reviving from refrigeration or a period of neglect.
Other reasons could be using chlorinated tap water (chlorine can harm the microbes), using bleached flour (unbleached is generally preferred), or the starter simply being weak due to irregular feeding or too-small feeding ratios. Ensure your feeding ratio provides enough food relative to the starter amount, use filtered water if necessary, and maintain a consistent warm temperature (70-80°F or 21-27°C). Give it time and consistent feeding – often, patience is the best solution. These specific sourdough starter maintenance tips address activity issues directly.
Dealing with Hooch (Liquid on Top): Understanding and Addressing It
Hooch is a layer of liquid that can form on top of your sourdough starter. It's typically a dark, watery substance, often brownish or grayish. Hooch is a byproduct of fermentation, specifically when the yeast has consumed most of the available carbohydrates in the flour and is essentially telling you it's hungry. Its presence indicates the starter is past its peak and needs to be fed.
You can either pour off the hooch before feeding or stir it back into the starter. Stirring it in adds moisture and some fermented flavor back into the culture. If hooch forms very quickly after feeding or is excessive, it's a strong sign that your starter is very active and needs to be fed more frequently or with a higher flour-to-starter ratio to provide more food for a longer period. Consistent feeding according to your starter's needs is a key preventative sourdough starter maintenance tip.
Recognizing and Preventing Mold in Your Sourdough Starter
Mold is perhaps the most concerning issue you might encounter. True mold on a sourdough starter will look like fuzzy or colored patches – green, black, orange, or pink. Unlike hooch or harmless surface bubbles, mold is typically fuzzy and sits on the surface. If you see any sign of fuzzy mold growth, it is safest to discard the entire starter and begin anew. Sourdough starters are acidic environments which usually prevent mold, but contamination can occur.
Preventing mold involves maintaining cleanliness and ensuring the starter is healthy and active. Always use clean jars and utensils. Avoid getting food particles or other contaminants into the starter. Keep the lid loosely covered to allow gas exchange but prevent airborne contaminants from settling. A robust, regularly fed starter is less susceptible to mold than a weak or neglected one because its acidity acts as a natural defense. Cleanliness is paramount in sourdough starter maintenance tips to avoid contamination.
Advanced Sourdough Starter Management Techniques
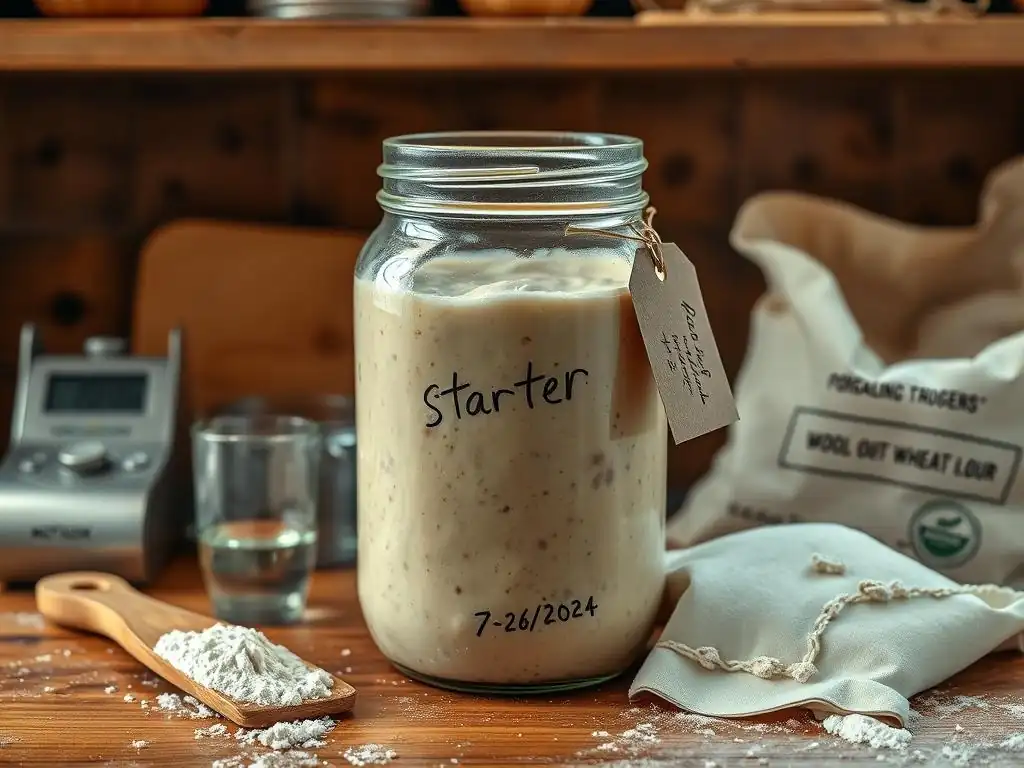
Once you're comfortable with the basics, you can explore more advanced sourdough starter maintenance tips to tailor your culture to specific baking goals, schedules, or desired outcomes like flavor and rise.
Adjusting Feeding Ratios for Different Baking Schedules
Beyond the standard 1:1:1 ratio, adjusting the proportion of starter, flour, and water allows you to control the rate of fermentation. A higher ratio of flour and water relative to the starter (e.g., 1:2:2, 1:3:3, or even 1:5:5) provides more food, which slows down fermentation and means the starter will take longer to peak. This is useful if you need your starter to be ready at a specific time later in the day or if you are feeding it less frequently (e.g., every 24 hours or longer).
Conversely, a lower ratio (e.g., 1:0.5:0.5) can be used for a very rapid build, though this is less common for standard maintenance. Understanding how ratios affect fermentation speed empowers you to time your starter's peak activity to align perfectly with your baking schedule, a valuable skill in advanced sourdough starter maintenance tips. For example, if you need your starter ready in 4 hours, you might use a warmer temperature and a 1:1:1 ratio. If you need it ready in 12 hours, you might use a 1:3:3 ratio at room temperature.
Strengthening Your Sourdough Starter: Enhancing Flavor and Rise
To enhance the flavor profile and leavening power of your starter, consider using a blend of flours. Incorporating a percentage of whole wheat or rye flour into your regular feedings can provide more diverse nutrients for the microbes, potentially leading to a more complex flavor (especially rye, which encourages acetic acid production) and a more vigorous culture. For example, you could feed your starter with a mix of 80% white bread flour and 20% whole rye flour.
Maintaining a consistent feeding schedule and optimal temperature also contributes significantly to starter strength. A starter that is regularly fed before it completely runs out of food (i.e., before excessive hooch forms and it collapses completely) tends to be more robust. Think of it like keeping a healthy pet well-nourished. These subtle adjustments are effective sourdough starter maintenance tips for improving quality.
Understanding Hydration Levels and Their Impact on Starter Activity
Hydration refers to the ratio of water to flour in your starter, typically expressed as a percentage of the flour weight. A 100% hydration starter (equal parts water and flour by weight) is the most common, resulting in a thick, batter-like consistency. However, you can maintain starters at different hydration levels. A lower hydration starter (e.g., 60-70% hydration, like a stiff dough) ferments more slowly and tends to produce more acetic acid, contributing a tangier flavor.
A higher hydration starter (e.g., 120% or more, like a very wet batter) ferments faster and tends to produce more lactic acid, resulting in a milder tang. The hydration level affects the starter's consistency and how quickly it rises and falls. While most sourdough starter maintenance tips focus on 100% hydration due to its versatility and ease of handling, experimenting with different hydration levels can be useful if you consistently bake specific types of bread that call for them or desire a particular flavor profile.
Conclusion: Mastering Sourdough Starter Maintenance for Baking Confidence
Caring for a sourdough starter is an ongoing process, but one that becomes intuitive with practice. By implementing consistent sourdough starter maintenance tips – daily feeding when at room temperature, weekly checks, and appropriate long-term storage – you build a relationship with your culture. Understanding its needs, recognizing its signs of health, and knowing how to troubleshoot problems are key steps toward becoming a confident sourdough baker.
Whether you choose to keep your starter on the counter for daily use or in the fridge for weekly baking, the principles of providing fresh food, maintaining a suitable temperature, and observing its activity remain constant. This dedication to care ensures you always have a vibrant, reliable leavening agent ready to transform simple flour and water into delicious, homemade sourdough bread.
Consistent Care: The Key to Baking Delicious Sourdough Bread
The quality of your sourdough bread is a direct reflection of the health of your starter. A strong, active starter provides the necessary lift for a good rise and contributes significantly to the depth and complexity of flavor. Embracing regular sourdough starter maintenance tips isn't just about keeping a culture alive; it's about cultivating a powerful natural leaven.
By integrating these daily, weekly, and long-term practices into your routine, you ensure your starter remains balanced, active, and ready to perform. This consistency removes guesswork from the baking process, allowing you to focus on dough handling, shaping, and baking techniques, ultimately leading to more successful and satisfying sourdough loaves every time you bake.
Frequently Asked Questions
How often should I feed my sourdough starter?
The feeding frequency depends on your baking schedule and the activity of your starter. Generally, feed it once or twice a day if you're baking regularly. If not, store it in the fridge and feed weekly.
What happens if I forget to feed my sourdough starter?
If you occasionally miss a feeding, your starter will likely be fine. However, prolonged neglect can weaken it, requiring multiple feedings to revive its fermentation power.
How do I know when my sourdough starter is ready to bake with?
A ready-to-bake starter will have doubled in size after feeding and exhibit plenty of bubbles. It should also have a slightly tangy, pleasant aroma, indicating active fermentation.
Can I use different types of flour to feed my sourdough starter?
Yes, you can! While unbleached all-purpose flour is common, experimenting with whole wheat or rye flour can add different flavors and nutrients, influencing the starter's activity and flavor profile.
How do I store my sourdough starter long-term?
For long-term storage, keep your starter in the refrigerator. Feed it at least once a week to maintain its viability. You can also dry a portion for even longer preservation.
Final Reflection: Nurturing the Living Legacy of Your Sourdough Starter
The enduring appeal of sourdough bread lies not just in its taste, but in the living, breathing culture at its heart – your starter. Maintaining a healthy starter is a testament to patience, consistency, and a deep connection to the craft of baking. It's more than just a recipe ingredient; it's a living organism that thrives on your care and attention.
The journey of sourdough starter maintenance is a microcosm of life itself – requiring dedication, understanding, and a willingness to adapt. It's a process that teaches us the importance of consistent nurturing, the beauty of slow growth, and the profound satisfaction of witnessing something flourish under our care. The best things in life are not things, but experiences.
This rings true for the rewarding experience of tending to your sourdough starter, a small act of creation that yields immense culinary satisfaction.
Now, consider your own starter. What lessons has it taught you about patience, consistency, and the interconnectedness of life? Perhaps it's time to reflect on your own routines and commitments, and how the principles of starter care – feeding, discarding, and observing – can be applied to other aspects of your life. Embrace the rhythm of your starter's life cycle, and let it inspire you to cultivate your own growth, one mindful step at a time.
Unlock Your Baking Potential: Start Baking Today!
Thanks for taking the time to explore essential baking tips with us! We hope you've gained valuable insights to elevate your baking game. Now, it's time to put that knowledge into action.
- Begin with your favorite recipe: Choose one simple recipe and commit to baking it today. Focus on mastering the basics before tackling complex projects. This is your first step to baking confidence!
- Share your baking journey: Post a picture of your creation on social media and tag us – we'd love to see your delicious results! Use #BakeWithEase to join our community.
- Explore our other resources: Dive deeper into your baking journey by browsing more articles on our website for advanced techniques and inspiration.
Ready to transform your kitchen into a baking haven? What recipe will you conquer first?