
Freeze Ahead: How to Store Croissant Dough or Baked Croissants

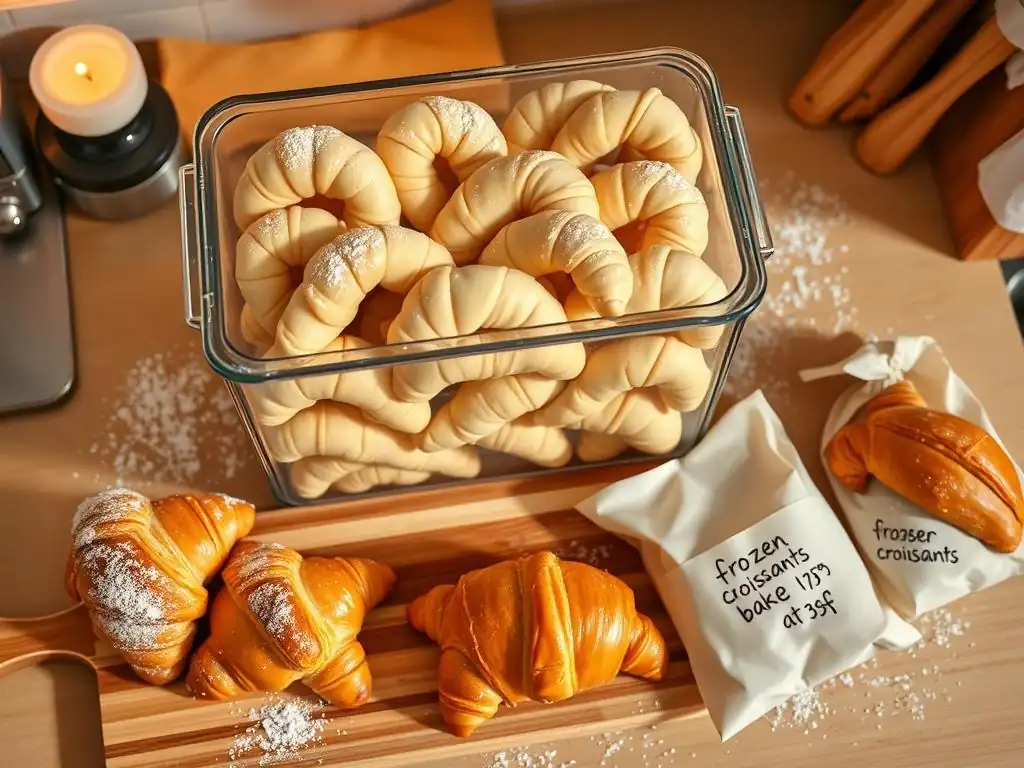
Welcome to BakeWithEase, your guide to baking bliss! Ever dreamt of flaky, buttery croissants on a whim? Our latest guide reveals how to freeze croissant dough easily, unlocking a world of freshly baked delights whenever the craving strikes. Discover the secrets to preserving that perfect texture and flavor, and say goodbye to last-minute baking stress. Intrigued? Let's get started and transform your baking routine!
- Freeze Ahead: How to Store Croissant Dough or Baked Croissants for Baking Success
- Introduction: Mastering Croissant Storage for BakeWithEase Home Bakers
- Freezing Unbaked Croissant Dough: A Step-by-Step Guide
- Thawing and Baking Frozen Croissant Dough: Achieving Perfect Results
- Freezing Baked Croissants: Preserving Freshness and Flavor
- Troubleshooting: Common Freezing and Thawing Issues
- Maximizing Croissant Baking with Smart Freezing Techniques
- Conclusion: Enjoy Freshly Baked Croissants Anytime with Easy Freezing Methods
- Frequently Asked Questions
- Final Reflection: The Enduring Delight of Frozen Croissants
- Unlock Your Croissant Potential: Mastering Storage & Enjoyment!
Freeze Ahead: How to Store Croissant Dough or Baked Croissants for Baking Success
Introduction: Mastering Croissant Storage for BakeWithEase Home Bakers
Baking croissants at home is a rewarding journey, often involving a significant time investment in dough preparation, lamination, and shaping. Imagine having freshly baked, flaky croissants ready for breakfast or brunch without starting from scratch every time. This is where mastering the art of freezing comes in, a technique that unlocks incredible flexibility for intermediate bakers on BakeWithEase.com. Learning how to properly store your croissant creations, whether as raw dough or fully baked pastries, allows you to enjoy that buttery goodness on demand, making your baking efforts more efficient and less stressful.
This guide will walk you through the essential steps for freezing both unbaked croissant dough and finished croissants. We'll cover everything from preparing the dough for the freezer to thawing and baking, ensuring you achieve that perfect texture and flavor every time. By understanding the nuances of cold storage, you can extend the life of your homemade croissants and streamline your baking process, turning a weekend project into a convenient anytime treat.
Why Freezing Croissants and Croissant Dough is Essential for Intermediate Baking
For the intermediate baker tackling croissants, the process often yields a larger batch than can be consumed immediately. Freezing becomes indispensable not just for preventing waste, but for strategic planning. Having frozen dough or baked croissants on hand means you can enjoy this luxurious pastry throughout the week or pull them out for unexpected guests without the intensive prep work. This approach makes ambitious recipes like croissants more accessible and manageable within a busy schedule.
Beyond convenience, freezing helps preserve the quality you worked so hard to achieve. Properly frozen dough maintains its delicate layers and leavening potential, while baked croissants retain their flaky exterior and tender interior. Without freezing, leftover croissants quickly lose their freshness, becoming stale within a day or two. Freezing halts this deterioration, locking in flavor and texture for future enjoyment, truly maximizing your baking efforts.
BakeWithEase Tip: Unlock Baking Flexibility with Proper Freezing Techniques
Mastering proper freezing techniques is the key to transforming your baking routine. It allows you to bake large batches of dough when you have time, then simply thaw and bake off individual portions as needed. Think about weekend baking – you could prepare enough dough for several dozen croissants, freeze them shaped, and then bake off just four or six for a weekday treat. This dramatically reduces the pressure of needing to bake everything at once.
Furthermore, knowing how to freeze croissant dough easily opens up possibilities for experimenting with different fillings or shapes from a single batch base. You can freeze plain dough, then thaw and add various sweet or savory fillings just before the final proof and bake. This flexibility not only saves time but encourages creativity in the kitchen, making your baking experience on BakeWithEase even more dynamic and enjoyable.
Freezing Unbaked Croissant Dough: A Step-by-Step Guide
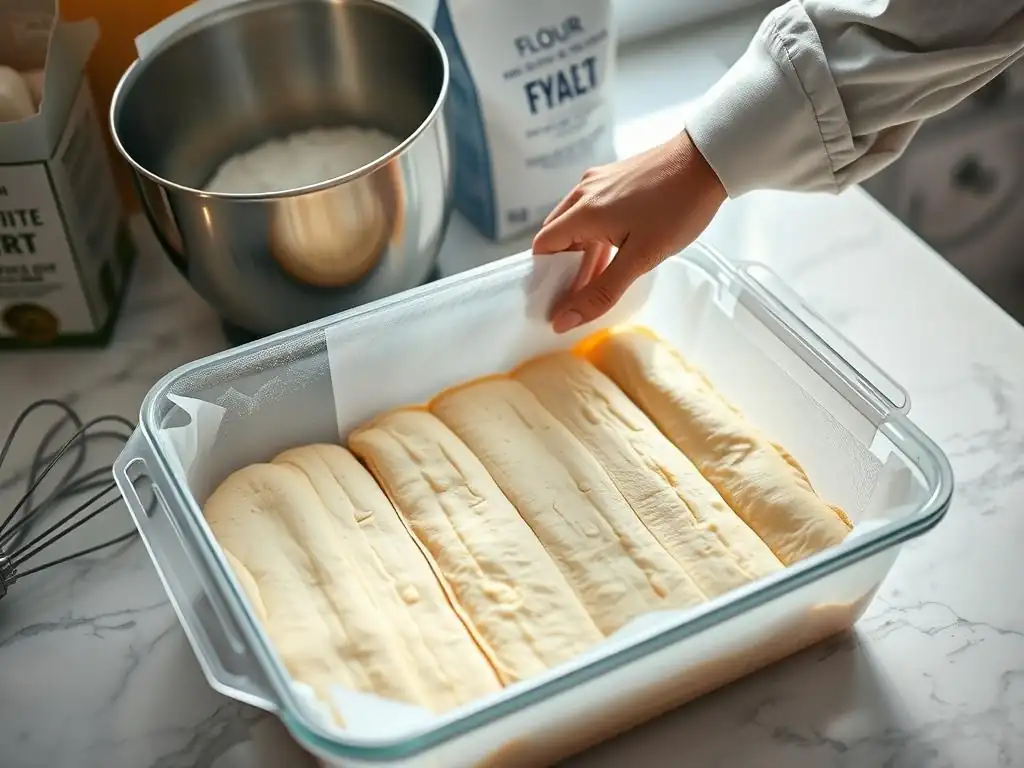
Getting unbaked croissant dough into the freezer correctly is crucial for preserving its delicate structure and potential for flakiness. The goal is to halt the yeast activity and prevent ice crystals from damaging the gluten network and butter layers. This section outlines the necessary preparations and steps to ensure your raw dough freezes successfully, ready to be thawed and baked into perfect croissants later.
Proper preparation involves ensuring the dough is at the right stage before freezing, handling it gently, and using appropriate packaging. Skipping any of these steps can lead to issues like poor rise, tough texture, or freezer burn, compromising the quality of your finished croissants. By following these guidelines, you can confidently freeze croissant dough easily and effectively.
Preparing Croissant Dough for Freezing: Key Steps for Optimal Results
The ideal time to freeze croissant dough is after it has been shaped but before the final proofing stage. At this point, the dough has been laminated and cut, containing all the butter layers essential for flakiness. Freezing at this stage preserves the structure while allowing the final proof to occur just before baking, which is critical for achieving a light and airy interior. Freezing earlier in the process, like after lamination but before shaping, is possible but less convenient for baking individual portions later.
Crucially, the shaped croissants should be well-chilled before they hit the freezer. Cold dough freezes faster, which helps minimize the formation of large ice crystals that can damage the dough's structure. Aim to chill the shaped croissants in the refrigerator for at least 30-60 minutes after shaping. This firming-up period also makes them easier to handle during the flash-freezing step.
Best Practices for Freezing Raw Croissant Dough: Maintaining Texture and Flavor
Maintaining the delicate texture and rich flavor of your raw croissant dough during freezing requires careful attention to detail. The primary enemies are large ice crystals and freezer burn, both of which can compromise the dough's quality. Proper technique minimizes these risks, ensuring your thawed dough performs just like fresh dough.
Implementing best practices like cooling the dough thoroughly, portioning it smartly, and using effective packaging are non-negotiable steps when you want to freeze croissant dough easily and successfully. These steps protect the butter layers and the yeast, setting the stage for a beautiful bake later on.
Cooling the Dough Properly Before Freezing
As mentioned, chilling the shaped dough in the refrigerator is a vital precursor to freezing. This step significantly lowers the dough's temperature, allowing it to freeze more rapidly once transferred to the freezer. Rapid freezing prevents the formation of large ice crystals, which can pierce the delicate layers of butter and dough, leading to a less flaky result after baking. A minimum of 30 minutes in the fridge is recommended, but longer chilling, up to a couple of hours, is also beneficial.
Beyond preventing ice crystal damage, chilling also solidifies the butter within the dough. This makes the shaped croissants more rigid and less likely to deform during the initial flash-freezing step and subsequent packaging. Handling firm, cold dough is much easier and reduces the risk of accidentally compressing the layers you worked so hard to create during lamination.
Portioning and Packaging for Easy Use
Freezing dough in usable portions is essential for convenience. If you make a batch of 12 croissants, freeze them individually or in small groups (e.g., 2-4) that represent a typical serving size for your household. This way, you only need to thaw exactly what you need, avoiding waste. Freezing a large block of dough is possible but makes portioning after freezing difficult and can damage the layers when cutting.
Packaging is key to protecting the dough from the harsh freezer environment. After flash freezing (which we'll cover next), each portion or individual croissant should be wrapped tightly. Using plastic wrap followed by a layer of aluminum foil or placing them in a high-quality freezer bag creates a robust barrier against moisture loss and odor absorption. Remove as much air as possible from the packaging.
Preventing Freezer Burn: The Importance of Airtight Storage
Freezer burn occurs when food is exposed to air in the freezer, causing dehydration and oxidation, which results in unappealing dry spots and off-flavors. For croissant dough, freezer burn can render the outer layers dry and tough, preventing them from proofing and baking properly. Airtight storage is your best defense against this.
The double-wrapping method—plastic wrap followed by foil or a freezer bag—is highly effective. Ensure the wrapping conforms closely to the shape of the dough, leaving no air pockets. Freezer bags specifically designed for long-term freezer storage are thicker and more resistant to air permeability than standard food storage bags. Properly stored raw croissant dough can typically be kept in the freezer for up to 1-2 months without significant loss of quality.
How to Freeze Croissant Dough Easily: A Detailed Walkthrough
Let's break down the process of how to freeze croissant dough easily into simple, actionable steps. This method ensures your shaped croissants are preserved optimally for future baking, maintaining their structure and potential for that signature flakiness. Following these steps will demystify freezing and make it a regular part of your croissant-making process.
This detailed walkthrough covers shaping, the critical flash-freezing step, and the final packaging. It's designed for the home baker using standard kitchen equipment.
Step 1: Shaping the Croissants
Begin with your fully laminated croissant dough, chilled and ready to be shaped. Roll out the dough to the specified thickness in your recipe, typically around 3-4 mm (about 1/8 inch). Use a sharp knife or pastry wheel to cut the dough into triangles of your desired size. For classic croissants, the base of the triangle is usually around 8-10 cm (3-4 inches).
Starting from the base, gently stretch the triangle slightly and then roll it up towards the point, creating the crescent shape. Try to roll somewhat loosely to allow for expansion during proofing and baking, but ensure the point is tucked underneath the finished shape. Place the shaped croissants on a baking sheet lined with parchment paper, leaving some space between them.
Step 2: Flash Freezing for Individual Pieces
Flash freezing is a crucial step to prevent the shaped croissants from sticking together when stored in bulk. Once shaped and placed on the parchment-lined baking sheet, transfer the entire sheet to the freezer. Ensure the croissants are not touching each other. Freeze them uncovered until they are solid, which usually takes about 1-2 hours depending on your freezer's temperature and the size of the croissants.
This quick freezing process solidifies the individual shapes, making them easy to handle and package without damaging their form or the delicate layers. Once they are frozen solid, you can proceed to the final packaging step without worrying about them clumping together in the freezer bag or container.
Step 3: Packaging and Labeling for Long-Term Storage
After flash freezing, remove the solid croissants from the freezer. Now it's time to package them for long-term storage. Carefully transfer the frozen croissants from the baking sheet. As discussed earlier, wrap individual croissants or small portions (e.g., 2-4) tightly in plastic wrap.
Then, place the wrapped croissants into a high-quality freezer bag or an airtight freezer-safe container. Press out as much air as possible before sealing. Label the package clearly with the contents ("Croissant Dough") and the date it was frozen. This helps you keep track of how long they've been stored. Properly packaged raw croissant dough can be stored in the freezer for up to 1-2 months.
Thawing and Baking Frozen Croissant Dough: Achieving Perfect Results
Freezing unbaked croissant dough is only half the battle; knowing how to properly thaw and bake it is just as important for achieving that flaky, golden perfection. Rushing the thawing process or skipping the final proof can result in dense, tough croissants. This section provides BakeWithEase's best methods for transforming frozen dough into delicious, ready-to-eat pastries.
Patience is key when working with frozen dough. Allowing it to thaw and proof correctly is essential for the yeast to become active again and for the dough to develop its final structure and volume before baking.
Thawing Frozen Croissant Dough: Best Methods for Successful Baking
The most recommended method for thawing frozen croissant dough is slow thawing in the refrigerator. This gradual process is gentle on the dough's structure and prevents the butter from melting out before baking. Avoid thawing at room temperature, especially if your kitchen is warm, as this can cause the butter to soften too much and potentially leak during baking, resulting in less flaky croissants.
Plan ahead when you want to bake frozen croissants, as the thawing and proofing process takes several hours. This isn't a spontaneous, quick-bake option, but the results are well worth the wait.
Slow Thawing in the Refrigerator
To slow thaw frozen croissant dough, remove the desired number of shaped croissants from the freezer and their packaging. Place them on a baking sheet lined with parchment paper. Cover the baking sheet loosely with plastic wrap to prevent the croissants from drying out.
Transfer the covered baking sheet to the refrigerator. Allow the croissants to thaw slowly overnight, typically for 8-12 hours. They should become soft and pliable but still very cold. Once thawed, they are ready for the final proofing stage at room temperature.
Proofing After Thawing: Ensuring a Light and Flaky Texture
After thawing in the refrigerator, the croissants need to undergo their final proof at room temperature. This is where the yeast wakes up and produces gas, causing the croissants to double in size and develop their airy internal structure. Place the thawed croissants on a baking sheet, leaving ample space (they will expand!). Cover loosely with plastic wrap or a clean kitchen towel.
Let them proof at room temperature (ideally around 22-24°C or 72-75°F) until they are visibly puffed up, look jiggly when gently shaken, and the layers are distinct. This usually takes 2-4 hours, but timing can vary based on room temperature. A properly proofed croissant will be significantly larger than its frozen state. You might see the layers starting to separate slightly – this is a good sign!
Baking Instructions for Frozen Croissants: BakeWithEase's Tips
Baking frozen or previously frozen croissant dough requires slight adjustments compared to baking fresh dough. The key is to ensure the croissants bake through evenly, developing a beautiful golden crust and a fully cooked, flaky interior.
These tips from BakeWithEase will help you achieve perfect results when baking off your frozen stash, making it easy to enjoy delicious homemade croissants anytime.
Adjusting Baking Time and Temperature for Frozen Dough
Once the croissants have fully proofed after thawing, they are ready for the oven. Preheat your oven to the temperature specified in your original croissant recipe, usually around 190-200°C (375-400°F). While the temperature is often the same, you may need to increase the baking time slightly compared to fresh dough, perhaps by 2-5 minutes, to ensure they are thoroughly cooked inside.
A common baking time range is 15-25 minutes, depending on the size of the croissants and your oven. Start checking for doneness around the lower end of the time range. The croissants should be deeply golden brown all over, including the sides and bottom.
Achieving a Golden-Brown Crust: The Perfect Bake
For that signature golden-brown, slightly crisp crust, consider using an egg wash just before baking. An egg wash (usually one egg whisked with a tablespoon of water or milk) brushed gently over the proofed croissants adds shine and promotes even browning. Be careful not to deflate the delicate proofed dough when applying the wash.
Bake the croissants until they are a rich, uniform golden-brown. If they are browning too quickly on top but don't seem fully baked inside, you can loosely tent them with aluminum foil for the last few minutes of baking. The finished croissants should feel light and airy when lifted. Let them cool on a wire rack for at least 10-15 minutes before enjoying, as the internal structure is still setting immediately after coming out of the oven.
Freezing Baked Croissants: Preserving Freshness and Flavor
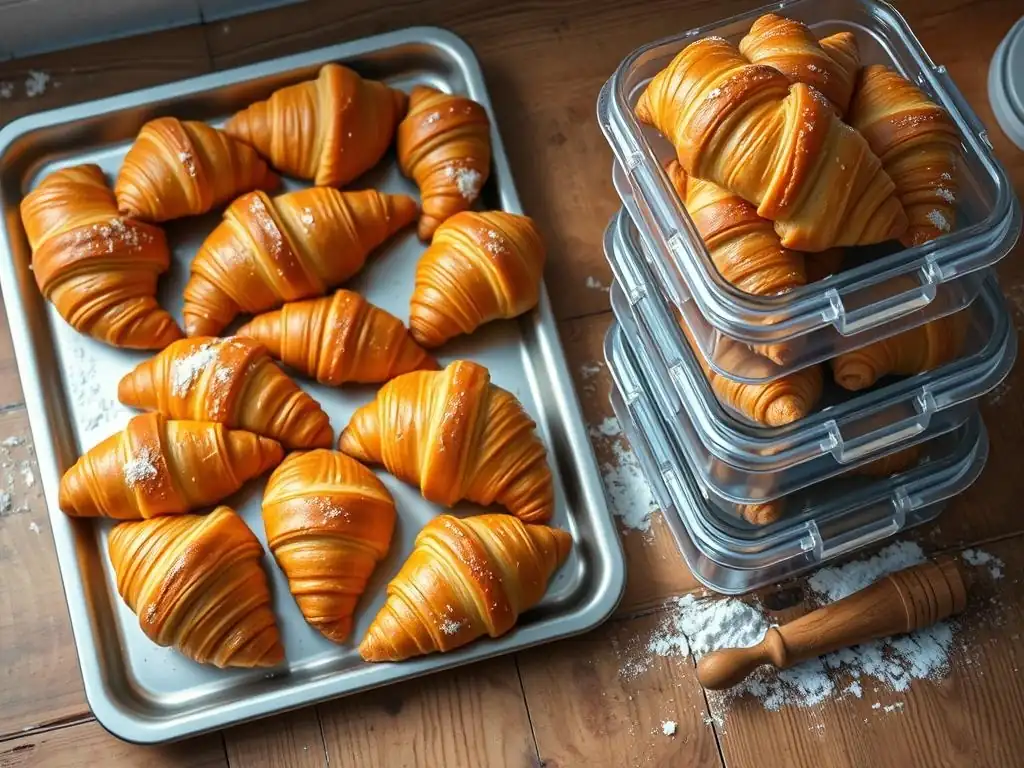
Perhaps you've already baked a large batch of croissants and want to save some for later. Freezing baked croissants is an excellent way to preserve their freshness and enjoy them another day. While the texture won't be exactly the same as freshly baked, proper freezing and reheating methods can bring them remarkably close to their original glory.
This method is incredibly convenient for meal prep or ensuring you always have a delicious pastry on hand. Learn how to freeze baked croissants effectively to maintain their quality and taste.
Can You Freeze Baked Croissants? Yes! Here's How
Absolutely, you can freeze baked croissants! It's a fantastic way to extend their shelf life beyond the typical 1-2 days they stay fresh at room temperature. Freezing halts the staling process, preserving the flavor and flaky texture much better than refrigeration, which can actually dry them out.
The key is to freeze them as soon as they are completely cool after baking. Freezing warm or hot croissants can lead to condensation inside the packaging, which turns into ice crystals and can make the croissants soggy upon thawing.
Cooling and Preparing Baked Croissants for Freezing
After baking, transfer the croissants to a wire rack immediately to cool completely. They should be cooled to room temperature throughout before freezing. This might take 1-2 hours depending on their size and your kitchen temperature. Ensure they are fully cooled; even slight warmth can create moisture issues in the freezer.
Do not stack warm croissants; allow air circulation around them on the cooling rack. Once completely cool, they are ready for packaging. Avoid leaving them exposed at room temperature for too long before freezing, as they will begin to stale.
Freezing Baked Croissants: Maintaining Quality and Taste
Maintaining the quality and taste of baked croissants in the freezer relies heavily on preventing moisture loss and protecting them from freezer odors. The goal is to keep the crust crisp and the interior tender.
Using proper packaging techniques is paramount to preserving the texture and flavor you worked hard to achieve during baking.
Individual Wrapping for Optimal Preservation
For best results and convenience, wrap each fully cooled baked croissant individually. Use plastic wrap or a similar airtight wrapping material. Wrap tightly, ensuring no parts of the croissant are exposed to the air. This individual wrapping provides the first layer of protection against freezer burn and makes it easy to grab just one or two croissants at a time.
Individual wrapping also prevents the croissants from sticking together in the freezer, which can happen if they are just tossed into a bag. This method ensures each croissant is perfectly preserved until you are ready to reheat it.
Using Freezer-Safe Bags or Containers
After individual wrapping, place the wrapped croissants into a larger freezer-safe bag or an airtight rigid container. This provides a second layer of protection against air and freezer odors. If using a bag, press out as much air as possible before sealing. If using a container, ensure it has a tight-fitting lid.
Label the bag or container with the contents ("Baked Croissants") and the date. Baked croissants can typically be stored in the freezer for 2-3 months. While they may last longer, quality can gradually decline after this period.
Reheating Frozen Baked Croissants: Restoring Warmth and Flakiness
Reheating frozen baked croissants properly is essential for bringing them back to life, restoring that warm, flaky texture. Simply microwaving them often results in a soft, slightly rubbery texture, losing the desirable crispness of the crust. The oven is generally the preferred method.
Knowing the right technique ensures your reheated croissants are almost as good as fresh, making your frozen stash a truly convenient option.
Best Reheating Methods: Oven, Toaster Oven, or Microwave?
The oven or toaster oven is the best method for reheating frozen baked croissants to restore their flaky crust. Preheat your oven or toaster oven to a moderate temperature, around 175°C (350°F). Place the frozen, unwrapped croissants directly on the oven rack or a baking sheet.
Reheat for approximately 10-15 minutes, or until they are warmed through and the crust feels crisp again. The exact time will depend on the size of the croissants and your oven. While a microwave is the fastest option (about 30-60 seconds), it will soften the crust. If you must use a microwave, consider a very brief zap just to warm the interior slightly, followed by a quick finish in a hot oven or toaster oven to crisp the exterior.
Tips for Reheating Without Drying Out the Croissants
To prevent your baked croissants from drying out during reheating, especially in the oven, avoid using excessively high temperatures or prolonged heating times. The moderate temperature of 175°C (350°F) is usually sufficient to warm them through without over-baking.
You can also place a small, oven-safe dish of water on the rack below the croissants in the oven. The steam generated can help keep the croissants moist while the crust crisps up. Always reheat from frozen; thawing them first is not necessary and can sometimes make them soggy.
Troubleshooting: Common Freezing and Thawing Issues
Even with the best intentions, sometimes things don't go perfectly when freezing and thawing croissants. Understanding common issues and how to address them can save your batch and improve your technique for next time.
From soggy dough to freezer burn, addressing these problems ensures you can successfully freeze croissant dough easily and consistently achieve great results.
Preventing Soggy Croissants After Thawing
Sogginess after thawing raw dough is often a result of improper thawing or condensation. Thawing at room temperature, especially in a humid environment, can cause excessive condensation on the surface of the dough as it warms up. This extra moisture can make the dough sticky and potentially lead to a soggy texture after baking.
Always thaw raw croissant dough slowly in the refrigerator. This gradual process minimizes condensation. Also, ensure the dough is properly wrapped before thawing in the fridge to protect it from ambient moisture and odors. After thawing and during proofing, cover the croissants loosely to allow airflow while still protecting them from drying out.
Dealing with Freezer Burn on Croissant Dough
Freezer burn is a common issue indicated by dry, discolored patches on the surface of the frozen dough. While small areas of freezer burn might not completely ruin the croissants, extensive damage can lead to poor rise and a tough texture in those areas. The best approach is prevention through airtight packaging.
If you discover freezer burn on your dough, you can try carefully trimming away the affected areas before thawing and proofing. However, if the freezer burn is widespread, the quality of the final baked croissant will likely be compromised. Double-wrapping and using high-quality freezer-safe materials are your best defense.
Ensuring Proper Proofing After Freezing and Thawing
A common pitfall after freezing and thawing raw dough is insufficient proofing. Freezing slows down yeast activity significantly, and it takes time for the yeast to become fully active again after thawing. If you bake the croissants before they are properly proofed, they will be dense and heavy instead of light and airy.
Be patient during the proofing stage after thawing. Proofing time can vary widely depending on your room temperature and the strength of the yeast. Look for visual cues: the croissants should double in size, look puffy, and feel very light. The layers should be more defined. If your kitchen is cool, proofing might take longer, perhaps 4-5 hours or even longer. You can create a slightly warmer environment (around 24-26°C or 75-80°F) to speed things up, but avoid excessive heat, which can melt the butter.
Maximizing Croissant Baking with Smart Freezing Techniques
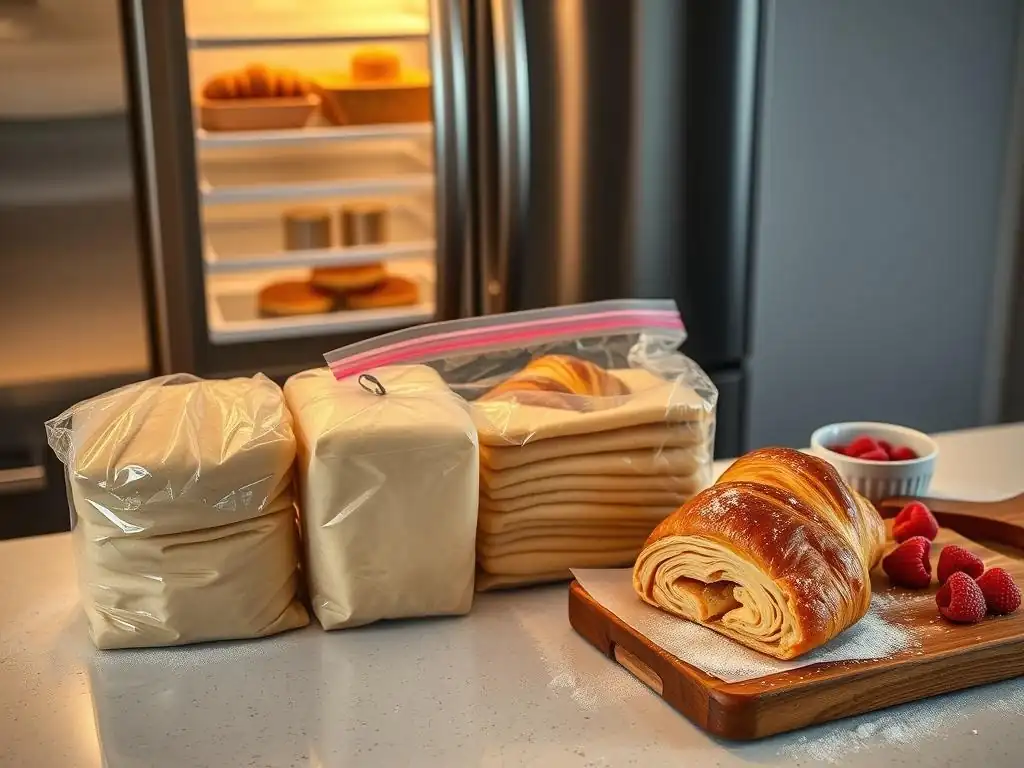
Incorporating freezing into your baking routine isn't just about saving leftovers; it's a strategy for maximizing efficiency and enjoying homemade croissants more often. By learning how to freeze croissant dough easily and effectively, you can bake smarter, not harder.
This approach allows you to manage your time better, produce larger quantities when convenient, and have a ready supply of delicious pastries at your fingertips.
Bake Ahead: Utilizing Frozen Croissant Dough for Efficient Baking
The "bake ahead" strategy is where freezing raw croissant dough truly shines. Dedicate a few hours on a weekend to make a large batch of dough, laminate, shape, and flash freeze the croissants. This gives you a supply of ready-to-bake pastries that you can pull out as needed throughout the week or month.
Instead of spending hours mixing, laminating, and resting dough every time you want fresh croissants, you simply need to remember to transfer the desired number from the freezer to the fridge the night before, then proof and bake in the morning. This drastically cuts down the active time required on baking day, making it feasible to enjoy fresh croissants even on busy weekdays.
Storing Croissants Long-Term: Tips for Extended Freezer Storage
While raw croissant dough is best used within 1-2 months, and baked croissants within 2-3 months for optimal quality, proper storage maximizes this window. Always use high-quality, airtight packaging specifically designed for freezer use. Remove as much air as possible.
Store the packaged croissants in a dedicated freezer section or away from items with strong odors, as fats can absorb smells. Maintain a consistent freezer temperature of -18°C (0°F) or lower. Fluctuations in temperature can lead to thawing and refreezing, which degrades quality. Keeping your freezer well-organized can also help prevent items from getting lost and overstaying their welcome.
Conclusion: Enjoy Freshly Baked Croissants Anytime with Easy Freezing Methods
Mastering the art of freezing is a game-changer for any home baker who loves croissants. Whether you choose to freeze raw dough or fully baked pastries, these techniques provide unparalleled convenience and flexibility, allowing you to enjoy that delightful buttery flakiness whenever the craving strikes. Learning how to freeze croissant dough easily means you can bake large batches efficiently and have a supply ready for spontaneous treats or planned brunches.
By following the steps outlined in this guide – from proper preparation and packaging to careful thawing and baking/reheating – you can confidently preserve the quality of your homemade croissants. Say goodbye to stale leftovers and hello to the possibility of warm, fresh croissants straight from your oven on any given morning.
Mastering the Art of Freezing Croissants: A Summary of Key Takeaways
Freezing croissants, in either dough or baked form, is a highly effective way to extend their life and enhance your baking flexibility. Key takeaways include:
- Freeze unbaked dough after shaping but before final proofing.
- Always chill shaped dough thoroughly before flash freezing.
- Flash freezing is essential to prevent shaped dough from sticking together.
- Use airtight, double-layer packaging (plastic wrap + freezer bag/container) to prevent freezer burn on both dough and baked croissants.
- Label everything with contents and date.
- Thaw raw dough slowly in the refrigerator overnight (8-12 hours).
- Allow thawed dough to proof fully at room temperature (2-4+ hours) before baking.
- Bake frozen/thawed dough at the recipe's specified temperature, potentially adding a few minutes to the baking time.
- Freeze baked croissants only after they are completely cool.
- Reheat baked croissants in an oven or toaster oven at 175°C (350°F) for 10-15 minutes for best results.
BakeWithEase Recommendation: Embrace Freezing for Baking Convenience
At BakeWithEase, we encourage you to embrace freezing as a tool to make your baking life easier and more enjoyable. Learning how to freeze croissant dough easily is a skill that pays dividends in convenience and satisfaction. It allows you to tackle ambitious recipes like croissants on your schedule and enjoy the fruits of your labor over time.
Don't let the perceived complexity of croissants limit you to only baking a few at a time. Make a large batch, freeze the excess using the methods described here, and savor the ability to pull perfect, ready-to-bake or ready-to-eat croissants from your freezer whenever you desire. Happy freezing and happy baking!
Frequently Asked Questions
How long can I freeze croissant dough?
You can generally freeze croissant dough for up to two months without significantly impacting the final product's quality. After this point, the dough's texture may degrade.
What's the best way to prevent freezer burn when freezing croissant dough?
The best method is to double-wrap the dough tightly in plastic wrap and then place it in a freezer-safe bag. This minimizes exposure to air and prevents freezer burn.
Can I freeze baked croissants instead of the dough?
Yes, baked croissants freeze well! Let them cool completely, then wrap them individually or in small batches before freezing. Reheat them in the oven for the best results.
What's the proper way to thaw frozen croissant dough?
The ideal method is to thaw the dough slowly in the refrigerator overnight. This allows for even thawing and prevents the butter from melting too quickly.
Will freezing affect the rise of my croissants after baking?
Freezing can slightly affect the rise of the croissants, but proper thawing and proofing can minimize this. Ensure the dough is fully thawed and proofed according to the recipe instructions after thawing.
Final Reflection: The Enduring Delight of Frozen Croissants
The art of freezing croissant dough, once a culinary mystery, is now a readily accessible skill, transforming the home baker's experience and democratizing access to this beloved pastry. No longer is the flaky, buttery perfection of a croissant limited to bakery visits or ambitious weekend projects. The ability to freeze both raw dough and baked croissants opens up a world of possibilities, from meal prepping to spontaneous breakfast treats.
The impact of easy freezing techniques extends beyond mere convenience; it fosters a deeper connection with the baking process itself. By mastering the art of freezing, we gain control over our time and our culinary creations. We can enjoy fresh croissants on demand, without the pressure of a time-consuming baking schedule. This resonates with the modern ethos of mindful consumption and efficient living. The best things in life are worth waiting for, but sometimes, the best things in life are also worth freezing.
This sentiment perfectly encapsulates the joy of pulling a perfectly formed, frozen croissant from the freezer, ready to be transformed into a golden, buttery delight.
Now, consider your own baking journey. Will you embrace the freedom that frozen croissant dough provides? Will you experiment with different freezing methods, tailoring them to your own kitchen and schedule? I encourage you to try it. The reward is not just a delicious pastry, but a newfound confidence in your baking abilities and a deeper appreciation for the simple pleasure of a perfectly crafted croissant, whenever the craving strikes.
Unlock Your Croissant Potential: Mastering Storage & Enjoyment!
Thanks for diving into the world of croissant storage with us! We hope you now feel confident tackling those flaky layers, whether you're freezing dough or preserving perfectly baked treats. Ready to put your new skills to the test?
- Primary Action: Try our recommended freezing method this week – it's easier than you think, and you'll be amazed at the results! Imagine having fresh croissants whenever you crave them.
- Share your croissant storage success (or questions!) in the comments below. Let’s build a community of croissant connoisseurs!
- Experiment with different freezing techniques and share your findings – what’s your best tip for preserving that perfect croissant texture?
What innovative ways will you be using your newly acquired croissant storage expertise?