
Mastering the Fold: Techniques for Pain au Chocolat Lamination

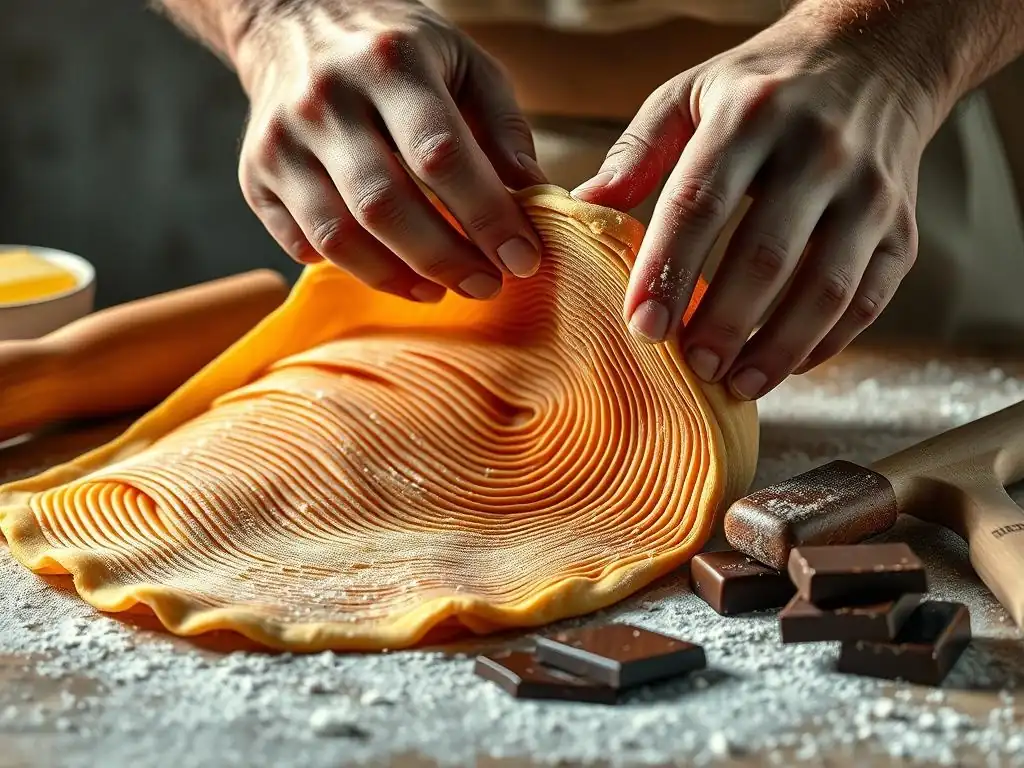
Welcome to BakeWithEase, your guide to unlocking the delicious world of baking! Ever wondered how to achieve that perfect, flaky layers in your pastries? Get ready to elevate your baking game as we delve into the secrets of Pain au Chocolat lamination techniques. Discover the precise folds and crucial steps that transform simple dough into bakery-worthy masterpieces. Intrigued? Let's get started on your journey to perfecting this classic treat and discover the art of lamination!
- Mastering Lamination: Techniques for BakeWithEase's Croissants & Pain au Chocolat
- Introduction to Lamination for Viennoiseries
- Understanding the Key Elements of Lamination
- Step-by-Step Guide to Croissant & Pain au Chocolat Lamination
- Advanced Lamination Techniques
- Troubleshooting Common Lamination Problems
- Tips and Tricks for Perfect Lamination
- From Lamination to Baking: Completing Your Croissants & Pain au Chocolat
- Conclusion: Elevating Your Baking with Precise Lamination
-
Frequently Asked Questions
- How important is temperature control in pain au chocolat lamination?
- What is the purpose of lamination in pain au chocolat?
- How many folds are typically required for optimal pain au chocolat lamination?
- What type of butter is best for pain au chocolat lamination?
- What are some common mistakes to avoid during pain au chocolat lamination?
- Final Reflection: The Enduring Allure of the Perfect Flake
- Unleash Your Inner Boulanger: Perfect Pain au Chocolat Awaits!
Mastering Lamination: Techniques for BakeWithEase's Croissants & Pain au Chocolat
Introduction to Lamination for Viennoiseries
What is Lamination and Why is it Crucial for Flaky Croissants and Pain au Chocolat?
Lamination is the baking technique of layering dough with butter, then repeatedly folding and rolling the resulting pastry. This process creates alternating thin sheets of dough and butter. When the dough is baked at a high temperature, the water in the butter turns to steam, forcing the dough layers apart and creating the characteristic airy, flaky texture found in classic viennoiseries like croissants and pain au chocolat. Without proper lamination, these pastries would be dense and bread-like, lacking the delicate structure that makes them so beloved.
Mastering the specifics of pain au chocolat lamination techniques is the secret to achieving those beautiful, defined layers and the satisfying crispness upon biting into one. Each fold and roll contributes to building the final structure. A typical lamination schedule, like one single fold followed by two double folds, can create around 37 distinct layers of dough and butter, while three double folds can yield over 55 layers, each contributing to the pastry's rise and texture in the oven. This intricate layering is the foundation of a truly exceptional pain au chocolat.
The Importance of Mastering Lamination Techniques for Viennoiseries Success
Achieving success with viennoiseries like croissants and pain au chocolat hinges almost entirely on mastering lamination. Poor lamination techniques can lead to a range of issues, from uneven layers and dense spots to butter leakage during baking, resulting in greasy, heavy pastries instead of light, airy ones. The goal is to create dozens of paper-thin, separate layers that puff up dramatically in the heat of the oven.
Understanding and executing the precise steps involved in pain au chocolat lamination techniques ensures that the butter remains distinct from the dough until baking, allowing the steam to do its work effectively. This skill elevates your baking from simply making sweet bread to crafting delicate, professional-quality pastries with a shatteringly crisp exterior and a soft, open interior crumb, perfect for encasing those classic chocolate batons.
Understanding the Key Elements of Lamination
The Dough: Achieving Optimal Gluten Development and Hydration for Lamination
The foundation of successful lamination is the détrempe, the base dough. For viennoiseries, this is typically a lean dough made from flour, water, yeast, and salt, sometimes with a little sugar or milk added. The key is to develop just enough gluten to provide structure and elasticity, allowing the dough to be rolled thin repeatedly without tearing, but not so much that it becomes tough or resistant. Over-mixing can lead to a dough that springs back excessively, making lamination difficult.
Hydration levels also play a critical role in pain au chocolat lamination techniques. A hydration percentage between 55% and 65% (relative to the flour weight) is common. Dough that is too dry will be difficult to roll and prone to tearing, while dough that is too wet can be sticky and hard to handle, making it challenging to maintain distinct layers during the delicate folding process. Finding the right balance ensures the dough is pliable and cooperative throughout lamination.
The Butter: Choosing European-Style Butter and Preparing a Beurrage
The quality and preparation of the butter are paramount in lamination. European-style butter is highly recommended due to its higher fat content, typically 82% or more, compared to the roughly 80% found in many American butters. The higher fat means less water, which is crucial because the water in the butter is what creates the steam that separates the layers during baking. Butter with less water is also more pliable when cold.
The butter must be prepared into a beurrage, a flat, uniformly thick block. This block needs to be cold but pliable – firm enough to hold its shape but soft enough to bend without cracking. It's often shaped by pounding and folding cold butter between parchment paper until it reaches the desired dimensions and consistency, usually about 40-50% of the weight of the flour in the détrempe. A properly prepared beurrage is essential for achieving even layers throughout the pain au chocolat lamination process.
Temperature Control: Maintaining Ideal Dough and Butter Temperatures for Lamination
Temperature is arguably the most critical factor in successful lamination. Both the dough and the butter must be kept cold, ideally between 4°C and 8°C (40°F and 46°F), throughout the entire process. The goal is for the butter to be firm enough not to melt into the dough, but pliable enough to flatten at the same rate as the dough during rolling. If the butter is too cold and hard, it will break into pieces within the dough, leading to uneven layers.
Conversely, if the butter is too warm, it will melt and combine with the dough, destroying the distinct layers before baking even begins. Similarly, if the dough becomes too warm, the gluten relaxes excessively, making it sticky and prone to tearing, and the yeast can become too active. Consistent chilling periods in the refrigerator between folds are non-negotiable steps in effective pain au chocolat lamination techniques to maintain these crucial temperatures.
Step-by-Step Guide to Croissant & Pain au Chocolat Lamination
Preparing the Détrempe: The Foundation for Flaky Layers
Begin by mixing your détrempe ingredients – typically flour, cold water, yeast, and salt – until just combined. Avoid over-mixing; you want moderate gluten development. Some recipes incorporate a brief autolyse period (resting flour and water together) to aid hydration without excessive mixing. After mixing, knead briefly until a smooth, relatively elastic dough forms.
The crucial step before lamination begins is chilling the détrempe thoroughly. Shape the dough into a rectangle or square, wrap it tightly, and refrigerate for several hours, or preferably overnight. This resting period chills the dough to the correct temperature for lamination and allows the gluten to relax significantly. A well-rested, cold détrempe is pliable and easy to roll, setting you up for success with your pain au chocolat lamination techniques.
Incorporating the Butter Block: Creating the Beurrage
While the détrempe chills, prepare your beurrage. Take cold, high-fat butter (e.g., 82% fat) and place it between two sheets of parchment paper. Use a rolling pin to pound the butter until it is about 1/2 inch thick and malleable. Then, roll it into a neat square or rectangle, ensuring the edges are relatively sharp. The size of your beurrage should be approximately one-half to two-thirds the size of your rolled-out détrempe.
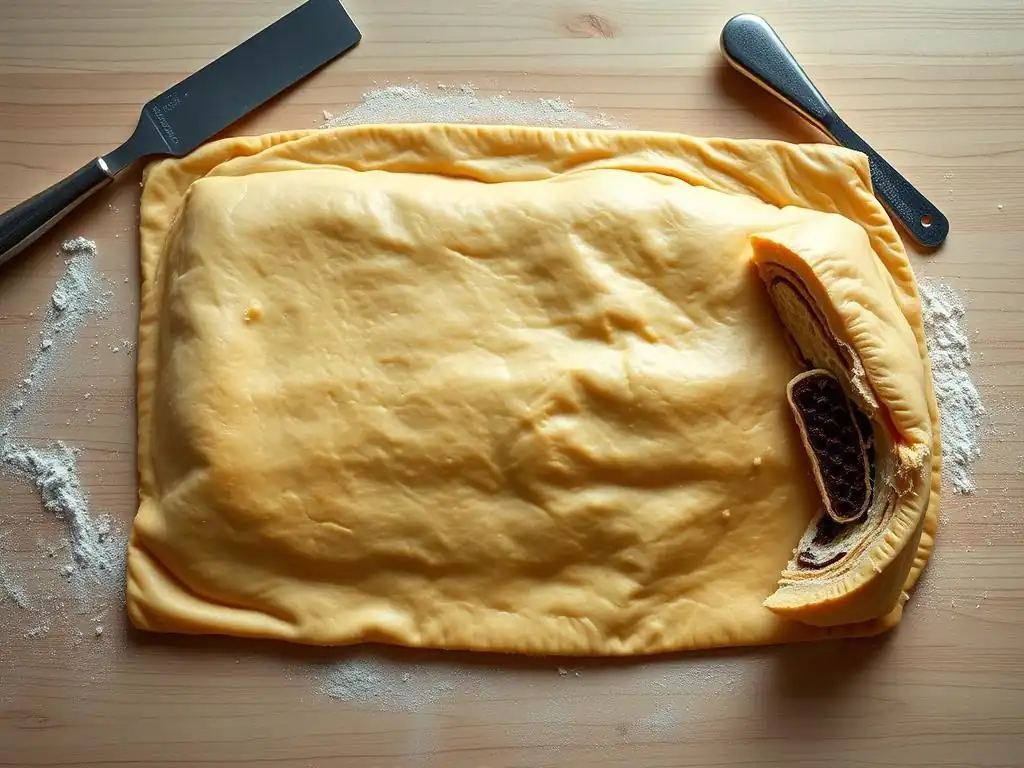
Once the détrempe is thoroughly chilled, roll it out into a rectangle about twice the size of your butter block. Place the butter block on one half of the dough, ensuring it's centered and the edges are neat. Fold the other half of the dough over the butter, carefully sealing the edges to completely encase the butter. This initial encapsulation is key to preventing butter leakage later in the pain au chocolat lamination process.
The Single Fold (Simple Fold): Creating Initial Layers
After the butter is encased, the folding process begins. Roll the dough-butter packet into a long rectangle, about three times as long as it is wide. Work gently and evenly to avoid tearing the dough or squeezing out the butter. Once rolled to the desired dimensions (e.g., around 18x6 inches or 45x15 cm), perform the single fold: fold one end of the rectangle about two-thirds of the way down the dough, then fold the remaining one-third over the first fold, like folding a letter.
This single fold creates three layers of dough and two layers of butter initially layered within the pastry. After completing the fold, gently square the edges of the dough packet to maintain a neat shape for subsequent rolls. Wrap the dough tightly and refrigerate for the recommended rest time (typically 30-60 minutes) before proceeding. This rest is vital for relaxing the gluten and firming the butter.
The Double Fold (Book Fold): Developing Defined Layers
The double fold, or book fold, is another common technique used in pain au chocolat lamination to rapidly increase the number of layers. After resting the dough from the previous fold, rotate it 90 degrees so the seam is on your right (like the spine of a book). Roll the dough packet into a long rectangle again, similar dimensions to the single fold, working carefully to maintain even thickness.
To perform the double fold, fold both ends of the rectangle towards the center, leaving a small gap (about 1/2 inch or 1 cm) in the middle. Then, fold the dough in half along this gap, closing it like a book. This fold creates four layers of dough and three layers of butter where the ends meet, effectively multiplying the existing layers by four. After the double fold, square the edges, wrap tightly, and refrigerate for another rest period.
The Laminating Schedule: Managing Rest Times and Folds for Optimal Results
A successful pain au chocolat lamination requires a specific schedule of rolling, folding, and resting. The most common schedules involve either one single fold followed by two double folds, or three double folds. The 1 Single + 2 Doubles schedule typically results in around 37 distinct layers of dough and butter (after the initial encasing), while the 3 Double folds schedule yields a finer texture with approximately 55 layers.
Between each fold, the dough must rest in the refrigerator for at least 30-60 minutes. This rest is crucial for allowing the gluten in the dough to relax, preventing it from springing back excessively during rolling, and for the butter to firm up again, ensuring it remains in distinct layers. Keep track of the number of folds completed by making small indentations on the dough surface. Adhering strictly to the schedule and rest times is key to achieving the perfect flaky layers in your pain au chocolat.
Advanced Lamination Techniques
Achieving a Consistent Butter Layer Distribution
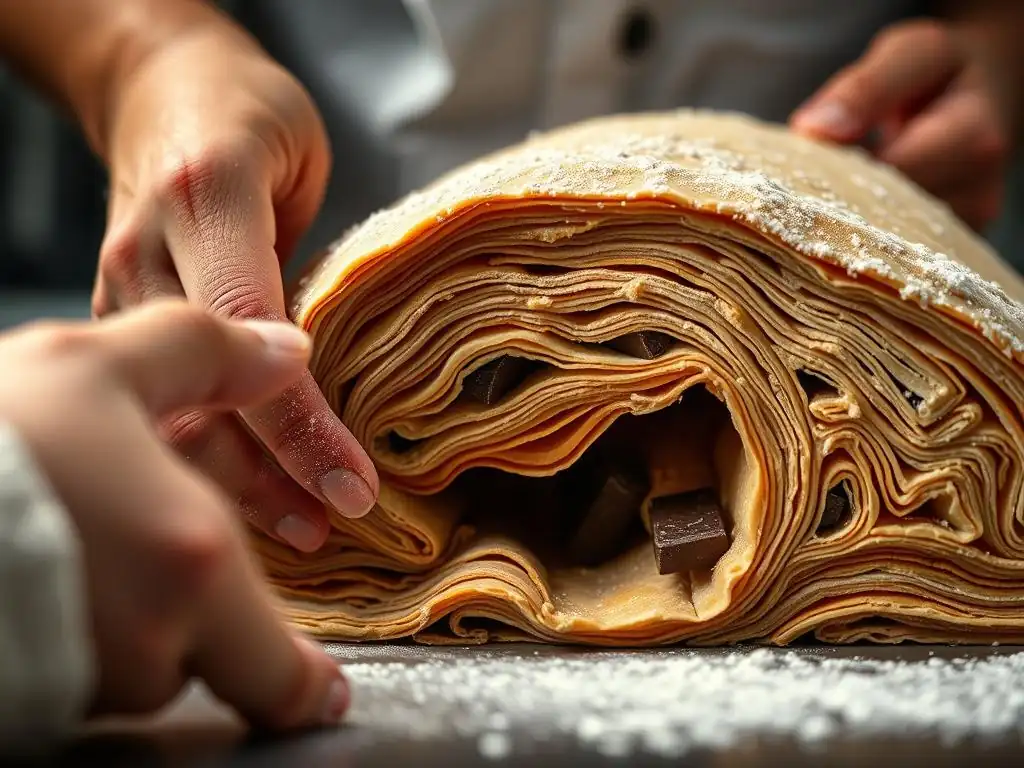
Ensuring the butter is distributed evenly throughout the dough is a hallmark of expert pain au chocolat lamination techniques. This begins with creating a uniformly thick and pliable beurrage. When incorporating the butter and during each subsequent roll, focus on applying even pressure across the entire surface of the dough. Avoid pressing down harder in the center or on the edges.
Roll the dough out into a true rectangle with square corners, rather than an oval or irregular shape. This allows for cleaner, more consistent folds. If you notice the dough or butter feels thicker in one area, gently coax it thinner with the rolling pin. Consistent thickness at every stage of lamination prevents some layers from becoming too thin (and tearing) or too thick (resulting in dense spots).
Preventing Butter Leakage During Lamination
Butter leakage is a common frustration in lamination, often leading to layers fusing together and a greasy final product. It typically occurs when the butter is too warm, the dough is torn, or the edges of the dough-butter packet were not sealed properly initially. To prevent this, always ensure your butter is cold but pliable, not meltingly soft, before you start rolling.
If you notice a small tear in the dough during rolling, stop immediately. Gently press the torn edges back together or use a tiny piece of reserved détrempe to patch the hole. Lightly dusting your work surface with flour helps prevent sticking, but use it sparingly, as too much flour can dry out the dough and affect lamination. Always check and re-seal the edges of the dough packet after each fold before resting.
Adjusting Technique Based on Dough Strength and Elasticity
Different flours and varying hydration levels will result in doughs with different strengths and elasticities, requiring slight adjustments to your pain au chocolat lamination techniques. A stronger dough, perhaps made with higher protein flour or kneaded slightly more, will have more resistance and spring back when rolled. This type of dough benefits from longer rest periods between folds (up to 90 minutes) to allow the gluten to fully relax.
Conversely, a dough that is less strong or elastic might be more prone to tearing. With such dough, roll more gently and avoid stretching it excessively. You might also find it helpful to work in a slightly warmer (but still cool) environment, or allow the dough to warm up for just a few minutes out of the fridge before rolling, making it more pliable. Pay close attention to how the dough feels and adjust your rolling pressure and rest times accordingly.
Troubleshooting Common Lamination Problems
Butter Melting Too Quickly: Causes and Solutions
If your butter starts oozing out or melting into the dough during lamination, the primary culprit is usually temperature. The butter or dough is too warm, your work surface is too warm, or you are working too slowly. High ambient kitchen temperature can exacerbate this problem significantly, especially when practicing pain au chocolat lamination techniques.
To combat melting butter, ensure your ingredients are properly chilled before you start. Work quickly and efficiently during the rolling and folding steps. If possible, use a cold surface like marble or granite. Consider chilling your rolling pin by rubbing it with ice or keeping it in the fridge. If the dough feels warm or the butter seems too soft at any point, stop immediately, wrap the dough tightly, and return it to the refrigerator for 15-30 minutes to firm up before continuing.
Dough Tearing or Cracking: Prevention and Repair
Dough tearing or cracking during lamination is often a sign that the dough is too cold, too stiff, or hasn't rested long enough, meaning the gluten hasn't relaxed sufficiently. It can also happen if you are rolling too aggressively or unevenly stretching the dough. This issue disrupts the layers and can lead to butter leakage.
Prevent tearing by ensuring the dough is pliable before rolling – it should be cold but slightly yielding to the touch. Always give the dough adequate rest time between folds. When rolling, use even pressure and roll from the center outwards, avoiding stretching the dough widthwise too much. If a tear occurs, gently pinch the edges together to seal it. For larger tears, patch with a small piece of dough and press firmly. Always chill the dough immediately after repairing a tear.
Uneven Layers: Identifying and Correcting the Issue
Uneven layers manifest as some parts of the pastry being dense while others are flaky, or the pastry rising unevenly during baking. This is typically caused by inconsistent thickness during rolling, uneven butter distribution from the start, or sloppy folding techniques. Achieving uniform layers is crucial for consistent results with pain au chocolat lamination techniques.
Identify uneven thickness by visually checking the dough as you roll – look for thicker or thinner spots. Correct this by applying more pressure to the thicker areas. Ensure your initial beurrage is uniformly thick and neatly incorporated. During folding, make sure your folds are straight and the edges align neatly. Practicing even rolling pressure and precise folding is key to correcting and preventing uneven layers.
Tips and Tricks for Perfect Lamination
The Importance of Resting the Dough Between Folds
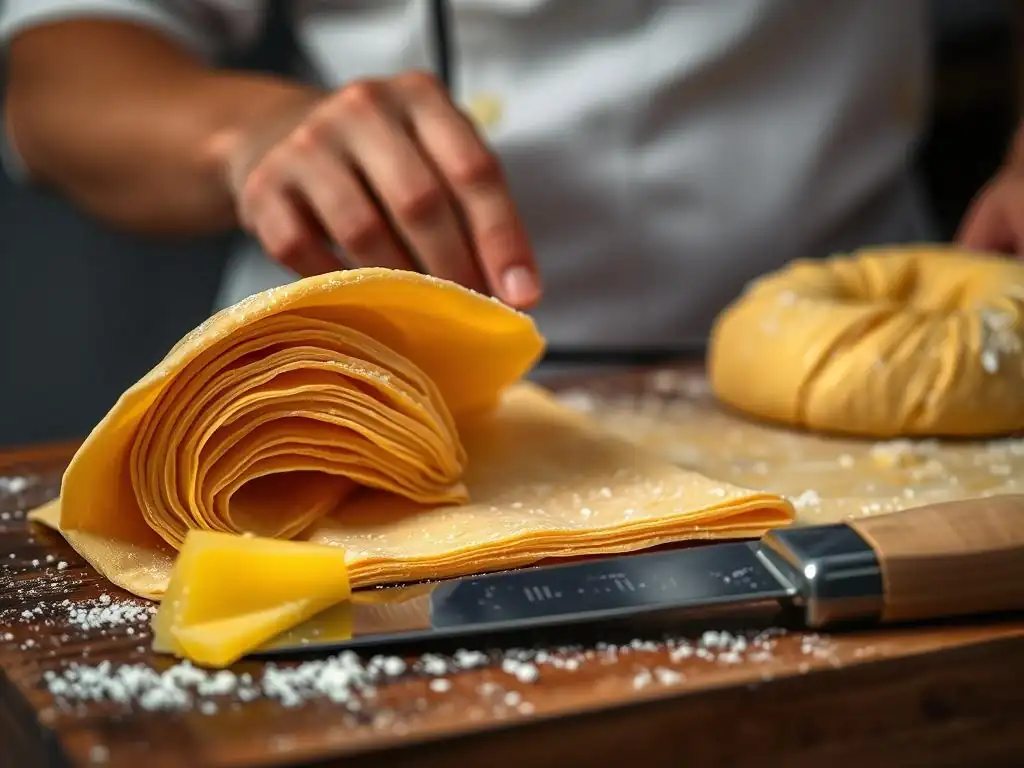
We cannot stress this enough: adequate resting time between folds is absolutely essential for successful lamination. Resting the dough in the refrigerator for 30 to 60 minutes (or longer if needed) serves two critical purposes: it allows the gluten, which has been stretched and tightened during rolling, to relax, making the dough easier to roll in the next step without excessive spring-back or tearing.
Equally important, resting allows the butter layers to firm up again. This ensures the butter remains distinct from the dough and doesn't melt or squeeze out during subsequent rolling and folding. Skipping or shortening rest times is a common mistake that leads to frustration, torn dough, butter leakage, and ultimately, poor layer separation in the final baked pain au chocolat.
Using a Dough Sheeter for Consistent Results
While most home bakers rely on a rolling pin, professional bakeries often use a mechanical dough sheeter. This piece of equipment rolls the dough to a perfectly uniform thickness across its entire surface, something that is very difficult to achieve consistently by hand. Using a sheeter ensures that each layer of dough and butter is of the same thickness, leading to incredibly even lamination and predictable results.
For the home baker, achieving this consistency requires practice and attention to detail. Focus on applying even pressure with your rolling pin, regularly checking the dough's thickness across the entire rectangle. While a sheeter provides mechanical precision, skillful hand rolling can still produce excellent results with dedicated practice of pain au chocolat lamination techniques.
Adjusting Lamination Based on Ambient Temperature and Humidity
Environmental conditions significantly impact the lamination process. High ambient temperature is the enemy of flaky pastry, as it causes the butter to soften and melt too quickly. In warm kitchens (above 20°C / 68°F), you may need to increase the rest times in the refrigerator, work in shorter bursts, or even chill your work surface or rolling pin.
High humidity can make the dough surface sticky, requiring more flour dusting on your work surface. However, use flour sparingly, as excess flour can be incorporated into the dough, making it dry and potentially leading to tearing. Be mindful of your kitchen environment and be prepared to adjust your pace and chilling routine to keep the dough and butter at the ideal cold temperature throughout the pain au chocolat lamination process.
From Lamination to Baking: Completing Your Croissants & Pain au Chocolat
Shaping Croissants and Pain au Chocolat: Achieving Classic Forms
Once lamination is complete and the dough has had its final rest, it's time to shape your pastries. For pain au chocolat, the dough is typically rolled to a thickness of about 3-4 mm (1/8 to 1/6 inch) and cut into rectangles, usually around 8-10 cm (3-4 inches) wide and 18-20 cm (7-8 inches) long. Place one or two chocolate batons (bâtons de chocolat) at one end of each rectangle and roll the dough up to enclose the chocolate.
Croissants are shaped from triangles cut from rolled dough. The rolling thickness is similar, but the dough is cut into isosceles triangles with a base of about 8-10 cm and a length of 25-30 cm. A small slit is made in the base, and the triangle is rolled up from the base to the point, gently stretching the point as you roll to create layers. Consistent shaping ensures the pastries bake evenly.
Proofing for Optimal Rise and Texture
Proofing is the critical stage after shaping where the yeast in the dough becomes active again, producing carbon dioxide gas that expands the dough and pushes the layers apart. Proper proofing is essential for a light, airy interior texture and maximum flakiness. The ideal proofing environment is warm and humid, typically around 24-26°C (75-79°F) with about 70-80% humidity.
Proofing too cold will result in insufficient rise, leading to dense pastries. Proofing too warm, especially above 28°C (82°F), can cause the butter layers to melt, destroying the lamination and resulting in greasy pastries. Proof until the pastries look visibly puffy and the layers are starting to become slightly visible, but the dough is not so fragile that it collapses when lightly touched. This typically takes 1.5 to 2.5 hours, depending on the temperature.
Baking to Golden Perfection: Achieving the Ideal Color and Flakiness
Before baking, pastries are often brushed with an egg wash (a mixture of egg and sometimes milk or water) to give them a beautiful golden color and shine. Bake pain au chocolat and croissants in a preheated oven, often starting at a higher temperature (e.g., 200-220°C / 400-425°F) for the first few minutes to encourage a rapid spring and layer separation, then reducing the temperature slightly (e.g., to 180-190°C / 350-375°F) for the remainder of the bake.
Baking time typically ranges from 15 to 20 minutes, depending on the size of the pastries and your oven. The pastries are done when they are a deep golden brown color, indicating the layers are fully cooked and crisp. A pale color suggests underbaking, resulting in a doughy texture. Remove from the oven and cool on a wire rack to maintain crispness.
Conclusion: Elevating Your Baking with Precise Lamination
The Rewards of Homemade Croissants and Pain au Chocolat with Perfect Lamination
There is immense satisfaction in pulling a batch of perfectly laminated pain au chocolat or croissants from your own oven. The aroma of warm butter and baked dough, the deep golden color, and the visible, distinct layers are testaments to the skill and patience invested in the lamination process. Achieving that ideal balance of a crisp, flaky exterior and a tender, airy interior crumb, coupled with melted chocolate inside a pain au chocolat, is a truly rewarding baking experience.
Mastering pain au chocolat lamination techniques is a journey that requires practice, but the results are well worth the effort. Each successful batch builds confidence and deepens your understanding of this foundational pastry technique. The ability to consistently produce such high-quality viennoiseries at home is a significant achievement for any intermediate baker.
Further Exploration of Viennoiseries and Advanced Lamination Techniques
The lamination techniques discussed here are fundamental not just for croissants and pain au chocolat, but for a whole family of pastries known as viennoiseries, including Danish pastries, kouign amann, and more. Once you feel confident with the basic folds and temperature control, you can explore variations in dough composition, butter ratios, and folding schedules to achieve different textures and characteristics in your laminated pastries.
Consider experimenting with enriched doughs containing more sugar, milk, or eggs for a softer crumb, or exploring alternative folding patterns. Continue practicing the core pain au chocolat lamination techniques, focusing on consistency in rolling, precision in folding, and strict temperature control. With dedication, you can continue to refine your skills and expand your repertoire of beautiful, flaky laminated treats.
Frequently Asked Questions
How important is temperature control in pain au chocolat lamination?
Temperature control is absolutely crucial for successful lamination. Keeping the butter cold prevents it from melting into the dough, creating distinct butter and dough layers. This results in a flaky and airy pain au chocolat.
What is the purpose of lamination in pain au chocolat?
Lamination creates hundreds of thin layers of butter and dough. These layers separate during baking, generating the characteristic flaky texture and rich flavor of pain au chocolat.
How many folds are typically required for optimal pain au chocolat lamination?
While variations exist, a common approach involves 3-4 single folds (or 2 double folds) for optimal lamination. This number of folds ensures a good balance between layer development and dough manageability.
What type of butter is best for pain au chocolat lamination?
European-style butter with a high fat content (around 82-84%) is generally preferred. This type of butter has a lower water content and results in a flakier final product.
What are some common mistakes to avoid during pain au chocolat lamination?
Common mistakes include overworking the dough, allowing the butter to become too soft, and not allowing sufficient resting time between folds. Patience and precision are key to avoiding these issues.
Final Reflection: The Enduring Allure of the Perfect Flake
The pursuit of the perfect pain au chocolat, with its shatteringly crisp layers and intensely rich chocolate heart, is more than just a baking challenge; it's a testament to the enduring power of meticulous technique. Mastering the art of lamination, as explored throughout this article, isn't simply about achieving a visually stunning pastry; it's about understanding the fundamental principles of gluten development and fat incorporation that elevate a simple treat into a culinary masterpiece. This understanding translates to countless other baking endeavors, highlighting the interconnectedness of seemingly disparate techniques.
The journey of lamination, from the initial chilling of the butter to the final, satisfying crackle of the finished product, is a deeply rewarding one. It's a process that demands patience, precision, and a willingness to learn from both successes and failures. The best bakers are those who are not afraid to fail, for it is in failure that we learn the most.
This quote, though not specifically about pain au chocolat, perfectly encapsulates the spirit of mastering any complex baking technique. The ongoing influence of this pursuit extends beyond the kitchen; it fosters a deeper appreciation for the artistry and science behind food creation, enriching our understanding of culinary traditions and the simple pleasure of a perfectly executed pastry.
Now, I invite you to consider your own baking journey. Perhaps you've already tackled the challenges of pain au chocolat lamination, or maybe this article has sparked a newfound curiosity. Regardless, remember the lessons learned here—the importance of precise measurements, the delicate balance of temperature, and the satisfaction of transforming simple ingredients into something extraordinary. Don't be afraid to experiment, to embrace the imperfections, and to find your own unique approach to mastering the fold.
The journey, with all its challenges and triumphs, is just as rewarding as the destination. So, gather your ingredients, preheat your oven, and embark on your own culinary adventure. The perfect flake awaits.
Unleash Your Inner Boulanger: Perfect Pain au Chocolat Awaits!
Thanks for joining us on this delicious journey into the art of pain au chocolat lamination! We hope you've gained valuable insights into achieving that perfectly flaky, buttery interior. Now it's time to put your new skills to the test.
- Bake your masterpiece! Try out your newly acquired lamination techniques with a fresh batch of pain au chocolat. Share your results – we’d love to see them!
- Experiment with fillings: Why stick to chocolate? Get creative and try different fillings like hazelnut praline, almond paste, or even fruit preserves. The possibilities are endless!
- Join our baking community: Connect with fellow baking enthusiasts on our forum and share your experiences, tips, and delicious creations. Let’s inspire each other!
Ready to transform your baking game? What unique twist will you add to your next pain au chocolat?