
Mastering the Turn: Folding Techniques for Puff Pastry Dough

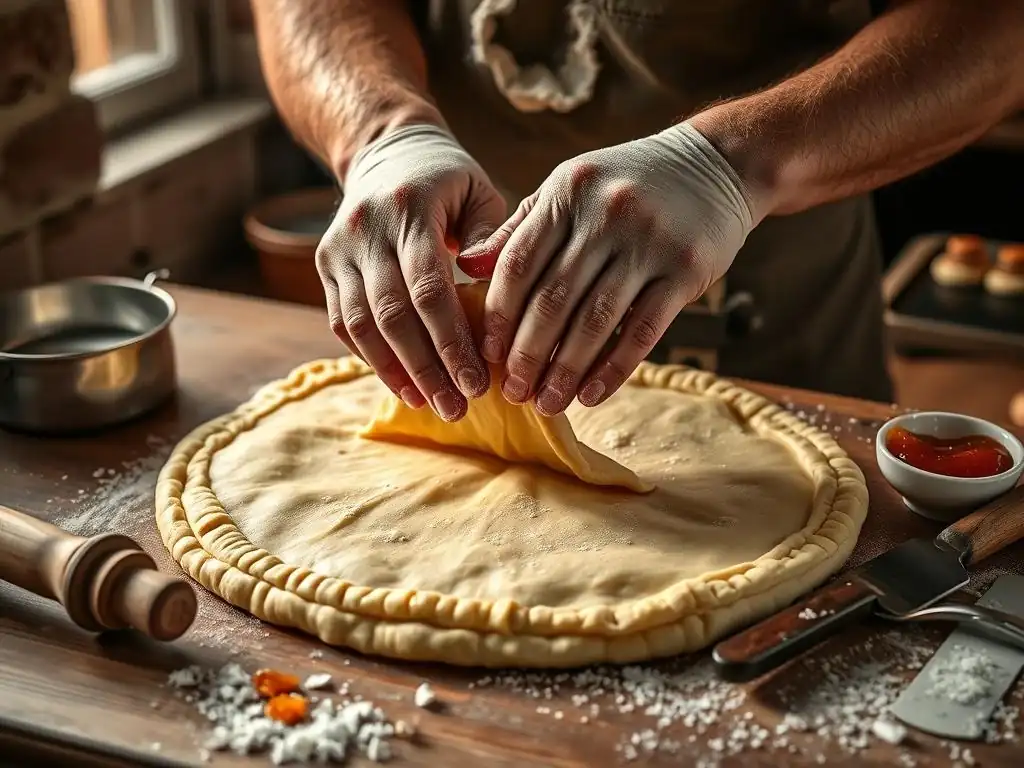
Welcome to BakeWithEase, your kitchen companion for unlocking baking brilliance! Ever wonder how to achieve that perfectly flaky, melt-in-your-mouth texture in your pastries? We're diving deep into the secrets behind puff pastry folding techniques today. Get ready to elevate your baking game as we unravel the art of the "turn," transforming simple dough into a masterpiece. Prepare to be amazed at how easy it can be!
- Introduction to Puff Pastry Folding: The Key to Flaky Layers
- Preparing for Puff Pastry Folding: Essential Steps
- The Single Fold (Simple Fold): Achieving Even Distribution
- The Double Fold (Book Fold): Achieving More Layers
- The Letter Fold (Triple Fold): Maximizing Layer Development
- Number of Folds: Finding the Right Balance for Puff Pastry
- Resting and Chilling: Essential Between Folds
- Common Puff Pastry Folding Mistakes and How to Avoid Them
- Blitz Puff Pastry: A Faster Alternative
- Applications of Perfectly Folded Puff Pastry
- Conclusion: Achieving Puff Pastry Perfection Through Folding Techniques
-
Frequently Asked Questions
- What is the most important aspect of puff pastry folding techniques?
- How many folds are typically recommended for puff pastry?
- What is the difference between a single and double fold in puff pastry?
- Why is resting the dough crucial between folds?
- What if my butter starts to melt during the folding process?
- Final Reflection: The Art and Science of the Perfect Fold
- Unleash Your Inner Pastry Chef: Master the Fold!
Introduction to Puff Pastry Folding: The Key to Flaky Layers
Understanding the Importance of Turns in Puff Pastry
The characteristic flakiness of puff pastry, the delicate layers that shatter when bitten into, is achieved through a process called lamination. This involves repeatedly folding a dough that encases a block of butter. Each fold, or "turn," multiplies the layers of dough and butter. After a single fold, what was initially two layers (dough and butter) becomes three (dough, butter, dough). A second fold on this tri-layered structure creates even more layers.
The magic happens during baking. As the pastry heats, the water in the butter turns to steam. This steam is trapped between the thin layers of dough, forcing them apart. Simultaneously, the heat sets the gluten structure in the dough and melts the butter, which fries the dough layers, preventing them from sticking back together. The number of turns directly correlates to the number of layers, which in turn dictates the final puff and flakiness. Achieving several hundred to over a thousand layers is key to that ethereal texture.
Why Proper Folding Technique Matters for Puff Pastry Success
Executing the folding techniques correctly is paramount to achieving the desired texture and rise in puff pastry. Sloppy folds can lead to uneven layers, causing some areas to puff more than others, resulting in a misshapen or dense pastry. If the butter isn't evenly distributed or maintained as a distinct layer during folding, it can leak out during baking, leading to a greasy, flat pastry instead of a light, airy one.
Mastering the specific techniques for the single fold, double fold, and letter fold ensures that the butter remains encapsulated within the dough and that the layers are uniformly distributed. For instance, aiming for a target thickness of about 1/4 to 1/3 inch (roughly 6-8 mm) before each fold helps maintain consistency. Proper execution minimizes stress on the dough, preventing gluten development that would make the pastry tough, and keeps the butter cold and pliable, which is essential for creating those distinct layers.
Preparing for Puff Pastry Folding: Essential Steps
Chilling the Dough: The Crucial First Step for Lamination
Proper chilling is non-negotiable when working with puff pastry dough. After mixing the initial dough (détrempe), it needs significant rest in the refrigerator. This allows the gluten structure, which develops slightly during mixing, to relax. A typical initial chill might be 1-2 hours, or even overnight. Without this rest, the dough would be too elastic and difficult to roll out thinly and evenly without shrinking back excessively.
Furthermore, chilling solidifies the butter incorporated into the dough. Whether you're using the classic method with a butter block or a quicker "blitz" method, the fat needs to be firm, but still pliable. Cold dough and cold butter are essential for maintaining distinct layers during the repetitive rolling and folding process. If the dough or butter is too warm, the butter can melt into the dough, destroying the lamination and resulting in a dense, bread-like texture rather than a flaky one. Aim for a dough temperature around 40-50°F (4-10°C) before beginning the first turn.
Preparing the Butter Block: Achieving Optimal Plasticity
For the classic puff pastry method, a separate block of butter is prepared and enclosed within the dough. The state of this butter block is critical. It should be cold but pliable, possessing a consistency similar to playdough – firm enough to hold its shape but soft enough to roll out without cracking. This state, known as plasticity, is typically achieved by gently beating or rolling chilled butter until it is malleable.
Using butter that is too cold and hard will cause it to break into shards during rolling, creating gaps in the butter layer and uneven puff. Conversely, butter that is too soft or warm will melt into the dough, ruining the layers.
The amount of butter used is also important; classic puff pastry often uses a high ratio, sometimes 1:1 or even slightly more butter than flour by weight (e.g., 500g flour might use 500-600g butter). Ensuring the butter block is roughly two-thirds the size of the rolled-out dough rectangle before enclosing it is a common practice to facilitate even coverage.
Dough and Butter Temperature: Maintaining Consistency for Best Results
Maintaining a consistent, cool temperature for both the dough and the butter throughout the entire lamination process is arguably the most critical factor for successful puff pastry. The ideal temperature range for the butter during rolling and folding is typically between 50°F and 60°F (10°C to 15°C). At this temperature, the butter is pliable enough to spread into thin sheets but remains distinct from the dough.
The dough itself should also be kept cool, ideally in a similar temperature range, though slightly colder is acceptable. Working in a cool kitchen environment can be beneficial, especially during warmer months. If at any point the dough or butter becomes too warm and sticky, or the butter starts to feel greasy and soft, it must be returned to the refrigerator immediately for at least 20-30 minutes to firm up before continuing the folding techniques. Ignoring this crucial step is a primary cause of butter leakage and poor layer development.
The Single Fold (Simple Fold): Achieving Even Distribution
Step-by-Step Guide to the Single Fold
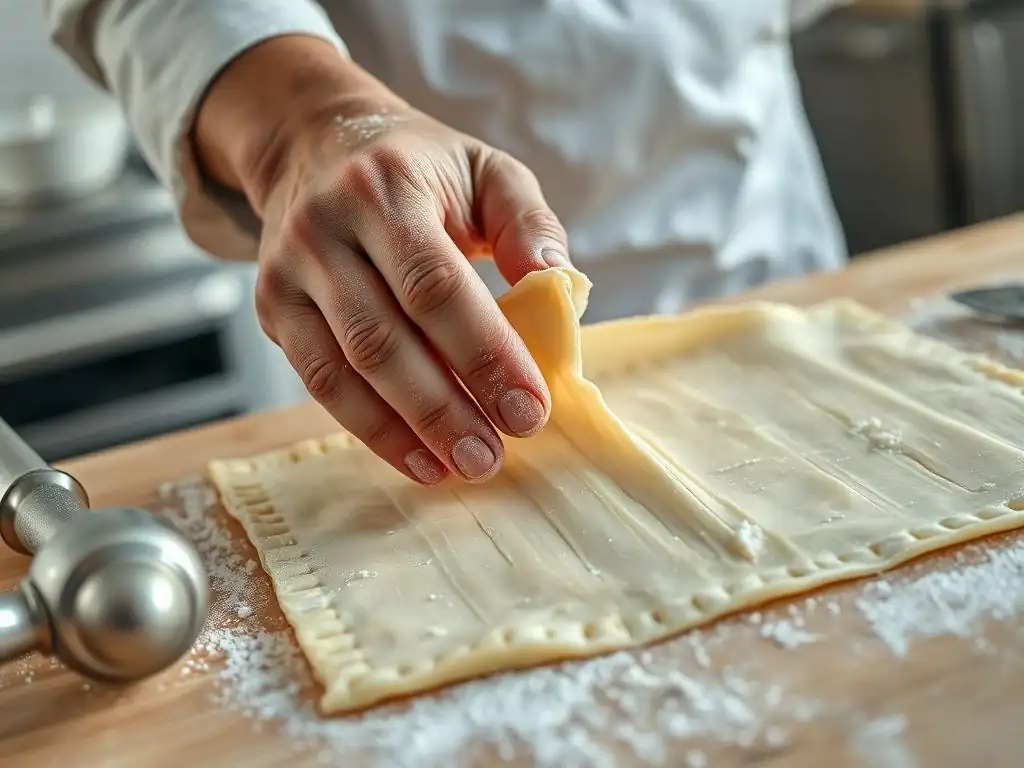
The single fold, also known as the simple fold, is one of the fundamental puff pastry folding techniques used to build layers. After enclosing the butter block in the dough and rolling it into a long rectangle, you perform the single fold. First, ensure your dough is rolled out to an even thickness, typically about 1/4 to 1/3 inch (6-8 mm), and is roughly three times as long as it is wide.
To execute the fold, imagine dividing the rectangle into three equal sections lengthwise. Fold one end of the dough rectangle over to cover the middle section. Then, fold the remaining end over the top of the first folded section, like folding a letter. This action effectively takes the original layers (dough, butter, dough) and folds them upon themselves, increasing the number of layers. After completing the fold, gently press down on the edges to seal and square off the dough packet.
Visualizing the Single Fold: Ensuring Even Distribution
Visualizing the single fold as folding a letter is key to ensuring even distribution of layers. When you roll your dough into a rectangle, aim for straight edges and square corners as much as possible. This initial shape influences the uniformity of layers created by the fold. If the rectangle is uneven, the folds will also be uneven, leading to areas with more layers than others.
As you fold one end over the middle, make sure the edges align neatly. Then, when folding the final section over, again, ensure the edges meet or slightly overlap cleanly. Think of creating a neat, compact package. This precision ensures that when you roll the dough out again for the next turn, the layers are spread out evenly across the entire sheet, contributing to consistent puffiness throughout the finished pastry. A typical single fold, starting with a dough/butter/dough structure, results in 3 layers of dough and 2 layers of butter within the folded packet.
Tips for Perfecting the Single Fold Technique
Several tips can help you perfect the single fold technique. Always flour your work surface and rolling pin lightly, but avoid using excessive flour, as this can dry out the dough or create dry pockets between layers. Roll the dough gently and evenly, applying consistent pressure across the surface to maintain uniform thickness without tearing the dough or squeezing out the butter. If the dough resists rolling or starts to shrink back, it indicates the gluten is too tense; cover it and chill it in the refrigerator for 15-20 minutes before resuming.
After folding, mark the dough packet to indicate the type of fold you've just performed (e.g., one indentation for a single fold) and the number of turns completed so far. This helps you keep track, especially when performing multiple turns. Always rotate the dough 90 degrees before rolling it out for the next turn. This rotation is crucial as it helps to stretch the dough evenly in all directions over the course of the lamination process, preventing it from developing a dominant grain or becoming too elastic in one direction.
The Double Fold (Book Fold): Achieving More Layers
Step-by-Step Guide to the Double Fold
The double fold, often called the book fold, is another essential technique in building layers in puff pastry, resulting in a faster increase in layer count compared to the single fold. After rolling your dough into a long rectangle, typically about four times as long as it is wide and about 1/4 to 1/3 inch thick (6-8 mm), you prepare for the double fold.
Imagine dividing the rectangle into four equal sections lengthwise. Fold both ends of the dough rectangle inwards so that their edges meet precisely in the center of the rectangle. Ensure these edges meet neatly without overlapping significantly. Once both ends are folded to the center, fold the entire rectangle in half along the center line where the two edges meet, as if closing a book. This action significantly multiplies the layers.
Creating the "Book": Ensuring Precise Alignment
The key to a successful double fold is the precise alignment of the edges in the center before folding the packet in half. When you fold the first end towards the center, make sure it reaches the imaginary center line. Then, fold the second end towards the center, ensuring its edge meets the first folded edge neatly. Avoid leaving a gap or creating a large overlap at the center seam.
This precise alignment ensures that when you fold the "book" in half, the layers stack neatly upon each other. An uneven center seam will result in uneven layer distribution after subsequent rolling and folding. A single double fold, starting with a dough/butter/dough structure (after the initial enclosure), results in 4 layers of dough and 3 layers of butter within the folded packet, effectively creating 8 dough layers and 7 butter layers when the initial setup is considered (though counts are usually tracked by the number of turns and the resulting total layers after all turns are complete).
Troubleshooting Common Double Fold Issues
One common issue with the double fold is achieving the perfect center seam. If the dough is too warm, the edges might stick together prematurely, making precise alignment difficult. If the dough is too cold, the edges might crack when folded. Ensure your dough is pliable and cool. Another issue is the packet becoming too thick and difficult to fold cleanly. Rolling the initial rectangle to the correct thickness (1/4-1/3 inch) is vital.
If the dough tears during folding, gently patch it together with your fingers. If butter starts to squeeze out at the seams, the butter is likely too warm; stop immediately, press the edges back together, and chill the dough thoroughly before attempting to fold again. After completing the double fold, gently press down on the packet to seal the edges and square it up. Remember to mark the dough (e.g., two indentations for a double fold) and rotate it 90 degrees before the next rolling and chilling step.
The Letter Fold (Triple Fold): Maximizing Layer Development
Step-by-Step Guide to the Letter Fold Technique
The letter fold, often referred to as the triple fold, is another popular method for building layers in puff pastry. Like the single fold, it involves dividing the rolled-out dough rectangle into three sections, but the folding method is slightly different. After rolling the dough into a rectangle, typically about 1/4 to 1/3 inch thick (6-8 mm) and roughly three times as long as it is wide, you are ready to perform the letter fold.
Imagine dividing the rectangle into three equal sections lengthwise. Fold one end of the dough rectangle over, covering roughly two-thirds of the way across the rectangle. Then, fold the remaining end (the shorter section) over the top of the first folded section. This creates a packet resembling a letter folded for an envelope. Ensure the edges align neatly to create a compact rectangle.
Advantages of Using the Letter Fold for Puff Pastry
The letter fold is a very efficient way to build layers. Each letter fold results in 3 layers of dough and 2 layers of butter within the folded packet (assuming you started with the basic dough/butter/dough structure after encasing the butter). Performing a series of letter folds allows you to reach a high number of layers relatively quickly compared to using only single folds. For example, four letter folds result in 243 layers (3^5 - initial layers before first fold), while four single folds result in only 81 layers (3^4).
Many classic puff pastry recipes call for a specific number of letter folds, often four or six, interspersed with chilling periods. This method is favored for its ability to create the very fine, numerous layers that contribute to a high rise and incredibly flaky texture, ideal for pastries like croissants or vol-au-vents. The compact shape of the folded packet is also easy to handle and roll out for the subsequent turn.
Tips for a Successful Letter Fold Every Time
For a successful letter fold, accuracy in dividing the rectangle into thirds is helpful, though perfect precision isn't strictly necessary; aiming for roughly equal sections is sufficient. Ensure the dough is evenly rolled out before folding to prevent thick or thin spots in the final packet. If the dough is resisting the fold or cracking, it's too cold; let it rest at room temperature for a few minutes (but watch it carefully) or give it a quick, short chill if it's too warm.
As with other folding techniques, lightly flour your surface and rolling pin, but avoid excess flour. After folding, gently press down to seal the edges and square up the packet. Mark the dough (e.g., three indentations or an 'L') to track your progress and rotate the dough 90 degrees before chilling and the next rolling step. Consistency in technique and proper chilling between turns are the most important factors for success when using the letter fold.
Number of Folds: Finding the Right Balance for Puff Pastry
How Many Folds Are Enough for Optimal Flakiness?
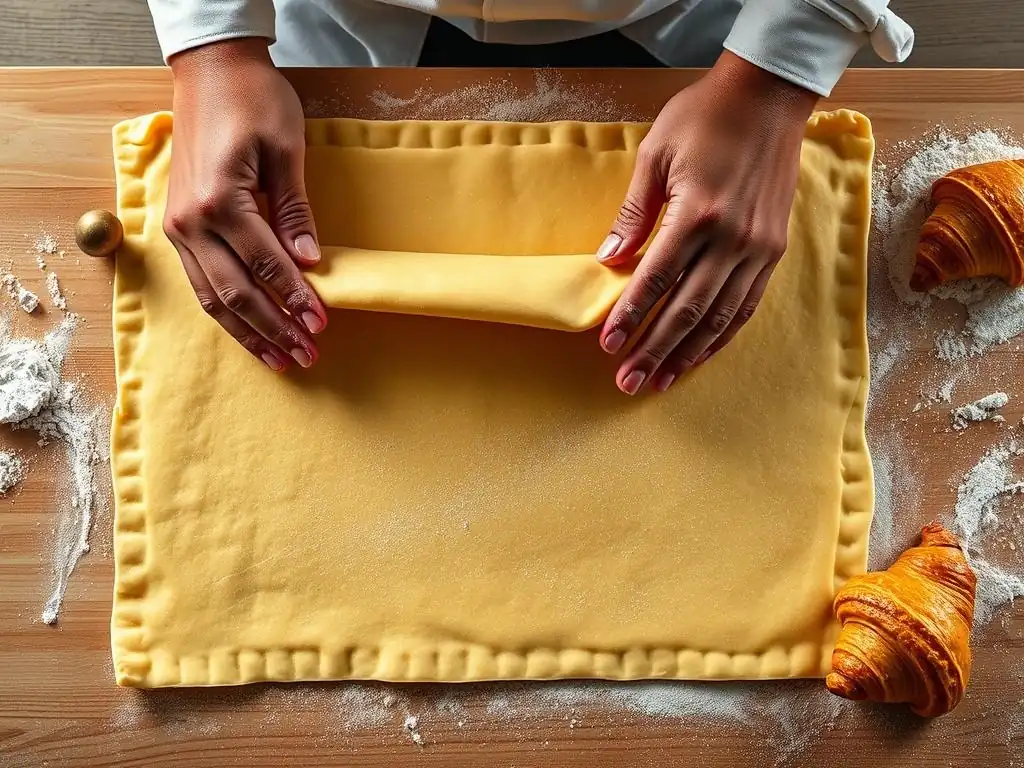
The optimal number of folds for puff pastry is generally considered to be between four and six turns. Each turn multiplies the number of layers geometrically. For example, starting with the dough/butter/dough structure:
- 1 Single Fold: 3 layers of dough
- 2 Single Folds: 3^2 = 9 layers of dough
- 3 Single Folds: 3^3 = 27 layers of dough
- 4 Single Folds: 3^4 = 81 layers of dough
- 5 Single Folds: 3^5 = 243 layers of dough
- 6 Single Folds: 3^6 = 729 layers of dough
Using letter folds builds layers faster:
- 1 Letter Fold: 3 layers of dough
- 2 Letter Folds: 3^2 = 9 layers of dough
- 3 Letter Folds: 3^3 = 27 layers of dough
- 4 Letter Folds: 3^4 = 81 layers of dough
- 5 Letter Folds: 3^5 = 243 layers of dough
- 6 Letter Folds: 3^6 = 729 layers of dough
Wait, that's the same math. Let's correct the layer count calculation. A single fold creates 3 layers. A double fold creates 4 layers of the folded packet. Let's track actual layers starting with 3 layers (Dough, Butter, Dough).
- Initial: 3 layers (D/B/D)
- 1 Single Fold: Folds 3 layers onto themselves -> 3 x 3 = 9 layers (D/B/D/D/B/D/D/B/D)
- 1 Double Fold: Folds 3 layers into 4 sections (D/B/D folded over) -> 3 x 4 = 12 layers
- 1 Letter Fold: Folds 3 layers into 3 sections (D/B/D folded over) -> 3 x 3 = 9 layers.
Okay, the layer counting is complex and depends on how you define "layers" and where you start. A simpler way is to consider the multiplication factor of each fold type on the existing structure:
- Single Fold: Multiplies layers by 3.
- Double Fold: Multiplies layers by 4.
- Letter Fold: Multiplies layers by 3.
So, starting with the initial 3 layers (D/B/D):
- 4 Single Folds: 3 * 3^4 = 3 * 81 = 243 layers (dough/butter combined)
- 4 Letter Folds: 3 * 3^4 = 3 * 81 = 243 layers
- 4 Double Folds: 3 * 4^4 = 3 * 256 = 768 layers
A common goal is to reach several hundred layers. Four letter folds (243 layers) or four to five single folds achieve this. Six turns using a combination of folds (e.g., 5 single folds or 4 letter folds) is a standard range. This range provides sufficient layers for significant puff while avoiding the pitfalls of over-folding.
The Impact of Over-Folding Puff Pastry Dough
While more layers generally mean more puff, there's a point of diminishing returns, and over-folding can actually harm the final product. As you repeatedly roll and fold, you continue to develop the gluten in the dough. Too much gluten development makes the dough tough and elastic, causing it to shrink excessively during rolling and baking. An overly elastic dough resists stretching into thin layers, leading to fewer, thicker layers rather than numerous thin ones.
Over-folding also risks breaking down the delicate butter layers. The constant stress of rolling can cause the butter to integrate too much with the dough, especially if the butter isn't perfectly cold and pliable. When the butter is no longer in distinct, thin sheets, it can't create the necessary steam pockets for puff. The result is a pastry that is tough, lacks significant rise, and may be greasy because the butter has melted into the dough matrix rather than creating separation. Sticking to the recommended 4-6 turns is usually sufficient for excellent puff pastry.
Adjusting Folds Based on Dough Strength and Butter Content
The ideal number and type of folds can sometimes be adjusted based on the specific recipe's dough strength and butter content. A dough made with a higher protein flour (like bread flour) will develop gluten more readily than one made with all-purpose flour. If using a stronger flour, you might opt for slightly fewer folds (e.g., 4-5 turns) or ensure very long chilling periods between turns to allow maximum gluten relaxation.
Conversely, a dough with a very high butter ratio might be slightly more prone to butter leakage if handled excessively. In such cases, using a combination of single and double folds might be preferred, or ensuring the butter is exceptionally cold and firm between turns. Some recipes explicitly call for a mix, like "4 turns, alternating single and double folds." Pay attention to how the dough feels during rolling – if it's very resistant or the butter seems too soft, these are signs to adjust your technique or prioritize chilling over adding more folds.
Resting and Chilling: Essential Between Folds
Why Resting is Crucial for Gluten Relaxation
Resting the puff pastry dough between folds is just as important as the folding itself. Each time the dough is rolled and folded, the gluten network within the flour is stretched and tightened. If you try to roll the dough out immediately after a fold, it will resist the rolling pin, shrink back, and be difficult to work with. This resistance is due to the tightened gluten structure.
Allowing the dough to rest, specifically in the refrigerator, gives the gluten strands time to relax. A typical rest period between turns is 30 to 60 minutes. This relaxation makes the dough pliable and easy to roll out thinly and evenly for the next fold without excessive force or tearing. Skipping or shortening the rest periods leads to a tough, elastic dough that fights back, making the lamination process frustrating and less effective at creating thin, distinct layers.
Optimal Chilling Times for Puff Pastry
Optimal chilling times for puff pastry vary depending on the recipe, the ambient kitchen temperature, and the temperature of your refrigerator. However, a general guideline is to chill the dough for at least 30-60 minutes between each turn. This time is sufficient for the gluten to relax and, crucially, for the butter layers to firm up again after being softened slightly by rolling.
For the initial chill after encasing the butter, or after the final fold before shaping and baking, a longer chill is often recommended, typically 2-4 hours, or even overnight. This ensures the dough and butter are thoroughly chilled and firm. If your kitchen is warm, or you are working quickly, you might need to extend the chilling time to ensure the butter doesn't melt. The dough should feel firm but not rock hard when you take it out of the refrigerator for the next step.
Preventing Butter from Melting During Folding
Preventing the butter from melting during the rolling and folding process is critical to maintaining distinct layers. The most effective way to do this is through rigorous chilling between turns. Ensure the dough is adequately chilled for at least 30 minutes (and often longer) after each fold before you attempt to roll it out again. If you see any signs of the butter becoming soft, greasy, or starting to ooze out, stop immediately and return the dough to the refrigerator.
Working quickly but carefully during the rolling and folding steps minimizes the time the dough is at room temperature. Use a lightly floured, cool surface. If your hands are warm, handle the dough as little as possible. In warm environments, consider chilling your rolling pin or working in short bursts, returning the dough to the fridge frequently. Maintaining a cool kitchen temperature, if possible, is also a significant advantage. The goal is to keep the butter solid and separate from the dough until it hits the hot oven.
Common Puff Pastry Folding Mistakes and How to Avoid Them
Preventing Butter Leakage During Folding
Butter leakage is a common frustration when making puff pastry. It occurs when the butter becomes too soft and warm, melting into the dough or squeezing out of the edges during rolling and folding. The primary culprit is insufficient chilling. To prevent this, ensure your dough and butter are consistently cold and firm between every turn. Chill for at least 30-60 minutes, or longer if needed, until the dough feels firm to the touch.
Another cause of leakage is rolling the dough too forcefully or unevenly, which can tear the dough layers and create channels for the butter to escape. Use gentle, even pressure when rolling. If you notice any small tears, patch them immediately by pressing the dough together. If butter starts to ooze, stop rolling, gently press the butter back in, and return the dough to the refrigerator for a substantial chill (e.g., 1 hour). Working quickly and in a cool environment also helps minimize the risk of butter melting.
Dealing with Tough or Elastic Dough
A tough or elastic dough that springs back excessively during rolling is usually a sign of overdeveloped or insufficiently relaxed gluten. This happens if the initial dough was overworked during mixing, if the dough wasn't chilled long enough initially, or if the rest periods between folds are too short. To prevent this, avoid over-mixing the initial dough; mix just until it comes together. Ensure the initial chill is long enough, at least 1-2 hours, to allow the gluten to relax.
If your dough becomes tough during the folding process, the best remedy is more rest. Cover the dough and return it to the refrigerator for a longer period, perhaps 45-90 minutes, to give the gluten ample time to relax. When you resume rolling, apply gentle, even pressure and stop if the dough resists. Roll in stages if necessary, letting the dough rest for a few minutes on the counter or back in the fridge if it keeps springing back. Patience and adequate rest are key to managing dough elasticity.
Troubleshooting Uneven Layers in Puff Pastry
Uneven layers can lead to a pastry that puffs unevenly, with some areas high and flaky and others flat and dense. This is often caused by inconsistent rolling or folding technique. Rolling the dough to an uneven thickness before folding means some sections will have more layers or thicker layers than others. Aim for a uniform thickness (1/4 to 1/3 inch) across the entire rectangle before each fold.
Sloppy or misaligned folds also contribute to uneven layers. When performing single, double, or letter folds, take care to align the edges neatly and create a square or rectangular packet. Rotating the dough 90 degrees after each fold is also crucial for developing layers evenly in all directions. If you notice the dough is consistently thicker on one side during rolling, try to apply slightly more pressure to that area while maintaining overall evenness. Practice improves the consistency of your rolling and folding techniques.
Blitz Puff Pastry: A Faster Alternative
Step-by-Step Guide to the Blitz Puff Pastry Method
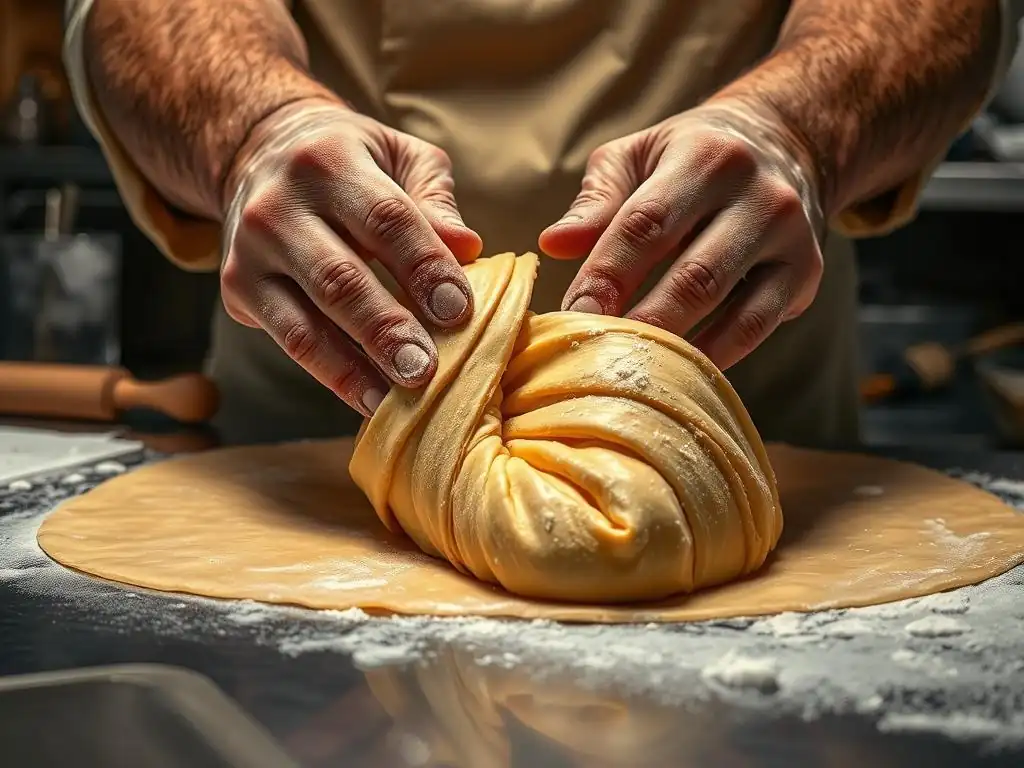
Blitz puff pastry, sometimes called rough puff or quick puff, offers a faster route to flaky layers, though typically yielding a less dramatic rise than traditional puff pastry. Instead of enclosing a solid butter block, cold butter is cut into small pieces and incorporated directly into the flour. A common ratio might be 1 part cold butter cut into 1/2-inch cubes to 2 parts flour, mixed with cold water.
The process involves cutting the cold butter into the flour until the pieces are coated but still visible, ranging in size from peas to walnuts. Very cold water is added just until the dough comes together. The key difference from pie crust is that the butter pieces are larger. The dough is then rolled out into a rectangle and folded multiple times immediately, often using the single fold technique (letter fold). Typically, 3-5 single folds are performed, with short chilling periods (15-20 minutes) in between, before the dough is ready to be shaped and baked.
Advantages and Disadvantages of Blitz Puff Pastry
The main advantage of blitz puff pastry is its speed. It eliminates the need for preparing a separate butter block and the longer initial chill periods required for classic puff. It's less technique-sensitive in terms of butter enclosure and can be more forgiving for beginners. It still produces a flaky pastry, suitable for many applications like tarts, turnovers, or quick appetizers. A batch can often be completed and ready to bake within 1-2 hours, compared to 4+ hours for traditional puff pastry.
However, the primary disadvantage is that blitz puff pastry generally does not achieve the same level of rise and ethereal flakiness as classic puff pastry. Because the butter is in smaller pieces and more integrated with the dough from the start, it creates fewer, less distinct layers compared to the hundreds or thousands created by laminating a solid butter block. While still flaky, the texture is often more rustic and less towering. It's a trade-off between speed and ultimate puffiness.
Tips for Successful Blitz Puff Pastry
Success with blitz puff pastry hinges on keeping everything very cold. Use ice water for the dough and ensure the butter is thoroughly chilled and cut into distinct pieces. Avoid overmixing the butter into the flour; you want visible chunks of butter. Handle the dough as little as possible to prevent the butter from melting and integrating too much.
When rolling and folding, work quickly and keep the dough cold between folds, even if it's just 15-20 minutes in the freezer if you're in a hurry. Don't expect the dough to be as smooth or easy to work with as traditional puff pastry; the butter chunks will make it lumpier initially. Be gentle during rolling to avoid squeezing the butter out. Blitz puff pastry is excellent for recipes where extreme puff isn't essential but a flaky base or topping is desired, such as a quick apple tart or sausage rolls.
Applications of Perfectly Folded Puff Pastry
Using Your Homemade Puff Pastry for Classic Recipes
Once you've mastered the puff pastry folding techniques and created your beautiful dough, a world of classic recipes opens up. Perfectly laminated puff pastry is the foundation for many beloved French pastries. Think of buttery, crescent-shaped croissants, often requiring 4-5 turns (usually a combination of single and double folds) for their iconic structure. Pain au chocolat, a croissant variant filled with chocolate, uses the same dough.
Vol-au-vents, small hollow cases, or larger bouchées, are made from puff pastry circles or squares that puff dramatically in the oven, creating cavities to be filled with savory or sweet mixtures. Palmiers, or elephant ears, are made by rolling puff pastry coated in sugar and slicing before baking, showcasing the numerous layers in a beautiful pattern. Other classics include turnovers filled with fruit or savory fillings, and mille-feuille (Napoleons), which feature layers of baked puff pastry separated by pastry cream. Achieving 700+ layers (like with 6 single folds) provides the maximum puff for these elaborate creations.
Exploring Creative Applications of Puff Pastry
Beyond the classics, perfectly folded puff pastry is incredibly versatile for creative culinary uses. Its ability to puff and crisp makes it ideal for both sweet and savory applications. Use it to top pot pies or casseroles for a flaky crust. Roll it out thinly and cut into strips to wrap around asparagus or cocktail sausages for elegant appetizers. Cut it into shapes to create decorative borders for tarts or use as a base for individual pizzas or flatbreads.
Sweet applications include simple sugar twists, fruit tarts (like a tarte Tatin), or even using it as a base for unconventional desserts. Imagine cutting strips, baking them until golden, and layering them with whipped cream and berries for a deconstructed mille-feuille. The neutral flavor and incredible texture of well-made puff pastry make it a fantastic canvas for innovation in the kitchen.
Storing Puff Pastry for Later Use
Puff pastry dough freezes exceptionally well, making it convenient to make a large batch and use it as needed. After completing all the required folds and chilling the dough thoroughly (for at least 2-4 hours), wrap the dough packet tightly in plastic wrap, ensuring no air pockets. Then, wrap it again in aluminum foil or place it in a freezer-safe bag. Properly wrapped, puff pastry can be stored in the freezer for up to 1-2 months.
To use frozen puff pastry, transfer it to the refrigerator and let it thaw slowly overnight. Avoid thawing at room temperature, as this can cause the butter layers to melt and merge. Once thawed, it should be chilled again for at least 30 minutes to ensure it is cold and firm before rolling and shaping. Thawed puff pastry should be used within 1-2 days. For shorter storage (a few days), the dough can simply be kept well-wrapped in the refrigerator after its final chill.
Conclusion: Achieving Puff Pastry Perfection Through Folding Techniques
Recap of Key Puff Pastry Folding Principles
Mastering puff pastry folding techniques is a journey that requires patience, precision, and a commitment to keeping things cold. The core principles involve creating and maintaining distinct, thin layers of dough and butter through repeated rolling and folding (the turns). Whether using the single fold, double fold, or letter fold, the goal is to multiply these layers geometrically, aiming for hundreds or even over a thousand layers for maximum flakiness.
Crucially, proper chilling between every single turn is non-negotiable. This allows the gluten to relax, making the dough workable, and keeps the butter firm, ensuring it remains in distinct sheets rather than melting into the dough. Avoiding common pitfalls like insufficient chilling, overworking the dough, or uneven rolling are key to preventing issues like butter leakage, toughness, and uneven puff. The specific number of folds, typically between 4 and 6, provides the optimal balance between layer development and avoiding overworking the dough.
Practice Makes Perfect: Improving Your Folding Skills
Like any baking skill, mastering puff pastry folding techniques takes practice. Don't be discouraged if your first attempt isn't perfect. Perhaps the butter leaked slightly, or the puff wasn't as high as you hoped. Each attempt teaches you more about the feel of the dough, the correct temperature, and the nuances of rolling and folding. Pay attention to how the dough behaves during each step.
Start with a simpler recipe or method, like blitz puff pastry, to get a feel for the process. As you become more comfortable, move on to traditional puff pastry. Take your time, prioritize chilling, and focus on executing each fold neatly. With consistent practice, you'll develop the intuition needed to create consistently flaky, beautiful puff pastry ready for any delicious application you can imagine. The reward of biting into a pastry you made yourself, knowing you mastered those crucial turns, is truly worth the effort.
Frequently Asked Questions
What is the most important aspect of puff pastry folding techniques?
The most important aspect is maintaining a consistent dough temperature. This ensures the butter layers remain distinct and create the desired flaky texture during baking.
How many folds are typically recommended for puff pastry?
Generally, 4-6 single or double folds (turns) are recommended. This amount provides a good balance between flakiness and tenderness. Over-folding can lead to a tough pastry.
What is the difference between a single and double fold in puff pastry?
A single fold involves folding the dough into thirds, like folding a letter. A double fold involves folding the dough in half, then folding each half to meet in the middle, creating four layers before folding in half again. Both are key techniques for creating layers.
Why is resting the dough crucial between folds?
Resting allows the gluten in the dough to relax. This prevents the dough from becoming too tough and ensures the butter layers remain intact during subsequent folds.
What if my butter starts to melt during the folding process?
If the butter starts to melt, immediately wrap the dough tightly and chill it in the refrigerator for a longer period. Cold butter is essential for creating distinct layers and a flaky pastry.
Final Reflection: The Art and Science of the Perfect Fold
Mastering the turn in puff pastry is not merely a culinary skill; it's a gateway to unlocking the airy, flaky perfection that defines this beloved pastry. The seemingly simple act of folding dough repeatedly holds the key to creating layers upon layers of butter and dough, resulting in a texture that is both delicate and decadent. This technique, once understood, transforms the seemingly daunting task of puff pastry making into a rewarding and creative process.
The impact of understanding proper folding techniques extends far beyond the kitchen. It's a testament to the power of precision and patience in achieving a desired outcome. The meticulous nature of the process mirrors many aspects of life, where careful planning and consistent effort lead to remarkable results. As the renowned chef Julia Child once said, Find something you're passionate about and keep tremendously interested in it.
This sentiment perfectly encapsulates the dedication required to master puff pastry folding, and the profound satisfaction that comes with it. The process itself becomes a meditative practice, a rhythm of folding and turning that connects us to a rich culinary tradition.
Now, consider your own endeavors. What seemingly complex tasks in your life could benefit from a similar approach of methodical practice and attention to detail? I encourage you to apply the principles of the "mastering the turn" – patience, precision, and a deep understanding of the process – to any challenge you face. Whether it's a personal project, a professional goal, or simply navigating the complexities of daily life, the lessons learned from folding puff pastry can serve as a valuable guide, leading you towards achieving your own unique and delicious successes.
Unleash Your Inner Pastry Chef: Master the Fold!
Thanks for taking the time to explore the art of puff pastry folding! You've now got the skills to create truly flaky, golden-brown masterpieces. Ready to put your new knowledge into practice?
- Bake a show-stopping creation: Use your newfound folding expertise to bake your favorite puff pastry recipe – maybe even try something new and challenging! Think croissants, palmiers, or even a savory tart.
- Share your success: Post a picture of your baked goods on social media and tag us – we'd love to see your amazing results!
- Challenge a friend: Send this article to a fellow baking enthusiast and see who can master the perfect fold first!
What delicious puff pastry treat will you bake first?